Creamy Crab & Cucumber Salad

Creamy Crab & Cucumber Salad

This recipe is a perfect balance of crunchy vegetables and tender imitation crab, tossed in a light, herby dressing.

Ingredients

  • 1 lb Imitation Crab: Chopped or shredded.

  • 2 Large Cucumbers: Peeled and sliced into half-moons.

  • 1/2 Red Onion: Thinly sliced (optional for extra bite).

  • 1/4 cup Light Mayonnaise or Greek Yogurt: To keep it light and “point-friendly”.

  • 1 tbsp Fresh Dill: Finely chopped.

  • 1 tbsp Lemon Juice: For brightness.

  • Salt & Pepper: To taste.


Instructions

  1. Prep the Base: In a large bowl, combine the chopped imitation crab and sliced cucumbers.

  2. Make the Dressing: In a small separate bowl, whisk together the light mayonnaise (or yogurt), lemon juice, and fresh dill.

  3. Toss: Pour the dressing over the crab mixture and toss gently until everything is evenly coated.

  4. Season: Add salt and pepper to taste.

  5. Chill: For the best flavor, let it sit in the refrigerator for at least 30 minutes before serving.


Why It Works

  • Quick & Easy: No stove or oven required—just simple chopping and mixing.

  • Beginner Friendly: The ingredients are affordable and the steps are foolproof.

  • High Volume: Using cucumbers allows for a large serving size that remains light and satisfying.
Spinach  and Feta Egg Muffins – Healthy, Fluffy, and Delicious

Spinach  and Feta Egg Muffins – Healthy, Fluffy, and Delicious

These Spinach and Feta egg  Muffins are a perfect blend of healthy greens, creamy feta, and fluffy eggs. Ideal for breakfast, brunch, or even a quick snack, they are protein-packed, easy to make, and highly customizable. With fresh spinach providing essential vitamins and minerals and feta cheese  adding a tangy, salty flavor, these muffins are not only nutritious but also irresistibly tasty. Bake a batch and enjoy a convenient, grab-and-go meal throughout the week.

Dairy & Eggs

Ingredients:

  • 6 large eggs
  • 1/4 cup milk (any kind: dairy or plant-based)
  • 1 cup fresh spinach, finely chopped
  • 1/2 cup feta cheese, crumbled
  • 1/4 cup red bell pepper, finely diced (optional for extra color and sweetness)
  • 1/4 cup onion, finely diced
  • 1 clove garlic, minced
  • 1/2 teaspoon salt (adjust to taste)
  • 1/4 teaspoon black pepper
  • 1/4 teaspoon paprika (optional for a smoky flavor)
  • 1 tablespoon olive oil or cooking spray (for greasing the muffin tin)

Instructions:

  1. Preheat the oven: Preheat your oven to 180°C (350°F) and lightly grease a 6- or 12-cup muffin tin with olive oil or non-stick cooking spray.
  2. Prepare the vegetables: Wash and finely chop the fresh spinach. Dice the red bell pepper and onion, and mince the garlic. You can lightly sauté the onions, garlic, and bell pepper in a small pan for 2–3 minutes to soften and enhance their flavor, though this step is optional.
  3. Whisk the eggs: In a medium bowl, crack all six eggs. Add the milk, salt, black pepper, and paprika. Whisk vigorously until the mixture is smooth and slightly frothy. This ensures your muffins will be fluffy.
  4. Combine ingredients: Gently fold the chopped spinach, crumbled feta, and sautéed vegetables (if using) into the egg  mixture. Stir just enough to distribute the ingredients evenly without overmixing.
  5. Fill the muffin tin: Pour the egg mixture into the prepared muffin cups, filling each about 3/4 full. Avoid overfilling, as the muffins will expand as they bake.
  6. Bake: Place the muffin tin in the preheated oven and bake for 18–22 minutes, or until the muffins are fully set and lightly golden on top. A toothpick inserted into the center should come out clean.
  7. Cool and serve: Allow the muffins to cool for 5 minutes in the tin before removing them. Serve warm for breakfast or store in an airtight container in the refrigerator for up to 4 days. They can also be frozen for up to 2 months and reheated in the microwave or oven.

Tips:

  • For extra flavor, add herbs such as parsley, dill, or chives.
  • Swap feta with goat cheese or cheddar for a different taste profile.
  • Make these muffins more filling by adding cooked quinoa, mushrooms, or diced cooked chicken.
  • Ensure muffins are not overbaked to keep them soft and moist.
  • Perfect for meal prep: bake a batch on Sunday, and you have ready-to-eat breakfast for the week.

Nutrition (per muffin, approx.):

  • Calories: 120–140 kcal
  • Protein: 8–10 g
  • Carbohydrates: 2–3 g
  • Fat: 8–10 g
  • Fiber: 0.5–1 g
  • Sugar: 1 g
  • Sodium: 220–250 mg

Cheesy Zucchini Pancake Pockets (Soft & Crispy)

Cheesy Zucchini Pancake Pockets (Soft & Crispy)

📖 Description
These cheesy zucchini pancake pockets are a delicious savory treat—crispy on the outside, soft inside, and filled with gooey melted cheese. Perfect for breakfast, lunch, or a quick snack, they’re easy to make and packed with flavor from fresh herbs and tender zucchini.

🛒 Ingredients

  • 2 medium zucchini (grated)
  • 3 large eggs
  • 1 cup all-purpose flour
  • 1 teaspoon salt
  • ½ teaspoon black pepper
  • ½ teaspoon garlic powder
  • ½ cup fresh dill or parsley (finely chopped)
  • 1 cup shredded mozzarella or cheddar cheese
  • 2–3 tablespoons milk (optional for smoother batter)
  • 2 tablespoons oil or butter (for frying)

🧑‍🍳 Instructions

  1. Prepare the Zucchini
    Grate the zucchini using a coarse grater. Place it in a clean cloth and squeeze out excess water. This step is important to keep the pancakes from becoming soggy.
  2. Make the Batter
    In a large bowl, add the grated zucchini and crack in the eggs. Mix well until combined. Add flour, salt, black pepper, and garlic powder. Stir everything together until a thick batter forms. If it feels too thick, add a little milk to loosen it slightly.
  3. Add Herbs & Cheese
    Mix in the chopped dill or parsley for a fresh flavor. Add half of the shredded cheese into the batter and keep the rest for filling.
  4. Cook the Pancakes
    Heat a non-stick pan over medium heat and add a little oil or butter. Pour a ladle of batter into the pan and spread it slightly into a round shape. Cook for about 2–3 minutes until golden brown on the bottom.
  5. Add Filling & Fold
    Sprinkle some shredded cheese on one half of the pancake. Fold the pancake over like a pocket and press gently. Cook for another 1–2 minutes until the cheese melts and both sides are golden.
  6. Repeat
    Continue the process with the remaining batter, adding oil as needed.

🍽️ Serving Suggestions
Serve these warm with yogurt dip, sour cream, or a simple garlic sauce. They also pair well with a fresh salad or tea for a light meal.

💡 Tips

  • Always remove excess water from zucchini for best texture.
  • Use mozzarella for stretchiness or cheddar for a sharper taste.
  • Cook on medium heat to avoid burning while ensuring the inside cooks through.

These cheesy zucchini pockets are simple, satisfying, and perfect for any time of the day! 😋

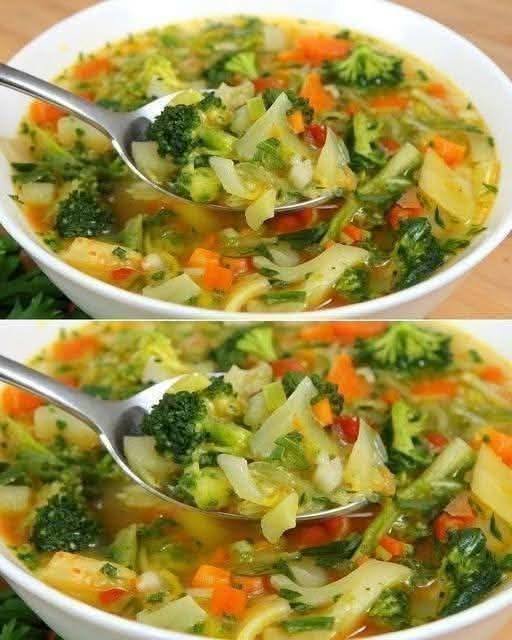
Healing Garden Vegetable Soup

Healing Garden Vegetable Soup

A nourishing, cozy vegetable soup packed with vitamins, minerals, and anti-inflammatory goodness. Light yet satisfying, this soup is perfect for daily meals, family dinners, and anyone looking to feel better from the inside out.

 Description

This Healing Garden Vegetable Soup is loaded with fresh vegetables simmered gently in a flavorful broth. It’s naturally low in calories, rich in fiber, and bursting with antioxidants. The flavors are clean, comforting, and deeply satisfying—making it a soup your body and your family will crave again and again.

 Ingredients

  • 1 tbsp olive oil

  • 1 medium onion, finely chopped

  • 2 cloves garlic, minced

  • 2 carrots, diced

  • 2 celery stalks, chopped

  • 1 medium potato, thinly sliced

  • 1½ cups broccoli florets

  • 1 zucchini, sliced

  • 1 cup green beans, chopped

  • 6 cups vegetable broth (low sodium)

  • 1 tsp dried thyme

  • ½ tsp turmeric (optional, for healing boost)

  • Salt and black pepper to taste

  • Fresh parsley or dill, chopped (for garnish)

  • Juice of ½ lemon (optional, for brightness)

 Instructions

  1. Heat olive oil in a large pot over medium heat.

  2. Add onion and sauté for 3–4 minutes until soft and translucent.

  3. Stir in garlic and cook for 30 seconds until fragrant.

  4. Add carrots, celery, and potato. Cook for 5 minutes, stirring occasionally.

  5. Pour in vegetable broth and bring to a gentle boil.

  6. Reduce heat and simmer for 10 minutes.

  7. Add broccoli, zucchini, and green beans.

  8. Season with thyme, turmeric, salt, and pepper.

  9. Simmer for another 8–10 minutes until vegetables are tender but vibrant.

  10. Finish with lemon juice if using.

  11. Serve hot, garnished with fresh herbs.

Notes

  • Keep vegetables slightly firm to preserve nutrients.

  • Chop vegetables evenly for consistent cooking.

  • This soup tastes even better the next day!

 Tips for Best Results

  • Use fresh, seasonal vegetables whenever possible

  • Don’t overcook—bright color means more nutrients

  • Add leafy greens (spinach or kale) at the end for extra benefits

  • A pinch of chili flakes adds gentle warmth

 Servings

  • Serves: 4–6 people

  • Prep Time: 15 minutes

  • Cook Time: 25 minutes

Nutritional Information (per serving, approx.)

  • Calories: 120

  • Protein: 4g

  • Carbohydrates: 20g

  • Fiber: 6g

  • Fat: 3g

  • Sodium: varies by broth

Health Benefits

  • Supports digestion and gut health

  • Rich in antioxidants and vitamins A, C, and K

  • Anti-inflammatory and immune-boosting

  • Helps with hydration and detox support

  • Light, comforting, and easy on the stomach

 Q & A

Q: Can I eat this soup every day?
Absolutely! It’s balanced, light, and nutrient-dense.

Q: Can I freeze it?
Yes—store in airtight containers for up to 3 months.

Q: Can I add protein?
Of course! Add lentils, chickpeas, beans, or shredded chicken.

Q: Is this soup good for weight management?
Yes—low calorie, high fiber, and very filling.

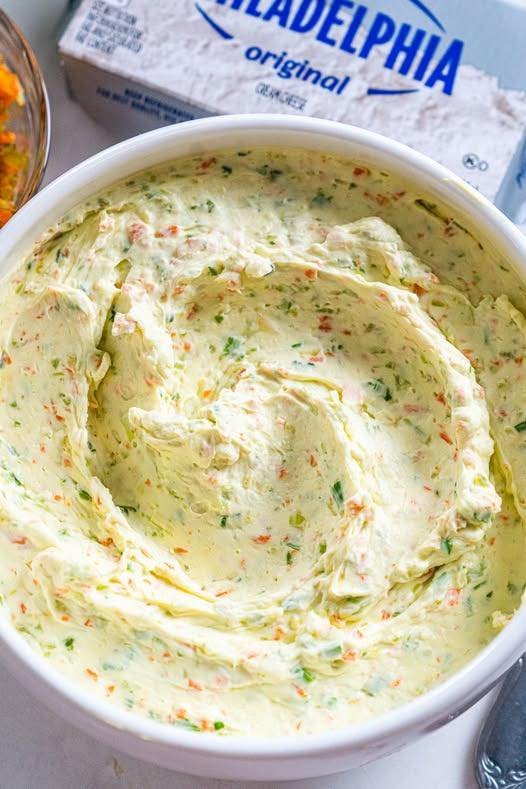
Homemade Garden Vegetable Spread

Homemade Garden Vegetable Spread

Ingredients

  • 2 blocks (225g each) cream cheese, softened to room temperature.

  • 1/4 cup carrots, very finely minced.

  • 1/4 cup bell pepper (any color), very finely minced.

  • 1/4 cup green onions, thinly sliced.

  • 1/4 cup cucumber, finely diced (remove the seeds first).

  • 1 teaspoon garlic powder.

  • 1/2 teaspoon onion powder.

  • Salt and black pepper to taste.

  • Optional: 1 tablespoon fresh dill or parsley for extra freshness.

Step-by-Step Instructions

  1. Prep the Vegetables: Use a sharp knife or a food processor to mince the carrots, peppers, and cucumbers as finely as possible. Pro Tip: If the cucumbers or peppers seem very watery, pat them dry with a paper towel before adding them to the cheese.

  2. Soften the Cheese: In a large mixing bowl, beat the softened cream cheese until it is completely smooth and fluffy. You can use a hand mixer or a sturdy spatula.

  3. Mix in Aromatics: Add the garlic powder, onion powder, salt, and pepper. Mix well to ensure the seasoning is distributed evenly.

  4. Fold in Vegetables: Gently fold in the minced carrots, peppers, green onions, and cucumbers. Stir until the vegetables are beautifully marbled through the cream cheese.

  5. Chill and Set: Transfer the spread to a glass jar or airtight container. Refrigerate for at least 1 hour before serving. This allows the flavors of the vegetables to infuse into the cream cheese.

  6. Serve: Spread generously over toasted bagels, crackers, or use it as a dip for fresh veggie sticks.


Recipe Q&A: Cream Cheese Spread

Q: How long will this homemade spread last in the fridge? A: Since it contains fresh vegetables, it is best enjoyed within 3–5 days. Keep it in an airtight container to maintain freshness.

Q: Can I use low-fat cream cheese? A: Yes, you can use “Neufchâtel” or low-fat cream cheese. However, keep in mind that it has a higher water content, so the spread might be slightly softer and less rich than the full-fat version.

Q: Why is my spread getting watery after a day? A: This usually happens because vegetables like cucumbers and peppers release moisture over time. To prevent this, make sure to remove the seeds from the cucumber and pat all chopped veggies dry with a paper towel before mixing them in.

Q: Can I add a bit of heat to this? A: Absolutely! You can finely mince half a jalapeño (remove the seeds for less heat) or add a pinch of red chili flakes to the mixture for a spicy kick.

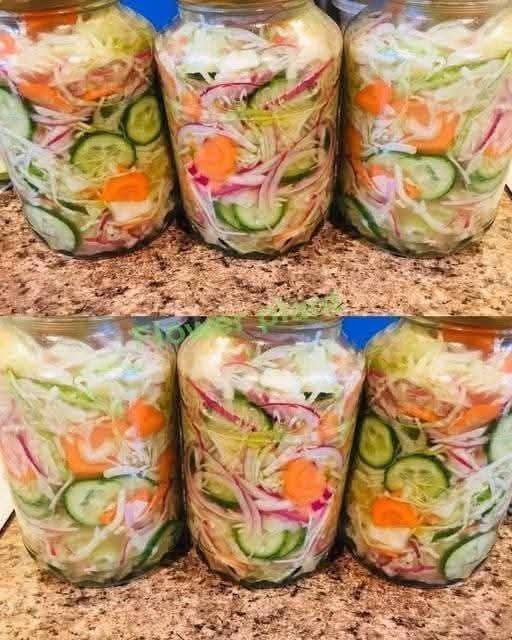
No-Cook Spicy Carrot Pickle

No-Cook Spicy Carrot Pickle (Instant Achaar)

📝 Ingredients:

•4–5 medium carrots (grated or julienne)

•3–4 cloves garlic (finely chopped)

•2 green chilies (finely chopped)

•1 tbsp red chili flakes

•½ tsp turmeric powder

•1 tsp salt (adjust to taste)

•1 tbsp sugar (optional, for balance)

•2 tbsp lemon juice OR vinegar

•3 tbsp mustard oil (or any oil)

•1 tbsp fresh coriander (chopped)

⸻

👩‍🍳 Step-by-Step Method:

Step 1: Prepare the carrots

Wash, peel, and grate or thinly slice the carrots. Put them in a large mixing bowl.

Step 2: Add aromatics

Add chopped garlic, green chilies, and fresh coriander to the carrots.

Step 3: Add spices

Sprinkle in:

•Red chili flakes

•Turmeric

•Salt

•Sugar (if using)

Mix everything well so spices coat the carrots evenly.

Step 4: Add tanginess

Pour in lemon juice or vinegar. This gives the pickle its signature tangy flavor.

Step 5: Add oil

Heat mustard oil slightly (optional but enhances flavor), let it cool a bit, then pour over the mixture.

Step 6: Mix thoroughly

Mix everything very well using a spoon or clean hands.

Step 7: Store

Transfer into clean, dry glass jars. Press down slightly so everything settles.

Step 8: Rest time

Let it sit for 4–6 hours at room temperature before eating.

For best taste, leave it overnight.

⸻

😋 Serving Tips:

•Serve with roti, paratha, or rice

•Use as a side with BBQ or fried food

•Can also be eaten as a crunchy salad!

⸻

❓ Q&A (Helpful Tips)

Q1: How long does this pickle last?

👉 It stays fresh for 1–2 weeks in the fridge if stored in a clean jar.

Q2: Can I skip mustard oil?

👉 Yes, you can use any oil, but mustard oil gives authentic achaar flavor.

Q3: Why is my pickle watery?

👉 Carrots release water naturally. Just mix again before serving.

Q4: Can I make it less spicy?

👉 Reduce green chilies and chili flakes according to your taste.

Q5: Can I add other vegetables?

👉 Yes! You can add cabbage, radish, or turnip for variation.

Q6: Is cooking required at all?

👉 No 😊 This is a completely no-cook recipe, which makes it quick and easy!­