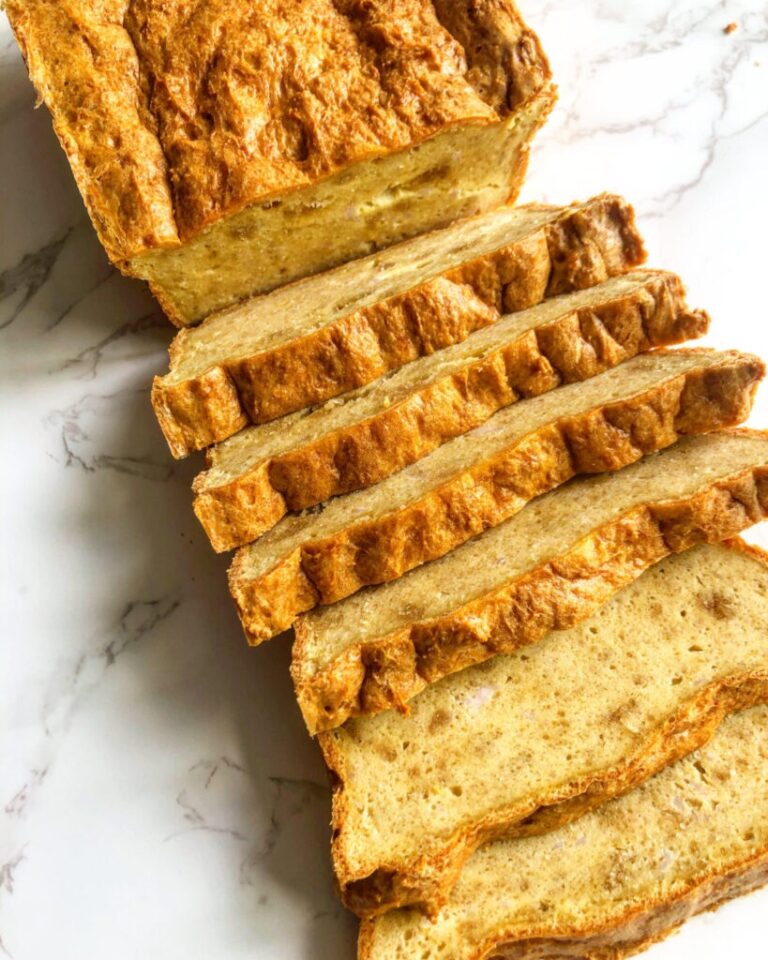
Carnivore Sandwich Bread Recipe

Crunchy on the outside, soft on the inside, this savory, carnivore, pork-based sandwich bread is perfect for sandwiches, spreads, or can be toasted and eaten alone.

Do not skip any of the steps. In the past, I sometimes would not follow the texture instructions (i.e. beat egg whites until frothy, separate these two ingredients into a separate bowl and mix, etc.)

for recipes, and it makes a difference. Each step in the recipe is important for maintaining texture.

Ingredients

  • 8 eggs
  • 1 lb raw ground pork (Can’t tolerate pork? Make Carnivore Sandwich Bread [Beef Version] instead.)
  • 5 oz pork rinds (pre-ground)
  • 1/4 cup grass-fed ghee (or butter)
  • 1 tsp sea salt

Instructions

Start the oven.

  • Preheat the oven to 375 degrees.

Make the batter.

  • Crack the eggs into a mixing bowl. Separate the egg whites from the egg yolks. Place the egg yolks in your blender (for later use).
  • With a hand mixer, beat the whites on high until the mixture is very frothy and you have soft peaks. The mixture should be light like foam.
  • Melt the ghee on your stovetop.
  • In a blender, mix the raw ground pork, melted ghee, and egg yolks until a smooth paste forms.
  • Note: the mixture may be a bit hard to blend due to the meat. I usually have to stop my blender, stir the mixture, and turn it back on 3-4 times.
  • With a hand mixer, blend the frothy egg whites and the pork-ghee-egg yolk paste until the mixture becomes smooth like batter.
  • In a blender or food processor, crush the pork rinds to a fine powder.
  • Fold the pork rind powder and sea salt (ASHLEYRfor 15% off) into the batter.
  • Note: if you go through tons of salt in your household like we do, check out this salt purchasing hack that will save you money + make things more efficient. We started this last year, and I’m so happy we did!

Bake the loaf.

  • Pour the batter into your bread pan and bake in the oven for 60 minutes at 375 degrees.
  • Note: You’ll know it’s done when the texture is consistent, dry, grainy, and bread-like throughout. When you cut into the loaf, if it has slimy patches that look like chunks of egg, it’s not done.
  • Once done, remove the loaf from the oven and allow it to cool for 10-15 minutes.

Prepare and serve.

  • Slice the loaf into 1-inch thick slices, or whatever size you prefer.
  • Meal ideas: Make a Classic Carnivore Club Sandwich, Pulled Pork Sandwich, or toast a slice and top with Strawberry Glaze and Honey Butter or Onion-Free Guacamole.
  • Store in the fridge in an airtight container for up to 5 days. Enjoy!
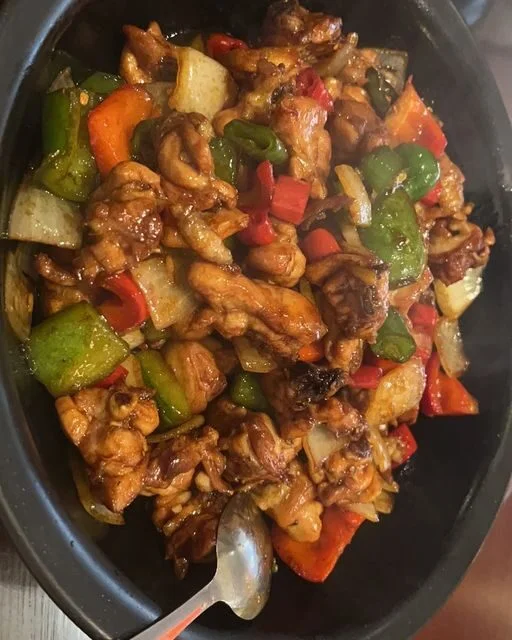
Weight Watchers Spicy Chinese Chicken

Title: Flavorful Spicy Chinese Chicken: A 20-Minute Weight Watchers Dinner Delight

Introduction: Embark on a culinary journey to the heart of Chinese cuisine with our tantalizing Spicy Chinese Chicken recipe. Crafted with tender boneless, skinless chicken breasts and infused with an array of aromatic spices, this dish is a testament to both flavor and convenience. In just 20 minutes, you can whip up a savory dinner that’s sure to impress your taste buds and leave you craving more. Plus, with its Weight Watchers-friendly ingredients, you can savor every bite without guilt. Let’s dive into the details of this delectable recipe and elevate your dinner game tonight!
Ingredients:

1 lb boneless, skinless chicken breasts, thinly sliced
2 tablespoons soy sauce (reduced-sodium)
1 tablespoon rice vinegar
1 tablespoon hoisin sauce
1 tablespoon sesame oil
2 cloves garlic, minced
1 teaspoon fresh ginger, grated
1/2 teaspoon crushed red pepper flakes (adjust to taste)
1/4 teaspoon Chinese five-spice powder
1 tablespoon cornstarch
2 tablespoons water
2 green onions, thinly sliced (for garnish)
Cooked rice or cauliflower rice, for serving
Instructions:

In a small bowl, whisk together soy sauce, rice vinegar, hoisin sauce, sesame oil, minced garlic, grated ginger, red pepper flakes, and Chinese five-spice powder. Set aside.
In a separate bowl, mix cornstarch and water until smooth to create a slurry. Set aside.
Heat a large skillet or wok over medium-high heat. Add a splash of oil and swirl to coat the pan.
Add the thinly sliced chicken breasts to the hot skillet, spreading them out in a single layer. Cook for 2-3 minutes per side, or until lightly browned and cooked through.
Once the chicken is cooked, reduce the heat to medium and pour the prepared sauce over the chicken in the skillet. Stir to coat the chicken evenly with the sauce.
Cook for an additional 1-2 minutes, allowing the sauce to thicken slightly.

Gradually pour the cornstarch slurry into the skillet, stirring constantly, until the sauce thickens to your desired consistency.
Remove the skillet from the heat and garnish the spicy Chinese chicken with thinly sliced green onions.
Serve the chicken hot over cooked rice or cauliflower rice, and enjoy the burst of flavors with each mouthful.
Nutritional Information (per serving, chicken only):

Calories: 220
Total Fat: 6g
Saturated Fat: 1g
Cholesterol: 96mg
Sodium: 543mg
Total Carbohydrates: 6g
Dietary Fiber: 0g
Sugars: 1g
Protein: 34g
SmartPoints (Weight Watchers): 4

Conclusion: Indulge in the savory goodness of our Spicy Chinese Chicken, a delightful dish that’s both quick and easy to prepare. With its bold flavors and tender chicken, this recipe is sure to become a favorite in your dinner rotation. Whether you’re following the Weight Watchers program or simply looking for a delicious meal that’s ready in a flash, this recipe ticks all the boxes. Treat yourself to a taste of Asia tonight and elevate your dinner experience with this mouthwatering creation!

Steak Bites Recipe

These Garlic Butter Steak Bites are quick and easy to make – and they vanish fast! Serve them as finger food on appetizer night, as part of your game day spread or as part of a fun family dinner date.

Steak bites are especially fun for the kids. I know it’s a recipe mostly served as an appetizer (Super Bowl! or any Game Day party!) , but we don’t mind them as a regular meal at all.

They are quick and easy to whip up, and turn out so tender.

Ingredients

  • ▢ 2 pounds steak cut into bites
  • ▢ salt and ground black pepper to taste (season on the generous side)
  • ▢ 1 tablespoon oil
  • ▢ 4 tablespoons butter
  • ▢ 2 cloves garlic or more to taste
  • ▢ 2 tablespoons chopped parsleyoptional for serving

Instructions

  • Prep steak: Remove steak from fridge 30 minutes before cooking. Unwrap, cut into cubes (see notes at bottom of recipe for size recommendation) and season with salt and pepper. Let sit on plate on counter for 30 minutes. (For best results, do not skip this step.)2 pounds steak, salt and ground black pepper
  • Sear steak: Once ready, heat a large skillet (preferably cast iron) over high heat. Add oil, then sear steak for around 2 minutes per side, until a nice, browned crust forms but middle stays tender. Work in batches if needed, do not overcrowd pan! Set seared steak bites aside on a plate and tent with foil.1 tablespoon oil
  • Make garlic butter: Once steak is done and set aside on a plate, reduce heat to medium. Add butter and garlic to empty skillet. Heat about 2 minutes, until garlic is fragrant. Take off the heat.4 tablespoons butter, 2 cloves garlic
  • Finish: Add steak to skillet with garlic butter. Toss to coat. Serve immediately with chopped parsley, if desired.2 tablespoons chopped parsley

Notes

Steak: Use any tender, boneless cut of steak, cut into cubes. Sirloin steak, strip steak or ribeye all work. You can use beef tenderloin/fillet if you want them extra-tender and special.

Parsley: Totally optional, but highly recommended by my entire family, save the picky 5 year old who thinks the green bits are a waste of space ?

Bite size: You can really cut these as large or as bite-sized as you like. Smaller bites cook more quickly and are more done, larger “bites” stay more tender and have a more medium middle.

I cut mine just under 1 inch, and cooked them for around 2 minutes per side, plus some extra tossing around for 30 seconds to get the edges charred.

Searing time: 4 minutes yielded just under 1-inch bites with a medium-done middle. If you want yours more rare, stick to 1-inch cubes and go with a short and blazing hot sear.

For more done bites, sear them a little longer on medium-high heat instead; and/or cut them smaller. Just make sure you don’t overcook them, or they may turn out chewy.

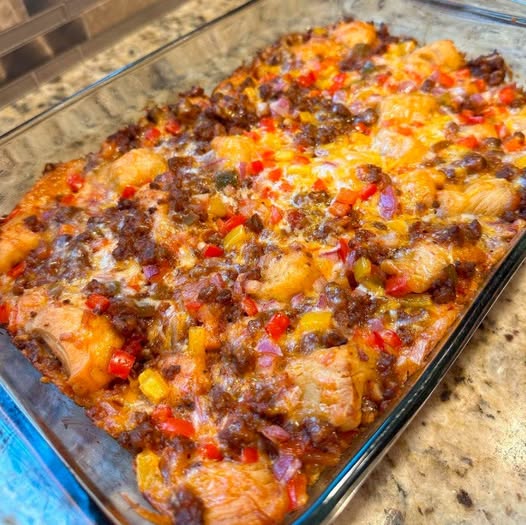
Taco fiesta bubble up casserole

Taco fiesta bubble up casserole
8 points, 7sp or 6pp/serving (same on freestyle 7sp) 7SP on blue, green or purple
PREP TIME20 mins
COOK TIME50 mins
TOTAL TIME1 hr 10 mins
COURSEMain meals
SERVINGS6
INGREDIENTS
1 lb cooked extra lean ground beef
1 7.5 oz package pillsbury biscuits (10 biscuits to the pack, the ones In the 4 value pack, if you can’t find that size you can buy the bigger size and weigh it out)
1 package Taco seasoning, 30g
1 1/3 cup salsa
2 cup diced peppers I used red, orange and yellow
1 cup diced onion I used red onion
1 cup reduced fat shredded cheese I use a 3 cheese blend
Green onion
Fat free sour cream for topping optional
INSTRUCTIONS
Cook the ground beef in a pan on the stove, add the taco seasoning and simmer for a few minutes.
Preheat oven to 350F, spray a 9×13 casserole dish and set aside.
Mix the ground beef and salsa together in a bowl.
Cut up the peppers & onion, and then cut the biscuits into 6 pieces each.
Place half of the biscuit pieces in the bottom of the casserole dish, top with half of the meat mixture, half of the peppers and onions and half of the cheese. Repeat layers and finish with the chopped green onion on top.
Loosely cover with foil and bake in oven for 35 minutes, remove foil and continue baking for 15 minutes.Let cool for 5 minutes then cut into 6 servings. 8 personal points per serving, 7sp or 6 points plus. Top with a spoon of fat free sour cream (optional)
NOTES
Points- 8
Personal Points- 8
Smart Points- Blue/Green/Purple- 7
Points Plus- 6

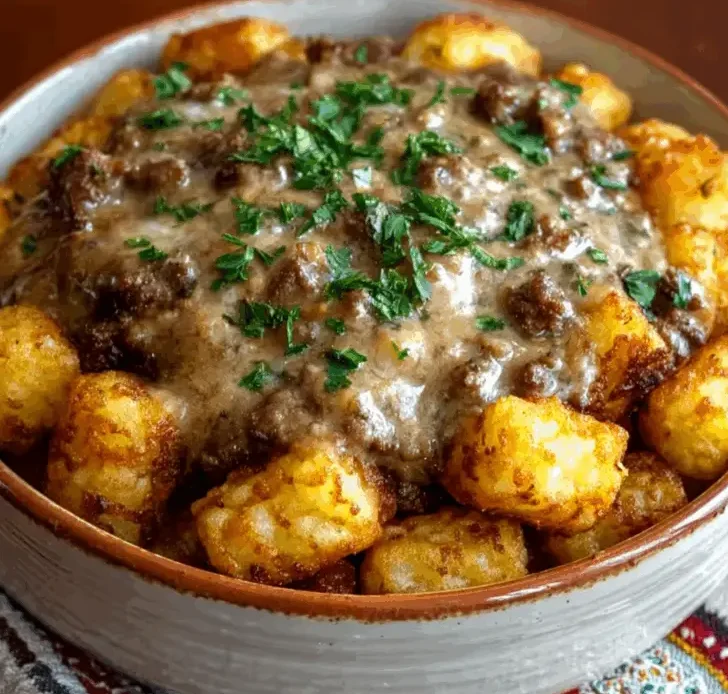
Loaded Tater Tot Breakfast Bowls

Golden, crispy tater tots loaded with savory sausage gravy, melty cheddar, and perfectly cooked eggs — a hearty, diner-style breakfast you can make at home.

Prep Time: 15 minutes
Cook Time: 25–30 minutes
Total Time: ~45 minutes
Servings: 4
Dietary: Comfort food, Make-ahead friendly

Ingredients

  • Frozen tater tots (32 oz / 900 g) – baked until golden and crispy

  • Beef breakfast sausage (1 lb / 450 g) – casings removed, crumbled

  • Unsalted butter (2 tbsp) – for the gravy base

  • All-purpose flour (2 tbsp) – for thickening

  • Whole milk (2 cups / 480 ml) – preferably warmed

  • Salt & freshly ground black pepper – to taste

  • Large eggs (4) – cooked your way (scrambled, fried, or poached)

  • Shredded sharp cheddar cheese (1 cup / 100 g) – for melty, cheesy goodness

  • Fresh chives (2 tbsp) – chopped, for garnish

Instructions

  1. Bake the tots – Preheat oven and cook frozen tater tots per package directions until golden and crisp. For extra crunch, use convection or broil settings for the last few minutes.

  2. Brown the sausage – In a large skillet over medium heat, cook crumbled sausage until no pink remains. Transfer to a plate, leaving the rendered fat in the pan.

  3. Make the roux – Melt butter in the same skillet, stir in flour, and cook for 1–2 minutes until lightly golden.

  4. Make the gravy – Gradually whisk in warm milk, scraping up any browned bits. Cook 3–5 minutes until thickened. Return sausage to the skillet, season with salt and pepper, and keep warm on low.

  5. Cook the eggs – In a separate pan, cook eggs to your liking (scrambled, fried, or poached). Season lightly.

  6. Assemble bowls – Divide crispy tater tots among 4 bowls. Top with eggs, ladle sausage gravy over, sprinkle with cheddar, and finish with chives. Serve hot.

Quick Notes & Pro Tips

  • Make ahead: Cook the gravy and sausage up to 2 days in advance. Reheat gently over low heat.

  • Milk tip: Warm milk before whisking into the roux to avoid lumps.

  • Eggs: For poached eggs, add a splash of vinegar to the water for perfectly set whites.

  • Extra crispy tots: Broil for 1–2 minutes after baking.

  • Assembly: Keep components separate until serving to maintain the best textures.

Why You’ll Love It

This dish is diner comfort food done right: crunchy tots, creamy sausage gravy, cheesy goodness, and eggs made just how you like them. It’s indulgent enough for weekend brunch but simple enough for a make-ahead weekday breakfast bowl.

Step-by-Step Cooking Guide

1. Baking the Tots

  • Bake until deep golden brown — a crispy base is key for holding up the gravy.

2. Making the Sausage Gravy

  • Cook sausage until browned. Use its drippings for the roux for maximum flavor.

  • Gradually whisk in warmed milk to create a smooth, thick gravy.

3. Eggs Your Way

  • Scrambled for easy eating, fried for a runny yolk, or poached for elegance.

4. Building the Bowl

  • Tots first, then eggs, a generous ladle of gravy, and a cheesy-chive finish.

Ingredient Details & Substitutions

  • Sausage: Use pork sausage for classic flavor or turkey for a lighter bowl.

  • Cheese: Swap cheddar for pepper jack for a little heat.

  • Eggs: Try soft-boiled eggs for a runny, jammy yolk.

  • Milk: Substitute with half-and-half for an extra rich gravy.

Variations & Serving Suggestions

  • Spicy kick: Add hot sauce, jalapeños, or Cajun seasoning to the gravy.

  • Veggie boost: Mix in sautéed mushrooms, bell peppers, or spinach.

  • Brunch spread: Serve with fresh fruit or a simple side salad for balance.

  • Crowd-style: Make it in a casserole dish with layers of tots, gravy, and cheese.

Storage & Make-Ahead

  • Refrigeration: Store components separately for up to 3 days.

  • Freezing: Freeze gravy and sausage mixture for up to 2 months; thaw overnight in the fridge.

  • Reheating: Warm gravy on the stovetop; bake tots in the oven for crispness.

FAQs

Q: Can I make this vegetarian?
A: Yes — use plant-based sausage and veggie gravy.

Q: How can I make this for a crowd?
A: Double the recipe and serve “buffet style” with toppings on the side.

Q: Can I use hash browns instead of tater tots?
A: Absolutely! Shredded or diced hash browns work well.

Personal Note

This bowl is my go-to for weekends when I crave a hearty breakfast that feels like a treat. It’s also one of my favorite “brunch-for-dinner” recipes — it never fails to hit the spot.

Your turn!
If you try these Loaded Tater Tot Breakfast Bowls, leave a review or share your creation — I’d love to see how you make it your own!

Do you want me to add a “crowd-sized casserole version” (for serving at brunch parties)?
Or keep it as individual bowls for a customizable breakfast setup?

Oven-Baked Cabbage Burger

The other night, I prepared these cabbage burgers, and they were a huge hit! Delicious, cheesy, oven-roasted delight that fits perfectly into a low-carb or keto lifestyle—without the buns or the guilt. This is how I went about it:


🛒 What You’ll Need:

  • 1 medium green cabbage (cut into thick slices,0ne inch)

  • 1 lb lean ground beef

  • ½ cup tomato sauce/sugar-free ketchup

  • ½ cup shredded cheese

  • ½ tsp salt & black pepper

  • ½ tsp red chili flakes (for a little kick)

  • ONE tsp grated garlic

  • ½ cup chopped green onions

  • ½ cup fresh chopped parsley


👨‍🍳 How to Make Them:

Step 1: Prep
Set your oven’s temperature to 400°F, or around 200°C, first. Arrange the pieces of cabbage on a baking sheet (if you like less cleanup, use parchment paper). Drizzle them with a little olive oil and season with salt and pepper. To slightly soften them, roast them in the oven for ten minutes. They cook more evenly with the meat later on thanks to this process.

Step 2: Beef Mixture
Take out a large mixing dish and start roasting your cabbage. Grated garlic, chopped green onion, parsley, chili flakes, salt, pepper, half of the shredded cheese, and ground meat should all be added. Combine the ingredients and form into four burger patties.

Step 3: Assemble
Remove from the oven the cabbage. Spread a dollop of tomato sauce over each slice. Place a beef burger directly on top of it after adding a little cheese. Add a final little grating of cheese on top of the meat.

Step 4: Bake
Place the tray back in the oven and continue baking for another 10 to 12 minutes, or until the cheese is brown and bubbling and the beef is cooked through. If you want that cheesy crust, you can broil it for the final one to two minutes.

Step 5: Serve
Remove them, garnish with more parsley if you want to be fancy, and serve hot. They taste fantastic by themselves or served with cauliflower mash or a side of salad.


Oven-Baked Cabbage Burger

💡 Bonus Tip:

Feel free to add hot sauce or jalapeños to the meat mixture if you prefer your burgers hotter. If you don’t like beef, you can also use ground chicken or turkey.