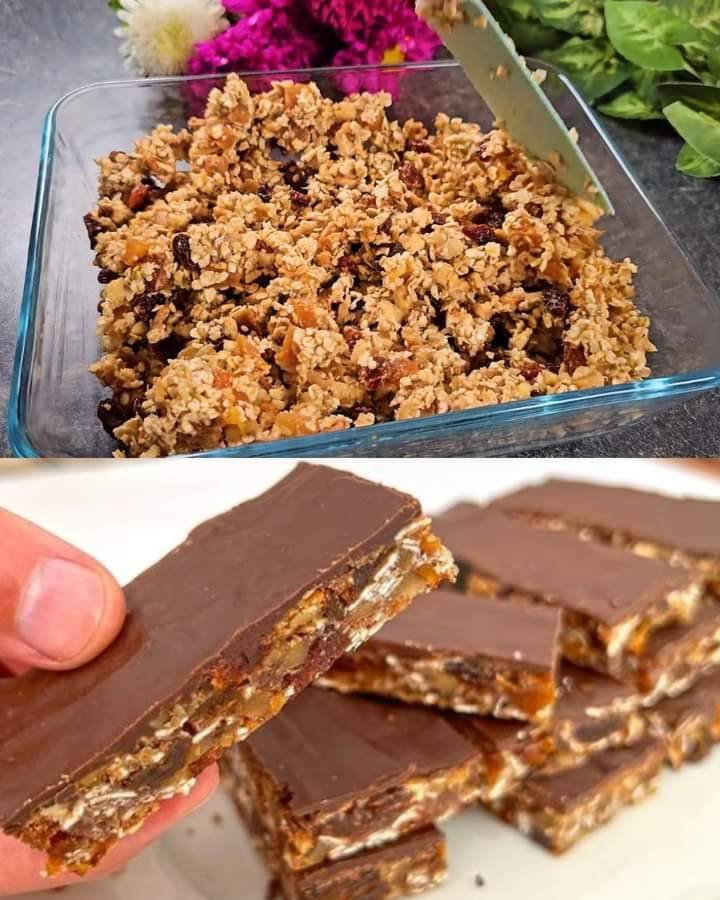
No-Bake Banana & Nut Energy Bars

No-Bake Banana & Nut Energy Bars

A naturally sweet, wholesome, and energizing snack packed with fruit, oats, and nuts. Perfect for breakfast, post-workout, or a healthy treat.

Prep Time: 15 minutes
Chill Time: 1–2 hours
Yield: 8–10 bars


Ingredients

For the Base:

  • 80 g (1 cup) oat flakes

  • 1 medium ripe banana, mashed

For the Mix-ins:

  • 100 g (1/2 cup) raisins

  • 100 g (1/2 cup) dried apricots, chopped

  • 80 g (1/2 cup) walnuts, chopped

For the Topping:

  • 100 g (3.5 oz) dark chocolate


Instructions

1. Prepare the Fruit and Nuts

  1. Check the raisins and chopped apricots. If they are very dry, soak them in warm water for 5 minutes, then drain and pat dry with a paper towel.

  2. Chop the walnuts into small pieces so the bars hold together more easily.

2. Make the Energy Bar Base

  1. In a large mixing bowl, mash the ripe banana into a smooth paste, ensuring there are no large lumps.

  2. Add the oat flakes, raisins, chopped apricots, and walnuts to the banana.

  3. Mix thoroughly with a spatula or spoon until all ingredients are evenly coated with the banana. The mixture should be sticky and hold its shape when pressed.

3. Shape the Bars

  1. Line a small square or rectangular dish (about 8×8 inches or similar) with parchment paper.

  2. Transfer the mixture into the prepared dish.

  3. Use a spatula, the back of a spoon, or your hands (slightly dampened to prevent sticking) to press the mixture firmly and evenly into a flat layer.

4. Add the Chocolate Topping

  1. Break the dark chocolate into small pieces.

  2. Melt the chocolate using a double boiler or microwave in 20-second intervals, stirring between each interval until smooth.

  3. Pour the melted chocolate over the oat mixture. Use a spatula to spread it evenly to the edges, creating a smooth chocolate layer.

5. Chill and Slice

  1. Place the dish in the refrigerator for at least 1–2 hours, or until the chocolate has fully hardened and the base is firm.

  2. Once set, lift the block out using the parchment paper.

  3. Slice into rectangular bars with a sharp knife.


Tips for Best Results

  • Use a very ripe banana for natural sweetness and a smooth texture.

  • Lightly toast the walnuts for extra flavor if desired.

  • Store the bars in an airtight container in the refrigerator to keep them firm for up to 1 week.

  • You can also add a pinch of cinnamon or a teaspoon of nut butter for extra flavor and richness.
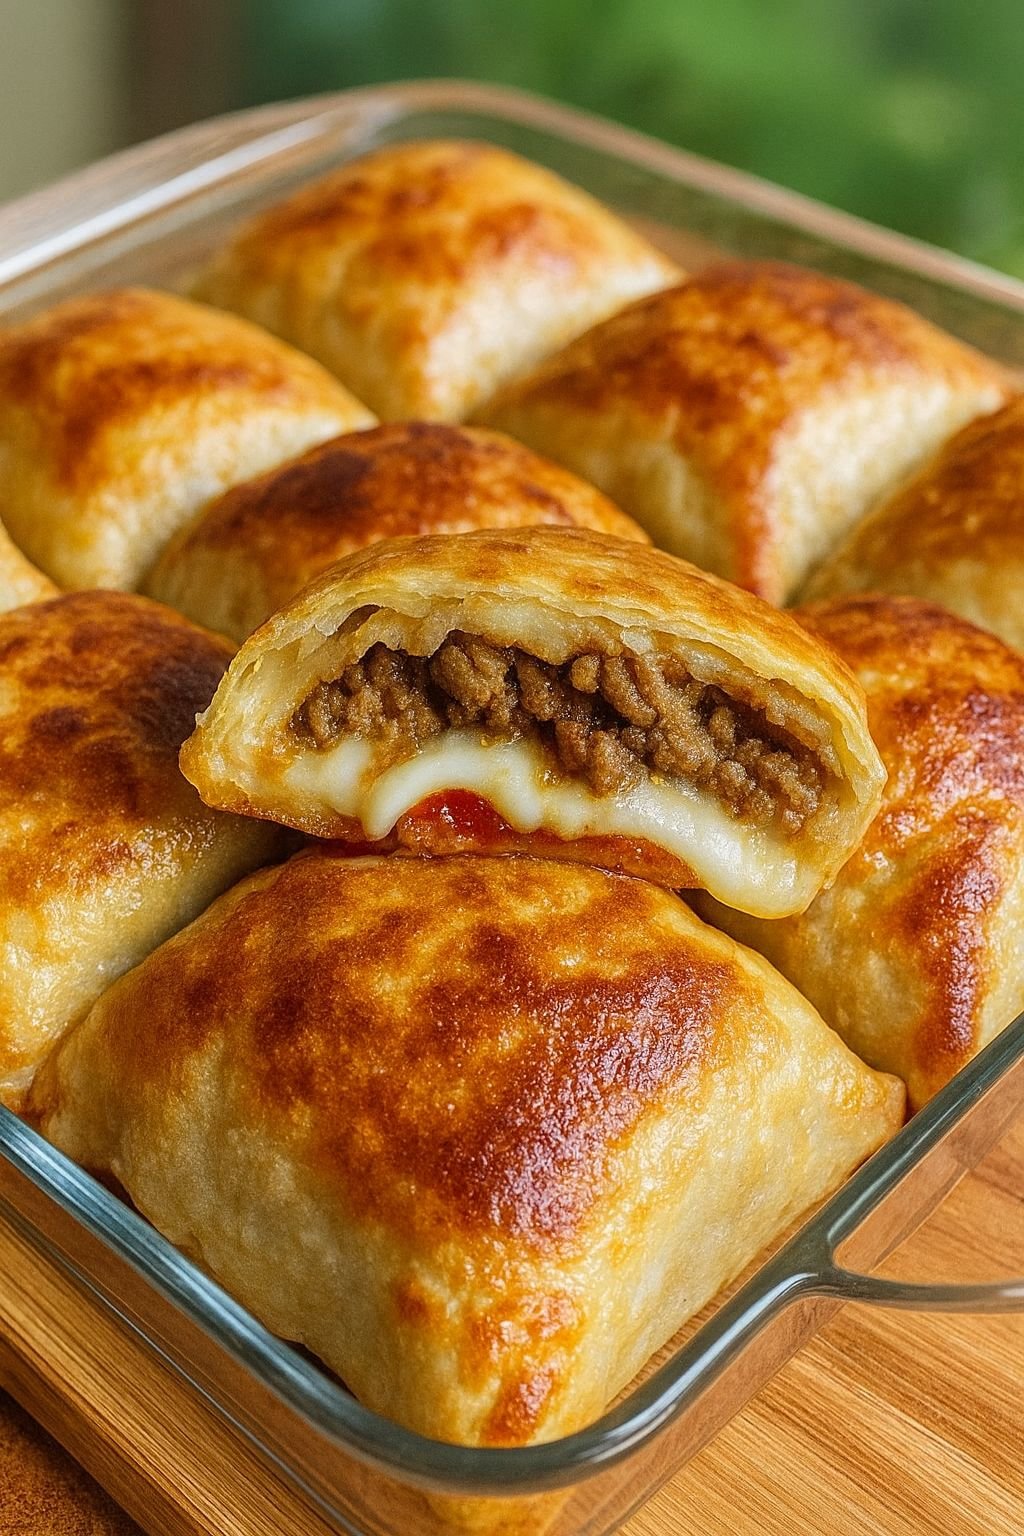
Loaded Cheesy Pocket Tacos

Loaded Cheesy Pocket Tacos

Prep time: 15 mins | Cook time: 25 mins | Total time: 40 mins

Ingredients

The Filling

  • 1 lb ground beef

  • 1 small onion: Finely chopped.

  • 1 tsp garlic powder

  • 1 tsp paprika

  • 1 tsp cumin

  • 1 tsp chili powder

  • Salt and black pepper: To taste.

  • 1/2 cup pizza sauce or taco sauce

The Cheese Blend

  • 1 cup shredded mozzarella or cheddar

  • 1/2 cup shredded Monterey Jack

The Dough & Finish

  • 1 package refrigerated crescent or pizza dough

  • 1 egg: Beaten (for egg wash).

  • Optional toppings: Sour cream, salsa, chopped parsley, or cilantro.


Instructions

1. Sauté and Season the Beef

In a skillet over medium heat, cook the ground beef and chopped onion until the beef is browned and the onions are soft. Drain the excess fat—this is crucial to ensure the dough doesn’t get soggy. Stir in the garlic powder, paprika, cumin, chili powder, salt, and pepper. Cook for 2 more minutes to let the spices “bloom,” then remove from heat to cool slightly.

2. Prepare the Oven and Dough

Preheat your oven to 375°F (190°C). Line a baking sheet with parchment paper. Unroll your dough and cut it into equal squares or rectangles. If using crescent dough, you can pinch the perforated diagonal seams together to create solid rectangles.

3. Assemble the Pockets

Place a spoonful of the beef mixture in the center of each dough piece. Drizzle a little sauce over the meat, then top with a generous pinch of the blended cheeses.

AI Tip: Leave a small border around the edges so you can get a clean seal!

4. Seal and Glaze

Fold the dough over the filling. Use your fingers or the tines of a fork to pinch the edges firmly. Place them seam-side down on your baking sheet. Brush the tops with the beaten egg wash; this is what gives them that professional, bakery-style golden sheen.

5. Bake to Perfection

Bake for 20–25 minutes. You’re looking for the dough to be puffed up and a deep golden brown. Let them rest for 5 minutes after they come out of the oven—the cheese inside will be very hot!


Serving Suggestions

  • The “Dip” Flight: Serve these with three small bowls: one with cool sour cream, one with spicy salsa, and one with guacamole.

  • Add a Crunch: If you want some texture, sprinkle a little cornmeal on the bottom of the baking sheet before placing the pockets down.

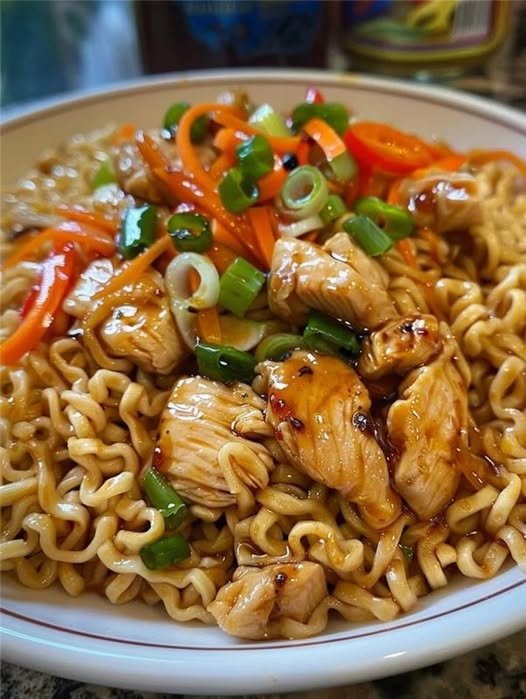
Keto Chicken Stir-Fry with Low-Carb Noodles

Introduction: This Keto Chicken Stir-Fry with Low-Carb Noodles is a delicious, low-carb twist on the classic stir-fry. Packed with tender chicken, crisp vegetables, and keto-friendly noodles, it’s a satisfying and flavorful meal that’s ready in under 30 minutes. With a savory garlic and ginger sauce, this dish is perfect for busy weeknights when you want something healthy, filling, and packed with flavor.


Ingredients:

  • 1 lb boneless, skinless chicken breast or thigh, sliced into thin strips
  • 2 tablespoons avocado oil or olive oil, divided
  • 1 medium bell pepper, thinly sliced
  • 1 medium zucchini, spiralized or sliced into thin strips
  • 1 cup broccoli florets
  • 1 cup mushrooms, sliced
  • 1 cup shredded cabbage (optional for extra crunch)
  • 2 cloves garlic, minced
  • 1 tablespoon fresh ginger, minced
  • 1 pack low-carb noodles (such as shirataki noodles or zucchini noodles, rinsed and drained)
  • 2 tablespoons soy sauce or tamari (for gluten-free)
  • 1 tablespoon rice vinegar
  • 1 teaspoon sesame oil
  • Salt and black pepper, to taste
  • Sesame seeds and sliced green onions, for garnish

Instructions:

Step 1: Prepare the Chicken

  1. Heat Oil in a Large Skillet:
    • In a large skillet or wok, heat 1 tablespoon of avocado oil over medium-high heat.
  2. Cook the Chicken:
    • Add the sliced chicken, season with a little salt and pepper, and stir-fry for 5-7 minutes, or until fully cooked and golden brown. Remove from the skillet and set aside.

Step 2: Stir-Fry the Vegetables

  1. Add Remaining Oil to the Skillet:
    • Add the remaining 1 tablespoon of oil to the skillet.
  2. Sauté Garlic and Ginger:
    • Add the minced garlic and ginger, stirring for 1-2 minutes until fragrant.
  3. Add Vegetables:
    • Add the bell pepper, broccoli, mushrooms, zucchini, and cabbage (if using). Stir-fry for 4-5 minutes, or until the vegetables are tender but still crisp.

Step 3: Add the Noodles and Sauce

  1. Prepare Low-Carb Noodles:
    • If using shirataki noodles, rinse them thoroughly and pat them dry. If using spiralized zucchini, lightly pat dry with a paper towel to remove excess moisture.
  2. Combine Noodles with Veggies:
    • Add the low-carb noodles to the skillet with the vegetables, stirring to combine.
  3. Add Sauce Ingredients:
    • Pour in the soy sauce (or tamari), rice vinegar, and sesame oil. Stir well, coating everything in the sauce.
  4. Return Chicken to Skillet:
    • Add the cooked chicken back to the skillet and toss to combine with the noodles and veggies. Stir-fry for an additional 2-3 minutes to heat everything through.

Step 4: Serve and Garnish

  1. Transfer to Serving Plates:
    • Divide the stir-fry into bowls or plates.
  2. Garnish and Enjoy:
    • Garnish with sesame seeds and sliced green onions. Serve hot, and enjoy your keto-friendly stir-fry!

Tips and Variations:

  1. Switch Up the Protein: Substitute chicken with shrimp, beef, or tofu for different flavors.
  2. Add Spice: Add a pinch of red pepper flakes or a drizzle of sriracha if you like a little heat.
  3. Storage: Store leftovers in an airtight container in the refrigerator for up to 3 days. Reheat in a skillet over low heat.

Nutritional Information (Per Serving, Approx. 4 Servings):

  • Calories: 250
  • Carbohydrates: 6 g
  • Fiber: 2 g
  • Net Carbs: 4 g
  • Protein: 25g
  • Fat: 15g

WW SmartPoints (Per Serving):

Each serving has approximately 6 SmartPoints on the Weight Watchers program, depending on specific ingredients used.


This Keto Chicken Stir-Fry with Low-Carb Noodles is a quick, satisfying, and flavorful meal that’s low in carbs but high in nutrients and protein. With tender chicken, fresh vegetables, and keto-friendly noodles, it’s a complete meal that’s perfect for any night of the week. Enjoy!

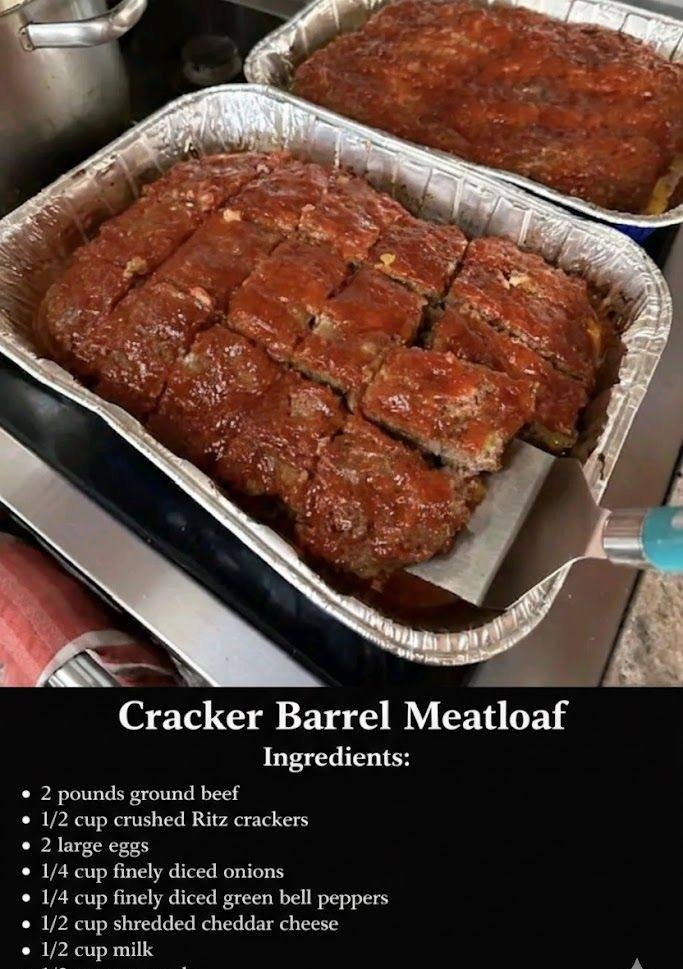
Cracker Barrel Style Meatloaf

Cracker Barrel-Style Meatloaf

A cheesy, savory meatloaf made with Ritz crackers for the perfect crumb.

Ingredients

  • 2 pounds ground beef

  • 1/2 cup crushed Ritz crackers

  • 2 large eggs

  • 1/4 cup finely diced onions

  • 1/4 cup finely diced green bell peppers

  • 1/2 cup shredded cheddar cheese

  • 1/2 cup milk

Optional Glaze (Classic Style):

  • 1/2 cup ketchup

  • 2 tbsp brown sugar

  • 1 tsp mustard


Instructions

  1. Preheat: Set your oven to 350°F (175°C).

  2. Combine: In a large bowl, lightly whisk the eggs and milk together.

  3. Mix: Add the ground beef, crushed Ritz crackers, diced onions, green bell peppers, and shredded cheddar cheese. Use your hands to mix until just combined—be careful not to overwork the meat, or it will become dense.

  4. Shape: Press the mixture into a 9×13 inch baking pan (like the one in your photo) or shape it into a rectangular loaf on a parchment-lined baking sheet.

  5. Glaze: If using a glaze, whisk the ketchup, brown sugar, and mustard together and spread it evenly over the top.

  6. Bake: Bake for 45–55 minutes, or until the internal temperature reaches 160°F.

  7. Rest: Let the meatloaf rest for at least 10 minutes before slicing to ensure it holds its shape.


Tips for the Best Result

  • The Cracker Prep: Don’t pulverize the Ritz crackers into fine dust; leave some small buttery chunks for better texture.

  • Drain the Fat: If you use a higher fat percentage beef (like 80/20), you may want to carefully drain the excess grease from the pan halfway through baking.

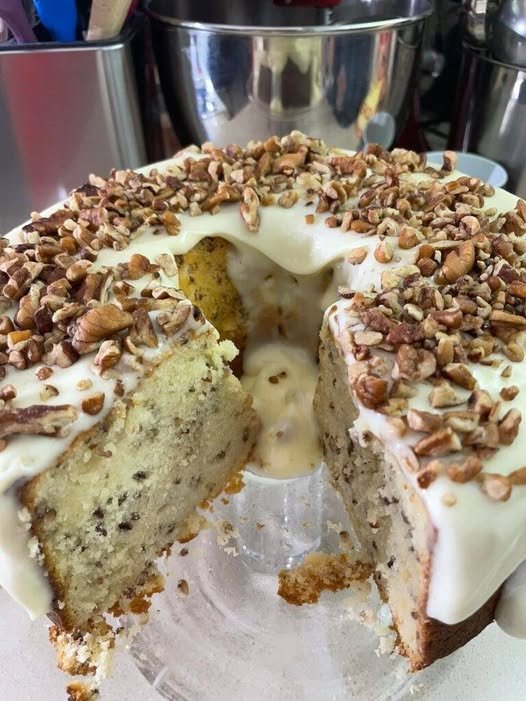
OLD SCHOOL BUTTER PECAN POUND CAKE

This buttery pecan cake is rich, tender, moist, and filled with chopped pecans. It is topped with a delicious cream cheese frosting that pairs perfectly with the easy cake. It’s a pecan lover’s dream.
Pecan desserts are a Southern tradition. From adding them to layered desserts to making them the stars of the show in cakes and pies, pecans are a classic addition to many different desserts. Over the years, pecans have been put into all kinds of recipes.
Of course, Hummingbird Cake is a classic dessert with pecans in it, as we like to call it “Pink Stuff” here. It’s a kind of pudding and whipped cream. Also, you better believe I’ve made my fair share of pecan pie. There is one pecan dessert that I love to make more than anything else: this delicious pecan cake.
Pecan Butter Pound Cake is a super easy cake recipe even for beginners. Just a few simple ingredients, a little mixing, a little baking, and frosting—that’s it. There are no fancy layers or build methods. It’s just good old-fashioned cake, and it’s delicious.

Ingredients:

3 cups of cake flour
°2 cups of sugar
°1 cup packed brown sugar
°3 sticks of butter (room temperature)
°5 eggs (room temperature)
°1 c whole milk (at room temperature)
°1/2 teaspoon baking powder
° 1/4 teaspoon salt
° 1 tablespoon of vanilla extract
°1 tablespoon pound extract
°2 cups of roasted American nuts
thick snow
°2 cups of powdered sugar
°4 ounces of butter
°4 ounces of cream cheese
°4 teaspoons half-and-half

*Directions:

Cream the butter and sugar together until smooth (about 3-7 minutes).
Slowly add eggs 1 at a time
Add flavors
Add flour and milk (alternately)
Start with flour and end with flour
stir in chopped pecans
Pour into a greased tube bowl
Bake at 325 degrees for 1 hour and 10 minutes. Check out after 45 minutes. Mine was ready in 1 hour.
Place a toothpick in the center of the cake, and if the toothpick comes out of the batter, leave the cake in it while baking.
Leave to cool in the pan on a wire rack for 20 minutes. Then put it on a cake plate. Make sure to cover it so the cake doesn’t dry out. A snugly fitting cake pan will be perfect.

Enjoy!

The “Perfect Transition” Ribeye & Butter-Basted Eggs

The “Perfect Transition” Ribeye & Butter-Basted Eggs

A nutrient-dense, zero-carb meal to keep energy high during the transition phase.

Ingredients

  • 1 lb Ribeye Steak: (Or any well-marbled cut like New York Strip). Look for “fat caps,” as fat is your primary fuel source on this diet.

  • 2-3 Large Eggs: (The “avian orbs” return, but this time as the star!).

  • 2 Tbsp Unsalted Butter: (Or Beef Tallow/Suet if avoiding dairy).

  • Coarse Sea Salt: To taste (essential for electrolytes during the first few weeks).


Instructions

  1. Temper the Meat: Take your steak out of the fridge 30 minutes before cooking. Pat it bone-dry with paper towels. A dry steak equals a better crust.

  2. Salt Heavily: Season all sides of the steak generously with sea salt. Don’t be shy; on a carnivore diet, salt is vital for preventing the “keto flu” or fatigue mentioned in your guide.

  3. The Sear: Heat a cast-iron skillet over high heat until it’s lightly smoking. Place the steak in the dry pan (the fat on the steak will render out). Sear for about 3–4 minutes per side for medium-rare.

  4. The Butter Baste: Reduce the heat to medium. Toss in the butter. Once it foams, use a spoon to pour the melted butter over the steak repeatedly for 1 minute.

  5. Rest: Remove the steak and let it rest on a wooden board for at least 5–8 minutes. This keeps the juices inside.

  6. Fry the Eggs: In the same pan with the leftover beef fat and browned butter, crack your eggs. Fry them sunny-side up or over-easy until the whites are set but the yolks remain liquid.

  7. Serve: Place the eggs directly on top of the sliced steak. The runny yolks act as a natural, creamy sauce.


Tips for the “Transition” Phase

  • Don’t Fear the Fat: If you find yourself hit by the “fatigue” mentioned in your guide, you likely aren’t eating enough fat. Increase the butter or choose fattier cuts of meat.

  • Hydration: Drink plenty of water, but ensure you are adding a pinch of salt to it if you feel a headache coming on.

  • Simplicity is Key: Don’t worry about “side dishes.” In this lifestyle, the meat is the meal.