Apple Upside Down Cake Recipe

This caramel apple upside down cake is a fall must-make. Combining a soft cinnamon-spiced cake with buttery caramelized apples, we’re essentially getting two desserts in one. After inverting, the topping’s juices seep down into the cake and add unbeatable flavor and moisture. What you’ll love most, besides the flavors, is that there’s no fancy decoration required—the lovely garnish is literally baked into the cake!

Prep Time: 25 minutes

Cook Time: 45 minutes

Total Time: 1 hour, 30 minutes

Yield: serves 8-10

This stunning apple upside down cake combines a soft cinnamon-spiced cake with a delicious buttery caramel topping. Pack those apples into the pan—this cake can hold a lot and you won’t regret those extra slices!

INGREDIENTS:

TOPPING

6 Tablespoons (85g) unsalted butter

1/2 cup (100g) packed light or dark brown sugar

1/4 teaspoon ground cinnamon

1/4 teaspoon pure vanilla extract

2 medium apples, peeled and sliced into 1/4-inch slices (1.5–2 cups, or 188–250g, apple slices)*

CAKE

1 and 1/2 cups (188g) all-purpose flour (spooned & leveled)

1 and 1/2 teaspoons baking powder

1 and 1/2 teaspoons ground cinnamon

1/4 teaspoon ground nutmeg

1/2 teaspoon salt

1/2 cup (8 Tbsp; 113g) unsalted butter, softened to room temperature

1/2 cup (100g) granulated sugar

1/2 cup (100g) packed light or dark brown sugar

2 large eggs, at room temperature

1 teaspoon pure vanilla extract

6 Tablespoons (90ml) whole milk, at room temperature*

INSTRUCTIONS:

Preheat oven to 350°F (177°C).

Prepare topping first: Combine butter and brown sugar together in a small saucepan over medium heat. Whisk occasionally until butter has melted. Cook, whisking constantly, for 1 minute as mixture thickens. Remove from heat and whisk in the cinnamon and vanilla extract. Pour into an ungreased 9×2 inch pie dish or round cake pan. (Make sure the pan is 2 inches deep. I recommend this pie dish, which is 1.8 inches deep but I never have an overflow issue.) Arrange the apple slices neatly on top, overlapping where necessary. See photo above. Place pan in the refrigerator for a few minutes as you prepare the cake batter. This helps solidify or “set” the topping’s arrangement.

Make the cake batter: Whisk the flour, baking powder, cinnamon, nutmeg, and salt together. Set aside.

Using a handheld or stand mixer fitted with a paddle or whisk attachment, beat the butter on high speed until smooth and creamy, about 1 minute. Add both sugars and beat on high speed until creamed together, about 1 minute. Scrape down the sides and up the bottom of the bowl with a rubber spatula as needed. On high speed, beat in the eggs and vanilla extract until combined. Scrape down the sides and up the bottom of the bowl as needed. Pour the dry ingredients into the wet ingredients. Turn the mixer onto low speed and as the mixer runs, slowly pour in the milk. Beat on low speed just until all of the ingredients are combined. Do not over-mix. You may need to whisk it all by hand to make sure there are no lumps at the bottom of the bowl. The batter will be slightly thick.

Remove topping from the refrigerator. Pour and spread cake batter evenly over topping.

Bake for 40-46 minutes, tenting foil on top of the cake halfway through bake time to prevent the top from over-browning before the center has a chance to fully cook. The cake is done when a toothpick inserted into the center of the cake comes out mostly clean—a couple moist crumbs are OK. Don’t be alarmed if your cake takes longer or if the cake rises up and sticks to the foil. (We serve the cake upside down anyway!)

Remove cake from the oven and cool on a wire rack for just 15 minutes. Invert the slightly cooled cake onto a cake stand or serving plate. Some of the juices from the topping will seep over the sides—that’s ok. You can slice and serve the cake warm, but the slices will be messy. I find it’s best to cool the cake completely at room temperature before slicing and serving. Do not refrigerate the cake to speed up the cooling process because it could end up tasting overly dense.

Cover leftover slices and store for up to 3 days in the refrigerator or 3 months in the freezer. Thaw at room temperature. I don’t recommend freezing the cake as a whole because the topping arrangement doesn’t thaw very nicely. See make ahead instructions below.

NOTES:

Make Ahead Instructions: You can refrigerate the topping in step 2 for up to 1 day. If refrigerating for longer than 1 hour, cover it tightly. Other than that, this isn’t the best cake to make ahead of time or freeze because the apples will settle down into the cake—while still tasty, the presentation won’t be as pleasing. You can, however, prepare the cake batter’s wet ingredients (cover and refrigerate) and dry ingredients (cover at room temperature) separately up to 1 day ahead of time, then continue with the recipe the next day. Let the wet ingredients come to room temperature before mixing.

Special Tools (affiliate links): Saucepan | Whisk | 9-inch Pie Dish | Glass Mixing Bowl | Electric Mixer (Handheld or Stand) | Cooling Rack

Old Recipe:  If you loved the old cake recipe,  increase the topping’s butter to 1/2 cup (1 stick; 115g) and add 1/4 teaspoon each of ground cloves and ground nutmeg when you stir in the cinnamon. Sprinkle 1/4 cup of walnuts on top of the apples before pouring/spreading on the cake batter. In the cake batter, reduce the milk to 1/4 cup (60ml).

Apples: Use your favorite variety of apple. I typically use Granny Smith, Fuji, or Honey crisp. Here’s more on the best apples to use for baking.

Milk: Whole milk is best, but you can use lower fat or nondairy milk if needed.

Why is everything at room temperature? All refrigerated items should be at room temperature so the batter mixes together easily and evenly. Read more about the importance of room temperature ingredients.
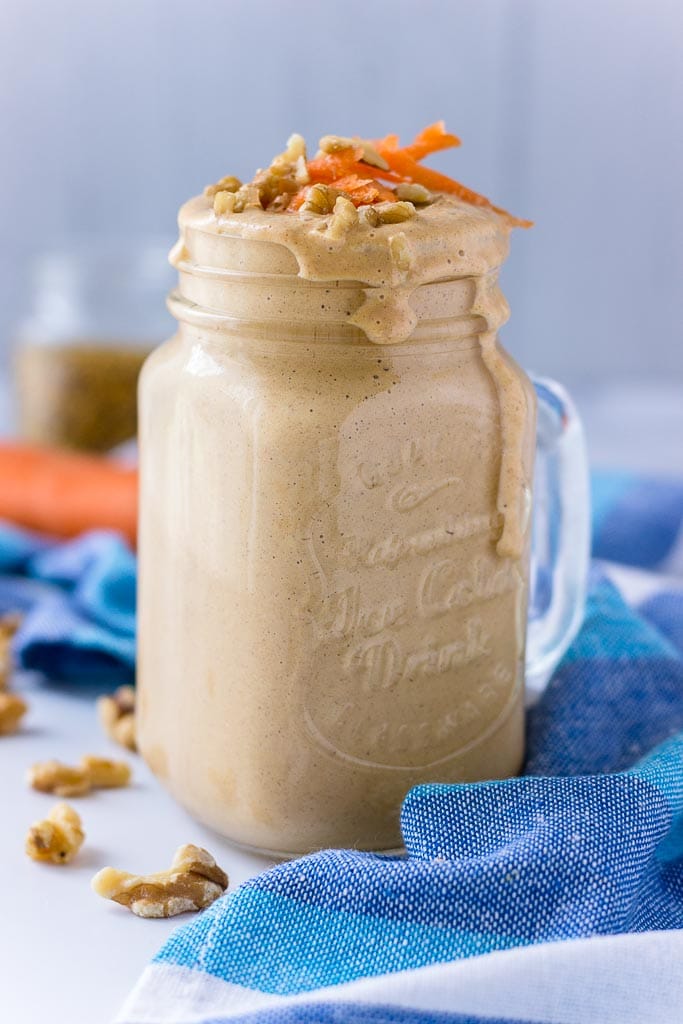
Carrot Cake Smoothie Recipe

Oh yes! I’m soooo into carrot cake everything mood lately. Because carrot cake symbolizes Spring and Spring means happiness. Carrot cake means happiness too. Does that make any sense? … Anyway, now that Spring has finally shown up in all its beauty … the weather is beautiful, birds are singing, and I’m blooming like flowers in my backyard … all I can think of is carrots and sweet carrot cake.

Carrots are sweet little veggies. Colorful and so HEALTHY. Honestly, I feel no guilt (nor shame) about having Carrot Cake Overnight Oats for breakfast and then later nibbling these amazing orange flavored Carrot Oatmeal Cookies. Nope. Both of these beauties are the healthiest + delicious thing EVER. And having this knowing I’m doing something good for my body is liberating.

This carrot smoothie recipe is super healthy, guilt-free and really incredible too. It’s loaded with nutrients and bursting with carrot cake flavor. It feels like a slice of carrot cake in a drinking form. I like that! Especially in the morning. It’s one really tasty breakfast option if you ask me. Sweet, creamy, thick and just beautiful.

This rich, sweet and creamy carrot cake smoothie is like dream come true, really. A nourishing blend of whole foods that tastes just like a slice of carrot cake. Yum! It’s very nutritious, loaded with proteins and healthy fats, and fibers good for digestion but without excess calories, WITHOUT ADDED SUGARS. It’s perfect healthy breakfast option. + It’s super easy to whip up! Trust me, you don’t want to miss this beauty. 

Thick, creamy and delicious, this Carrot Cake Smoothie is perfect nutritious and healthy breakfast. It’s packed with amazing flavors and SUPER FOODS, and completely added-sugar-free.

PREP TIME: 5mins

TOTAL TIME: 5 mins

COURSE: Breakfast

CUISINE: American

SERVINGS: 1 cup

INGREDIENTS:

1 ripe banana

1 cup carrots chopped (about 1 large)

1 cup almond milk

½ cup soya probiotic yogurt

¼ cup walnuts

1 teaspoon Ceylon cinnamon

1 teaspoon vanilla extract

¼ teaspoon freshly grated ginger

Dash of nutmeg

INSTRUCTIONS:

Add all the ingredients into your blender and process until smooth.

Pour in glass and add toppings. Drink immediately.

NOTES:

As a measure, I used UScup(240ml).

NUTRITIONAL INFO:

Calories: 436kcal | Carbohydrates: 50g | Protein: 10g | Fat: 24g | Saturated Fat: 2g | Sodium: 383mg | Potassium: 746mg | Fiber: 9g | Sugar: 24g | Vitamin A: 10265IU | Vitamin C: 28.9mg | Calcium: 519mg | Iron: 1.4mg Smoothies

 Super Green Spirulina Smoothie Recipe

A nutritious and vibrant green smoothie with 5 ingredients: banana, cucumber, coconut milk, spirulina, and spinach! The perfect plant-based breakfast or snack.

PREP TIME: 5minutes 

TOTAL TIME: 5minutes

Servings: 1

Course: Beverage, Breakfast

Cuisine: Gluten-Free, Vegan

Freezer Friendly: 1 Week

INGREDIENTS:

1 medium ripe banana (previously peeled and frozen // ~1 cup as original recipe is written)

1/2 cup sliced cucumber (organic when possible // skin on)

3/4 – 1 cup light coconut milk (or other non-dairy milk // less for thicker smoothie, more for thinner smoothie)

1 cup spinach or chopped kale (organic when possible // I like to freeze mine)

1 tsp spirulina powder*

1 Tbsp hemp seed (optional // or sub chia seeds or vegan protein powder)

FOR SERVING optional

1/4 cup frozen or fresh blueberries (organic when possible)

1/4 cup granola (store-bought or homemade*)

INSTRUCTIONS:

To a blender*, add frozen banana, cucumber, coconut milk, spinach, spirulina, and hemp seed (optional). Blend until creamy and smooth, scraping down sides (or using smoothie wand) as needed.

If too thick, thin with water or more coconut milk. If too thin, thicken with ice or more frozen banana. Taste and adjust flavor as needed, adding more banana for sweetness, cucumber for freshness, or greens or spirulina for green color. See note about spirulina (brands + how much to add).

Serve immediately as is or in my preferred: top with blueberries, granola, and more hemp seeds. Best when fresh, though leftovers will keep covered in the refrigerator up to 2 days or the freezer for 1 week. Thaw to enjoy from freezer.

Notes

*When adding spirulina to smoothies, start with 1 tsp and add more as desired, but this is the max for me without tasting it. Otherwise, it can start tasting a little seaweedy.

*Granola recipes: Peanut Butter Chocolate Chip Granola, Banana Bread Granola, Simple Quinoa Granola, or Nut ‘n’ Honey Granola (the one I used in photos).

*Spirulina also works extremely well when added in the same quantity to my Ginger Colada Green Smoothie!

Nutritional Info: (1 of 1 servings)

Serving: 1 smoothie

Calories: 225

Carbohydrates: 36.8 g

Protein: 5.8 g

Fat: 9.7 g

Saturated Fat: 8.7 g

Trans Fat: 0 g

Cholesterol: 0 mg

Sodium: 72 mg

Fiber: 4 g

Sugar: 15.4 g

Did you make this recipe?

Creamy Peach Smoothie Recipe

Creamy and delicious peach smoothie made with 5 simple ingredients for a refreshing, filling breakfast or snack! This easy peach smoothie recipe gets a boost of protein from greek yogurt and has the perfect amount of sweetness from ripe peaches and berries. Enjoy as is or add your fav nutritional boosters!

I call this my “pretty in pink” because it has the most beautiful color and incredible flavor from the addition of raspberries or strawberries. I love that they don’t overpower the peach flavor, but just add subtle hints of sweetness and berry flavor. This peach smoothie is ultra creamy and packed with protein thanks to greek yogurt (feel free to use dairy free!) and you seriously only need 5 total ingredients to make it. This one’s a must before summer ends!

5-ingredient peach smoothie recipe

This healthy peach smoothie with yogurt has simple ingredients but an incredible, creamy peach flavor! Here’s what you’ll need to make it:

Peaches: you’ll need frozen peach slices, of course, for that delicious peach flavor.

Berries: I like to add frozen raspberries or strawberries for additional fruit sweetness and a pretty pink color.

Yogurt: get that peaches and cream flavor and a boost of protein with vanilla greek yogurt.

Milk: to help the smoothie blend up you’ll add your favorite dairy free milk.

Vanilla extract: a little vanilla brings out all of the natural sweetness. Learn how to make your own at home with this tutorial!

This easy peach smoothie recipe is great for customizing with your fav smoothie ingredients, toppings, and more. Here’s what I can recommend:

Make it vegan/dairy free: simply use your favorite dairy free yogurt and dairy free milk to keep the peach smoothie both dairy free and vegan. I think a coconut-based yogurt would be delicious!

Choose your extra fruit: I love the flavor and color that raspberries and strawberries add to this peach smoothie, but it would also be delicious with blueberries or even banana.

Have fun with toppings: try adding my homemade granola on top, plus some extra fresh fruit slices for the ultimate treat!

ingredients for a peach smoothie with yogurt in a blender

Looking for more sweetness?

Because this peach smoothie is made without banana, the sweetness depends on the ripeness and/or seasonality of your frozen fruit. To make it sweeter you can add 1 pitted date or a little bit of honey/pure maple syrup and blend again until it’s sweet to your liking.

Try these easy nutritional boosters

Looking for another boost of nutrition in this creamy peach smoothie? Try adding any of the following, and remember to blend in a little more milk along with any of these additions.

Nut butter: for an additional boost of healthy fats feel free to blend in 1 tablespoon of your fav nut butter. I think almond butter would be perfect in this peach smoothie!

Flaxseed meal: this is one of my favorite ingredients to add to smoothies for a boost of fiber and minerals, and is especially great for nursing mamas as flaxseed can help increase milk supply. Here’s a brand I love.

Chia seeds: try adding in a tablespoon of chia seeds for a boost of healthy fats and fiber.

Hemp seeds: feel free to throw in some hemp seeds for another boost of healthy fats, omegas and minerals.

Avocado: add healthy fats and extra creaminess by adding ripe avocado. Usually, 1/4 or 1/2 of an avocado will be sufficient and also help to keep you satisfied thanks to those healthy fats.

Protein: Easily add more protein to this turmeric smoothie by adding 1 scoop of your favorite protein powder (vanilla would be delicious!) I recommend Vital Protein collagen peptides or Four Sigmatic Plant-Based Protein Powder.

Tips and Tricks 💫 

Use frozen fruit. This will help keep the smoothie cold and thick. Sometimes ice doesn’t blend as well, so it’s best to skip it unless absolutely necessary. If you only have fresh fruit, try adding 1 cup of frozen cauliflower.

Add liquid. Don’t be afraid to add more liquid if your smoothie is too thick or won’t fully blend. High powered blenders tend to blend frozen fruit much better, so if you have a regular or personal size blender, you may need to add more coconut milk.

Start low, go high. Start the blender on low speed, then gradually increase to high to help blend all ingredients. Finally, end with the blender on low speed.

top-down view of peach smoothies in glasses topped with granola and raspberries

Make it ahead of time

Yes, you can even make this easy peach smoothie ahead of time! Make it as-is or even double it and then try one of my three amazing ways to prep and store smoothies right in your freezer.

Pretty in Pink Peach Smoothie

Prep Time: 5minutes

TOTAL TIME: 5minutes 

Serves: 1

Creamy and delicious peach smoothie made with 5 simple ingredients for a refreshing, filling breakfast or snack! This easy peach smoothie recipe gets a boost of protein from greek yogurt and has the perfect amount of sweetness from ripe peaches and berries. Enjoy as is or add your fav nutritional boosters!

INGREDIENTS:

For the smoothie:

1 heaping cup frozen peach slices

1 cup frozen raspberries or strawberries

½ cup vanilla greek yogurt (or sub dairy free yogurt of choice)

1 cup unsweetened dairy free milk of choice (i use almond milk but coconut milk would be YUM)

1 teaspoon pure vanilla extract

To garnish:

Granola and fresh raspberries/peach slices

INSTRUCTIONS:

Add all ingredients to a high powered blender: frozen peaches, frozen raspberries, yogurt, milk and vanilla extract. Feel free to add any optional add-ins to your smoothie if you’d like. Blend until smooth, adding more milk to thin, if necessary. Taste and add honey to sweeten as necessary then blend again; this is totally optional but some might prefer a sweeter smoothie. Pour into a glass and enjoy! Serves 1. Feel free to double the recipe to serve 2.

Recipe Notes

Feel free to add 1 tablespoon almond butter for a boost of healthy fats. I also love to add a tablespoon or two of hemp seeds but it’s up to you.

If the smoothie isn’t sweet enough, which typically depends on the ripeness/seasonality of your frozen fruit, you can add 1 pitted date or a little bit of honey/pure maple syrup and blend again until it’s sweet to your liking.

If you want a boost of greens, add in 1-2 cups of spinach; the color will change but the flavor will not.

Get all of my smoothie-making tips and tricks within the blog post!

Nutritional Info:

Serving: 1smoothie (without granola topping)

Calories: 336cal

Carbohydrates: 43g

Protein: 16.2g

Fat: 11.7g

Saturated Fat: 4.6g

Fiber: 10.9g

Sugar: 29.6g