Diluted Apple Cider Vinegar Skin Toner

Diluted Apple Cider Vinegar Skin Toner

Ingredients

  • 1 tablespoon raw apple cider vinegar

  • 3 tablespoons water (minimum dilution)

  • Cotton pad

Instructions

  1. Mix ACV and water thoroughly

  2. Dip a cotton pad into the mixture

  3. Gently dab only on the dark spot (not the whole hand/face)

  4. Leave on for 5–10 minutes max

  5. Rinse with cool water

  6. Apply a gentle moisturizer

⏱ Use 1–2 times per week only

Servings

  • About 4–5 spot applications

Nutritional Information (Topical Use)

Not nutritionally relevant when applied to skin
(ACV nutrients do not absorb meaningfully through skin)

Potential Benefits (Limited & Not Guaranteed)

  • Mild exfoliation

  • Temporary brightening

  • Smoother skin texture

Risks & Warnings (Very Important)

❌ Never use undiluted ACV
❌ Do not use on broken, sensitive, or acne-prone skin
❌ Stop immediately if stinging, redness, or burning occurs
❌ Always wear sunscreen — acids increase sun sensitivity

Patch test required (inside of arm, wait 24 hours)

Better, Safer Options That Actually Work

If your goal is fading dark spots, these are proven and safer:

  • Sunscreen (SPF 30+) – most important

  • Vitamin C

  • Niacinamide

  • Azelaic acid

  • Retinoids (with adult/doctor guidance)

  • Dermatologist treatments (chemical peels, lasers)

Q & A

❓ Does ACV permanently remove age spots?

No. At best, it may slightly lighten them temporarily.

❓ Why does it look like it works in pictures?

Lighting, editing, makeup, or temporary exfoliation effects.

❓ Can ACV make spots worse?

Yes — irritation can trigger post-inflammatory hyperpigmentation.

❓ Is it safe for teens?

Only rare, cautious use, diluted, and not on the face. Sunscreen is far more important.

❓ Should I try it?

If you do, do it carefully, but understand it’s not a real treatment.
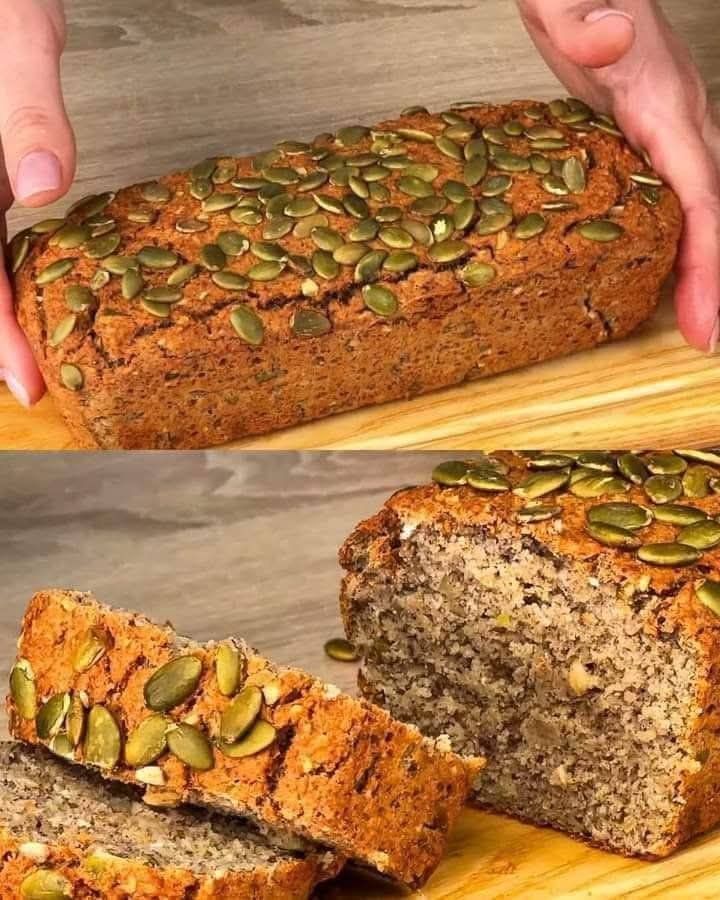
Lentil Bread (Gluten-Free, Sugar-Free, and Yeast-Free)

Lentil Bread (Gluten-Free, Sugar-Free, and Yeast-Free)


Ingredients:

  • 200 g lentils (preferably green or brown lentils)

    • Provides the base for the bread and a healthy source of protein and fiber.

  • 30 ml olive oil

    • Adds moisture and richness to the bread.

  • 1/2 teaspoon salt

    • Enhances the flavors of the lentils and other ingredients.

  • 1/2 teaspoon baking powder

    • Helps the bread rise slightly, giving it a light texture.

  • 1 tablespoon pumpkin seeds (optional, for topping)

    • Adds crunch and a nice visual touch on top of the bread.

  • Water as needed to blend the lentils

    • Helps achieve the right dough consistency.


Instructions:

  1. Prepare the Lentils:

    • Rinse the lentils thoroughly under cold water.

    • Boil the lentils in a pot with enough water to cover them. Simmer for about 15-20 minutes, or until the lentils are soft. Drain any excess water and let them cool down slightly.

  2. Blend the Lentils:

    • In a blender or food processor, add the cooked lentils, olive oil, salt, and baking powder. Blend until smooth, adding water gradually to reach a thick, dough-like consistency. The dough should be thick enough to hold its shape but not too dry.

  3. Prepare the Baking Dish:

    • Preheat your oven to 350°F (175°C).

    • Grease a loaf pan with olive oil or line it with parchment paper for easy removal of the bread later.

  4. Pour the Mixture into the Loaf Pan:

    • Transfer the blended lentil mixture into the prepared loaf pan, smoothing the top with a spatula. Sprinkle some pumpkin seeds on top for extra crunch and decoration.

  5. Bake the Bread:

    • Place the loaf pan in the preheated oven and bake for about 40-45 minutes, or until the top is golden brown, and a toothpick inserted into the center comes out clean.

  6. Cool and Serve:

    • Let the bread cool in the pan for 10 minutes before transferring it to a wire rack to cool completely. Slice and serve.


Benefits:

  • Gluten-Free: Made entirely from lentils, this bread is naturally free from gluten, making it suitable for those with gluten sensitivity or celiac disease.

  • High in Protein and Fiber: Lentils are a great source of plant-based protein and fiber, helping to keep you full and support digestion.

  • Sugar-Free: This bread is completely sugar-free, making it ideal for those on a low-sugar or ketogenic diet.

  • Quick and Simple: With just a few ingredients, this bread is easy to make and doesn’t require yeast or rising time.


Nutritional Info (Approximate per slice, based on 10 servings):

  • Calories: 120-140 kcal

  • Carbohydrates: 20-22 g

  • Protein: 8-9 g

  • Fat: 5-6 g

  • Fiber: 6-7 g

  • Sodium: 200-250 mg

Tips:

  • Add Flavors: For added flavor, you can include herbs or spices like garlic powder, onion powder, or dried rosemary in the dough before baking.

  • Storage: Store leftover bread in an airtight container at room temperature for up to 3 days. It also freezes well for up to 3 months.

  • Make it Savory or Sweet: To make it savory, you can add diced vegetables like onions, bell peppers, or spinach to the dough. For a sweeter version, add a small amount of honey or cinnamon.

  • Mixing the Dough: If you prefer a chunkier bread, you can leave the lentils slightly less blended for more texture.

Frequently Asked Questions (Q/A):

Q1: Can I use canned lentils for this recipe?
A1: Yes, you can use canned lentils. Just make sure they are drained and rinsed well before blending.

Q2: Can I substitute the olive oil with another oil?
A2: Yes, you can substitute the olive oil with coconut oil or avocado oil if preferred.

Q3: Can I make this bread in a different shape or size?
A3: Absolutely! If you want to make smaller or larger loaves, adjust the baking time accordingly. Just ensure the bread is cooked through before serving.

Q4: How can I make this bread more fluffy?
A4: You can experiment with adding a small amount of baking soda in place of some of the baking powder, but because this bread is naturally dense, don’t expect it to be as airy as traditional wheat bread.

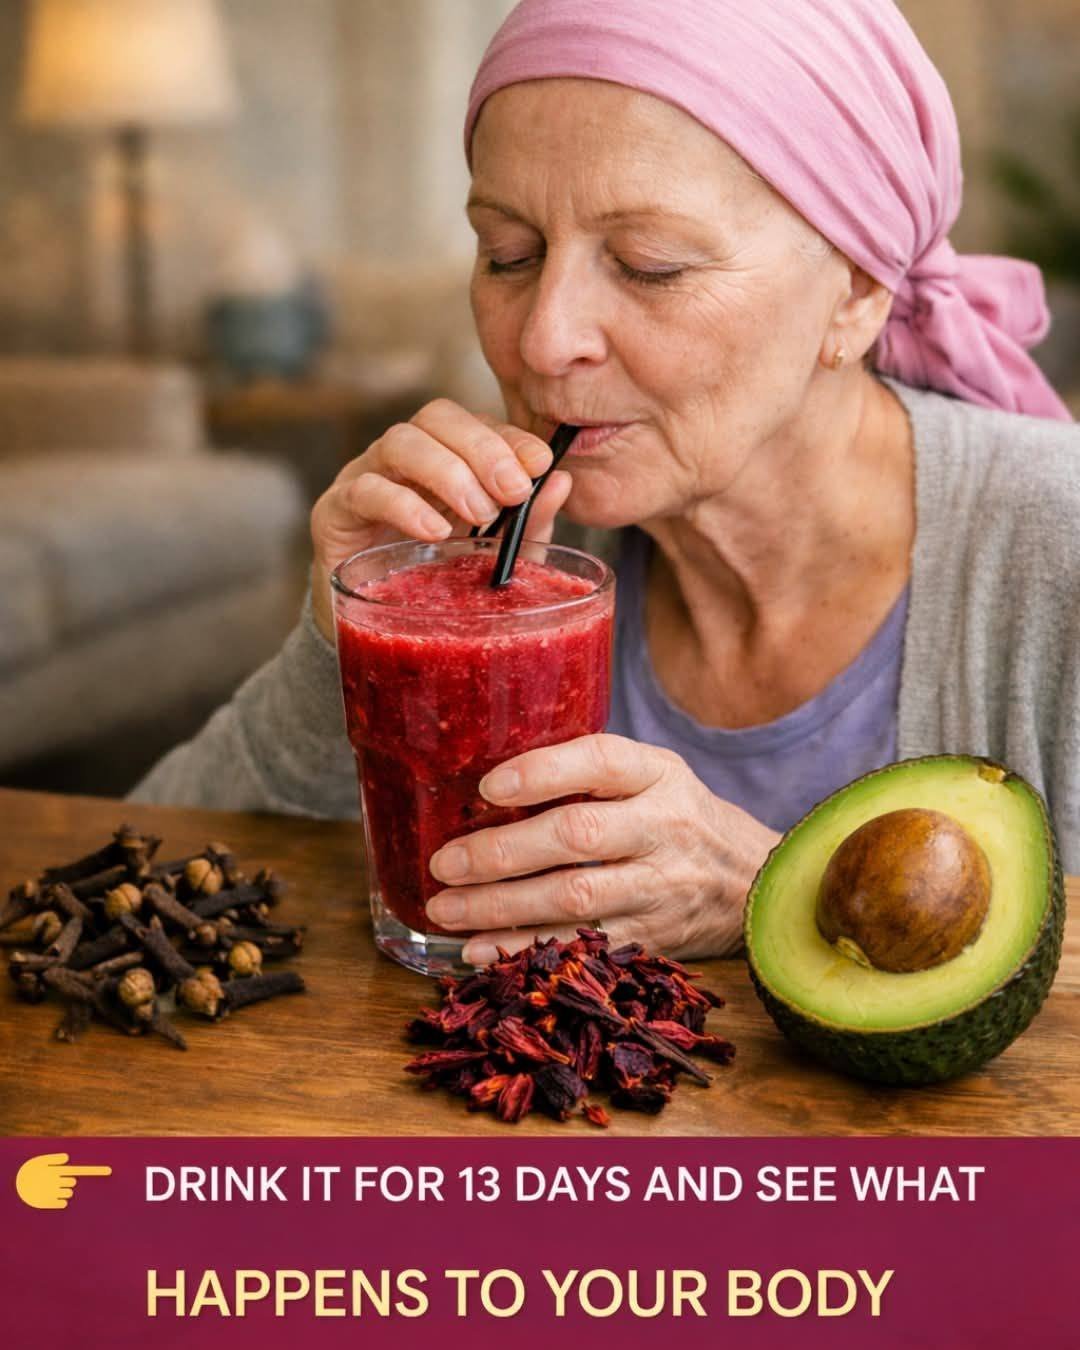
Flaxseed Cardiovascular Support Drink

Flaxseed Cardiovascular Support Drink

(Not a cure – a supportive wellness beverage)

 Description

A nutrient-dense drink rich in fiber, omega-3s, and antioxidants that may help support heart health, circulation, and blood sugar balance when combined with a healthy lifestyle.

Servings

1 serving (can be taken once daily)

 Ingredients

  • 1 tablespoon ground flaxseed (never whole)

  • 1 cup warm water or unsweetened almond milk

  • ½ teaspoon ground cinnamon (optional)

  • 1 teaspoon lemon juice (optional)

  • Optional additions (choose one):

    • Hibiscus tea (cooled)

    • A few berries

    • Small piece of avocado (for creaminess)

 Instructions

  1. Grind flaxseed fresh (or use pre-ground).

  2. Add to liquid of choice.

  3. Stir well or blend for 20–30 seconds.

  4. Drink immediately.

Important Notes

  • Always use ground flaxseed – whole seeds pass undigested.

  • Drink water afterward (fiber expands).

  • This is not a replacement for medication or treatment.

 Tips for Best Results

  • Take in the morning or with meals

  • Start with 1 teaspoon if new to flax

  • Store ground flaxseed refrigerated

  • Do not exceed 1–2 tablespoons daily

 Nutritional Information (Approx. per serving)

  • Calories: 55

  • Fiber: 3g

  • Protein: 2g

  • Fat: 4g (mostly omega-3 ALA)

  • Net Carbs: ~0.5g

  • Sugar: 0g

 Evidence-Based Benefits (Supported by Research)

Flaxseed may help:

  • ✔ Support heart health

  • ✔ Improve cholesterol levels

  • ✔ Aid blood sugar control

  • ✔ Reduce inflammation

  • ✔ Support digestive health

  • ✔ Improve blood vessel function

⚠️ It does NOT cure cancer, diabetes, or hypertension.

 Q & A

Q: Can flaxseed cure cancer?
❌ No. It may support overall health but cannot cure cancer.

Q: Does it lower blood pressure?
✔ It may help modestly as part of a healthy diet.

Q: Can diabetics use this?
✔ Often yes, but only with medical guidance.

Q: How long before benefits appear?
⏳ Typically 2–6 weeks with consistent use and proper diet.

Q: Who should avoid flaxseed?

  • People with bowel obstruction

  • Hormone-sensitive conditions (ask a doctor)

  • Those on blood thinners (consult first)

Old-Fashioned Rice Pudding

Old-Fashioned Rice Pudding

Description

Old-Fashioned Rice Pudding is a traditional comfort dessert made with simple pantry ingredients. Slowly cooked rice is combined with milk, cream, eggs, and sugar to create a rich, creamy pudding with a soft texture and gentle sweetness. Served warm or chilled, it’s a nostalgic dessert loved across generations.

Ingredients

  • 1 cup white rice (long-grain or medium-grain)

  • 2 cups whole milk

  • ½ cup heavy cream

  • ½ cup granulated sugar

  • 2 large eggs

  • 1 teaspoon vanilla extract

  • ¼ teaspoon salt (recommended for balance)

  • Optional: ground cinnamon or nutmeg for topping

 Instructions

  1. Cook the rice
    In a medium saucepan, bring 2 cups of water to a boil. Add rice and a pinch of salt. Reduce heat, cover, and simmer until rice is tender and water is absorbed (about 15–18 minutes).

  2. Heat the milk mixture
    Stir the milk, heavy cream, and sugar into the cooked rice. Cook over medium-low heat, stirring frequently, for 10–15 minutes until thickened.

  3. Temper the eggs
    In a bowl, whisk eggs. Slowly add about ½ cup of the hot rice mixture to the eggs while whisking constantly to prevent scrambling.

  4. Combine
    Pour the egg mixture back into the saucepan, stirring continuously. Cook on low heat for 2–3 minutes, until pudding thickens (do not boil).

  5. Finish
    Remove from heat. Stir in vanilla extract.

  6. Serve
    Spoon into bowls and sprinkle with cinnamon or nutmeg if desired. Serve warm or chilled.

 Notes

  • The pudding will thicken more as it cools.

  • Stir frequently to prevent sticking or scorching.

  • If it becomes too thick, add a splash of warm milk to loosen.

 Tips for Best Results

  • Medium-grain rice creates a creamier texture.

  • Use whole milk for richness; low-fat milk makes it thinner.

  • For extra creaminess, add 1 tablespoon butter at the end.

  • Avoid boiling once eggs are added.

 Servings

  • Serves: 4–6

  • Serving size: ~¾ cup

 Nutritional Information (Approx. per serving)

  • Calories: 280 kcal

  • Protein: 7 g

  • Fat: 9 g

  • Saturated Fat: 5 g

  • Carbohydrates: 42 g

  • Sugar: 20 g

  • Calcium: 15% DV

(Values may vary based on ingredients used.)

Benefits

  • Comforting and easy to digest

  • Provides calcium and protein

  • Uses basic pantry ingredients

  • Can be enjoyed warm or cold

  • Naturally gluten-free

Q & A

Q: Can I use leftover rice?
A: Yes! Use 3 cups cooked rice and reduce initial cooking time.

Q: Can I make it dairy-free?
A: Yes—use coconut milk or almond milk and skip the cream.

Q: How long does rice pudding last?
A: Up to 4 days refrigerated in an airtight container.

Q: Can I add raisins?
A: Absolutely! Stir in ¼ cup raisins during the last 5 minutes.

Q: Why did my pudding get lumpy?
A: Eggs cooked too fast—always temper them and keep heat low.

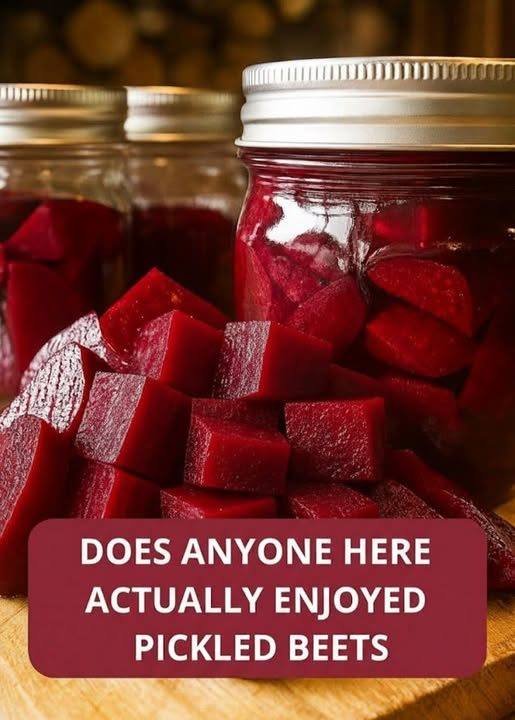
Easy Refrigerator Pickled Beets

🥗 Recipe: Easy Refrigerator Pickled Beets

  • Prep time: 15 minutes

  • Cook time: 30–45 minutes (to boil beets)

  • Total time: 1 hour + 24 hours chilling

  • Servings: 8 (approx. 2 quart-sized jars)

Ingredients

  • 6–8 medium beets (stems removed, scrubbed clean)

  • 1 cup apple cider vinegar (for that fruity tang)

  • 1 cup water

  • ½ cup granulated sugar (adjust to your sweetness preference)

  • 1 tsp salt

  • 1 tsp whole black peppercorns

  • 1 small red onion, thinly sliced (optional, but highly recommended)

  • Optional Aromatics: 2 cloves garlic, 1 cinnamon stick, or 2 sprigs of fresh dill.

Instructions

  1. Boil the Beets: Place cleaned beets in a large pot and cover with water. Bring to a boil, then reduce heat and simmer for 30–45 minutes until fork-tender.

  2. The “Slip” Method: Drain the beets and immediately plunge them into an ice-water bath. Once cool enough to touch, the skins should slip right off with your fingers. Slice or wedge the peeled beets.

  3. Prepare the Brine: In a small saucepan, combine vinegar, water, sugar, salt, and peppercorns. Bring to a simmer over medium heat, stirring until sugar and salt dissolve.

  4. Jar it Up: Pack the sliced beets and onions into clean glass jars. Pour the hot brine over the beets, ensuring they are completely submerged.

  5. Chill: Let the jars cool to room temperature. Seal the lids and refrigerate for at least 24 hours before eating to let the flavors develop.

💡 Notes & Tips

  • Uniformity: Slice your beets to a consistent thickness (about ¼ inch) so they pickle evenly.

  • The Golden Option: Use golden beets if you want the flavor without the “crime scene” red stains on your cutting board.

  • Don’t Toss the Greens: If your beets came with leaves, sauté them with garlic and olive oil—they taste like a sweeter version of Swiss chard.

📊 Nutritional Info (Per Serving)

Estimate based on 1/2 cup serving:

Nutrient Amount
Calories 75 kcal
Carbohydrates 16g
Fiber 2g
Sugars 13g
Sodium 310mg
Protein 1g

✨ Benefits

  1. Nitrate Rich: Beets are famous for natural nitrates, which can help improve blood flow and lower blood pressure.

  2. Digestive Aid: The vinegar in the brine acts as a mild digestive stimulant.

  3. Antioxidant Powerhouse: The deep red pigment (betalains) has anti-inflammatory properties.

❓ Common Q&A

Q: How long do these last in the fridge?

A: Since these are “quick pickles” and not processed in a water bath, they should be eaten within 3–4 weeks.

Q: Can I use canned beets instead?

A: You can, but the texture will be much softer. If using canned, skip the boiling step and go straight to making the brine.

Q: Why did my brine turn cloudy?

A: This usually happens if you use table salt with anti-caking agents. It’s safe to eat, but for a crystal-clear brine, use pickling salt or sea salt.

Top 7 BEST Night Drinks for Lower Blood Sugar

Top 7 BEST Night Drinks for Lower Blood Sugar

 Cinnamon Turmeric Golden Milk

Description

A warm anti-inflammatory bedtime drink that may improve insulin sensitivity and reduce overnight glucose spikes.

Ingredients (1 Serving)

  • 1 cup unsweetened almond milk (or low-fat milk)

  • ½ tsp Ceylon cinnamon

  • ¼ tsp turmeric

  • Pinch black pepper

  • Optional: stevia

Instructions

  1. Heat milk gently (do not boil).

  2. Whisk in spices.

  3. Simmer 2–3 minutes.

  4. Drink warm 30–60 minutes before bed.

Nutritional Info (approx.)

  • Calories: 40–80

  • Carbs: 2–10g

  • Sugar: 0–8g

  • Fat: 2–3g

Benefits

  • Cinnamon may improve insulin sensitivity.

  • Turmeric reduces inflammation.

  • Promotes relaxation before sleep.

Tips

  • Use Ceylon cinnamon (safer long term).

  • Avoid adding honey or sugar.

Q&A

Q: Can I drink daily? Yes, in moderation.
Q: Is it safe with medication? Usually yes, but monitor glucose.

 Fenugreek Water

Description

Fenugreek seeds contain soluble fiber that may help lower fasting glucose.

Ingredients

  • 1 tsp fenugreek seeds

  • 1 cup warm water

Instructions

  1. Soak seeds overnight.

  2. Drink water (you may chew seeds).

Nutritional Info

  • Very low calorie

  • Small amount of fiber if seeds consumed

Benefits

  • May reduce fasting blood sugar.

  • Supports digestion.

Tips

  • Start with small amounts to avoid bloating.

  • Avoid during pregnancy.

Q&A

Q: Best time? Before bed or early morning.


3️⃣ Chamomile Tea

Description

A calming herbal tea that supports sleep and may reduce blood sugar levels.

Ingredients

  • 1 chamomile tea bag

  • 1 cup hot water

Instructions

Steep 5–7 minutes.

Nutritional Info

  • 0 calories (unsweetened)

Benefits

  • Improves sleep quality.

  • May reduce oxidative stress.

  • Supports overnight glucose balance.

Tips

  • Do not add sugar.

  • Can combine with cinnamon stick.

4️⃣ Apple Cider Vinegar Drink

Description

Some studies suggest vinegar before bed may reduce morning blood sugar.

Ingredients

  • 1 tbsp raw apple cider vinegar

  • 1 cup warm water

Instructions

Mix and drink before bed.

Nutritional Info

  • 3 calories

  • 0 carbs

Benefits

  • May improve insulin sensitivity.

  • May reduce fasting glucose levels.

Tips

  • Always dilute.

  • Use a straw to protect teeth.

  • Avoid if you have acid reflux or ulcers.

Q&A

Q: Can I take 2 tbsp? Start with 1 tbsp only.


5️⃣ Aloe Vera Water

Description

Food-grade aloe vera juice may help improve fasting blood sugar.

Ingredients

  • 1–2 tbsp pure aloe vera juice

  • 1 cup water

Nutritional Info

  • 5–10 calories

  • 1–2g carbs

Benefits

  • Anti-inflammatory.

  • May support glucose regulation.

Tips

  • Use only food-grade aloe.

  • Avoid high doses (may cause diarrhea).


6️⃣ Cucumber Mint Infused Water

Description

A refreshing, ultra-low-carb hydration drink perfect for nighttime.

Ingredients

  • ½ cucumber sliced

  • Few fresh mint leaves

  • 2 cups water

Instructions

Infuse 2–4 hours in refrigerator.

Nutritional Info

  • 5 calories

  • 1g carbs

Benefits

  • Supports hydration.

  • Zero added sugar.

  • Helps reduce late-night cravings.

Tips

  • Add lemon slice for flavor (optional).


7️⃣ Low-Carb Protein Bedtime Shake

Description

Protein before bed may prevent overnight glucose spikes and reduce hunger.

Ingredients

  • 1 scoop unsweetened protein powder

  • 1 cup unsweetened almond milk

  • Ice cubes

Instructions

Blend and drink 30 minutes before bed.

Nutritional Info (varies by brand)

  • 100–150 calories

  • 15–25g protein

  • 2–5g carbs

Benefits

  • Stabilizes overnight blood sugar.

  • Reduces dawn phenomenon impact.

  • Supports muscle health.

Tips

  • Choose low-carb, no-sugar protein powder.

  • Avoid flavored sugary blends.