Crispy Garlic & Herb Baked Cauliflower

Crispy Garlic & Herb Baked Cauliflower

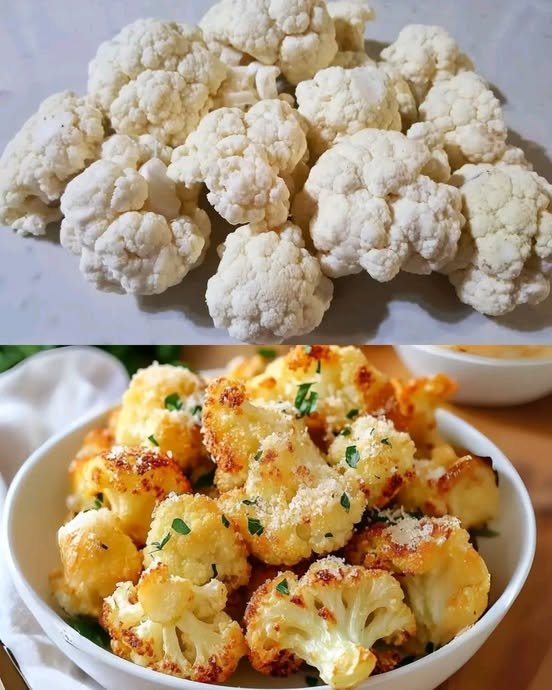
This roasted cauliflower is a fantastic alternative to traditional side dishes. By using high heat and a blend of aromatic spices, the florets become tender on the inside with perfectly crisp, golden edges.

Ingredients

  • 1 large head of cauliflower, cut into bite-sized florets

  • 3 tbsp olive oil

  • 1 tsp garlic powder

  • 1 tsp smoked paprika

  • 1/2 tsp dried oregano

  • 1/4 tsp black pepper

  • Optional: A pinch of salt and 2 tbsp grated parmesan cheese (for extra crunch)


Step-by-Step Instructions

  1. Preparation: Preheat your oven to 200°C. Line a large baking sheet with parchment paper to prevent sticking and ensure easy cleanup.

  2. Clean and Dry: After cutting the cauliflower into florets, make sure they are thoroughly dry. Any excess water will cause the cauliflower to steam rather than crisp up.

  3. Seasoning: In a large mixing bowl, toss the cauliflower florets with the 3 tbsp olive oil. Add the garlic powder, smoked paprika, dried oregano, and black pepper. Toss well until every piece is evenly coated in the oil and spices.

  4. Arrange: Spread the florets in a single layer on the prepared baking sheet. Ensure they are not crowded; space between the pieces allows the hot air to circulate, making them crispy.

  5. Bake: Place the tray in the oven and bake for 20–25 minutes. Halfway through the cooking time, use a spatula to toss the florets so they brown evenly on all sides.

  6. Final Touch: If you are using parmesan cheese, sprinkle it over the cauliflower during the last 5 minutes of baking.

  7. Serve: Remove from the oven when the edges are charred and golden. Serve hot as a snack, a side dish, or even as a filling for tacos.


Recipe Variation

For an even crispier texture, you can also prepare these in an Air Fryer at 190°C for 12–15 minutes, shaking the basket every few minutes.

🥤 Glowing Skin Juice Recipe

.


🥤 Glowing Skin Juice Recipe

This recipe makes approximately 1–2 servings depending on the size of your produce.

Ingredients

  • 1 medium Carrot: High in beta-carotene for skin repair.

  • 1 small Beet: Rich in antioxidants and improves blood flow.

  • 1 Apple (Gala or Granny Smith): Provides natural sweetness and Vitamin C.

  • 1 Large Cucumber: High water content for deep hydration.

  • 1/2 Lemon: Brightens the flavor and aids digestion.


Instructions

Option 1: Using a Juicer (Best for Texture)

  1. Prep: Wash all produce thoroughly. Peel the beet (optional, but it reduces the “earthy” taste) and the lemon.

  2. Chop: Cut the vegetables into pieces small enough to fit through your juicer’s chute.

  3. Juice: Run everything through the juicer, alternating between harder items (carrots/beets) and softer/watery items (cucumber/apple).

  4. Finish: Stir the juice to combine the layers and serve immediately over ice.

Option 2: Using a Blender (Whole Food Version)

  1. Prep: Chop all ingredients into small chunks. Remove the apple seeds and peel the lemon.

  2. Blend: Add the ingredients to the blender with 1/2 cup of cold water or coconut water to help it move. Blend on high until completely smooth.

  3. Strain: For a “juice” consistency, pour the mixture through a nut milk bag or a fine-mesh strainer into a glass. If you don’t mind the pulp, drink it as a thick smoothie to keep all the fiber!


💡 Pro-Tips for the Best Glow

  • Keep the Skin: Unless you are using a blender and want it ultra-smooth, keep the skin on the cucumber and apple for extra nutrients.

  • Drink it Fresh: Fresh juice oxidizes quickly. For the most “glow” benefits, try to drink it within 15–20 minutes of making it.

  • Add Ginger: If you want an extra kick, add a 1-inch knob of ginger. It’s great for inflammation and adds a lovely spice.

Creamy Cucumber Shrimp Salad

Creamy Cucumber Shrimp Salad

This refreshing salad combines succulent shrimp with crisp cucumbers in a velvety, herb-filled dressing. It is a light yet satisfying dish that comes together quickly, making it an excellent choice for a fresh lunch or a side dish for a gathering.

Ingredients

  • 1 lb cooked shrimp, peeled and deveined

  • 2 large cucumbers, sliced or chopped into bite-sized pieces

  • 1/2 cup Greek yogurt or sour cream

  • 2 tbsp mayonnaise

  • 1 tbsp fresh dill, finely chopped (or 1 tsp dried dill)

  • 1 tbsp lemon juice

  • 1 clove garlic, minced

  • Salt and black pepper to taste

  • Optional: 1 cup cherry tomatoes, halved


Preparation Steps

  1. Prepare the Cucumbers: Slice the cucumbers into thin rounds or bite-sized chunks. If the cucumbers are very watery, you can lightly salt them in a colander for 10 minutes, then pat them dry with a paper towel to keep the salad crisp.

  2. Mix the Dressing: In a medium bowl, whisk together the Greek yogurt (or sour cream), mayonnaise, lemon juice, minced garlic, and dill. Stir until the dressing is smooth and well-blended.

  3. Combine the Salad: In a large mixing bowl, add the cooked shrimp and the prepared cucumbers. If you are using cherry tomatoes, add them at this stage as well.

  4. Toss Gently: Pour the creamy dressing over the shrimp and vegetables. Use a large spoon to gently toss the ingredients until everything is evenly coated in the dressing.

  5. Season: Taste the salad and add salt and black pepper as needed.

  6. Chill and Serve: For the best flavor, cover the salad and refrigerate it for at least 15–30 minutes before serving. This allows the herbs and lemon to infuse into the shrimp and cucumbers.

Golden Zucchini Garden Wraps

Golden Zucchini Garden Wraps

These wraps are a fantastic alternative to traditional flour tortillas. They are soft, flexible, and have a beautiful golden color with green flecks from the fresh zucchini. They work perfectly for tacos, breakfast wraps, or even as a light snack on their own.

Ingredients

  • 2 medium zucchinis (about 2 cups grated)

  • 2 large eggs

  • 1/4 cup almond flour (or coconut flour)

  • 1/4 cup shredded cheese (cheddar or mozzarella)

  • 1/2 tsp garlic powder

  • 1/2 tsp salt

  • 1/4 tsp black pepper


Preparation Steps

  1. Grate and Prep: Grate the zucchinis using the medium side of a box grater. Place the grated zucchini in a clean kitchen towel and squeeze out as much liquid as possible. Removing the excess water is the secret to a wrap that holds together perfectly.

  2. Mix the Base: In a medium bowl, whisk the two eggs. Add the squeezed zucchini, almond flour, shredded cheese, garlic powder, salt, and black pepper. Stir everything together until well combined.

  3. Set Up the Pan: Lightly grease a non-stick skillet and set it over medium heat.

  4. Form the Wraps: Spoon about 1/4 cup of the mixture into the hot pan. Use the back of the spoon to spread it out into a thin, even circle, about 5 or 6 inches wide.

  5. Cook to Golden: Let the wrap cook for 3–4 minutes on the first side. You will know it is ready to flip when the edges look dry and golden.

  6. Flip Carefully: Gently flip the wrap with a wide spatula and cook for another 2 minutes on the other side until it is lightly browned and set.

  7. Cool for Flexibility: Transfer the finished wraps to a wire rack or a plate. Letting them cool for a minute or two makes them more pliable and easier to fold without breaking.

Perilla Leaf Green Juice

Perilla Leaf Green Juice

 Description

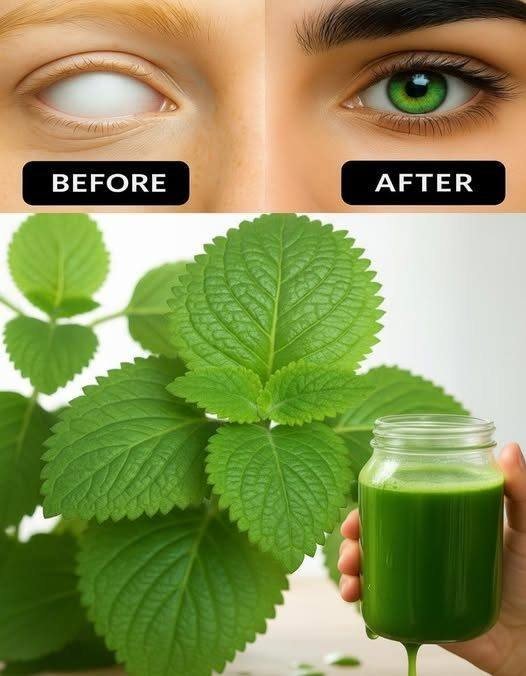
Perilla leaf juice is a refreshing herbal drink made from fresh perilla leaves, blended with lemon, apple, and water. It is rich in antioxidants, vitamin A precursors, vitamin C, and anti-inflammatory compounds that can support immune health, digestion, and overall wellness.

The drink has a fresh mint-basil flavor with a slightly earthy taste.

 Ingredients (2 Servings)

  • 1 cup fresh perilla leaves (about 15–20 leaves)

  • 1 green apple (chopped)

  • ½ cucumber

  • 1 tbsp lemon juice

  • 1 tsp honey (optional)

  • 1 cup cold water or coconut water

  • 3–4 ice cubes (optional)

 Instructions

1️⃣ Wash the herbs

Rinse the perilla leaves thoroughly to remove dirt.

2️⃣ Prepare ingredients

Chop the apple and cucumber into small pieces.

3️⃣ Blend

Add the following to a blender:

  • Perilla leaves

  • Apple

  • Cucumber

  • Lemon juice

  • Water

Blend for 30–40 seconds until smooth.

4️⃣ Strain (optional)

Strain through a fine mesh if you prefer smoother juice.

5️⃣ Serve

Pour into a glass, add ice, and drink fresh.

 Servings

2 servings

 Nutritional Information (Approx per serving)

  • Calories: 55

  • Carbohydrates: 12 g

  • Fiber: 2 g

  • Vitamin C: ~30% DV

  • Vitamin A: ~20% DV

  • Potassium: ~200 mg

  • Antioxidants: High

 Potential Benefits

👁 Eye health support

Contains antioxidants and vitamin A precursors that help support normal eye function.

🛡 Immune support

Rich in vitamin C and plant compounds.

🔥 Anti-inflammatory properties

Perilla leaves contain rosmarinic acid, which may reduce inflammation.

❤️ Heart health

May help support healthy cholesterol levels.

🌿 Digestive support

Natural plant compounds may aid digestion.

 Notes

  • Fresh perilla leaves give the best flavor.

  • The drink is slightly herbal and mint-like.

  • Best consumed immediately after blending.

Tips

✔ Add ginger for extra digestive benefits.
✔ Use coconut water instead of plain water for electrolytes.
✔ Add spinach or kale to boost nutrients.
✔ Drink in the morning for best freshness.

 Q&A

Q1: Can this drink restore eyesight?

No. It cannot cure blindness or restore lost vision. It may only support general eye health due to nutrients.

Q2: Can I drink it every day?

Yes, in moderate amounts (1 glass per day).

Q3: What does perilla taste like?

It tastes like a mix of mint, basil, and green tea.

Q4: Can I use dried perilla leaves?

Fresh leaves are recommended for better nutrients and taste.

Q5: Who should avoid it?

People with plant allergies or those taking blood-thinning medication should consult a doctor.

Korean-Style Carrot Salad (Morkovcha)

Korean-Style Carrot Salad (Morkovcha)

  • Prep time: 20 minutes

  • Chilling time: 2–12 hours (essential for flavor)

  • Servings: 4–6

  • Calories: ~115 kcal per serving

Ingredients

Ingredient Amount Notes
Carrots 1 lb (500g) Firm, large carrots work best
Sugar 1 tbsp Balances the acidity
Salt 1 tsp For sweating the carrots
Vinegar (9%) 2 tbsp White distilled or Apple Cider
Vegetable Oil 1/4 cup Neutral oil (Sunflower or Grapeseed)
Garlic 3–4 cloves Minced or pressed
Coriander 1 tsp Ground (the “secret” ingredient)
Red Chili Flakes 1/2 to 1 tsp Adjust to your heat preference
Black Pepper 1/2 tsp Freshly ground
Onion 1/2 medium Used to flavor the oil (optional)

Instructions

  1. The Shred: Peel the carrots. Use a julienne peeler or a Korean carrot grater to create long, thin matchsticks.

  2. The Sweat: Place carrots in a bowl. Sprinkle with salt and sugar. Massage them with your hands for 1–2 minutes until they start to soften and release moisture. Let sit for 10 minutes, then drain any excess liquid if you prefer a crunchier texture.

  3. The Seasoning: Add the minced garlic, coriander, black pepper, and chili flakes in a small pile right on top of the carrots. Do not mix yet.

  4. The Sizzle: In a small skillet, heat the oil until it’s shimmering (just before it smokes). Optional: Sauté the chopped onion in the oil until golden, then discard the onion—this infuses the oil with flavor.

  5. The Bloom: Pour the hot oil directly over the spices and garlic. You should hear a sizzle; this “blooms” the spices and mellows the raw garlic bite.

  6. The Marinate: Add the vinegar. Toss everything thoroughly with tongs or gloved hands.

  7. The Wait: Cover and refrigerate for at least 2 hours. Overnight is best.

Tips for Success

  • The Cut Matters: Do not use a standard box grater; it makes the carrots too mushy. You want long, spaghetti-like strands for that authentic “snap.”

  • Oil Temperature: If the oil isn’t hot enough, the spices won’t release their aromatics. If it’s too hot, you’ll burn the garlic. Aim for a light shimmer.

  • Toasted Sesame: For an extra layer of flavor, add a teaspoon of toasted sesame oil at the very end.

Nutritional Info (Per Serving)

  • Calories: 115

  • Total Fat: 9g

  • Carbohydrates: 9g

  • Fiber: 2.5g

  • Vitamin A: 300% DV (A powerhouse for eye health!)

Benefits

  • Gut Health: The vinegar and raw garlic act as mild digestive aids.

  • Bioavailability: Adding fats (oil) to carrots significantly increases your body’s ability to absorb Beta-carotene.

  • Meal Prep King: This salad stays fresh and crunchy in the fridge for up to 5–7 days.

Q&A

Q: Can I use pre-shredded carrots from the store?

A: You can, but store-bought matchstick carrots are often too thick and dry. They won’t soak up the marinade as well as freshly shredded ones.

Q: Is this dish actually from Korea?

A: Technically, no. It’s a “fusion” dish created by the Korean diaspora in the former USSR. You won’t often find it in Seoul, but you’ll find it at every street market in Uzbekistan, Russia, and Ukraine.

Q: How do I make it less spicy?

A: Swap the red chili flakes for sweet paprika. You’ll keep the vibrant color without the burn.