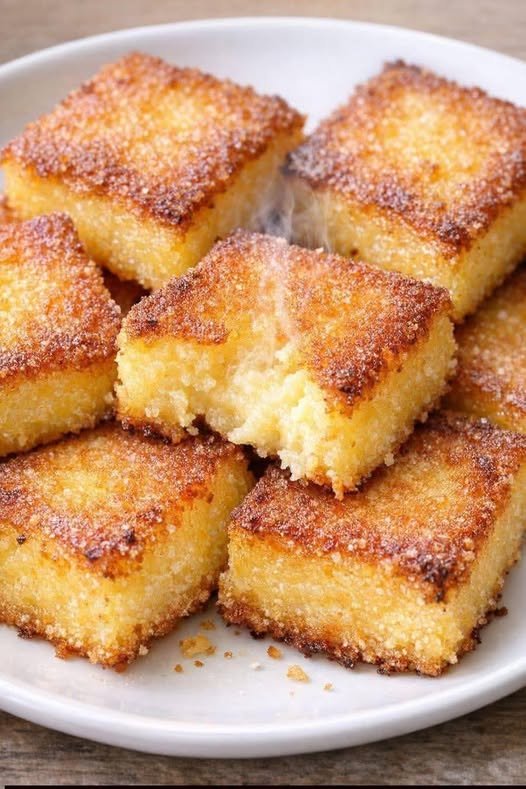
Crispy-Top Buttery Cake Squares

Crispy-Top Buttery Cake Squares

Ingredients

  • 1 cup (225g) Unsalted Butter: Melted and slightly cooled.

  • 1 ½ cups (300g) Granulated Sugar: Plus 2–3 extra tbsp for the topping.

  • 3 Large Eggs: At room temperature.

  • 1 tbsp Vanilla Extract: For a deep, aromatic flavor.

  • 1 ½ cups (190g) All-Purpose Flour: Sifted.

  • 1 tsp Baking Powder: To give it a light lift.

  • ½ tsp Salt: To balance the sweetness.

  • ½ cup (120ml) Milk: Whole milk provides the best texture.


Detailed Step-by-Step Instructions

  1. Preparation: Preheat your oven to 175°C (350°F). Grease an 8×8 or 9×9 inch square baking pan with butter and line the bottom with parchment paper, leaving an overhang on the sides for easy removal.

  2. Cream the Base: In a large mixing bowl, whisk together the melted butter and the 1 ½ cups of sugar until the mixture is smooth and pale.

  3. Incorporate Eggs and Vanilla: Add the eggs one at a time, whisking thoroughly after each addition. Stir in the vanilla extract until fully combined.

  4. Sift Dry Ingredients: In a separate medium bowl, whisk together the flour, baking powder, and salt. This ensures there are no lumps and the leavening agent is evenly distributed.

  5. Combine the Batter: Gradually add the dry ingredients to the butter mixture, alternating with the milk. Start and end with the flour. Mix only until the flour streaks disappear—do not overmix, as this can make the cake tough.

  6. The Secret Crust: Pour the batter into your prepared pan and smooth the top with a spatula. Evenly sprinkle the remaining 2–3 tablespoons of sugar over the entire surface. This is what creates that signature “shattered glass” crispy crust.

  7. Bake: Place in the center of the oven and bake for 30–35 minutes. The cake is ready when the edges are deep golden brown and a toothpick inserted into the center comes out with just a few moist crumbs.

  8. Cool and Slice: Allow the cake to cool in the pan for at least 15 minutes. This helps the sugary top set. Lift it out using the parchment paper and cut into 16 even squares.


Frequently Asked Questions (Q&A)

Q: Why is my cake texture more like a blondie than a sponge? A: This recipe uses melted butter and a high sugar-to-flour ratio, which naturally creates a denser, more fudgy “snack cake” texture rather than a tall, airy sponge. If it feels too heavy, ensure your baking powder is fresh.

Q: Can I use brown sugar for the topping? A: You can, but it will result in a softer, more caramel-like topping rather than a crisp, crackly crust. For the specific “crunch” shown in the photo, white granulated sugar works best.

Q: My sugar topping melted into the cake instead of staying crisp. What happened? A: This usually happens if the batter is too thin or if the oven temperature is too low. Ensure you measure your flour accurately (spoon and level method) and that your oven is fully preheated before the pan goes in.

Q: How should I store these to keep the top crispy? A: Store them in a container but leave the lid slightly cracked for the first few hours. If sealed completely while still slightly warm, the moisture will soften the crust. They stay fresh at room temperature for up to 3 days.

Q: Can I add fruit to this recipe? A: Yes! A handful of fresh blueberries or raspberries folded into the batter works beautifully. Just be aware that the extra moisture from the fruit might slightly soften the crispy top near where the fruit sits.
The Natural Soothing Rinse & Care Guide

The Natural Soothing Rinse & Care Guide

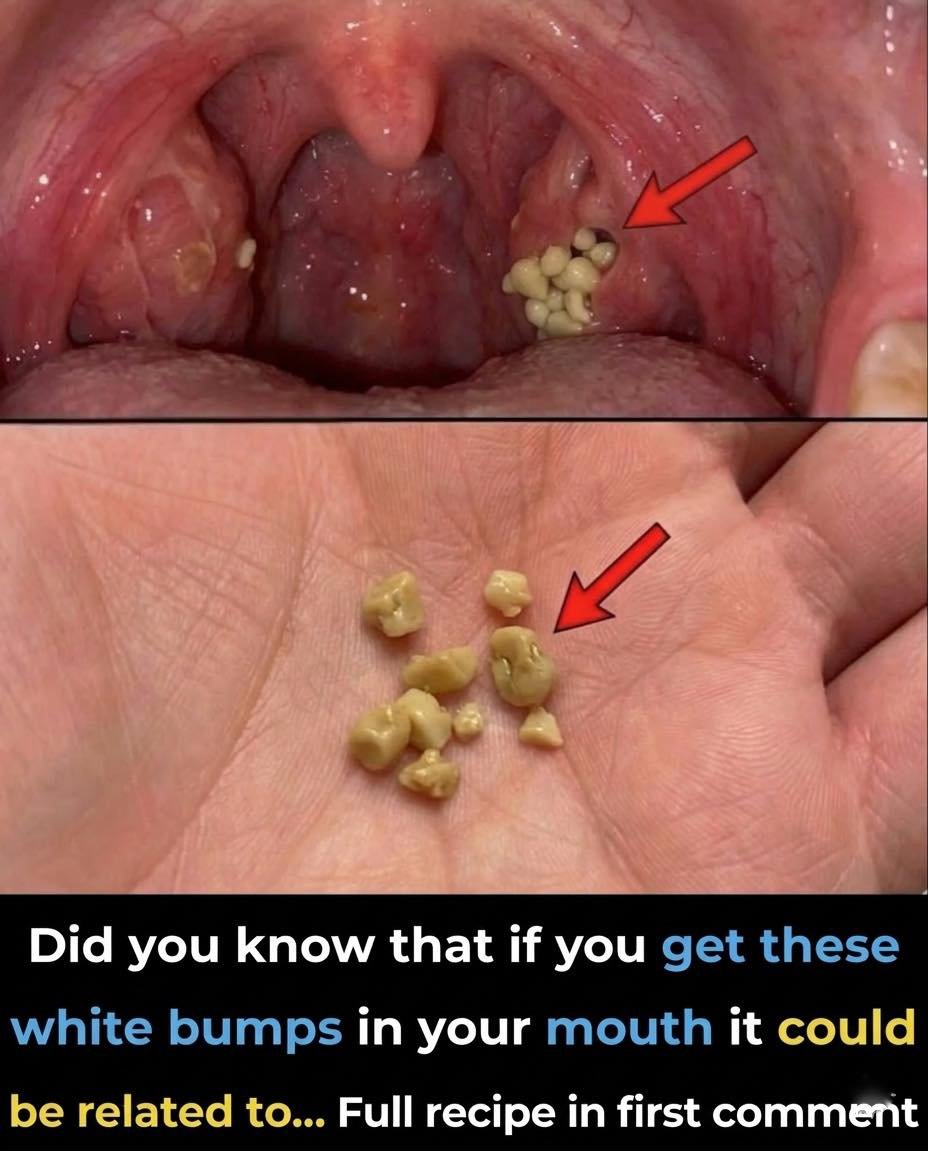
If you feel these bumps, the goal is to gently encourage them to dislodge while soothing the throat area.

Ingredients

  • 1 cup Warm Water: (Not hot, just comfortable to the touch).

  • 1/2 tsp Salt: Helps reduce inflammation and acts as a natural antiseptic.

  • 1/4 tsp Baking Soda: Helps neutralize acids and odors caused by the stones.

  • Optional: 1 drop of Peppermint oil for extra freshness.

Detailed Step-by-Step Instructions

  1. Prepare the Rinse: Mix the salt and baking soda into the warm water until completely dissolved.

  2. Gargle Deeply: Take a sip of the solution and gargle deeply at the back of your throat for 30 seconds. The vibration of the gargling can help loosen smaller stones naturally.

  3. Stay Hydrated: Drink plenty of water throughout the day. A dry mouth makes it easier for debris to build up in the tonsil crypts.

  4. Gentle Oral Hygiene: Use an alcohol-free mouthwash and brush your tongue regularly. This reduces the amount of bacteria available to form new stones.

  5. Manual Removal (Caution): If a stone is very visible and causing discomfort, some people use a clean, dampened cotton swab to very gently nudge the area. Never use sharp objects or apply heavy pressure, as tonsil tissue is delicate and bleeds easily.


Frequently Asked Questions (Q&A)

Q: Are tonsil stones a sign of an infection? A: Not necessarily. While they can appear after a bout of tonsillitis, they are often just a result of the shape of your tonsils. If you have deep “crypts” (holes) in your tonsils, you are more likely to get them even if your throat is healthy.

Q: Why do they smell so bad? A: Because they are made of trapped organic matter and bacteria, they undergo a process of decay. This releases sulfur compounds, which is why they often have a very strong, unpleasant odor.

Q: When should I see a doctor? A: You should consult a healthcare professional if you experience:

  • Severe throat pain or difficulty swallowing.

  • Tonsils that are very red, swollen, or bleeding.

  • Stones that are too large to come out on their own and cause constant discomfort.

Q: Can I prevent them from coming back? A: Good oral hygiene is the best defense. Using a water flosser on a low-pressure setting to gently rinse the tonsil area can also prevent debris from building up into stones.

Q: Are they contagious? A: No. Tonsil stones are not an infection or a virus; they are simply a physical buildup of material in your own throat.

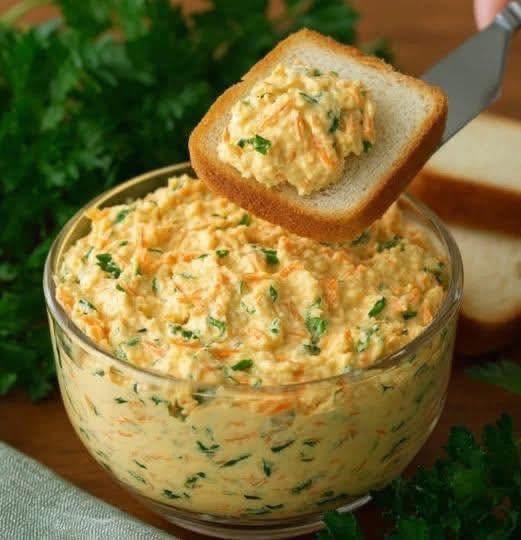
10-Minute Creamy Carrot & Herb Spread


10-Minute Creamy Carrot & Herb Spread

Ingredients

  • 2 cups Carrots: Peeled and very finely grated.

  • 1 cup Cream Cheese: Softened to room temperature for easy mixing.

  • 1/2 cup Greek Yogurt or Sour Cream: Adds a nice tang and creamy texture.

  • 1/4 cup Fresh Parsley: Finely chopped.

  • 1/4 cup Fresh Dill or Chives: Finely chopped.

  • 1 Clove Garlic: Minced or pressed.

  • 1/2 tsp Salt: Adjust to taste.

  • 1/4 tsp Black Pepper: Freshly cracked.

  • 1/2 tsp Lemon Juice: To brighten the flavors.


Detailed Step-by-Step Instructions

  1. Prep the Carrots: Use the finest side of your grater for the carrots. If they are particularly juicy, place them in a clean kitchen towel and squeeze gently to remove excess moisture. This ensures the spread stays thick and creamy.

  2. Soften the Base: In a medium mixing bowl, beat the cream cheese with a spatula or hand mixer until it is completely smooth and free of lumps.

  3. Combine the Dairy: Add the Greek yogurt (or sour cream) and the minced garlic to the cream cheese. Stir until well incorporated.

  4. Fold in Vegetables and Herbs: Add the finely grated carrots, chopped parsley, and dill/chives. Fold them gently into the creamy base until the color is even and the herbs are distributed throughout.

  5. Season: Stir in the lemon juice, salt, and black pepper. Give it a quick taste and adjust the seasoning if necessary.

  6. Chill and Serve: While you can serve this immediately, letting it sit in the refrigerator for 30 minutes allows the garlic and herb flavors to meld beautifully. Serve with toasted bread, crackers, or fresh veggie sticks.


Frequently Asked Questions (Q&A)

Q: Can I make this spread ahead of time? A: Yes! In fact, it tastes even better the next day. You can store it in an airtight container in the refrigerator for up to 3 to 4 days.

Q: Is there a way to make this lighter? A: You can substitute the cream cheese for a low-fat version or use Neufchâtel cheese. Increasing the ratio of Greek yogurt will also make it lighter and add more protein.

Q: Can I use a food processor to save time? A: You can, but be careful not to over-process. Pulse the carrots first, remove them, then blend the dairy. If you process everything together for too long, the carrots may release too much water and make the spread runny.

Q: What else can I use this for besides a dip? A: This works wonderfully as a spread for wraps, a topping for grilled chicken, or even a creamy filling for finger sandwiches.

Q: Can I add nuts to this recipe? A: Absolutely. Adding 1/4 cup of crushed walnuts or toasted pecans provides a lovely crunch that pairs perfectly with the sweetness of the carrots.

Golden Crispy Vegetable Fingers

Golden Crispy Vegetable Fingers

Ingredients

  • 2 cups Potatoes: Boiled and grated (cold potatoes work best for a crispy texture).

  • 1 cup Carrots: Finely grated.

  • 1/2 cup Green Onions: Finely chopped.

  • 2 Large Eggs: To bind the mixture.

  • 1/2 cup Mozzarella or Cheddar Cheese: Grated (adds a beautiful melt).

  • 1/4 cup Cornstarch or Breadcrumbs: To help achieve that golden crunch.

  • Seasoning: 1 tsp Salt, 1/2 tsp Black Pepper, 1/2 tsp Garlic Powder, and 1/2 tsp Paprika.

  • Oil: For shallow frying.


Detailed Step-by-Step Instructions

  1. Prepare the Vegetables: Grate the boiled potatoes and fresh carrots into a large mixing bowl. If the carrots seem very watery, squeeze them slightly with a paper towel to remove excess moisture.

  2. Mix the Base: Add the finely chopped green onions, grated cheese, and the two eggs to the bowl. Stir everything together until well combined.

  3. Season and Bind: Sprinkle in the salt, pepper, garlic powder, paprika, and your choice of cornstarch or breadcrumbs. Mix thoroughly until the dough-like mixture holds its shape when pressed.

  4. Shape the Fingers: Take a small portion of the mixture (about 2 tablespoons) and roll it between your palms to form a cylinder shape, roughly 3 to 4 inches long.

  5. Heat the Pan: Pour enough oil into a large non-stick skillet to cover the bottom (about 1/4 inch). Heat over medium heat until the oil is shimmering.

  6. Fry to Perfection: Carefully place the vegetable fingers into the hot oil. Do not overcrowd the pan. Fry for 3–4 minutes per side, turning gently with tongs, until every side is deep golden brown and crispy.

  7. Drain and Serve: Remove the fingers and place them on a plate lined with paper towels to soak up any excess oil. Serve warm with your favorite dipping sauce.


Frequently Asked Questions (Q&A)

Q: Can I bake these instead of frying them? A: Yes! Arrange the fingers on a baking sheet lined with parchment paper. Spray them lightly with olive oil and bake at 200°C (400°F) for 20–25 minutes, flipping halfway through until they are golden and firm.

Q: My mixture is too soft to shape. What should I do? A: If the mixture feels too wet, add another tablespoon of cornstarch or breadcrumbs. Letting the mixture chill in the fridge for 15 minutes before shaping also helps it firm up significantly.

Q: Can I freeze these for later? A: Absolutely. Shape the fingers and place them on a tray in the freezer for an hour. Once they are firm, transfer them to a freezer bag. You can fry or bake them straight from frozen—just add 2 extra minutes to the cooking time.

Q: What other vegetables can I add? A: Finely chopped spinach, steamed broccoli florets, or corn kernels work wonderfully in this recipe. Just ensure any extra vegetables are chopped very small so the fingers stay together.

Q: How do I keep them crispy if I am making a large batch? A: Keep the finished fingers on a wire rack over a baking sheet in a warm oven (about 90°C) while you finish frying the rest. This prevents them from becoming soggy on the bottom.

The Vitamin-Rich Night Glow Balm

The Vitamin-Rich Night Glow Balm

This recipe combines the protective properties of coconut oil with the antioxidant power of Vitamin E and the brightening potential of citrus.

Ingredients

  • 1/2 cup Organic Cold-Pressed Coconut Oil: Acts as a deeply moisturizing base.

  • 1 tbsp Extra Virgin Olive Oil: Adds Vitamin A and E for skin repair.

  • 3 Vitamin E Capsules (400 IU): Helps protect the skin from oxidative stress.

  • 5 drops Lemon Essential Oil: Used for its brightening properties (Note: Essential oil is safer for the skin’s pH than fresh juice).

  • Optional: 1 tsp Beeswax pellets (if you prefer a firmer, more traditional “balm” texture).

Detailed Step-by-Step Instructions

  1. Sanitize Your Workspace: Before beginning, ensure your mixing bowl and final storage jar are completely clean and dry. Since this recipe does not contain water, it will last longer if kept free of bacteria.

  2. Melt the Base: Place the coconut oil (and beeswax, if using) in a heat-safe glass bowl. Use a double-boiler method by placing the bowl over a pot of simmering water. Gently melt until it is a clear liquid. Avoid high heat to preserve the nutrients.

  3. Cool Slightly: Remove the bowl from the heat. Let it sit for about 5 minutes so it is warm but not hot.

  4. Incorporate Vitamins: Carefully puncture the Vitamin E capsules with a clean pin and squeeze the oil into the mixture. Stir in the olive oil.

  5. Add the Brightening Agent: Add the 5 drops of lemon essential oil. Stir thoroughly with a glass or silicone spatula to ensure the oils are fully blended.

  6. Set the Texture: Pour the liquid into a dark glass jar. Place the jar in the refrigerator for 30–45 minutes until it solidifies into a creamy consistency.

  7. Final Whip (Optional): If you want a “fluffy” texture, remove it from the fridge once it is semi-solid and whip it with a clean hand mixer for 2 minutes before returning it to the jar.

Application Guide

  • Night Use Only: Because citrus oils can make skin sensitive to the sun, only apply this before bed.

  • Damp Skin: For best results, apply a pea-sized amount to skin that is still slightly damp from washing. This helps the oil “lock in” the moisture.


Frequently Asked Questions (Q&A)

Q: How often should I use this night balm? A: For the best results in skin texture and hydration, use it every night as the final step in your routine. Consistency is key to seeing a “natural glow.”

Q: Why do I need to store this in a dark glass jar? A: Vitamin E and essential oils are sensitive to light and heat. A dark glass jar (amber or cobalt) prevents the ingredients from breaking down, ensuring the balm stays effective for up to 3 months.

Q: Is this suitable for all skin types? A: This is a rich, oil-based balm. It is excellent for dry, mature, or combination skin. If you have very oily or acne-prone skin, use it sparingly or focus only on the areas around the eyes and neck.

Q: Can I use fresh lemon juice instead of oil? A: It is not recommended for a long-term balm. Fresh juice contains water, which will cause the oil to spoil quickly without a preservative. Additionally, fresh juice has a very low pH that can irritate the skin; the essential oil is a more stable choice for DIY recipes.

Q: When will I start seeing results? A: You will likely feel increased softness and see a “plump” look the very next morning due to the hydration. For visible improvements in skin tone and fine lines, expect to see a difference after 4 weeks of consistent nightly use.

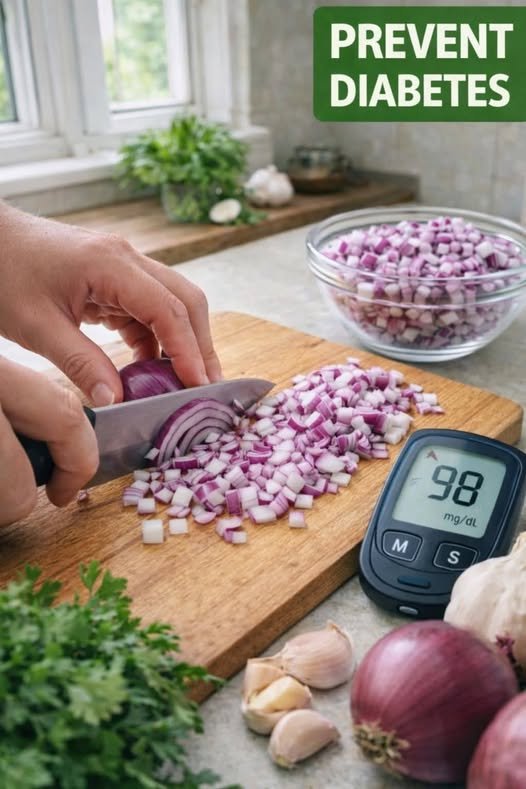
Mediterranean Red Onion & Black Bean Skillet

Mediterranean Red Onion & Black Bean Skillet

A blood-sugar–friendly savory dish

Description

This colorful Mediterranean-style skillet combines red onions, black beans, sweet potatoes, and fresh herbs. It’s rich in fiber, plant protein, and healthy fats—key nutrients that help support steady blood sugar levels when part of a balanced diet.

 Ingredients (Serves 4)

  • 1 large red onion, thinly sliced

  • 2 medium sweet potatoes, diced small

  • 1 cup cooked black beans (rinsed)

  • ½ cup corn kernels (optional)

  • 1 red bell pepper, diced

  • 2 cloves garlic, minced

  • 2 tablespoons olive oil

  • 1 teaspoon ground cumin

  • ½ teaspoon smoked paprika

  • ½ teaspoon oregano

  • Salt & pepper to taste

  • 1 tablespoon lemon juice

  • Fresh parsley or cilantro for garnish

  • Optional: ½ avocado, diced

 Instructions

  1. Sauté the Onion
    Heat olive oil in a skillet over medium heat. Add sliced red onion and cook 5–7 minutes until softened and slightly caramelized.

  2. Cook Sweet Potatoes
    Add diced sweet potatoes. Cover and cook 8–10 minutes, stirring occasionally, until fork-tender.

  3. Add Remaining Ingredients
    Stir in garlic, black beans, bell pepper, corn, and spices. Cook another 5 minutes.

  4. Finish
    Add lemon juice, adjust seasoning, and garnish with herbs and avocado.

Serve warm.

 Notes & Tips

  • Slice onions thinly to maximize caramelization (this enhances natural sweetness without added sugar).

  • Pair with a protein (grilled chicken, tofu, or Greek yogurt) to slow glucose absorption.

  • Keep portions moderate—sweet potatoes and beans contain carbs.

  • Monitor blood sugar individually, as responses vary.

Servings

Makes 4 servings
Serving size: About 1–1¼ cups

 Estimated Nutritional Info (Per Serving)

Approximate values:

  • Calories: 280–320

  • Carbohydrates: 40–45g

  • Fiber: 9–11g

  • Protein: 8–10g

  • Fat: 10–14g

  • Glycemic impact: Moderate (balanced by fiber and fat)

 Potential Benefits

  • Red onion: Contains antioxidants like quercetin

  • Black beans: High fiber & plant protein

  • Sweet potatoes: Provide complex carbs & beta-carotene

  • Olive oil: Heart-healthy fats

These ingredients may help support stable blood sugar as part of an overall healthy lifestyle—but they do not replace medical treatment.

Q & A

Q: Can this cure diabetes?
No. There is currently no cure for type 1 diabetes and most cases of type 2 require ongoing management.

Q: Can onions lower blood sugar?
Some small studies suggest onions may have mild glucose-lowering effects, but they are not a substitute for prescribed medication.

Q: Is this safe for diabetics?
Generally yes, in appropriate portions—but always consult your healthcare provider and monitor blood glucose.

Q: Can I make it lower carb?
Yes. Reduce or remove sweet potatoes and corn, and add more non-starchy vegetables like zucchini or spinach.