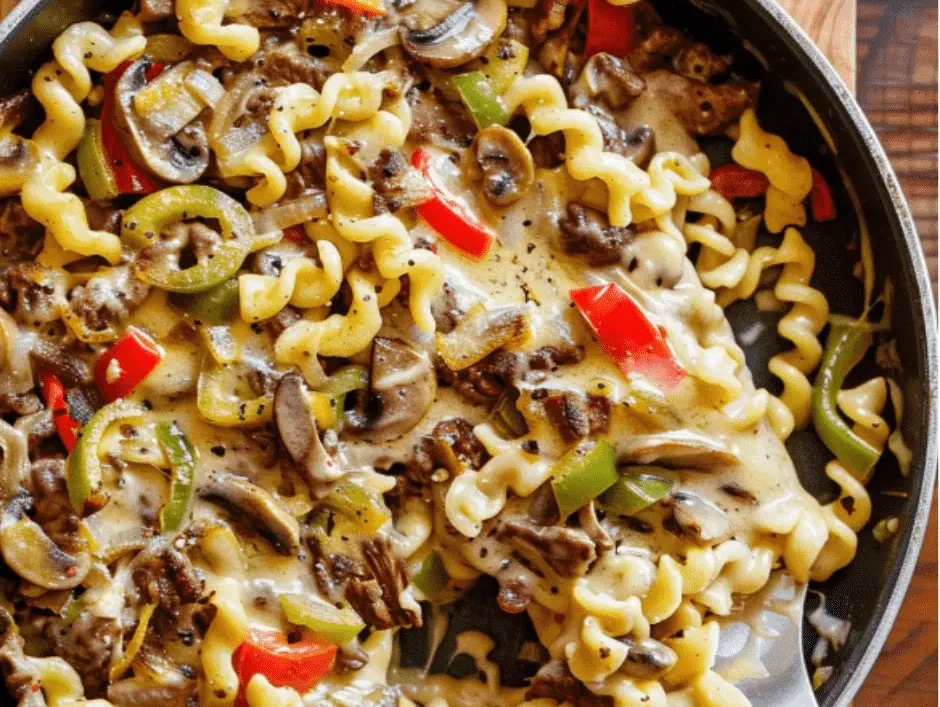
Keto Philly Cheesesteak Pasta

Keto Philly Cheesesteak Pasta is classic and delicious pasta. It is made with a combination of steak shreds, bell pepper, sautéed onions, & mushrooms along with cheesy sauce with keto pasta made with almond flour. This pasta is prepared quickly in only thirty minutes, so this pasta is a great dish to make for busy days. This dish is easily customizable, so we can easily use alternate ingredients of choice to prepare this dish. It is not dairy-free, so we can consume dairy-free cheese and vegan cream cheese to prepare dairy-free cheese. We can serve this Keto Philly Cheesesteak Pasta with Cesar or arugula salad, or with roasted zucchini or cauliflower for a filling dinner or lunch.


STATS:

  • Overall Time: 30 mints.
  • Portion size: 1.5 cups
  • Time of Prep: 10 mints.
  • Portions: 4
  • Cuisine: American
  • Caloric content: 450 Kcal
  • Course: Dinner
  • Time of Cook: 20 mints.
  • Diet: Keto & Low-Carb

EQUIPMENT:

  • Large skillet
  • Saucepan
  • Mixing spoon
  • Cutting board
  • Knife
  • Colander

INGREDIENTS:

  • 12 oz. keto pasta
  • 1 lb. shaved beef steak
  • 1 tbsp. olive oil
  • 1 green bell pepper
  • 1 small onion
  • 1 cup mushrooms
  • 1 tsp. garlic powder
  • Salt & pepper
  • 4 oz. cream cheese
  • ½ cup beef broth
  • ½ cup provolone
  • ¼ cup Parmesan cheese

INGREDIENT NOTES:

KETO PASTA:

  • We have to sue keto pasta made with almond flour or use Shirataki noodles or zoodles to prepare this dish.

SHAVED BEEF:

  • We have to utilize rib-eye or sirloin steak, which works great for this purpose.

BELL PEPPER:

  • We use different color of bell pepper to prepare this pasta dish and it also adds crunch and classic flavor of Philly cheesesteak with less carbs.

ONIONS:

  • We have to use yellow or white onions to prepare this dish to include the natural aroma and sweet flavor.

MUSHROOMS:

  • They are added to the dish to include the umami flavor, and they also deepen the flavor of this dish.

CREAM CHEESE:

  • It is included to make the indulgent smooth base of sauce to prepare this pasta.

BEEF BROTH:

  • We have to use the beef broth to prepare the sauce, and it is also used to adjust the consistency of this sauce.

MOZZARELLA OR PROVLONE CHEESE:

  • We use provolone and mozzarella cheese to prepare this dish to add a smooth and melty texture to this pasta.

PARMESAN CHEESE:

  • It is used to add a sharp flavor, and it also helps to thicken the consistency of sauce.

GARLIC POWDER:

  • It is added to include the garlic flavor without the use of fresh garlic.


INSTRUCTIONS:

  1. We can boil the keto pasta as directed on the package than drain and put the pasta in corner.
  2. Then we can add oil in the skillet on a moderate setting.
  3. We can add bell pepper, mushrooms, and onions and saute them to make the veggies tender.
  4. Then we can add beef shreds along with black pepper, garlic seasoning, and salt and cook to brown the meat.
  5. We can set the flame on a low setting and add the cream cheese and beef broth to the pan and stir to form a
  6. smooth consistency of sauce.
  7. Then we can add parmesan & provolone cheese & mingle to smooth the cheese in sauce.
  8. Now we can add the pasta and stir to combine with the sauce, and simmer for around three minutes and serve warm.

SERVING SUGGESTIONS:

  • We can garnish this pasta with parsley or green onions.
  • Serve this cheesesteak pasta with a Caesar or arugula salad.
  • We can pair this pasta with roasted zucchini or cauliflower for dinner or lunch.
  • You can top this pasta with additional provolone and broil to prepare the golden crust.
  • Serve this pasta in a skillet for rustic presentation.
  • We can add some chili flakes as we like to make the spicy pasta.

TIPS:

  • We can freeze the shaved beef so it gets sliced easily.
  • You would use the different color bell pepper to add color.
  • We don’t have to overcook the noodles as they get mushy.
  • You can add cream cheese slowly so that clumps will not get created.
  • We can stir the cheese constantly to form the smooth sauce.

STORAGE INFORMATION:

FRIDGE:

  • We can palace pasta in container and preserve this dish for 3 days.

FREEZER:

  • We can make and store separate portions for one month.

FAQs:

Can I prepare this pasta with the ground beef?

  • We can easily prepare this pasta with ground beef, and it cooks quickly as well.

Will I make this pasta dairy-free?

  • We can make the dairy-free pasta and use dairy-free cheese and vegan cream cheese to prepare dairy-free pasta.


NUTRITIONAL INFORMATION:

Fiber: 2g
Net carbs: 7g
Protein: 35g
Total carbs: 9g
Fat: 32g
Sodium: 580mg
Caloric content: 450 kcal
Potassium: 550mg
Serving size: 1.5 cups
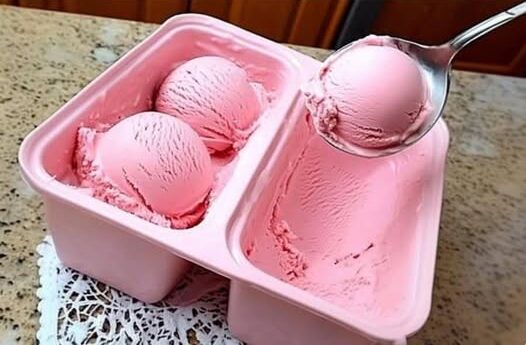
Zero Point Strawberry ice Cream

Introduction:

Indulging in a delicious frozen treat while sticking to your Weight Watchers plan is made possible with this 0-Point Strawberry Ice Cream. Packed with the natural sweetness of strawberries and tailored to meet Weight Watchers’ zero-point food list, this homemade ice cream is a guilt-free delight that satisfies your dessert cravings without compromising your health goals.

Ingredients:

Gather the following simple ingredients to prepare this delightful 0-Point Strawberry Ice Cream:
2 cups fresh strawberries, hulled and halved
1 cup fat-free Greek yogurt
1 teaspoon vanilla extract
Sweetener to taste (such as Stevia or monk fruit)

Instructions:
Prepare Strawberries:

Begin by thoroughly washing and hulling the fresh strawberries. Cut them into halves, ensuring they are ripe and flavorful.

Freeze Strawberries:

Spread the halved strawberries on a tray lined with parchment paper and freeze them until firm. This step enhances the creaminess of the ice cream and intensifies the strawberry flavor.

Blend Strawberries:

Once the strawberries are frozen, place them in a blender along with fat-free Greek yogurt, vanilla extract, and your chosen sweetener. Blend the ingredients until smooth and creamy.

Adjust Sweetness:

Taste the mixture and adjust the sweetness according to your preference. Add more sweetener if needed, keeping in mind that the sweetness may vary depending on the natural sugars in the strawberries.

Freeze the Mixture:

Transfer the blended mixture into a freezer-safe container, spreading it evenly. Cover the container and place it in the freezer for at least 4-6 hours or until the ice cream reaches a firm consistency.

Serve and Enjoy:

Once the 0-Point Strawberry Ice Cream is fully frozen, scoop it into bowls or cones. Garnish with fresh strawberry slices for an extra burst of flavor. This refreshing treat is perfect for satisfying your sweet tooth on warm days or as a guilt-free dessert option.

Conclusion:

Indulging in a tasty frozen treat is made healthier with the 0-Point Strawberry Ice Cream, specially crafted for Weight Watchers. By using fresh strawberries and fat-free Greek yogurt, this homemade delight offers a satisfying and flavorful dessert option that aligns with your weight management goals. Enjoy the sweetness of strawberries without any added points, making this guilt-free ice cream a delightful addition to your Weight Watchers journey.
Someone posted this 0 point strawberry ice cream recipe, made it today and it’s just perfect😋☺️ taste absolutely yum

Ingredients:

2 cups frozen strawberries (unsweetened)

1 ripe banana, frozen (this will add natural sweetness)

1/2 cup fat-free Greek yogurt

1 teaspoon vanilla extract (optional for added flavor)

Sweetener of your choice (if desired, but keep in mind this will add points)

Instructions:

Prepare the Fruit:

Slice the ripe banana into small pieces and freeze them along with the strawberries. It’s best to freeze them overnight for a creamier texture.

Blend the Ingredients:

In a blender or food processor, combine the frozen strawberries, frozen banana slices, fat-free Greek yogurt, and vanilla extract (if using).

Blend Until Smooth:

Blend the mixture until it’s smooth and creamy. You may need to stop and scrape down the sides of the blender a few times to ensure everything is well combined.

Taste and Sweeten (If Desired):

Taste the mixture and decide if it’s sweet enough for your liking. If you want it sweeter, you can add a small amount of your preferred sweetener. Keep in mind that this may add points if you’re following Weight Watchers, so use it sparingly.

Serve or Freeze:

You can serve the strawberry “ice cream” immediately for a soft-serve consistency.

For a firmer texture, transfer the mixture to a container with a lid and freeze it for an additional 1-2 hours.

Enjoy:

Scoop out your strawberry “ice cream” and enjoy it as a guilt-free and zero-point treat!

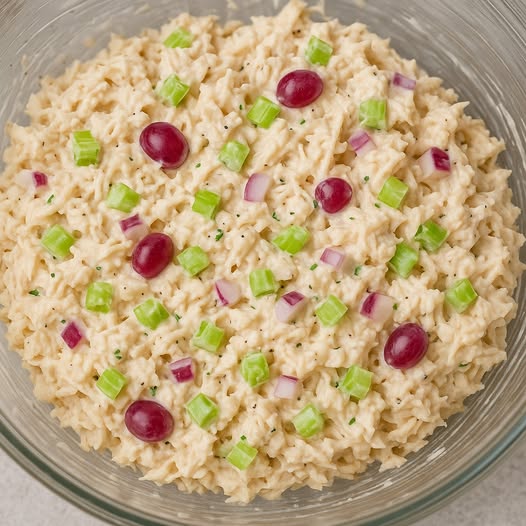
Weight Watchers Chicken Salad on Croissants

Yield: 4 servings
Prep Time: 15 minutes
Total Time: 15 minutes

For the Chicken Salad:

  • 2 cups cooked and shredded skinless, boneless chicken breast
  • 1/2 cup non-fat Greek yogurt
  • 1/4 cup light mayonnaise
  • 1 celery stalk, finely chopped
  • 1/4 cup red onion, finely chopped
  • 1/4 cup grapes, halved
  • 1 tablespoon Dijon mustard
  • Salt and pepper, to taste

For Serving:

  • 4 small whole wheat croissants

Instructions:

  1. Prepare the Chicken Salad:
    • In a large bowl, combine shredded chicken, non-fat Greek yogurt, light mayonnaise, chopped celery, chopped red onion, halved grapes, Dijon mustard, salt, and pepper. Mix until well combined.
  2. Assemble the Sandwiches:
    • Slice the whole wheat croissants in half. Place an equal amount of chicken salad onto the bottom half of each croissant.
  3. Serve:
    • Place the top half of the croissants on the chicken salad to create sandwiches.

SmartPoints Information:

  • The SmartPoints value will depend on the specific ingredients and brands used. Be sure to calculate the points based on your Weight Watchers plan and the ingredients you choose. Consider using light or fat-free alternatives to reduce points.

Enjoy your Weight Watchers Chicken Salad on Croissants, a delicious and point-friendly lunch option!

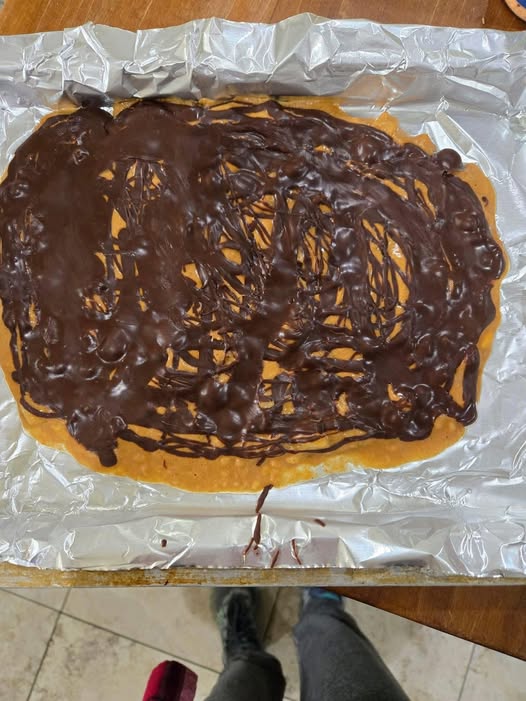
Frozen chocolate peanut butter bark

Serves 8 Frozen chocolate peanut butter bark is a delightful fruity spin on the more traditional frozen yogurt bark. This is 2 weight watchers points per serving! Simply arrange banana slices on a sheet pan, and mash them down until they flatten and form a base for your toppings—in this case, reconstituted powdered peanut butter and melted dark chocolate. After the bark freezes, cut or break it into pieces, and store it in a freezer-safe container for up to 2 weeks.

Ingredients

  • Banana
  • 2 large cut into 1/2-inch-thick slices
  • Powdered peanut butter
  • ¾ cup s
  • Lily’s Dark chocolate baking chips
  • 3 oz or similar product
  • Flaky salt
  • ¼ tsp

Instructions

  1. Line a sheet pan with foil or parchment paper. Arrange the banana slices on the pan to form a rectangle (about 8 x 5 inches). Cover the banana slices with a sheet of parchment paper; press the slices using the bottom of a glass or a dry measuring cup so that they flatten and touch each other. Carefully peel off the top sheet of parchment.
  2. In a small bowl, stir together the powdered peanut butter and 7 to 8 tablespoons of water until smooth; spread the peanut butter over the bananas.
  3. In a small microwave-safe bowl, microwave the chocolate chips on High until melted and smooth, about 1 minute, stopping to stir every 20 seconds. Drizzle the chocolate evenly over the peanut butter and gently spread to cover. Sprinkle evenly with the salt. Freeze until fully firm, at least 1 hour. Cut or break into 8 pieces.
  4. Serving size: 1 piece

Frozen chocolate peanut butter bark

Serves 8 Frozen chocolate peanut butter bark is a delightful fruity spin on the more traditional frozen yogurt bark. This is 2 weight watchers points per serving! Simply arrange banana slices on a sheet pan, and mash them down until they flatten and form a base for your toppings—in this case, reconstituted powdered peanut butter and melted dark chocolate. After the bark freezes, cut or break it into pieces, and store it in a freezer-safe container for up to 2 weeks.

Ingredients

  • Banana
  • 2 large cut into 1/2-inch-thick slices
  • Powdered peanut butter
  • ¾ cup s
  • Lily’s Dark chocolate baking chips
  • 3 oz or similar product
  • Flaky salt
  • ¼ tsp

Instructions

  1. Line a sheet pan with foil or parchment paper. Arrange the banana slices on the pan to form a rectangle (about 8 x 5 inches). Cover the banana slices with a sheet of parchment paper; press the slices using the bottom of a glass or a dry measuring cup so that they flatten and touch each other. Carefully peel off the top sheet of parchment.
  2. In a small bowl, stir together the powdered peanut butter and 7 to 8 tablespoons of water until smooth; spread the peanut butter over the bananas.
  3. In a small microwave-safe bowl, microwave the chocolate chips on High until melted and smooth, about 1 minute, stopping to stir every 20 seconds. Drizzle the chocolate evenly over the peanut butter and gently spread to cover. Sprinkle evenly with the salt. Freeze until fully firm, at least 1 hour. Cut or break into 8 pieces.
  4. Serving size: 1 piece

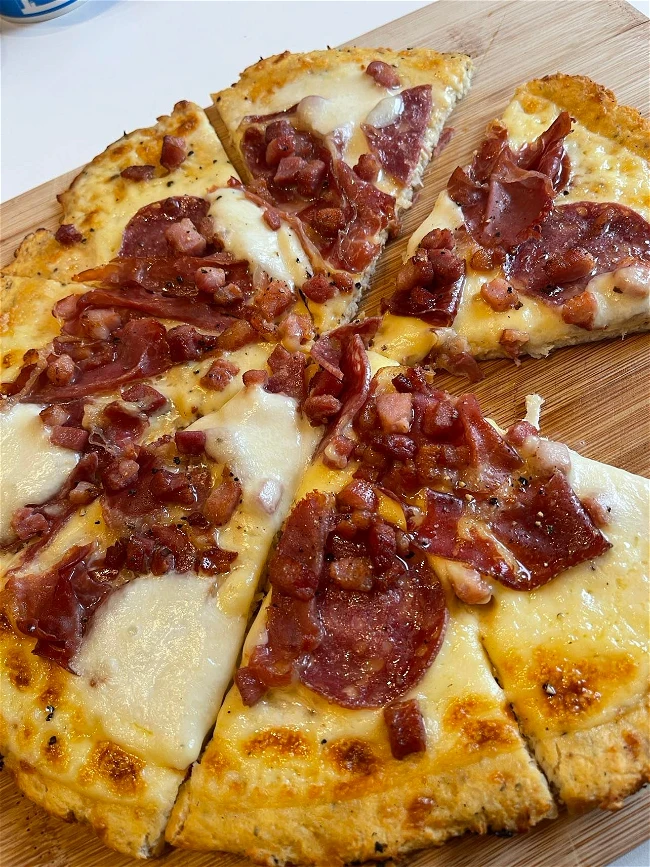
Carnivore Pizza Recipe

Ingredients:

For the Crust:

  • 1 1/2 cups (180g) mozzarella cheese, shredded
  • 1/4 cup (60g) cream cheese
  • 1 large egg
  • 1 cup (100g) almond flour
  • 1/2 tsp garlic powder (optional)
  • 1/4 tsp salt
  • 1/4 tsp baking powder

For the Toppings:

  • 1/2 cup (120g) pizza sauce (optional, can omit for strict carnivore)
  • 1 1/2 cups (180g) shredded mozzarella cheese
  • 1/2 cup (75g) cooked ground beef
  • 1/2 cup (75g) cooked sausage, crumbled
  • 4 slices pepperoni or other carnivore-friendly deli meats
  • 2 slices cooked bacon, chopped
  • 1/2 cup (60g) cooked chicken breast, shredded
  • 1/4 cup (30g) Parmesan cheese (optional, for extra flavor)

Instructions:

  1. Preheat Oven:
    • Preheat your oven to 400°F (200°C) and line a baking sheet with parchment paper or use a pizza stone if you have one.
  2. Make the Crust:
    • In a microwave-safe bowl, combine the shredded mozzarella and cream cheese. Microwave for 30-45 seconds until melted and easy to stir.
    • Stir in the egg, almond flour, garlic powder, salt, and baking powder. Mix until smooth and dough-like.
    • Transfer the dough to the prepared baking sheet and shape it into a pizza crust about 1/4-inch thick.
  3. Bake the Crust:
    • Bake the crust in the preheated oven for 10-12 minutes or until golden and firm.
  4. Assemble the Pizza:
    • Once the crust is done, spread a thin layer of pizza sauce (optional) over the crust. Sprinkle a generous amount of shredded mozzarella cheese over the sauce.
    • Top with your carnivore toppings: ground beef, sausage, pepperoni, bacon, and chicken.
  5. Bake Again:
    • Return the pizza to the oven and bake for an additional 5-7 minutes, until the cheese is melted and bubbly. Optionally, sprinkle Parmesan on top for extra flavor.
  6. Serve:
    • Slice and enjoy your delicious, low-carb carnivore pizza!

Tip: Customize with any other meats or toppings that fit your carnivore diet!

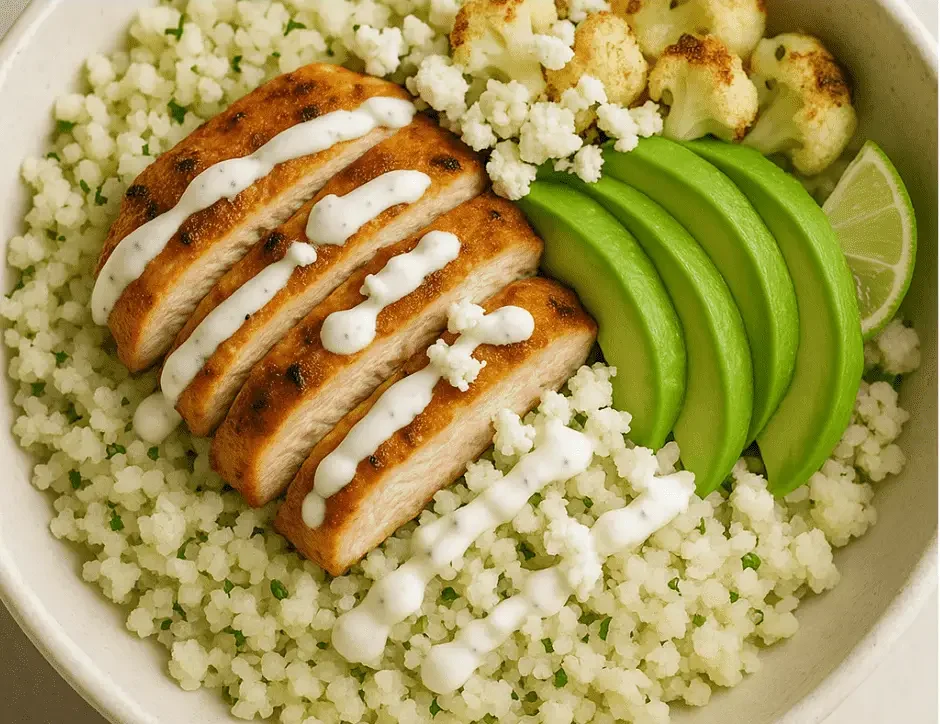
Street Corn Chicken Rice

The keto bowl of Street Corn Chicken Rice is a satisfying & healthy meal that is perfect for those on low-carb/strict-keto diets. We have crafted the recipe to smartly swap the corns & rice for their low-carb counterparts. These bowls feature cauliflower rice & corns(extremely keto), marinated cooked chicken slices, lime crema with keto mayo, sour cream, lime, etc., & all keto toppings like wedges of lime, avocado slices, crumbled cheese, chopped cilantro. This keto bowl of Street Corn Chicken Rice is perfectly seasoned, packed with healthy fats, proteins, and many essential nutrients.


NUMERICAL OVERVIEW:

  • Diet: Ketogenic
  • Course: Main course
  • Cuisine: Fusion/Tex-Mex
  • Time for prep: Fifteen mins
  • Twenty-five mins for cooking
  • Working time(in total): Forty minutes
  • Size/serving: A bowl/person
  • Yield in total: 4 bowls
  • Mode of cooking: Grill(grill pan) + stovetop
  • Level of difficulty: Easy to normal

TOOLS:

  • Board & knife for cutting & chopping
  • A grill pan/skillet
  • Rice grater/food processor(for making the rice from cauliflower)
  • Bowls for mixing
  • Tongs/spatula
  • Baking sheet/tray
  • Spoons & cups, to measure

INGREDIENTS:

FOR THE CHICKEN:

  • One tsp. of cumin
  • 2 tbsps. of oil(olive)
  • Chili powder, 1/2 tsp
  • 2 breasts of chicken, boneless & skinless
  • To taste of salt & pepper
  • 1 tsp. of paprika, smoked
  • Fresh juice of half a lime

STRICT KETO VERSION OF THE STREET CORN:

  • 1/4th tsp. of powdered garlic
  • Florets of cauliflower, 1.5 cups
  • 0.25 tsp. of paprika
  • To taste of salt
  • 1 tbsp. of oil(avocado)

CREMA:

  • Fresh juice of a lime
  • 0.5 cup of sour cream, full-fat
  • To taste of salt & pepper
  • 1/4th cup of mayonnaise(avocado-oil based)
  • To taste of salt & pepper
  • 1 clove of minced garlic
  • Chopped cilantro, one tbsp.

RICE BASE:

  • 1 tbsp. of coconut oil/butter
  • Rice of cauliflower, 2 cups
  • To taste of salt

TOPPINGS:

  • Wedges of lime
  • 1/2 sliced avocado
  • Cojita cheese(crumbled), two tbsps.
  • 1/4thc up of fresh cilantro, chopped


INSTRUCTIONS:

COOKING CHICKEN:

  1. Include & mix the paprika, juice of lime, cumin, pepper(black), oil of olives, salt, powdered chili, & garlic in a bowl.
  2. Add chicken to the above marinade you just made.
  3. Coat all the chicken properly & refrigerate while covered it for a minimum of fifteen mins.
  4. Place a skillet on the stove over a normal-fulll flame.
  5. Add the marinated chicken to that skillet.
  6. After ~seven mins, turn the side of the chicken.
  7. Fry for the same precise length of time on the other side.
  8. Check that the chicken must be tender from inside & golden & crisp from the outer side.
  9. If it’s done, dish it out, cool it, then slice/dice the chicken.

PREPARING THE STRICT KETO VERSION OF CORN:

  1. First, prepare the corn-sized bits of cauliflower florets.
  2. Then coat them properly with the mixture of salt, paprika, oil of avocado, & powdered garlic.
  3. Spread the seasoned corn-sized cauliflower bits on the baking sheet/tray.
  4. Shift that baking tray to the oven for roasting the cauliflower bits for ~twenty mins at 200 °C.
  5. After ~ten mins mix them to change their position for even roasting.
  6. Check them after twenty mins, and remove them from the oven if they are crisp & golden.

LIME CREMA:

  1. Mix juice of lime, sour cream, pepper, mayo, salt, minced garlic, & chopped cilantro in a bowl.
  2. Now, you can refrigerate your lime crema.

COOKING OF CAULIFLOWER RICE:

  1. Include oil/butter in a skillet over a normal flame.
  2. Include the cauliflower rice in that melted butter/hot oil.
  3. Sprinkle the salt, mix & cook them until tender(~five mins).

ASSEMBLING:

  1. Grab the four serving bowls.
  2. Add an equal amount of cauliflower rice in each bowl.
  3. Now, top the rice with chicken slices, cauliflower”corn”, avocado slices, drizzle of lime crema, cheese, & fresh cilantro one by one.
  4. Finally, press half a fresh lime’s juice into each bowl.
  5. Your strict keto bowls of Street Corn Chicken Rice are ready to serve!

TIPS:

  • Use an airfryer to have the extra crispy cauliflower corns
  • You may use the leftover/rotisserie chicken for the quick work.
  • You may use the chipotle/jalapenos for the spicy version.
  • Longer marination of chicken & longer refrigerating of crema will give you deep flavor.

HOW TO PRESERVE(LEFTOVERS):

NOTE: Never store an assembled rice bowl

CHILLING:

  • Save every component individually in the containers(sealed). Refrigerate them all for ~four days. Bring all components to the surrounding temperature while rewarming the rice & chicken. Then assemble them for quick serving.

FREEZING:

  • You may save the chicken & rice of cauliflower individually in the container with sealed lids. Freeze them for ~sixty days. Never freeze the crema & topping. Defrost & reheat the chicken, prepare the lime crema & toppings fresh. Assemble them all to serve.

FAQs:

What can I use in place of the dairy cheese?

  • You may use extra cream, paste of avocado, or almond-based crumbled cheese in place of dairy cheese. You can also skip the cheese if you want.

Will the frozen cauliflower rice work?

  • Absolutely! You need to defrost & drain extra water properly, then your cauliflowers are good to go.


NUTRITIONAL FACTS/SERVING:

Size/serve: 1 Bowl
Calories: ~395 kcal
Carbs in total: Nine grams
Fiber: 4 g
Net carbohydrates: Five grams
Fats: 27 grams
Sugar: Two grams
Proteins: 27 g
Sodium: 510 mg