Healthy Tips
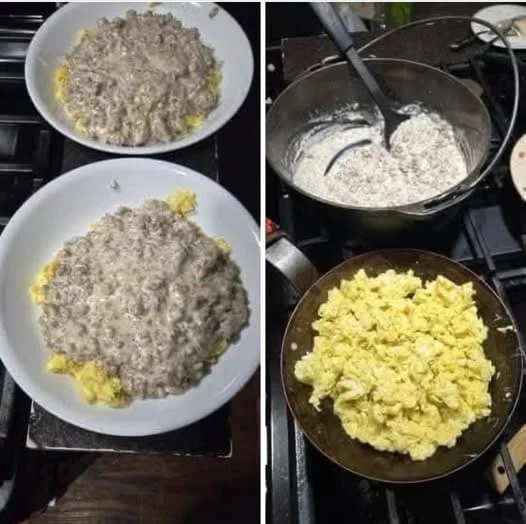
Carnivore Sausage Gravy
Ingredients:
-
1 pound (450g) ground pork sausage (choose a fattier sausage for best flavor)
-
4 ounces (½ block) cream cheese, cut into cubes
-
1 cup heavy whipping cream
-
Salt and black pepper to taste (optional — sausage often has enough salt)
Instructions:
-
Cook the sausage:
-
Heat a large skillet over medium heat.
-
Add the sausage and cook, breaking it apart with a spatula, until fully browned and cooked through (about 7-10 minutes).
-
Drain excess grease if desired, but leaving some fat will add flavor.
-
-
Add cream cheese:
-
Reduce heat to low.
-
Add the cream cheese cubes directly into the skillet with the sausage.
-
Stir gently and continuously to soften and melt the cream cheese, combining it fully with the sausage.
-
-
Add heavy cream:
-
Pour in 1 cup of heavy whipping cream.
-
Stir well to combine everything into a creamy mixture.
-
-
Simmer and thicken:
-
Keep the heat low and cook, stirring occasionally, until the gravy thickens to your desired consistency (about 5-8 minutes).
-
If it gets too thick, you can add a little more cream or water to loosen it.
-
-
Season:
-
Taste the gravy and add salt and pepper if needed (usually the sausage has enough salt).
-
-
Serve:
-
Serve hot over cooked eggs, steak, or as a dipping sauce for carnivore bread or pork rinds.
-
Tips:
-
For extra flavor, you can use breakfast sausage with herbs and spices, or keep it plain for a pure carnivore experience.
-
Keep the heat low after adding cream cheese and cream to avoid curdling.
-
This gravy is great for meal prep and stores well in the fridge for 3-4 days.
Would you like me to suggest a full carnivore meal plan using this gravy? Or ideas on what to pair it with?
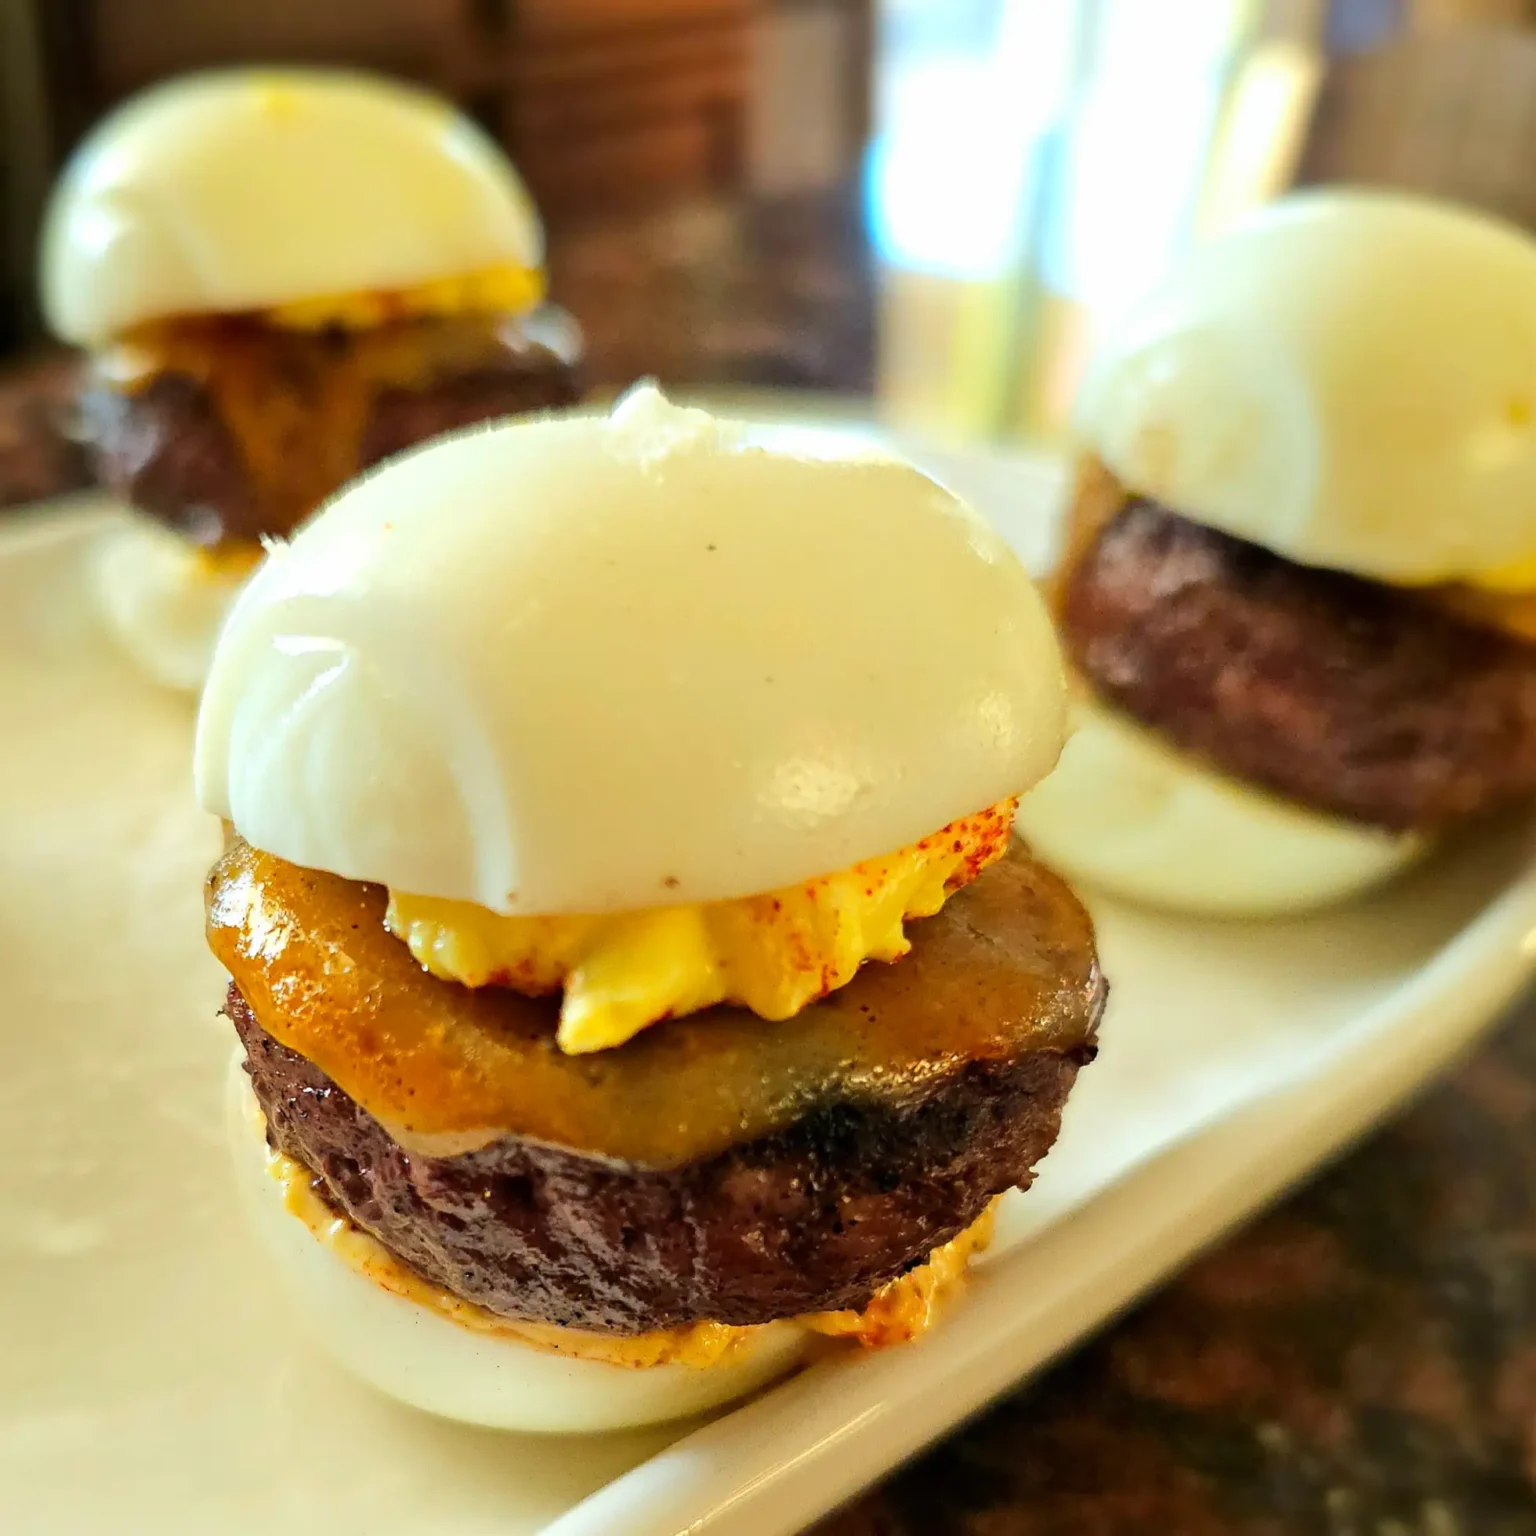
Deviled Egg Hamburgers Recipe (Carnivore-Friendly and Flavorful)
These Deviled Egg Hamburgers are a fun, protein-packed twist on the classic burger. Combining the rich flavors of a juicy hamburger patty with the creamy goodness of deviled eggs, this recipe is perfect for carnivore enthusiasts looking to enjoy a flavorful, low-carb, high-fat meal. Whether you’re hosting a gathering or just craving something hearty and delicious, these deviled egg hamburgers will not disappoint.
Ingredients:
- 4 large eggs (hard-boiled)
- 1 lb ground beef (80/20 fat ratio, for juicy burgers)
- 2 tbsp butter (grass-fed, for cooking)
- 1/4 cup mayonnaise (preferably sugar-free and made with animal fats)
- 1 tbsp Dijon mustard (optional, check ingredients for no carbs or sugar)
- Salt and freshly cracked black pepper, to taste
- 2 tbsp fresh chopped chives or parsley (optional, for garnish)
- 4 small pieces of crispy bacon (optional, for topping)
- 2 tbsp beef bone broth (optional, for extra flavor in patties)
Instructions:
- Prepare the Deviled Eggs: Boil the eggs by placing them in a pot of cold water. Bring to a boil, then reduce to a simmer for 10 minutes. Afterward, transfer the eggs to an ice bath to cool. Once cooled, peel the eggs, slice them in half, and carefully remove the yolks. Place the yolks in a bowl and mash them.
- Make the Deviled Egg Filling: To the mashed yolks, add the mayonnaise, Dijon mustard (if using), and a pinch of salt and pepper. Stir until smooth and creamy. Set aside.
- Form the Patties: In a bowl, season the ground beef with salt, pepper, and optional beef bone broth. Mix well and form 4 burger patties, about 1/2 inch thick.
- Cook the Patties: Heat a skillet over medium-high heat and melt 1 tablespoon of butter. Cook the patties for about 3-4 minutes per side, or until they reach your desired doneness.
- Assemble the Deviled Egg Hamburgers: Place a cooked burger patty on a plate. Spoon a generous amount of the deviled egg filling on top. Optionally, add crispy bacon and garnish with fresh herbs like chives or parsley for extra flavor.
- Serve: Enjoy your deviled egg hamburgers hot! These are perfect as a carnivore-friendly burger option without the bun, packed with protein and rich flavor.
This unique and delicious recipe will be your new favorite way to enjoy a burger with a creamy, indulgent twist!
Coconut Cream Pie
A silky coconut custard filling in a buttery graham cracker crust, topped with fluffy whipped cream and toasted coconut — a tropical classic that’s creamy, light, and irresistible.
Prep Time: 25 minutes
Cook Time: 15 minutes
Chill Time: 4–6 hours
Total Time: ~5–6 hours
Servings: 8
Dietary: Vegetarian
Ingredients
For the crust:
-
Graham cracker crumbs (1 ½ cups)
-
Melted butter (⅓ cup)
-
Granulated sugar (¼ cup)
For the filling:
-
Whole milk (1 cup)
-
Coconut milk (1 cup)
-
Granulated sugar (⅔ cup)
-
Cornstarch (¼ cup)
-
Salt (¼ tsp)
-
Egg yolks (4 large)
-
Butter (1 tbsp)
-
Vanilla extract (1 tsp)
-
Sweetened shredded coconut (1 ½ cups)
For the topping:
-
Heavy whipping cream (1 cup)
-
Powdered sugar (2 tbsp)
-
Vanilla extract (½ tsp)
-
Toasted coconut (¼ cup)
Instructions
-
Bake the crust: Preheat oven to 350°F (175°C). Combine graham cracker crumbs, melted butter, and sugar. Press evenly into a 9-inch pie plate. Bake for 10 minutes. Let cool completely.
-
Make the custard: In a saucepan over medium heat, whisk together milk, coconut milk, sugar, cornstarch, and salt. In a separate bowl, lightly beat the egg yolks.
-
Temper the yolks: Slowly pour ½ cup of the hot milk mixture into the yolks while whisking constantly. Return the yolk mixture to the saucepan.
-
Cook & thicken: Continue whisking over medium heat until thickened and bubbling. Remove from heat and stir in butter, vanilla, and shredded coconut.
-
Fill the crust: Pour custard into the cooled crust and smooth the surface. Cover with plastic wrap (press against the custard to prevent skin). Chill at least 4 hours, preferably overnight.
-
Whip the topping: Beat heavy cream, powdered sugar, and vanilla until stiff peaks form. Spread over the chilled pie.
-
Finish & serve: Sprinkle with toasted coconut. Slice and serve cold.
Quick Notes & Pro Tips
-
Extra coconut flavor: Replace more whole milk with coconut milk or coconut cream.
-
Firm crust: Press crumbs firmly and evenly into the pan for a solid base.
-
Yolk safety: Temper yolks slowly to prevent curdling.
-
Best texture: Chill overnight for perfect slicing and flavor melding.
Why You’ll Love It
This pie combines buttery crunch, creamy coconut custard, and airy whipped topping — it’s indulgent yet refreshing. The contrast of textures makes every bite feel like a treat.
Step-by-Step Cooking Guide
1. Graham Cracker Crust
-
Combine crumbs, butter, and sugar. Bake to set and let cool.
2. Coconut Custard Filling
-
Whisk, temper, thicken, then fold in shredded coconut for texture and flavor.
3. Whipped Topping
-
Beat cream until stiff peaks form and spread generously over the set custard.
Ingredient Details & Substitutions
-
Coconut milk: Use full-fat for richer custard.
-
Crust options: Swap graham crackers for shortbread cookies or a baked pastry crust.
-
Topping: Stabilize whipped cream with gelatin if making ahead for events.
Variations & Serving Suggestions
-
Tropical twist: Add crushed pineapple to the filling for a piña colada pie.
-
Chocolate lovers: Drizzle melted chocolate over the whipped cream for a decadent touch.
-
Mini pies: Prepare in individual tart shells for easy entertaining.
Storage & Make-Ahead
-
Refrigerate: Cover and store for up to 3 days.
-
Crust tip: If storing longer, bake the crust an extra 5 minutes for extra crispness.
-
Reheating crust: Pop individual slices into a 300°F (150°C) oven for 3 minutes to re-crisp the crust.
FAQs
Q: Can I make this ahead?
A: Yes — prepare the crust and filling a day ahead, then whip and add topping just before serving.
Q: Can I use a store-bought crust?
A: Absolutely — a pre-made graham cracker or pastry crust works.
Q: How do I keep whipped cream stable?
A: Add 1 tsp cornstarch or use stabilized whipped cream for longer-lasting topping.
Personal Note
This coconut cream pie is one of my go-to holiday desserts. It’s tropical yet cozy, light yet rich — a beautiful balance of flavors that makes it a showstopper at any gathering.
Your turn!
Tried this Coconut Cream Pie? Leave a review or tag me on social media — I’d love to see your creation!
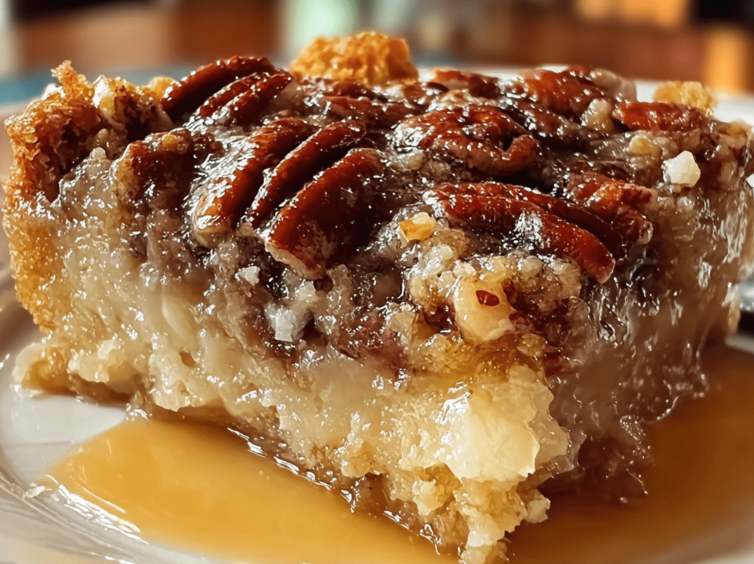
Pecan Praline Dump Cake
A rich, gooey, caramel-like pecan dessert layered with yellow cake mix and buttery praline flavor — this easy “dump-and-bake” cake is perfect for holidays or casual gatherings.
Prep Time: 10 minutes
Cook Time: 50–60 minutes
Total Time: ~1 hour 10 minutes
Servings: 12
Dietary: Kid-friendly, Make-ahead friendly
Ingredients
-
Chopped pecans (1 cup) – toasted for enhanced flavor
-
Sweetened condensed milk (1 can / 14 oz)
-
Light or dark corn syrup (1 cup)
-
Unsalted butter – melted (½ cup / 1 stick)
-
Pure vanilla extract (1 tsp)
-
Yellow cake mix (1 box / 15.25 oz) – dry, unprepared
-
Unsalted butter – cold, sliced thinly (½ cup / 1 stick)
-
Water (1 cup)
Instructions
-
Preheat the oven: Set to 350°F (175°C). Grease a 9×13-inch baking dish.
-
Layer pecans: Sprinkle chopped pecans evenly across the bottom of the dish.
-
Pour wet ingredients: In order, pour condensed milk, corn syrup, melted butter, and vanilla evenly over the pecans. Do not stir.
-
Add cake mix: Sprinkle dry cake mix evenly over the wet layer, gently spreading to cover. Do not stir.
-
Dot with butter: Place cold butter slices evenly over the surface of the cake mix.
-
Add water: Slowly and evenly pour 1 cup of water over the entire dish to help moisten the cake mix.
-
Bake: Bake for 50–60 minutes, until the top is golden brown and bubbling around the edges.
-
Cool & serve: Let cool for 10 minutes to set. Serve warm with vanilla ice cream or whipped cream.
Quick Notes & Pro Tips
-
Toasting pecans: Toast in a dry skillet for 3–5 minutes for a richer flavor.
-
Butter matters: Use real butter (not margarine) for best texture and taste.
-
Do not stir: Keeping layers distinct creates the gooey praline texture.
Why You’ll Love It
This cake gives you the best of both worlds: the rich, gooey texture of pecan pralines and the fluffy sweetness of yellow cake. Best of all, it comes together with almost no effort — no mixing bowls required!
Step-by-Step Cooking Guide
Layering the Base
-
Pecans first, then the “gooey” mix (condensed milk, corn syrup, melted butter, vanilla).
Adding the Cake Layer
-
Gently sprinkle cake mix to cover the top, then dot with butter slices to create a golden crust.
Baking to Perfection
-
Bake until golden brown and bubbling, letting the flavors meld into a praline-like filling.
Ingredient Details & Substitutions
-
Cake mix: Swap yellow cake for spice cake or butter pecan cake for seasonal flair.
-
Add-ins: Try chocolate chips, butterscotch chips, or sweetened coconut flakes for a flavor twist.
-
Corn syrup: Use dark for a deeper caramel flavor.
Variations & Serving Suggestions
-
Holiday twist: Add a pinch of cinnamon or nutmeg for a festive touch.
-
Serve it à la mode: Pair with vanilla ice cream or dollops of whipped cream.
-
Make it tropical: Add shredded coconut and a splash of rum extract to the wet layer.
Storage & Make-Ahead
-
Refrigerate: Store covered at room temperature for 2 days or refrigerate up to 5 days.
-
Make-ahead: Bake a day ahead; reheat in the oven at 300°F until warm.
-
Reheat: Microwave individual slices for 30–45 seconds for that fresh-from-the-oven feel.
FAQs
Q: Can I use a different nut?
A: Yes — walnuts or almonds work, though pecans give the most praline-like flavor.
Q: Can I make this without corn syrup?
A: Substitute with maple syrup or honey for a different flavor profile (texture may vary slightly).
Q: Can I halve the recipe?
A: Yes — use an 8×8-inch dish and reduce bake time by 10–15 minutes.
Personal Note
This is one of those “effortless showstopper” desserts I make for family gatherings — it feels like a praline cobbler meets cake, and it always disappears fast.
Your turn!
If you try this Pecan Praline Dump Cake, leave a review or tag me on social media — I’d love to see your creation!
Would you like me to make a “holiday version” (like a pecan pie + spice cake combo) or a “mini dessert version” (baked in ramekins for individual servings)?