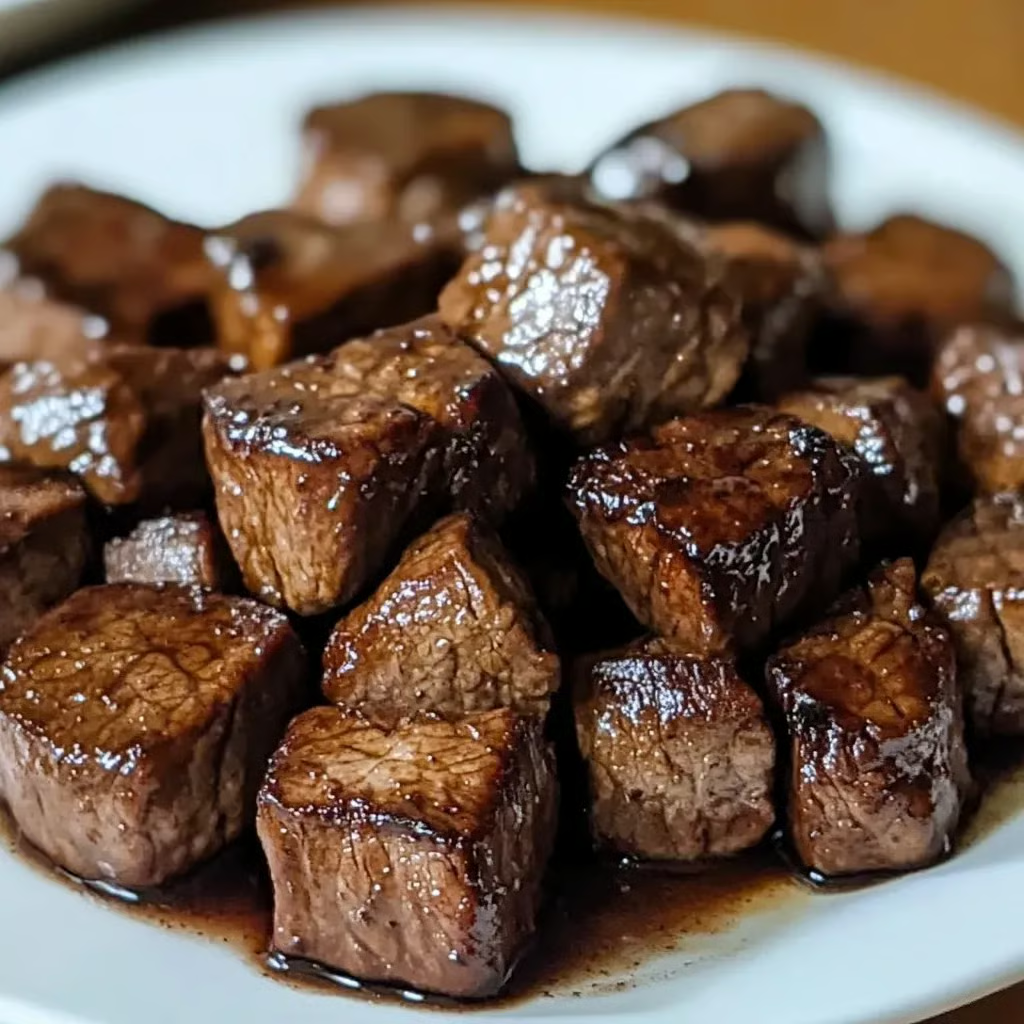
Slow Cooker Beef Tips in Savory Gravy

Fork-tender chunks of beef simmered in a rich, savory sauce with optional hearty vegetables — a comforting, set-it-and-forget-it slow cooker meal.

Prep Time: 15 minutes
Cook Time: 6–8 hours (low) or 3–4 hours (high)
Total Time: ~6–8 hours
Servings: 6–8
Dietary: Gluten-free adaptable

Ingredients

For the beef:

  • Beef sirloin, chuck roast, or stew meat – 2 lbs, cut into bite-sized chunks

  • Salt – 1 tsp

  • Black pepper – 1 tsp

  • Olive oil – 1–2 tbsp (for browning, optional)

For the sauce:

  • Beef broth – 1 cup (low-sodium preferred)

  • Soy sauce – ¼ cup

  • Worcestershire sauce – ¼ cup

  • Brown sugar – 3 tbsp

  • Tomato paste – 2 tbsp

  • Garlic – 3 cloves, minced

  • Smoked paprika – 1 tsp

  • Onion powder – ½ tsp

  • Red pepper flakes – ¼ tsp (optional)

Optional add-ins:

  • Baby potatoes – 1 lb, halved

  • Baby carrots – 1 cup

  • Mushrooms – 1 cup, sliced

  • Onion – 1 medium, roughly chopped

  • Cornstarch slurry – 1–2 tbsp cornstarch + 2 tbsp cold water (for thickening)

Instructions

  1. Prep the beef: Pat beef chunks dry with paper towels. Season evenly with salt and pepper.

  2. Brown the beef (optional): Heat olive oil in a skillet over medium-high. Sear beef in batches until browned on all sides. (Skip if short on time.)

  3. Make the sauce: In a bowl, whisk together beef broth, soy sauce, Worcestershire, brown sugar, tomato paste, garlic, paprika, onion powder, and red pepper flakes.

  4. Assemble in slow cooker: Place beef in slow cooker. Add optional vegetables around and on top. Pour sauce over everything, coating the beef well.

  5. Cook: Cover and cook on low for 6–8 hours or high for 3–4 hours, until beef is fork-tender.

  6. Thicken (optional): About 20 minutes before serving, mix cornstarch with cold water. Stir into the slow cooker, cover, and cook on high until the sauce thickens.

  7. Serve: Spoon beef and sauce over mashed potatoes, rice, or egg noodles. Garnish with fresh parsley if desired.

Quick Notes & Pro Tips

  • Choose the right cut: Chuck roast is budget-friendly and melts beautifully after slow cooking.

  • Brown for flavor: While optional, searing the beef adds a deeper, richer taste.

  • Thicker sauce: Adjust cornstarch to reach your preferred gravy consistency.

Why You’ll Love It

This dish is hearty, versatile, and family-friendly. With minimal prep, you get beef that’s melt-in-your-mouth tender and swimming in a savory, well-balanced gravy — comfort food made easy.

Ingredient Details & Substitutions

  • Beef: Swap for pork shoulder or even chicken thighs for a different twist.

  • Vegetables: Add parsnips, celery, or sweet potatoes for variety.

  • Soy sauce: Use tamari for a gluten-free version.

Variations & Serving Suggestions

  • Make it creamy: Stir in ¼ cup heavy cream or sour cream at the end for a silky sauce.

  • Serve it with: Mashed potatoes, egg noodles, or crusty bread to soak up the gravy.

  • Add wine: Replace ¼ cup broth with red wine for a deeper, richer flavor.

Storage & Make-Ahead

  • Refrigerate: Store in an airtight container for up to 4 days.

  • Freeze: Cool completely and freeze for up to 2 months.

  • Reheat: Warm gently on the stovetop or in the microwave until heated through.

FAQs

Q: Can I make this in the oven instead?
A: Yes — bake in a covered Dutch oven at 160°C (325°F) for 2½–3 hours.

Q: How do I make it less sweet?
A: Reduce brown sugar to 1–2 tbsp or skip entirely for a more savory profile.

Q: Can I prep this the night before?
A: Absolutely — assemble all ingredients in the slow cooker insert, cover, and refrigerate overnight.

Personal Note

This recipe is my go-to when I want a hearty dinner with little hands-on time. The soy-Worcestershire-tomato combo builds a flavorful gravy that tastes like it’s been simmering all day (because it has!).

Garlic Parmesan Chicken Meatloaf

A juicy, flavor-packed chicken meatloaf topped with a buttery garlic-Parmesan glaze — comfort food with a delicious Italian twist.

Prep Time: 15 minutes
Cook Time: 45–50 minutes
Total Time: ~1 hour
Servings: 6–8
Dietary: High-protein, Comfort food

Ingredients

For the meatloaf:

  • Ground chicken – 900 g

  • Grated Parmesan cheese – 100 g

  • Panko breadcrumbs – 60 g

  • Large eggs – 2

  • Garlic – 4 cloves, minced

  • Garlic powder – 1 tsp

  • Onion powder – 1 tsp

  • Dried basil – ½ tsp

  • Dried parsley – ½ tsp

  • Fine salt – ½ tsp

  • Ground black pepper – ½ tsp

  • Whole milk – 60 ml

For the garlic-Parmesan glaze:

  • Unsalted butter – 45 g

  • Garlic – 2 cloves, minced

  • Grated Parmesan cheese – 25 g

  • Fresh parsley – 1 tbsp, finely chopped

  • Fine salt – pinch

Instructions

  1. Prep the oven: Preheat to 190°C (375°F). Line a baking sheet with parchment or lightly grease a loaf pan.

  2. Make the meatloaf mixture: In a large bowl, mix ground chicken, Parmesan, panko, eggs, garlic, garlic powder, onion powder, basil, parsley, salt, pepper, and milk until combined. Do not overmix.

  3. Shape & bake: Form into a loaf shape on the baking sheet or press into the loaf pan. Bake for 40–45 minutes, or until the internal temperature reaches 74°C (165°F).

  4. Make the glaze: While the meatloaf bakes, melt butter in a small saucepan over medium heat. Add garlic and sauté 1–2 minutes. Stir in Parmesan and parsley; cook 1–2 minutes until slightly thickened. Add a pinch of salt.

  5. Glaze & finish: Brush the glaze over the meatloaf and return to the oven for 5–7 minutes.

  6. Rest & serve: Let rest for 5 minutes before slicing. Garnish with extra parsley.

Quick Notes & Pro Tips

  • Don’t overmix: This keeps the meatloaf tender and juicy.

  • Check temp: Use a meat thermometer — chicken must reach 74°C (165°F).

  • Extra moisture: Swap some chicken for ground turkey thigh if you prefer a richer texture.

Why You’ll Love It

This isn’t your average meatloaf — it’s moist, flavorful, and topped with a buttery garlic-Parmesan glaze that adds an irresistible savory finish. Perfect for weeknight dinners or meal prep.

Ingredient Details & Substitutions

  • Breadcrumbs: Use regular or Italian-style breadcrumbs for a different flavor.

  • Cheese: Try Asiago or Pecorino Romano for a sharper taste.

  • Milk: Substitute with cream for extra richness.

Variations & Serving Suggestions

  • Make it spicy: Add ¼ tsp red pepper flakes to the glaze.

  • Serve it with: Garlic mashed potatoes, roasted vegetables, or a simple Caesar salad.

  • Mini loaves: Form into smaller loaves or muffin tins for quicker cooking and meal prep.

Storage & Make-Ahead

  • Refrigerate: Store in an airtight container for up to 3 days.

  • Freeze: Wrap slices individually and freeze for up to 2 months.

  • Reheat: Warm in a 175°C (350°F) oven until heated through.

FAQs

Q: Can I use ground turkey instead of chicken?
A: Absolutely — or use a blend for extra flavor.

Q: How do I keep chicken meatloaf from drying out?
A: Don’t overbake, and let it rest before slicing. The glaze also adds moisture.

Q: Can I make this ahead?
A: Yes — assemble and refrigerate up to 24 hours before baking.

Personal Note

This meatloaf came from my love for Italian-style chicken dishes — the garlic-Parmesan combo makes it feel special while staying family-friendly and easy to make.

Cheesy Baked Zucchini Casserole

Thinly sliced zucchini layered with cheddar, Parmesan, and golden breadcrumbs — a simple yet flavorful side dish that’s crispy on top and tender inside.

Prep Time: 10 minutes
Cook Time: 25–30 minutes
Total Time: ~40 minutes
Servings: 4–6
Dietary: Vegetarian

Ingredients

For the zucchini base:

  • Zucchini – 3 medium, sliced

  • Garlic – 2 cloves, minced

  • Olive oil – 2 tbsp

  • Salt – to taste

  • Black pepper – to taste

For the cheesy topping:

  • Cheddar cheese – shredded (120 g)

  • Parmesan cheese – grated (50 g)

  • Breadcrumbs – (100 g)

Instructions

  1. Preheat the oven: Set to 190°C (375°F). Grease a baking dish with olive oil or non-stick spray.

  2. Season the zucchini: In a mixing bowl, toss zucchini slices with minced garlic, olive oil, salt, and black pepper.

  3. Assemble the dish: Spread zucchini evenly in the baking dish. Sprinkle with cheddar and Parmesan, then top with breadcrumbs.

  4. Bake: Cook for 25–30 minutes, until zucchini is tender and the topping is golden brown.

  5. Cool & serve: Let rest for a few minutes before serving warm.

Quick Notes & Pro Tips

  • Slice evenly: Uniform zucchini slices ensure even cooking.

  • Extra crispy: Broil for 1–2 minutes at the end for a deeper golden crust.

  • Cheese swap: Try mozzarella or Gruyère for a different flavor.

Why You’ll Love It

This casserole transforms simple zucchini into a cheesy, crunchy side dish that pairs beautifully with grilled meats, pasta, or roasted chicken. It’s quick, hearty, and a great way to use up summer zucchini.

Ingredient Details & Substitutions

  • Breadcrumbs: Use panko for a lighter, crunchier texture.

  • Cheese: Swap cheddar for a milder mozzarella or use sharp Parmesan only for a bolder taste.

  • Add-ins: Mix in chopped herbs like basil or thyme for freshness.

Variations & Serving Suggestions

  • Make it spicy: Add chili flakes or smoked paprika to the breadcrumb mix.

  • Add protein: Sprinkle cooked, crumbled bacon or sausage over the zucchini before baking.

  • Pair it: Serve alongside grilled chicken, steak, or pasta for a full meal.

Storage & Make-Ahead

  • Refrigerate: Store leftovers in an airtight container for up to 3 days.

  • Reheat: Warm in the oven at 180°C (350°F) for 10 minutes to keep the topping crisp.

  • Make-ahead: Assemble up to 12 hours ahead; bake just before serving.

FAQs

Q: Can I use yellow squash instead of zucchini?
A: Yes — or use a mix of both for color and flavor variety.

Q: Can I make this gluten-free?
A: Swap regular breadcrumbs for gluten-free panko.

Q: How do I prevent watery zucchini?
A: Salt slices and let them rest for 10 minutes, then pat dry before assembling.

Personal Note

This dish started as a way to use up garden zucchini, but it’s become a go-to side at family dinners. The cheesy, garlicky topping makes even picky eaters happy.

Bacon, Pickle & Cheese Grilled Sandwich

Smoky bacon, melty cheddar and Swiss, and tangy dill pickles layered between buttery, golden bread — this grilled sandwich is next-level comfort food with a zesty twist.

Prep Time: 5 minutes
Cook Time: 8–10 minutes
Total Time: ~15 minutes
Servings: 1 sandwich
Dietary: Comfort food

Ingredients

  • Bacon – 2 slices

  • Bread – 2 slices (white, sourdough, or your favorite)

  • Unsalted butter – 1 tbsp

  • Dill pickles – 4 slices

  • Swiss cheese – 2 slices

  • Cheddar cheese – 2 slices

Instructions

  1. Cook the bacon: In a skillet or oven, cook bacon until crispy. Transfer to a paper towel-lined plate to drain.

  2. Prepare the bread: Spread butter evenly over one side of each bread slice.

  3. Assemble the sandwich: Place one slice of bread, buttered side down, in a preheated skillet. Layer cheddar cheese, cooked bacon, dill pickle slices, and Swiss cheese. Top with the second bread slice, buttered side out.

  4. Grill the sandwich: Cook over medium-low heat, pressing gently, for 3–4 minutes per side, until bread is golden and cheese is fully melted.

  5. Serve: Slice in half and enjoy hot.

Quick Notes & Pro Tips

  • Low and slow: Use medium-low heat so the cheese melts before the bread gets too dark.

  • Crispier finish: Press gently with a spatula for a panini-like effect.

  • Pickle prep: Pat pickles dry to avoid a soggy sandwich.

Why You’ll Love It

This isn’t your average grilled cheese. The smoky bacon and creamy melted cheeses are perfectly balanced by the bright, tangy crunch of dill pickles — an addicting combination in every bite.

Ingredient Details & Substitutions

  • Bread: Sourdough or rye adds a heartier texture.

  • Cheese: Swap Swiss for provolone or add pepper jack for heat.

  • Pickles: Try bread-and-butter pickles for a sweeter twist.

Variations & Serving Suggestions

  • Spicy kick: Add sliced jalapeños or a smear of hot mustard.

  • Deli-style: Layer in smoked turkey or ham for a heartier melt.

  • Dip it: Serve with tomato soup or a creamy ranch dressing.

Storage & Make-Ahead

  • Best fresh: Enjoy immediately for the crispiest texture.

  • Reheat: Warm in a skillet or air fryer to restore crunch (avoid microwaving).

FAQs

Q: Can I make this without bacon?
A: Absolutely — swap in turkey bacon or skip for a vegetarian version.

Q: Can I make this in a panini press?
A: Yes! A press will create even more melt and crispness.

Personal Note

This sandwich is one of my favorite “guilty pleasure” lunches — a mashup of a grilled cheese and a deli pickle plate. It’s easy, indulgent, and deeply satisfying.

Grilled Teriyaki Chicken with Pineapple

Juicy teriyaki-marinated chicken paired with caramelized grilled pineapple, finished with sesame seeds and green onions — a tropical, sweet-savory meal perfect for summer grilling.

Prep Time: 15 minutes (plus 2–8 hours marinating)
Cook Time: 15–20 minutes
Total Time: ~2½–9 hours
Servings: 4
Dietary: Dairy-free

Ingredients

For the marinade:

  • Sesame oil (1 tbsp)

  • Fresh ginger – grated (1 tsp)

  • Garlic – finely chopped (2 cloves)

  • Brown sugar – packed (2 tbsp)

  • Soy sauce (¼ cup)

  • Pineapple juice (½ cup)

  • Teriyaki sauce (1 cup)

For the chicken & pineapple:

  • Ripe pineapple – cut into circles (1 whole)

  • Boneless, skinless chicken thighs or breasts (4 pieces)

For garnish:

  • Chopped green onions

  • Toasted sesame seeds

Instructions

  1. Make the marinade: In a bowl, mix sesame oil, ginger, garlic, brown sugar, soy sauce, pineapple juice, and teriyaki sauce until well combined.

  2. Marinate the chicken: Place chicken in a dish or zip-top bag. Pour the marinade over it, seal, and refrigerate for at least 2 hours (overnight for best flavor).

  3. Preheat the grill: Set to medium-high heat.

  4. Grill the chicken: Remove chicken from the marinade (reserve leftover marinade for basting). Grill 6–7 minutes per side, brushing with the marinade occasionally, until internal temperature reaches 165°F (74°C). Discard any marinade that touched raw chicken.

  5. Grill the pineapple: Place pineapple rings on the grill for 2–3 minutes per side, until charred and caramelized.

  6. Serve: Top chicken with grilled pineapple rings. Sprinkle with chopped green onions and toasted sesame seeds.

Quick Notes & Pro Tips

  • Marinate longer: Overnight marination deepens the flavor.

  • Char the pineapple: Look for grill marks — they bring sweetness and a smoky touch.

  • Brush with marinade: Adds layers of flavor while cooking, but toss any marinade that touched raw chicken.

  • Chicken choice: Thighs stay juicier on the grill, but breasts work great with careful cooking.

Why You’ll Love It

This dish blends sweet, smoky, and savory flavors with minimal effort. The teriyaki and pineapple combo creates a bright, tropical balance — perfect for a casual backyard cookout or an easy weeknight dinner.

Step-by-Step Cooking Guide

1. Marinating the Chicken

  • Combine all marinade ingredients and soak the chicken for at least 2 hours.

2. Grilling the Chicken & Pineapple

  • Grill chicken to 165°F, brushing occasionally with marinade. Grill pineapple until caramelized.

3. Serving

  • Top grilled chicken with pineapple rings and garnish with green onions and sesame seeds.

Ingredient Details & Substitutions

  • Teriyaki sauce: Use a thick, glaze-style teriyaki for richer coating.

  • Soy sauce: Sub with tamari for gluten-free.

  • Pineapple: Fresh works best for grilling; canned rings can be used in a pinch.

Variations & Serving Suggestions

  • Add heat: Stir sriracha or chili flakes into the marinade for a spicy kick.

  • Rice bowl: Serve over steamed rice with stir-fried veggies for a full meal.

  • Skewers: Cut chicken and pineapple into chunks, thread onto skewers, and grill for kabobs.

Storage & Make-Ahead

  • Refrigerate: Store leftovers in an airtight container for up to 3 days.

  • Freeze: Freeze marinated raw chicken for up to 2 months; thaw before grilling.

  • Reheat: Warm gently in a skillet or low oven to avoid drying out.

FAQs

Q: Can I bake this instead of grilling?
A: Yes — bake at 400°F for 20–25 minutes (add pineapple during the last 10 minutes).

Q: Can I use chicken drumsticks or wings?
A: Absolutely — just adjust cooking times and ensure they reach 165°F internally.

Q: How do I prevent the chicken from drying out?
A: Use thighs or brine chicken breasts for extra moisture before marinating.

Personal Note

This recipe came from my love for Hawaiian-style teriyaki plates — juicy chicken, sweet pineapple, and a pop of sesame crunch. It’s become a summer staple in my kitchen.

Your turn!
Tried this Grilled Teriyaki Chicken with Pineapple? Leave a review or tag me on social media — I’d love to see your version!

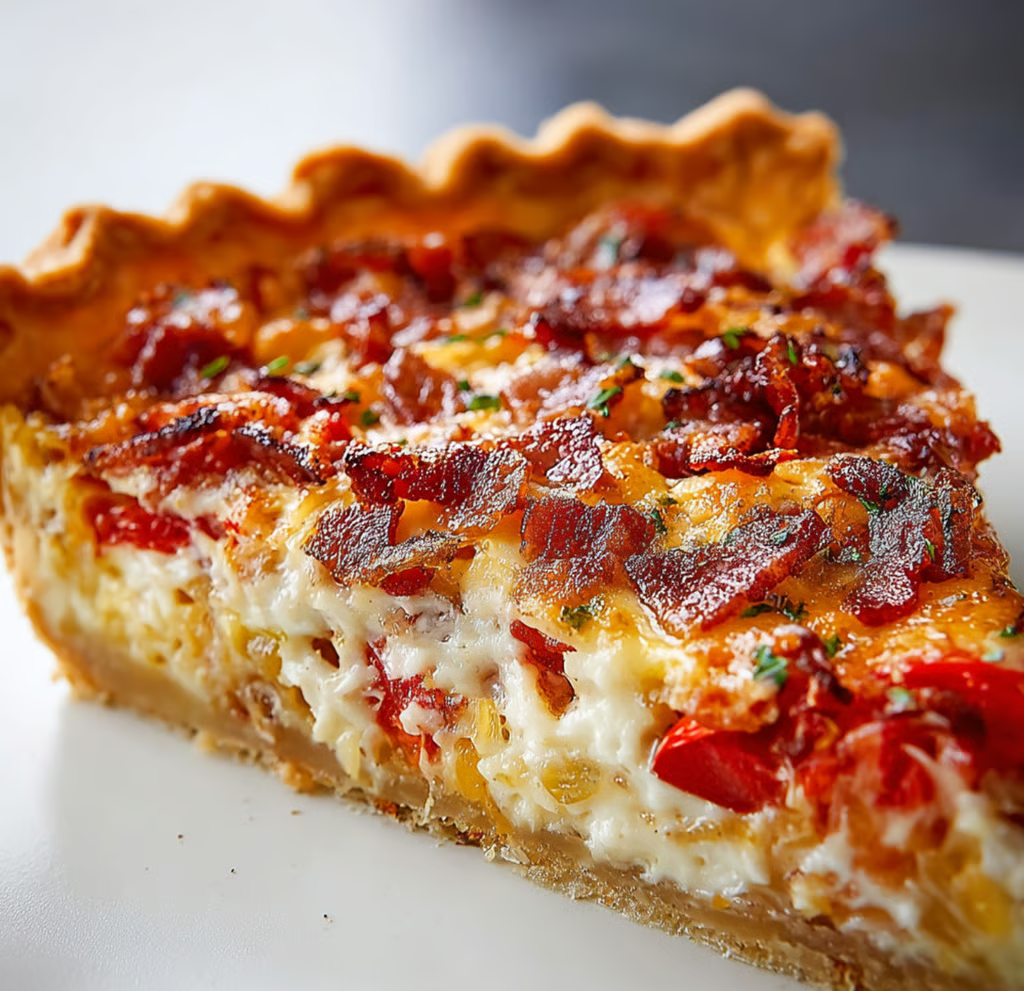
Bacon, Tomato & Onion Pie

A savory pie layered with caramelized onions, crisp bacon, juicy tomatoes, and a creamy, cheesy topping — the perfect comfort dish for brunch, dinner, or potlucks.

Prep Time: 20 minutes
Cook Time: 35–40 minutes
Total Time: ~1 hour
Servings: 6–8
Dietary: Comfort food, Crowd-pleaser

Ingredients

For the crust:

  • One pre-baked deep 9-inch pie shell

For the filling:

  • 8–6 thick slices of bacon – fried crisp and chopped

  • 2 medium tomatoes – thinly sliced

  • 1 large yellow onion – very thinly sliced

For the topping:

  • Mozzarella cheese – shredded (1 ½ cups)

  • Mayonnaise (½ cup)

  • Sour cream (½ cup)

  • All-purpose flour (1 tbsp)

  • Garlic powder (½ tsp)

  • Salt (¼ tsp)

  • Black pepper (¼ tsp)

For garnish (optional):

  • Fresh parsley or chives – chopped (1 tbsp)

Instructions

  1. Preheat oven: Set to 350°F (175°C). Place a baking sheet on the lower rack (to catch drips).

  2. Caramelize the onions: In a skillet over medium heat, cook onion slices in a little bacon grease until soft and golden brown (about 10 minutes). Let cool slightly.

  3. Layer the filling: In the pre-baked pie shell, layer half the onions, half the tomatoes, and half the bacon. Repeat with remaining onions, tomatoes, and bacon.

  4. Make the topping: In a bowl, mix mozzarella, mayonnaise, sour cream, flour, garlic powder, salt, and pepper until smooth.

  5. Assemble & bake: Spread the topping evenly over the layered filling. Bake for 35–40 minutes until bubbly and golden on top.

  6. Cool & serve: Let rest for a few minutes. Garnish with parsley or chives before slicing.

Quick Notes & Pro Tips

  • Pre-bake the crust: Ensures a crisp base that holds up to the filling.

  • Onions: Slow-cook them for deeper flavor.

  • Tomatoes: Pat slices dry to avoid excess moisture in the pie.

  • Serving tip: Let the pie cool slightly before slicing so it holds its shape.

Why You’ll Love It

This pie combines layers of smoky bacon, caramelized onions, and fresh tomatoes with a creamy, cheesy topping that bakes up golden and bubbly. It’s hearty enough for dinner but elegant enough for brunch.

Step-by-Step Cooking Guide

1. Prepping the Filling

  • Fry bacon until crisp. Caramelize onions in the rendered grease for rich flavor.

2. Layering the Pie

  • Onion, tomato, bacon — twice for even flavor distribution.

3. Mixing the Topping

  • Whip together the creamy mixture with mozzarella for a tangy, cheesy finish.

Ingredient Details & Substitutions

  • Cheese: Try cheddar or a mozzarella–Parmesan mix for more depth.

  • Sour cream: Swap for Greek yogurt for a lighter topping.

  • Crust: Use homemade pie dough or a store-bought pastry shell.

Variations & Serving Suggestions

  • Add a kick: Sprinkle in red pepper flakes or a dash of hot sauce.

  • Vegetarian version: Skip the bacon and add sautéed mushrooms or spinach.

  • Serving idea: Pair with a fresh green salad or serve as a side to grilled meats.

Storage & Make-Ahead

  • Refrigerate: Store covered for up to 3 days.

  • Reheat: Warm slices in a 325°F oven for 10–15 minutes to keep the crust crisp.

  • Make-ahead: Pre-cook bacon and onions and assemble layers a day ahead; bake fresh.

FAQs

Q: Can I use different cheese?
A: Yes — sharp cheddar, Gruyère, or a blend adds great flavor.

Q: Can I make this crustless?
A: Yes — pour filling into a greased pie dish and bake until set.

Q: How do I prevent a soggy crust?
A: Pat tomatoes dry and pre-bake the crust thoroughly.

Personal Note

This pie is inspired by classic Southern tomato pie but takes it up a notch with caramelized onions and smoky bacon. It’s the kind of dish that disappears fast at family gatherings.

Your turn!
Tried this Bacon, Tomato & Onion Pie? Leave a review or tag me on social media — I’d love to see your version!


Would you like me to make a “breakfast version” (with eggs for a quiche-like texture) or turn this into individual mini pies for parties?