Philly Steak Cheese Fries

All the flavors of a Philly cheesesteak piled high over crispy waffle fries and smothered in gooey melted cheese — the ultimate indulgent comfort food.

Servings: 4–6
Prep Time: 15 minutes
Cook Time: 25 minutes
Total Time: 40 minutes
Dietary Badges: Contains Dairy, Contains Gluten (from fries unless using GF), Contains Meat

Ingredients

Main Ingredients

  • Steak, thinly sliced (450g — ribeye or sirloin recommended)

  • Garlic salt (1 tsp)

  • Ground black pepper (½ tsp)

  • Green bell pepper, sliced

  • Large onion, sliced

  • White American cheese slices (8–10 slices)

  • Frozen waffle cut fries (567g bag)

  • Olive oil (1 tbsp)

Instructions

  1. Preheat Oven: Set oven to 220°C (425°F).

  2. Cook Steak: Heat an oven-safe skillet over medium-high heat with olive oil. Add steak, season with garlic salt and pepper, and sauté until browned. Remove and set aside.

  3. Sauté Veggies: Keep 1 tbsp of cooking juices in skillet; discard the rest. Add bell pepper and onion; cook until tender but still slightly crisp. Remove and set aside with steak.

  4. Layer Fries & Cheese: Remove skillet from heat. Spread frozen waffle fries evenly across bottom. Top with 4 cheese slices, then steak and vegetables. Add remaining cheese slices on top.

  5. Bake: Transfer skillet to oven; bake 8–10 minutes, until cheese is melted, bubbly, and golden.

  6. Serve: Let cool 1–2 minutes before serving hot and gooey.

Notes:

  • Waffle fries hold toppings well, but you can swap for curly fries, shoestring, or steak fries.

  • For extra indulgence, drizzle with garlic aioli or add chopped parsley before serving.

Brief Introduction

Philly cheesesteaks meet loaded fries in this skillet-baked masterpiece. Tender steak, sautéed peppers and onions, crispy waffle fries, and creamy white American cheese come together in a dish that’s perfect for sharing — or keeping all to yourself.

Step-by-Step Cooking Guide

Steak & Veggie Prep

  1. Sear Steak: Quick searing keeps steak juicy while adding flavor.

  2. Sauté Veggies: Cook peppers and onions until softened but still vibrant for texture.

Assembly

  1. Fries First: Lay fries flat for even crisping and coverage.

  2. Layered Cheese: Half the cheese under the toppings, half on top for maximum melt.

Oven Finish

  1. Melt & Brown: Baking ensures toppings heat through and cheese bubbles beautifully.

Ingredient Details & Substitution Tips

  • Steak: Ribeye for richness, sirloin for leaner option; thin slicing ensures quick cooking.

  • Cheese: White American melts smoothly; provolone or mozzarella also work.

  • Fries: Waffle fries give the best topping hold; sweet potato fries for a twist.

  • Peppers & Onions: Can be swapped with mushrooms for a classic “Philly” variation.

Recipe Variations & Serving Suggestions

  • Spicy Kick: Add pickled jalapeños or hot sauce drizzle.

  • BBQ Twist: Swap garlic salt for BBQ seasoning and drizzle with BBQ sauce before serving.

  • Party Platter: Serve in the skillet or transfer to a platter for easy sharing.

Storage & Make-Ahead Information

  • Refrigeration: Store leftovers in airtight container for up to 3 days.

  • Reheating: Bake at 180°C (350°F) until heated through; broil briefly to re-crisp fries.

  • Make-Ahead: Prep steak and veggies in advance; assemble and bake just before serving.

Nutrition Facts (per serving, 6 servings)

Calories: ~510 kcal | Carbs: 35g | Protein: 27g | Fat: 30g | Sodium: 890mg | Fiber: 3g

FAQs

Q: Can I make this without an oven-safe skillet?
A: Yes — cook steak and veggies in a regular pan, then transfer everything to a baking dish for layering and baking.

Q: Can I use a different cheese?
A: Absolutely — provolone is a more traditional Philly choice, and mozzarella gives extra stretch.

Q: How do I make it gluten-free?
A: Use certified GF frozen fries and check your cheese and seasonings.

Personal Story

I first made this for a game day gathering, thinking it would be a fun snack. It turned into the main event, with people hovering around the skillet until every last cheesy fry was gone. It’s indulgent, messy in the best way, and guaranteed to make you everyone’s favorite cook.

If you want, I can also create short, punchy captions for each cooking step so this post is ready for your blog’s step-by-step image section. Want me to prepare those next?

Garlic Butter Beef and Rice

A one-pan comfort classic — tender rice, savory beef, and a silky garlic butter cheese sauce come together for an easy, hearty dinner.

Servings: 4–6
Prep Time: 10 minutes
Cook Time: 30 minutes
Total Time: 40 minutes
Dietary Badges: Contains Dairy, Contains Gluten-Free Option (with GF broth)

Ingredients

Main Ingredients

  • Ground beef (450g)

  • Long-grain white rice, uncooked (200g)

  • Low-sodium beef broth (720ml)

  • Small onion, diced

  • Garlic cloves, minced

Dairy and Cheese

  • Butter, divided (45g total)

  • Sharp cheddar cheese, shredded (120g)

  • Parmesan cheese, freshly grated (50g)

  • Whole milk (120ml)

Seasoning and Garnish

  • Salt, to taste

  • Black pepper, to taste

  • Italian seasoning (1 tsp)

  • Fresh parsley, chopped (2 tbsp, optional garnish)

Instructions

  1. Sauté Onions: In a large skillet over medium heat, melt 15g butter. Add diced onion and cook 3–4 minutes until translucent.

  2. Brown Beef: Add ground beef and cook, breaking apart with a spoon, until browned. Drain excess fat if needed.

  3. Add Garlic: Stir in minced garlic; cook 1 minute until fragrant.

  4. Add Rice & Liquid: Stir in uncooked rice, beef broth, Italian seasoning, salt, and pepper. Mix well so rice is evenly coated.

  5. Simmer: Bring to a boil, then reduce heat to low, cover, and simmer 18–20 minutes until rice is tender and most liquid absorbed. Avoid lifting the lid too often.

  6. Make Cheese Sauce: While rice cooks, melt remaining 30g butter in a small saucepan over low heat. Add milk, cheddar, and Parmesan, stirring constantly until smooth.

  7. Combine: Pour cheese sauce into skillet with beef and rice; stir until creamy and fully combined.

  8. Finish & Serve: Cook uncovered 2–3 minutes for flavors to meld. Garnish with parsley and serve hot.

Notes:

  • For extra flavor, toast the uncooked rice in the skillet for 1–2 minutes before adding broth.

  • Add veggies like diced bell peppers, mushrooms, or peas for variety.

Brief Introduction

This garlic butter beef and rice is comfort food at its finest — one pan, simple steps, and flavors that hit all the right notes. The creamy cheese sauce elevates it from weeknight meal to irresistible family favorite.

Step-by-Step Cooking Guide

Building the Base

  1. Onion & Beef: Create a savory foundation with sautéed onions and browned beef.

  2. Garlic Boost: Add minced garlic for that warm, aromatic kick.

Cooking the Rice

  1. Simmer to Tender: Let rice absorb broth and seasonings for a flavorful, fluffy finish.

Cheese Sauce Magic

  1. Low & Slow: Melt butter, milk, cheddar, and Parmesan over low heat, whisking constantly until smooth.

Final Blend

  1. Creamy Finish: Stir the sauce into the beef-rice mix and serve while hot and melty.

Ingredient Details & Substitution Tips

  • Beef: Use lean beef for less grease; ground turkey or chicken works too.

  • Rice: Long-grain holds its shape best; jasmine adds a subtle floral note.

  • Cheddar & Parmesan: Freshly shredded melts smoother than pre-packaged.

  • Milk: Swap with half-and-half for richer sauce.

  • Italian Seasoning: Use fresh herbs for a brighter flavor.

Recipe Variations & Serving Suggestions

  • Veggie Boost: Stir in spinach or broccoli before adding cheese sauce.

  • Spicy Kick: Add red pepper flakes or diced jalapeños.

  • Serving Ideas: Serve with a simple side salad or garlic bread.

Storage & Make-Ahead Information

  • Refrigeration: Store in airtight container for up to 4 days.

  • Freezing: Freeze in portions up to 2 months; thaw before reheating.

  • Reheating: Microwave gently, stirring occasionally; add a splash of milk if needed.

  • Make-Ahead: Cook rice and beef mixture ahead; reheat with fresh cheese sauce.

Nutrition Facts (per serving, 6 servings)

Calories: ~430 kcal | Carbs: 32g | Protein: 22g | Fat: 24g | Sodium: 640mg

FAQs

Q: Can I use brown rice?
A: Yes, but increase broth to 900ml and simmer for 35–40 minutes.

Q: Can I skip the cheese sauce?
A: Yes — you’ll have a flavorful garlic butter beef and rice without the creamy element.

Q: How do I keep the sauce smooth?
A: Use low heat and constant stirring to prevent separation or graininess.

Personal Story

I first made this dish as a quick dinner after a busy workday. The cheesy garlic butter sauce was a last-minute addition — and it turned a simple beef and rice skillet into something that tasted like a hug in a bowl.

If you want, I can also create step-by-step photo captions so this is fully ready for the “visual guide” section of your blog posts. Would you like me to prepare those?

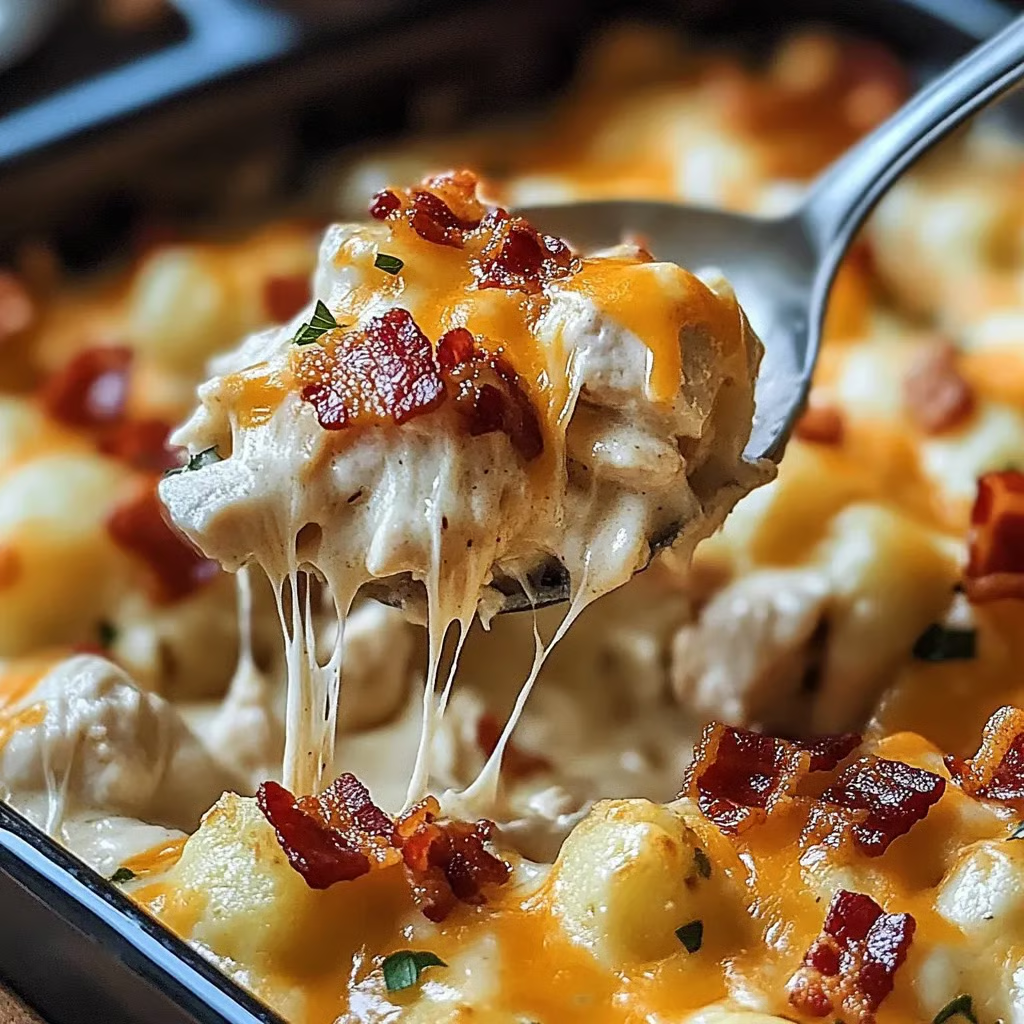
Chicken Bacon Crunch Casserole

Creamy, cheesy chicken and bacon casserole topped with golden, crispy tater tots — the perfect blend of comfort and crunch.

Servings: 8
Prep Time: 15 minutes
Cook Time: 40 minutes
Total Time: 55 minutes
Dietary Badges: Contains Dairy, Contains Gluten, Contains Meat

Ingredients

Casserole Base

  • Frozen tater tots (32 oz bag)

  • Sharp cheddar cheese, shredded

  • Ranch seasoning mix (1 packet)

  • Cream of chicken soup (1 can)

  • Sour cream

  • Bacon, cooked and crumbled (reserve 2 tbsp for garnish)

  • Cooked chicken, chopped or shredded

Fresh Garnish

  • Green onions, sliced

  • Reserved crumbled bacon

Instructions

  1. Preheat Oven: Set to 400°F (200°C). Grease a 9×13-inch baking dish.

  2. Mix Filling: In a large bowl, combine chicken, most of the bacon (reserve 2 tbsp for garnish), sour cream, cream of chicken soup, ranch mix, and shredded cheddar. Mix until fully combined.

  3. Assemble Casserole: Spread mixture evenly in the prepared baking dish. Arrange frozen tater tots in a single layer on top.

  4. Bake: Cook for about 40 minutes, until tater tots are golden and crispy and casserole is bubbling at the edges.

  5. Garnish & Serve: Sprinkle with reserved bacon and sliced green onions. Serve hot.

Notes:

  • Rotisserie chicken is a quick, flavorful shortcut.

  • Assemble ahead and refrigerate until baking, or freeze for up to 3 months.

Brief Introduction

This casserole is like a loaded baked potato in a dish — creamy chicken, smoky bacon, sharp cheddar, and crispy tater tots come together for the ultimate comfort food. It’s family-friendly, freezer-friendly, and weeknight-approved.

Step-by-Step Cooking Guide

Filling Prep

  1. Combine Base: Mix chicken, bacon, sour cream, cream soup, ranch seasoning, and cheddar until creamy and uniform.

Layering

  1. Spread & Top: Smooth mixture in baking dish, then neatly arrange tater tots on top for even crisping.

Baking & Serving

  1. Bake Until Golden: Watch for bubbling edges and crunchy, golden tater tots.

  2. Add Fresh Finish: Sprinkle with green onions and extra bacon right before serving.

Ingredient Details & Substitution Tips

  • Chicken: Rotisserie, baked, or leftover roasted chicken all work. Turkey is a great substitute.

  • Bacon: Thick-cut bacon gives bigger crunchy bits; turkey bacon for a lighter version.

  • Cheddar Cheese: Sharp cheddar for bold flavor; Colby Jack or mozzarella for a milder profile.

  • Tater Tots: Swap for seasoned potato wedges or hash brown patties for a twist.

Recipe Variations & Serving Suggestions

  • Spicy Kick: Add diced jalapeños or a pinch of cayenne to the filling.

  • Veggie Boost: Stir in broccoli florets or diced bell peppers.

  • Serving Ideas: Pair with a side salad or roasted vegetables for balance.

Storage & Make-Ahead Information

  • Refrigeration: Store leftovers in airtight container for up to 4 days.

  • Freezing: Freeze unbaked casserole up to 3 months; thaw before baking.

  • Reheating: Bake at 350°F covered with foil until heated through.

  • Make-Ahead: Assemble, cover, and refrigerate up to 24 hours before baking.

Nutrition Facts (per serving, 8 servings)

Calories: ~480 kcal | Carbs: 26g | Protein: 23g | Fat: 32g | Sodium: 950mg | Fiber: 2g

FAQs

Q: Can I use leftover turkey instead of chicken?
A: Yes — it works perfectly, especially after the holidays.

Q: Can I use Greek yogurt instead of sour cream?
A: Absolutely, for a lighter, tangier option.

Q: How do I keep the tater tots extra crispy?
A: Make sure they’re in a single layer and avoid overcrowding.

Personal Story

This casserole was born out of a craving for comfort food that still had texture and bite. The combination of creamy filling and crunchy tater tot topping hits every note — and the bacon-green onion garnish takes it over the top. It’s my go-to for potlucks and lazy Sunday dinners.

If you want, I can also create process photo captions so it’s completely ready for the “Hero Image & Step-by-Step Visual Guide” part of your outline. Would you like me to prepare those next?

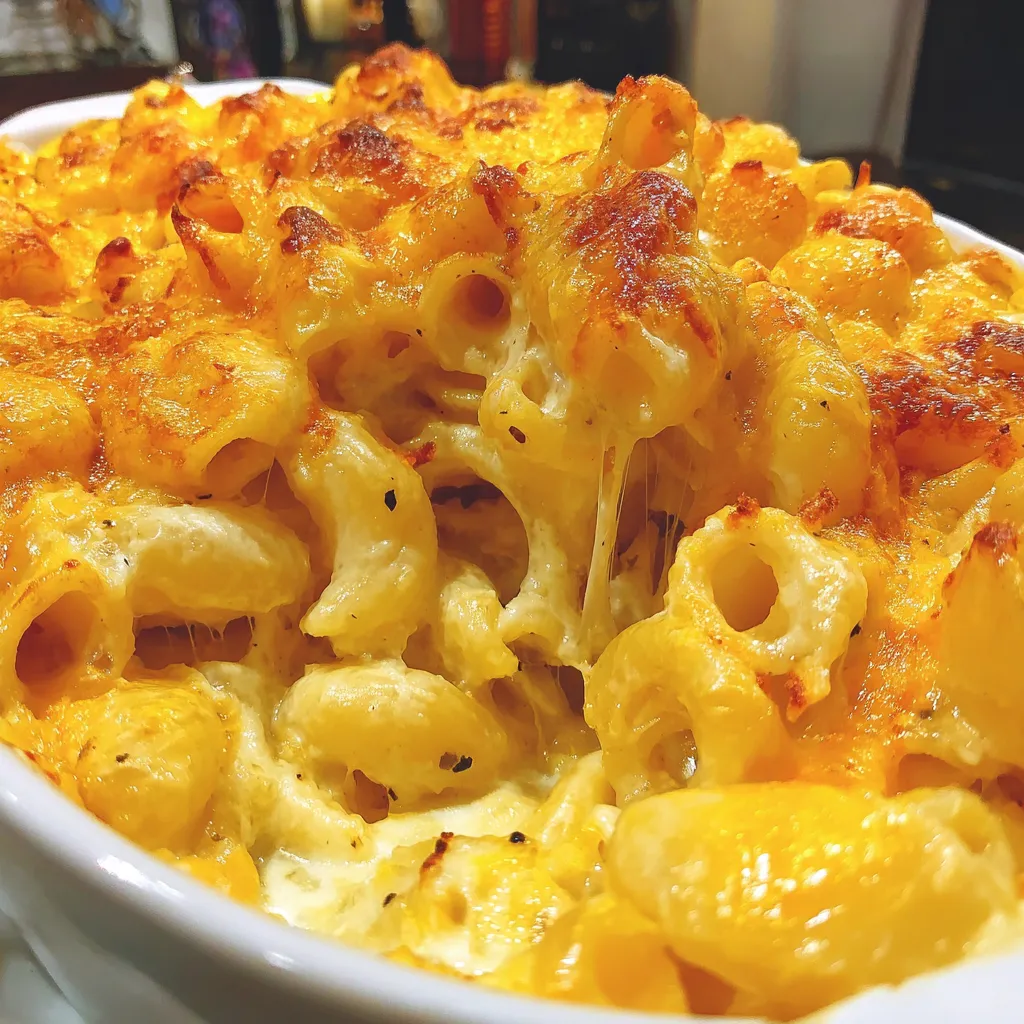
Southern Baked Macaroni and Cheese

Rich, creamy, and topped with a golden, crispy cheese crust — the ultimate soul food comfort dish.

Servings: 10–12
Prep Time: 25 minutes
Cook Time: 15 minutes
Broil Time: 5 minutes
Total Time: 45 minutes
Dietary Badges: Contains Dairy, Contains Gluten, Vegetarian-Friendly (no meat)

Ingredients

  • Pasta & Butter Base:

    • Pasta noodles (elbow or rotini)

    • Butter, room temperature (divided)

  • Cheese Sauce:

    • Garlic cloves, minced

    • All-purpose flour

    • Reserved pasta water

    • Heavy cream

    • Half and half

    • Shredded medium cheddar

    • Shredded Colby Jack

    • Shredded mozzarella

    • Shredded sharp cheddar

    • Shredded white cheddar

    • Whipped cream cheese

    • Onion powder

    • Paprika

    • Mustard powder

    • Salt & black pepper to taste

Instructions

  1. Prep Cheeses & Butter: Shred all cheeses. Reserve 1 cup each of medium cheddar, Colby Jack, and mozzarella for topping. Mince garlic and portion butter into 7 tablespoons.

  2. Cook Pasta: Boil pasta until slightly less than al dente. Reserve ½ cup pasta water before draining. Transfer to a greased 9×13-inch casserole dish and toss with 2 tablespoons butter.

  3. Make Cheese Sauce: In a large skillet, melt remaining 5 tablespoons butter over medium-high heat. Add garlic and sauté 1 minute. Whisk in flour, cooking until golden. Slowly whisk in reserved pasta water, heavy cream, and half and half until sauce thickens (about 4 minutes). Lower heat and add remaining shredded cheeses, one handful at a time, until melted. Stir in cream cheese, onion powder, paprika, mustard powder, salt, and pepper. Mix until smooth.

  4. Combine & Layer: Pour cheese sauce over pasta, toss to coat, then sprinkle reserved cheeses evenly on top.

  5. Bake: Bake at 425°F (220°C) for 10 minutes.

  6. Broil: Switch oven to broil and cook 5 minutes, until cheese topping is golden and crispy.

  7. Cool & Serve: Rest 3–5 minutes before serving.

Notes:

  • Freshly shredded cheese melts more smoothly than pre-shredded.

  • Slightly undercooking the pasta helps it hold texture during baking.

Brief Introduction

This Southern baked macaroni and cheese is all about indulgence — a velvety, multi-cheese sauce envelops tender pasta, topped with a bubbling crust of golden cheddar, Colby Jack, and mozzarella. It’s a side dish that steals the spotlight.

Step-by-Step Cooking Guide

Cheese Prep & Pasta Base

  1. Shred & Reserve: Grate all cheeses, setting aside the topping mix.

  2. Cook Pasta: Boil just shy of al dente for the perfect baked texture.

Cheese Sauce Perfection

  1. Build Roux: Melt butter, sauté garlic, and whisk in flour until golden.

  2. Creamy Blend: Add liquids gradually, whisk until thickened, then melt in cheeses and seasonings.

Baking & Crisping

  1. Bake for Fusion: Pasta and sauce meld together in the oven.

  2. Broil for Crust: The reserved cheese topping crisps beautifully under high heat.

Ingredient Details & Substitution Tips

  • Pasta: Elbows are classic; rotini or cavatappi hold sauce well.

  • Cheeses: Blend of cheddar, Colby Jack, mozzarella, sharp cheddar, and white cheddar gives depth.

  • Half and Half: Can use all milk for lighter sauce, or heavy cream for richer texture.

  • Cream Cheese: Adds extra creaminess; can be omitted for a slightly less rich sauce.

Recipe Variations & Serving Suggestions

  • Spicy Twist: Add diced jalapeños or a dash of cayenne to the sauce.

  • Crunchy Top: Sprinkle breadcrumbs mixed with butter over cheese before baking.

  • Serving Ideas: Serve as a side for BBQ meats, fried chicken, or holiday spreads.

Storage & Make-Ahead Information

  • Refrigeration: Store in airtight container up to 4 days.

  • Freezing: Freeze portions up to 2 months; thaw and reheat gently.

  • Reheating: Warm in oven at 325°F covered with foil to retain moisture.

  • Make-Ahead: Assemble up to 24 hours before baking; store covered in fridge.

Nutrition Facts (per serving, 12 servings)

Calories: ~420 kcal | Carbs: 29g | Protein: 16g | Fat: 27g | Sodium: 510mg

FAQs

Q: Can I make it without broiling?
A: Yes — bake 5–10 extra minutes for a golden crust.

Q: Can I use pre-shredded cheese?
A: You can, but it may not melt as smoothly due to anti-caking agents.

Q: Can I add meat?
A: Yes — cooked bacon, ham, or pulled chicken make it a main dish.

Personal Story

I first had Southern baked mac and cheese at a holiday dinner in Georgia, and I’ve been hooked ever since. After testing countless cheese blends, this one delivers the perfect creamy interior and crispy topping balance. It’s now my go-to for gatherings where I want guaranteed clean plates.

Do you want me to also prepare step-by-step photo captions for this one so it’s fully blog-ready with your “visual cooking guide” section? That would complete the structure from your outline.

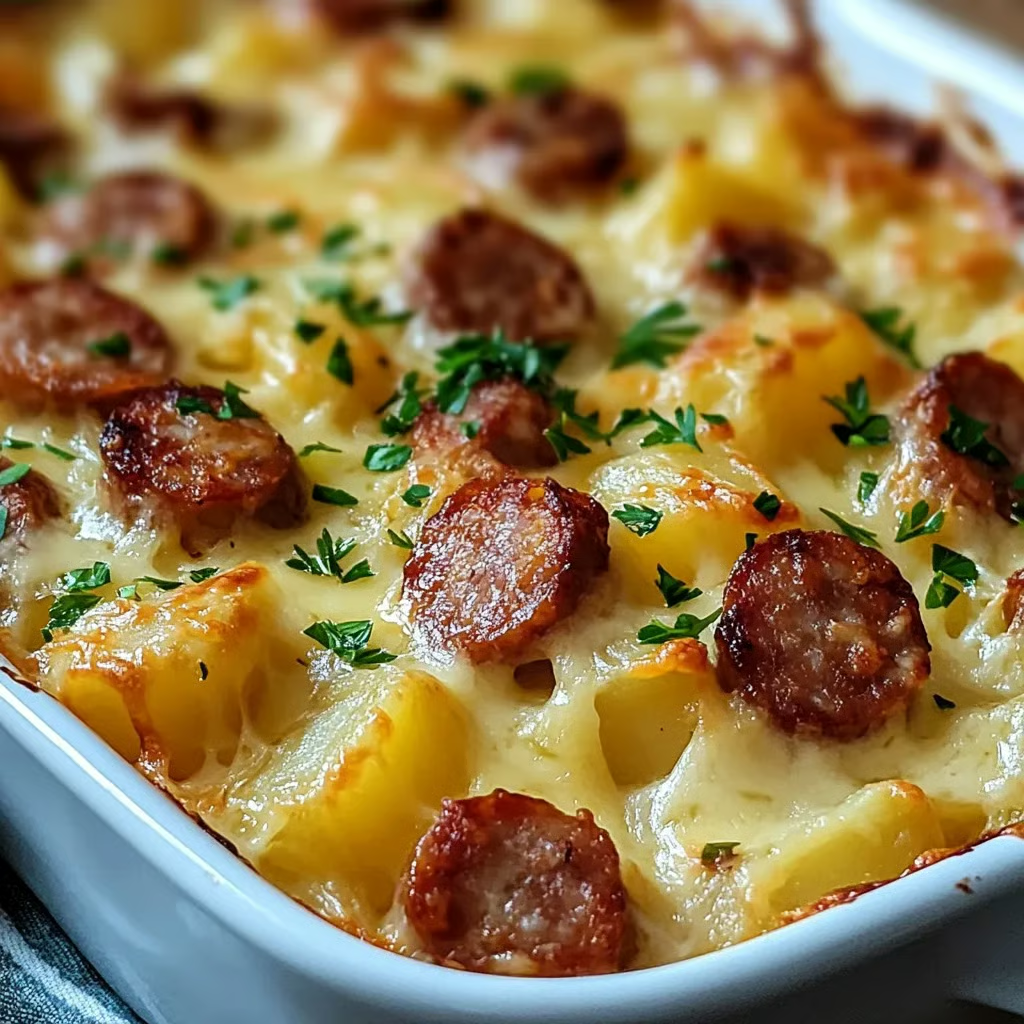
Cheesy Potato & Kielbasa Casserole

Thinly sliced potatoes layered with smoky kielbasa, onions, and cheddar, all baked in a creamy, seasoned sauce — the ultimate cozy bake for family dinners.

Servings: 6–8
Prep Time: 20 minutes
Cook Time: 55–60 minutes
Total Time: 1 hour 15–20 minutes
Dietary Badges: Contains Dairy, Contains Gluten, Contains Meat

Ingredients

Main Ingredients

  • Potatoes, peeled and thinly sliced

  • Kielbasa sausage, sliced into ¼-inch rounds

  • Onion, minced

  • Cheddar cheese, shredded

Creamy Sauce

  • Sour cream

  • Cream of chicken soup (10.5 oz can)

  • Melted butter

  • Garlic powder

  • Paprika

  • Salt

  • Black pepper

  • Fresh parsley, chopped (optional garnish)

Instructions

  1. Prep Oven & Dish: Preheat oven to 375°F (190°C). Grease a 9×13-inch baking dish.

  2. Mix Sauce: In a large bowl, whisk together sour cream, cream of chicken soup, melted butter, garlic powder, paprika, salt, and pepper until smooth.

  3. First Layer: Arrange half the potatoes in an even layer in the prepared dish. Top with half the kielbasa, half the onion, half the sauce, and 1 cup cheddar.

  4. Second Layer: Repeat layering with remaining potatoes, kielbasa, onion, sauce, and cheddar.

  5. Bake Covered: Cover with foil and bake for 40 minutes.

  6. Bake Uncovered: Remove foil and bake an additional 15–20 minutes, until cheese is bubbly and potatoes are tender.

  7. Finish & Serve: Garnish with parsley if desired. Serve hot.

Notes:

  • For a smokier flavor, use smoked kielbasa.

  • Bell peppers or mushrooms can be added between layers for extra flavor.

Brief Introduction

This hearty casserole layers tender potatoes, savory kielbasa, and plenty of cheese under a creamy, seasoned sauce. It’s easy to assemble, bakes to perfection, and works just as well for weeknight dinners as it does for potlucks.

Step-by-Step Cooking Guide

Sauce Prep

  1. Creamy Blend: Combine sour cream, cream of chicken soup, butter, and seasonings for a rich, flavorful sauce.

Layering the Casserole

  1. Base Layers: Half the potatoes, half the kielbasa, half the onion, sauce, and cheese.

  2. Repeat: Finish with the remaining ingredients for a full, even bake.

Baking & Finishing

  1. Cover & Bake: Keeps moisture in for tender potatoes.

  2. Uncover & Brown: Melts and browns the cheese for that perfect crust.

Ingredient Details & Substitution Tips

  • Kielbasa: Can substitute with smoked sausage, turkey sausage, or even chorizo for a spicy twist.

  • Cheddar Cheese: Sharp cheddar adds bold flavor; mozzarella or Colby Jack can be used for milder taste.

  • Cream of Chicken Soup: Cream of mushroom or celery works for different flavor profiles.

  • Potatoes: Russet or Yukon Gold are best for tenderness and flavor.

Recipe Variations & Serving Suggestions

  • Veggie Boost: Add layers of spinach, mushrooms, or roasted red peppers.

  • Spicy Kick: Add sliced jalapeños or a pinch of cayenne to the sauce.

  • Serving Ideas: Pair with a crisp green salad or crusty bread to round out the meal.

Storage & Make-Ahead Information

  • Refrigeration: Store in an airtight container for up to 4 days.

  • Freezing: Freeze baked or unbaked casserole for up to 2 months; thaw before reheating or baking.

  • Reheating: Warm in oven at 325°F covered with foil until heated through.

  • Make-Ahead: Assemble up to 24 hours ahead; refrigerate until ready to bake.

Nutrition Facts (per serving, 8 servings)

Calories: ~410 kcal | Carbs: 28g | Protein: 17g | Fat: 25g | Sodium: 1020mg | Fiber: 3g

FAQs

Q: Can I use precooked potatoes?
A: Yes — reduce covered baking time by about 15 minutes.

Q: How do I make this gluten-free?
A: Use gluten-free cream soup or make your own roux-based sauce with GF flour.

Q: Can I assemble and freeze before baking?
A: Absolutely — just thaw overnight before baking.

Personal Story

This casserole became a family favorite after I made it for a snowy weekend dinner. The smoky sausage, creamy sauce, and tender potatoes made it one of those “stick-to-your-ribs” meals that everyone asks for again.

If you want, I can also prepare step-by-step photo captions so this post is fully ready for your blog’s visual recipe card section. Would you like me to do that next?

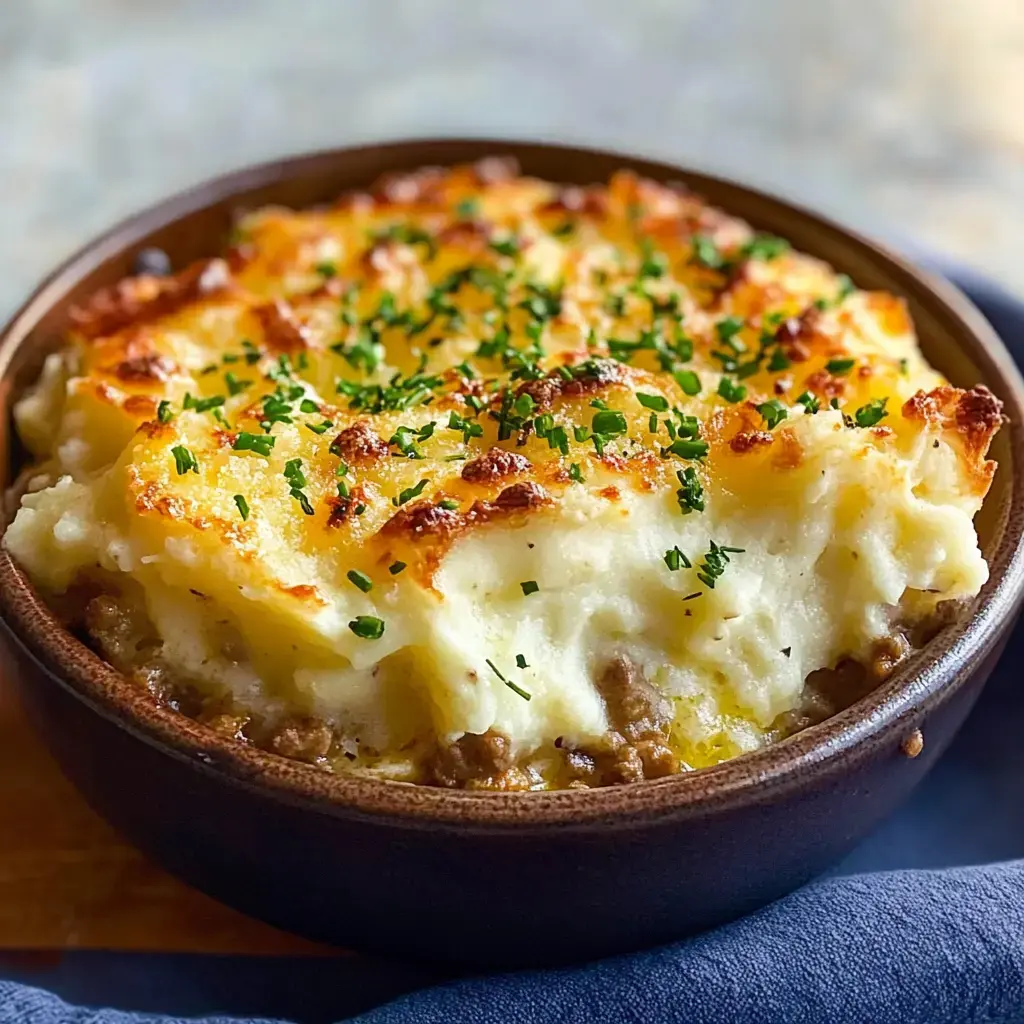
Cozy Comfort Classic (Shepherd’s Pie–Style Bake)

A rich, savory beef or lamb filling topped with buttery, cheesy mashed potatoes — the ultimate cold-weather comfort dish.

Servings: 6–8
Prep Time: 25 minutes
Cook Time: 55 minutes
Cooling Time: 15 minutes
Total Time: 1 hour 35 minutes
Dietary Badges: Contains Dairy, Contains Gluten, Contains Meat

Ingredients

Filling

  • Olive oil

  • Yellow onion, finely diced

  • Ground beef or lamb (lean, 90%)

  • Dried thyme

  • Crushed rosemary

  • Dried parsley

  • Salt

  • Ground black pepper

  • Garlic cloves, finely chopped

  • Worcestershire sauce

  • Plain flour

  • Tomato paste

  • Beef broth

  • Frozen peas, carrots, and corn

Mashed Potato Topping

  • Russet potatoes, peeled and cut into chunks

  • Unsalted butter

  • Half-and-half cream

  • Garlic powder

  • Extra salt (for mash)

  • Additional black pepper

  • Shredded parmesan cheese

Instructions

  1. Cook Onions: Heat olive oil in a large skillet over medium-high heat. Add onions; sauté 5 minutes.

  2. Brown Meat: Add ground beef or lamb, thyme, rosemary, parsley, salt, and pepper. Cook 6–8 minutes until browned.

  3. Add Aromatics & Sauce: Stir in garlic and Worcestershire sauce; cook 1 minute.

  4. Thicken & Flavor: Sprinkle in flour, then stir in tomato paste. Mix thoroughly.

  5. Simmer: Pour in beef broth, add peas, carrots, and corn. Simmer 5 minutes.

  6. Boil Potatoes: In a large pot, boil potato chunks 10–15 minutes until tender.

  7. Mash Potatoes: Drain, let steam 1 minute. Add butter, cream, garlic powder, extra salt, and pepper. Mash until smooth. Stir in parmesan until melted.

  8. Assemble: Preheat oven to 400°F (200°C). Spread meat mixture in a 9×9-inch baking pan. Top evenly with mashed potatoes.

  9. Bake: Cook 25–30 minutes until top is golden.

  10. Cool & Serve: Let rest 15 minutes before slicing.

Notes:

  • Lamb gives a more traditional shepherd’s pie flavor; beef makes it a cottage pie.

  • Can be prepped 1–2 days ahead or frozen for later.

Brief Introduction

This “Cozy Comfort Classic” is a rustic, heartwarming bake with a savory meat-and-vegetable base and a creamy, cheesy mashed potato crown. It’s perfect for Sunday dinners, holidays, or freezing ahead for busy weeks.

Step-by-Step Cooking Guide

Making the Filling

  1. Sauté & Brown: Build flavor by cooking onions first, then browning the meat with herbs.

  2. Layer Flavor: Garlic, Worcestershire, tomato paste, and flour add richness and thickness.

  3. Simmer: Let vegetables and broth mingle with the meat for a tender, flavorful base.

Mashed Potato Perfection

  1. Boil & Mash: Cook potatoes until tender, mash with butter, cream, and seasoning.

  2. Cheesy Finish: Parmesan melts into the mash for extra depth.

Assembly & Baking

  1. Layer & Bake: Spread filling in the dish, cover with mash, and bake until golden brown.

Ingredient Details & Substitution Tips

  • Meat Choice: Beef is milder; lamb adds a richer, traditional note.

  • Potatoes: Russets are ideal for fluffy mash; Yukon Golds add creaminess.

  • Parmesan Cheese: Optional but adds a savory, nutty finish.

  • Vegetables: Swap frozen mix for fresh chopped carrots, peas, and corn if desired.

  • Broth: Chicken or vegetable broth can be used in a pinch.

Recipe Variations & Serving Suggestions

  • Cheddar-Topped: Swap parmesan for sharp cheddar for a bolder topping.

  • Garlic Lovers: Roast garlic cloves and mash into the potatoes.

  • Serving Ideas: Best with crusty bread and a green salad.

Storage & Make-Ahead Information

  • Refrigeration: Store covered for up to 4 days.

  • Freezing: Freeze assembled (unbaked) or baked dish for up to 3 months.

  • Reheating: Bake at 350°F covered with foil until heated through.

  • Make-Ahead: Assemble up to 2 days in advance; refrigerate until baking.

Nutrition Facts (per serving, 8 servings)

Calories: ~410 kcal | Carbs: 28g | Protein: 19g | Fat: 25g | Fiber: 4g | Sodium: 670mg

FAQs

Q: Can I use sweet potatoes instead?
A: Yes — they add a sweeter, earthier flavor. Reduce cream slightly for a firmer topping.

Q: How do I keep the top golden without overbaking?
A: Broil for the last 2–3 minutes, watching closely.

Q: Can I make this gluten-free?
A: Yes — replace flour with cornstarch slurry and use GF Worcestershire sauce.

Personal Story

This dish started as my way to combine the comfort of mashed potatoes with the heartiness of a meat-and-veg stew. It became a household staple — a recipe I turn to when the weather cools or when someone needs a warm, home-cooked hug.

If you’d like, I can create process photo captions so your blog post matches the visual, step-by-step format in your outline. That would complete the “Hero Image & Process Guide” section. Would you like me to prepare them?