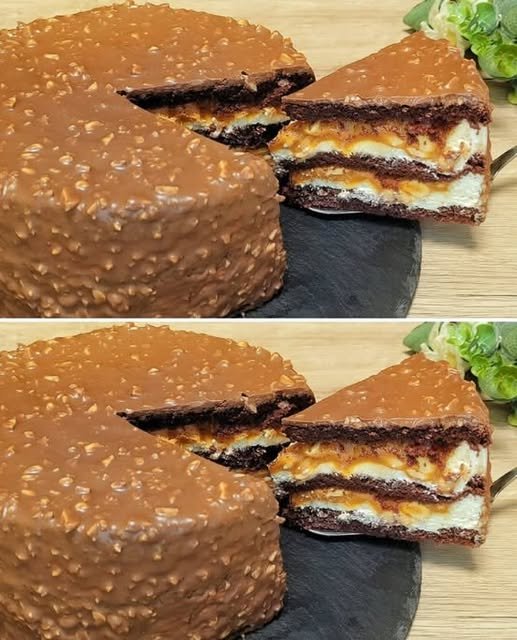
Chocolate Caramel Peanut Layer Cake

Chocolate Caramel Peanut Layer Cake

Soft • Creamy • Richly Flavored

This layered chocolate cake features tender cocoa sponge, a smooth caramel-peanut cream, and a glossy chocolate coating. The combination creates a balanced dessert with contrasting textures and deep, comforting flavors.


Ingredients

Chocolate Sponge Layers

  • 3 large eggs, at room temperature

  • 80 g granulated sugar (about ⅓ cup + 1 tbsp)

  • A small pinch of salt

  • 30 ml vegetable oil (2 tablespoons)

  • 50 ml milk (about 3½ tablespoons)

  • 80 g all-purpose flour (about ⅔ cup, sifted)

  • 20 g cocoa powder (about 2 tablespoons, sifted)

  • 1 teaspoon baking powder


Caramel Peanut Cream

  • 220 g granulated sugar (about 1 cup + 2 tbsp)

  • 100 g butter, cut into pieces

  • 160 g cream (30–36% fat, warmed slightly)

  • ½ teaspoon salt

  • 150 g roasted peanuts, roughly chopped


Optional Chocolate Coating (Recommended for Finish)

  • 200 g milk or semi-sweet chocolate

  • 1 tablespoon vegetable oil or butter

  • Optional: 2–3 tablespoons finely chopped peanuts


Step-by-Step Instructions


1. Prepare the Chocolate Sponge

Preheat & Prepare

  • Heat the oven to 170°C (340°F)

  • Line a 20–22 cm (8–9 inch) round pan with parchment paper

  • Lightly grease the sides


Mix the Batter

  • In a bowl, whisk the eggs, sugar, and salt for 3–4 minutes until pale and slightly fluffy

  • Add the oil and milk, whisking gently until smooth

In a separate bowl:

  • Combine flour, cocoa powder, and baking powder

  • Sift the dry ingredients into the egg mixture

  • Fold gently until just combined and smooth


Bake

  • Pour batter into the prepared pan

  • Smooth the top

  • Bake for 20–25 minutes, until the sponge springs back lightly when touched

  • Let cool completely, then slice horizontally into 2 or 3 even layers


2. Prepare the Caramel Peanut Cream

Make the Caramel

  • Place the sugar in a saucepan over medium heat

  • Allow it to melt gradually, swirling the pan gently until amber in color

Finish the Cream

  • Add the butter and stir until fully melted

  • Slowly pour in the warm cream, stirring continuously

  • Add the salt

  • Cook for 2–3 minutes until smooth and slightly thick

  • Remove from heat and stir in the roasted peanuts

Allow the caramel to cool until spreadable.


3. Assemble the Cake

  • Place one sponge layer on a serving plate

  • Spread an even layer of caramel peanut cream

  • Repeat with remaining layers

  • Lightly press to level the cake

  • Chill for 20–30 minutes to help it set


4. Add the Chocolate Coating (Optional)

  • Melt the chocolate and oil gently until smooth

  • Pour over the chilled cake

  • Smooth the sides and top

  • Sprinkle chopped peanuts if desired

  • Chill until the coating sets


5. Serve

  • Slice with a warm knife for clean layers

  • Serve slightly chilled or at room temperature

  • Enjoy with tea, coffee, or as a special dessert


Helpful Notes

  • Smooth Layers: Chill between steps for neat assembly

  • Flavor Balance: Salt enhances the caramel and chocolate beautifully

  • Storage: Keeps well refrigerated for up to 3 days

  • Texture Tip: Let the cake rest 10 minutes before slicing
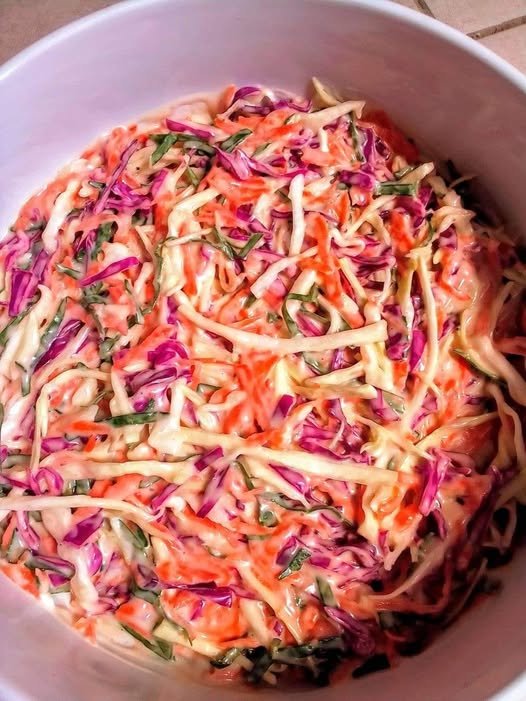
Fresh & Vibrant Coleslaw (No Added Sweeteners)

Fresh & Vibrant Coleslaw (No Added Sweeteners)

Crisp • Creamy • Refreshing

This colorful coleslaw is made with fresh vegetables and a smooth, well-balanced dressing. The natural flavors of the ingredients shine, making it a wonderful side dish for everyday meals or gatherings.


Ingredients

Vegetable Base

  • ½ small green cabbage, finely shredded

  • ½ small red cabbage, finely shredded

  • 2 large carrots, peeled and grated

  • ¼ cup fresh parsley or cilantro, finely chopped

  • Optional: 2 green onions, thinly sliced


Creamy Dressing

  • ½ cup mayonnaise (avocado-oil or olive-oil based if preferred)

  • 2 tablespoons apple cider vinegar or fresh lemon juice

  • 1 tablespoon Dijon mustard

  • ½ teaspoon celery seed

  • ¼ teaspoon sea salt, or to taste

  • ¼ teaspoon freshly ground black pepper, or to taste


Step-by-Step Instructions

1. Prepare the Vegetables

  • Remove any tough outer leaves from the cabbages

  • Slice the cabbages thinly using a sharp knife or food processor

  • Grate the carrots finely

  • Chop the fresh herbs

  • Add all prepared vegetables to a large mixing bowl


2. Make the Dressing

  • In a small bowl, add the mayonnaise, vinegar or lemon juice, Dijon mustard, celery seed, salt, and pepper

  • Whisk until the dressing becomes smooth and well blended


3. Combine

  • Pour the dressing over the vegetables

  • Use two large spoons or tongs to gently toss until everything is evenly coated

  • Take care to keep the vegetables light and crisp


4. Rest for Best Flavor

  • Cover the bowl and place it in the refrigerator for 30–60 minutes

  • This resting time allows the vegetables to soften slightly and the flavors to blend naturally


5. Serve

  • Give the coleslaw a gentle toss before serving

  • Adjust seasoning if needed

  • Serve chilled as a refreshing side dish


Helpful Notes

  • Texture Tip: Finely shredded cabbage creates a smoother, more balanced bite

  • Flavor Balance: The acidity brightens the dressing while keeping it light and refreshing

  • Make-Ahead Friendly: This coleslaw can be prepared a few hours in advance and stays fresh and crisp


Serving Suggestions

  • Pair with grilled dishes, sandwiches, or wraps

  • Serve alongside roasted vegetables or baked meals

  • Enjoy as a fresh addition to everyday lunches

Classic Soft Bread Rolls (Pide-Style)

Classic Soft Bread Rolls (Pide-Style)

Light • Soft • Beautifully Layered

These bread rolls are wonderfully soft with delicate layers and a tender crumb. They are perfect for breakfast, alongside soups, or served warm at the table for any meal.


Ingredients

Liquid Base

  • 1½ cups (300 ml) warm water
    (Comfortably warm to the touch, not hot)

  • 1 tea glass vegetable oil (about 90 g / 100 ml)

  • 1 tea glass plain yogurt (about 100 ml, room temperature)

Dry Ingredients

  • 1 packet active dry yeast (7 g or 2¼ teaspoons)

  • 1 tablespoon granulated sugar

  • 1 teaspoon salt

  • 4½–5 cups all-purpose flour, added gradually

For Layering & Finishing

  • 50 g butter, melted (for brushing between layers)

  • 1 egg yolk (for brushing the tops)


Step-by-Step Instructions

1. Prepare the Yeast Mixture

  • In a large mixing bowl, add the warm water, sugar, and yeast

  • Stir gently until combined

  • Let the mixture rest for 5–10 minutes until it becomes foamy and active

This step ensures the dough rises beautifully.


2. Combine the Dough Ingredients

  • Add the vegetable oil and yogurt to the yeast mixture

  • Whisk until smooth and well blended

  • Gradually add flour and salt, mixing with a spoon or spatula

  • Continue until a soft dough forms


3. Knead and First Rise

  • Transfer the dough to a lightly floured surface

  • Knead gently for 8–10 minutes until smooth, elastic, and soft

  • Place the dough in a lightly oiled bowl

  • Cover with a clean cloth

  • Let it rest in a warm place for about 1 hour, or until it has expanded noticeably


4. Form the Layers

  • Gently press the dough to release excess air

  • Divide it into 4 equal portions

For each portion:

  • Roll into a thin rectangle

  • Brush evenly with melted butter

Once all pieces are brushed:

  • Stack them neatly on top of each other

  • Roll the stack into a firm log, starting from the long side


5. Shape the Rolls

  • Using a sharp knife or dough scraper, cut the log into triangle shapes by slicing in a gentle zig-zag pattern

  • This shaping helps create the beautiful layered texture once baked


6. Rest and Prepare for Baking

  • Place the shaped rolls on a baking tray lined with parchment paper

  • Leave a little space between each piece

  • Cover lightly and allow them to rest for 20 minutes

Meanwhile:

  • Preheat the oven to 190°C (375°F)


7. Bake to a Golden Finish

  • Brush the tops of the rolls with egg yolk for a glossy, golden surface

  • Bake for 20–25 minutes, until evenly golden and beautifully risen

The rolls should feel light and sound crisp on the outside while remaining soft inside.


Serving Suggestions

  • Serve warm with butter, honey, or jam

  • Pair with cheese, eggs, or soup

  • Excellent for sandwiches or as a dinner side


Helpful Tips

  • Yogurt Temperature: Use room-temperature yogurt to keep the dough comfortable for rising

  • Flour Amount: Add flour gradually; the dough should feel soft and slightly elastic

  • Extra Flavor: Sprinkle sesame or nigella seeds on top before baking if desired

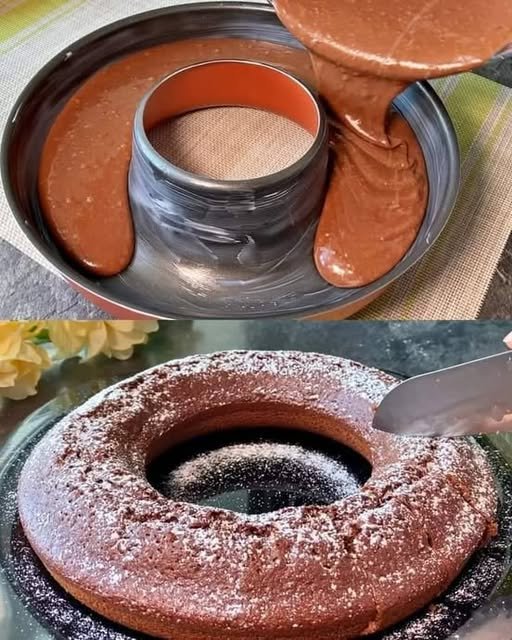
Simple & Moist 5-Minute Chocolate Cake

Simple & Moist 5-Minute Chocolate Cake

Soft • Fluffy • Comforting Homemade Cake

This easy chocolate cake comes together quickly using everyday ingredients. It bakes into a tender, moist sponge with a rich cocoa taste and a smooth crumb, making it ideal for casual gatherings or a relaxed homemade treat.


Ingredients

Cake Batter

  • 2 large eggs, at room temperature

  • 160 g granulated sugar (about ¾ cup)

  • 10 g vanilla sugar (or 1 teaspoon pure vanilla extract)

  • 2 tablespoons unsweetened cocoa powder

  • 160 ml milk (⅔ cup)

  • 100 ml vegetable oil (about 7 tablespoons; any neutral oil works)

  • A small pinch of salt

  • 170 g all-purpose flour (about 1⅓ cups, sifted)

  • 1 teaspoon baking powder

Optional Add-Ins & Finish

  • Chocolate chips or chunks (for extra texture)

  • Powdered sugar for a light decorative dusting


Step-by-Step Instructions

1. Prepare the Oven and Baking Dish

  • Heat your oven to 180°C (360°F)

  • Lightly coat a 24 cm (9–10 inch) round, casserole, or bundt pan with oil or butter

  • If desired, lightly dust with flour and tap out the excess to help with easy release


2. Combine the Eggs and Sugar

  • In a large mixing bowl, add the eggs, granulated sugar, and vanilla sugar

  • Whisk for 1–2 minutes until the mixture becomes slightly lighter in color and looks smooth and glossy

    • This step helps create a soft, airy texture


3. Add the Liquid Ingredients

  • Pour in the milk and vegetable oil

  • Add the pinch of salt

  • Whisk gently until everything is fully blended and uniform


4. Incorporate the Dry Ingredients

  • Place a sieve over the bowl and add:

    • Flour

    • Cocoa powder

    • Baking powder

  • Sift directly into the wet mixture

  • Whisk gently just until the batter is smooth and lump-free

    • Avoid over-mixing to keep the cake tender

If using chocolate chips, fold them in gently at this stage.


5. Bake the Cake

  • Pour the batter evenly into the prepared baking dish

  • Smooth the top lightly with a spatula

  • Place in the center of the oven

  • Bake for 38–42 minutes

Doneness Check:
Insert a toothpick into the center. It should come out clean or with a few soft crumbs.


6. Cool and Finish

  • Remove from the oven and let the cake rest in the pan for 10 minutes

  • Carefully turn it out onto a serving plate or cooling rack

  • Once completely cooled, dust lightly with powdered sugar if desired


Serving Suggestions

  • Enjoy as is with tea or coffee

  • Serve with fresh fruit

  • Pair with yogurt, cream, or a light dessert topping for special occasions


Helpful Tips

  • Extra Moist Texture: Replace 2 tablespoons of milk with yogurt

  • Flavor Boost: Add a pinch of cinnamon or instant coffee powder

  • Smaller Pan: If using a loaf pan, bake slightly longer and check near the end

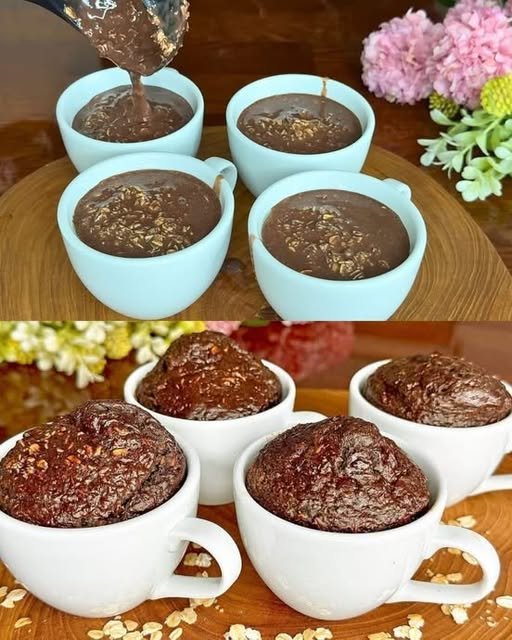
Healthy Chocolate Lava Baked Oats

Healthy Chocolate Lava Baked Oats

Naturally Sweet • Wholesome • Comforting
Serves: 2 generous portions (easily doubled)

This recipe turns simple pantry staples into a warm, chocolatey breakfast or dessert with a naturally soft center. It’s filling, balanced, and made with everyday ingredients.


Ingredients

Oat Base

  • 1 cup rolled oats (old-fashioned oats for best texture)

  • 1 medium ripe banana (naturally sweet and creamy)

  • ½ cup milk of choice (almond, oat, soy, or dairy)

  • 2 tablespoons unsweetened cocoa powder

  • 1–2 tablespoons natural liquid sweetener (maple syrup or honey, to taste)

  • 1 teaspoon baking powder

  • ½ teaspoon pure vanilla extract

  • A small pinch of sea salt (balances the chocolate flavor)

Soft Chocolate Center (Optional but Recommended)

  • 2 small pieces dark chocolate (70% cocoa or higher)
    or

  • 1 tablespoon dark chocolate chips


Step-by-Step Instructions

1. Prepare the Oven

  • Heat your oven to 180°C (350°F)

  • Lightly coat two oven-safe ramekins or ceramic mugs with a little oil or butter to prevent sticking

  • Place them on a baking tray for easy handling


2. Blend the Batter

Add the following to a blender:

  • Rolled oats

  • Banana

  • Milk

  • Cocoa powder

  • Natural sweetener

  • Baking powder

  • Vanilla extract

  • Sea salt

Blend for 30–45 seconds until the mixture is:

  • Completely smooth

  • Thick but pourable

  • Similar to cake or pancake batter

If the batter seems too thick, add 1–2 tablespoons of milk.


3. Fill the Cups

  • Pour the batter into the prepared mugs

  • Fill each about ¾ full to allow gentle rising


4. Add the Chocolate Center

  • Gently press one piece of dark chocolate into the center of each mug

  • Make sure it is fully covered with batter so it stays soft inside


5. Bake

  • Place the tray in the oven

  • Bake for 18–25 minutes, depending on your preferred texture:

    • 18–20 minutes: softer, richer texture

    • 22–25 minutes: more set and cake-like


6. Rest & Enjoy

  • Remove from the oven

  • Let sit for 5 minutes to settle

  • Enjoy warm, straight from the mug or turned out onto a plate


Optional Toppings (Wholesome Add-Ons)

  • Fresh berries or sliced banana

  • A spoon of yogurt or coconut yogurt

  • Chopped nuts or seeds

  • Light drizzle of nut butter


Helpful Notes

Air Fryer Method

  • Cook at 160°C (320°F) for 12–15 minutes

  • Check at 12 minutes and adjust as needed

No Blender Option

  • Use 1 cup oat flour instead of whole oats

  • Mash the banana very smoothly with a fork

  • Whisk all ingredients until well combined

Diet-Friendly

  • Naturally sweetened

  • Made with whole grains

  • Easily adaptable for dairy-free or gluten-free needs (use certified oats)

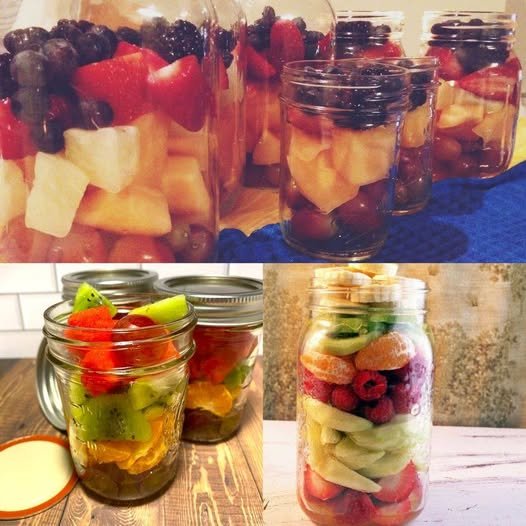
🍓 Fresh Fruit Mason Jar Prep

🍓 Fresh Fruit Mason Jar Prep

A simple, effective way to keep your berries and sliced fruits crisp and fresh for up to two weeks without them getting mushy.

  • Prep time: 15 minutes

  • Storage: Up to 10–14 days in the refrigerator

The Method

  1. The Vinegar Soak (Optional but Recommended): To kill any mold spores on berries, soak them in a mixture of 3 cups water and 1 cup white vinegar for 5 minutes. Rinse thoroughly with cold water.

  2. Dry Completely: This is the most important step! Lay your fruit out on a clean kitchen towel or paper towels. They must be 100% dry before going into the jars. Any moisture trapped inside will cause spoilage.

  3. Jar Selection: Use clean, dry glass Mason jars with tight-fitting lids. Glass provides a better seal and stays colder than plastic.

  4. Layering: * Place firmer fruits (like grapes, melon, or pineapple) at the bottom.

    • Place delicate fruits (like raspberries, strawberries, or kiwi) toward the top.

  5. Seal Tight: Screw the lids on firmly. The airtight environment in the glass jar significantly slows down the ripening and spoiling process.


💡 Why You’ll Love This

  • Visibility: You are more likely to eat the fruit when you can see it beautifully displayed in the fridge!

  • Freshness: Glass jars keep berries fresh far longer than the plastic ventilated containers they come in from the store.

  • Portion Control: Perfect for grabbing on the way to work or for kids to have a healthy snack ready to go.


Tips for Specific Fruits

  • Apples & Bananas: If you are prepping sliced apples or bananas in jars, toss them in a little lemon juice first to prevent browning.

  • Soft Berries: For raspberries and blackberries, place a small piece of paper towel at the bottom of the jar to absorb any tiny amounts of residual moisture.