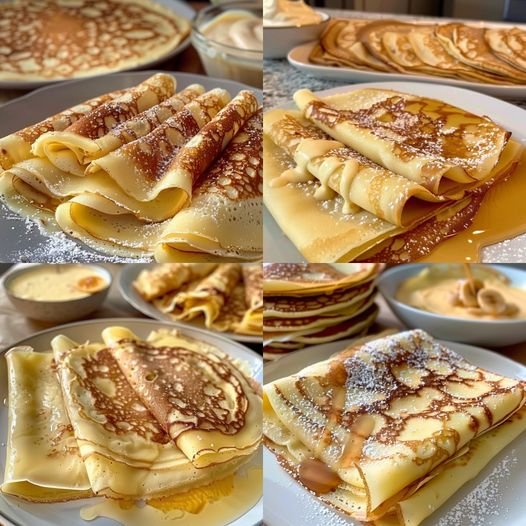
Classic Easy Crêpes

Classic Easy Crêpes

Thin, tender crêpes suitable for both sweet and savory fillings

Yield

Makes approximately 10–12 crêpes (22–24 cm / 9–10 inch)

Cooking Temperature

Medium heat


Ingredients

  • 1 cup (125 g) all-purpose flour

  • 2 large eggs, at room temperature

  • ½ cup (120 ml) whole milk

  • ½ cup (120 ml) water

  • 2 tablespoons unsalted butter, melted and cooled

  • ¼ teaspoon salt

Optional (for sweet crêpes)

  • 1 tablespoon granulated sugar

  • 1 teaspoon vanilla extract


Instructions


1. Prepare the Batter

  1. Place the flour into a large mixing bowl.

  2. Add the eggs and whisk until a thick, smooth mixture forms. This step helps prevent lumps later.

  3. Gradually pour in the milk and water while whisking continuously. Continue mixing until the batter becomes smooth and fluid.

  4. Add the salt and melted butter. If preparing sweet crêpes, also add the sugar and vanilla extract. Whisk until fully combined.

  5. The finished batter should have the consistency of light cream and pour easily.

  6. Cover the bowl and allow the batter to rest in the refrigerator for 30 minutes. This resting period improves texture and results in softer crêpes.


2. Cook the Crêpes

  1. Heat a non-stick pan or crêpe pan over medium heat.

  2. Lightly coat the surface with a small amount of butter or neutral oil, wiping away any excess.

  3. Pour approximately ¼ cup of batter into the center of the pan.

  4. Immediately lift and rotate the pan so the batter spreads evenly into a thin layer covering the entire surface.

  5. Cook for 1–2 minutes, until the underside is lightly golden and the edges begin to loosen from the pan.

  6. Gently turn the crêpe using a spatula and cook the second side for 30–45 seconds, just until set.

  7. Transfer the cooked crêpe to a plate and repeat with the remaining batter, lightly greasing the pan as needed.


3. Serving Suggestions

Sweet Fillings

  • Fresh berries or sliced fruit

  • Chocolate or hazelnut spread

  • Lemon juice with a light sprinkle of sugar

  • Whipped cream or custard

Savory Fillings

  • Ham and cheese

  • Sautéed mushrooms

  • Spinach with cream or cheese

  • Eggs and herbs

Finishing

  • Dust lightly with powdered sugar

  • Serve with honey, syrup, or fruit sauce


Storage

  • Cooked crêpes can be stacked, covered, and refrigerated for up to 2 days

  • Reheat gently in a dry pan before serving
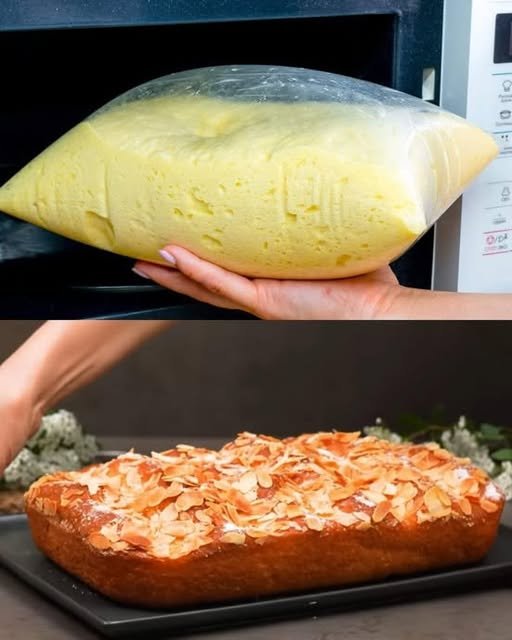
Apricot Custard Puff Cake

Apricot Custard Puff Cake

A layered pastry dessert with flaky dough, bright apricot fruit, and smooth vanilla custard

Yield

1 cake (20–22 cm / 8–9 inch)
Serves 8–10

Oven Temperature

180°C (350°F), conventional oven


Ingredients

Quick Puff-Style Yeasted Pastry

  • 250 g all-purpose flour

  • 150 g cold unsalted butter, cut into small cubes or coarsely grated

  • 100 ml milk, lukewarm (not hot)

  • 25 g granulated sugar

  • 4 g instant yeast

  • 1 large egg (room temperature)

  • 10 g vanilla sugar (or 1 teaspoon vanilla extract)

  • 20 ml melted butter (cooled)


Apricot Layer

  • 300 g apricot jam or thick apricot compote

  • Optional: 1–2 teaspoons fresh lemon juice (for balance)


Vanilla Custard Cream

  • 400 ml whole milk

  • 2 large egg yolks

  • 80 g granulated sugar

  • 30 g cornstarch

  • 50 g unsalted butter, softened


Decoration

  • 50 g sliced almonds

  • Powdered sugar, for dusting


Instructions


1. Prepare the Dough

  1. In a small bowl, combine the lukewarm milk, sugar, and instant yeast. Stir gently and let stand for 5 minutes until slightly foamy.

  2. Add the egg, vanilla sugar, and melted butter to the yeast mixture. Whisk until smooth.

  3. In a large mixing bowl, add the flour and cold butter. Using your fingertips or a pastry cutter, gently combine until the mixture resembles coarse crumbs.

    • Important: The butter pieces should remain visible. This creates flakiness.

  4. Pour the liquid ingredients into the flour mixture. Mix just until a soft dough forms.

    • Do not knead excessively.

  5. Shape the dough into a flat disc, cover with a clean cloth, and allow it to rest in a warm, draft-free place for 30 minutes, until slightly puffed.


2. Shape and Bake the Pastry Layers

  1. Divide the rested dough into two equal portions.

  2. Roll each portion into a circle approximately 20–22 cm (8–9 inches) in diameter.

  3. Place both circles on parchment-lined baking trays.

  4. Lightly score the top pastry circle into wedges using a sharp knife (do not cut all the way through). This will help with slicing after assembly.

  5. Bake both layers at 180°C (350°F) for 15–20 minutes, until lightly golden and fully baked.

  6. Remove from the oven and allow to cool completely.


3. Prepare the Custard Cream

  1. In a bowl, whisk the egg yolks, sugar, and cornstarch with 3–4 tablespoons of the milk until smooth and lump-free.

  2. Heat the remaining milk in a saucepan over medium heat until hot but not boiling.

  3. Slowly pour the hot milk into the egg mixture while whisking continuously.

  4. Return the mixture to the saucepan. Cook over medium heat, stirring constantly, until thick and smooth.

  5. Remove from heat and immediately stir in the butter until fully incorporated.

  6. Transfer the custard to a bowl, cover the surface directly with parchment or food-safe wrap to prevent a skin from forming, and allow to cool completely.


4. Assemble the Cake

  1. Place the first pastry layer on a serving plate. Position a cake ring or springform ring around it.

  2. Spread the apricot jam evenly over the pastry base.

  3. Spoon the cooled custard over the apricot layer and smooth the surface.

  4. Carefully place the second pastry layer (scored side up) on top.

  5. Refrigerate for at least 4 hours, preferably overnight, to allow the custard to fully set.


5. Final Decoration

  1. Remove the cake ring carefully.

  2. Gently press almond slices onto the sides of the cake.

  3. Dust the top generously with powdered sugar.

  4. Optional: add a small spoon of apricot jam in the center for a polished finish.


Storage

  • Keep refrigerated

  • Best enjoyed within 48 hours

🍳 The Perfect “Doctor-Approved” Morning Scramble

🍳 The Perfect “Doctor-Approved” Morning Scramble

This recipe focuses on maintaining the integrity of the nutrients (like choline and lutein) by not overcooking the eggs while adding healthy fats and antioxidants.

Prep time: 5 mins | Cook time: 5 mins | Yield: 1 serving

Ingredients

  • The Base:

    • 2 to 3 large organic, pasture-raised eggs (higher in Vitamin D and Omega-3s)

    • 1 tbsp grass-fed butter or avocado oil

  • The “Booster” Add-ins:

    • 1/4 cup fresh spinach (for extra Vitamin K and Folate)

    • 1 tbsp nutritional yeast (optional, for a B-vitamin and cheesy flavor boost)

    • A pinch of sea salt and cracked black pepper

    • 1/4 avocado (served on the side for healthy monounsaturated fats)

Instructions

  1. Whisk with Intention: Crack the eggs into a bowl. Whisk vigorously for about 30 seconds. This incorporates air, making them fluffier without needing to add milk or cream.

  2. Low and Slow: Heat your skillet over medium-low heat. Add the butter. Once melted and bubbling slightly, pour in the eggs.

  3. The Gentle Fold: Let the eggs sit for 20 seconds until the edges set. Use a silicone spatula to gently push the cooked eggs toward the center, letting the raw eggs flow to the edges.

  4. Add Greens: When the eggs are halfway cooked (still looking wet), fold in the spinach and nutritional yeast. The residual heat will wilt the spinach perfectly without destroying its nutrients.

  5. Finish Early: Remove the pan from the heat while the eggs still look slightly underdone. They will continue to cook on the plate (carry-over cooking), ensuring they stay “jammy” and nutrient-dense rather than rubbery.

  6. Serve: Top with sliced avocado and a dash of black pepper.


How to Maximize the Benefits

  • Don’t Fear the Yolk: About 90% of an egg’s calcium, iron, and nearly all its fat-soluble vitamins (A, D, E, and K) are in the yolk. Eating only the whites means missing the brain-boosting choline.

  • Pair with Vitamin C: To help your body absorb the non-heme iron found in the egg and spinach, pair your breakfast with a few berries or a squeeze of lemon juice in your water.

  • Avoid High Heat: Cooking eggs at extremely high temperatures can oxidize the cholesterol in the yolk. Stick to medium or low heat for poaching, soft-boiling, or gentle scrambling.

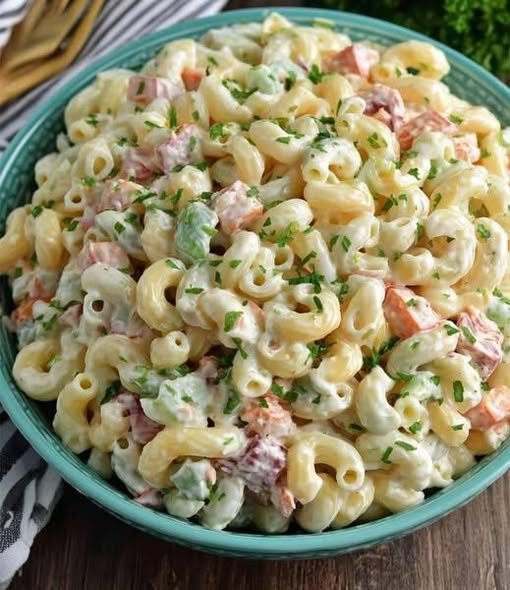
Keto Hawaiian Macaroni Salad

Keto Hawaiian Macaroni Salad

Prep time: 15 mins | Cook time: 7 mins | Total time: 22 mins (plus chilling) Yield: 6 servings | Net Carbs: ~3g per serving

Ingredients

  • The Base:

    • 8 oz low-carb elbow macaroni (e.g., Great Low Carb Bread Co., Immi, or konjac-based)

  • The Dressing:

    • 1 cup sugar-free mayonnaise (Avocado oil-based like Primal Kitchen is best)

    • 2 tbsp apple cider vinegar

    • 1 tbsp heavy cream (optional, for extra richness)

    • 1 tbsp sugar-free Dijon mustard

    • 1 tsp erythritol or monk fruit sweetener (optional)

    • 1/2 tsp garlic powder

    • 1/2 tsp onion powder

    • Salt and black pepper to taste

  • The Add-ins:

    • 1/2 cup celery, finely chopped

    • 1/4 cup red onion, finely chopped

    • 1/4 cup carrots, shredded (omit or swap for jicama to further reduce carbs)

    • 1 tbsp green onions, chopped

    • Optional: 1/2 tsp paprika for color

Instructions

  1. Boil the Pasta: Bring a large pot of salted water to a boil. Cook the low-carb pasta according to package directions (usually 5–7 minutes). Do not overcook, as low-carb pasta can become mushy. Drain and immediately rinse with cold water to stop the cooking process.

  2. Whisk the Dressing: In a large mixing bowl, combine the mayonnaise, apple cider vinegar, heavy cream, Dijon mustard, sweetener, garlic powder, and onion powder. Whisk until the mixture is smooth, creamy, and fully emulsified.

  3. Prep the Veggies: Finely chop your celery and onions. Add them to the dressing bowl along with the shredded carrots.

  4. Fold Together: Add the cooled, drained pasta to the dressing mixture. Using a spatula, gently fold the pasta until every piece is evenly coated. Be careful not to break the noodles.

  5. The Chill Factor (Crucial): Cover the bowl and refrigerate for at least 1 hour. For the most authentic “island style” flavor, let it sit overnight; this allows the pasta to absorb the tang of the vinegar and the sweetness of the dressing.

  6. Final Touch: Before serving, give it a quick stir. If it seems too dry (pasta absorbs moisture as it sits), fold in an extra tablespoon of mayo. Garnish with green onions or a dash of paprika.


Pro Tips for the Best Mac Salad

  • The “Double Dressing” Rule: Low-carb noodles are notorious for soaking up sauce. If you are making this a day ahead, consider making 1.5x the dressing recipe so it stays creamy until serving.

  • Texture Trick: If you find konjac-based pasta too “rubbery,” try a lupin-flour or almond-flour based elbow macaroni for a more traditional bite.

  • Plate Lunch Pairing: Serve this alongside Keto Kalua Pork or Grilled Teriyaki Chicken (using a sugar-free glaze) for a complete Hawaiian experience.

  • Storage: This keeps beautifully in an airtight container for up to 5 days in the fridge. Do not freeze, as the emulsion in the mayo will break and the pasta texture will degrade.


Nutritional Profile (Per Serving)

  • Calories: 210

  • Fat: 18g

  • Net Carbs: 3g

  • Protein: 6g

Baked Cheesy Chicken Bread Rolls

Baked Cheesy Chicken Bread Rolls

A savory, melt-in-your-mouth snack featuring seasoned shredded chicken and bubbly melted cheese nestled in soft dinner rolls.

  • Prep time: 15 minutes

  • Cook time: 15 minutes

  • Total time: 30 minutes

Ingredients

For the Chicken Filling

  • Chicken: 1 cup boiled and shredded chicken (rotisserie chicken works great here)

  • Onion: 1 small, finely chopped

  • Capsicum (Bell Pepper): ½ cup, finely chopped

  • Garlic: 1 tsp garlic paste

  • Condiments: 2 tbsp ketchup (or pizza sauce) and 2 tbsp mayonnaise

  • Seasoning: Salt (to taste), ½ tsp black pepper, ½ tsp red chili powder, and ½ tsp chili flakes (optional for heat)

For the Rolls & Topping

  • Bread: 1 pack of dinner rolls or slider buns

  • Cheese: 1½ cups mozzarella or cheddar cheese, grated

  • Butter Mixture: 2 tbsp butter (melted) mixed with 1 tsp garlic powder

  • Garnish: Freshly chopped parsley or coriander


Detailed Instructions

1. Sauté the Savory Filling

Heat 1 tablespoon of oil in a non-stick pan over medium heat. Add the finely chopped onion and garlic paste, sautéing for about 2 minutes until the onion becomes translucent and soft. Add the shredded chicken and chopped capsicum.

2. Season and Combine

Stir in the salt, black pepper, red chili powder, and chili flakes. Mix thoroughly and cook for 3–4 minutes to allow the flavors to meld and the capsicum to soften slightly. Remove the pan from the heat. Once the mixture has cooled for a minute, stir in the ketchup (or pizza sauce) and mayonnaise until the chicken is evenly coated and creamy.

3. Prepare and Stuff the Rolls

Preheat your oven to 180°C (350°F). Take your dinner rolls and make a deep slit down the center of each, being careful not to cut all the way through to the bottom. Gently pull the bread apart and stuff each roll generously with the prepared chicken filling.

4. Add Cheese and Butter

Place the stuffed rolls side-by-side on a baking tray lined with parchment paper. Sprinkle the grated mozzarella or cheddar cheese over the top of the filling in each roll. Using a pastry brush, coat the tops and sides of the bread with the melted garlic butter.

5. Bake to Perfection

Place the tray in the center rack of the oven. Bake for 12–15 minutes, or until the cheese is completely melted and bubbling, and the edges of the rolls have turned a beautiful golden brown.

6. Garnish and Serve

Remove from the oven and immediately sprinkle with fresh parsley or coriander. Serve these rolls while hot, ideally paired with extra ketchup or a creamy garlic dipping sauce.


Tips for the Best Rolls

  • Don’t Overfill: While it’s tempting to pile the chicken high, keep the filling level with the top of the bread to ensure the cheese stays on the roll rather than sliding off onto the tray.

  • Soft vs. Crusty: If you prefer a softer roll, cover the tray loosely with aluminum foil for the first 8 minutes of baking, then remove it for the final 5 minutes to melt the cheese.

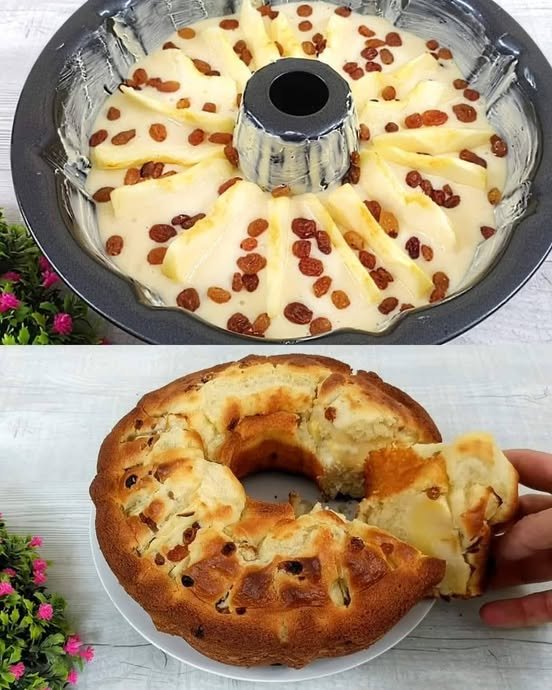
Grandmother’s Italian Apple & Lemon Cake

Grandmother’s Italian Apple & Lemon Cake

Prep Time: 15 minutes
Bake Time: 35–40 minutes
Cooling Time: 10–15 minutes
Servings: 8–10


Ingredients

  • 3 large eggs

  • 150 g (¾ cup) granulated sugar

  • 200 ml (¾ cup + 1 tbsp) milk

  • 370 g (3 cups) all-purpose flour

  • 20 g (4 tsp) baking powder

  • 1 large apple, peeled and sliced into thin wedges

  • 1 lemon, juiced (zest optional for extra flavor)

  • 50 g (¼ cup) raisins

  • Butter (for greasing the cake mold)

  • Optional: Powdered sugar for dusting


Instructions

1. Prepare the Fruit

  • Peel and slice the apple into thin wedges.

  • Place the slices in a small bowl and toss them with the lemon juice.

    • Tip: The lemon juice prevents the apples from browning and adds a gentle, fresh citrus flavor.

  • If using raisins that seem dry, soak them in warm water or a bit of lemon juice for 5 minutes to plump them up. Drain before using.


2. Mix the Batter

  • In a large mixing bowl, whisk the eggs and sugar together using a hand whisk or electric mixer until the mixture is pale and frothy.

    • This step traps air in the batter, making the cake light.

  • Gradually stir in the milk until fully combined.


3. Sift and Combine Dry Ingredients

  • Sift together the all-purpose flour and baking powder.

  • Gently fold the dry ingredients into the wet mixture using a spatula or whisk.

    • Tip: Fold carefully to avoid overmixing, which can make the cake dense. The batter should be smooth, slightly thick, and airy.

  • Optional: Grate the lemon zest into the batter for an extra layer of citrus aroma.


4. Assemble the Cake

  • Preheat your oven to 180°C (350°F).

  • Generously grease a bundt or ring cake mold with butter, making sure to coat the inner crevices.

  • Pour the prepared batter into the mold, spreading it evenly.

  • Arrange the apple wedges in a circular or spiral pattern on top of the batter. Press them lightly so they stay partially embedded during baking.

  • Sprinkle the raisins evenly over the top.


5. Bake the Cake

  • Place the cake in the center of the preheated oven.

  • Bake for 35–40 minutes, or until the top is golden brown and a toothpick inserted in the thickest part comes out clean.

    • Tip: If the top browns too quickly, cover loosely with aluminum foil for the last 5–10 minutes.


6. Cool and Serve

  • Let the cake cool in the pan for 10 minutes.

  • Carefully turn it out onto a plate or cooling rack.

  • Once fully cooled, dust generously with powdered sugar for a classic Italian finish.


Helpful Tips

  1. Apple Texture: Use a firm variety like Granny Smith or Gala to hold their shape while baking.

  2. Even Baking: Make sure the apple wedges are similar in size so they bake evenly.

  3. Flavor Boost: Adding ½ tsp cinnamon or a pinch of nutmeg to the batter pairs beautifully with apple and lemon.

  4. Storage: Keep the cake covered at room temperature for 2 days or in the fridge for up to 5 days.