Butterfinger Balls (No-Bake Candy Bites)

Butterfinger Balls (No-Bake Candy Bites)

Yield: 20 balls
Prep Time: 15 minutes
Chill Time: 30 minutes
Total Time: About 45 minutes
Course: Dessert
Cuisine: American

These no-bake Butterfinger Balls combine creamy peanut butter, crunchy graham cracker crumbs, and crushed Butterfinger candy, all coated in smooth chocolate. They’re easy to make, freezer-friendly, and perfect for parties or gifting.


🧾 Ingredients

For the filling:

  • 4 tablespoons (56 g) unsalted butter, softened

  • 1 cup (240 g) creamy peanut butter (use regular creamy peanut butter, not natural)

  • 1 teaspoon vanilla extract

  • 1 cup (120 g) powdered (confectioners’) sugar, sifted

  • ¾ cup (75 g) graham cracker crumbs (about 6 full crackers, crushed)

  • ½ cup (about 50 g) Butterfinger bars, crushed (2–3 regular bars)

For coating:

  • 8 ounces (225 g) chocolate chips, melting wafers, or chocolate bark

Optional toppings:

  • Extra crushed Butterfinger

  • Sprinkles

  • Pinch of coarse sea salt


👩‍🍳 Instructions

1️⃣ Mix the base

In a medium bowl, beat together:

  • Softened butter

  • Peanut butter

Mix until smooth and fully blended.


2️⃣ Add sugar and vanilla

  • Stir in vanilla extract.

  • Gradually add powdered sugar (in 2–3 parts), mixing well after each addition.
    You should get a soft, moldable dough that holds together.


3️⃣ Add crumbs and candy

  • Fold in graham cracker crumbs.

  • Gently mix in crushed Butterfinger pieces.
    (Reserve 1 tablespoon of candy for topping, if desired.)


4️⃣ Shape the balls

  • Scoop about 1 to 1½ tablespoons of mixture.

  • Roll into smooth balls using your palms.

  • Place on a parchment-lined tray.


5️⃣ Chill

Refrigerate or freeze for 30 minutes until firm.
(Cold balls are much easier to dip in chocolate.)


6️⃣ Melt the chocolate

Melt chocolate:

  • In the microwave: 20–30 second bursts, stirring each time
    OR

  • Over a double boiler until smooth


7️⃣ Dip the balls

  • Dip each chilled ball into melted chocolate using a fork.

  • Tap gently to remove excess chocolate.

  • Place back on parchment paper.

Optional: sprinkle crushed Butterfinger, sprinkles, or sea salt on top before chocolate sets.


8️⃣ Set the coating

Chill for 10–20 minutes until chocolate hardens.


🧠 Troubleshooting

Too sticky?
➜ Add 1–2 tablespoons powdered sugar or graham crumbs.

Too dry?
➜ Add 1 teaspoon peanut butter or softened butter.

Chocolate too thick?
➜ Stir in 1 teaspoon vegetable oil or coconut oil.

Candy lost crunch?
➜ Do not over-crush Butterfinger; leave some small chunks.


❄️ Storage

Refrigerator:
Store in airtight container for up to 7 days

Freezer:
Freeze up to 5–6 months
Thaw overnight in fridge before serving.


💡 Expert Tips

✔ Use cookie scoop for equal sizes
✔ Let balls sit 5 minutes before dipping to prevent cracking
✔ For extra crunch, press candy on top after dipping
✔ Add espresso powder to chocolate for mocha flavor
✔ For nut-free: use sunflower seed butter and nut-free candy


🧮 Nutrition (Approximate per ball)

  • Calories: ~140

  • Fat: 9–10 g

  • Carbohydrates: 12–14 g

  • Protein: 3–4 g


📌 Important Note

Use regular creamy peanut butter.
Natural peanut butter can make the mixture too oily and soft.
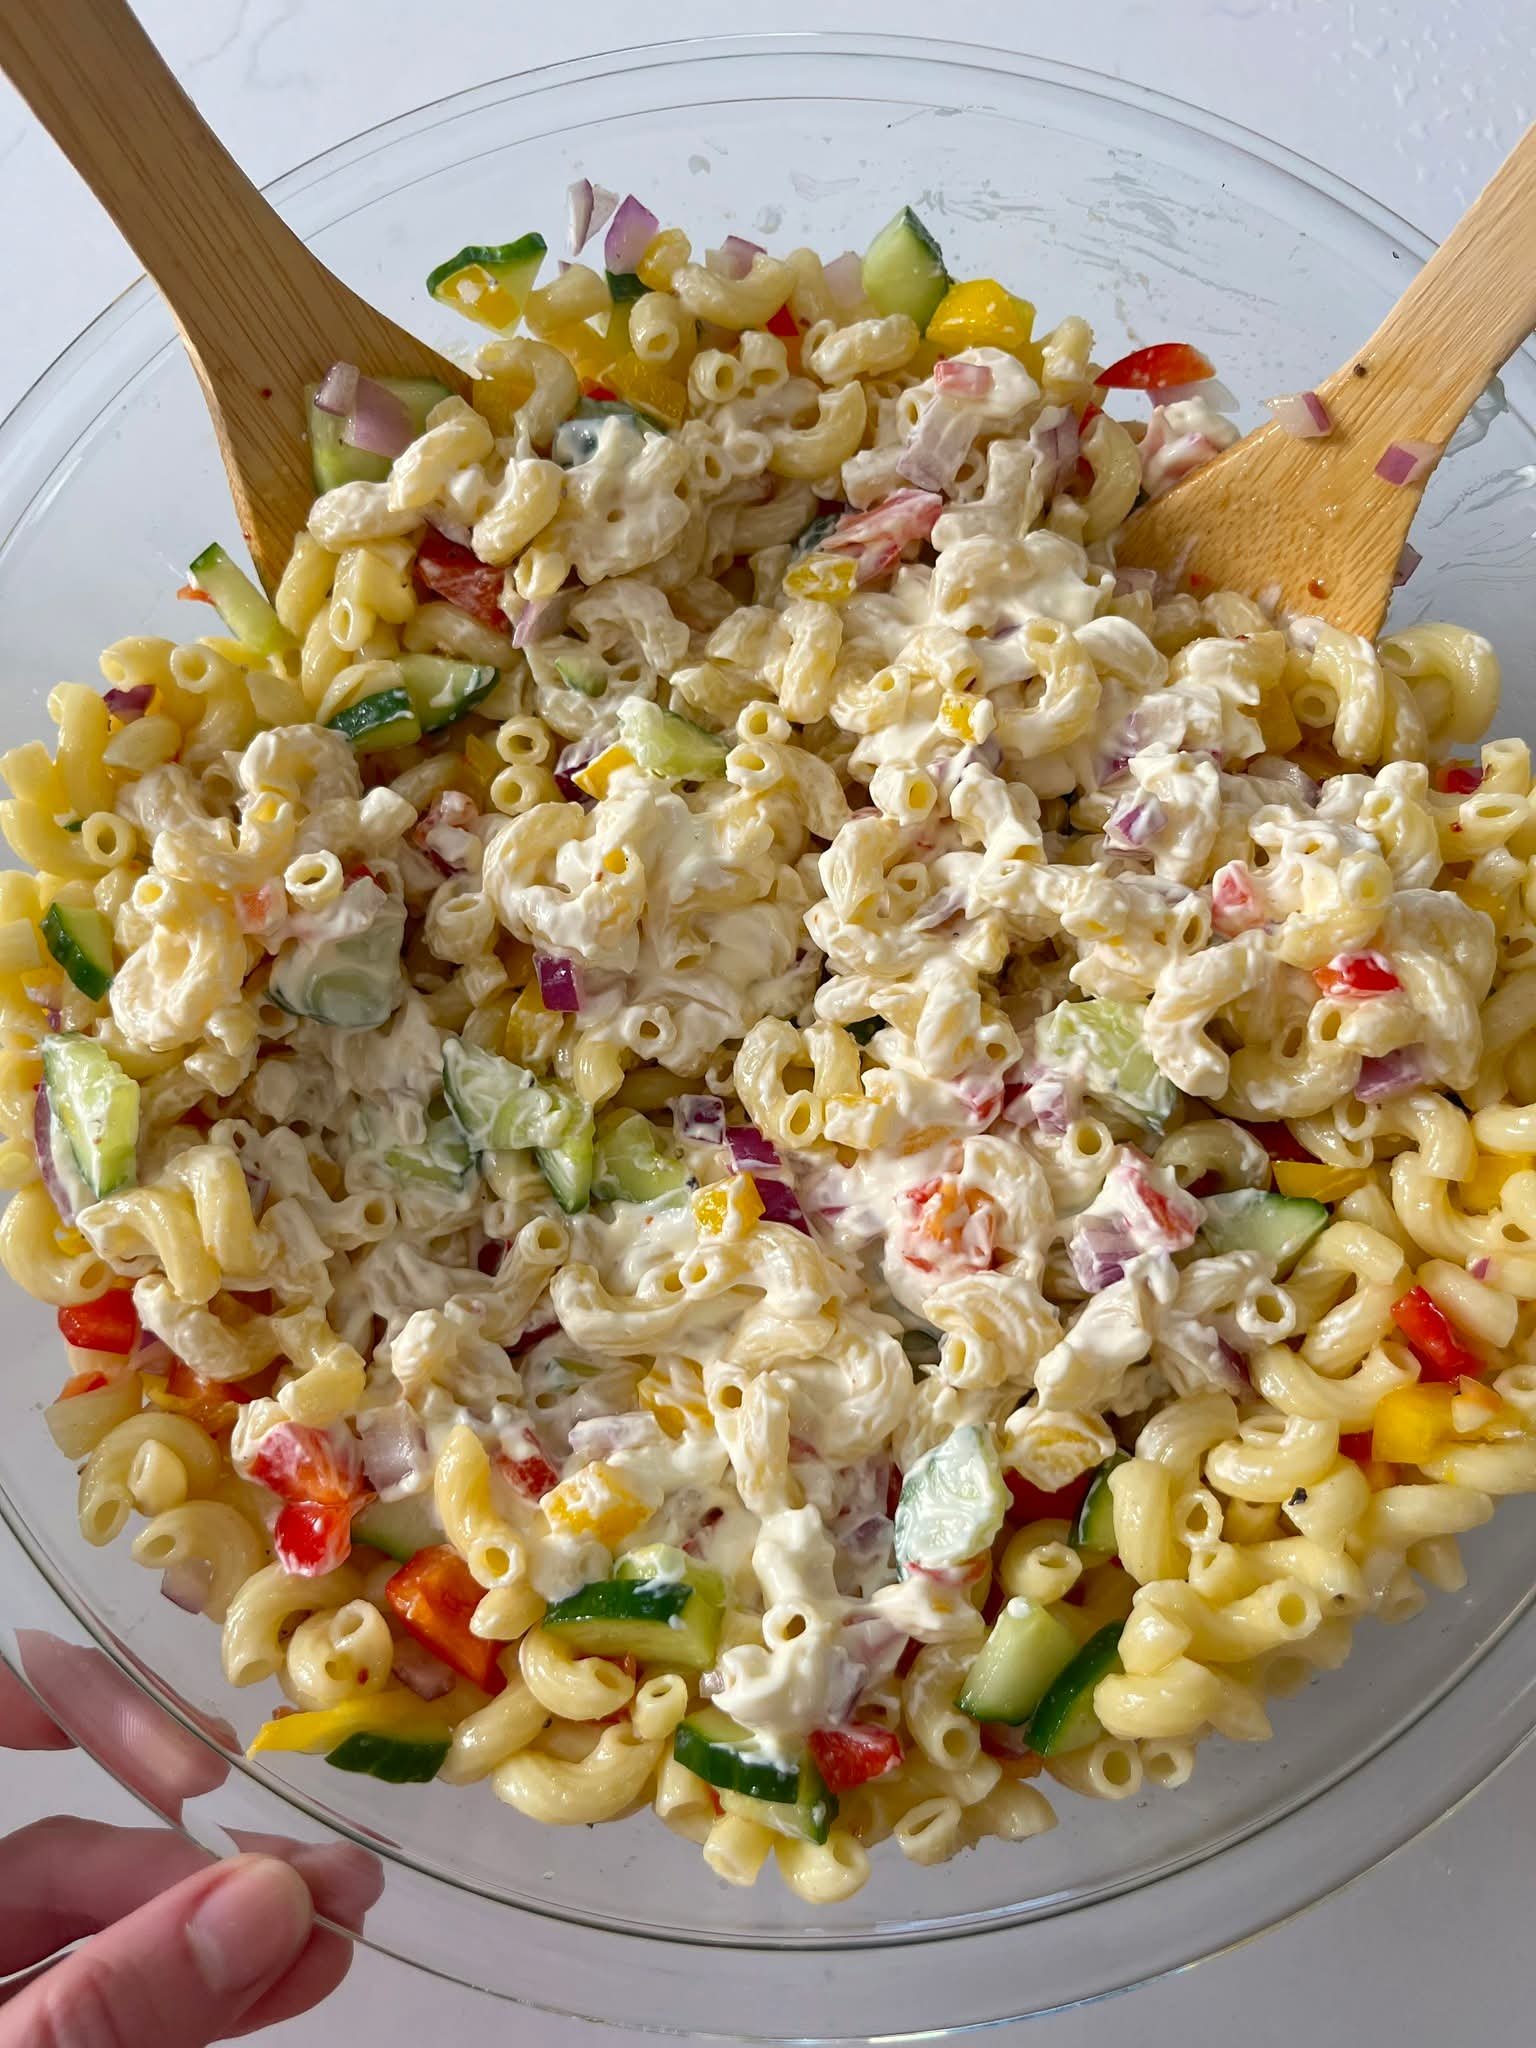
Church Pitch-In Salad

Church Pitch-In Salad

​Yields: 8-10 servings | Prep time: 15 minutes | Chill time: 1 hour

​Ingredients

​The Base:

  • ​16 oz macaroni pasta (cooked according to package directions and drained)
  • ​1/2 red onion, diced
  • ​1 red bell pepper, diced
  • ​1 yellow bell pepper, diced
  • ​1 English cucumber, diced
  • ​1 1/2 cups shredded Italian blend cheese

​The Dressing:

  • ​2 pouches dry Italian dressing mix
  • ​1/3 cup white vinegar
  • ​1/4 cup olive oil
  • ​1/3 cup mayonnaise
  • ​To taste: Salt and freshly ground black pepper

​Preparation

  1. ​Combine the Base: In a large mixing bowl, toss together the cooked macaroni, diced onion, peppers, cucumber, and shredded cheese.
  2. ​Whisk the Dressing: In a separate small bowl, whisk together the Italian dressing mix, white vinegar, olive oil, and mayo until the mixture is smooth and emulsified.
  3. ​Toss: Pour the dressing over the pasta mixture. Stir well until every piece of pasta and vegetable is thoroughly coated.
  4. ​Season: Taste and add salt or pepper if needed.
  5. ​Chill: Cover the bowl and refrigerate for at least 1 hour. This allows the flavors to meld and the pasta to absorb the seasoning.

​Pro-Tips for the Best Salad

  • ​Rinse the Pasta: Unlike warm pasta dishes, you should rinse the macaroni under cold water after draining. This stops the cooking process and removes excess starch, preventing the salad from becoming a sticky clump.
  • ​The “English” Difference: Using an English cucumber (the long, thin ones wrapped in plastic) is better here because the skin is thinner and the seeds are smaller, meaning it won’t get “watery” as it sits.
  • ​Make it Ahead: This actually tastes even better the next day. If the pasta has soaked up too much dressing overnight, just stir in a tiny splash of vinegar or a teaspoon of mayo to loosen it back up.

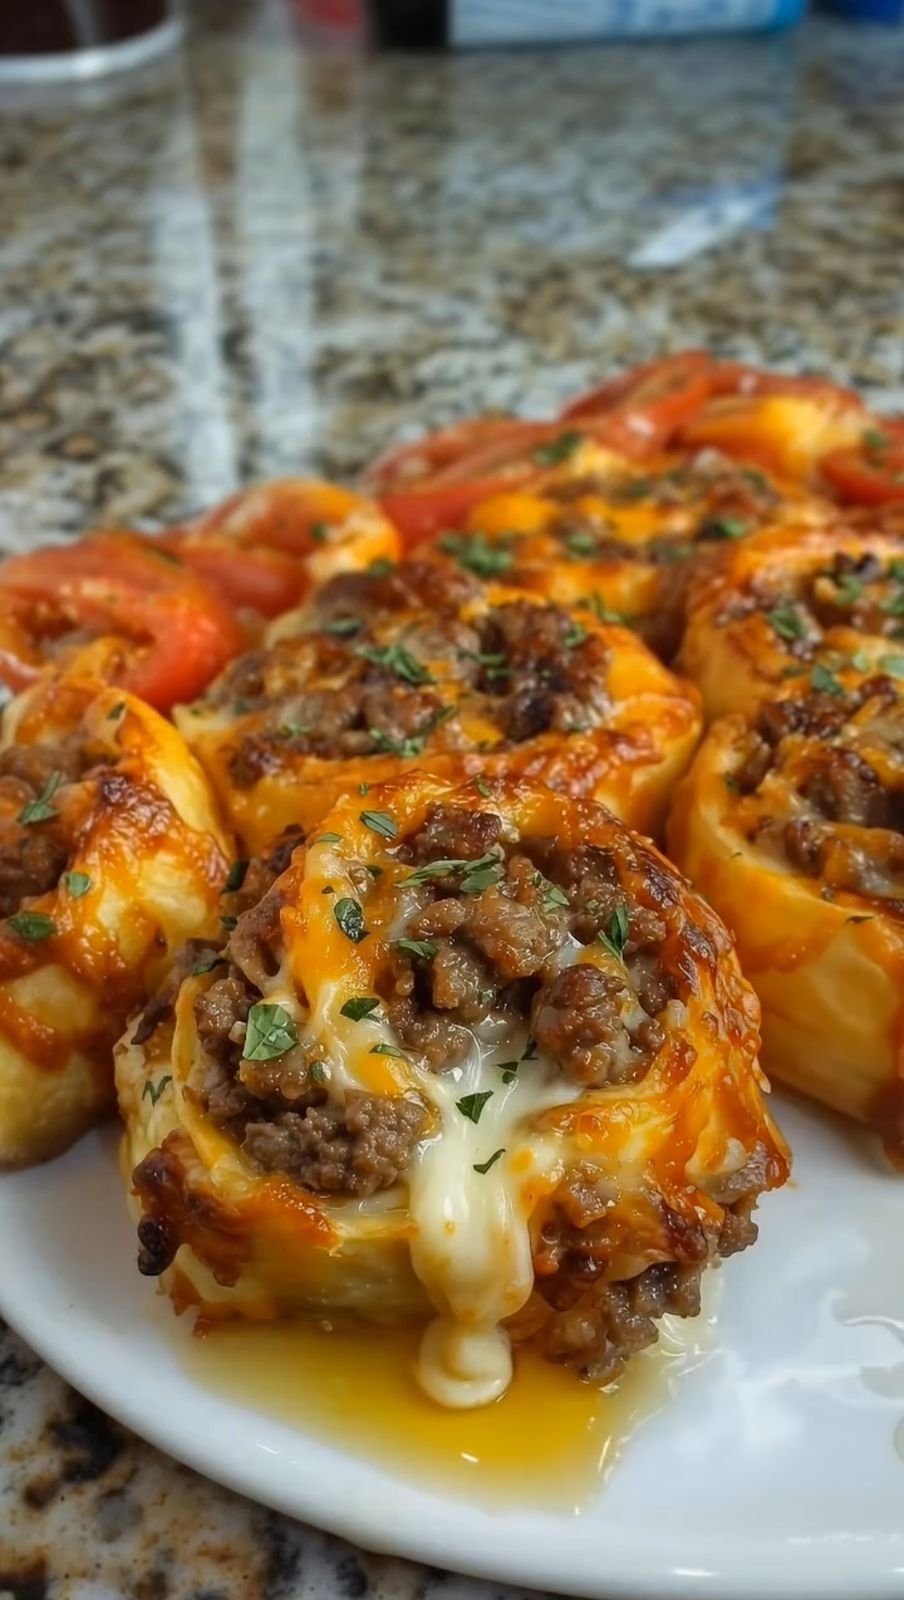
Garlic Butter Cheeseburger Rollups

🧄🧀 Garlic Butter Cheeseburger Rollups

Soft dough filled with seasoned beef and melted cheese

⏱ Prep Time: 15 minutes

🔥 Bake Time: 20–25 minutes

🍽 Servings: 6–8 rollups


🛒 Ingredients

For the Filling:

  • 1 pound (450 g) ground beef

  • 1 teaspoon garlic powder

  • 1 teaspoon onion powder

  • Salt, to taste

  • Black pepper, to taste

  • 1 cup shredded cheddar cheese

  • 1 cup shredded mozzarella cheese

For the Dough:

  • 1 package refrigerated pizza dough

For Brushing:

  • 2 tablespoons butter, melted


👩‍🍳 Instructions

Step 1: Cook the Beef

Heat a skillet over medium heat.
Add the ground beef and cook, stirring often, until fully cooked and evenly browned.
Season with garlic powder, onion powder, salt, and pepper.
Remove from heat and allow the beef to cool slightly.


Step 2: Prepare the Oven

Preheat your oven to the temperature listed on the pizza dough package (usually about 375°F / 190°C).
Line a baking tray with parchment paper or lightly grease it.


Step 3: Roll the Dough

Lightly dust your work surface with flour.
Roll out the pizza dough into a large rectangle, about ¼ inch thick.


Step 4: Add Cheese

Sprinkle the shredded cheddar cheese evenly over the dough, leaving about 1 inch around the edges.


Step 5: Add Beef

Spread the cooked beef evenly over the cheese layer.


Step 6: Add More Cheese

Sprinkle the mozzarella cheese evenly over the beef.


Step 7: Roll It Up

Starting from the long side, gently roll the dough into a tight log, keeping the filling inside.


Step 8: Brush with Butter

Brush the melted butter over the outside of the roll.

(Optional: sprinkle a little garlic powder or dried parsley on top.)


Step 9: Bake

Place the roll on the prepared baking tray.
Bake for 20–25 minutes, or until the dough is golden and the cheese inside is fully melted.


Step 10: Slice and Serve

Remove from the oven and let rest for 5 minutes.
Slice into rolls and serve warm.


🍽 Serving Suggestions

  • Serve with ketchup, mustard, or garlic sauce

  • Add pickles or onions to the beef for a cheeseburger-style flavor

  • Pair with a fresh salad or fries


🧊 Storage

  • Store leftovers in an airtight container in the refrigerator for up to 2 days

  • Reheat in oven or air fryer for best texture

Lemon, Ginger & Turmeric Wellness Drink

Lemon, Ginger & Turmeric Wellness Drink

A warm, refreshing drink that supports digestion and daily wellness

Ingredients

  • 1 fresh lemon

  • 1 small piece of fresh ginger root (about 1 inch)

  • ½ teaspoon turmeric powder or 1 teaspoon freshly grated turmeric

  • 2 cups water

  • Optional: 1 teaspoon honey (for mild sweetness)


Instructions

Step 1: Prepare the Ingredients

Wash the lemon, ginger, and turmeric (if using fresh turmeric).
Slice the lemon into thin rounds.
Peel and grate the ginger (and turmeric, if using fresh).


Step 2: Simmer the Drink

Pour the water into a saucepan and bring it to a gentle boil.
Add the lemon slices, grated ginger, and turmeric.
Lower the heat and let it simmer for 10 minutes so the flavors blend well.


Step 3: Strain and Serve

Remove from heat and strain into a cup.
Add honey if desired and stir gently.

Drink warm in the morning or between meals.


Helpful Tips

✔ Drink once daily for best results
✔ Always use fresh lemon for better flavor
✔ Do not drink on an empty stomach if you have acid sensitivity
✔ Combine with balanced meals and light activity for overall wellness


Important Note

This drink supports digestion and hydration. It does not replace healthy eating or movement, and it works best as part of a healthy lifestyle.

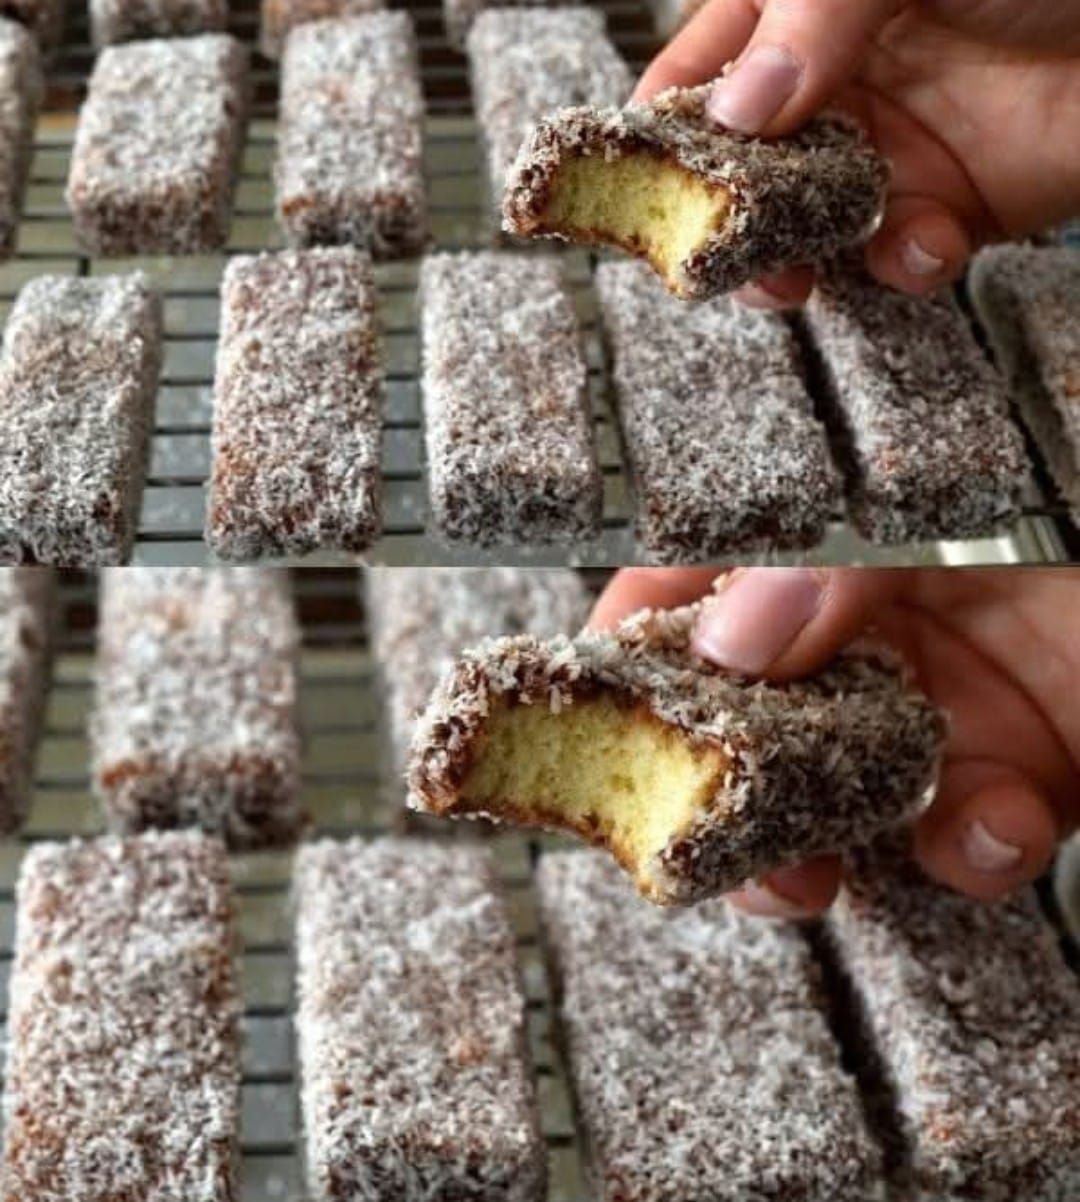
Honey & Coconut Cake Bars

Honey & Coconut Cake Bars

Soft honey sponge covered in smooth chocolate and coated with coconut

Ingredients

For the Cake

  • 1 large egg

  • 200 ml milk

  • 200 g sugar

  • 2 tablespoons honey

  • 1 tablespoon cooking oil

  • 300 g all-purpose flour

  • 1 teaspoon baking powder

For the Coating

  • 150 g dark or milk chocolate

  • ½ cup milk

  • 2 cups desiccated coconut


Instructions

Step 1: Make the Batter

In a large bowl, whisk the egg and sugar together until the mixture becomes light in color and slightly airy.

Add the milk, honey, and oil. Stir well until the honey is completely blended into the liquid.

Sift the flour and baking powder over the wet mixture.
Gently fold everything together until a smooth batter forms with no dry spots or lumps.


Step 2: Bake the Cake

Preheat the oven to 180°C (350°F).

Lightly grease a rectangular baking pan and line it with parchment paper.

Pour the batter evenly into the pan and level the top with a spoon or spatula.

Bake for 20–25 minutes, or until a toothpick inserted into the center comes out clean.

Let the cake cool fully in the pan before moving to the next step.


Step 3: Prepare the Coating

Place the chocolate and milk in a heat-safe bowl.
Warm gently (using a microwave or a bowl set over warm water) and stir until smooth and glossy.

Spread the coconut on a plate or shallow tray.


Step 4: Cut and Coat

Once the cake is completely cool, cut it into equal-sized rectangular bars.

Dip each cake bar into the chocolate mixture, turning gently so all sides are covered.

Immediately roll each coated bar in the coconut until evenly coated.


Step 5: Rest and Serve

Place the coated bars on a wire rack or parchment paper.
Let them rest for about 15 minutes until the chocolate layer firms up.

Serve with tea, coffee, or milk.


Helpful Tips

✔ For a lighter sponge, separate the egg and whip the egg white until fluffy, then fold it into the batter at the end
✔ For extra flavor, add a little vanilla or orange zest to the batter
✔ Store in an airtight container once set

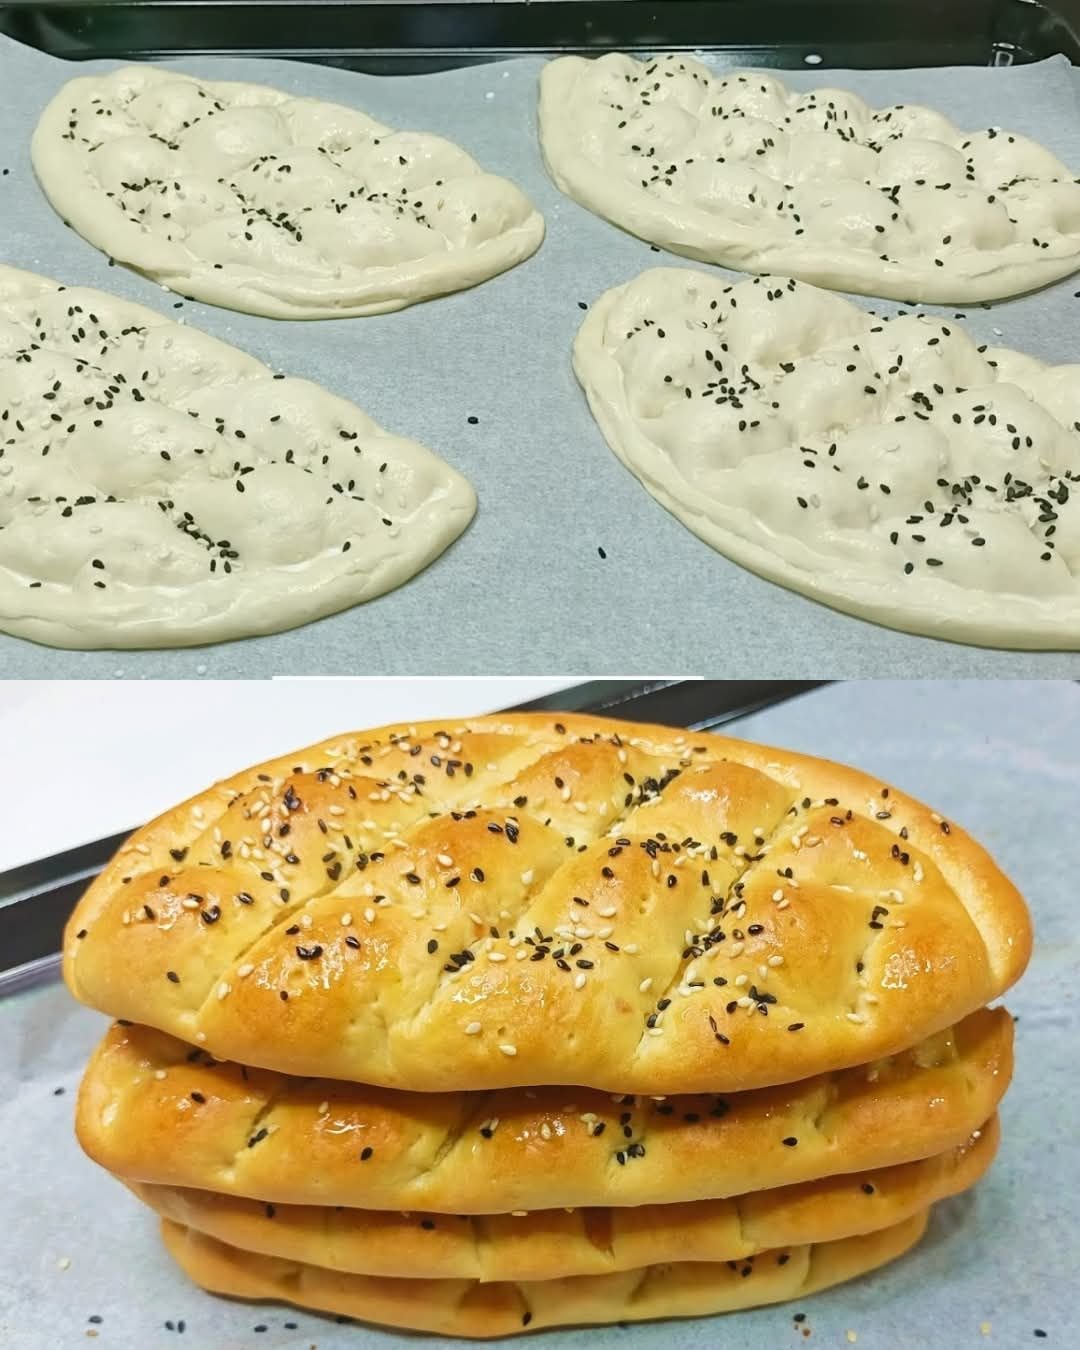
Soft Cheesy Diamond Flatbread

Soft Cheesy Diamond Flatbread

Fluffy, lightly sweet bread with a soft cheese-filled center

Ingredients

  • ½ cup warm water (not hot)

  • ½ cup warm milk

  • 1 teaspoon dry yeast

  • 1 tablespoon sugar

  • ½ teaspoon salt

  • 1 tablespoon cooking oil

  • 3 cups all-purpose flour

  • 100 g mozzarella cheese, shredded or finely diced

Optional Topping:

  • 1 egg yolk (for brushing the surface)

  • Sesame seeds or nigella seeds


Instructions

Step 1: Prepare the Yeast Mixture

In a large bowl, combine the warm water, warm milk, sugar, and dry yeast.
Stir gently and let the mixture rest for 5–10 minutes until it looks foamy and active.


Step 2: Make the Dough

Add the oil and salt to the yeast mixture.
Gradually add the flour, one cup at a time, mixing after each addition.

When the dough comes together, knead it on a clean surface for 8–10 minutes until it becomes smooth, soft, and stretchy.
If the dough feels sticky, lightly dust with a small amount of flour.


Step 3: Add the Cheese

Gently work the mozzarella into the dough until the cheese is evenly spread throughout.


Step 4: First Rest

Lightly coat a bowl with oil and place the dough inside.
Cover with a clean cloth and leave it in a warm place for about 1 hour, or until it doubles in size.


Step 5: Shape the Flatbreads

Divide the risen dough into 4 equal portions.
Place them on a lined baking tray.
Flatten each piece into an oval or diamond shape about 1–1.5 cm thick.


Step 6: Create the Pattern

Using your fingertips or the back of a spoon, gently press a diamond or grid pattern into the surface of each bread.


Step 7: Final Rest and Topping

Cover the shaped dough and let it rest for 20 minutes.
Brush the tops lightly with egg yolk for shine.
Sprinkle with sesame or nigella seeds if desired.


Step 8: Bake

Preheat the oven to 400°F (200°C).
Bake for 15–20 minutes, until the tops are golden and the bread feels light when gently tapped.


Step 9: Keep the Bread Soft

While the bread is still warm, lightly brush the tops with melted butter.
Cover with a clean kitchen towel for a few minutes to help keep the texture soft and tender.


Serving Suggestions

  • Serve warm with soup, tea, or salad

  • Enjoy as a snack or side dish

  • Can be reheated gently in the oven or pan


Helpful Tips

✔ Use low-moisture mozzarella for best results
✔ Add a pinch of garlic powder or dried herbs for extra flavor
✔ Store in an airtight container once cooled