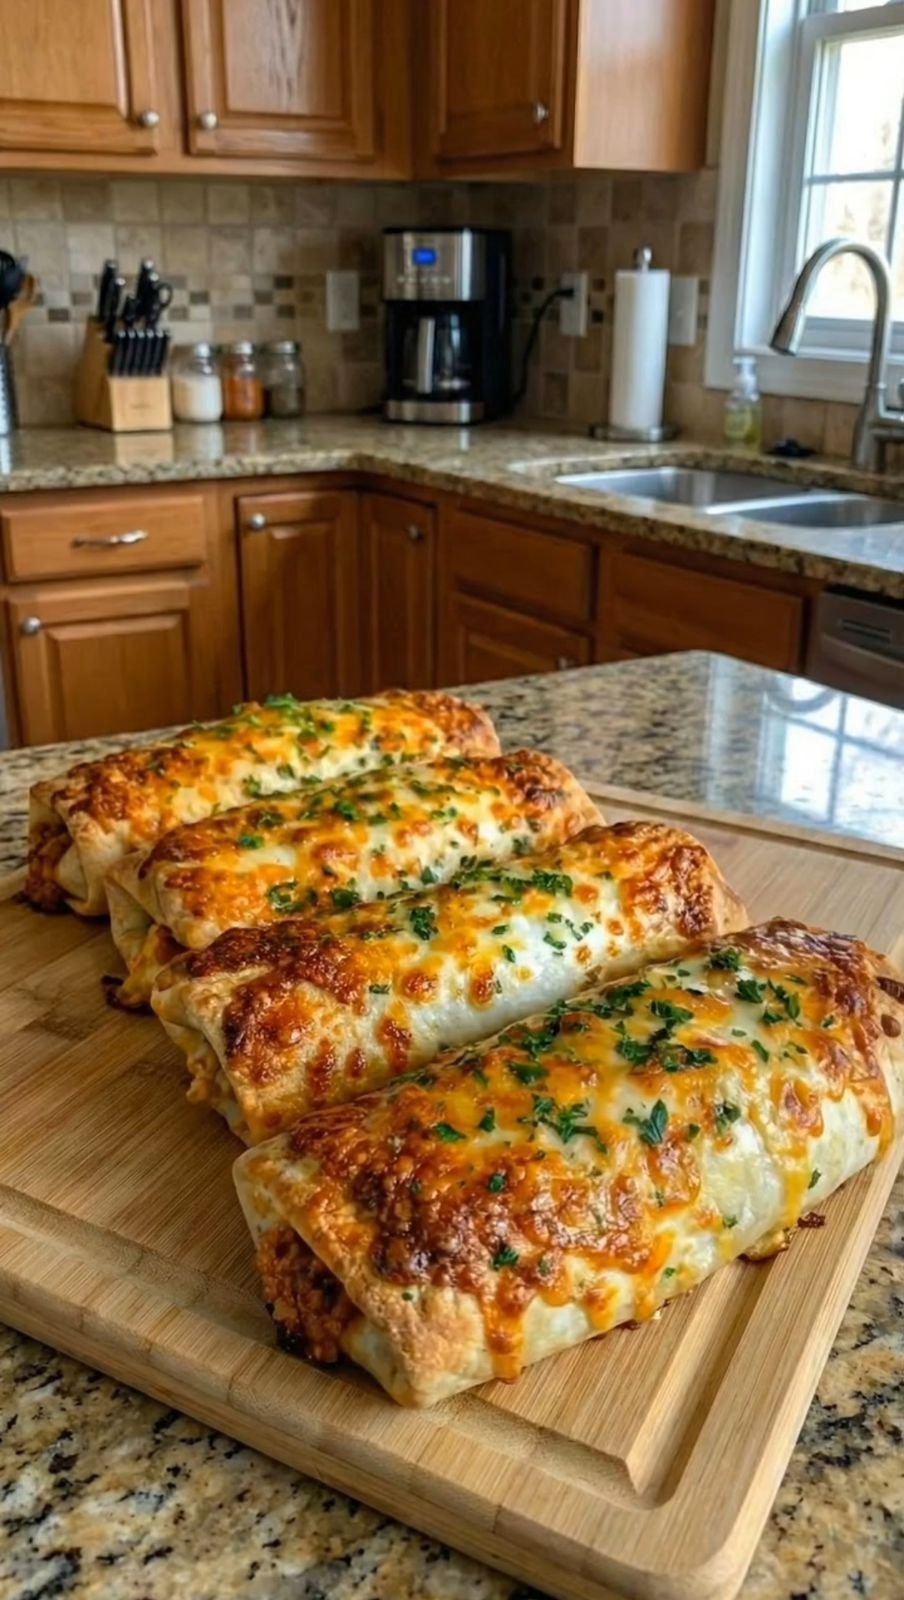
Cheesy Taco Sticks

Cheesy Taco Sticks

Baked dough sticks filled with seasoned ground beef and melted cheese, brushed with garlic butter and served with dipping sauces.

Prep Time: 12 minutes
Bake Time: 12–15 minutes
Yield: 8 sticks


🧾 Ingredients

β€’ 1 lb (450 g) lean ground beef
β€’ 1 packet taco seasoning (about 28 g / 1 oz)
β€’ ΒΌ cup water
β€’ 1 tube refrigerated pizza dough or classic refrigerated dough (about 13.8 oz / 390 g)
β€’ 1Β½ cups shredded cheddar cheese (or cheese blend)

For topping:
β€’ 2 tablespoons butter, melted
β€’ Β½ teaspoon garlic salt
β€’ 1 teaspoon dried parsley

For serving (optional):
β€’ Salsa
β€’ Sour cream
β€’ Guacamole
β€’ Cheese dip


πŸ‘©β€πŸ³ Instructions

1. Prepare the Oven and Pan

Preheat oven to 200Β°C (400Β°F).

Line a large baking sheet with parchment paper or a silicone baking mat.


2. Cook the Beef

Heat a skillet over medium-high heat.

Add ground beef and cook until fully browned, breaking it up with a spoon.

Drain excess fat from the pan.

Add taco seasoning and water.
Simmer for 3–5 minutes, stirring, until the liquid is absorbed.

Remove from heat and allow the meat to cool slightly.


3. Prepare the Dough

Unroll the dough onto a lightly floured surface.

Cut into 8 equal rectangles.


4. Fill the Dough

Place each rectangle flat on the work surface.

Add:
β€’ A strip of shredded cheese down the center
β€’ A spoonful of the beef mixture on top of the cheese

Do not overfill.


5. Seal the Sticks

Fold the long sides of the dough over the filling.

Pinch the seam tightly closed.

Pinch the ends shut and tuck them slightly underneath.

Place seam-side down on the prepared baking sheet.


6. Add Butter Topping

In a small bowl, mix:
β€’ Melted butter
β€’ Garlic salt
β€’ Dried parsley

Brush this mixture over the tops of each stick.


7. Bake

Bake for 12–15 minutes, until:
β€’ Dough is fully cooked
β€’ Tops are golden
β€’ Cheese inside is melted


8. Serve

Allow to cool for 3–5 minutes before serving.

Serve warm with dipping sauces if desired.


⭐ Helpful Tips

βœ” Let beef cool before filling dough
βœ” Do not overfill or the seams may open
βœ” Always place seam-side down on the pan
βœ” Use parchment paper for easy cleanup
βœ” Bake with space between sticks for even cooking


🧊 Storage & Reheating

β€’ Refrigerate in an airtight container for up to 3 days
β€’ Reheat in oven or air fryer at 175Β°C (350Β°F) for 5–7 minutes
β€’ Freezer storage: up to 1 month
β€’ Reheat from frozen at 190Β°C (375Β°F) for 12–15 minutes

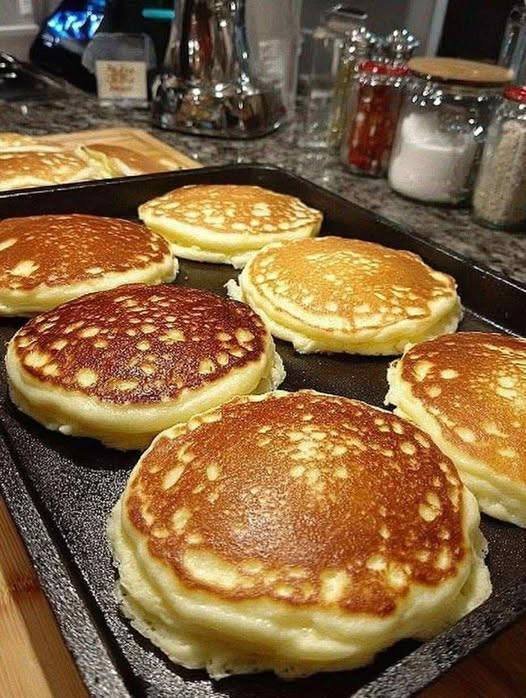
Banana Protein Pancakes

Banana Protein Pancakes

Soft pancakes made from banana, eggs, and protein powder with a light, tender texture.

Prep Time: 5 minutes
Cook Time: 10 minutes
Yield: 4–6 small pancakes


🧾 Ingredients

β€’ 1 large ripe banana
β€’ 2 large eggs
β€’ 1 scoop vanilla protein powder
β€’ ΒΌ teaspoon baking powder
β€’ Β½ teaspoon vanilla extract
β€’ Pinch of ground cinnamon

Optional additions:
β€’ Fresh blueberries
β€’ Chocolate chips


πŸ‘©β€πŸ³ Instructions

1. Mash the Banana

Place the banana in a medium bowl.

Mash with a fork until:
β€’ Completely smooth
β€’ No large lumps remain

This helps create a uniform batter.


2. Add the Eggs

Crack the eggs into the mashed banana.

Whisk until:
β€’ Fully combined
β€’ Pale and slightly frothy


3. Add Dry Ingredients

Add to the bowl:

β€’ Protein powder
β€’ Baking powder
β€’ Vanilla extract
β€’ Cinnamon

Mix until:
β€’ Batter is smooth
β€’ No dry pockets remain

The batter will be thinner than traditional pancake batter.


4. Heat the Pan

Lightly coat a non-stick pan or griddle with oil or cooking spray.

Heat over medium-low heat.

Lower heat helps the pancakes cook through without over-browning.


5. Cook the Pancakes

Spoon 2–3 tablespoons of batter into the pan for each pancake.

If using optional add-ins, place them onto the batter after pouring.

Cook for 2–3 minutes, until:
β€’ Small bubbles appear
β€’ Edges look set

Flip carefully with a thin spatula.

Cook the second side for 1–2 minutes, until lightly golden and firm.


6. Serve

Serve warm as-is or with:

β€’ Yogurt
β€’ Fresh fruit
β€’ Nut butter
β€’ Honey or syrup


⭐ Helpful Tips

βœ” Use very ripe bananas for better texture
βœ” Keep heat low to prevent burning
βœ” Flip gently β€” these pancakes are soft
βœ” Cook in small sizes for easier handling


🧊 Storage

β€’ Store in an airtight container in the refrigerator for up to 2 days
β€’ Reheat in a pan, microwave, or toaster
β€’ Can be frozen for up to 1 month

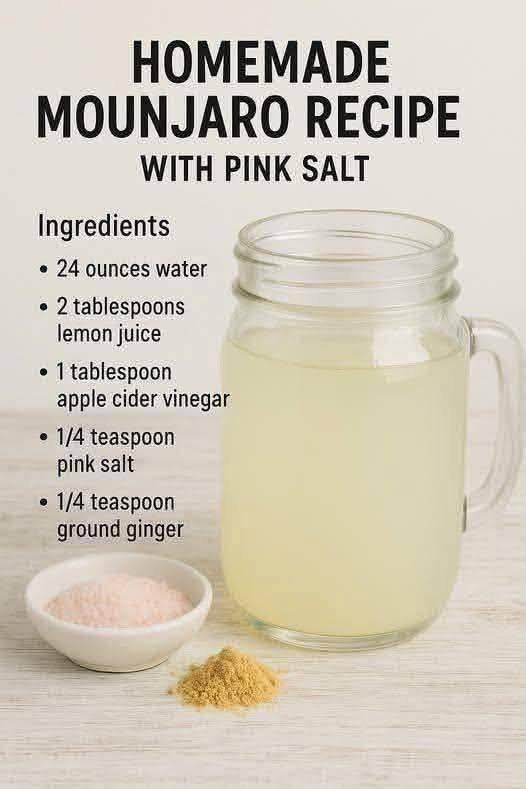
Refreshing Pink Salt & Ginger Tonic

Refreshing Pink Salt & Ginger Tonic

This drink combines citrus, ginger, and pink Himalayan salt for a crisp flavor that supports hydration.

  • Prep time: 5 minutes

  • Serves: 1 large serving (approx. 24 ounces)


Ingredients

  • 24 ounces (3 cups) Water

  • 2 tablespoons Lemon juice (freshly squeezed for best flavor)

  • 1 tablespoon Apple cider vinegar (with β€œthe mother” preferred)

  • 1/4 teaspoon Pink Himalayan salt

  • 1/4 teaspoon Ground ginger


Instructions

  1. Prepare Your Base: Pour the 24 ounces of water into a large glass, mason jar, or water bottle. You can use room-temperature water or chilled water depending on your preference.

  2. Add the Flavorings: Stir in the 2 tablespoons of lemon juice and the 1 tablespoon of apple cider vinegar.

  3. Incorporate the Spices: Add the 1/4 teaspoon of pink Himalayan salt and the 1/4 teaspoon of ground ginger.

  4. Mix Thoroughly: * If using a glass, stir vigorously with a long spoon until the salt and ginger are completely dissolved.

    • If using a mason jar or bottle, secure the lid and shake well for about 30 seconds.

  5. Serve: Drink immediately or store in the refrigerator. The ginger may settle at the bottom over time, so give it a quick stir or shake before each sip.


Tips for Best Results

  • Adjusting Flavor: If the apple cider vinegar is too strong for your palate, you can start with 1-2 teaspoons and gradually work your way up to a full tablespoon.

  • Temperature: Some people prefer this drink served warm in the morning (like a tea), while others enjoy it poured over ice as a refreshing afternoon beverage.

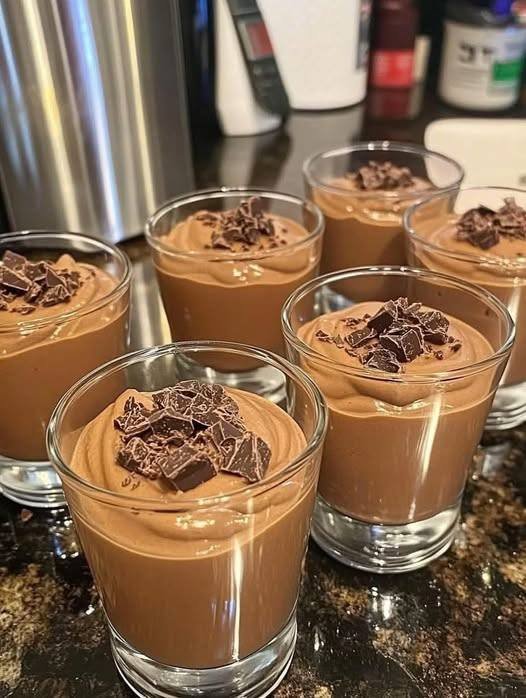
Whipped Chocolate Dessert

Whipped Chocolate Dessert

A chilled chocolate dessert with a soft, airy texture made by folding whipped topping into prepared pudding.

Prep Time: 5 minutes
Chill Time: 30 minutes
Servings: 4


🧾 Ingredients

β€’ 1 box (about 1 oz / 28 g) chocolate instant pudding mix
β€’ 2 cups milk (dairy or plant-based)
β€’ 1 cup whipped topping, thawed

Optional garnish:
β€’ Chocolate shavings
β€’ Cocoa powder


πŸ‘©β€πŸ³ Instructions

1. Mix the Pudding Base

In a large mixing bowl, add:

β€’ Chocolate pudding mix
β€’ Milk

Whisk vigorously for about 2 minutes, until:
β€’ The mixture thickens
β€’ Texture becomes smooth
β€’ No dry powder remains


2. Fold in the Whipped Topping

Add the whipped topping to the thickened pudding.

Using a spatula:
β€’ Gently fold it in
β€’ Use slow, sweeping motions
β€’ Avoid stirring hard

This keeps the dessert light rather than dense.


3. Portion the Dessert

Divide the mixture evenly into:
β€’ 4 small bowls
β€’ Or dessert cups
β€’ Or ramekins

Smooth the tops if desired.


4. Add Garnish (Optional)

Sprinkle lightly with:
β€’ Chocolate shavings
β€’ Or a small amount of cocoa powder


5. Chill

Place in the refrigerator for at least 30 minutes, until:
β€’ Slightly firm
β€’ Spoonable
β€’ Fully chilled


⭐ Helpful Tips

βœ” Fold gently to keep texture airy
βœ” Chill before serving for best structure
βœ” Serve in clear cups for a layered look
βœ” Add fresh fruit or crushed biscuits if desired


🧊 Storage

β€’ Keep covered in the refrigerator
β€’ Best consumed within 2 days
β€’ Do not leave at room temperature for long periods

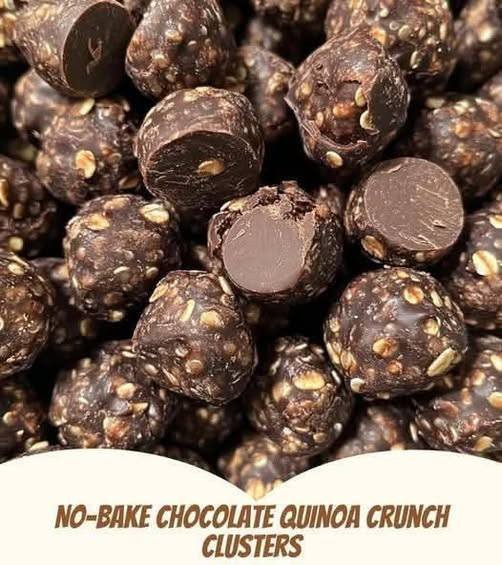
Chocolate Quinoa Crunch Clusters (No-Bake)

Chocolate Quinoa Crunch Clusters (No-Bake)

Simple no-bake clusters made with quinoa, oats, almond butter, and chocolate.

Prep Time: 15 minutes
Chill Time: 1 hour
Yield: 18–20 clusters


🧾 Ingredients

β€’ 1 cup cooked quinoa (cooled and dry)
β€’ 1 cup rolled oats
β€’ 1 cup almond butter
β€’ Β½ cup honey or maple syrup
β€’ Β½ cup cocoa powder
β€’ Β½ cup dark chocolate chips
β€’ ΒΌ teaspoon salt
β€’ 1 teaspoon vanilla extract

Optional additions:
β€’ ΒΌ cup chopped nuts
β€’ ΒΌ cup shredded coconut


πŸ‘©β€πŸ³ Instructions

1. Prepare the Dry Base

In a large mixing bowl, add:

β€’ Cooked quinoa
β€’ Rolled oats

If using optional nuts or coconut, add them now.

Stir to evenly distribute all dry ingredients.


2. Warm the Almond Butter Mixture

In a microwave-safe bowl or small saucepan over low heat, combine:

β€’ Almond butter
β€’ Honey or maple syrup

Heat gently until:
β€’ The mixture is smooth
β€’ Easy to stir
β€’ Warm but not boiling

Remove from heat.


3. Make the Chocolate Mixture

Add to the warm almond butter mixture:

β€’ Cocoa powder
β€’ Vanilla extract
β€’ Salt

Whisk until fully blended and glossy.


4. Combine Wet and Dry Ingredients

Pour the chocolate mixture over the quinoa and oats.

Using a spatula or wooden spoon, stir thoroughly until:
β€’ All quinoa and oats are coated
β€’ No dry patches remain
β€’ Mixture is thick and sticky


5. Add Chocolate Chips

Fold in the dark chocolate chips.

If the mixture is still warm, the chips may soften slightly β€” this helps the clusters hold together.


6. Shape the Clusters

Line a baking tray with parchment paper.

Using a tablespoon or small scoop:
β€’ Drop rounded portions onto the tray
β€’ Press lightly to form compact clusters

Leave a small gap between each cluster.


7. Chill to Set

Place the tray in the refrigerator for at least 1 hour, until clusters are firm and hold their shape.


⭐ Helpful Tips

βœ” Use fully cooled quinoa so excess moisture does not soften the mixture
βœ” Stir thoroughly so coating is even
βœ” Press clusters firmly so they don’t crumble
βœ” If mixture feels loose, chill the bowl for 10 minutes before shaping


🧊 Storage

β€’ Store in an airtight container in the refrigerator for up to 7 days
β€’ Freeze for up to 1 month
β€’ Best served chilled

Cheesy Breakfast Toasts (5-Minute Style)

Cheesy Breakfast Toasts (5-Minute Style)

Golden toasted bread topped with creamy white sauce, cheese, and savory meats β€” quick, filling, and perfect for breakfast or brunch.

Prep Time: 5 minutes
Cook Time: 8–10 minutes
Servings: 3


πŸ“ Ingredients

  • 6 slices bread

  • 30 g butter

  • 3 tablespoons all-purpose flour

  • 1/2 cup milk

  • A pinch of nutmeg

  • 3 slices bacon, chopped

  • 100 g hunter sausage, thinly sliced

  • 3 slices cheese (cheddar, mozzarella, or processed cheese)

  • Fresh parsley, finely chopped


πŸ‘©β€πŸ³ Instructions

1. Prepare the creamy sauce

  • In a small pan over medium heat, melt the butter.

  • Add flour and stir constantly for 1 minute to form a smooth paste.

  • Gradually pour in the milk while whisking to avoid lumps.

  • Cook until thick and creamy (about 2–3 minutes).

  • Add a pinch of nutmeg and salt to taste.

  • Remove from heat and set aside.


2. Cook the meats

  • In a frying pan, cook the chopped bacon until lightly crisp.

  • Add sliced hunter sausage and sautΓ© for 1–2 minutes.

  • Remove from heat.


3. Assemble the toasts

  • Place bread slices on a baking tray.

  • Spread a layer of creamy sauce on each slice.

  • Add cooked bacon and sausage evenly.

  • Place cheese slices on top.

  • Sprinkle chopped parsley.


4. Bake or toast

  • Bake in a preheated oven at 200Β°C (400Β°F) for 5–8 minutes,
    OR

  • Cook in an air fryer at 180Β°C (350Β°F) for 5 minutes,
    OR

  • Cover and toast in a pan on low heat until cheese melts.


5. Serve

  • Remove once cheese is melted and lightly golden.

  • Serve hot with tea, coffee, or fresh juice.


⭐ Optional Variations

  • Vegetarian: Skip meat and add mushrooms or bell peppers

  • Spicy: Add black pepper or chili flakes

  • Extra creamy: Mix cheese into the sauce

  • Healthier: Use whole wheat bread and turkey slices


🍽 Serving Ideas

  • Serve with boiled eggs or fruit

  • Add tomato slices on top

  • Pair with fresh juice or milk