Crispy Chicken Ham & Cheese Bites (Party Appetizer)

Crispy Chicken Ham & Cheese Bites (Party Appetizer)

Golden, crispy chicken layered with ham and melted cheese, finished with seasoning on top. Perfect for parties or family meals.


Ingredients

  • 2 large boneless, skinless chicken breasts

  • Salt and black pepper, to taste

  • ½ cup all-purpose flour

  • 2 large eggs

  • 1 cup breadcrumbs or crushed crackers

  • 1 teaspoon garlic powder

  • 1 teaspoon paprika

  • 8 slices ham

  • 8 slices Swiss, mozzarella, or provolone cheese

  • 2 tablespoons butter, melted

  • 1 tablespoon poppy seeds or mixed dried herbs (optional)


Instructions

1. Prepare the Chicken

Slice each chicken breast horizontally into thinner pieces (cutlets).
Season both sides with salt and black pepper.

2. Set Up Breading Station

Place in three bowls:

  • Bowl 1: flour

  • Bowl 2: beaten eggs

  • Bowl 3: breadcrumbs mixed with garlic powder and paprika

Dip each chicken piece:

  1. In flour

  2. In egg

  3. In breadcrumbs

Press gently so coating sticks well.

3. Fry or Bake the Chicken

Heat oil in a skillet over medium heat and cook chicken until golden on both sides (about 3–4 minutes per side).
OR bake at 200°C (400°F) for 18–20 minutes until fully cooked.

4. Assemble the Stacks

Preheat oven to 180°C (350°F).
Place cooked chicken pieces in a baking dish.

On each piece:

  • Add ½ slice ham

  • Add ½ slice cheese

  • Top with another chicken piece (to form a sandwich stack)

5. Add Topping

Brush tops with melted butter.
Sprinkle with poppy seeds or dried herbs.

6. Bake to Melt

Bake for 10–12 minutes until cheese melts and tops are lightly crisp.


Serving Suggestions

  • Serve hot

  • Cut into smaller pieces for appetizers

  • Serve with honey mustard, garlic sauce, or marinara


Storage

  • Refrigerate leftovers up to 3 days

  • Reheat in oven or air fryer for best texture


Variations

  • Use turkey instead of ham

  • Add a thin layer of mustard inside

  • Use cheddar or gouda cheese

  • Add a pinch of chili flakes for heat
No-Bake Creamy Cocoa Dessert (5-Minute Prep)

No-Bake Creamy Cocoa Dessert (5-Minute Prep)

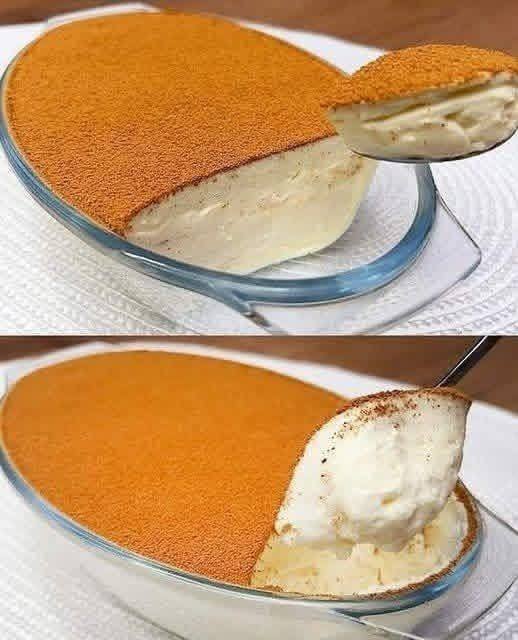
A smooth, creamy chilled dessert with a cocoa-dusted top. No oven needed.


Ingredients

  • 2 cups (500 ml) heavy whipping cream

  • ½ cup (100 g) sugar or sweetener of choice

  • 1 teaspoon vanilla extract

  • 1 cup (250 g) cream cheese or mascarpone, softened

  • 2 tablespoons cornstarch (or instant vanilla pudding powder)

  • ½ cup (120 ml) milk

  • Unsweetened cocoa powder, for topping


Step-by-Step Instructions

1. Make the Cream Base

In a mixing bowl, beat:

  • Heavy cream

  • Sugar

  • Vanilla

Whip until thick and fluffy (soft peaks form).

2. Add the Cheese

Add the softened cream cheese (or mascarpone) to the whipped cream.
Beat again until completely smooth and creamy with no lumps.

3. Thicken the Mixture

In a small bowl, whisk:

  • Milk

  • Cornstarch

Pour this into the cream mixture and mix well until fully combined.

4. Chill

Pour the mixture into a serving dish or glass container.
Smooth the top with a spatula.

Refrigerate for 2–3 hours until firm.

5. Finish

Before serving, dust the top generously with unsweetened cocoa powder.


How to Serve

  • Serve cold

  • Scoop or slice with a spoon

  • Optional: add grated chocolate or coffee powder on top


Storage

  • Keep covered in the refrigerator for up to 3 days

  • Do not leave at room temperature for long


Optional Variations

  • Add instant coffee to the cream for coffee flavor

  • Layer with crushed biscuits for a tiramisu-style dessert

  • Add lemon zest for citrus flavor

  • Use chocolate pudding instead of vanilla


Tips

✔ Use cold cream for better whipping
✔ Sift cocoa powder for a smooth top
✔ Chill fully for clean slices
✔ Beat cream cheese well to avoid lumps

The 2-Ingredient Silk Pudding

The 2-Ingredient Silk Pudding

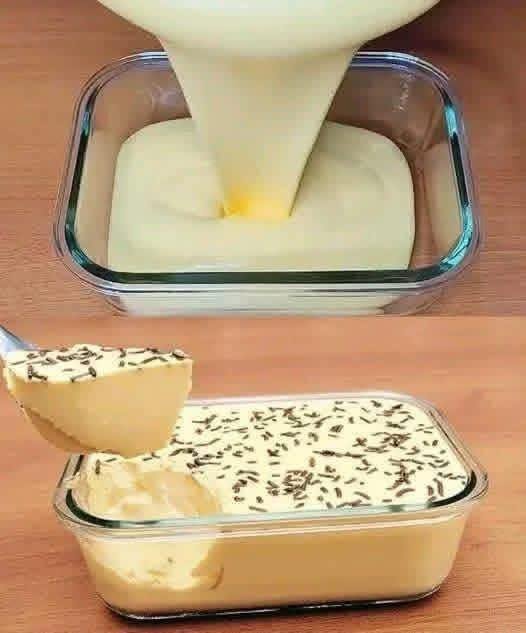
Creamy, sweet, and perfectly smooth.

Ingredients

  • 1 can (approx. 400g) Sweetened Condensed Milk

  • 1 ½ cups (approx. 350g) Plain Greek Yogurt (or Natural Unsweetened Yogurt)

  • Optional: Chocolate sprinkles or a dusting of cocoa powder for the top.


Instructions

  1. Combine: In a medium mixing bowl, pour in the entire can of sweetened condensed milk. Add the Greek yogurt.

  2. Blend until Smooth: Use a whisk or a hand mixer to blend the two ingredients together. Mix for about 1–2 minutes until the texture is completely uniform and has a beautiful glossy sheen.

  3. The “Cook” (Microwave or Oven): * Microwave Method: Pour the mixture into a microwave-safe glass dish. Heat on high for 2 minutes, stir gently, and heat for another 2 minutes. The mixture should thicken significantly.

    • Oven Method: Pour into a baking dish and bake at 160°C (320°F) in a water bath (place the dish inside a larger pan filled with hot water) for about 30 minutes until set.

  4. Add Toppings: While the mixture is still warm but not hot, smooth the top with a spatula and add your chocolate sprinkles or garnish.

  5. Chill to Set: This is the most important part! Let the dish cool to room temperature, then cover and refrigerate for at least 3–4 hours (overnight is even better). This allows the proteins to bond and creates that firm, spoonable texture.

  6. Serve: Scoop directly from the dish or slice if you used the oven method for a firmer set.


Why This Works

The acidity in the yogurt reacts with the proteins in the condensed milk, and the application of gentle heat helps it “set” into a custard without the need for eggs or gelatin. It’s a wonderful kitchen hack for a last-minute dessert!

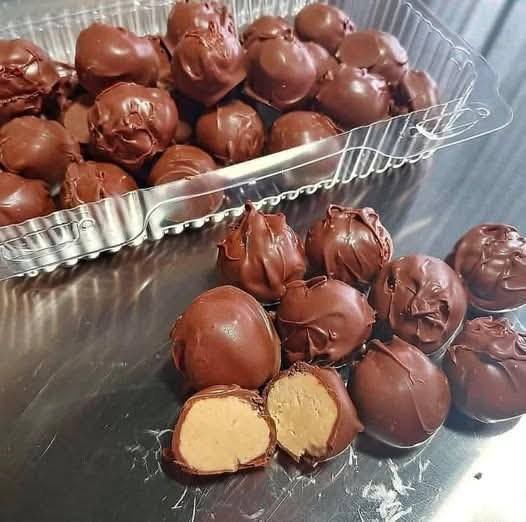
Chocolate Peanut Butter Balls (No-Bake)

Chocolate Peanut Butter Balls (No-Bake)

These bite-size treats have a creamy peanut butter center and a smooth dark chocolate coating. They are easy to prepare and perfect for chilling and serving as a snack or dessert.


Ingredients

For the filling:

  • 1 cup natural peanut butter

  • ½ cup powdered sweetener or powdered sugar

  • ¼ cup protein powder (optional, plain or vanilla)

  • 1 teaspoon vanilla extract

  • Pinch of salt (if peanut butter is unsalted)

For coating:

  • 1½ cups dark chocolate chips or chopped dark chocolate

  • 1 tablespoon coconut oil or butter (for smooth melting)


Instructions

1. Make the Peanut Butter Mixture

In a mixing bowl, combine:

  • Peanut butter

  • Sweetener

  • Protein powder (if using)

  • Vanilla

  • Salt

Stir until thick, smooth, and fully combined. The mixture should be firm enough to roll.
If too soft, refrigerate for 10–15 minutes.

2. Shape the Balls

Scoop about 1 tablespoon of mixture and roll into a ball using your palms.
Place on a tray lined with baking paper.

Repeat with all the mixture.

3. Chill

Place the tray in the freezer for 15–20 minutes so the balls become firm for dipping.

4. Melt the Chocolate

In a microwave-safe bowl, melt the chocolate with coconut oil in 20–30 second bursts, stirring between each, until smooth.

5. Coat the Balls

Dip each chilled peanut butter ball into melted chocolate using a fork or toothpick.
Let excess chocolate drip off, then place back on the lined tray.

6. Set

Refrigerate for 20–30 minutes until the chocolate is fully set.


Storage

  • Store in an airtight container in the refrigerator for up to 5 days

  • Can be frozen for up to 1 month


Optional Variations

  • Add crushed nuts to the peanut butter mixture

  • Use milk or white chocolate instead of dark

  • Add a pinch of cinnamon or espresso powder

  • Drizzle with melted white chocolate on top

Creamy No-Bake Cheese Log (5-Minute Prep Dessert)

Creamy No-Bake Cheese Log (5-Minute Prep Dessert)

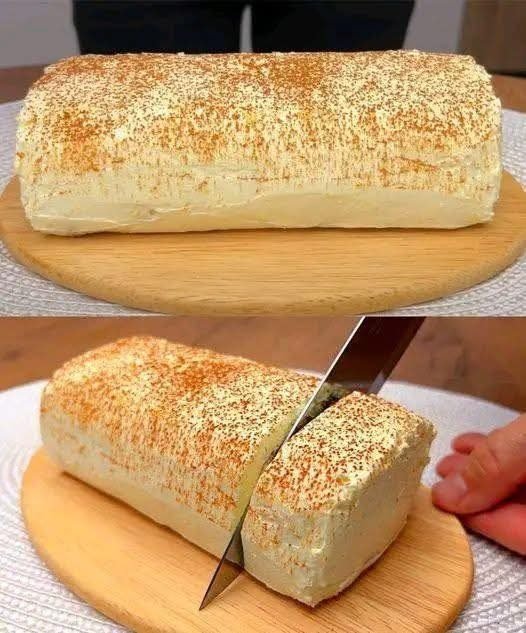
This simple no-bake dessert is smooth, lightly sweet, and easy to shape into a sliceable log. It’s perfect for quick entertaining or a make-ahead chilled treat.


Ingredients

  • 2 cups (500 g) ricotta or quark cheese, well drained

  • ½ cup (120 g) cream cheese, softened

  • ¼ cup sweetener of choice (honey, agave syrup, or powdered monk fruit)

  • 1 teaspoon vanilla extract

For coating (optional):

  • Unsweetened cocoa powder

  • Ground cinnamon

  • Finely chopped nuts (almonds, walnuts, pistachios)


Step-by-Step Instructions

1. Prepare the Cheese

If using ricotta, place it in a sieve or cheesecloth and let it drain for 10–15 minutes. This prevents excess moisture and helps the log hold its shape.

2. Blend Until Smooth

In a medium mixing bowl, add:

  • Ricotta (or quark)

  • Cream cheese

Beat using a hand mixer or whisk until completely smooth and creamy. Scrape the sides of the bowl so no lumps remain.

3. Sweeten and Flavor

Add:

  • Sweetener

  • Vanilla extract

Mix again for about 30 seconds until fully combined and evenly flavored.

4. Shape the Log

Lay a large sheet of plastic wrap on your counter.
Spoon the mixture onto the center and shape it into a thick line (log shape).

5. Roll and Seal

Lift the plastic wrap and roll the mixture tightly into a cylinder.
Twist the ends like a candy wrapper to compress and smooth the log.

6. Chill to Set

Place in:

  • Freezer: 20–30 minutes
    OR

  • Refrigerator: 2 hours

This firms it up so it slices neatly.

7. Coat the Outside

Unwrap the chilled log.
Roll it gently in:

  • Cocoa powder

  • Cinnamon
    or

  • Chopped nuts

until fully coated.

8. Slice and Serve

Cut into thick slices using a sharp knife.
Serve cold.


Optional Mix-Ins (Add Before Rolling)

  • Mini chocolate chips

  • Finely chopped dates or raisins

  • Lemon or orange zest

  • Shredded coconut


Storage

  • Store wrapped in the refrigerator for up to 3 days

  • Can be frozen for up to 2 weeks

  • Slice while cold for best shape

The High-Protein Cloud Cake

The High-Protein Cloud Cake

No flour, no refined sugar, and packed with protein.

Ingredients

  • 4 Large Eggs (separated into whites and yolks)

  • 1 ½ cups (approx. 350g) Plain Greek Yogurt (thick, strained yogurt works best)

  • 3 tbsp Cornstarch or Arrowroot Powder (to help stabilize the structure)

  • ¼ cup Natural Sweetener (Honey, Maple Syrup, or Stevia/Monkfruit to taste)

  • 1 tsp Vanilla Extract

  • A pinch of Salt

  • Optional: 1 tsp Lemon juice (helps the egg whites peak)


Instructions

  1. Prep the Oven: Preheat your oven to 150°C (300°F). Line a 6 or 7-inch round cake pan with parchment paper. Pro tip: Make sure the parchment paper sticks up higher than the pan edges, as this cake will rise quite a bit!

  2. Mix the Base: In a medium bowl, whisk together the egg yolks, Greek yogurt, sweetener, vanilla, and cornstarch until the mixture is completely smooth and creamy.

  3. Whip the Whites: In a separate, very clean glass or metal bowl, add the egg whites and a pinch of salt (and lemon juice if using). Use a hand mixer or stand mixer to beat them on high until stiff peaks form. You should be able to turn the bowl upside down without the whites moving.

  4. The Fold (Crucial Step): Gently fold about 1/3 of the egg whites into the yogurt mixture to lighten it up. Then, add the rest of the whites. Use a spatula to gently fold in a “U” motion—do not stir or whisk, as you want to keep all that air inside.

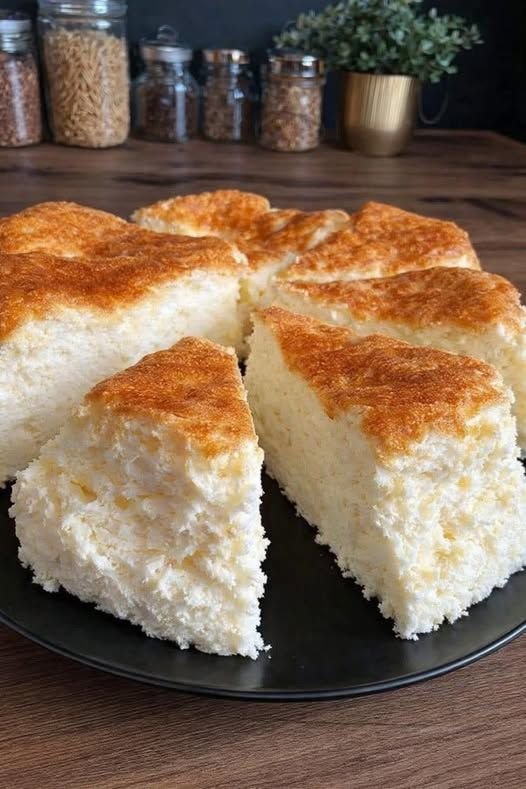
  5. Bake: Pour the batter into your prepared pan. Bake for 45–50 minutes. The top should be golden brown, and the cake should have a slight jiggle.

  6. The Cool Down: Turn off the oven and leave the door slightly ajar for 10 minutes before taking it out. This prevents the cake from collapsing too quickly.

  7. Chill: For the best texture, let it cool to room temperature, then refrigerate for at least 2 hours. This sets the “custard” texture inside.


Nutrition Note

Because this recipe uses Greek yogurt and eggs as the primary ingredients, it is exceptionally high in protein compared to traditional sponges. It’s a great way to satisfy a sweet craving while staying fueled.