Lentil and Spinach Stuffed Flatbreads

Lentil and Spinach Stuffed Flatbreads

A wholesome, family-friendly meal perfect for a nutritious lunch or dinner.

Ingredients

For the Dough:

  • 2 cups All-purpose flour (or whole wheat flour for extra fiber)

  • 1/2 tsp Salt

  • 2 tbsp Olive oil

  • 3/4 cup Warm water (add gradually)

For the Filling:

  • 1 cup Cooked brown or green lentils (canned is fine, just drain and rinse)

  • 2 cups Fresh spinach, finely chopped

  • 1 small Onion, finely diced

  • 2 Garlic cloves, minced

  • 1 tsp Ground cumin

  • 1/2 tsp Red pepper flakes (optional)

  • Salt and black pepper, to taste

  • 1/2 cup Crumbled feta cheese or shredded mozzarella (optional)


Instructions

  1. Make the Dough: In a large bowl, whisk the flour and salt. Add the olive oil and warm water. Knead by hand for about 5 minutes until you have a smooth, elastic dough. Cover with a damp cloth and let it rest for 20 minutes to relax the gluten.

  2. Sauté the Filling: While the dough rests, heat a splash of oil in a pan over medium heat. Sauté the onion and garlic until soft. Add the chopped spinach and cook until wilted. Stir in the cooked lentils, cumin, salt, pepper, and red pepper flakes. Remove from heat and let the mixture cool. If using cheese, stir it in once the mixture is cool.

  3. Divide and Roll: Divide your rested dough into 6 equal balls. On a lightly floured surface, roll each ball into a very thin circle (about 8–10 inches wide).

  4. Stuff the Flatbreads: Place a generous spoonful of the filling on one half of the dough circle, leaving a small border at the edge. Fold the other half over to create a semi-circle. Press the edges firmly with your fingers or a fork to seal.

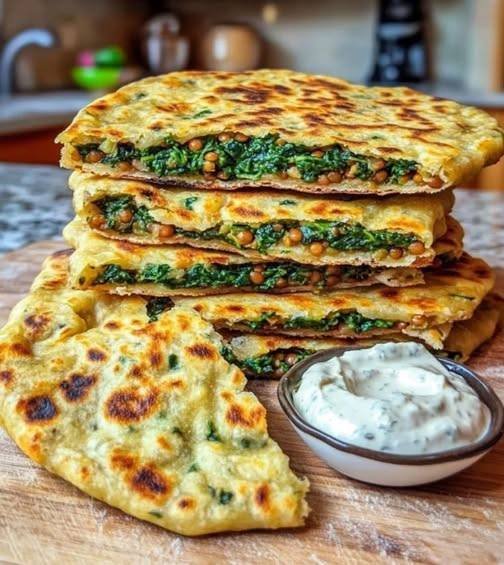
  5. Cook: Heat a non-stick skillet or griddle over medium heat with a tiny bit of oil or butter. Place the flatbread in the pan and cook for 3–4 minutes per side until golden brown and crispy, as seen in the photo.

  6. Serve: Cut into wedges and serve hot. This pairs perfectly with a side of Greek yogurt or a garlic-herb dipping sauce.


Recipe Highlights

  • Wholesome Energy: The combination of complex carbohydrates from the dough and plant-based protein from the lentils provides steady energy throughout the day.

  • Nutrient Dense: Spinach adds essential iron and vitamins, making this a much healthier alternative to traditional fast-food wraps.

  • Family Favorite: Because these are hand-held and customizable, they are usually a big hit with both kids and adults.
Cheesy Broccoli Bake

Cheesy Broccoli Bake

A crustless, flour-free casserole that’s light yet satisfying.

Ingredients

The Base:

  • 4 cups Broccoli florets (fresh or frozen, thawed)

  • 2 tbsp Olive oil or butter

  • 1 small Red onion, finely chopped

  • 2 Garlic cloves, minced

  • 1/2 tsp Dried oregano

  • 1/2 tsp Dried thyme or basil

  • Salt and black pepper, to taste

The Binder (Custard):

  • 4 large Eggs

  • 1/2 cup Greek yogurt or sour cream (for creaminess without flour)

  • 1.5 cups Shredded cheddar cheese (or a mix of mozzarella and cheddar)

  • 1/4 cup Grated Parmesan cheese


Instructions

  1. Prep the Broccoli: If using fresh broccoli, steam it for 3–4 minutes until bright green and slightly tender. If using frozen, ensure it is fully thawed and patted dry with a paper towel to prevent the casserole from becoming watery. Chop into bite-sized pieces.

  2. Sauté the Aromatics: Heat the olive oil or butter in a skillet over medium heat. Add the red onion and cook until translucent (about 5 minutes). Add the minced garlic, oregano, thyme, salt, and pepper. Sauté for another minute until fragrant, then remove from heat.

  3. Prepare the Custard: In a large mixing bowl, whisk together the eggs and Greek yogurt (or sour cream) until smooth. Stir in 1 cup of the shredded cheese and the grated Parmesan.

  4. Combine: Add the broccoli and the sautéed onion/garlic mixture into the bowl with the egg and cheese. Stir well to ensure every floret is coated.

  5. Assemble: Preheat your oven to 190°C (375°F). Lightly grease a glass baking dish (roughly 9×9 inch). Pour the mixture into the dish and spread it evenly.

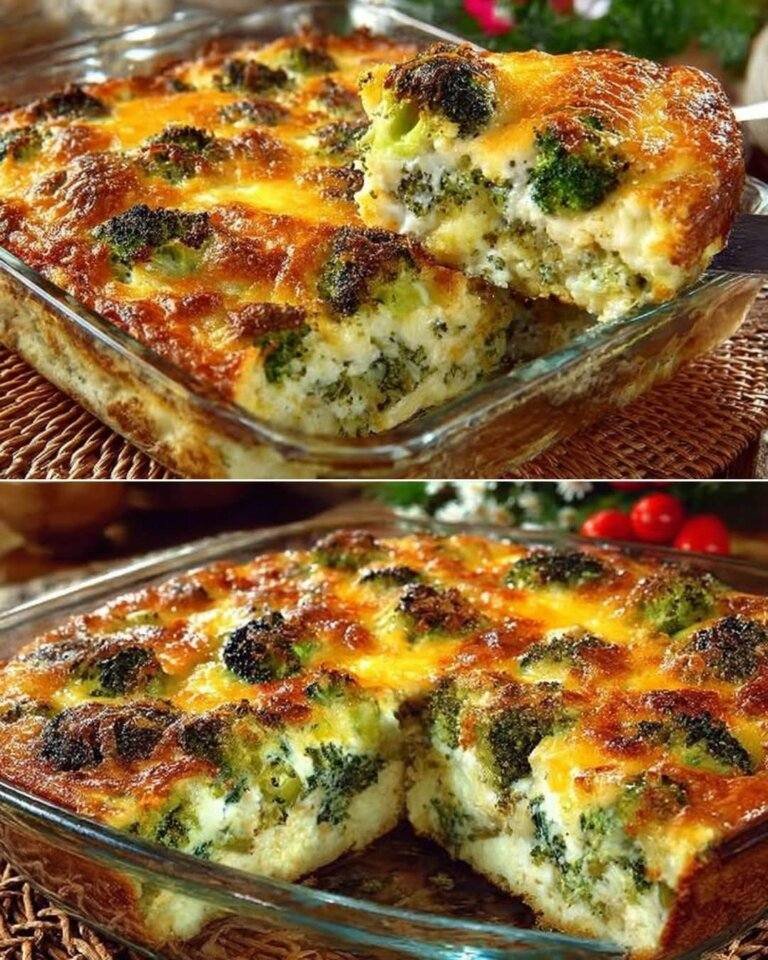
  6. Top and Bake: Sprinkle the remaining 1/2 cup of cheese over the top. Bake for 25–30 minutes, or until the center is set and the top is golden brown and bubbly as seen in the photo.

  7. Rest: Let the casserole sit for 5–10 minutes before slicing. This allows the egg and cheese to firm up so you get clean, beautiful slices.


Why this works:

  • High Fiber: The broccoli provides bulk and nutrients without the need for breadcrumbs or flour.

  • Protein-Rich: Using eggs and Greek yogurt creates a “soufflé” like texture that is very filling.

  • Flavor Boost: Sautéing the garlic and onions first adds a depth of flavor that raw vegetables can’t match.

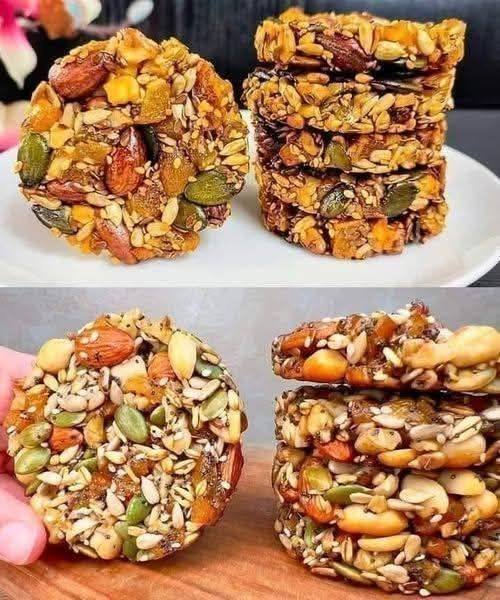
Nut & Seed Energy Cookies

Nut & Seed Energy Cookies

A crunchy, naturally sweetened snack packed with healthy fats and fiber.

Ingredients

  • 70g (2.5 oz) Dried apricots, finely chopped

  • 60g (2 oz) Whole almonds

  • 50g (1.8 oz) Walnuts, roughly chopped

  • 70g (2.5 oz) Hazelnuts

  • 30g (1 oz) Pumpkin seeds (pepitas)

  • 40g (1.4 oz) Sunflower seeds

  • 20g (0.7 oz) Sesame seeds

  • 20g (0.7 oz) Flaxseeds

  • 20g (0.7 oz) Pine nuts

  • 40ml (1.4 oz) Natural honey (acts as the binder)

  • 1 Egg white (helps create that crisp, held-together texture)

  • A pinch of salt (to enhance the nutty flavors)


Instructions

  1. Prepare the Fruit and Nuts: Finely dice the dried apricots into very small pieces so they distribute evenly. Roughly chop the walnuts and any larger nuts if you prefer a slightly more uniform cookie, though keeping them mostly whole (like the almonds and hazelnuts) provides a great crunch as seen in the photo.

  2. Toast (Optional but Recommended): For a deeper flavor, you can lightly toast the seeds (sunflower, pumpkin, sesame) in a dry pan over medium heat for 2–3 minutes until fragrant before mixing.

  3. Mix the Dry Ingredients: In a large mixing bowl, combine all the nuts, seeds, chopped apricots, and the pinch of salt. Toss them together so the seeds are well-distributed among the larger nuts.

  4. Add the Binders: Pour the natural honey over the mixture. In a separate small bowl, lightly whisk the egg white until it’s just frothy (not stiff peaks), then add it to the nut mixture. Stir everything thoroughly until every nut and seed is lightly coated and sticky.

  5. Shape the Cookies: Preheat your oven to 150°C (300°F). Line a baking sheet with parchment paper. To get the perfect circular shape shown in your image, use a round cookie cutter or a mason jar lid as a mold. Scoop about 2 tablespoons of the mixture into the mold, press down firmly with the back of a spoon to pack it tightly, and then lift the mold.

  6. Bake: Bake for 20–25 minutes. You are looking for the honey to bubble slightly and the nuts to turn a light golden brown. Keep a close eye on them toward the end, as honey and seeds can brown quickly.

  7. Cool Completely: This is the most important step. The cookies will feel soft when they first come out of the oven. Let them cool completely on the baking sheet for at least 30 minutes. As the honey and egg white cool, they will harden and “glue” the nuts together into a crisp cluster.


Storage Tip

Store these in an airtight container at room temperature for up to a week, or in the fridge for a snappier, cold treat.

Apple Fritter Bites

Apple Fritter Bites

These Apple Fritter Bites are really a life-changing autumn treat that I had to share with you today.

This is true apple flavor packed, doughnut-like fritters that are light as air and covered with the most delectable apple cider glaze.

You may feel somewhat better about coming back for seconds—or thirds—because they are baked rather than fried!

I first sampled these little morsels of perfection when Baker Mama’s clever friend Courtney sent me a copy of her new cookbook Brilliant Bites.

I had to make them as soon as I saw the recipe title.

Could you possibly come up with an autumn snack that is better? Crisp cider glaze over warm, doughy apple fritters that pop? Indeed, do!

These, let me just say, are every bit as good as apple fritters could possibly be.

Soft pieces of fresh apple abound in these very moist treats.

The glaze is sweet and sour, and it gives you that distinctive crackly crust that is just too good.

Finally, the nicest thing? You may feel comfortable about nibbling on a couple since they are baked rather than fried.If you’re anything like me, the whole batch!

Components Cooking spray nonstick
One and a half cups total flour
Two tsp baking powder
A teaspoon each of ground cinnamon and kosher salt
Melt one-fourth cup unsalted butter
3/4 cup sugar, granulated
Just one big egg
A half teaspoon of vanilla essence
1/2 cup applesauce, unsweet
About two medium-sized neatly chopped Honeycrisp or Gala apples
Appel Cider two cups powdered sugar for the glaze
1/3 cup plus two tablespoons apple juice or cider

See also  Air Fryer Roasted Garlic Recipe

Guidelines :


Arrange an oven rack to 400°F and mist a baking sheet with nonstick cooking spray.

Stir together the flour, baking powder, salt, and cinnamon in a medium-sized basin.

Beat the sugar and melted butter together well in a big basin. Whisk in the applesauce, vanilla, and egg until smooth.

Stirring just until mixed, add the dry ingredients to the wet ones. Fold in the diced apples rather gently.

To the prepared baking sheet, scoop out 1 tablespoon quantities of batter and place them a few inches apart.

After ten minutes of baking, take out of oven and set broiler to high.

To make the glaze, beat the powdered sugar and apple juice or cider until it is pourable.

Let some of the glaze run down the edges of the heated fritter bits as you brush over them. Broil, turning the pan often, for two to four minutes, or until the glaze begins to boil and caramelize.

Take out of the oven and liberally coat the fritters’ tops with the remaining glaze.

Give the glaze fifteen minutes to set before serving.

Enjoy !

Sugar-Free Creamy Chia Seed Pudding

Sugar-Free Creamy Chia Seed Pudding

Prep time: 5 minutes | Set time: 2 hours (or overnight)

Ingredients

  • 3 tbsp Chia seeds

  • 1 cup Unsweetened almond milk (or coconut milk for extra creaminess)

  • 1/4 tsp Vanilla extract

  • Sweetener (pick one): 1 tsp Monk fruit sweetener, a few drops of Stevia, or half a mashed banana for natural sweetness.

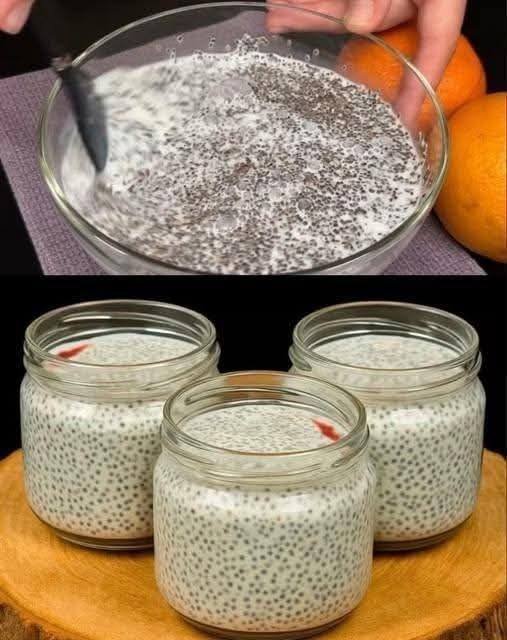
  • Toppings (as seen in the image): Fresh orange zest or slices, and a few berries.


Instructions

  1. Mix the Base: In a medium bowl or wide-mouth jar, combine the chia seeds, your choice of milk, vanilla extract, and your preferred sugar-free sweetener.

  2. Stir Thoroughly: Whisk or stir vigorously for about 1-2 minutes. This is the most important step! If you don’t stir well initially, the seeds will clump together at the bottom.

  3. The First Rest: Let the mixture sit for 5 minutes, then give it one more good stir to break up any remaining clumps.

  4. Chilling: Cover the bowl or transfer the mixture into small glass jars (like those in the photo). Place them in the refrigerator for at least 2 hours. For the best “pudding” texture, let them sit overnight.

  5. Serve: Before eating, give it a quick stir. If it’s too thick, add a splash more milk. Top with fresh orange segments or berries as shown in the image.


Pro Tips for Success

  • Texture: If you don’t like the “beady” texture of chia seeds, you can blend the entire mixture in a high-speed blender before chilling to create a smooth, mousse-like consistency.

  • Storage: These jars will stay fresh in the fridge for up to 5 days, making them an excellent option for Sunday meal prep.

  • The “Slim” Factor: Focus on using unsweetened nut milks to keep the calorie count low while maintaining the high fiber content that helps with digestion.

Purple Onion Metabolic Support Salad

Purple Onion Metabolic Support Salad

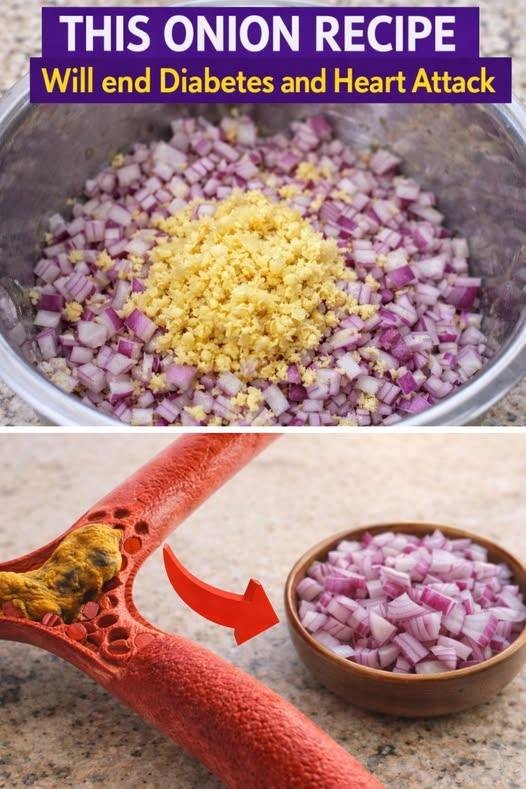
A nutrient-rich side dish that may help support blood sugar and heart health when eaten regularly as part of a healthy lifestyle.

Description

This simple raw purple onion recipe preserves beneficial plant compounds like quercetin, anthocyanins, and sulfur compounds. These antioxidants may help improve insulin sensitivity, reduce inflammation, and support cardiovascular health — not as a treatment, but as nutritional support.

Ingredients

  • 1 medium purple (red) onion, finely chopped

  • 1 tbsp lemon juice or apple cider vinegar

  • 1 tbsp extra-virgin olive oil

  • 1 small garlic clove, minced

  • Salt to taste

  • Optional: parsley, cucumber, tomato, or avocado

Instructions

  1. Soak chopped onion in cold water for 5–10 minutes (reduces harshness).

  2. Drain well.

  3. Mix with garlic, lemon juice (or vinegar), olive oil, and salt.

  4. Add optional vegetables if desired.

  5. Serve fresh.


Servings

2 servings

Nutritional Info (approx. per serving)

  • Calories: ~60

  • Carbohydrates: ~7 g

  • Fiber: ~1.5 g

  • Fat: ~4 g

  • Sugar: ~3 g

  • Glycemic load: Low

Potential Benefits (Evidence-Based, Not Miracles)

✔ May help support blood sugar regulation over time
✔ Rich in antioxidants (especially quercetin)
✔ May support heart health by reducing inflammation
✔ Low-glycemic and diabetes-friendly when portioned properly

These effects are gradual and supportive, not immediate or curative.

Tips

  • Eat raw or lightly cooked to preserve antioxidants.

  • Pair with protein or healthy fats to reduce glucose spikes.

  • Best consumed regularly, not as a one-time “fix.”

Q & A

Q: Can this replace diabetes medication?
❌ No. Never replace prescribed treatment without a doctor’s guidance.

Q: Will my blood sugar drop instantly after eating this?
❌ No. Blood sugar changes happen over hours to days, not minutes.

Q: Is purple onion better than white?
✅ Yes — purple onions contain more antioxidants.

Q: How often can I eat this?
✅ 3–5 times per week is reasonable for most people.