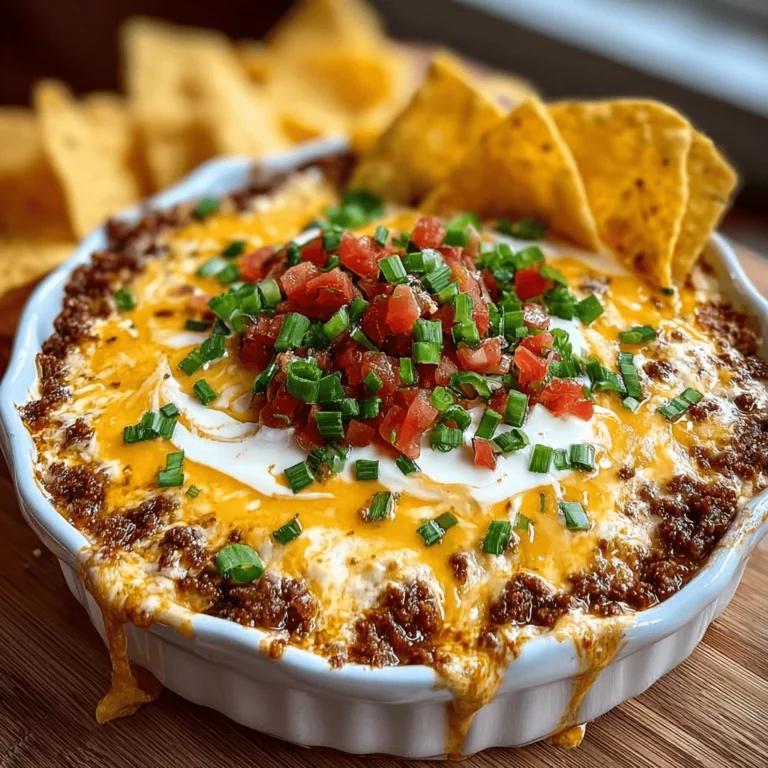
Cheesy Taco Bean Dip

A warm, creamy, and cheesy dip layered with seasoned beef, beans, salsa, and melty cheese — perfect for game days, parties, or an easy weeknight snack!

Prep Time: 15 minutes
Cook Time: 25 minutes
Total Time: ~40 minutes
Servings: 8–10
Dietary: Gluten-Free (when served with GF chips), Make-Ahead Friendly

Ingredients

  • Ground beef – or use turkey sausage for a lighter option

  • Taco seasoning – one packet (or homemade)

  • Water – to help the seasoning blend

  • Refried beans – one can (vegetarian works too)

  • Cream cheese – softened for smooth mixing

  • Sour cream – for tang and creaminess

  • Salsa – chunky style preferred

  • Garlic powder – for extra flavor

  • Shredded Mexican cheese blend – cheddar, Monterey Jack, or a combo

  • Chopped green onions or jalapeños – for garnish

  • Tortilla chips – for serving

Instructions

  1. Preheat oven – Set to 350°F (175°C). Grease a 9×13-inch baking dish.

  2. Cook the meat – Brown ground beef (or sausage) in a skillet over medium heat. Drain fat, add taco seasoning + water, and simmer for 2–3 minutes.

  3. Make the creamy base – In a large bowl, mix softened cream cheese, sour cream, refried beans, salsa, and garlic powder until smooth.

  4. Combine – Fold the cooked meat into the bean-cheese mixture.

  5. Assemble – Spread evenly into the prepared dish. Top with shredded cheese.

  6. Bake – Bake uncovered for 20–25 minutes, until bubbly and slightly golden.

  7. Serve – Garnish with green onions or jalapeños. Serve warm with tortilla chips, veggies, or pita chips.

Quick Notes & Pro Tips

  • Cream cheese tip: Fully soften before mixing for a lump-free base.

  • Make-ahead: Assemble up to 24 hours ahead; refrigerate, then bake before serving.

  • Slow cooker method: Combine ingredients (minus toppings) and heat on LOW for 2–3 hours.

  • Adjust spice: Use mild or spicy salsa and add jalapeños or hot sauce for a kick.

Why You’ll Love It

This dip is hearty enough to double as a burrito filling and crowd-pleasing enough to disappear fast at parties. It’s a creamy, cheesy, taco-inspired dish with customizable heat levels and plenty of texture.

Step-by-Step Cooking Guide

Seasoning & Meat

  • Brown beef or sausage, season with taco mix, and simmer to enhance flavor.

  • Tip: Drain excess fat well to avoid a greasy dip.

Mixing the Base

  • Blend softened cream cheese, sour cream, beans, salsa, and garlic.

  • Tip: Use a hand mixer for a super smooth, creamy consistency.

Assembling & Baking

  • Spread in the dish, top with shredded cheese, and bake until bubbly.

  • Troubleshooting: If the top cheese browns too quickly, cover loosely with foil for the last 5 minutes.

Ingredient Details & Substitutions

  • Meat: Swap ground beef with turkey, chorizo, or plant-based crumbles.

  • Beans: Replace refried beans with black beans or pinto beans for texture.

  • Cheese: Use pepper jack for a spicier kick or extra cheddar for more tang.

  • Salsa: Try corn salsa or verde salsa for a flavor twist.

Variations & Serving Suggestions

  • Party version: Make mini individual dips in ramekins for easy serving.

  • Buffet style: Keep warm in a slow cooker during parties.

  • Repurpose it: Use leftovers as a burrito, quesadilla, or nacho topping.

Storage & Make-Ahead

  • Refrigeration: Store leftovers in an airtight container for up to 4 days.

  • Freezing: Not ideal (dairy may separate), but works for up to 1 month if tightly wrapped.

  • Reheating: Warm in the oven at 325°F until heated through or microwave in short bursts.

FAQs

Q: Can I make this vegetarian?
A: Yes — replace the meat with black beans, lentils, or plant-based crumbles.

Q: Can I use homemade taco seasoning?
A: Definitely. Mix 1 tbsp chili powder, 1 tsp paprika, ½ tsp cumin, ½ tsp garlic powder, ½ tsp onion powder, ½ tsp oregano, and a pinch of cayenne.

Q: Can I make this spicier?
A: Use hot salsa, add diced jalapeños, or sprinkle with crushed red pepper.

Personal Note

This recipe came together for a last-minute game-day snack — and it’s been a go-to for parties ever since. It’s hearty, versatile, and the kind of dip everyone hovers over until it’s gone.

Your turn!
If you try this Cheesy Taco Bean Dip, leave a comment or tag me on social media — I’d love to see your version!

Would you like me to add a quick “homemade taco seasoning” recipe card for readers who want to skip the packet?
Also, should I make a “party platter version” (baked in a cast-iron or served in a skillet for presentation)?
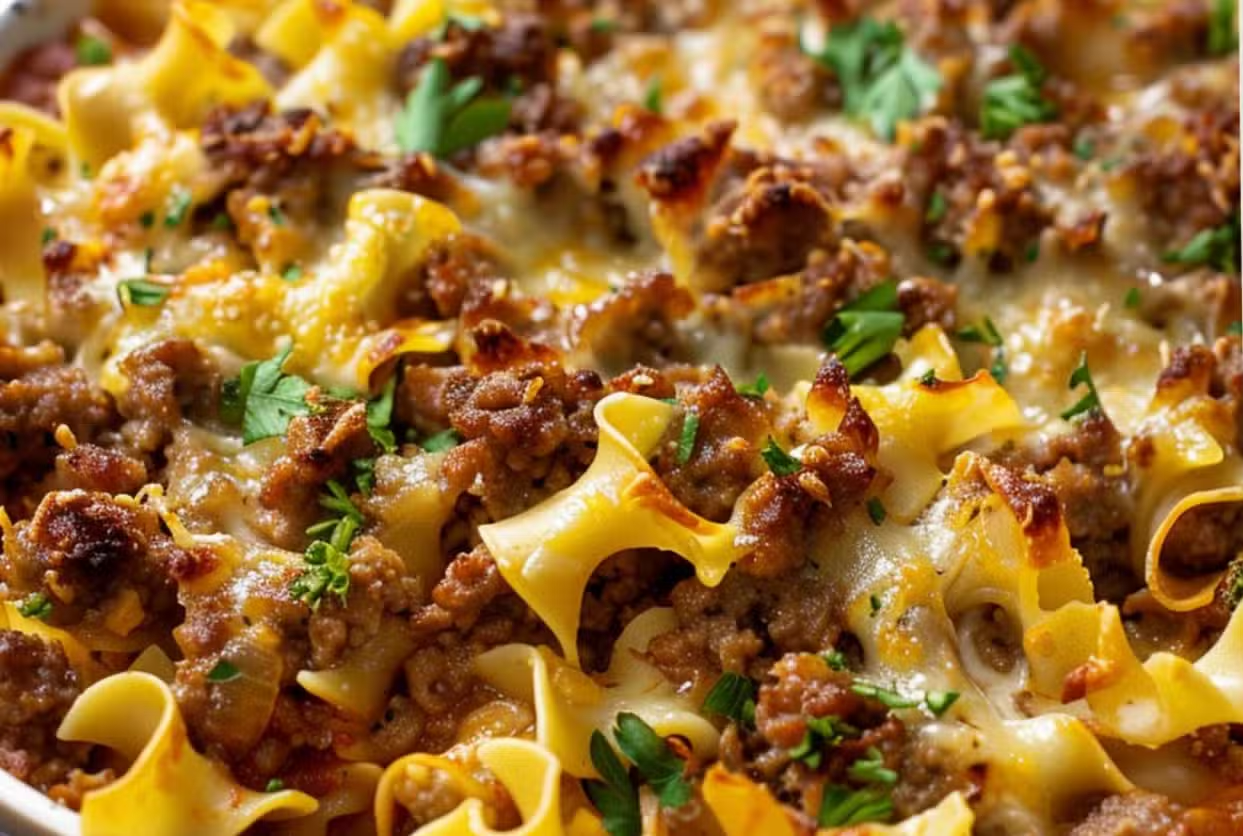
Cheesy Beef & Noodle Casserole

Creamy, cheesy egg noodles layered with savory ground beef sauce – the ultimate family-friendly comfort bake.

Prep Time: 20 minutes
Cook Time: 30 minutes
Total Time: ~50 minutes
Servings: 6–8
Dietary: Kid-friendly, Make-ahead, Freezer-friendly

Ingredients

  • Egg noodles (12 oz) – cooked al dente

  • Ground beef (1 lb)

  • Yellow onion – chopped

  • Garlic – minced (2 cloves)

  • Tomato sauce (1 can, 15 oz)

  • Diced tomatoes – drained (1 can, 14.5 oz)

  • Worcestershire sauce (1 tbsp)

  • Smoked paprika (1 tsp)

  • Red pepper flakes (½ tsp, optional)

  • Salt & pepper – to taste

  • Sour cream (1 cup)

  • Cottage cheese (1 cup)

  • Parmesan cheese – grated (½ cup)

  • Cheddar cheese – shredded (2 cups)

  • Fresh parsley – chopped (2 tbsp)

  • Olive oil – for tossing noodles

Instructions

  1. Preheat & prep: Preheat oven to 350°F (175°C). Grease a 9×13 baking dish.

  2. Cook noodles: Boil egg noodles until al dente. Drain, rinse under cold water, and toss with a drizzle of olive oil.

  3. Cook beef & aromatics: In a large skillet, brown ground beef. Drain excess fat. Add onion and garlic; sauté until soft and fragrant.

  4. Make the sauce: Stir in tomato sauce, diced tomatoes, Worcestershire sauce, smoked paprika, red pepper flakes, salt, and pepper. Simmer for a few minutes to thicken.

  5. Mix creamy noodles: In a large bowl, combine sour cream, cottage cheese, Parmesan, and cooked noodles until well-coated.

  6. Assemble casserole: Layer half the creamy noodle mixture in the baking dish, top with half the beef sauce, and sprinkle with cheddar. Repeat layers, finishing with cheddar on top.

  7. Bake: Bake uncovered for 25–30 minutes until bubbly and golden.

  8. Serve: Let rest for 5 minutes. Garnish with parsley and serve warm.

Quick Notes & Pro Tips

  • Don’t overcook noodles: Slightly undercook them so they stay firm after baking.

  • Make it spicier: Add extra red pepper flakes or a pinch of cayenne.

  • Cheese swap: Try mozzarella or Monterey Jack instead of cheddar for a different flavor.

  • Shortcut: Use pre-shredded cheese and pre-chopped onions for faster prep.

Why You’ll Love It

This casserole hits every comfort food note – creamy, cheesy, hearty, and full of flavor. It’s simple enough for weeknights but satisfying enough for a Sunday family dinner. Bonus: it reheats beautifully for leftovers.

Step-by-Step Cooking Guide

1. Make the Beefy Sauce

  • Brown ground beef, then sauté with onion and garlic.

  • Stir in tomato sauce, diced tomatoes, Worcestershire, paprika, and seasonings.

  • Tip: Let it simmer for a few minutes so the flavors meld.

2. Mix the Creamy Noodles

  • Combine noodles with sour cream, cottage cheese, and Parmesan.

  • Tip: Use full-fat dairy for extra richness.

3. Layer & Bake

  • Assemble in a 9×13 dish: creamy noodles, beef sauce, cheddar cheese – repeat.

  • Bake uncovered until bubbly and golden on top.

Ingredient Details & Substitutions

  • Ground beef: Swap with ground turkey or Italian sausage for a different flavor.

  • Dairy: Use Greek yogurt instead of sour cream for a tangier, higher-protein version.

  • Cheese: Parmesan adds saltiness – you can also add mozzarella for extra stretch.

  • Noodles: Any short pasta (penne, rotini) works if you don’t have egg noodles.

Variations & Serving Suggestions

  • Make it spicy: Add chopped jalapeños or hot sauce to the beef mixture.

  • Veggie boost: Stir in spinach, bell peppers, or zucchini for extra nutrition.

  • Pair it: Serve with garlic bread and a crisp side salad.

Storage & Make-Ahead

  • Refrigeration: Store leftovers in an airtight container for up to 4 days.

  • Freezing: Assemble unbaked casserole, wrap tightly, and freeze up to 3 months. Bake from frozen (add 15–20 minutes to baking time).

  • Reheating: Reheat in a 350°F oven, covered, for 15–20 minutes or until warmed through.

FAQs

Q: Can I make this ahead of time?
A: Yes – assemble fully, cover, and refrigerate up to 24 hours before baking.

Q: Can I skip the cottage cheese?
A: Yes – replace it with an equal amount of sour cream or ricotta.

Q: Can I double the recipe?
A: Absolutely – use two 9×13 dishes or one deep casserole dish.

Personal Note

This casserole is inspired by the kind of hearty bakes my family would gather around on cold evenings – it’s cozy, creamy, and always a crowd-pleaser.

Your turn!
If you make this Cheesy Beef & Noodle Casserole, leave a review or tag me on social media – I’d love to see your version!

Would you like me to add a simple nutrition breakdown (calories, macros per serving) for this one?
Also – do you want a “Make it one-pot” variation (so it all cooks in one skillet + baking dish)? Or keep it as is for layering?

Chicken Bacon Ranch Stromboli

Cheesy, crispy, and loaded with flavor – this stromboli combines creamy ranch, smoky bacon, juicy chicken, and melty mozzarella all wrapped in golden pizza dough.

Prep Time: 15 minutes
Cook Time: 25–30 minutes
Total Time: ~45 minutes
Servings: 4–6
Dietary: Kid-friendly, Party-friendly, Freezer-friendly


Ingredients You’ll Need

  • Pizza dough (store-bought or homemade) – for a crispy, chewy crust

  • Ranch dressing – creamy, tangy base

  • Mozzarella cheese – shredded for melty goodness

  • Cooked bacon – crumbled for salty crunch

  • Cooked chicken – diced (rotisserie chicken works perfectly)

  • Red onion – thinly sliced (mild bite, optional to sauté)

  • Fresh parsley – chopped for garnish (optional)

  • Egg – beaten, for brushing over the crust

Instructions

  1. Prep the dough

    • Preheat oven to 375°F (190°C).

    • Lightly flour a surface and roll out pizza dough into a large rectangle.

    • Tip: Let the dough rest at room temp for 10–15 minutes to make rolling easier.

  2. Build the filling

    • Spread ranch dressing evenly, leaving a border around the edges.

    • Layer on mozzarella, bacon, chicken, and red onion.

  3. Roll it up

    • Starting from one long side, roll tightly like a jelly roll.

    • Pinch the seams and ends to seal. Place seam-side down on a parchment-lined baking sheet.

  4. Finish for baking

    • Brush with beaten egg for a golden crust.

    • Use a sharp knife to make shallow slits across the top (to release steam).

  5. Bake

    • Bake for 25–30 minutes, until golden brown and puffed.

  6. Slice & serve

    • Cool for 5 minutes to make slicing easier. Garnish with parsley, cut, and enjoy warm!

Quick Notes & Pro Tips

  • Don’t overstuff: Too much filling makes it hard to roll and may leak.

  • Seal well: Pinch edges to prevent cheese and ranch from oozing.

  • Cool before slicing: Let rest for 5 minutes so the filling sets.

  • Reheating: Oven or air fryer keeps it crispy; skip the microwave if you want crunch.

Why You’ll Love It

This isn’t just dinner – it’s comfort food you can hold in your hands. The ranch gives a tangy twist, bacon adds smokiness, and mozzarella ties it all together in a golden crust. Perfect for weeknight dinners, game-day snacking, or as a party appetizer.

Step-by-Step Cooking Guide

Rolling & Filling

  • Roll out dough into a rectangle. Spread ranch evenly (don’t overdo it).

  • Layer chicken, bacon, mozzarella, and onions.

  • Tip: Keep fillings light near the edges to make sealing easier.

Rolling & Sealing

  • Roll tightly, jelly-roll style, pinching seams closed.

  • Transfer carefully to a parchment-lined sheet, seam-side down.

Finishing Touches

  • Brush with egg for a glossy finish.

  • Cut shallow slits for steam release.

Baking & Cooling

  • Bake until puffed and golden.

  • Troubleshooting: If the crust browns too quickly, tent with foil for the last 10 minutes.

Ingredient Details & Substitutions

  • Pizza dough: Store-bought saves time, but homemade works for extra flavor.

  • Chicken: Leftover rotisserie or grilled chicken works best. Swap with turkey for a lighter version.

  • Cheese: Use cheddar or Monterey Jack for a different twist.

  • Ranch dressing: Swap for Caesar or garlic cream sauce if preferred.

  • Veggies: Add spinach, bell peppers, or sautéed mushrooms for more texture.

Variations & Serving Suggestions

  • Flavor twist: Add jalapeños for heat or swap ranch for Buffalo sauce for a spicy version.

  • Party-ready: Slice into bite-sized pieces for a fun appetizer.

  • Pair it: Serve with extra ranch, marinara, or sriracha mayo.

  • Balance it: Pair with a Caesar or garden salad for a fresh contrast.

Storage & Make-Ahead

  • Refrigeration: Wrap cooled slices in foil or store in an airtight container for up to 3 days.

  • Freezing: Wrap unbaked or baked stromboli tightly in plastic wrap + foil. Freeze up to 2 months. Thaw overnight in the fridge if baked before freezing.

  • Reheating: Oven or air fryer at 375°F for 5–8 minutes keeps the crust crispy.

FAQs

Q: Can I make this ahead of time?
A: Yes – assemble, wrap tightly, and refrigerate for up to 24 hours before baking.

Q: Can I use a different cheese?
A: Absolutely – cheddar, provolone, or even pepper jack add great flavor.

Q: Can I make it vegetarian?
A: Yes – swap chicken and bacon for roasted veggies and a sprinkle of feta or extra cheese.

Personal Note

This recipe was born from my love of game-day snacks and weeknight meals that don’t require utensils. It’s cheesy, hearty, and has that perfect mix of creamy, smoky, and tangy flavors that make everyone ask for seconds.

Your turn!
Tried this Chicken Bacon Ranch Stromboli? Drop a comment, rate the recipe, or tag me on social media – I’d love to see your creation!

Do you want me to add a nutrition label (calories, protein, carbs, fat per slice) to make it more like a fully optimized recipe card?
Also, should I make a party-sized version (two smaller strombolis) for serving at gatherings?

Oven-Baked Cabbage Burger

The other night, I prepared these cabbage burgers, and they were a huge hit! Delicious, cheesy, oven-roasted delight that fits perfectly into a low-carb or keto lifestyle—without the buns or the guilt. This is how I went about it:


🛒 What You’ll Need:

  • 1 medium green cabbage (cut into thick slices,0ne inch)

  • 1 lb lean ground beef

  • ½ cup tomato sauce/sugar-free ketchup

  • ½ cup shredded cheese

  • ½ tsp salt & black pepper

  • ½ tsp red chili flakes (for a little kick)

  • ONE tsp grated garlic

  • ½ cup chopped green onions

  • ½ cup fresh chopped parsley


👨‍🍳 How to Make Them:

Step 1: Prep
Set your oven’s temperature to 400°F, or around 200°C, first. Arrange the pieces of cabbage on a baking sheet (if you like less cleanup, use parchment paper). Drizzle them with a little olive oil and season with salt and pepper. To slightly soften them, roast them in the oven for ten minutes. They cook more evenly with the meat later on thanks to this process.

Step 2: Beef Mixture
Take out a large mixing dish and start roasting your cabbage. Grated garlic, chopped green onion, parsley, chili flakes, salt, pepper, half of the shredded cheese, and ground meat should all be added. Combine the ingredients and form into four burger patties.

Step 3: Assemble
Remove from the oven the cabbage. Spread a dollop of tomato sauce over each slice. Place a beef burger directly on top of it after adding a little cheese. Add a final little grating of cheese on top of the meat.

Step 4: Bake
Place the tray back in the oven and continue baking for another 10 to 12 minutes, or until the cheese is brown and bubbling and the beef is cooked through. If you want that cheesy crust, you can broil it for the final one to two minutes.

Step 5: Serve
Remove them, garnish with more parsley if you want to be fancy, and serve hot. They taste fantastic by themselves or served with cauliflower mash or a side of salad.


Oven-Baked Cabbage Burger

💡 Bonus Tip:

Feel free to add hot sauce or jalapeños to the meat mixture if you prefer your burgers hotter. If you don’t like beef, you can also use ground chicken or turkey.

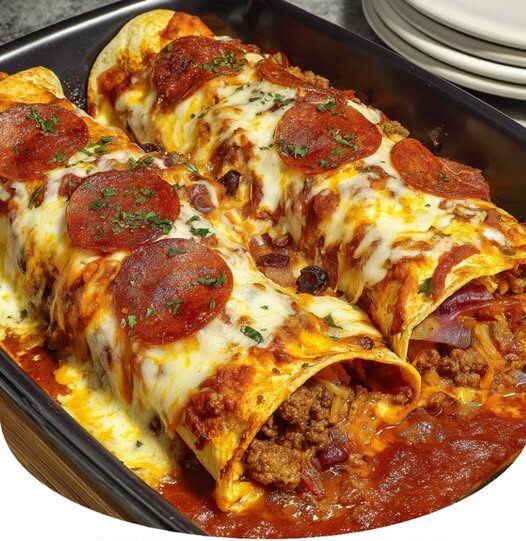
Pizza Enchiladas Ground Beef

Flour tortillas filled with beef, pepperoni, and cheese, baked under pizza sauce and melted mozzarella, perfect for family nights.

Ingredients

→ Filling

 1 lb lean ground beef
 1 cup diced yellow onion
 1 medium green bell pepper, diced
 3 oz pepperoni, chopped
 1 tablespoon chopped garlic
 1/3 cup pizza sauce
 1 tablespoon Italian seasoning
 1 cup ricotta cheese
 1 cup shredded mozzarella cheese
 1/3 cup crumbled bacon
 8 large flour tortillas

→ Topping

 2 cups pizza sauce
 2 1/2 cups shredded mozzarella cheese
 3 oz pepperoni slices
 1/4 cup crumbled bacon

Steps

Preheat oven to 375F.

Drop the lean ground beef into a large skillet over medium-high heat. Crumble the ground beef well as it cooks.

Once the ground beef is fully browned, add the diced onions, bell peppers, and chopped pepperoni to the skillet. Stir well and continue cooking until the vegetables have softened.

Add the chopped garlic to the skillet. Stir well and continue cooking for 2 minutes.

Remove the skillet from heat. Add the pizza sauce, Italian seasoning, ricotta cheese, shredded mozzarella, and crumbled bacon to the skillet. Stir until all ingredients are well combined.

Lay out the flour tortillas and scoop some of the ground beef mixture down the center of each tortilla. Roll up the tortillas tightly.

Spray a baking sheet with cooking spray. Place the rolled-up tortillas onto the baking sheet.

Pour the pizza sauce over the rolled-up tortillas. Sprinkle the shredded mozzarella, pepperoni slices, and crumbled bacon on top.

Place the baking sheet in the oven and bake the enchiladas until the cheese is fully melted and just starting to brown around the edges, about 20 to 25 minutes.

Serve warm and enjoy your pizza enchiladas.

Required Tools

  • Large skillet
  • Baking sheet
  • Cooking spray

Allergy Information

Always check each ingredient for allergens, and consult a medical professional if unsure.

Nutritional Information (per serving)

These details are shared for general guidance and don’t replace professional advice.


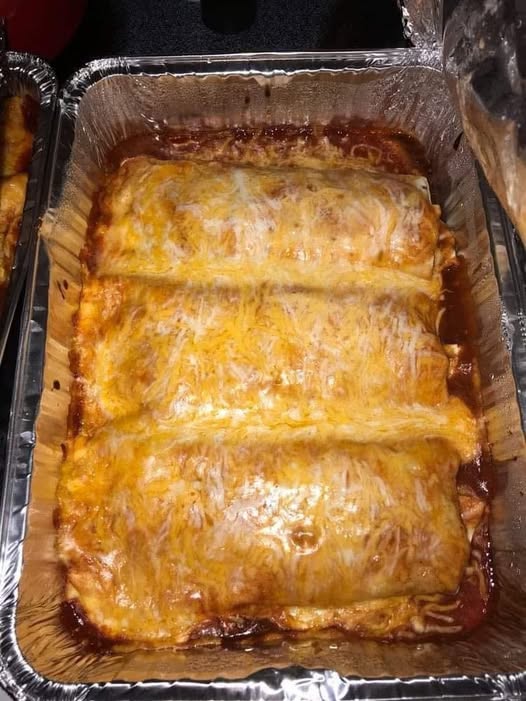
Low Point Hearty Beef Enchiladas

Ingredients

  • 2 packages of the Mission White Corn  Tortillas, super size
  • 1 ( 16 oz. ) can of fat free refried beans
  • 1 (20 oz.) can red enchilada sauce
  • 2 Tbsp diced olives
  • 1 (4 oz.) can green chiles
  • 1 pound 96%  ground lean beef or 99% ground turkey
  • 1/2 cup reduced fat shredded  cheese ( I use Trader Joe’s lite 3 cheese blend)
  • 1/2 Tbsp taco seasoning

Instructions

  1. Preheat oven to 350 degrees.
  2. Spray a large skillet pan with non stick cooking spray. Cook ground beef over medium heat until meat is no longer pink.
  3. Add taco seasoning and 2 tsp of water and reduce heat to low for 60 seconds. Remove from heat and set aside.
  4. In a large mixing bowl combine, refried beans, green chiles and cooked ground beef. Stir until well combined.
  5. Spray a 13 x 9 baking dish or 2 ( 8 x 8) baking dish with non stick cooking spray.
  6. If you prefer the tortilla crispy, then you will want to first cook tortillas in a skillet, sprayed with non stick cooking spray for 1-2 over medium heat on each side.
  7. Then top each tortilla with 1/4 cup of beef mixture. Roll up and place seam down in prepared baking dish.
  8. IIf you use two (8 x 8 ) baking dishes-you will add 7 enchiladas per dish.
  9. Repeat for all 14 tortillas.
  10. Pour enchilada sauce evenly over enchiladas. Sprinkle cheese evenly over the top of sauce.Add diced olives.
  11. Bake for 20 minutes or until bubbly.

Makes 14 enchiladas

3 Points® per enchilada

Notes

  • Source” Thepounddropper.com