Crispy Roasted Cauliflower

Cauliflower has transcended its reputation as a bland, overlooked vegetable and emerged as a culinary superstar, especially when roasted to perfection. My Crispy Roasted Cauliflower recipe is a testament to the versatility and deliciousness of this humble vegetable. Infused with Italian herbs and Parmesan, this dish promises a crispy, flavorful experience that rivals any meat dish. Whether you are a dedicated vegetarian or simply looking to add more vegetables to your diet, this recipe will win you over with its crispy texture and rich, savory taste.

Ingredients
Main Ingredients:
1 head of cauliflower
3 slices of lemon
A handful of dill
1 1/4 cups panko breadcrumbs
1 clove of minced garlic
3/4 cup all-purpose flour
3 eggs

5 tbsp olive oil
1 tsp Italian herbs
A handful of chopped parsley
1 cup grated Parmesan cheese
Salt, to taste
Ground black pepper, to taste
Sauce:
3/4 cup sour cream
1/2 cup yogurt

Freshly chopped parsley
Salt and ground black pepper
Lemon juice
Directions
Step 1: Prepare the Cauliflower
Start by cutting the cauliflower into florets. Bring a pot of salted water to a boil and add the lemon slices, a handful of dill, and the cauliflower florets. Boil for five minutes, then drain and set aside. This step helps to infuse the cauliflower with subtle flavors and tenderize it slightly before roasting.

Step 2: Prepare the Coating Mixture
In a large mixing bowl, combine the panko breadcrumbs, minced garlic, olive oil, Italian herbs, salt, ground black pepper, chopped parsley, and grated Parmesan cheese. Mix until well combined. This breadcrumb mixture will give the cauliflower its irresistible crispy coating.

Step 3: Coat the Cauliflower
Set up a dredging station with a plate of all-purpose flour, a bowl of whisked eggs, and the bowl of breadcrumb mixture. Dredge each cauliflower floret first in the flour, then dip it in the whisked eggs, and finally coat it in the breadcrumb mixture. Ensure each piece is evenly coated for maximum crispiness.

Step 4: Bake the Cauliflower
Place the coated cauliflower florets on a parchment-lined baking tray. Preheat your oven to 350°F (175°C) and bake for 20 minutes, or until the cauliflower is golden brown and crispy. The aroma of the herbs and Parmesan will fill your kitchen, making it hard to wait for the finished product.

Step 5: Prepare the Sauce
While the cauliflower is baking, prepare the sauce. In a small bowl, combine the sour cream, yogurt, freshly squeezed lemon juice, chopped parsley, salt, and ground black pepper. Mix well. This creamy, tangy sauce complements the crispy cauliflower perfectly, adding a refreshing contrast to each bite.

Step 6: Serve and Enjoy
Once the cauliflower is done baking, remove it from the oven and let it cool slightly. Serve the crispy roasted cauliflower with the prepared sauce. Garnish with extra parsley if desired. Enjoy this delicious, meat-free dish that is sure to impress both vegetarians and meat-lovers alike.

Nutrition Information
Per Serving:

Calories: 220
Protein: 10g
Carbohydrates: 25g
Dietary Fiber: 3g
Sugars: 3g
Fat: 10g
Saturated Fat: 3g
Cholesterol: 75mg
Sodium: 320mg
Vitamin A: 8% DV
Vitamin C: 70% DV
Calcium: 20% DV
Iron: 10% DV
Conclusion
This Crispy Roasted Cauliflower recipe is a delightful alternative to traditional meat dishes. The combination of herbs, Parmesan, and a crispy breadcrumb coating makes it a standout dish that will leave you craving more. Perfect for a weeknight dinner or as a side dish for a special occasion, this recipe is sure to become a favorite in your household.
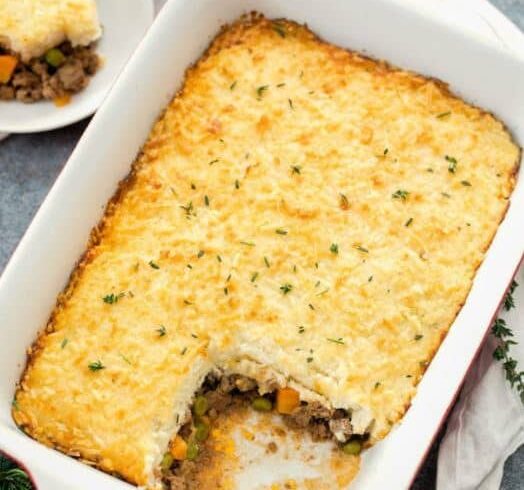

KETO SHEPHARD’S PIE RECIPE

Using Parmesan-mashed cauliflower in instead of mashed potatoes creates a low-carb and keto KETO SHEPHARD’S PIE. This simple casserole dish is delicious and a wonderful way to honor St. Patrick’s Day.

A great way to observe the holiday is with this low-carb shepherd’s pie dish. I used my parmesan-mashed cauliflower as a substitute for the conventional mashed potatoes crust. Before baking, I added extra parmesan cheese to the mashed cauliflower shell.


For St. Patrick’s Day, I also enjoy making corned beef, but if you don’t like corned beef and want a hearty lunch, this keto Shepherd’s pie is a terrific alternative.

Ground meat topped with delicious vegetables, mashed potatoes, and cheese? Please, yes! In this keto shepherd’s pie recipe, I used excellent cauliflower mash in place of the potatoes and swapped out the peas, corn, and carrots that I would often use as low-carb vegetables. YUM!!!

Seriously, this Keto Shepherd’s Pie tastes so much better than the classic version, plus you won’t experience the terrible carb bloat afterward. This recipe has me super excited, especially for Nick who loves shepherd’s pie.


RECIPE FOR SHEPHERD’S PIE FILLING

Traditional Shepherd’s Pie is made using lamb, but as ground lamb is less common in the US, ground beef is frequently substituted. For this recipe, either one may be used. I used ground beef since although I adore lamb, my husband does not.

I used frozen peas and fresh carrots for my vegetables. English peas would have been ideal, but they can be difficult to find. Swap out peas and carrots can be with other veggies like green beans and celery if you’re following a ketogenic diet.

The remaining filling ingredients are tomato paste, onions, broth, rosemary, thyme, and Worchester sauce. The filling is really tasty and easy to make.


Why it functions

The ground beef topped with gravy and low-carb vegetables make this recipe the pinnacle of layered comfort cuisine.
This dish reheats well, making it a terrific meal for a small family or a busy home.

Expert Advice

Sprinkle the xanthan gum sparingly on top of the beef when adding it. It will clump up if you add it all at once, just like flour does when it’s added to a hot recipe.
See below for advice on how to prepare the best cauliflower mash.


HOW TO MAKE CAULIFLOWER MASHED WITH PARMESAN

I use a food processor to prepare my mashed cauliflower topping.

Boil the cauliflower until it is quite tender. To keep your cauliflower mash from tasting watery, pat the cauliflower dry after which you put it to your food processor.

Combine cream cheese and heavy cream with the cauliflower to create a creamy cauliflower mash consistency.

The mash has a great flavor that helps to hide the flavor of the cauliflower thanks to the parmesan cheese.

What distinguishes this from Cottage Pie?

It is cooked with lamb in the UK. Cottage pie is made with beef. In the US, a meat and vegetable filling topped with mashed potatoes is known by the titles cottage pie and shepherd’s pie interchangeably.

I’ve always thought of this shepherd’s pie made with beef, but if you want the conventional form, use the same amount of ground lamb instead.

GROUND TURKEY?

Use the same quantity of ground turkey for the shepherd’s pie filling for a leaner variation. Since turkey has a light flavour, you can wish to brown it with some Worcestershire sauce to give it a savoury flavour.


This keto shepherd’s pie dish is a terrific option to try if you’re in the mood for comfort cuisine but prefer something lighter. I do hope you like it!

INGREDIENTS

SCRUBBERY CAULIFLOWER

  • Cauliflower florets, 1 lb
  • Cream cheese, 3 ounces
  • a half-cup of grated parmesan cheese
  • 2 to 4 ounces of heavy cream, salt to taste

MEATS INSULATION

  • 1 small onion, diced finely
  • 1 pound of ground lamb or beef
  • a half cup of cubed, tiny carrots
  • Frozen or fresh peas, half a cup
  • 1 cup beef broth 1 teaspoon coarsely chopped rosemary
  • 1 teaspoon finely chopped thyme
  • 1 teaspoon Worcester sauce
  • 2 teaspoons of tomato paste, salt to taste

TOPPINGS (OPTIONAL) (OPTIONAL)

  • Shredded 1/4 cup parmesan cheese
  • 0.5 tsp of finely chopped rosemary or thyme

INSTRUCTIONS

MASHED CAULIFLOWER WITH PARMESAN

  1. Soften cauliflower in boiling water. Drain, remove, and pat dry the cauliflower. Put in the food processor. Till the cauliflower is totally mashed, add the Parmesan cheese and cream cheese.
  2. Blend the mashed cauliflower, then 1 oz at a time, gradually add the heavy cream. The mashed cauliflower should not be too thin, therefore you must be careful not to add too much liquid. As required, salt the food.

DELICIOUS MEATS

  1. Add onions and ground beef to a big skillet. Heat skillet to a medium-high temperature. While the ground beef cooks, stir and crumble it. Cook beef until browned and onions are transparent.
  2. Add tomato paste, Worcestershire sauce, rosemary, thyme, carrots, peas, and broth. Mix Worcester sauce and tomato paste. If necessary, add salt. Simmer mixture before the heat is reduced to medium. Simmer combination for the duration necessary for the broth to decrease and slightly thicken.

PUFFING UP THE PIE

  1. Set the oven to 350°F. Spread the filling in a casserole, measuring 7 by 11 inches.
  2. Mash the cauliflower and top the meat filling. Over the mashed cauliflower, spread 1/4 cup of grated parmesan cheese .
  3. Bake the mashed potatoes for TWENTY to TWENTY FIVE minutes in a preheated oven until the edges begin to brown. After that, turn the oven’s broiler to low and cook the dish for a few more minutes, or until the cheese is lightly browned.
  4. I suggest closely monitoring the oven because this should only take 2-4 minutes.
    Before serving, if preferred, sprinkle on 1/2 tsp of rosemary or thyme.

NOTES

  • Fresh rosemary and thyme can be substituted with dried versions.
  • Don’t forget to utilise the entire one pound of cauliflower florets. You won’t have enough mash otherwise to cover the entire baking pan.
  • 85/15 ground beef and 2 oz. of heavy cream were used to compute the nutritional information. There is no salt in it.

NUTRITION

calories: 340kcal,
carbohydrates: 9g,
protein: 22g,
fat: 23g,
saturated fat: 11g,
sodium: 508mg,
fiber: 2g,
sugar: 4g,
net carbs: 7g

Green Enchilada Chicken Soup

Directions:

  1. Prepare the Chicken and Broth Base:
    • Place chicken, green enchilada sauce, and chicken broth into the Crock Pot.
    • Cook on low for 6-8 hours.
  2. Shred the Chicken:
    • Remove chicken, shred with two forks, and return to the Crock Pot.
  3. Add Creamy Ingredients:
    • Add Monterey Jack cheese, cream cheese, half and half or Greek yogurt, and green salsa.
    • Stir well and cook on low for an additional 30 minutes.
  4. Taste and Adjust Seasoning:
    • Add salt and pepper to taste.
  5. Serve and Garnish:
    • Ladle soup into bowls and top with desired garnishes like avocado, cilantro, green onion, and sour cream.

Tips:

  • Use chicken thighs for more flavor.
  • Adjust spice level with mild or hot enchilada sauce.
  • Make ahead and store in the fridge for up to 3 days or freeze for up to 3 months.
  • Customize with toppings like shredded cheese, jalapeños, or crispy tortilla strips.

Enjoy your comforting and flavorful Crock Pot Green Enchilada Chicken Soup! 🍲😊

This soup combines the tangy flavor of green enchilada sauce, tender chicken, and creamy cheeses for a delightful meal. Perfect for busy weeknights or cozy weekends, it’s sure to become a family favorite.

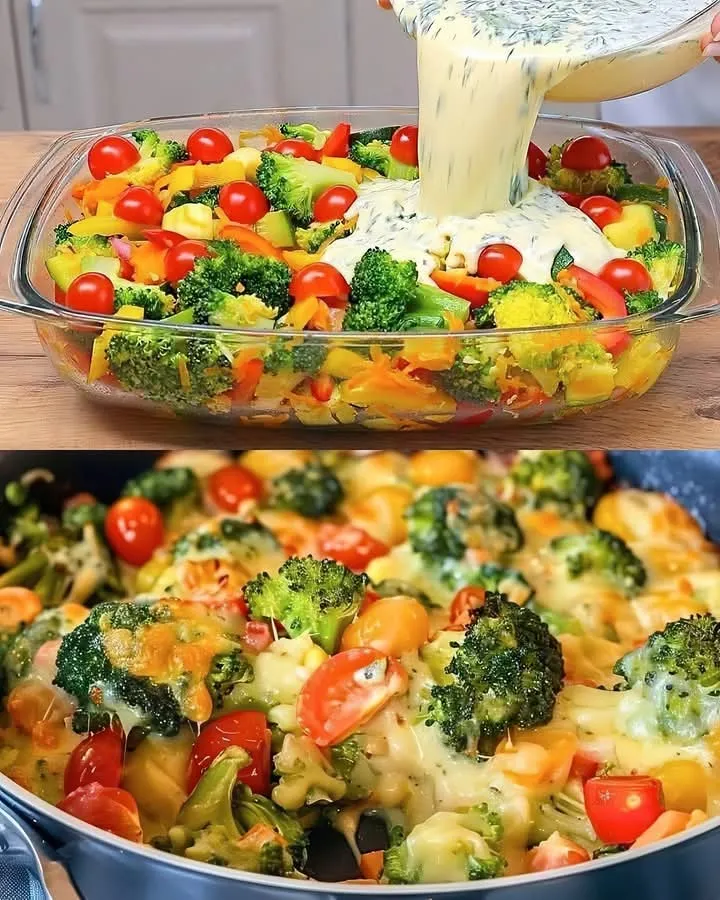
Cheesy Baked Vegetables Casserole Ingredients

Cheesy Baked Vegetables Casserole
This Cheesy Baked Vegetables Casserole is a wholesome, veggie-packed bake layered with tender roasted vegetables, a creamy herbed béchamel-style sauce, and plenty of gooey melted cheese. It’s the ultimate comfort food that’s still full of nourishing ingredients — a fantastic way to enjoy your favorite vegetables in one satisfying dish. Ideal for family dinners, potlucks, or meal prep!

Total Time: 55 minutes
Prep Time: 20 minutes

Cook Time: 35 minutes

Ingredients
For the Vegetables:
1 medium zucchini, sliced

1 medium carrot, thinly sliced

1 small head broccoli, cut into florets

1 red bell pepper, sliced

1 small red onion, sliced

2 tbsp olive oil

Salt and black pepper, to taste

½ tsp dried oregano

½ tsp garlic powder

For the Sauce & Topping:
2 tbsp butter

2 tbsp all-purpose flour

1½ cups milk (or plant-based milk)

½ tsp dried thyme or Italian seasoning

½ tsp Dijon mustard (optional, for depth)

Salt and pepper, to taste

1½ cups shredded cheese (mozzarella, cheddar, gouda, or a blend)

½ cup grated Parmesan (optional)

2 tbsp chopped fresh parsley or chives, for garnish

Instructions
Preheat Oven & Prepare Vegetables:
Preheat oven to 400°F (200°C).
Toss zucchini, carrot, broccoli, bell pepper, and red onion in olive oil, oregano, garlic powder, salt, and pepper.
Spread onto a parchment-lined baking sheet and roast for 15 minutes, just until slightly tender. Set aside.

Make the Cheese Sauce:
In a saucepan over medium heat, melt butter. Whisk in flour and cook for 1 minute to form a roux.
Slowly add milk while whisking to avoid lumps. Simmer and stir until the sauce thickens (about 3–4 minutes).
Stir in thyme (or Italian seasoning), mustard (if using), and salt/pepper to taste.
Remove from heat and mix in 1 cup of shredded cheese until smooth.

Assemble the Casserole:
In a greased 9×9″ or similar baking dish, layer the roasted vegetables.
Pour the cheese sauce evenly over the veggies. Top with the remaining ½ cup shredded cheese and grated Parmesan (if using).

Bake:
Bake uncovered at 400°F (200°C) for 20 minutes, or until the top is golden and bubbly.

Finish & Serve:
Remove from oven, sprinkle with fresh herbs, and let sit for 5 minutes before serving.

Tips
Veggie Prep Tips:
Cut vegetables evenly so they cook uniformly during roasting and baking.

Pre-roast or steam firm veggies like carrots and broccoli to ensure tenderness in the final bake.

Pat moisture-heavy veggies dry (like zucchini or mushrooms) before roasting to prevent a watery casserole.

Cheese Tips:
For best meltability and flavor, grate your own cheese — pre-shredded cheese contains anti-caking agents that can affect the sauce’s texture.

Use a mix of mild and sharp cheeses (like mozzarella + sharp cheddar) for balance.

Sauce Tips:
If the sauce thickens too much, whisk in a little extra milk before pouring over the vegetables.

Add a spoonful of cream cheese or ricotta to the sauce for a silkier texture and extra richness.

Variations
Add Protein:
Stir in cooked shredded chicken, ground turkey, or white beans for a more filling casserole.

Top with crispy bacon or sautéed sausage before baking.

Go Green:
Add spinach, kale, or Swiss chard into the vegetable mix — just sauté or steam before layering.

Mushroom Lover’s Version:
Add sliced mushrooms (button, cremini, or portobello) to the roasted veggie mix for a savory, meaty depth.

Low-Carb Swap:
Replace carrots or potatoes with cauliflower florets or celery root for a lower-carb version.

Spice It Up:
Add a pinch of chili flakes, smoked paprika, or harissa paste to the sauce for a gentle kick.

Vegan Option:
Use plant-based milk and butter, and swap in your favorite vegan cheese shreds or nutritional yeast.

Add a spoonful of blended cashew cream to the sauce for richness.

Crunchy Topping Twist:
Sprinkle with buttered panko breadcrumbs or crushed nuts for a golden, crispy top layer.

Q&A
Q: Can I prepare this casserole ahead of time?
A: Yes! You can assemble it fully (without baking) up to 24 hours ahead and refrigerate. When ready, bake as directed — just add 5–10 extra minutes to the baking time if going straight from the fridge.

Q: Can I freeze Cheesy Vegetable Casserole?
A: Yes, but for best results, freeze it before baking. Wrap tightly and freeze for up to 2 months. Thaw overnight in the fridge and then bake until bubbly.

Q: What are the best cheeses to use?
A: Use melty cheeses like mozzarella, cheddar, gouda, or fontina. Combine with Parmesan or Pecorino for flavor depth.

Q: How do I make it more filling as a main dish?
A: Add proteins like chicken, turkey, beans, or tofu, or stir in a grain like cooked quinoa, bulgur, or brown rice to make it a complete meal.

Q: Can I make it gluten-free?
A: Yes! Substitute the all-purpose flour in the cheese sauce with a gluten-free flour blend or cornstarch (1 tbsp cornstarch = 2 tbsp flour).

Nutrition Facts
Calories: 270

Protein: 10g

Fat: 18g

Carbohydrates: 18g

Fiber: 4g

Sugar: 6g

Sodium: 350mg

Calcium: ~20% DV

Note: Nutritional values vary depending on cheese, vegetables, and milk used.

Conclusion
This Cheesy Baked Vegetables Casserole is proof that comfort food and wholesome eating can go hand in hand. It’s rich, creamy, packed with vibrant veggies, and endlessly adaptable — making it a hit for busy weeknights, festive gatherings, or cozy weekends at home. Whether served as a meatless main or a hearty side, this casserole delivers warmth and satisfaction in every bite.

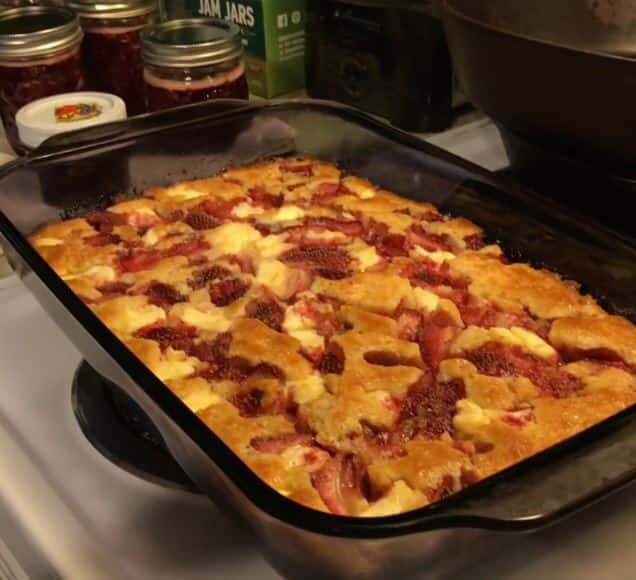
Keto Strawberry Cream Cheese Cobbler

This delectable recipe for quick Keto Strawberry Cobbler, which uses almond flour and strawberries, is a wonderful gluten-free and low-carb dessert.


Ingredients

  • 1/2 cup of almond flour
  • 1/2 cup softened unsalted butter
  • two medium eggs
  • 1/2 cup of low-carb erythritol sweetener
  • 0.5 teaspoons baking powder
  • ONE teaspoon vanilla extract
  • 4 grains of salt
  • 4 ounces of cream cheese, broken up.
  • 8 strawberries, quartered

Instructions

  • The oven to 190C/380F for preheating
  • The butter and erythritol should be thoroughly combined in a bowl.
  • Add the eggs and vanilla essence after that.
  • Continue(when you have a smooth mixture) to add the baking powder, salt, and almond flour.
  • Batter should be poured into baking pan.
  • The batter should be covered with the strawberries.
  • Sprinkle the cream cheese bits on top.
  • Bake the baking dish for 45 to 50 minutes, or until it is firm and brown. After baking for 25 minutes, take off the foil. Fruit may poke out from the top as the crust grows over and around it.
  • Eat and have fun!

Notes

The overall carb count less the fibre count will be the net carbohydrates. The carb count does not include sugar alcohols.

NUTRITION

serving size: oneEnergy: 264kcal3.6g of carbohydrates5.3g of proteinFat: 26g1.3g of fibre

Strawberry Cheesecake Chimichangas

Ingredients

→ Chimichangas

 6 (8-inch) soft flour tortillas
 8 oz cream cheese, room temperature
 2 tablespoons sour cream
 1 tablespoon sugar
 1 teaspoon vanilla extract
 3/4 cup sliced strawberries
 Vegetable oil for frying

→ Coating

 1 tablespoon cinnamon
 1/3 cup sugar

→ Serving

 1 cup sliced strawberries

Instructions

Beat the cream cheese, sour cream, sugar, and vanilla extract in a bowl until smooth. Fold in 3/4 cup of sliced fresh strawberries.

Divide the filling evenly among the 6 tortillas. Spread the filling in the lower third of each tortilla. Fold the sides of each tortilla toward the center and roll it up like a burrito. Secure with toothpicks.

Combine 1/3 cup sugar with 1 tablespoon cinnamon in a shallow bowl and set aside.

Line a large plate with paper towels to drain fried chimichangas.

Place about 2 to 2 1/2 inches of vegetable oil in a saucepan and heat it over medium-high heat until the oil reaches 360ºF.

Fry the chimichangas in batches until golden brown and crispy, about 2-3 minutes, flipping as needed.

Drain the chimichangas briefly on the paper towel-lined plate, then roll them in the cinnamon and sugar mixture.

Ensure all toothpicks are removed before serving.

Tools You’ll Need

  • Mixing bowl
  • 5-inch deep saucepan
  • Paper towels
  • Toothpicks

Allergy Information

Please check ingredients for potential allergens and consult a health professional if in doubt.

Nutrition Facts (Per Serving)

It is important to consider this information as approximate and not to use it as definitive health advice.