Fresh Vegetable Juice Blend

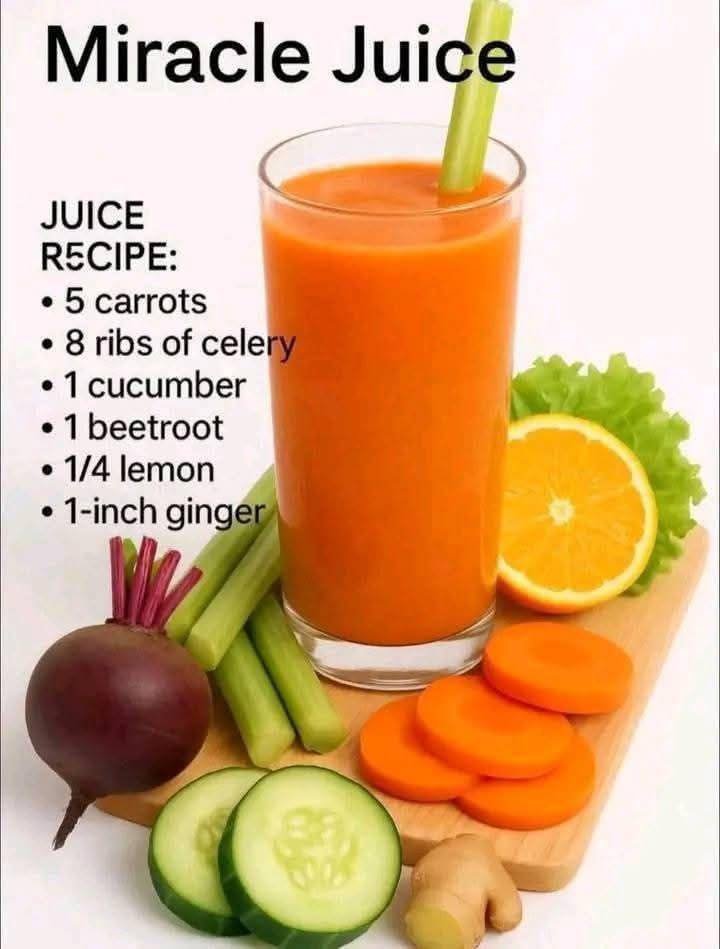
Fresh Vegetable Juice Blend

A refreshing vegetable juice made from simple, fresh ingredients. This drink is intended for general nourishment and hydration as part of a balanced diet.


Yield

Approximately 2 servings

Preparation Time

10 minutes


Ingredients

  • 5 medium carrots

  • 8 celery ribs

  • 1 medium cucumber

  • 1 beetroot

  • ¼ lemon (peeled)

  • 1-inch piece fresh ginger


Instructions

1. Wash and Prepare the Vegetables

Rinse the carrots, celery, and cucumber thoroughly under running water to remove dirt.

Scrub the beetroot well. You may leave the skin on if it is clean, or peel it for a milder taste.

Peel the ginger using the edge of a spoon.

Remove the outer yellow peel from the lemon and keep the inner white portion.


2. Cut for Juicing

Cut the carrots, celery, and cucumber into pieces that fit easily into your juicer.

Cut the beetroot into smaller chunks to help it process smoothly.


3. Juice the Ingredients

Turn on the juicer and feed the ingredients through gradually.

Alternate between firm vegetables (carrots, beetroot) and softer items (cucumber, lemon, ginger) to ensure smooth processing.


4. Mix and Serve

Stir the juice well to combine all flavors evenly.

Pour into glasses and serve immediately. Ice may be added if desired.


Storage

Fresh juice is best consumed right away. If needed, store in a sealed glass container in the refrigerator for up to 24 hours. Shake well before drinking.


Classic Homemade Fluffy Doughnuts

Classic Homemade Fluffy Doughnuts

Soft, light doughnuts with a tender interior and a lightly crisp exterior. These are made with simple pantry ingredients and are best enjoyed fresh.


Yield

12–15 doughnuts

Time

  • Preparation: 20 minutes

  • Rising: 1½ hours

  • Cooking: 15 minutes


Ingredients

Dough

  • 3 cups all-purpose flour

  • 1 cup whole milk, warm (not hot)

  • 7 g active dry yeast

  • 5 tablespoons granulated sugar

  • 2 tablespoons unsalted butter, softened

  • 1 large egg, room temperature

  • ½ teaspoon salt

Frying and Coating

  • Vegetable oil, for frying

  • Granulated sugar or powdered sugar, for coating


Instructions

1. Prepare the Yeast

Pour the warm milk into a small bowl. Add 1 tablespoon of the sugar and stir to dissolve. Sprinkle the yeast over the milk and stir gently. Let it rest for 5–10 minutes until the mixture looks foamy. This shows the yeast is ready.


2. Mix the Dough

In a large bowl, combine the flour, remaining sugar, and salt. Make a well in the center. Add the egg, softened butter, and the yeast mixture. Stir with a spoon until a soft, rough dough forms.


3. Knead the Dough

Transfer the dough to a lightly floured surface.

  • Knead by hand for 8–10 minutes until smooth and elastic

  • Or knead with a mixer and dough hook for about 5 minutes

The dough should feel soft and slightly tacky but not sticky.


4. First Rise

Place the dough in a lightly greased bowl. Cover and let it rest in a warm place for about 1 hour, or until doubled in size.


5. Shape the Doughnuts

Gently press the dough to release air. Roll it out to about ½-inch thickness on a floured surface.

Cut doughnut shapes using a cutter or a large glass with a smaller cutter for the center. Place each doughnut on a small piece of parchment paper. Cover and let rest for 30 minutes.


6. Fry the Doughnuts

Heat about 2 inches of oil in a heavy pot to 350°F (175°C).

Carefully lower the doughnuts into the oil. Remove the parchment paper once it releases.

Fry for 1–2 minutes per side until evenly golden.

Transfer to paper towels to drain excess oil.


7. Coat and Serve

While still warm, roll the doughnuts in granulated sugar or dust with powdered sugar.

Serve fresh.


Helpful Notes

  • Keep oil temperature steady for even cooking

  • Do not overcrowd the pot

  • Best enjoyed the same day

Fluffy Sparkling Water Pizza Buns

Fluffy Sparkling Water Pizza Buns

Yield: 12–15 buns
Preparation Time: 20 minutes + 1 hour rising
Cooking Time: 15–20 minutes


Ingredients

Dough

  • 750 g (5¾ cups) all-purpose flour, plus extra for dusting

  • 350 ml (1½ cups) sparkling water, room temperature

  • 50 g fresh yeast

  • 100 ml (7 tablespoons) butter, melted and slightly cooled

  • 3 large eggs

  • 1 teaspoon salt

Toppings (Optional)

  • Tomato sauce or marinara

  • Shredded mozzarella cheese

  • Dried oregano or Italian seasoning


Instructions

1. Prepare the Yeast

In a small bowl, crumble the fresh yeast into 100 ml of the sparkling water. Stir gently and leave for 5–10 minutes until dissolved and lightly foamy.

2. Mix Wet Ingredients

In a large bowl, whisk the eggs with the remaining sparkling water and melted butter. Add the yeast mixture and mix well.

3. Form the Dough

Gradually add the flour and salt to the wet mixture. Mix until a soft dough forms.

4. Knead

Knead the dough on a lightly floured surface for 8–10 minutes, or until smooth and elastic. The dough should be soft but not sticky.

5. First Rise

Place the dough in a lightly greased bowl. Cover with a clean cloth and let rise in a warm place for about 1 hour, or until doubled in size.

6. Shape the Buns

Gently press down the dough to release air.
Divide into equal portions and shape into balls.
Place on a baking tray lined with parchment paper.
Flatten each ball slightly to form a shallow center.

7. Add Toppings and Bake

Preheat the oven to 200°C (400°F).
Spread a small amount of tomato sauce on each bun.
Top with mozzarella and sprinkle with dried herbs.
Bake for 15–20 minutes, until golden and fully cooked.


Helpful Notes

  • Use room-temperature sparkling water for best dough texture.

  • Fresh yeast can be replaced with 18 g active dry yeast if needed.

  • Serve warm or allow to cool before storing.

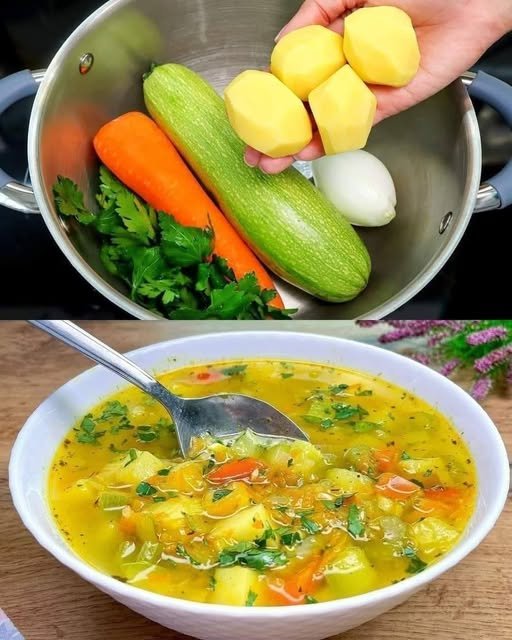
Healing Stomach-Friendly Vegetable Soup

Healing Stomach-Friendly Vegetable Soup

 Description

This nourishing vegetable soup is light, soothing, and packed with fiber, vitamins, and minerals. It’s ideal for sensitive digestion, bloating, or when you want something warm and comforting day or night. The vegetables simmer gently to create a flavorful, naturally golden broth that feels like medicine for the stomach.

 Ingredients

For the Soup:

  • 1 onion, chopped

  • 2 tbsp olive oil

  • 2 leeks, chopped

  • 2 stalks celery, chopped

  • 1 chili pepper, minced (optional)

  • 1 large carrot, sliced

  • 1 medium zucchini, chopped

  • 3–4 potatoes, peeled and diced

  • 1 handful fresh parsley, chopped

  • 1 tsp turmeric

  • ½ tsp black pepper

  • Salt to taste

  • 5–6 cups water or vegetable broth

 Instructions

  1. Heat olive oil in a large pot over medium heat.

  2. Add onion and sauté until soft and translucent.

  3. Stir in leeks, celery, and chili pepper; cook 3–4 minutes.

  4. Add carrots, zucchini, and potatoes. Mix well.

  5. Pour in water or broth and bring to a gentle boil.

  6. Add turmeric, salt, and black pepper.

  7. Reduce heat and simmer 25–30 minutes, until vegetables are tender.

  8. Stir in fresh parsley, adjust seasoning, and serve warm.

Notes & Tips

  • Chop vegetables evenly for uniform cooking

  • For extra digestion support, add ½ tsp grated ginger

  • Blend partially if you prefer a thicker texture

  • Skip chili if your stomach is very sensitive

  • Tastes even better the next day

 Servings

  • Makes 4–6 servings

Nutritional Info (per serving, approx.)

  • Calories: 120

  • Carbohydrates: 20 g

  • Fiber: 4 g

  • Fat: 4 g

  • Protein: 3 g

  • Sodium: Low (adjustable)

 Health Benefits

  • Supports digestion and gut health

  • Anti-inflammatory (turmeric + olive oil)

  • Hydrating and easy to digest

  • Helps with bloating and stomach discomfort

  • Naturally vegan, gluten-free, and low-fat

 Q & A

Q: Can I eat this soup every day?
A: Yes! It’s balanced, light, and safe for daily consumption.

Q: Is this good for gastritis or IBS?
A: Very good—just omit chili and keep seasoning mild.

Q: Can I store it?
A: Refrigerate for up to 4 days or freeze for 2 months.

Q: Can I add protein?
A: Yes—lentils, chickpeas, or shredded chicken work well.

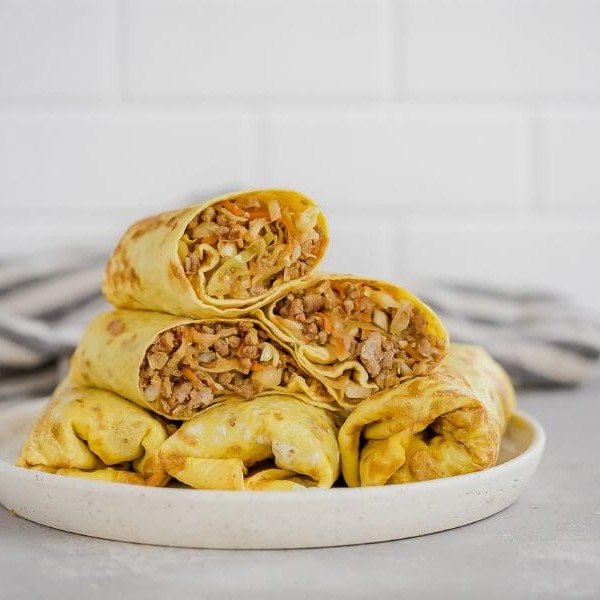
Keto Egg Roll Wrap

Keto Egg Roll Wrap
❤️Ingredients

🍓 1 tablespoon sesame oil
12 ounces of ground pork
3 tablespoons fresh ginger grated
🍒3 teaspoon fresh garlic minced
1 ½ cup green cabbage, shredded
¼ cup carrot shredded
¼ cup gluten-free soy sauce
8 large eggs
½ teaspoon salt
1 teaspoon avocado oil
Instructions

Measure out and prepare all of the ingredients.
In a frying pan over medium heat, add the sesame oil along with the ground pork, grated ginger, and minced garlic.
Stir together and break up the meat until the pork starts to brown.
Add the shredded cabbage, shredded carrots, and gluten-free soy sauce. Stir together and let cook for 3-5 minutes.
In a large bowl, crack the eggs. Season with salt.
Whisk them together until they are combined well.
In a frying pan over medium heat, add the avocado oil. Pour the egg mixture in until it fills up the pan. Let this sit and cook for about 1-2 minutes.
Carefully flip over the egg wrap and let this side cook for 1-2 minutes. Move to a plate.
Spoon the pork and vegetable mixture onto the egg wrap.
Carefully roll the egg wrap like a burrito. Roll it over the pork, then tuck both of the sides in and continue to roll.
Serve and enjoy!

Oven-Baked Garlic Herb Chicken & Vegetables

Oven-Baked Garlic Herb Chicken & Vegetables

Prep time: 15 mins | Cook time: 30-35 mins | Serves: 4

Ingredients

The Base:

  • Chicken: 1.5 lbs (approx. 3 large) boneless, skinless chicken breasts.

  • Potatoes: 1 lb baby gold potatoes, quartered.

  • Green Beans: 1/2 lb fresh green beans, trimmed.

  • Garnish: Fresh parsley or chives, chopped.

The Garlic Herb Sauce:

  • 1/4 cup olive oil

  • 3 tbsp melted butter

  • 4 cloves garlic, minced

  • 1 tsp dried oregano

  • 1 tsp dried thyme

  • 1/2 tsp onion powder

  • 1/2 tsp smoked paprika (for that golden color)

  • Salt and black pepper to taste

  • Optional: Red pepper flakes (for the red bits seen in the photo)


Instructions

  1. Prep the Oven and Pan:

    Preheat your oven to 400°F (200°C). Lightly grease a large 9×13 inch glass baking dish or a rimmed sheet pan.

  2. Season the Vegetables:

    Place the quartered potatoes and trimmed green beans in the baking dish. Drizzle with half of the Garlic Herb Sauce. Toss well to ensure they are evenly coated, then push the vegetables to the sides to make room for the chicken in the center.

  3. Prepare the Chicken:

    Pat the chicken breasts dry with a paper towel. Place them in the center of the dish. Brush the remaining Garlic Herb Sauce generously over the chicken.

    Tip: For the look in the photo, you can pre-slice the chicken halfway through (hassleback style) or slice them fully after cooking. Slicing after cooking keeps them juicier!

  4. Bake:

    Place the dish in the oven. Roast for 25–30 minutes.

    • Check for doneness: The chicken is safe when it reaches an internal temperature of $165^\circ\text{F}$ ($74^\circ\text{C}$).

    • Check the potatoes: They should be fork-tender and slightly browned.

  5. Finish and Serve:

    Remove from the oven and let the chicken rest for 5 minutes (this keeps it moist). If you didn’t slice it before, slice it now. Garnish with fresh parsley and a squeeze of fresh lemon juice if desired.


Tips for Success

  • Even Cooking: If your potatoes are large, start them in the oven 10 minutes before adding the chicken and green beans so everything finishes at the same time.

  • Crispy Texture: If you prefer crispier potatoes, use a large metal sheet pan instead of a glass dish; metal conducts heat faster for better browning.