Easy Cherry Vanilla Oven Cake

🍒 Easy Cherry Vanilla Oven Cake

Serves: 8
Preparation Time: 10 minutes
Baking Time: 30–35 minutes

This cherry vanilla cake is soft, lightly sweet, and simple to prepare. A tender sponge base combined with juicy cherries makes it suitable for everyday baking, family gatherings, or serving with tea.


📋 Ingredients

  • 1½ cups (190 g) all-purpose flour

  • 1 cup (200 g) granulated sugar

  • 3 large eggs

  • ½ cup (115 g) unsalted butter, melted and cooled

  • ½ cup (120 ml) milk

  • 1½ teaspoons baking powder

  • 1 teaspoon vanilla extract

  • A small pinch of salt

  • 1 cup fresh or canned cherries, pitted and well drained


👩‍🍳 Step-by-Step Instructions

Step 1: Prepare the Oven and Pan

  1. Preheat the oven to 350°F (175°C).

  2. Grease a round cake pan or line it with parchment paper.


Step 2: Mix the Wet Ingredients

  1. In a large bowl, whisk the eggs and sugar together.

  2. Continue whisking until the mixture becomes light in color.

  3. Add the melted butter, milk, and vanilla extract.

  4. Whisk until smooth and well combined.


Step 3: Add the Dry Ingredients

  1. Sift the flour, baking powder, and salt into the bowl.

  2. Gently fold the dry ingredients into the wet mixture using a spatula.

  3. Mix only until smooth; avoid overmixing.


Step 4: Add Cherries and Bake

  1. Pour the batter evenly into the prepared pan.

  2. Scatter the cherries over the top.

  3. Place the pan in the oven and bake for 30–35 minutes.

  4. The cake is ready when a toothpick inserted in the center comes out clean.


Step 5: Cool and Serve

  1. Allow the cake to cool in the pan for 10 minutes.

  2. Transfer to a wire rack or serving plate.

  3. Serve as is or lightly dust with powdered sugar if desired.


🧊 Storage Tips

  • Store in an airtight container at room temperature for up to 2 days

  • Refrigerate for up to 5 days if needed


💡 Helpful Notes

  • Drain canned cherries well to prevent excess moisture

  • Gently press cherries into the batter for even distribution

  • Let the cake cool fully before slicing for clean pieces


🔄 Variations

  • Replace cherries with blueberries, raspberries, or sliced peaches

  • Add lemon or orange zest for extra flavor

  • Serve with plain yogurt or whipped cream if desired
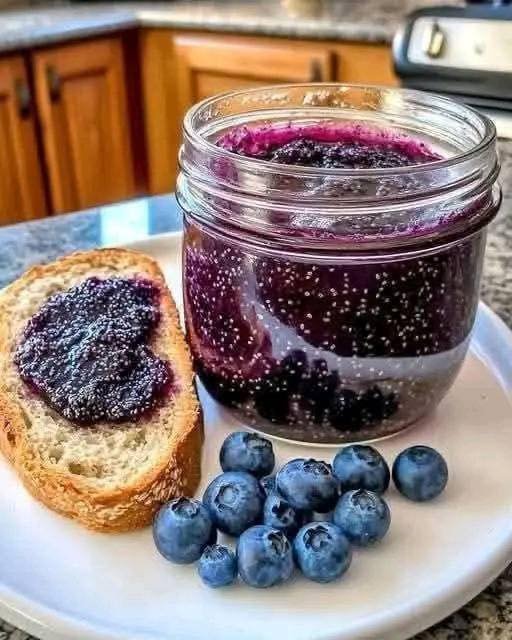
Homemade Blueberry Chia Seed Jam

Homemade Blueberry Chia Seed Jam

Yields: About 1 cup
Preparation Time: 5 minutes
Cooking Time: 10 minutes

This homemade blueberry chia seed jam is simple to prepare and made with just a few basic ingredients. It thickens naturally using chia seeds and works well as a spread, topping, or filling.


📋 Ingredients

  • 2 cups fresh or frozen blueberries

  • 2 tablespoons chia seeds

  • 1 tablespoon fresh lemon juice

  • 1–2 tablespoons honey or maple syrup (optional, to taste)

  • ½ teaspoon vanilla extract (optional)


👩‍🍳 Step-by-Step Instructions

Step 1: Cook the Blueberries

  1. Place the blueberries in a small saucepan.

  2. Set the pan over medium heat.

  3. Cook for 5–10 minutes, stirring occasionally.

  4. The berries will soften and release their juices as they heat.


Step 2: Mash the Fruit

  1. Once the berries are soft and gently bubbling, remove the pan from heat.

  2. Use a fork or potato masher to mash the berries.

  3. Mash lightly for a chunky texture or more thoroughly for a smoother result.


Step 3: Add Remaining Ingredients

  1. Stir in the chia seeds.

  2. Add the lemon juice.

  3. Mix in honey or maple syrup if using.

  4. Add vanilla extract if desired.

  5. Stir well to combine.


Step 4: Allow the Jam to Thicken

  1. Let the mixture sit uncovered for 10–15 minutes.

  2. Stir once or twice during this time.

  3. The chia seeds will absorb liquid and thicken the mixture.


Step 5: Cool and Store

  1. Transfer the jam to a clean glass jar or container.

  2. Allow it to cool completely.

  3. Seal and refrigerate.


🧊 Storage Tips

  • Store in the refrigerator for up to 7 days

  • Freeze in a sealed, freezer-safe container for up to 3 months

  • Thaw in the refrigerator before use


💡 Helpful Notes

  • Adjust sweetness based on the natural flavor of the berries

  • Stir well before serving if the jam thickens unevenly

  • Chop larger fruits if using this method with other berries


🍽️ Serving Ideas

  • Spread on toast or crackers

  • Spoon over yogurt or oatmeal

  • Use as a filling for baked goods

  • Serve with pancakes or waffles

Baked Chicken Alfredo Calzones

Baked Chicken Alfredo Calzones


Ingredients

    • 1 pound (450 g) pizza dough (store-bought or homemade), divided into 4 portions
    • 1 cup cooked chicken breast, shredded or finely chopped
    • 1/2 cup Alfredo sauce (store-bought or homemade)
    • 1/4 cup Parmesan cheese, finely grated
    • 1 cup shredded mozzarella cheese, divided
    • 1 teaspoon garlic powder
    • 1 teaspoon Italian seasoning (or 1/2 teaspoon dried oregano + 1/2 teaspoon dried basil)
    • Salt and freshly ground black pepper, to taste
    • 1 large egg, beaten (for egg wash)
    • Optional: a pinch of red pepper flakes for heat
    • Optional: marinara sauce for dipping
  • Optional garnish: chopped fresh parsley or basil

Instructions

    1. Preheat the oven: Preheat the oven to 400°F (200°C). Line a baking sheet with parchment paper or lightly oil a rimmed baking tray.
    2. Prepare the filling: In a medium bowl combine the shredded chicken, Alfredo sauce, Parmesan cheese, half of the mozzarella (reserve the other half for stuffing/topping), garlic powder and Italian seasoning. Season with salt and pepper to taste. If the mixture seems very loose, reduce the Alfredo slightly or add a tablespoon of extra Parmesan to thicken. Taste and adjust seasoning.
  1. Roll out the dough: On a lightly floured surface, divide the dough into four equal pieces. Roll each piece into a circle or oval about 6–7 inches (15–18 cm) across. Keep the unused portions covered to prevent drying.
  2. Assemble the calzones: Spoon about 1/4 of the chicken Alfredo filling onto one half of each dough disc, leaving a 1/2–1 inch (1–2 cm) border around the edge. Sprinkle a little of the remaining mozzarella on top of the filling for extra melt.
  3. Seal the edges: Fold the dough over the filling to create a half-moon. Press the edges together firmly and crimp with a fork or use your fingers to create a tight seal. Make a small slit or two in the top of each calzone to vent steam during baking.
  4. Brush and bake: Place calzones on the prepared baking sheet. Brush the tops with beaten egg for a glossy, golden finish. Bake in the preheated oven for 18–22 minutes, or until the crust is deep golden and the filling is hot and bubbling. If tops brown too quickly, tent loosely with foil.
  5. Garnish and rest: Remove from the oven and let calzones rest 4–5 minutes before serving—this allows the filling to set slightly and prevents scalding. Optional: sprinkle with extra Parmesan and chopped parsley or basil. Serve with warm marinara sauce for dipping if desired.

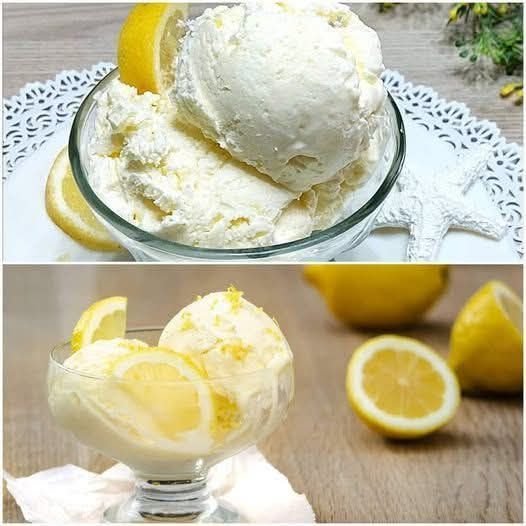
Effortless Lemon Ice Cream Sugar-Free Delight with Just Three Ingredients

Effortless Lemon Ice Cream Sugar-Free Delight with Just Three Ingredients

Ice cream lovers, rejoice! Imagine creating a delicious, sugar-free lemon ice cream at home using just three ingredients in under five minutes. This simple recipe not only satisfies your sweet tooth but does so in a healthier way, without any added sugar. Here’s how to make this refreshing treat that’s so easy and tasty, you may never want to buy store-bought ice cream again!

1. Benefits of Homemade Lemon Ice Cream

Healthier: By making your own ice cream, you control the ingredients, ensuring there are no unwanted additives or sugars.

Refreshing: Lemon adds a natural zest that is both invigorating and delightful, perfect for cooling down on a warm day.

Simple Ingredients: With only three ingredients, this recipe is uncomplicated and quick, ideal for spontaneous dessert cravings.

2. Ingredients Needed

To whip up your own batch of lemon ice cream, you’ll need:

1 cup of heavy cream

2 tablespoons of fresh lemon juice

3 tablespoons of honey (or to taste, depending on your preference for sweetness)

3. How to Make Lemon Ice Cream

This recipe is not only straightforward but also quick, making it a perfect last-minute dessert option.

INSTRUCTIONS:

Mix Ingredients: In a medium-sized mixing bowl, combine the heavy cream, fresh lemon juice, and honey. Mix thoroughly until the honey is completely dissolved.

Whisk or Blend: Using a hand mixer or blender, whip the mixture until it becomes thick and creamy. This usually takes about 3 to 4 minutes.

Freeze: Pour the mixture into a freezer-safe container. If you prefer a soft-serve consistency, you can enjoy it immediately. For those who like their ice cream firmer, freeze it for about an hour, then stir it, and freeze again until it reaches the desired consistency.

4. Serving Suggestions

Scoop your lemon ice cream into bowls or cones. This ice cream pairs beautifully with fresh berries or a sprig of mint for an extra touch of elegance and freshness. It’s a wonderful dessert to follow a meal or as a cool treat on a sunny afternoon.

5. Storage Tips

Store any leftover ice cream in an airtight container in the freezer. Before serving again, let it sit out for a few minutes to soften slightly for easier scooping.

This three-ingredient, sugar-free lemon ice cream is a testament to the idea that simplicity often leads to the best results. Quick, easy, and delightfully refreshing, it’s a perfect treat for anyone looking to indulge their sweet tooth without overdoing it on sugar. Give this recipe a try, and it might just become your new favorite way to beat the heat and keep your dessert game light and zesty!

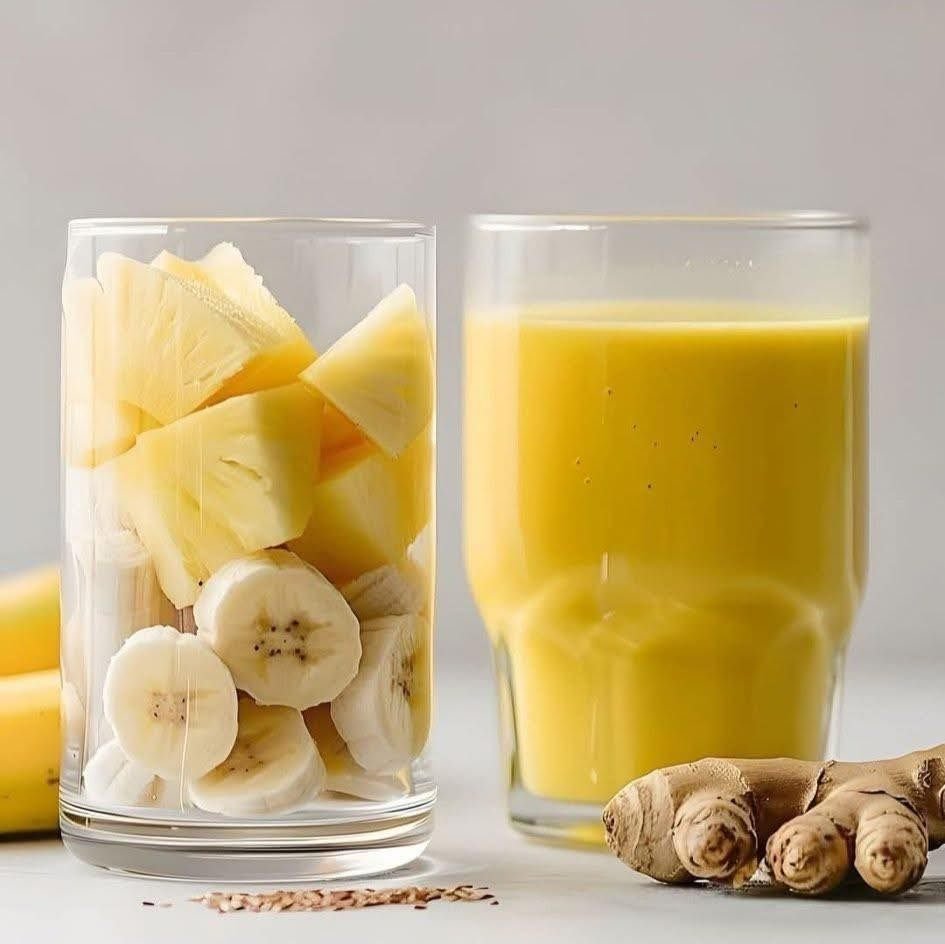
Banana Pineapple Ginger Smoothie

This Banana Pineapple Ginger Smoothie is a vibrant, tropical drink that combines natural sweetness with a gentle spicy kick from fresh ginger. It’s perfect for breakfast, a mid-day energy boost, or a light evening refreshment. The smoothie is rich in vitamins, aids digestion, and helps support immunity.

Ingredients

  • 1 ripe banana (peeled and sliced)

  • 1 cup fresh pineapple chunks (or frozen)

  • 1 teaspoon fresh ginger (grated or thinly sliced)

  • 1 cup chilled milk (dairy or plant-based like almond or coconut milk)

  • ½ cup fresh orange juice or cold water

  • 1 teaspoon honey or maple syrup (optional)

  • 4–5 ice cubes (optional, for extra chill)

Preparation Steps

  1. Prepare the Fruits:
    Peel the banana and slice it into small rounds. Cut fresh pineapple into bite-sized chunks, removing the hard core. If using frozen pineapple, no thawing is required.

  2. Prepare the Ginger:
    Peel the ginger using a spoon or knife. Grate it finely or slice it thin so it blends smoothly without fibrous bits.

  3. Blend the Ingredients:
    Add banana slices, pineapple chunks, ginger, milk, and orange juice (or water) into a blender. If you prefer a sweeter smoothie, add honey or maple syrup at this stage.

  4. Adjust Texture:
    Blend on high speed for 30–45 seconds until smooth and creamy. Add ice cubes and blend again if you want a colder, thicker texture.

  5. Taste and Serve:
    Taste the smoothie and adjust sweetness or liquid if needed. Pour into a chilled glass and serve immediately.

Health Benefits

  • Banana provides potassium and natural energy.

  • Pineapple is rich in vitamin C and bromelain, supporting digestion.

  • Ginger helps reduce inflammation and soothes the stomach.

  • Milk or plant milk adds creaminess and calcium.

Serving Tips

  • Garnish with a pineapple slice or a pinch of grated ginger.

  • For a protein boost, add a tablespoon of yogurt or soaked chia seeds.

  • Best enjoyed fresh to retain maximum nutrients.

This smoothie is naturally refreshing, lightly spicy, and full of tropical flavor—perfect for a healthy daily routine. 🥤🍍🍌

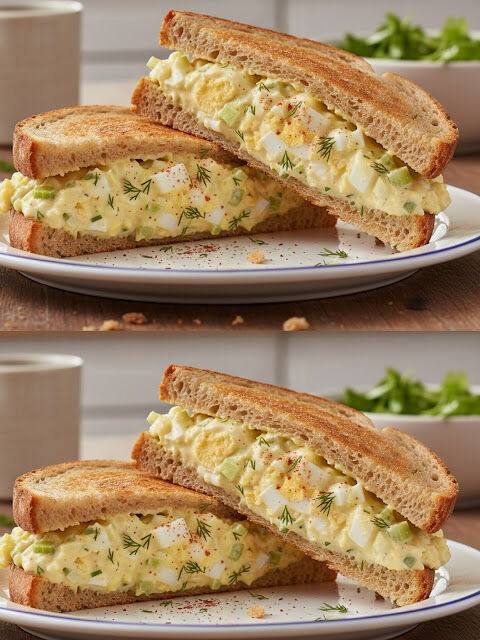
A Chef’s Key to Exceptional Egg Salad: Techniques for Achieving Creamy Perfection

Egg salad may seem simple, but any seasoned chef will tell you: the difference between an ordinary bowl and an unforgettable one comes down to technique. This humble dish relies on a balance of texture, seasoning, and method. When done right, egg salad becomes silky, rich, and luxurious — the kind you want to eat straight from the bowl.

Here’s how chefs elevate this classic comfort food into something exceptional.

1. Start With Perfectly Cooked Eggs

The foundation of a creamy egg salad is a tender, velvety egg — never rubbery whites, never chalky yolks.

Chef’s Technique:

  • Place eggs in a pot.
  • Cover with cold water by at least one inch.
  • Bring to a boil slowly over medium heat.
  • Once the water reaches a full boil, turn off the heat, cover, and let the eggs sit for 10–11 minutes.
  • Immediately transfer to an ice bath for 5 minutes.

This prevents that gray ring around the yolk and ensures they peel beautifully.

2. Grate, Don’t Chop

Most home cooks roughly chop their eggs. Chefs often use a different method:

Use the small side of a grater or press eggs through a mesh cooling rack.

This technique creates:

  • An ultra-fine texture
  • Even distribution of yolk richness
  • That signature restaurant-level creaminess

This is the trick that transforms good egg salad into silky egg salad.

3. Build a Balanced, Creamy Base

The classic mistake is adding too much mayonnaise in an attempt to make the salad creamy. True creaminess comes from combining:

  • Mayonnaise for richness
  • Mustard for acidity
  • A touch of sour cream or Greek yogurt for extra silkiness
  • A tiny splash of pickle brine or lemon juice for brightness

This creates a layered flavor profile and prevents the salad from tasting flat.

4. Season Like a Chef

Eggs crave seasoning. Without it, even the best technique falls flat.

Chefs add:

  • A generous pinch of Kosher salt
  • Fresh black pepper
  • Smoked paprika or regular paprika for depth
  • Fresh dill or chives for fresh, aromatic notes

Optional but chef-approved:

  • A small spoon of finely minced shallot
  • Celery for crisp texture
  • A little Dijon for tang

5. Let It Rest

Texture and flavor improve dramatically after 20–30 minutes in the refrigerator.

Resting time allows:

  • Flavors to meld
  • Excess moisture to absorb
  • The salad to thicken naturally

This is why restaurant egg salad always tastes “more put together.”

Restaurant-Quality Creamy Egg Salad Recipe

Ingredients (Serves 4)

For the eggs:

  • 8 large eggs

Creamy base:

  • 1/3 cup mayonnaise
  • 1 tbsp Dijon mustard
  • 1 tbsp sour cream or Greek yogurt
  • 1–2 tsp pickle brine or lemon juice

Mix-ins & seasoning:

  • 1/4 cup finely diced celery
  • 1 tbsp minced shallot (optional)
  • 1 tbsp chopped fresh dill or chives
  • 1/2 tsp salt
  • 1/4 tsp black pepper
  • Pinch of smoked or regular paprika

Instructions

1. Cook the Eggs

  1. Place eggs in a pot and cover with cold water.
  2. Heat over medium until the water comes to a full boil.
  3. Turn off heat, cover, and let sit for 10–11 minutes.
  4. Transfer eggs to an ice bath for 5 minutes.
  5. Peel once cool.

2. Prepare the Eggs

  • Grate the eggs using the small side of a box grater, OR press them through a metal rack for fluffy, even pieces.

3. Make the Creamy Dressing

In a large bowl, whisk together:

  • Mayonnaise
  • Dijon
  • Sour cream/Greek yogurt
  • Pickle brine or lemon juice
  • Salt, pepper, and paprika

4. Combine

  • Fold in the grated eggs, celery, and shallot.
  • Finish with fresh herbs.
  • Mix gently to keep the mixture airy.

5. Chill and Serve

  • Refrigerate for 20–30 minutes to enhance creaminess.
  • Serve on toasted bread, crackers, croissants, or in lettuce cups.

Final Thoughts

The secret to extraordinary egg salad isn’t a long list of ingredients — it’s professional technique. Perfectly cooked eggs, grated texture, balanced acidity, and a short resting time transform a simple, everyday recipe into something luxurious and memorable.

Master these steps, and you’ll never go back to ordinary egg salad again.