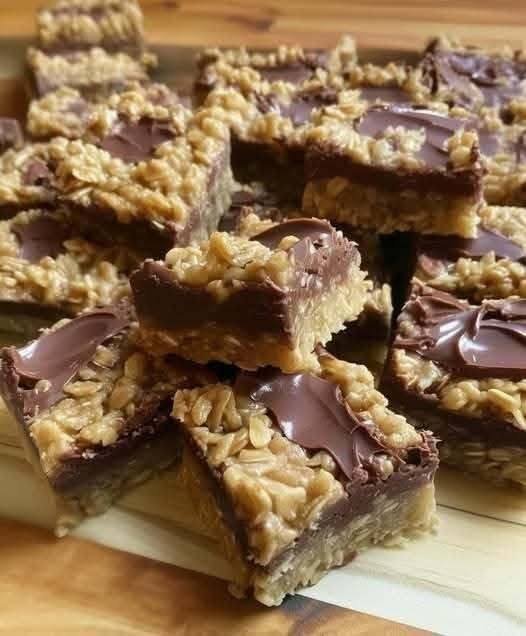
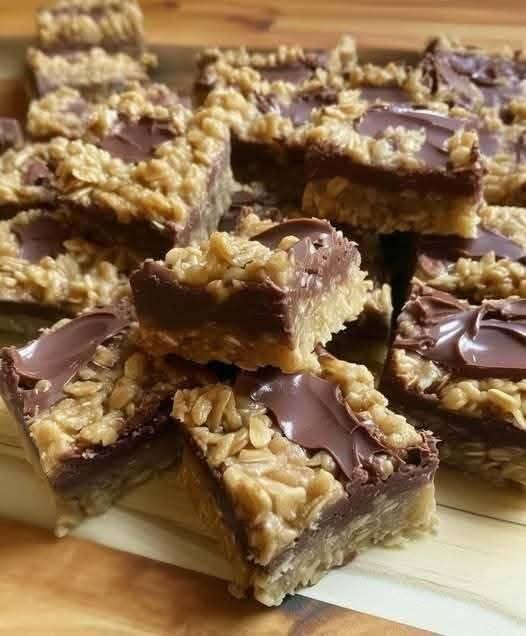
WW-Friendly Oat Chocolate Bars

Quick Description:
Delicious, chewy, and chocolatey oat bars that are perfect for a WW-friendly snack. High in protein, low in SmartPoints, and completely satisfying!

Servings & Timing:

  • Prep Time: 15 minutes
  • Chill Time: 1 hour
  • Total Time: 1 hour 15 minutes
  • Yield: 12 bars

Dietary Badges:
WW-Friendly, High-Protein, Vegetarian, Low-SmartPoints

Ingredients

  • 1 ½ cups rolled oats
  • ½ cup brown sugar (or sugar substitute for fewer SmartPoints)
  • ½ cup light butter or margarine
  • ¾ cup Lily’s sugar-free chocolate chips
  • Optional: nuts, seeds, or dried fruit (watch quantity for SmartPoints)

Instructions

  1. Prep the Pan:
    Lightly spray a 8×8-inch pan with cooking oil.
  2. Mix the Base:
    In a bowl, combine oats, brown sugar (or substitute), and melted light butter until crumbly.
  3. Press Half of Mixture:
    Press half of the oat mixture evenly into the prepared pan to form the base layer.
  4. Add Chocolate Layer:
    Melt the sugar-free chocolate chips (microwave in 30-second intervals, stirring in between). Spread melted chocolate evenly over the oat base.
  5. Top with Remaining Oats:
    Sprinkle the remaining oat mixture on top and gently press to form the final layer.
  6. Chill:
    Refrigerate for at least 1 hour or until firm.
  7. Cut into Bars:
    Remove from the fridge and cut into 12 bars. Serve immediately or store for later.

Additional Notes & Tips

  • WW-Friendly Tips: Using light butter and sugar-free chocolate chips reduces SmartPoints significantly.
  • Add Protein: Sprinkle chopped nuts or seeds for a boost of protein and healthy fats; track quantity for points.
  • Sugar Substitutes: Any preferred sugar substitute (like monk fruit or stevia blends) can reduce points further.
  • Storage: Store in an airtight container in the fridge for up to 5 days. Freeze for up to 1 month.

Step-by-Step Cooking Guide with Tips

Step 1 – Prep Your Pan:
Spray the pan lightly. This prevents sticking while keeping fat content low.

Step 2 – Make the Crumbly Mixture:
Mix the oats, sugar (or substitute), and melted light butter. For extra texture, lightly toast the oats first.

Step 3 – Form the Base:
Press firmly to prevent the bars from falling apart later. Use a spatula or clean hands.

Step 4 – Chocolate Layer:
Melt chocolate carefully; overcooking may make it grainy. Spread evenly for a consistent layer.

Step 5 – Add Top Oat Layer:
Don’t press too hard, or the chocolate will squish out. Just gentle pressure is perfect.

Step 6 – Chill & Cut:
Chill until firm. For neat edges, use a sharp knife and wipe between cuts.


Ingredient Details & Substitution Tips

  • Rolled Oats: Use gluten-free oats if needed. Old-fashioned oats give the best chewiness.
  • Butter Alternatives: Light butter, margarine, or coconut oil can be used (coconut oil may alter flavor).
  • Sugar Alternatives: Monk fruit, stevia blends, or erythritol reduce points.
  • Chocolate: Lily’s sugar-free chips are best for WW; dark chocolate (70%+) can work but increases points.

Recipe Variations & Serving Suggestions

  • Add-ins: Chopped almonds, walnuts, pumpkin seeds, or sunflower seeds for crunch and protein.
  • Flavor Boost: Sprinkle a pinch of cinnamon or cocoa powder on top before chilling.
  • Serving: Great with coffee, tea, or as a grab-and-go snack.

Storage & Make-Ahead Information

  • Fridge: Airtight container for up to 5 days.
  • Freezer: Wrap individually or in portions for up to 1 month.
  • Reheating: Serve cold or slightly soften at room temperature.

Nutrition Facts (Estimated)

Per Bar (12 bars total) Amount
Calories 150 kcal
Carbs 18 g
Protein 4 g
Fat 7 g
Fiber 2 g

Dietary Highlights: WW-Friendly, Low-SmartPoints, High-Protein


FAQs

Q: Can I use regular chocolate chips?
A: Yes, but SmartPoints will be higher. Sugar-free is best for WW.

Q: Can I make them nut-free?
A: Absolutely! Just skip the nuts or seeds.

Q: Can I use maple syrup instead of brown sugar?
A: You can, but this will increase points and slightly alter texture.

Q: How can I make bars chewier?
A: Toast oats lightly before mixing or add 1–2 tbsp of honey or syrup (watch points).


Personal Note

I love these bars because they satisfy a chocolate craving without blowing your SmartPoints for the day. They’re perfect for a mid-afternoon pick-me-up or a sweet, healthy snack on the go. I often add pumpkin seeds for a little extra crunch—it’s my favorite combo!
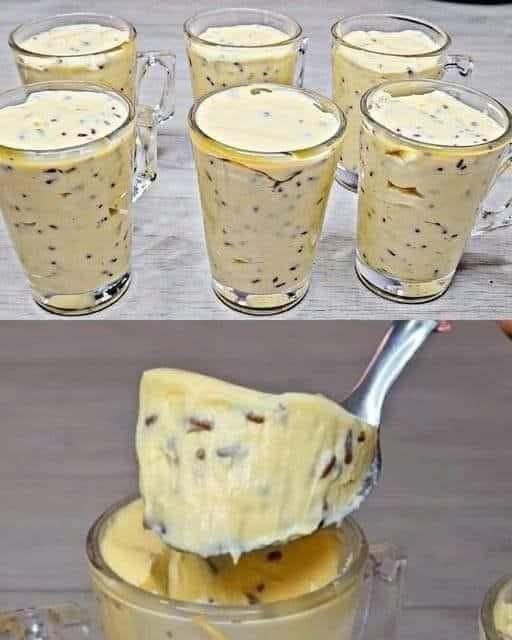
Dessert I make twice a week: Just put everything in the blender

Creamy Banana Blender Dessert (No Baking)

Prep time: 5 minutes
Chill time: 2–3 hours
Makes: 4–6 servings

Ingredients

  • 3 ripe bananas

  • 2 cups milk (dairy or plant-based)

  • 2 large eggs

  • 3 tablespoons cornstarch

  • 2 tablespoons honey or maple syrup (optional, bananas may be enough)

  • 1 teaspoon vanilla extract

  • Pinch of salt

  • 2 tablespoons dark chocolate chips or cacao nibs (optional)

Instructions

  1. Blend everything
    Add bananas, milk, eggs, cornstarch, honey, vanilla, and salt to a blender.
    Blend for 30–40 seconds until completely smooth.

  2. Cook gently
    Pour the mixture into a saucepan.
    Cook on medium-low heat, stirring constantly, for 6–8 minutes until thick and creamy (custard-like).

  3. Add mix-ins
    Remove from heat and stir in chocolate chips or nibs if using.

  4. Set & chill
    Pour into glass cups or mugs.
    Let cool slightly, then refrigerate for 2–3 hours until fully set.

  5. Serve
    Enjoy cold—spoonable, creamy, and naturally sweet.


Why people love this dessert

  • ✔ Blender-friendly

  • ✔ No flour

  • ✔ Naturally sweet

  • ✔ Budget-friendly

  • ✔ Kid-approved

  • ✔ Easy to customize


Variations

  • Protein boost: Add 2 tbsp Greek yogurt

  • Sugar-free: Skip honey entirely

  • Vegan: Use plant milk + 3 tbsp cornstarch (no eggs)

  • Flavor twist: Add cinnamon or a little lemon zest

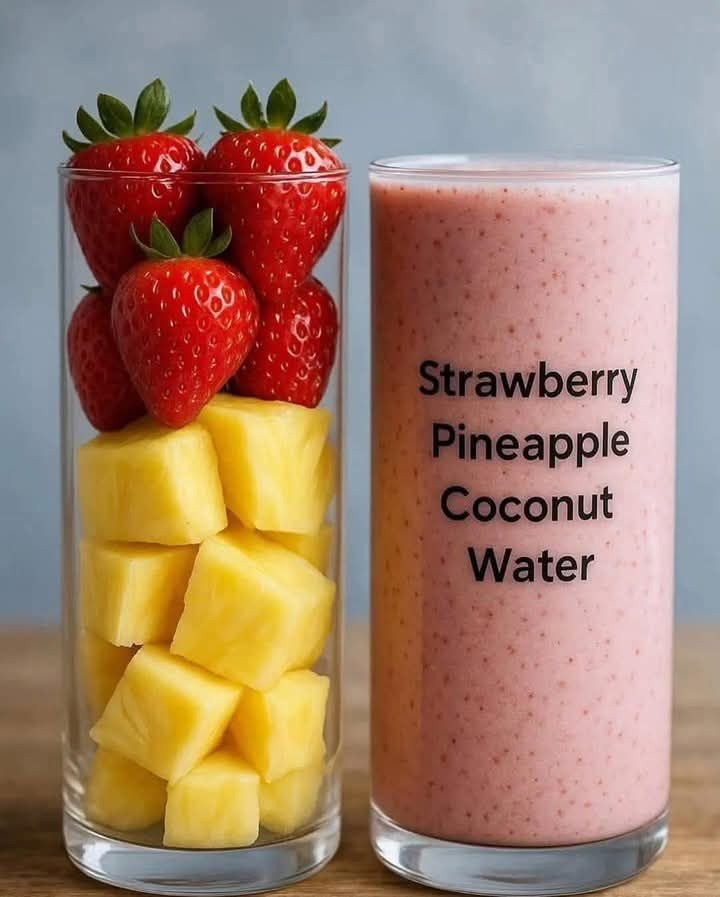
Strawberry Pineapple Coconut Water Smoothie

Strawberry Pineapple Coconut Water Smoothie


This recipe makes a refreshing and hydrating smoothie with a tropical flavor. It’s perfect for a quick breakfast, a post-workout drink, or a light snack.

Yields: 1 serving Prep time: 5 minutes


Ingredients

  • 1 cup fresh strawberries: Washed, hulled, and halved. For a colder, thicker smoothie, you can use frozen strawberries.
  • 1 cup fresh pineapple chunks: You can use frozen pineapple chunks for a thicker texture.
  • 1 cup coconut water: Chilled. Use a high-quality, pure coconut water for the best flavor and hydration benefits.
  • Optional additions (for extra flavor, nutrition, or texture):
    • 1/2 a ripe banana: Adds creaminess and natural sweetness.
    • 1 tablespoon chia seeds or flax seeds: Boosts fiber and omega-3 fatty acids.
    • 1 scoop vanilla or unflavored protein powder: For a protein-rich smoothie.
    • A squeeze of lime juice: Brightens the flavors.
    • A few mint leaves: Adds a fresh, herbal note.


Instructions


  1. Prepare the fruit: Ensure your strawberries are hulled and your pineapple is cut into chunks. If using frozen fruit, there’s no need to thaw it.
  2. Combine ingredients: Place all of the ingredients into a blender. Start with the liquid (coconut water) first, as this helps the blades move more easily.
  3. Blend until smooth: Secure the lid and blend on high speed for 30-60 seconds, or until the mixture is completely smooth and no large chunks of fruit remain. If the smoothie is too thick, add a little more coconut water, a tablespoon at a time, until you reach your desired consistency.
  4. Taste and adjust: Taste the smoothie and add any optional ingredients if you wish. You can add a little honey or maple syrup if you prefer a sweeter drink, though the fruits usually provide enough sweetness.
  5. Serve immediately: Pour the smoothie into a tall glass and serve immediately. Garnish with a fresh strawberry or a small piece of pineapple if desired.

Enjoy your delicious and healthy Strawberry Pineapple Coconut Water Smoothie!

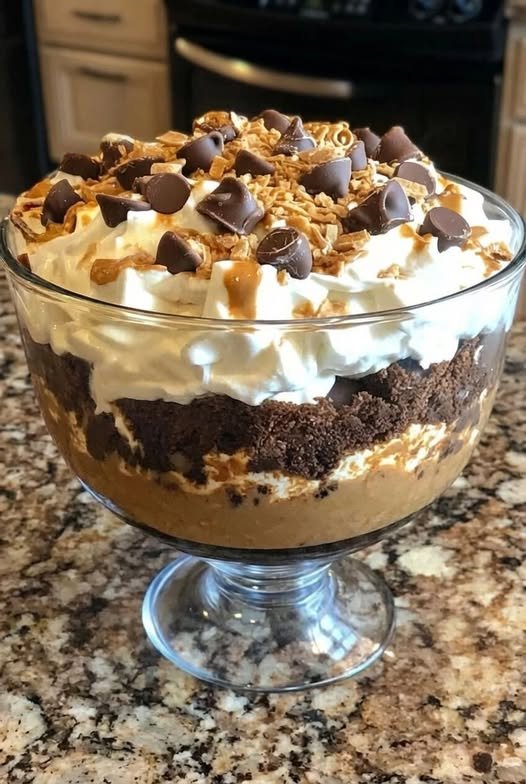
Heaven In A Bowl (Double Chocolate Edition)

Heaven In A Bowl (Double Chocolate Edition)
A dreamy, no-bake layered trifle that tastes like childhood.

Prep time: 20 minutes

Chilling time: 2 hours (minimum)

Servings: 8–10

Ingredients
The Cookie Base & Crunch:

1 package (approx. 14 oz) Chocolate sandwich cookies (like Oreos)

1 cup Mini chocolate chips (for layering and garnish)

The Cream Cheese Layer:

1 package (8 oz) Cream cheese, softened to room temperature

1 cup Powdered sugar

1 tsp Vanilla extract

The Fluffy Pudding Layer:

1 package (5.1 oz) Instant chocolate pudding mix

2 cups Cold whole milk

1 container (8 oz) Whipped topping (like Cool Whip) OR 2 cups freshly whipped heavy cream

Instructions
1. Prep the Cookies
Place the chocolate sandwich cookies in a large zip-top bag. Use a rolling pin to crush them into coarse crumbs. You want some fine dust but also some small chunks for texture. Set aside.

2. Make the Sweetened Cream Base
In a medium bowl, beat the softened cream cheese until completely smooth and no lumps remain. Add the powdered sugar and vanilla extract, beating until the mixture is fluffy and well combined.

3. Whip Up the Pudding
In a separate large bowl, whisk together the instant chocolate pudding mix and cold milk for about 2 minutes until it starts to thicken.

4. Lighten the Texture
Gently fold half of your whipped topping (or whipped cream) into the chocolate pudding. This creates a “mousse-like” consistency that makes the dessert feel like a cloud.

5. Assemble the “Heaven”
Grab a glass trifle bowl or a 9×13 inch baking dish to show off the layers:

Layer 1: Spread half of the crushed cookies on the bottom.

Layer 2: Carefully spread the cream cheese mixture over the cookies.

Layer 3: Spread the chocolate pudding mousse over the cream cheese.

Layer 4: Add the remaining crushed cookies and a handful of chocolate chips.

Layer 5: Top with the remaining half of the whipped topping.

6. Garnish and Chill
Sprinkle the top with the remaining mini chocolate chips and maybe a few extra cookie crumbs. Cover and refrigerate for at least 2 hours.

Pro Tip: This dessert is even better if made the night before! The cookies soften just enough to take on a cake-like texture while staying distinct from the cream.

Cheesy Herb-Stuffed Potato Roll Recipe

Cheesy Herb-Stuffed Potato Roll Recipe

If you’re a fan of crispy, cheesy comfort food, the Cheesy Herb-Stuffed Potato Roll is about to become your new favorite recipe! This dish combines the rich, savory flavors of potatoes, melted cheese, and aromatic herbs, creating a delightful treat perfect for family dinners, gatherings, or even as a hearty snack.

Ingredients
For the Potato Base:

4 medium-sized potatoes, peeled and grated
2 large eggs
1 cup grated mozzarella cheese
½ cup grated Parmesan cheese
2 tablespoons all-purpose flour
½ teaspoon garlic powder
½ teaspoon onion powder
½ teaspoon paprika
Salt and pepper to taste
For the Filling:

1 cup shredded mozzarella cheese
½ cup grated cheddar cheese
1 cup cooked chicken, shredded (optional)
¼ cup fresh parsley, chopped
¼ cup green onions, chopped
Preparation Time
Prep Time: 20 minutes
Cooking Time: 30 minutes
Total Time: 50 minutes
Serving Size: 4–6 portions

Instructions
Prepare the Potato Mixture:
Begin by peeling and grating the potatoes. Use a clean kitchen towel or cheesecloth to squeeze out any excess moisture from the grated potatoes.
In a large bowl, combine the grated potatoes with the eggs, mozzarella cheese, Parmesan cheese, flour, and seasonings (garlic powder, onion powder, paprika, salt, and pepper). Mix well until everything is fully incorporated.
Create the Potato Base:
Preheat your oven to 375°F (190°C) and line a baking sheet with parchment paper.
Spread the potato mixture evenly onto the baking sheet, forming a thin, rectangular layer about 1 cm thick. Use a spatula to smooth the surface out as evenly as possible.
Bake the Potato Base:
Bake the potato base in the preheated oven for about 20 minutes, or until it becomes golden brown and crispy. Once done, remove it from the oven and let it cool slightly.
Add the Filling:
Once the potato base has cooled slightly, sprinkle the shredded mozzarella cheese, cheddar cheese, and shredded cooked chicken (if using) over the surface evenly.
Add the chopped parsley and green onions for added flavor and color.
Roll It Up:
Using the parchment paper, carefully roll the potato layer into a log shape. Roll it tightly but gently to avoid any cracks in the potato base. Once rolled, place the roll seam-side down on the baking sheet.
Bake the Roll:
Return the rolled potato log to the oven and bake for an additional 10 minutes, or until the cheese inside has completely melted. For an extra crispy finish, broil the roll for 2–3 minutes, keeping a close eye to prevent burning.

Garnish and Serve:
Once baked, remove the roll from the oven and allow it to cool for a few minutes before slicing it into thick pieces.
Garnish with additional parsley or grated cheese if desired, then serve warm.
See also Pancake Cake with Meat: A Hearty and Delicious Meal

Tips and Variations
Add Protein: For a vegetarian version, skip the chicken and add sautéed mushrooms, spinach, or roasted bell peppers. For a meat-lover’s twist, try adding diced ham, crispy bacon bits, or even cooked sausage.
Cheese Options: Experiment with different cheeses like gouda, Swiss, or pepper jack for a unique flavor profile. You can even mix and match your favorites for a cheesy explosion of flavor.
Dip It: Serve with marinara sauce, ranch dressing, sour cream, or even a tangy yogurt dip for an extra layer of deliciousness.

Frequently Asked Questions (Q/A)
Q: Can I use different types of potatoes?
Yes, you can use russet potatoes or Yukon gold potatoes depending on your preference. Russets tend to make a crispier roll, while Yukon golds will give a creamier texture.
Q: Can I prepare the roll in advance?
Absolutely! You can assemble the roll the day before and refrigerate it. When ready to bake, let it sit at room temperature for about 10-15 minutes before baking.
Q: Can I freeze this dish?
Yes, you can freeze the unbaked roll for later use. Once assembled, wrap the roll tightly in plastic wrap and aluminum foil, and freeze for up to 1-2 months. When ready to cook, thaw in the refrigerator overnight, then bake as directed.
Q: Can I make it gluten-free?
Yes, you can substitute gluten-free flour for the all-purpose flour in the potato mixture. Just make sure the other ingredients, especially the cheese and chicken (if used), are gluten-free.
Q: What if I don’t have parchment paper?
If you don’t have parchment paper, you can grease the baking sheet with a bit of oil or butter to prevent the roll from sticking. You can also use a silicone baking mat as an alternative.

Q: Can I skip the chicken in the filling?
Yes, you can make it vegetarian by omitting the chicken and using extra cheese or vegetables for a delicious vegetarian option.
Q: How do I know when the roll is done?
The roll is ready when the cheese inside has melted and the outer layer is crispy and golden. Broiling it for a few minutes gives the top a perfect crispy finish.
Q: Can I make this roll ahead of time?
Yes! You can prepare the roll ahead of time and store it in the refrigerator. Just bake it just before serving to enjoy the freshly melted cheese and crispy potato base.

Final Thoughts
This Cheesy Herb-Stuffed Potato Roll is a delightful and visually impressive dish that will wow your family and guests. Its crispy exterior, gooey cheesy filling, and savory herbs make it an irresistible choice for any occasion. Whether you serve it as an appetizer, a main course, or a snack, it’s bound to become a household favorite!

Gather your ingredients, roll up your sleeves, and get ready to enjoy a warm, cheesy, and comforting dish that’s sure to impress. Enjoy!

Let me know if you’d like more recipes or tips! 😊

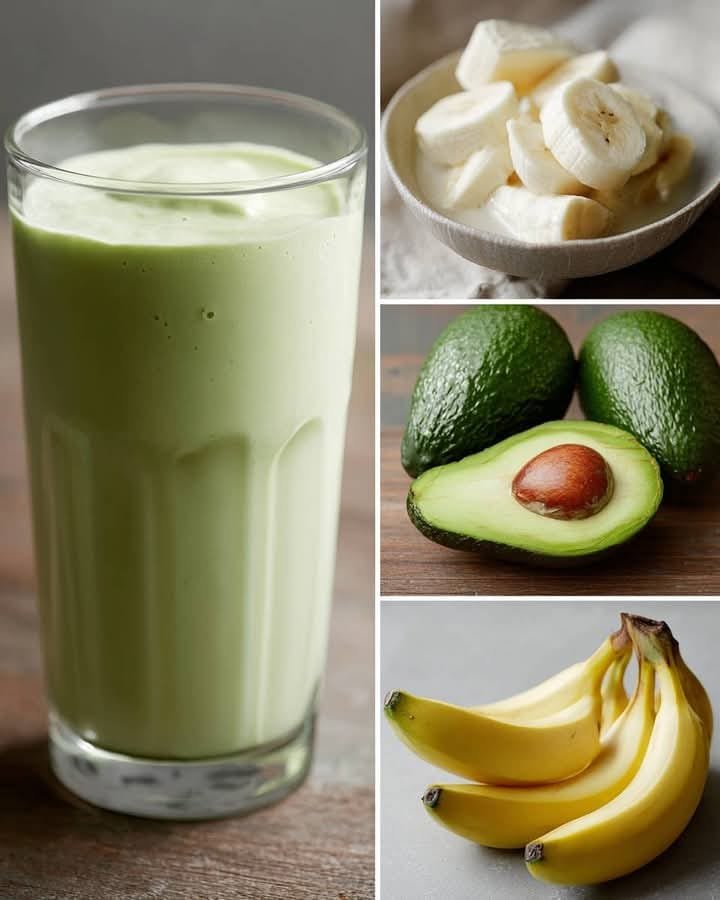
Creamy Avocado Banana Smoothie

Creamy Avocado Banana Smoothie

Prep time: 5 minutes | Servings: 1

Ingredients

  • 1/2 ripe avocado (pitted and scooped)

  • 1 medium banana (frozen slices work best for a thicker texture)

  • 1 cup milk of choice (dairy, almond, oat, or coconut milk)

  • 1–2 teaspoons honey or maple syrup (optional, depending on your preferred sweetness)

  • 1/2 cup ice cubes (only if using a room-temperature banana)

  • A squeeze of lime juice (optional, helps keep the color bright green)


Instructions

  1. Prepare the Fruit: Peel the banana and scoop out the avocado flesh. If you have time, freezing the banana slices beforehand makes the smoothie much creamier.

  2. Combine: Place the avocado, banana, milk, and sweetener into a high-speed blender.

  3. Blend: Start on a low speed and gradually increase to high. Blend for about 45–60 seconds until the mixture is completely smooth and pale green.

  4. Adjust Consistency: If it is too thick, add a splash more milk. If you want it colder/thicker, add a few more ice cubes and blend again.

  5. Serve: Pour into a tall glass and enjoy immediately while fresh.


Tips for the Best Results

  • The “Perfect” Avocado: Ensure your avocado is ripe (it should give slightly when pressed) but not brown inside to maintain that vibrant green color seen in your photo.

  • Add Protein: If you want to turn this into a meal replacement, add a scoop of vanilla protein powder or a tablespoon of Greek yogurt.

  • Flavor Boost: A tiny pinch of salt or a drop of vanilla extract can enhance the natural flavors of the fruit.