Hearty Chicken & Garden Vegetable Soup

Hearty Chicken & Garden Vegetable Soup

Prep time: 15 mins | Cook time: 30 mins | Servings: 4-6


Ingredients

  • Protein: 2 large chicken breasts, cooked and shredded (rotisserie chicken works great too).

  • Vegetables: * 2 cups broccoli florets, chopped small.

    • 3 large carrots, peeled and sliced into rounds.

    • 2 cups cabbage or kale, shredded.

    • 1 can (14 oz) diced tomatoes (undrained).

    • 1 medium onion, diced.

  • Liquid & Aromatics:

    • 6 cups chicken bone broth or stock.

    • 3 cloves garlic, minced.

    • 1 tbsp olive oil.

  • Seasoning:

    • 1 tsp dried oregano or Italian seasoning.

    • Salt and black pepper to taste.

    • Optional: A pinch of red pepper flakes for a tiny bit of warmth.


Instructions

  1. Sauté the Base: Heat olive oil in a large pot over medium heat. Add the onions and carrots. Cook for about 5 minutes until the onions are translucent. Stir in the minced garlic and cook for 1 more minute until fragrant.

  2. Simmer the Broth: Pour in the chicken broth and the diced tomatoes. Bring the mixture to a gentle boil, then reduce the heat to low.

  3. Add Vegetables: Stir in the broccoli and shredded cabbage. Let them simmer for about 8–10 minutes until the broccoli is tender but still bright green.

  4. Incorporate Chicken: Add your shredded chicken to the pot. Stir in the oregano, salt, pepper, and red pepper flakes.

  5. Finish: Let everything simmer together for another 5 minutes to ensure the chicken is heated through and the flavors have blended.


Tips for Success

  • Texture: If you prefer your broccoli to have a “crunch,” add it in the last 5 minutes of cooking.

  • Brighten it up: Squeeze the juice of half a lemon into the pot just before serving to make the flavors pop.

  • Storage: This soup tastes even better the next day! It stays fresh in the fridge for up to 4 days.
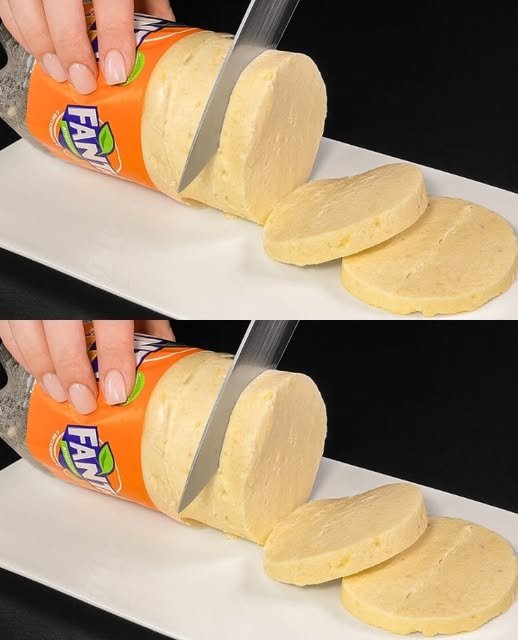
5-Minute Homemade “Bottle” Cheese

5-Minute Homemade “Bottle” Cheese

This recipe creates a semi-soft, sliceable cheese similar in texture to a mild provolone or a firm mozzarella block.

Ingredients

  • 2 liters of Full-fat milk (Whole milk works best for yield)

  • 1 tsp Salt (adjust to taste)

  • 50 ml White vinegar (or lemon juice)

  • 100 g Butter (unsalted preferred)

  • 200 g Mozzarella cheese, shredded or diced

  • Equipment: 1 empty plastic bottle (top cut off)

Instructions

  1. Curdle the Milk: Pour the 2 liters of milk into a large pot. Heat over medium heat until it almost reaches a boil. Just as it begins to foam, stir in the white vinegar.

  2. Separate the Curds: Continue stirring gently for 1–2 minutes. You will see the milk separate into white clumps (curds) and a yellowish liquid (whey). Turn off the heat.

  3. Strain: Pour the mixture through a fine-mesh strainer or cheesecloth to collect the curds. Press down firmly to remove as much liquid as possible. (You can discard the whey or save it for baking).

  4. Melt and Blend: Place a clean pot over low heat. Add the butter and let it melt. Add the strained curds, the salt, and the 200 g of mozzarella.

  5. Emulsify: Stir constantly until the mixture becomes a smooth, stretchy, and unified mass. For an extra smooth texture like the one in the photo, you can use an immersion blender while it’s still hot in the pot.

  6. Mold: While the cheese is still hot and pliable, pour/spoon it into your empty plastic bottle. Tap the bottle firmly on the counter to remove air bubbles.

  7. Chill: Let it cool to room temperature, then refrigerate for at least 3 hours (or until completely firm).

  8. Serve: Once set, you can either squeeze the cheese out or carefully slit the side of the plastic bottle with scissors to release the cheese log. Slice into rounds and enjoy!

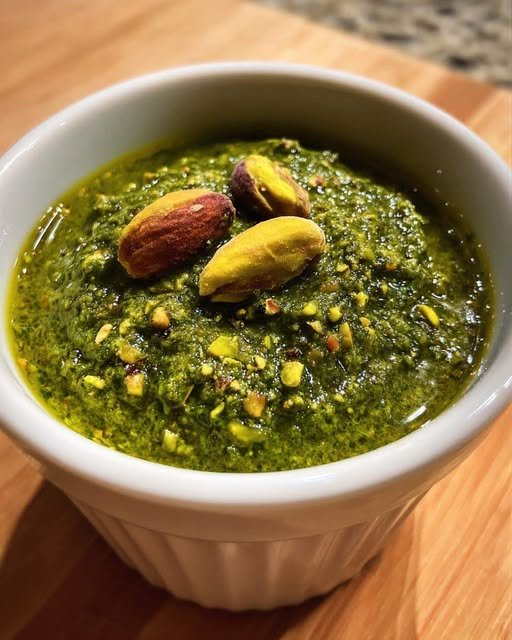
Pistachio Pesto

Pistachio Pesto

A creamy, nut-forward pesto that clings perfectly to pasta and doubles as a luxurious spread for sandwiches or grilled meats.

  • Prep time: 10 minutes

  • Cook time: 3 minutes (for toasting)

  • Total time: 13 minutes

  • Yield: Approximately 1 ½ cups

Ingredients

  • 1 cup shelled pistachios (no shells)

  • 2 cups fresh basil leaves, firmly packed

  • ½ cup extra virgin olive oil (high quality is best)

  • ½ cup grated Parmesan cheese (freshly grated is preferred)

  • 2 cloves garlic, peeled

  • ½ tsp salt (adjust to taste)

  • ¼ tsp black pepper (freshly cracked)

Instructions

  1. Toast the Nuts: Toss the shelled pistachios in a dry pan over medium heat for 2–3 minutes. Stir constantly until they are fragrant and smell heavenly; be careful as they can burn quickly.

  2. Combine the Base: In a food processor, combine the toasted pistachios, fresh basil, grated Parmesan, and garlic cloves.

  3. Pulse: Pulse the mixture until it reaches the consistency of coarse sand. Use a spatula to scrape down the sides of the bowl to ensure everything is evenly incorporated.

  4. Emulsify with Oil: Turn the processor back on and slowly drizzle the olive oil through the feed tube while it is running. This slow process helps create a smooth emulsion.

  5. Season: Add the salt and black pepper. Pulse a few more times to blend and achieve your desired texture—leave it slightly chunky for a rustic feel or process longer for a smooth paste.

  6. Taste Test: Try a spoonful and adjust the salt or oil if needed until it reaches your preference.


Pro-Tips & Substitutions

  • The Golden Rule: Never skip toasting the nuts; it is essential for unlocking the warm, buttery flavor.

  • Fixing Texture: If the pesto is too thick, drizzle in more olive oil. If it starts to separate, stir in a teaspoon of ice water to help it emulsify and “come back together”.

  • Swaps: If you run out of basil, you can use half baby spinach or arugula, though the color may be less vibrant. For a vegan version, substitute nutritional yeast for the Parmesan.

Storage Guidelines

  • Refrigerate: Keep in an airtight container for up to 5 days. To maintain the bright green color, pour a thin layer of olive oil over the top before sealing.

  • Freeze: Freeze in ice cube trays for up to 3 months. These “pesto cubes” can be tossed directly into hot pasta for a quick meal.

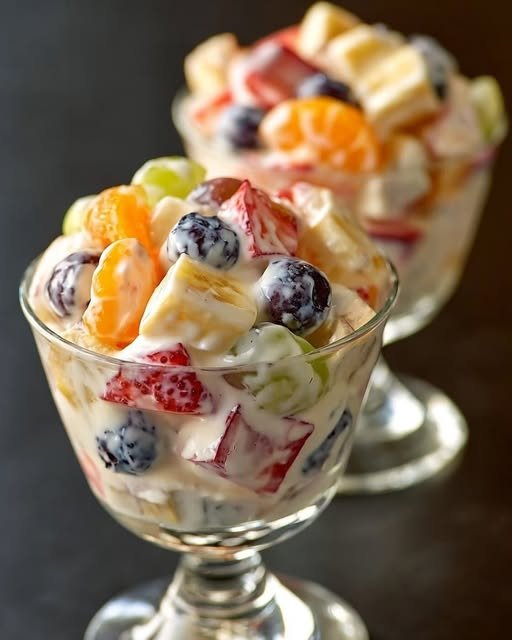
🍓🍌 Creamy Fruit Salad 🍊🍇

🍓🍌 Creamy Fruit Salad 🍊🍇
📝 Ingredients
1 banana, sliced 🍌
1 apple, diced 🍎
1 orange, peeled & segmented 🍊
½ cup grapes 🍇
½ cup strawberries, chopped 🍓
½ cup pineapple chunks 🍍
1 cup plain or vanilla yogurt 🥣
2 tbsp fresh cream or whipped cream 🍶
1 tbsp honey (optional) 🍯
👩‍🍳 Method
Wash and cut all fruits into bite-sized pieces 🔪
Add the fruits to a large bowl 🥗
In a separate bowl, mix yogurt, cream, and honey until smooth 🥣
Pour the creamy mixture over the fruits 🍶
Gently mix until well coated 🍴
Chill for 15–20 minutes and serve cold ❄️

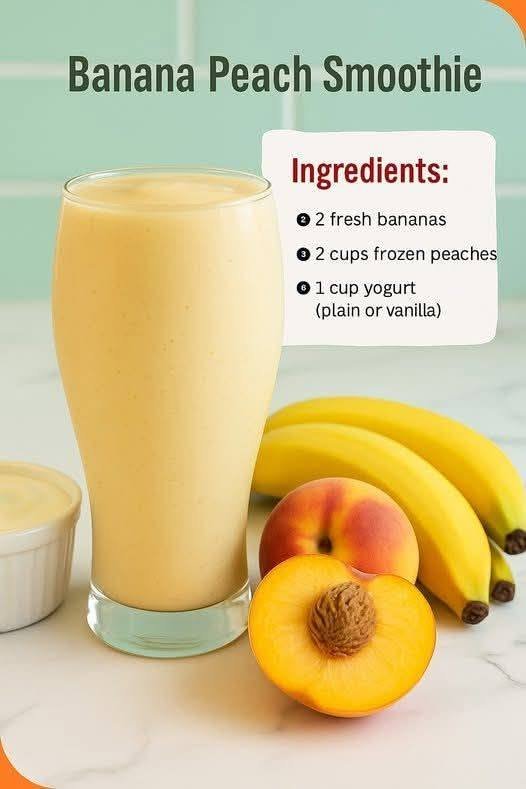
Banana Peach Smoothie

Banana Peach Smoothie

Ingredients

  • 2 Fresh Bananas: Best if they are ripe (with a few brown spots) for natural sweetness.

  • 2 Cups Frozen Peaches: Using frozen peaches gives the smoothie a thick, chilled texture without needing ice.

  • 1 Cup Yogurt: You can use plain or vanilla. Greek yogurt works great if you want extra protein and a thicker consistency.

  • Optional Liquid (as needed): 1/4 to 1/2 cup of milk, water, or orange juice if the mixture is too thick to blend.


Instructions

  1. Prep the Fruit: Peel the bananas and break them into smaller chunks to help your blender process them more easily.

  2. Layer the Ingredients: Add the yogurt to the blender first. Adding the liquid/soft ingredients at the bottom helps the blades move more efficiently. Follow with the banana chunks and finally the frozen peaches.

  3. Blend: Secure the lid and blend on high until the mixture is completely smooth and creamy.

  4. Adjust Consistency: If the smoothie is too thick, add a small splash of your preferred liquid and blend for another 5–10 seconds.

  5. Serve: Pour into a chilled glass and enjoy immediately while cold!


Tips for Success

  • Sweetness: If your peaches aren’t very sweet, you can add a teaspoon of honey or maple syrup.

  • Texture: If you prefer an even colder “soft-serve” texture, try slicing and freezing your bananas ahead of time as well.

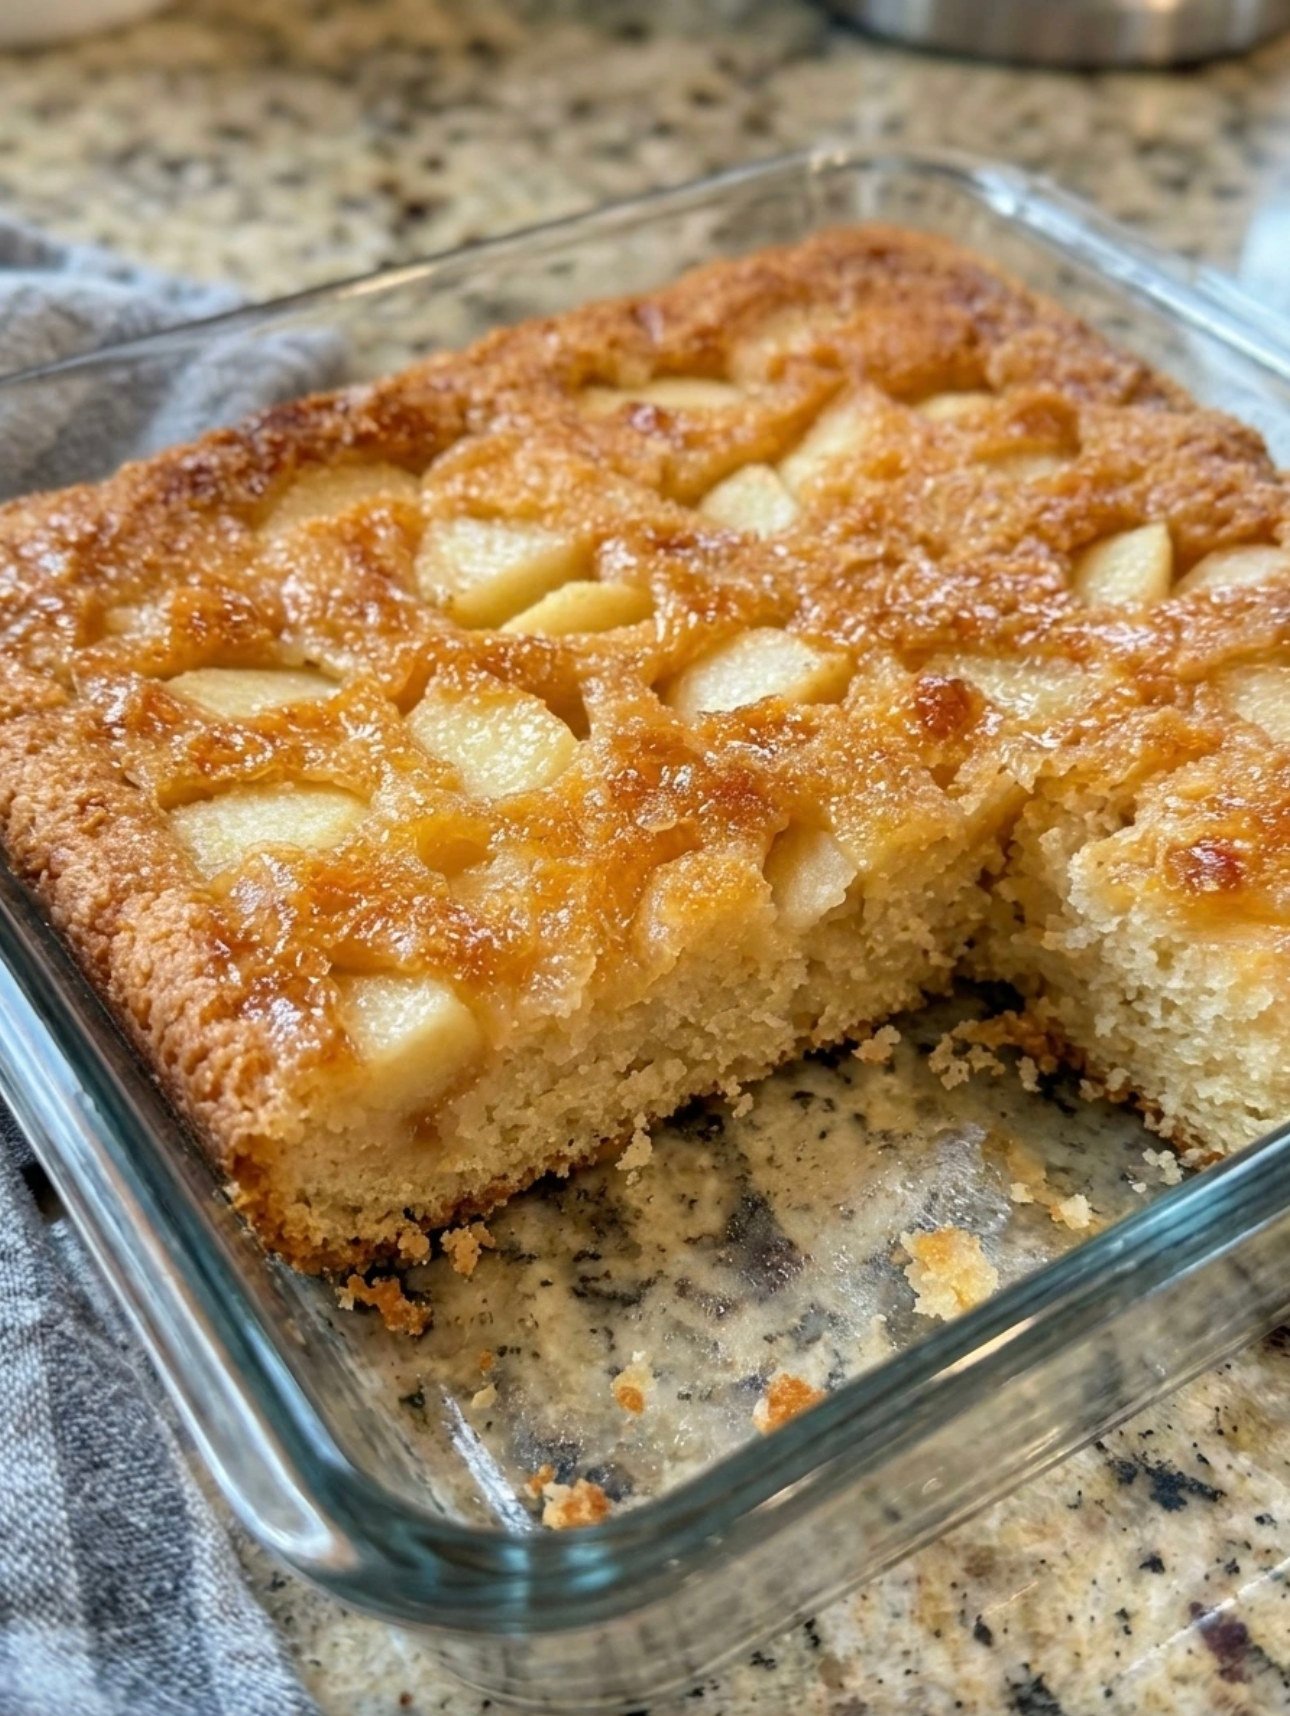
Apple Cinnamon Cake

Apple Cinnamon Cake

Ingredient Notes & Details

Apples
Use crisp baking apples like Honeycrisp, Granny Smith, or Fuji. They hold their shape and provide the perfect sweet-tart balance.

All-purpose flour
Gives structure while keeping the cake soft and fluffy.

Granulated sugar
Sweetens the cake while allowing the apple flavor to shine.

Brown sugar
Adds moisture and deep caramel notes to the cinnamon topping.

Ground cinnamon
The heart of this baked apple recipe — warm, comforting, and fragrant.

Eggs
Bind the batter and create a tender crumb.

Milk
Keeps the batter smooth and pourable.

Vegetable oil or melted butter
Adds richness and moisture.

Baking powder
Ensures a soft, fluffy rise.

Vanilla extract
Enhances the sweetness and spice.

Salt
Balances all the flavors.

Step-by-Step Instructions

Preheat and prepare your pan
Preheat your oven to 350°F (175°C). Grease and line an 8×8 or 9×9 baking pan with parchment paper.

Peel and dice the apples
Cut apples into small chunks so they bake evenly and melt into the cake.

Mix the dry ingredients
In a bowl, whisk flour, baking powder, salt, and cinnamon together.

Combine wet ingredients
In another bowl, whisk eggs, sugar, milk, oil, and vanilla until smooth.

Bring everything together
Slowly add dry ingredients to wet ingredients and mix just until combined.

Fold in the apples
Gently stir in the diced apples so they’re evenly distributed.

Make the cinnamon topping
Mix brown sugar and cinnamon. Sprinkle evenly over the batter.

Bake until golden and set
Bake for 35–45 minutes, or until a toothpick comes out clean.

Cool before slicing
Let the cake cool slightly before cutting for clean slices.