2-Ingredient Homemade Condensed Milk (Detailed & Gentle Method)

2-Ingredient Homemade Condensed Milk (Detailed & Gentle Method) ✨🥛

Making condensed milk at home is easy, budget-friendly, and gives you full control over the ingredients. With just two simple items, you can create a smooth, creamy condensed milk perfect for desserts, drinks, and baking—no additives, no extras.

This method uses slow, gentle heat and patience to naturally thicken the milk and develop its rich texture.


🧾 Ingredients

  • 2 cups (500 ml) whole milk
    Full-cream milk gives the best creamy body and smooth mouthfeel.

  • ⅔ cup (150 g) granulated sugar
    Sweetens the milk and helps it thicken naturally as it reduces.


👩‍🍳 Step-by-Step Instructions

1️⃣ Combine the Ingredients

Pour the milk into a heavy-bottomed saucepan. Add the sugar and gently stir to combine.
Using a thick pan helps the milk heat evenly and stay smooth.


2️⃣ Dissolve the Sugar

Place the saucepan over medium-low heat.
Stir slowly and continuously until the sugar fully dissolves into the milk.
This step is important for a silky texture later.


3️⃣ Gentle Simmer & Reduce

Once the sugar has dissolved, reduce the heat slightly so the milk stays at a very gentle simmer (small bubbles at the edges, not active bubbling).

  • Let it cook for 35–45 minutes

  • Stir every few minutes to keep the mixture smooth

  • If light foam forms on top, gently skim it off with a spoon

As it cooks, you’ll notice:

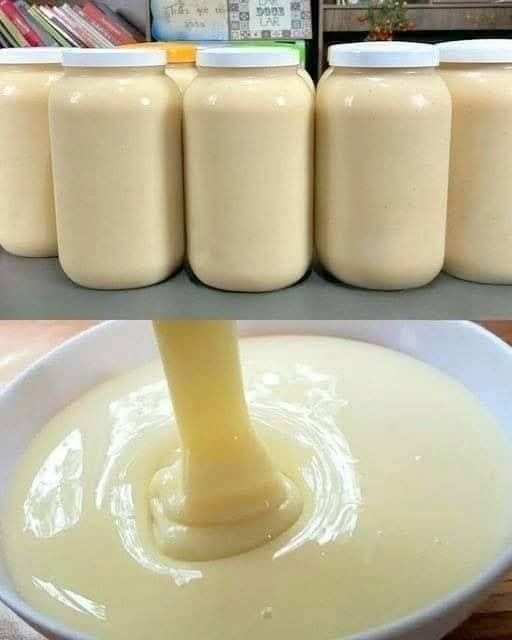
  • The color changing from white to a soft creamy tone

  • The volume gradually reducing to about half

  • The texture becoming thicker and glossy


4️⃣ Check the Consistency

The condensed milk is ready when it:

  • Looks smooth and shiny

  • Feels lightly thick and coats the back of a spoon

👉 Keep in mind: it will become thicker as it cools.


5️⃣ Cool and Smooth

Remove the pan from heat and let the condensed milk cool completely.
If you notice tiny lumps:

  • Strain through a fine sieve or

  • Blend briefly for a perfectly smooth finish


6️⃣ Store

Pour into clean, dry glass jars.
Store covered in the refrigerator for up to 2 weeks.


🌟 Helpful Tips & Variations

  • 🥥 Dairy-free option: Full-fat coconut milk works very well and gives a rich result

  • 🍯 Flavor boost: Add a small splash of vanilla after cooling

  • 🧁 Uses: Perfect for desserts, no-bake treats, tea, coffee, and baking

  • ❄️ Texture tip: If it thickens too much in the fridge, stir in a little warm milk to loosen


❓ Common Questions

Can I use sugar alternatives?
Yes, but the texture may be lighter since regular sugar thickens more naturally.

How long does it last?
Up to 2 weeks when kept cold in a sealed container.
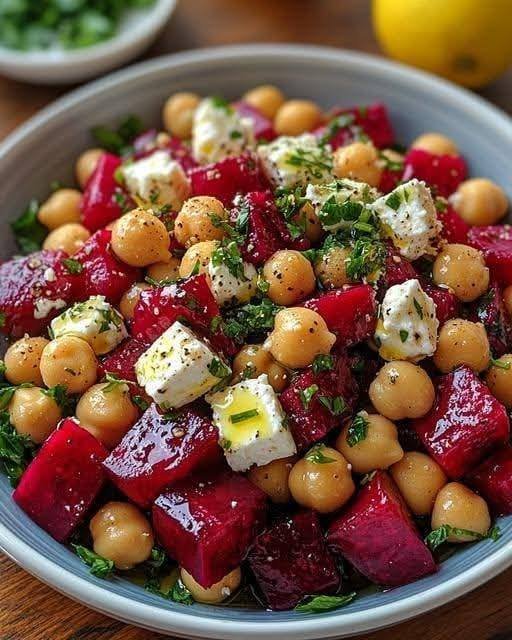
Chickpea, Beet & Feta Salad with Lemon-Garlic Vinaigrette

🥗 Chickpea, Beet & Feta Salad with Lemon-Garlic Vinaigrette

Ingredients

🥣 For the Salad:

  • 1 can (15 oz / 425 g) chickpeas, drained and rinsed

  • 2 medium cooked beets, peeled and diced (roasted or boiled)

  • 1 small red onion, thinly sliced

  • 1 cup baby spinach or arugula (optional for freshness)

  • ½ cup feta cheese, crumbled

  • ¼ cup chopped walnuts or almonds (lightly toasted)

  • 1 tablespoon chopped fresh parsley or mint (for garnish)

🍋 For the Lemon-Garlic Vinaigrette:

  • 3 tablespoons extra-virgin olive oil

  • 2 tablespoons fresh lemon juice

  • 1 garlic clove, finely minced

  • 1 teaspoon Dijon mustard

  • ½ teaspoon honey (optional, for balance)

  • Salt and freshly ground black pepper, to taste

Instructions

  1. Prepare the Beets

    • If using raw beets, roast them at 400°F (200°C) for 35–40 minutes until tender, then peel and dice.
      (You can also use pre-cooked or canned beets for convenience.)

  2. Make the Vinaigrette

    • In a small bowl, whisk together olive oil, lemon juice, garlic, Dijon mustard, honey, salt, and pepper until smooth and emulsified.

  3. Assemble the Salad

    • In a large mixing bowl, combine chickpeas, diced beets, red onion, and spinach or arugula (if using).

    • Drizzle with the vinaigrette and toss gently to coat everything evenly.

  4. Finish and Serve

    • Top with crumbled feta, toasted nuts, and fresh parsley or mint.

    • Serve chilled or at room temperature.

💡 Tips & Variations

  • 🧡 Roasted flavor boost: Toss chickpeas in olive oil and roast at 400°F (200°C) for 15 minutes before adding.

  • 🧄 Extra garlic lover? Add roasted garlic for a milder, sweeter note.

  • 🌾 Make it a meal: Add quinoa, farro, or grilled chicken for extra protein.

  • 🧀 No feta? Try goat cheese or ricotta salata instead.

  • 🥬 Leafy upgrade: Mix in kale or baby greens for a heartier salad.

❓ Q&A

Q: Can I make this salad ahead of time?
A: Yes! Prepare it up to 1 day in advance and store in the fridge. Add the feta and nuts just before serving.

Q: Can I use canned beets?
A: Absolutely — just drain and rinse well to reduce excess brine flavor.

Q: What pairs well with this salad?
A: It’s perfect with grilled salmon, chicken, or a simple soup on the side.

Q: How long does it last in the fridge?
A: Store in an airtight container for 3 days — it even tastes better after marinating!

Creamy Lemon Mousse

Creamy Lemon Mousse

Prep time: 15 minutes | Chill time: 2 hours | Servings: 4–6 cups

Ingredients

  • 1 cup Heavy whipping cream (cold)

  • 1/2 cup Powdered sugar (adjust to your sweetness preference)

  • 8 oz (225g) Cream cheese or Mascarpone (softened to room temperature)

  • 1/2 cup Lemon curd (store-bought or homemade)

  • 1 tbsp Fresh lemon zest

  • 2 tbsp Fresh lemon juice

  • Garnish: 4 crushed graham crackers or vanilla wafers


Instructions

  1. Whip the Cream: In a chilled bowl, beat the heavy whipping cream and powdered sugar until stiff peaks form. Set this aside in the fridge.

  2. Cream the Base: In a separate large bowl, beat the cream cheese until it is completely smooth and no lumps remain.

  3. Mix Citrus: Add the lemon curd, lemon juice, and lemon zest to the cream cheese. Beat on medium speed until well combined and yellow.

  4. Fold Together: Gently fold the whipped cream into the lemon mixture using a spatula. Use a “cut and fold” motion to keep the mousse light and airy—don’t over-mix!

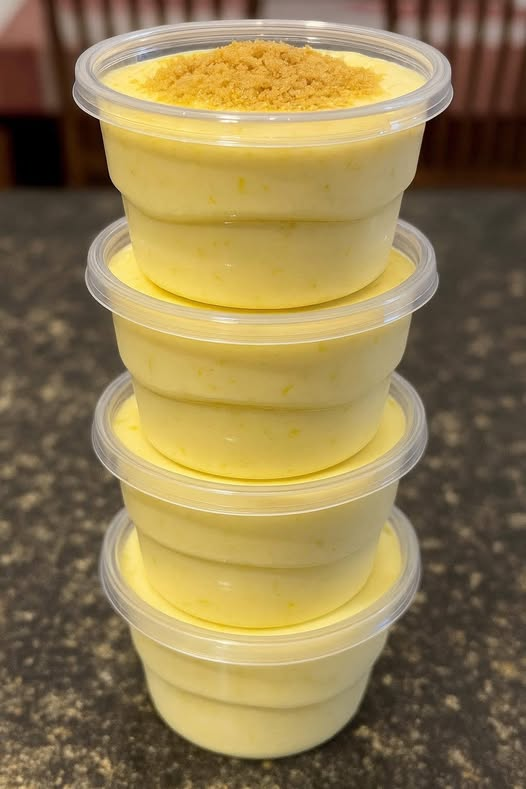
  5. Assemble: Transfer the mousse into a piping bag (or a plastic bag with the corner snipped off). Pipe the mixture into small clear cups like the ones in your photo.

  6. Top and Chill: Sprinkle the crushed graham crackers or cookies on top. Refrigerate for at least 2 hours to allow the mousse to set and the flavors to meld.


Tips for Success

  • Zest First: Always zest your lemons before squeezing the juice; it’s much easier!

  • Stability: If you want them to be even firmer, you can add an extra 2 tablespoons of powdered sugar to the whipped cream.

  • Variations: You can put a layer of the crumbs at the very bottom of the cup before piping the mousse for a “cheesecake in a cup” style.

Mexican Street Corn White Chicken Chili

🌽 Mexican Street Corn White Chicken Chili

📝 Description

This creamy and flavorful Mexican Street Corn White Chicken Chili combines the zesty flavors of Mexican elote (street corn) with hearty, protein-rich white chicken chili. It’s a comforting one-pot meal loaded with tender chicken, roasted corn, white beans, green chiles, and spices—finished with lime juice, cilantro, and a touch of cotija cheese for an authentic street corn twist.

Perfect for cozy nights, game days, or when you’re craving a Mexican-inspired comfort dish!

🍲 Ingredients

Servings: 6–8
Prep Time: 15 minutes
Cook Time: 30–40 minutes
Total Time: 45–55 minutes

Main Ingredients

  • 2 tablespoons olive oil or butter

  • 1 medium onion, diced

  • 3 cloves garlic, minced

  • 1 ½ pounds boneless, skinless chicken breasts (or thighs), cubed

  • 4 cups chicken broth (low-sodium)

  • 2 cans (15 oz each) white beans, drained and rinsed (Great Northern or cannellini)

  • 2 cups corn kernels (fresh, frozen, or fire-roasted canned)

  • 1 can (4 oz) diced green chiles

  • 1 teaspoon cumin

  • 1 teaspoon chili powder

  • ½ teaspoon smoked paprika

  • Salt and pepper to taste

Creamy Base

  • ½ cup sour cream or plain Greek yogurt

  • 4 oz cream cheese, softened

  • ½ cup heavy cream (or milk for lighter version)

Street Corn Toppings

  • ½ cup cotija cheese (or feta cheese)

  • ¼ cup chopped fresh cilantro

  • 1 tablespoon lime juice + lime wedges for serving

  • Optional: Tajín or chili-lime seasoning for garnish

👩‍🍳 Instructions

  1. Sauté aromatics:
    Heat olive oil in a large pot over medium heat. Add onions and cook for 3–4 minutes until translucent. Add garlic and cook another 30 seconds until fragrant.

  2. Cook the chicken:
    Add cubed chicken, season with salt, pepper, cumin, and chili powder. Cook until chicken is lightly browned (not fully cooked through).

  3. Add the base ingredients:
    Pour in chicken broth, white beans, corn, and green chiles. Bring to a boil, then reduce heat and simmer for 20–25 minutes, until chicken is tender.

  4. Make it creamy:
    Stir in cream cheese until melted and smooth. Add sour cream and heavy cream; stir until fully combined.

  5. Adjust seasoning:
    Taste and add more salt, pepper, or spices as needed.

  6. Serve and garnish:
    Ladle into bowls and top with cotija cheese, cilantro, a squeeze of lime, and a sprinkle of Tajín for that street corn flavor!

🍴 Serving Suggestions

  • Serve with tortilla chips, cornbread, or warm flour tortillas.

  • Garnish with avocado slices or pickled jalapeños for extra kick.

  • Pairs well with a fresh side salad or Mexican rice.

🧠 Chef’s Notes & Tips

  • Shortcut: Use rotisserie chicken to cut prep time in half.

  • Fire-roasted flavor: Use roasted corn and charred jalapeños for smokier depth.

  • Thickener tip: Mash ½ cup of beans before adding to naturally thicken the chili.

  • Dairy-free option: Substitute coconut milk for cream and dairy-free yogurt for sour cream.

  • Make ahead: The chili tastes even better the next day—perfect for meal prep.

⚖️ Nutrition (Per Serving)

(Approximate, based on 6 servings)

Nutrient Amount
Calories 420 kcal
Protein 32 g
Carbohydrates 25 g
Fat 20 g
Fiber 6 g
Sodium 650 mg
Sugar 5 g

💪 Health Benefits

  1. High in Protein: Supports muscle growth and repair.

  2. Fiber-Rich: White beans and corn aid in digestion and satiety.

  3. Good Fats: Olive oil and dairy provide healthy fats for sustained energy.

  4. Rich in Vitamins: Corn and cilantro offer Vitamin C and antioxidants.

  5. Gut-Friendly: The use of yogurt or sour cream adds probiotics.

❓ Frequently Asked Questions

Q1: Can I make this in a slow cooker?
👉 Yes! Add all ingredients except the dairy to your slow cooker. Cook on LOW for 6–7 hours or HIGH for 3–4 hours. Stir in cream cheese and sour cream before serving.

Q2: Can I freeze leftovers?
👉 Absolutely. Cool completely, store in airtight containers, and freeze up to 3 months. Reheat gently to preserve texture.

Q3: Can I make it vegetarian?
👉 Yes—skip the chicken, use vegetable broth, and add extra beans or roasted cauliflower for heartiness.

Q4: How do I make it spicier?
👉 Add diced jalapeños, chipotle peppers in adobo, or a pinch of cayenne pepper.

Q5: What’s the best cheese alternative if I can’t find cotija?
👉 Feta or grated Parmesan work great as substitutes.

Thanksgiving Stuffing Balls

Thanksgiving Stuffing Balls

Ingredients

  • 3 cups dried bread cubes or stuffing mix
  • ½ cup melted unsalted butter
  • ½ cup finely chopped onion
  • ½ cup finely chopped celery
  • 2 cloves garlic minced
  • ¾ cup chicken or vegetable broth
  • 2 large eggs
  • 1 teaspoon poultry seasoning
  • ½ teaspoon dried sage
  • ½ teaspoon salt
  • ¼ teaspoon black pepper
  • 2 tablespoons fresh parsley chopped
  • Optional: ¼ cup dried cranberries or finely diced apple

Instructions

  • Preheat your oven to 375°F (190°C) and line a baking sheet with parchment paper.
  • In a skillet over medium heat, melt the butter. Add onion, celery, and garlic. Sauté for about 4–5 minutes, until soft and fragrant.
  • Place the bread cubes in a large bowl. Pour the sautéed vegetables and melted butter over the bread.
  • Add the poultry seasoning, sage, salt, pepper, parsley, and any optional add-ins you like.
  • In a separate bowl, whisk together the broth and eggs. Pour this mixture over the bread and gently stir until evenly moistened.
  • Using your hands or a scoop, form the mixture into golf-ball-size balls and arrange them on the prepared baking sheet.
  • Bake for 22–25 minutes, until the outsides are golden and slightly crisp while the centers stay soft.
  • Serve warm as a festive Thanksgiving side dish or party appetizer.

Sweet Alabama Pecanbread

Sweet Alabama Pecanbread

Ingredients

  • 2 cups granulated sugar
  • 1 cup vegetable oil
  • 3 large eggs
  • 2 cups all-purpose flour
  • 1 teaspoon vanilla extract
  • 1 teaspoon salt
  • 1 teaspoon baking soda
  • 1½ cups chopped pecans

Instructions

  • Preheat oven to 350°F (175°C). Lightly grease a 9×13-inch baking dish or line with parchment paper.
  • In a large bowl, whisk together the sugar and oil until smooth.
  • Add eggs one at a time, mixing well after each addition.
  • Stir in the vanilla extract.
  • In a separate bowl, combine flour, salt, and baking soda.
  • Gradually fold the dry ingredients into the wet mixture until just combined.
  • Gently fold in the chopped pecans.
  • Pour batter evenly into the prepared baking dish.
  • Bake for 30–35 minutes, or until a toothpick inserted in the center comes out clean.
  • Allow to cool before slicing and serving.