Pickled Beets

Ingredients

-10 pounds fresh small beets, stems removed
-2 cups white sugar
-1 tablespoon pickling salt
-1 quart white vinegar
-¼ cup whole cloves

Directions

Step 1: Put enough water in a large stockpot to cover the beets.
Bring to a boil and cook until the beets are soft, which should take about 15 minutes depending on how big they are.
If your beets are big, cut them in half.
Drain the beets, keeping 2 cups of the water, let them cool, and peel them.

Step 2: Boil the jars and lids for at least 10 minutes to make sure they are clean.
Put beets in each jar and a few whole cloves in each jar.

Step 3: Mix the sugar, beet water, vinegar, and pickling salt in a large pot.
Bring quickly to a boil.
Pour the hot brine over the beets in the jars and make sure the lids are on tight.

Step 4: Put a rack in the bottom of a large stockpot and fill it halfway with water.
Bring to a boil over high heat, then use a holder to carefully place the jars in the pot.
Leave a space of 2 inches between each jar.
If you need to, add more boiling water until the level of water is at least 1 inch above the tops of the jars.
Bring the water to a boil, put the lid on the pot, and let it cook for 10 minutes.
🍦 3-Ingredient Mango Sorbet

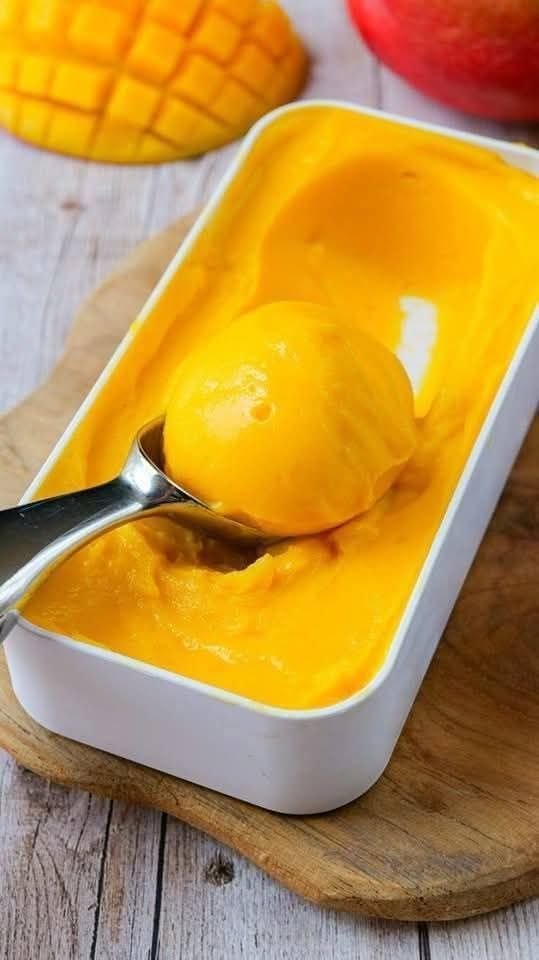
🍦 3-Ingredient Mango Sorbet

Prep time: 10 minutes | Freeze time: 4+ hours | Servings: 4

Ingredients

  • 3 cups Frozen Mango Chunks: (About 2 large ripe mangoes). Using frozen mango is the secret to getting that thick, “soft-serve” consistency immediately.

  • 2 tablespoons Honey or Maple Syrup: Adjust based on how sweet your mangoes are.

  • 1 tablespoon Fresh Lime Juice: This cuts through the sweetness and keeps the color bright.

  • Optional: 2–4 tablespoons of warm water or coconut milk (only if needed to help your blender move).


Instructions

  1. Prep the Mango: If you are using fresh mangoes, peel and dice them, then freeze the chunks in a single layer on a tray for at least 4 hours. If using store-bought frozen mango, you’re ready to go!

  2. Blend: Place the frozen mango, sweetener, and lime juice into a high-speed blender or food processor.

  3. Process: Pulse until the mango is broken down. Then, blend on high. You may need to stop and scrape down the sides a few times.

    • Tip: If the blade is spinning but not grabbing the fruit, add 1 tablespoon of water or coconut milk at a time until it creates a smooth swirl.

  4. Serve or Firm Up: * For soft-serve: Serve immediately right out of the blender.

    • For scoopable sorbet (as pictured): Transfer the mixture into a shallow container (like a loaf pan), smooth the top, and freeze for another 2–3 hours.

  5. Scoop: Use a warm ice cream scoop to create those perfect round spheres.


Pro-Tips for Success

  • The Mango Matters: Use “Alphonso” or “Honey” (Ataulfo) mangoes if available; they are less fibrous and much creamier than other varieties.

  • Don’t Over-blend: Blending for too long will cause the friction of the blades to melt the sorbet.

  • Easy Scooping: If the sorbet has been in the freezer overnight, let it sit on the counter for 5–10 minutes before scooping so it softens slightly.

Creamy Ice Cream with Condensed Milk

 Creamy Ice Cream with Condensed Milk

Description

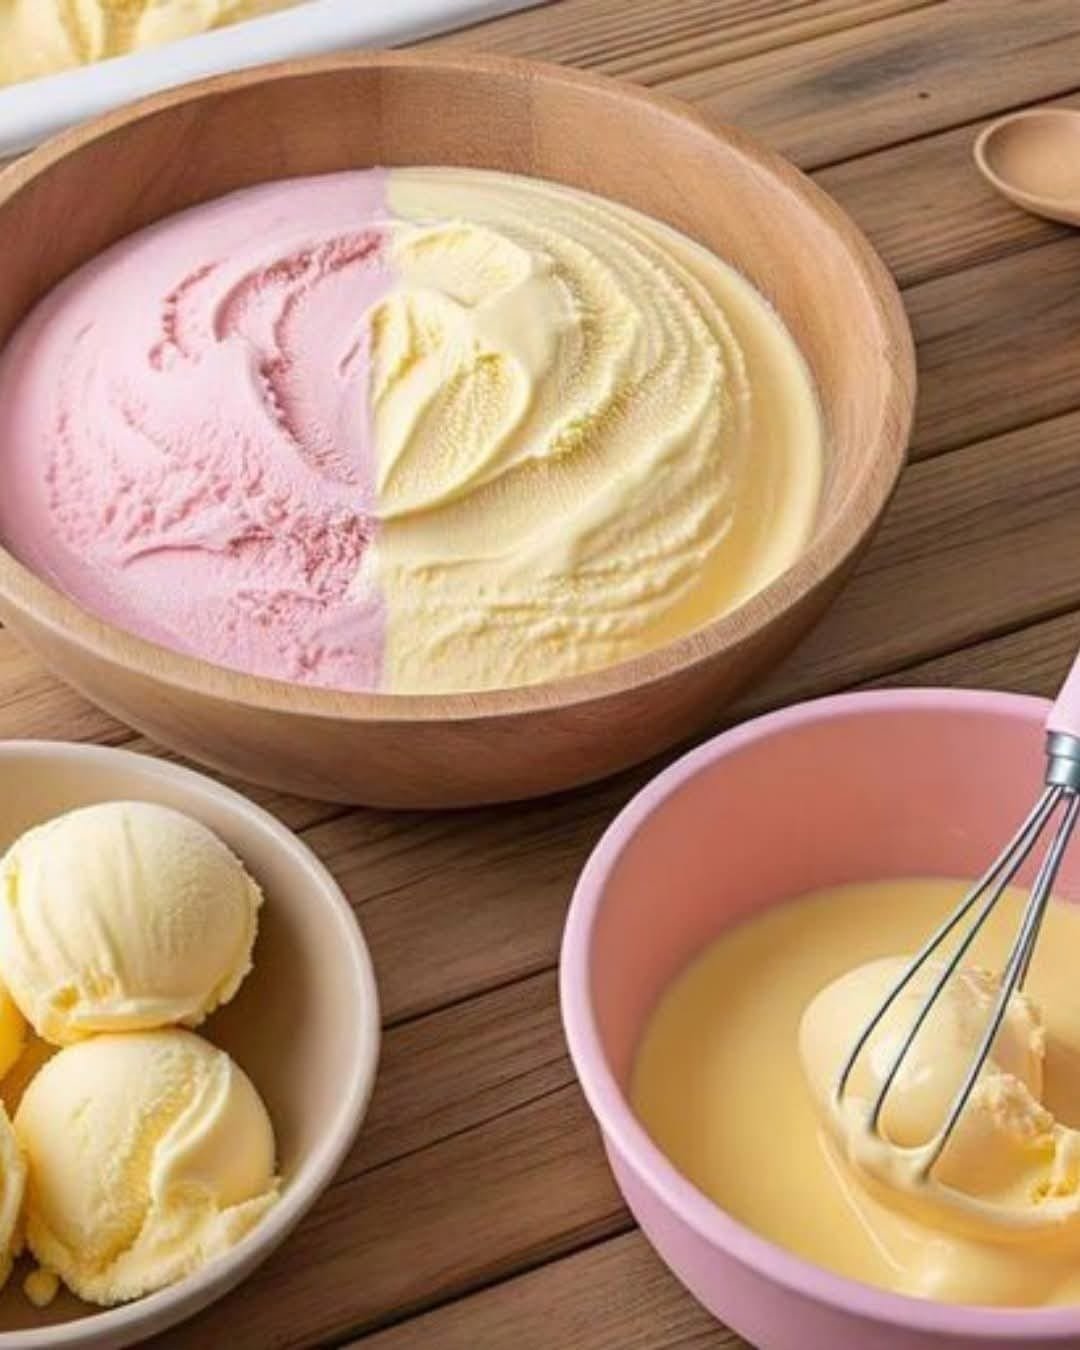
This Creamy Ice Cream with Condensed Milk is a rich, velvety, and easy-to-make frozen dessert that requires no eggs or special machine. It’s made using only a few simple ingredients — condensed milk, whipped cream, and vanilla — resulting in a luscious, smooth texture and melt-in-your-mouth goodness. Perfect for a hot summer day or any time you crave a sweet treat!

 Ingredients For Creamy Ice Cream with Condensed Milk

  • 2 cups (480 ml) heavy whipping cream, chilled

  • 1 can (14 oz / 400 g) sweetened condensed milk

  • 1 tsp vanilla extract (or any preferred flavoring)

  • Optional mix-ins: chocolate chips, nuts, caramel, fruit puree, etc.]

Instructions:

  1. Whip the Cream:
    In a large chilled bowl, beat the heavy cream with an electric mixer on medium-high speed until stiff peaks form (about 3–4 minutes).

  2. Mix Condensed Milk & Flavoring:
    In another bowl, whisk together the condensed milk and vanilla extract (or other flavors like cocoa powder, coffee, or fruit puree).

  3. Combine:
    Gently fold the whipped cream into the condensed milk mixture. Use a spatula to mix carefully — keep the mixture airy for that light, creamy texture.

  4. Add Mix-ins (Optional):
    Fold in chocolate chips, fruit bits, or nuts if desired.

  5. Freeze:
    Pour the mixture into an airtight container, smooth the top, and cover with plastic wrap or a lid.
    Freeze for at least 6 hours or overnight until firm.

  6. Serve:
    Scoop and enjoy! For easier scooping, let the ice cream sit at room temperature for 5 minutes before serving.

 Notes:

  • Keep your cream very cold before whipping — it helps create better volume and texture.

  • Don’t overmix after combining; it can make the texture dense.

  • You can divide the base into smaller containers and flavor each one differently (chocolate, strawberry, coffee, etc.).

 Tips:

  • Add a pinch of salt to balance sweetness.

  • For chocolate ice cream: mix ¼ cup cocoa powder with the condensed milk before folding in the whipped cream.

  • For fruity flavors: swirl in ½ cup fruit puree like mango or strawberry before freezing.

  • Use sweetened condensed milk, not evaporated milk.

 Servings:

Makes about 6–8 scoops (4–5 servings).

 Nutritional Info (per serving):

Nutrient Amount
Calories ~290 kcal
Protein 4 g
Fat 18 g
Carbohydrates 28 g
Sugar 26 g
Calcium 110 mg

Benefits:

  • Homemade & preservative-free – You control the ingredients.

  • Quick & easy – No machine or eggs required.

  • Customizable – Add your favorite mix-ins or flavorings.

  • Rich in calcium & energy, making it a delicious indulgence.

❓ Q&A:

Q1: Can I make this without heavy cream?
A: You can use chilled whipping cream or non-dairy alternatives like coconut cream, but texture may vary.

Q2: How long does it last?
A: Store in an airtight container in the freezer for up to 2 weeks.

Q3: Can I make it sugar-free?
A: Yes! Use sugar-free condensed milk and unsweetened whipping cream.

Q4: How can I make it extra creamy?
A: Add 1 tbsp of cream cheese or milk powder to the condensed milk before mixing.

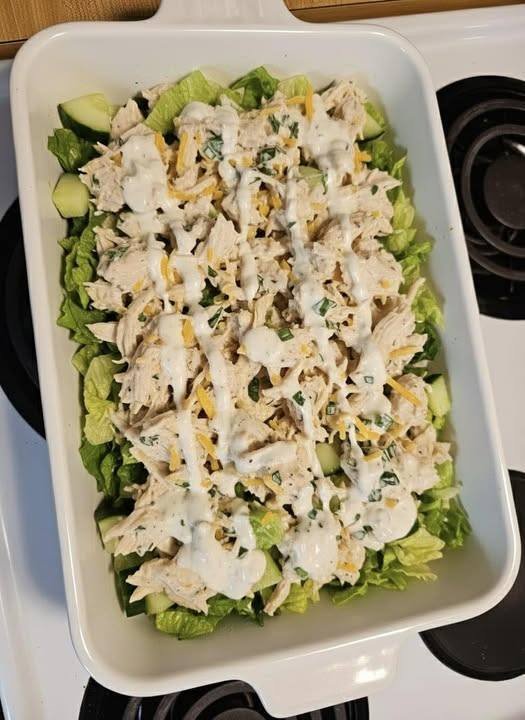
Layered Chicken Ranch Salad

Layered Chicken Ranch Salad

Ingredients

  • The Base: 2 large heads of Romaine lettuce, chopped.

  • The Crunch: 1 large English cucumber, diced.

  • The Protein: 3 cups shredded cooked chicken (rotisserie chicken works perfectly).

  • The Toppings: ½ cup shredded cheddar cheese and 2 tablespoons chopped fresh chives or green onions.

  • The Dressing: ½ cup creamy Ranch dressing (plus extra for serving).


Instructions

  1. Prepare the Base: In a large rectangular dish (approx. 9×13 inch), lay down a thick, even layer of the chopped Romaine lettuce.

  2. Add the Texture: Scatter the diced cucumbers over the lettuce. Focus some around the edges so they are visible through the glass or over the top.

  3. Layer the Chicken: Spread the shredded chicken evenly over the center of the salad. If the chicken is cold, you can lightly season it with black pepper beforehand.

  4. Add Flavor: Sprinkle the shredded cheddar cheese and chopped chives over the top of the chicken.

  5. The Finish: Using a spoon or a squeeze bottle, drizzle the Ranch dressing in vertical lines across the entire dish as seen in the photo.


Tips for the Best Results

  • Keep it Crisp: If you aren’t serving this immediately, wait to add the dressing until right before eating. This prevents the lettuce from wilting.

  • Additions: This base also pairs beautifully with crumbled bacon, halved cherry tomatoes, or sliced avocado.

  • Shortcut: Use a store-bought rotisserie chicken to save time; just shred it while it’s still slightly warm for the best texture.

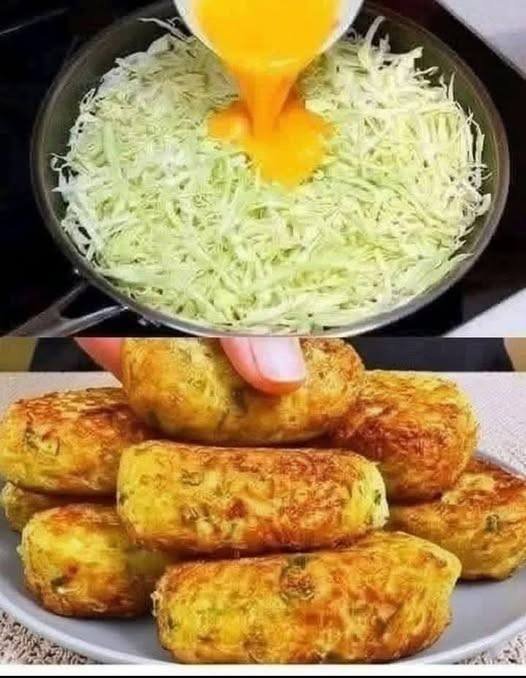
Cabbage Fritters

🥬 Cabbage Fritters

📖 Description

Cabbage fritters are crispy on the outside, soft on the inside, and packed with flavor. Made with finely shredded cabbage, simple spices, and a light batter, these fritters are a budget-friendly, quick snack or side dish. They’re popular across many cuisines and can be shallow-fried, deep-fried, baked, or air-fried.

⏱️ Prep & Cook Time

  • Prep Time: 15 minutes

  • Cook Time: 15 minutes

  • Total Time: 30 minutes

🍽️ Servings

  • Serves: 4 people

  • Yield: ~12 fritters

📝 Ingredients

  • 2 cups finely shredded cabbage

  • ½ cup onion, finely chopped

  • ½ cup all-purpose flour (or chickpea flour for gluten-free)

  • 2 tbsp cornstarch (optional, for extra crispiness)

  • 1 egg (optional; skip for vegan version)

  • 1 tsp salt (adjust to taste)

  • ½ tsp black pepper

  • ½ tsp chili powder or paprika

  • ½ tsp cumin powder

  • 1 tsp garlic, minced

  • 2–3 tbsp water (as needed)

  • Oil for frying

👩‍🍳 Instructions

  1. Prepare the cabbage: Shred cabbage finely and squeeze out excess moisture.

  2. Mix ingredients: In a bowl, combine cabbage, onion, flour, cornstarch, spices, garlic, and egg (if using).

  3. Make batter: Add water gradually to form a thick, scoopable batter.

  4. Heat oil: Heat oil in a pan over medium heat.

  5. Fry fritters: Drop spoonfuls of batter into hot oil and flatten slightly.

  6. Cook evenly: Fry 2–3 minutes per side until golden brown.

  7. Drain & serve: Remove and drain on paper towels. Serve hot.

🧾 Notes

  • Squeezing moisture from cabbage is key to crispy fritters.

  • Chickpea flour adds protein and enhances flavor.

  • Egg helps binding but is optional.

💡 Tips for Best Results

  • Don’t overcrowd the pan; fry in batches.

  • Keep oil at medium heat to avoid soggy fritters.

  • Add chopped herbs (cilantro, parsley) for extra freshness.

  • For healthier cooking, air-fry at 180°C (350°F) for 12–15 minutes, flipping halfway.

🧮 Nutritional Information (Approx. per serving)

  • Calories: 180 kcal

  • Carbohydrates: 22 g

  • Protein: 4 g

  • Fat: 8 g

  • Fiber: 3 g

  • Sodium: 300 mg

(Values may vary based on oil and ingredients used.)

🌱 Health Benefits

  • Rich in fiber: Supports digestion and gut health

  • Low-cost & nutritious: Cabbage is packed with vitamin C and antioxidants

  • Versatile diet-friendly: Can be made vegan or gluten-free

  • Good for weight management: Filling and low-calorie when baked or air-fried

❓ Q & A

Q: Can I make cabbage fritters without egg?
A: Yes. Use chickpea flour or add 1 tbsp flaxseed meal mixed with water.

Q: Why are my fritters soggy?
A: Excess moisture in cabbage or oil not hot enough.

Q: Can I store leftovers?
A: Yes. Refrigerate for up to 2 days and reheat in an oven or air fryer.

Q: Can I add other vegetables?
A: Absolutely. Carrots, zucchini, or bell peppers work well.

Q: Are cabbage fritters healthy?
A: Yes, especially when baked or air-fried and made with minimal oil.

Nut and Date Bars

Nut and Date Bars

These bars are made from dates, nuts, and seeds. The dates provide binding and mild sweetness, while the nuts and seeds add texture. The mixture is pressed into a pan and chilled until firm before slicing.

Preparation Time

15 minutes

Cooking Time

10 minutes

Chilling Time

1 hour

Total Time

Approximately 1 hour 25 minutes

Yield

About 10–12 bars (depending on size)


Ingredients

  • 150 g dates, pitted and soaked in cold water for 15 minutes

  • 70 g cashews

  • 70 g walnuts

  • 70 g almonds

  • 70 g hazelnuts

  • 70 g pumpkin seeds

  • 40 g pine nuts


Instructions

1. Prepare the Dates

Drain the soaked dates thoroughly.
Place them in a blender or food processor and blend until a thick, smooth paste forms. Set aside.


2. Toast the Nuts and Seeds

Place the cashews, walnuts, almonds, hazelnuts, pumpkin seeds, and pine nuts into a large dry skillet.
Heat over medium heat and toast for 5–8 minutes, stirring frequently to prevent burning, until lightly browned and aromatic.

Remove from the heat and allow to cool slightly. If desired, roughly chop the larger nuts for a more even texture.


3. Combine the Mixture

Transfer the toasted nuts and seeds to a large mixing bowl.
Add the date paste and mix thoroughly using a sturdy spatula or lightly oiled hands until all components are evenly combined.


4. Press Into a Pan

Line a small rectangular pan or loaf tin with parchment paper, leaving excess paper over the edges for easy removal.

Transfer the mixture into the pan and press it down firmly using the back of a spoon or a flat-bottomed glass to create a compact, even layer.


5. Chill and Slice

Place the pan in the refrigerator for at least 1 hour, or until the mixture is firm.
Once set, lift the mixture out using the parchment paper and place it on a cutting board.

Slice into bars or squares using a sharp knife.


Storage Notes

  • Store the bars in an airtight container in the refrigerator for up to 2 weeks.

  • For longer storage, they may be frozen for up to 3 months and thawed as needed.