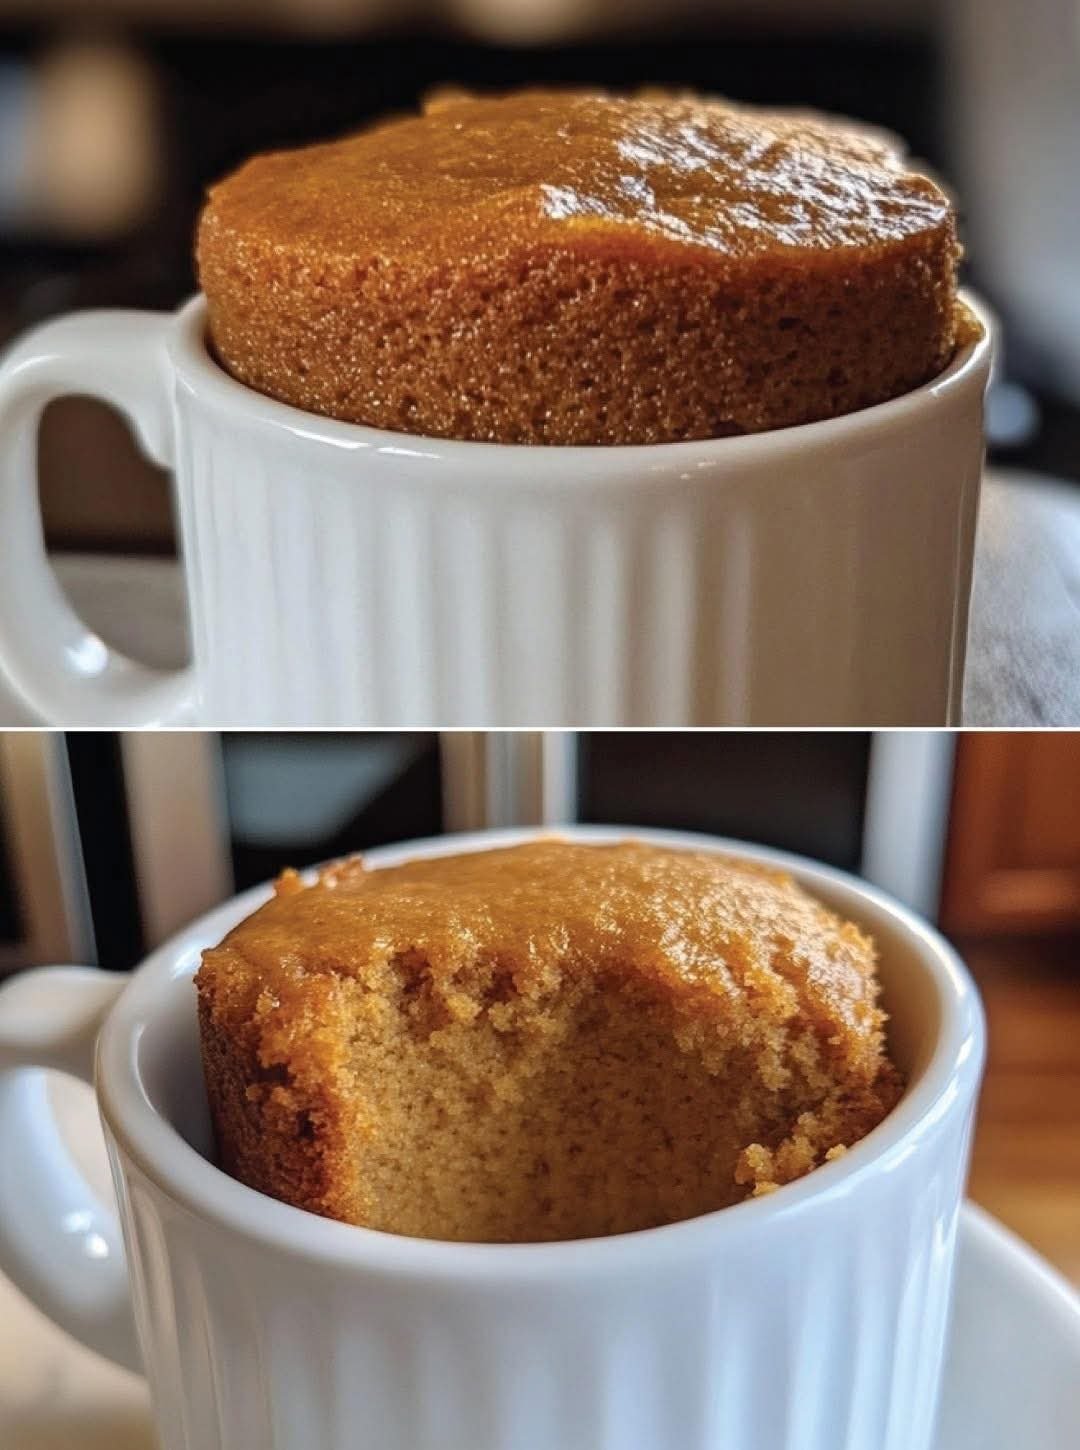
Pumpkin Mug Cake, A warm, spiced cake made in minutes right in your mug.


Servings: 2

Total Time: 5 minutes

Difficulty: Easy

Calories per Serving: 115 kcal

Macros: Protein 7g / Carbs 14g / Fat 3g / Fiber 3g


The Ultimate Guilt-Free Autumn Treat

When that fall craving for pumpkin spice hits, you don’t have to head to the bakery and spend a day’s worth of points on a single muffin. This 2-Minute Pumpkin Spice Mug Cake is thePumpkin Spice Mug Cake is the perfect solution for Weight Watchers members who need a quick, sweet fix that won’t derail their progress. It is warm, comforting, and perfectly portioned to keep you on track.

This recipe is a staple for clean eating because it uses wholesome pumpkin purée and oat flour to provide a boost of fiber and Vitamin A. By utilizing a mix of a whole egg and liquid egg whites, we keep the texture rich and cake-like while significantly lowering the points and fat content. It’s a macro-friendly dessert that feels like a warm hug in a mug.

Whether you need a quick breakfast on a chilly morning or a late-night snack that fits your points, this mug cake delivers. It is a healthy recipe that requires no oven, no messy pans, and just a few minutes of your time.

Look at the Recipe

  • Moist & Tender Crumb: Thanks to the pumpkin purée, this cake stays incredibly soft without any added oil or butter.
  • Warm Harvest Spices: The aromatic blend of cinnamon and pumpkin spice provides that classic “autumn in a cup” flavor.
  • WW-Friendly Volume: A generous serving size that satisfies your hunger for very few points.
  • Ingredients Needed

    • 90g Pumpkin Purée (1/3 cup): Use 100% pure pumpkin, not pumpkin pie filling.
    • 1 Whole Egg: For structure and richness.
    • 2 tbsp Liquid Egg Whites: Adds volume and protein without extra fat.
    • 4 tbsp Oat Flour: (Or your favorite WW-friendly flour blend).
    • 1 tbsp Erythritol: (Or 1 packet of Stevia) for calorie-free sweetness.
    • 1/4 tsp Baking Powder: To give our mug cake the perfect rise.
    • 1/4 tsp Vanilla Extract: To enhance the sweetness.
    • Pinch of Pumpkin Spice: Or cinnamon for that cozy flavor profile.
    • How to Make Our Pumpkin Mug Cake

      1. Prep the Batter: Place a small mixing bowl on your counter. Add the pumpkin purée, whole egg, egg whites, flour, sweetener, vanilla, and baking powder.
      2. Whisk Until Smooth: Mix well using a fork or whisk until the batter is completely smooth and no flour clumps remain.
      3. Prepare the Mugs: Lightly spray two microwave-safe mugs with non-stick cooking spray if you plan on popping the cakes out to serve.
      4. Divide and Portion: Pour the batter evenly between the two mugs.
      5. Microwave Magic: Cook on high for 90–100 seconds. The tops should look set but still slightly springy to the touch.
      6. Rest and Serve: Let the cakes rest for 1 minute before eating. This allows the steam to distribute, ensuring a moist texture.
    • Storage & Serving Suggestions

      Storing: These are best enjoyed fresh, but you can store a cooked mug cake in the fridge for 24 hours. Just cover the top with plastic wrap.

      Reheating: If eating cold from the fridge, microwave for 10–15 seconds to restore that “fresh-baked” warmth.

    • Serving Pairings: Top with a dollop of non-fat Greek yogurt or a swirl of sugar-free whipped topping. For a decadent twist, drizzle with 1 tsp of sugar-free maple syrup.
  • Tips & FAQs

    How many WW points is this pumpkin mug cake?

    Depending on your specific flour and sweetener, this recipe usually ranges between 2–4 WW points per mug. Using oat flour is often the most point-friendly option!

    Can I add chocolate chips?

  • Yes! Adding 1 tsp of sugar-free mini chocolate chips is a great way to add a “treat” feel for a very small point increase.Why is my mug cake rubbery?

    Overcooking is the main culprit. Start with 90 seconds; every microwave power varies. If it’s still wet, add 10-second increments.

  • Can I bake this in the oven?If you prefer the oven, bake at $350°F$ ($175°C$) in oven-safe ramekins for 12–15 minutes, or until a toothpick comes out clean.


The Best Garlic Bread Recipe – Quick, Easy & Guilt-Free Comfort Food

Servings: 8
Total Time: 15 minutes
Difficulty: Easy
Calories per Serving: ~105
Macros (Per Slice): Protein 3g • Carbs 8g • Fat 7g • Fiber 1g

Intoduction

This garlic bread delivers everything we crave—crispy golden edges, a soft buttery center, and the kind of aroma that makes the whole kitchen feel warm and inviting. It’s quick, comforting, and wonderfully light compared to traditional versions.

Perfect for anyone wanting a simple, wholesome, and guilt-free recipe, this version uses clean, pantry-friendly ingredients while still delivering big garlic flavor. Whether you’re pairing it with dinner, serving it as a snack, or adding it to a weekend spread, this garlic bread fits beautifully into a lighter, more intentional approach to comfort food.

If you love easy weeknight meals, nutrient-conscious swaps, and bold, satisfying flavor, this garlic bread is your new go-to.

Look at the Recipe

  • Crispy edges with a soft, buttery center
  • Rich garlic flavor with herby, savory notes
  • Lightened-up ingredients for a guilt-free, cleaner comfort food experience

Ingredients Needed

Garlic Butter Spread
• 4 tbsp softened butter or light butter
• 1 tbsp olive oil
• 4–5 garlic cloves, minced
• 1 tbsp chopped parsley
• ½ tsp garlic powder
• ½ tsp dried oregano
• Salt and pepper to taste
• 2 tbsp parmesan (optional)

Bread
• 1 baguette, ciabatta, sourdough, or low-carb bread of choice

How to Make Our Garlic Bread

  1. Preheat your oven to 400°F (200°C).
  2. Mix together the butter, olive oil, minced garlic, parsley, garlic powder, oregano, salt, and pepper until smooth.
  3. Slice your bread and spread the garlic mixture generously over the surface.
  4. Sprinkle parmesan on top if you want deeper savory flavor.
  5. Bake for 10–12 minutes until the edges turn golden and crisp.
  6. Slice and serve warm for the best texture and flavor.

Macros & Plan Compatibility

Plan Notes
Keto & Low-Carb 3–4g net carbs per slice using low-carb bread. Grain-free options work well.
Slimming About 2 syns per slice using light butter and a lighter bread option.
High-Protein 6–8g protein per slice if using high-protein bread and adding parmesan.
Weight Watchers About 2–3 SmartPoints per slice (Blue plan) using reduced-fat butter.
Mediterranean Works well using whole-grain bread and olive oil for heart-healthy fats.

Storage & Serving Suggestions

Store:
Keep leftovers in an airtight container for up to 2 days.
Reheat:
Warm in the oven at 350°F for 5–7 minutes to regain crispness.
Freeze:
Freeze pre-buttered slices and bake straight from frozen.
Serve With:
Soups, salads, pasta alternatives, grilled chicken, low-carb casseroles.

FAQs

1. Can I make this garlic bread without butter?

Yes. You can replace butter with olive oil to keep it lighter. Olive oil gives a crispier crust, while butter creates a richer texture.

2. How do I keep garlic bread from getting soggy?

Bake in a hotter oven, avoid excess butter/oil, and use a wire rack to allow air to circulate underneath.

3. Can I prepare garlic bread ahead of time?

Yes. Assemble the bread and refrigerate up to 24 hours before baking.

4. Does garlic bread freeze well?

Absolutely. Freeze prepared slices and bake directly from frozen at 400°F for 12–14 minutes.

5. What bread works best?

Baguette for crispness, ciabatta for chew, sourdough for depth, or keto/high-protein bread for diet-friendly versions.

6. How can I boost the flavor even more?

Use roasted garlic, stir parmesan into the spread, or add fresh herbs after baking.

🥭 Fresh Mango Lassi Recipe

🥭 Fresh Mango Lassi Recipe

Prep time: 5 minutes | Servings: 2

Ingredients

  • 1 cup Fresh Mango: Diced (Alphonso or Kesar mangos are best for color and sweetness, but any ripe mango works).

  • 1 cup Plain Yogurt: Use Greek yogurt for a thicker consistency or regular yogurt for a traditional feel.

  • 1/2 cup Milk: (Or water) to adjust the thickness.

  • 2 tablespoons Honey or Sugar: Adjust based on the sweetness of your mango.

  • 1/4 teaspoon Cardamom powder: For that authentic floral aroma.

  • Ice cubes: A small handful for serving chilled.

  • Garnish: Fresh mint leaves or a pinch of saffron.


Instructions

  1. Prepare the Mango: Peel and dice your mango, discarding the pit.

  2. Blend: Place the mango chunks, yogurt, milk, sweetener, and cardamom powder into a blender.

  3. Smooth it out: Blend on high speed until the mixture is completely smooth and frothy.

  4. Check Consistency: If it is too thick, add a little more milk. If you want it colder, add a few ice cubes and pulse again.

  5. Serve: Pour into glasses. Garnish with a fresh mint leaf (as seen in your photo) or a few extra mango bits on top.


Pro Tips for Success

  • Vegan Option: Swap the dairy yogurt for coconut yogurt and use almond or oat milk. It pairs beautifully with mango!

  • No Fresh Mango? You can use 1 cup of canned mango pulp instead; just reduce the added sugar as the pulp is usually pre-sweetened.

  • The “Chill” Factor: For the best texture, ensure your yogurt and mango are cold before you start.

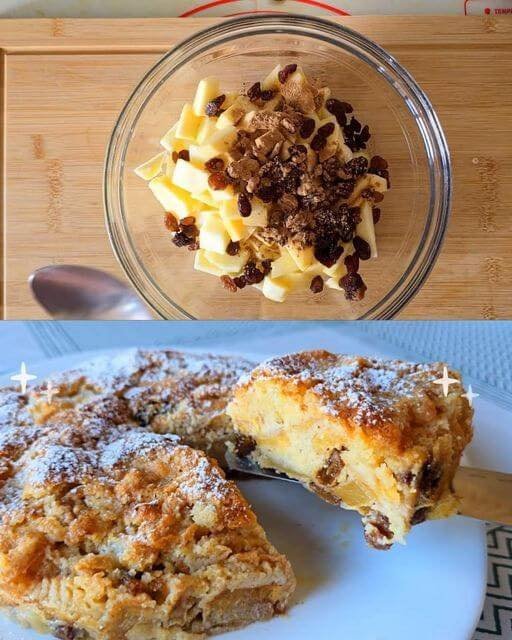
No-Beat German Apple Pie

🍎 No-Beat German Apple Pie

Prep time: 15 minutes | Bake time: 35–40 minutes

Detailed Ingredients

  • The Fruit Base: * 3 large apples (peeled and cut into small bite-sized pieces)

    • ½ cup (75g) raisins

    • 2 teaspoons cinnamon powder

  • The Dry Mix:

    • 1 cup (130g) wheat flour

    • ½ cup (100g) granulated sugar

    • 1 teaspoon baking powder

  • The Liquid Binder:

    • 3 large eggs

    • 1 tablespoon extra sugar (for the eggs)

    • 100g butter (melted and slightly cooled)

  • Optional Garnish: * Icing sugar for dusting

    • Flaked almonds (optional)

  • Step-by-Step Instructions

    1. Prepare the Fruit

    In a large mixing bowl, combine your chopped apples, raisins, and cinnamon. Toss them thoroughly until every piece of apple is coated in cinnamon. This ensures the flavor is distributed throughout the pie.

    2. Prep the Baking Mold

    Grease a 9-inch (23cm) springform pan or glass baking dish with butter. For easier removal, you can line the bottom with parchment paper. Spread the cinnamon-apple and raisin mixture evenly across the bottom of the pan.

    3. Create the Dry Layer

    In a separate medium bowl, whisk together the wheat flour, ½ cup sugar, and baking powder until well combined. The Secret Step: Sprinkle this dry flour mixture directly and evenly over the raw apples in the pan. Do not stir it in. You want a flat layer of dry ingredients sitting on top of the fruit.

    4. Prepare the Liquid Layer

    In another bowl, crack the 3 eggs and add the 1 tablespoon of extra sugar. Whisk vigorously (by hand or with a fork) for about 1-2 minutes until the eggs are pale and very frothy.

    5. Assemble the “No-Beat” Layers

    • Slowly pour the frothy egg mixture over the dry flour layer in the pan.

    • Immediately follow by drizzling the 100g of melted butter evenly over the entire surface.

    • Important: Use a spoon to gently spread the liquid to any “dry spots” where you can still see white flour. The liquids will seep down through the flour and fruit during baking to create the dough.

    6. Bake to Perfection

    Place the pan in a preheated oven at 180°C (350°F). Bake for 35–40 minutes. The pie is done when the top is a deep golden brown and a toothpick inserted into the center comes out clean (though it will feel moist due to the apples).

    7. Cool and Serve

    Allow the pie to cool in the mold for at least 15 minutes. This is critical as it allows the “custard” formed by the eggs and butter to set. Dust generously with icing sugar before slicing.

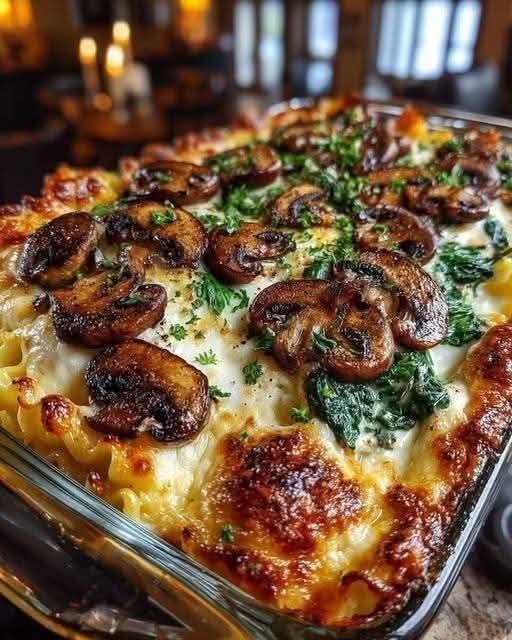
Cottage Cheese Mushroom & Spinach Lasagna Bake

Cottage Cheese Mushroom & Spinach Lasagna Bake
Ingredients
For the Lasagna
9–12 lasagna noodles, cooked according to package
2 cups cottage cheese
1 cup shredded mozzarella
1/2 cup grated Parmesan
2 cups fresh spinach, chopped (or 1 cup frozen, thawed & drained)
2 cups mushrooms, sliced
2 garlic cloves, minced
1 tsp dried Italian herbs
Salt & black pepper to taste
2 tbsp olive oil
For the Sauce
2 cups marinara sauce
1/2 cup heavy cream (optional for creamier texture)
Salt & pepper to taste
Directions
Preheat oven:
Preheat oven to 180°C (350°F). Grease a baking dish lightly with olive oil.
Cook the vegetables:
Heat olive oil in a skillet over medium heat.
Sauté garlic and mushrooms for 5 minutes until softened.
Add spinach, Italian herbs, salt, and pepper. Cook 2–3 minutes until spinach wilts. Remove from heat.
Prepare the cheese mixture:
In a bowl, mix cottage cheese, half of the mozzarella, and half of the Parmesan. Season lightly with salt and pepper.
Assemble the lasagna:
Spread a thin layer of marinara sauce on the bottom of the baking dish.
Layer noodles, cottage cheese mixture, mushroom-spinach mixture, and sauce. Repeat until all ingredients are used, finishing with sauce on top.
Sprinkle remaining mozzarella and Parmesan on top.
Bake:
Cover with foil and bake for 25 minutes.
Remove foil and bake an additional 10–15 minutes until cheese is golden and bubbly.
Serve:
Let rest 5 minutes before slicing. Serve warm as a comforting, vegetarian main dish.
Nutritional Info (per serving, approx. 1/6 lasagna)
Calories: 380
Protein: 22g
Carbs: 36g
Fat: 16g
Fiber: 4g
Sugar: 6g

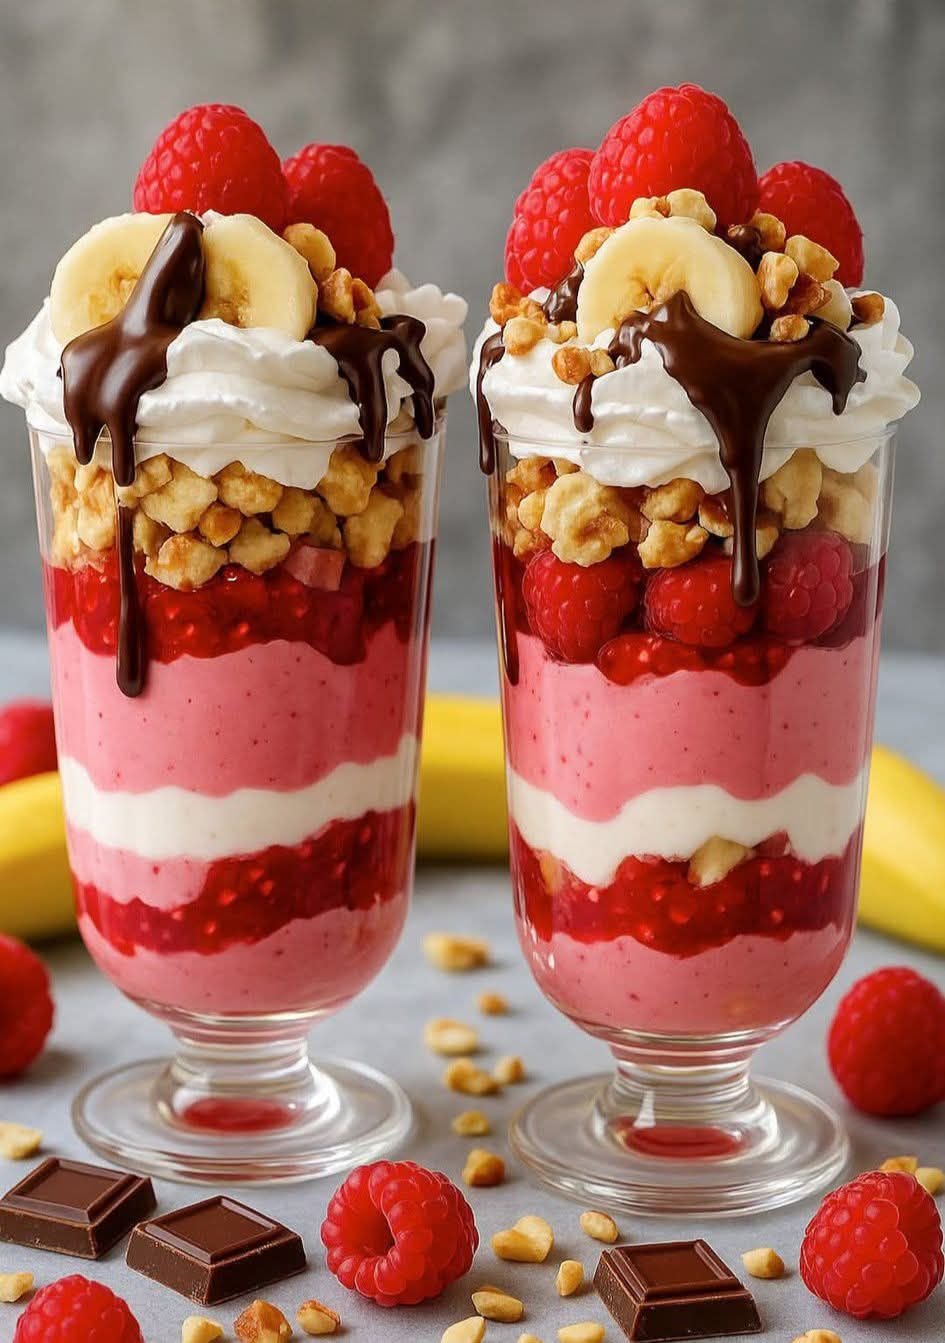
Raspberry Banana Crunch Parfaits

Raspberry Banana Crunch Parfaits

Yields: 2 large parfaits | Prep time: 20 minutes

Ingredients

The Fruit Layers

  • Fresh Raspberries: 2 cups (divided)

  • Banana: 1 large, sliced into rounds

  • Raspberry Jam: 2 tablespoons (to sweeten the berry layers)

The Creamy Layers

  • Greek Yogurt or Vanilla Pudding: 1.5 cups (you can use pink-tinted raspberry yogurt for the darker pink layers and plain vanilla/white for the center stripe)

  • Whipped Cream: 1 cup (heavy cream whipped with a little powdered sugar)

The Crunch & Toppings

  • Granola or Honey-Roasted Nuts: ½ cup (chopped walnuts or peanuts work great)

  • Dark Chocolate: 2 oz, melted (for the drizzle)

  • Extra Toppings: A few whole raspberries and banana slices for the garnish


Instructions

  1. Prepare the Raspberry Compote: In a small bowl, lightly mash 1 cup of the raspberries with the raspberry jam. This creates that juicy, deep red layer seen in the photo. Keep the remaining whole raspberries for the middle and top.

  2. Melt the Chocolate: Break the chocolate into pieces and melt it in 20-second intervals in the microwave, stirring until smooth. Set aside to cool slightly.

  3. Build the Base: In two tall glasses, start with a thick layer of pink raspberry yogurt. Follow this with a spoonful of your mashed raspberry compote.

  4. Create the Contrast: Add a thin, clean layer of white vanilla yogurt or whipped cream to create that bright center stripe.

  5. Add Texture: Add another layer of pink yogurt, followed by a layer of whole raspberries and a generous handful of granola or chopped nuts.

  6. The Topping: Pipe or spoon a large swirl of whipped cream onto the very top.

  7. Final Flourish: Arrange a few banana slices and whole raspberries on top of the cream. Drip the melted chocolate over the fruit and cream so it runs down the sides. Sprinkle a few more nuts over the top.


Pro-Tips for Presentation

  • Clean Lines: Use a long spoon or a piping bag to drop the yogurt into the glass without smearing the sides.

  • Chill: Let the parfaits sit in the fridge for about 15 minutes before serving to help the layers set.