Tzatziki Chicken Salad

Tzatziki Chicken Salad – Light, Fresh, and Flavorful!

This Tzatziki Chicken Salad is a refreshing and satisfying dish packed with Mediterranean flavors! Perfect for a light lunch or dinner, it’s loaded with fresh veggies, tender chicken, and a creamy homemade tzatziki sauce.

Ingredients:

For the Tzatziki Sauce:

1 cup + 2 Tbsp plain Greek yogurt

½ cucumber, grated

2-3 garlic cloves, pressed

2 Tbsp olive oil

2 Tbsp fresh dill, chopped

Salt and pepper, to taste

For the Salad:

2 cups cooked chicken, chopped

2 cups romaine lettuce, chopped

1 cup grape tomatoes, halved

½ cup pepperoncini peppers, sliced

½ cup Kalamata olives, sliced

¼ cup red onion, chopped

½ cup feta cheese, crumbled

Instructions:

Prepare the Tzatziki Sauce:

In a bowl, mix together Greek yogurt, grated cucumber, garlic, olive oil, and fresh dill.

Season with salt and pepper to taste. Set aside.

Assemble the Salad:

In a large bowl, toss together romaine lettuce, grape tomatoes, pepperoncini, Kalamata olives, and red onion.

Add the Chicken:

Layer the chopped cooked chicken over the salad base.

Dress the Salad:

Drizzle or dollop the prepared tzatziki sauce generously over the salad.

Garnish:

Top with crumbled feta cheese for the perfect finishing touch.

Pro Tip: Serve with warm pita bread or a side of crispy pita chips for added texture and a complete Mediterranean-inspired meal!

This Tzatziki Chicken Salad is a delightful blend of creamy, tangy, and savory flavors that’s sure to please your palate.
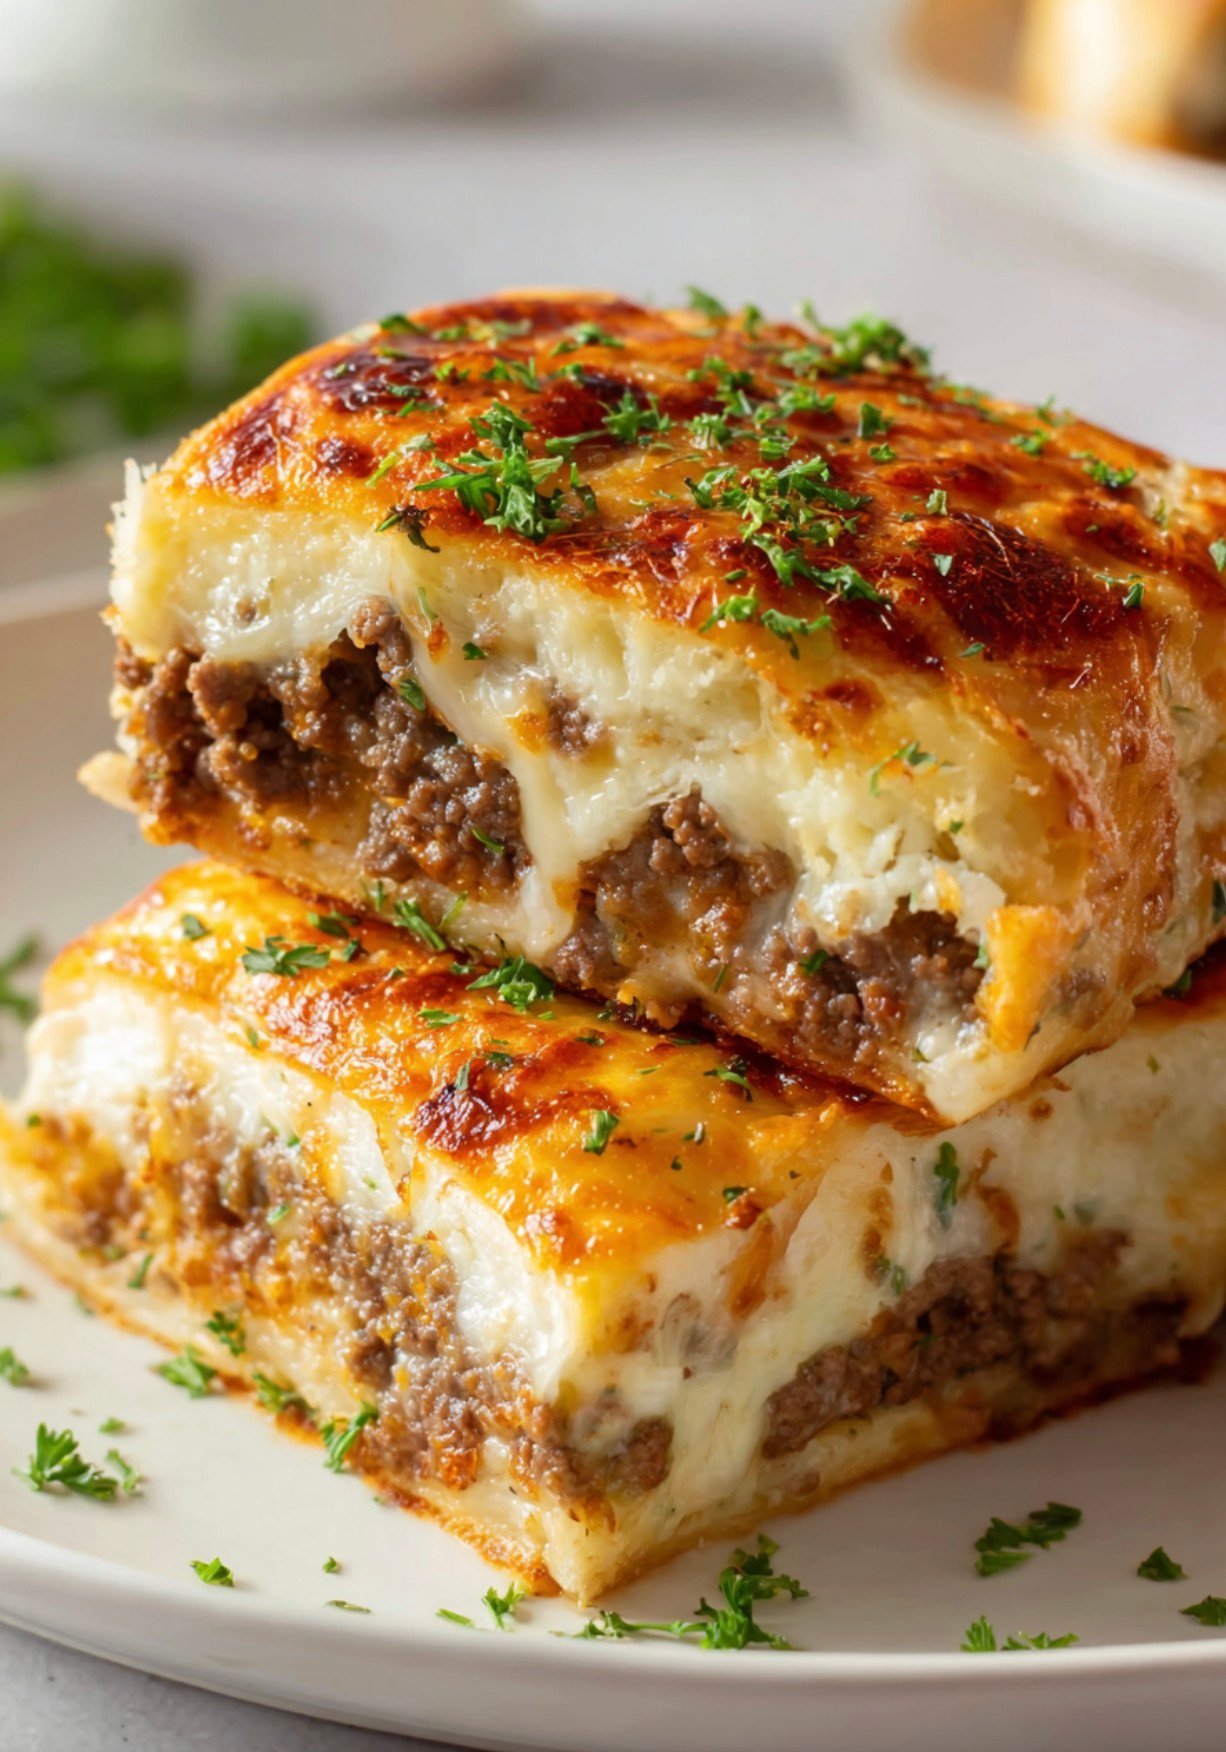
Garbage Bread Recipe

Garbage Bread Recipe

Ingredients

  • 1 pound pizza dough store-bought or homemade
  • 1 tablespoon olive oil
  • ½ pound ground beef or Italian sausage
  • ½ cup onion finely chopped
  • ½ cup bell pepper diced
  • 1 cup shredded mozzarella cheese
  • ¼ cup grated Parmesan cheese
  • ½ cup pepperoni slices chopped
  • ½ teaspoon garlic powder
  • ½ teaspoon Italian seasoning
  • ¼ teaspoon black pepper
  • 1 egg beaten (for egg wash)
  • Optional: marinara sauce for dipping

Instructions

  • Preheat the oven to 375°F (190°C) and line a baking sheet with parchment paper.
  • In a skillet over medium heat, cook the ground meat with onion and bell pepper until browned. Drain excess grease and season with garlic powder, Italian seasoning, and pepper.
  • Roll the pizza dough into a large rectangle on a lightly floured surface.
  • Spread the cooked meat mixture evenly over the dough, leaving a small border around the edges.
  • Sprinkle mozzarella, Parmesan, and chopped pepperoni on top.
  • Carefully roll the dough lengthwise into a tight log, sealing the edges. Place seam-side down on the baking sheet.
  • Brush the top with beaten egg for a golden finish.
  • Bake for 22–25 minutes, or until golden brown and fully cooked through.
  • Let rest for 5 minutes before slicing. Serve warm with marinara sauce if desired.

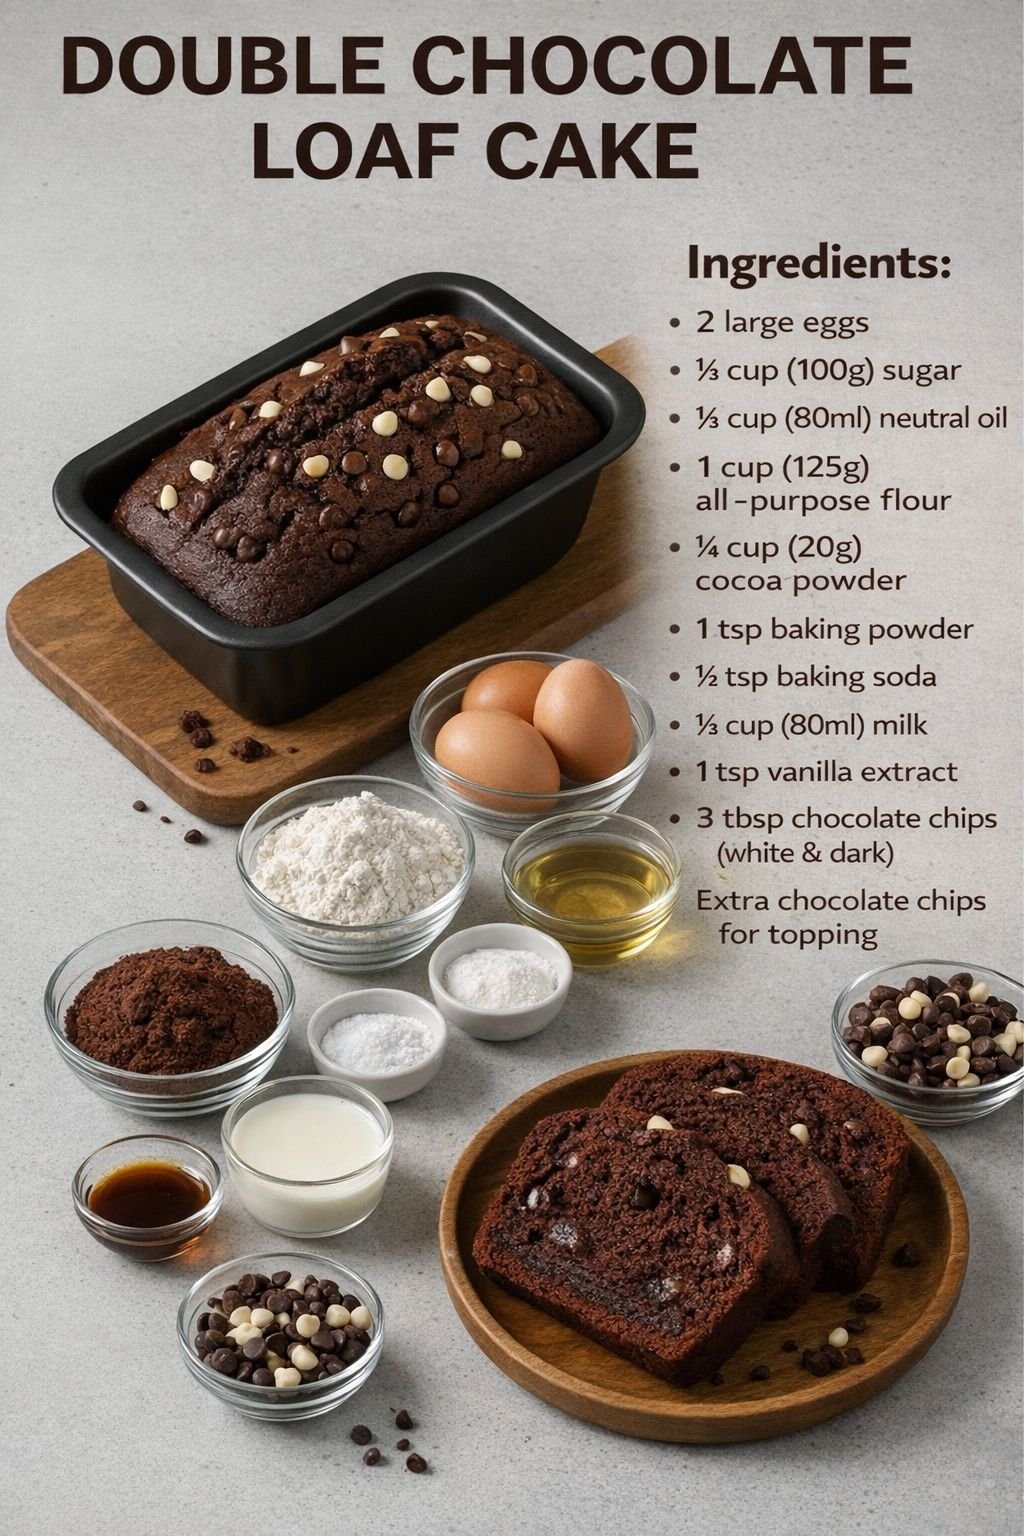
Double Chocolate Loaf Cake

🍫 Double Chocolate Loaf Cake

A rich, moist chocolate loaf packed with chocolate chips. Perfect for breakfast, dessert, or an afternoon treat.


📝 Ingredients

  • 2 large eggs

  • ⅓ cup (100 g) sugar

  • ⅓ cup (80 ml) neutral oil (vegetable or canola)

  • ⅓ cup (80 ml) milk

  • 1 teaspoon vanilla extract

  • 1 cup (125 g) all-purpose flour

  • ¼ cup (20 g) cocoa powder

  • 1 teaspoon baking powder

  • ½ teaspoon baking soda

  • 3 tablespoons chocolate chips (white or dark, or a mix)

  • Extra chocolate chips for topping


👩‍🍳 Instructions

1️⃣ Mix the Wet Ingredients

  1. In a medium bowl, whisk the eggs and sugar until slightly pale and well combined.

  2. Add the oil, milk, and vanilla extract. Stir until smooth.


2️⃣ Combine with Dry Ingredients

  1. Sift together the flour, cocoa powder, baking powder, and baking soda.

  2. Gently fold the dry ingredients into the wet mixture until just combined. Avoid overmixing to keep the cake tender.

  3. Fold in 3 tablespoons of chocolate chips.


3️⃣ Prepare for Baking

  1. Preheat the oven to 175°C (350°F).

  2. Grease a standard loaf pan or line it with parchment paper.

  3. Pour the batter into the pan and smooth the top with a spatula.

  4. Sprinkle extra chocolate chips over the surface.


4️⃣ Bake

  1. Bake for 35–45 minutes.

  2. Test doneness by inserting a toothpick into the center; it should come out clean or with a few moist crumbs.

  3. Let the cake cool in the pan for 10 minutes, then transfer to a wire rack to cool completely.


🍽 Serving Suggestions

  • Serve slightly warm so chocolate chips are melty

  • Pair with a cold glass of milk or a cup of coffee

  • Slice thick for an indulgent snack


🧁 Tips

✔️ Use high-quality cocoa powder for deeper flavor
✔️ Fold gently to keep the cake soft and airy
✔️ Store in an airtight container for 2–3 days
✔️ Freeze slices for up to 1 month

Quick Pickled Red Onions

🧅 Quick Pickled Red Onions

Bright, tangy, and crisp, these quick pickled red onions add a punch of flavor and color to sandwiches, salads, bowls, and more. Ready in just one hour!


📝 Ingredients

  • 2 small red onions

  • 2 cups white vinegar

  • 2 cups water

  • 1/3 cup cane sugar

  • 2 tablespoons sea salt

  • 2 garlic cloves (whole or lightly smashed)

  • 1 teaspoon mixed peppercorns


👩‍🍳 Instructions

1️⃣ Prepare the Onions

  1. Peel the red onions.

  2. Slice into thin rings or half-moons.

  3. Peel the garlic cloves; leave whole or smash slightly to release flavor.


2️⃣ Make the Pickling Liquid

  1. In a medium saucepan, combine:

    • Vinegar

    • Water

    • Sugar

    • Salt

  2. Heat over medium heat, stirring occasionally, until the sugar and salt dissolve. No need to boil — just hot enough to fully dissolve the solids.


3️⃣ Pack the Jar

  1. Place the sliced onions into a clean, heat-proof jar (Mason jar works well).

  2. Add garlic cloves and mixed peppercorns.


4️⃣ Add the Pickling Liquid

  1. Carefully pour the hot liquid over the onions until fully submerged.

  2. Use a spoon to press down gently and remove any air bubbles.

  3. Let sit uncovered at room temperature for 30–60 minutes. The onions will turn a vibrant pink.


5️⃣ Storage

  1. Once cooled, seal the jar with a lid.

  2. Store in the refrigerator.

Tip: Onions are ready after 1 hour, but the flavor deepens after 24 hours. Keeps well for up to 2 weeks.


🍽 Serving Suggestions

  • Top avocado toast

  • Add to burgers or sandwiches

  • Serve in Mediterranean bowls

  • Include in tacos or grain bowls for acidity and crunch


🧂 Tips

✔️ Slice onions uniformly for even pickling
✔️ Use a heat-proof jar to avoid cracking
✔️ For extra flavor, add a bay leaf or chili slice
✔️ Press onions down to minimize air bubbles

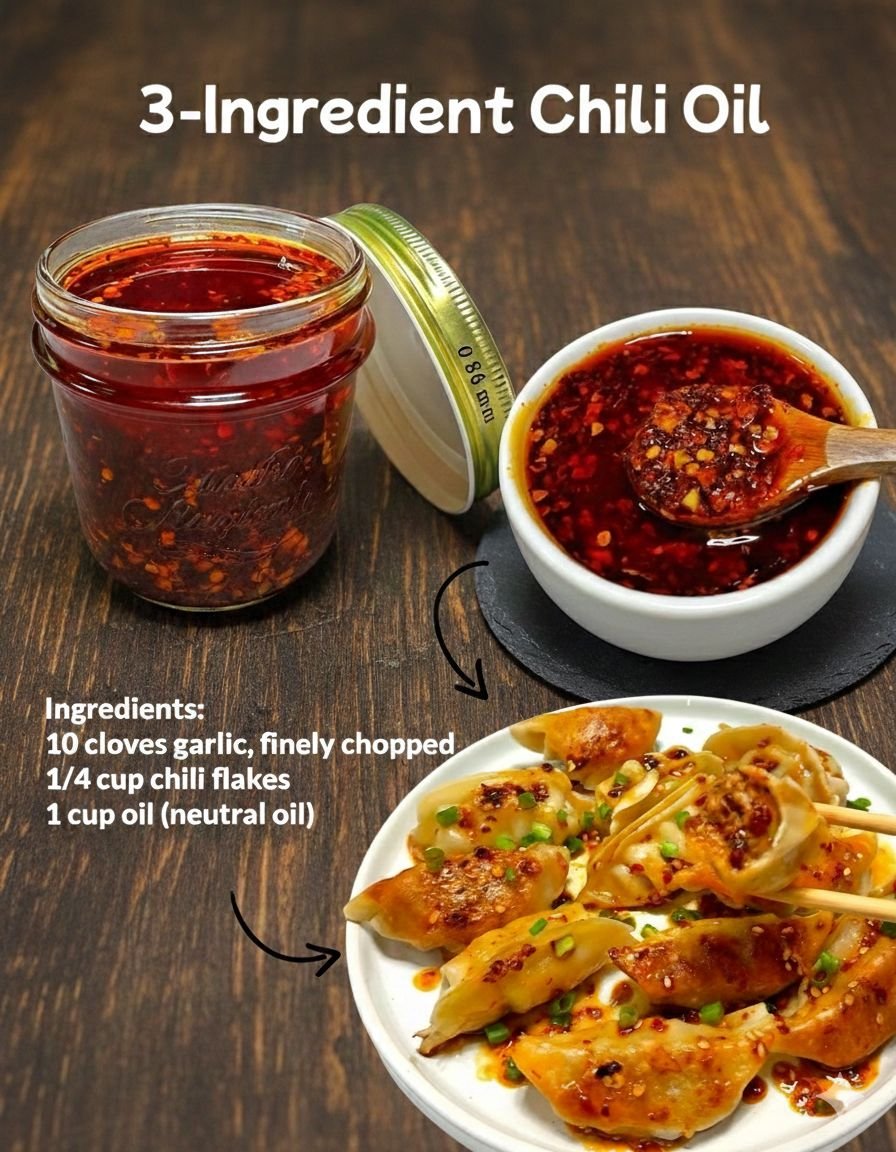
3-Ingredient Garlic Chili Oil

🌶 3-Ingredient Garlic Chili Oil

A fragrant, spicy oil perfect for drizzling over noodles, dumplings, stir-fries, or as a dipping sauce base.


📝 Ingredients

  • 10 cloves garlic, finely chopped

  • ¼ cup red chili flakes

  • 1 cup neutral oil (canola, vegetable, or grapeseed)


👩‍🍳 Instructions

1️⃣ Prepare the Aromatics

  1. Peel and finely mince the garlic.

  2. Place the garlic and chili flakes into a heat-proof jar or small metal bowl. Make sure the container is completely dry to avoid oil splatters.


2️⃣ Heat the Oil

  1. Pour the oil into a small saucepan.

  2. Heat over medium heat for 3–5 minutes until hot but not smoking.

Tip: Drop a single chili flake into the oil; if it sizzles immediately, the oil is ready. If it smokes, remove from heat and let it cool slightly.


3️⃣ Infuse the Flavors

  1. Carefully pour the hot oil over the garlic and chili flakes.

  2. The mixture will bubble and sizzle — this releases the flavors from the garlic and chili.

  3. Stir gently with a dry spoon to distribute the garlic evenly.


4️⃣ Cool and Store

  1. Let the oil cool completely to room temperature.

  2. The oil will deepen to a vibrant red color as it cools.

  3. Seal with a tight-fitting lid.

Storage: Keep in a cool, dark place or in the refrigerator for up to 2–3 weeks. Always use a clean, dry spoon to avoid contamination.


🍽 Serving Suggestions

  • Drizzle over noodles, fried rice, or stir-fried vegetables

  • Add to soy-sauce-based dipping sauces for dumplings

  • Spoon over grilled meats or roasted vegetables


🧂 Optional Customizations

  • Add 1 tsp toasted sesame seeds after the oil cools

  • Add a pinch of salt for extra flavor

  • For more heat, include crushed fresh chilies along with chili flakes

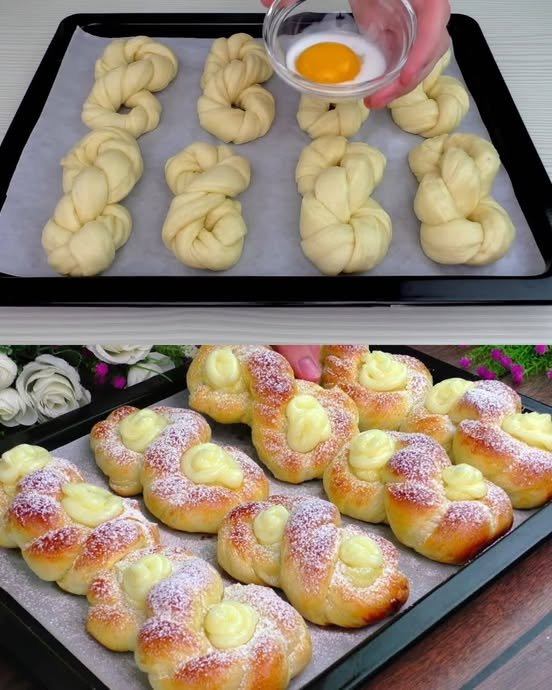
Fluffy Custard-Filled Braid Buns

🥐 Fluffy Custard-Filled Braid Buns

Soft, lightly sweet yeast buns filled with smooth vanilla custard and finished with a light dusting of powdered sugar.


📝 Ingredients

For the Dough

  • 180 ml lukewarm milk

  • 1 egg (room temperature)

  • 3 tablespoons sugar

  • 1 teaspoon instant dry yeast

  • ½ teaspoon salt

  • 40 g (2 tablespoons) unsalted butter, melted and cooled

  • 400 g all-purpose flour (about 2½ cups)

For the Custard Filling

  • 250 ml milk

  • 1 egg yolk

  • 2 tablespoons sugar

  • 1 tablespoon cornstarch

  • ½ teaspoon vanilla extract

For Brushing & Finishing

  • 1 egg yolk

  • 1 teaspoon milk

  • Powdered sugar (for dusting)


👩‍🍳 Instructions

1️⃣ Prepare the Dough

  1. In a large bowl, mix:

    • Lukewarm milk

    • Sugar

    • Yeast

  2. Let sit for 5 minutes until slightly foamy.

  3. Add:

    • Egg

    • Melted butter

  4. Mix well.

  5. Gradually add flour and salt and mix until a dough forms.

  6. Knead for 8–10 minutes until smooth and elastic.

  7. Place dough in a lightly greased bowl, cover, and let rise for 1 hour or until doubled in size.


2️⃣ Make the Custard Filling

  1. In a saucepan, whisk together:

    • Egg yolk

    • Sugar

    • Cornstarch

  2. Slowly add milk while whisking.

  3. Cook over medium heat, stirring constantly, until thick and smooth.

  4. Remove from heat and stir in vanilla.

  5. Cover the custard with plastic wrap touching the surface and allow to cool completely.


3️⃣ Shape the Buns

  1. Gently deflate the risen dough.

  2. Divide into 8–10 equal pieces.

  3. Roll each piece into a rope about 25–30 cm (10–12 inches) long.

  4. Fold rope in half and twist the strands together.

  5. Join the ends to form a braided loop or figure-eight shape.

  6. Place on parchment-lined baking tray.

  7. Cover and let rise for 20 minutes.


4️⃣ Fill and Bake

  1. Preheat oven to 180°C (350°F).

  2. Mix egg yolk with milk.

  3. Brush dough lightly with egg wash.

  4. Transfer cooled custard to a piping bag.

  5. Pipe custard into the open centers or loops of each braid.

  6. Bake for 20–25 minutes until golden brown.


5️⃣ Finish

  1. Cool slightly.

  2. Dust edges lightly with powdered sugar (avoid custard centers).


🧁 Tips

✔️ Custard must be fully cooled before piping
✔️ Do not overfill
✔️ Keep buns covered while resting
✔️ Best eaten fresh
✔️ Store in airtight container up to 2 days