Fluffy Blueberry Pancakes

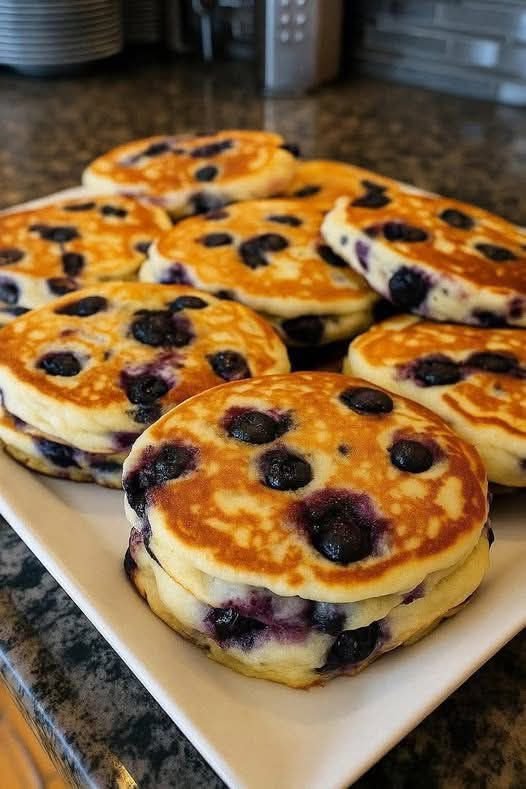
Fluffy Blueberry Pancakes

Mediterranean Fluffy Blueberry Pancakes bring together simple pantry staples, fresh fruit, and the light touch that Mediterranean cooking is known for. Instead of heavy batters or excessive sugar, this recipe relies on good-quality olive oil, yogurt for tenderness, and blueberries for natural sweetness. The result is pancakes that are soft inside, lightly golden outside, and never greasy. They feel indulgent but stay wholesome enough for a relaxed breakfast or brunch. Serve them with honey, fresh fruit, or a spoon of Greek yogurt for a meal that feels comforting yet fresh.

Prep Time: 10 minutes

Cook Time: 15 minutes

Total Time: 25 minutes

Servings: 4 (about 10 pancakes)

Ingredients

Dry Ingredients

1½ cups all-purpose flour

2 tablespoons sugar or honey powder

2 teaspoons baking powder

¼ teaspoon baking soda

¼ teaspoon salt

Wet Ingredients

1 cup plain Greek yogurt
½ cup milk (regular or plant-based)
2 large eggs
2 tablespoons extra virgin olive oil
1 teaspoon vanilla extract

Add-ins

1 cup fresh or frozen blueberries

Olive oil or butter for cooking

Instructions

In a large bowl, whisk together flour, sugar, baking powder, baking soda, and salt until evenly combined.

In another bowl, whisk Greek yogurt and milk until smooth.

Add eggs, olive oil, and vanilla extract to the yogurt mixture and whisk until fully blended.

Pour the wet ingredients into the dry ingredients. Stir gently just until combined. Do not overmix.

Fold in blueberries carefully to avoid breaking them.

Heat a nonstick skillet or griddle over medium heat. Lightly grease with olive oil or butter.

Scoop about ¼ cup batter for each pancake onto the hot surface.

Cook for 2 to 3 minutes, until bubbles form on the surface and edges look set.

Flip gently and cook another 1 to 2 minutes until golden and cooked through.

Remove from pan and repeat with remaining batter. Serve warm.

Tips

Use room-temperature eggs and yogurt for smoother batter.

Do not overmix. A few lumps keep pancakes fluffy.

If using frozen blueberries, do not thaw them before adding.

Keep heat medium to prevent burning before the center cooks.

Let batter rest for 5 minutes if time allows.

Use a measuring scoop for evenly sized pancakes.

Lightly oil the pan between batches, not heavily.

Flip only once for best texture.

Cover cooked pancakes loosely to keep warm.

Serve immediately for the softest texture.

Variations

Lemon Blueberry Pancakes: Add 1 teaspoon lemon zest to batter.

Whole Wheat Version: Replace half the flour with whole wheat flour.

Honey Yogurt Pancakes: Replace sugar with 2 tablespoons honey.

Almond Blueberry Pancakes: Add ¼ teaspoon almond extract.

Vegan Style: Use plant yogurt, flax eggs, and almond milk.

Cinnamon Blueberry Pancakes: Add ½ teaspoon cinnamon.

Orange Mediterranean Twist: Add orange zest and drizzle with honey.

Protein Boost: Add 2 tablespoons vanilla protein powder.

Savory Touch: Reduce sugar and add crushed walnuts.

Berry Mix: Use a mix of blueberries, raspberries, and strawberries.

Q&A

Can I make the batter ahead?
Yes, up to 12 hours refrigerated.

Can I freeze these pancakes?
Yes, freeze fully cooled pancakes for up to 2 months.

What milk works best?
Any milk works. Almond and oat are great options.

Can I skip yogurt?
Yogurt is key for fluffiness, but sour cream can substitute.

Why are my pancakes flat?
Overmixing or expired baking powder is usually the cause.

Can I reduce sugar?
Yes, especially if serving with honey or fruit.

Are these kid-friendly?
Absolutely. They are soft and naturally sweet.

What toppings pair well?
Greek yogurt, honey, nuts, or fresh fruit.

Can I use olive oil instead of butter?
Yes, olive oil fits the Mediterranean profile perfectly.

How do I keep them warm?
Place on a baking tray in a low oven while cooking batches.

Nutrition

(Approximate per Serving)

Calories: 280

Protein: 9g

Carbohydrates: 38g

Fat: 10g

Fiber: 3g

Sugar: 9g

Conclusion

Mediterranean Fluffy Blueberry Pancakes prove that breakfast can be both comforting and balanced. With yogurt for tenderness, olive oil for richness, and blueberries for natural sweetness, these pancakes feel special without being heavy. They fit easily into a weekend brunch or a calm weekday morning when you want something nourishing and homemade. Once you try them, they are likely to become a regular favorite, adaptable to seasons, tastes, and whatever ingredients you have on hand.
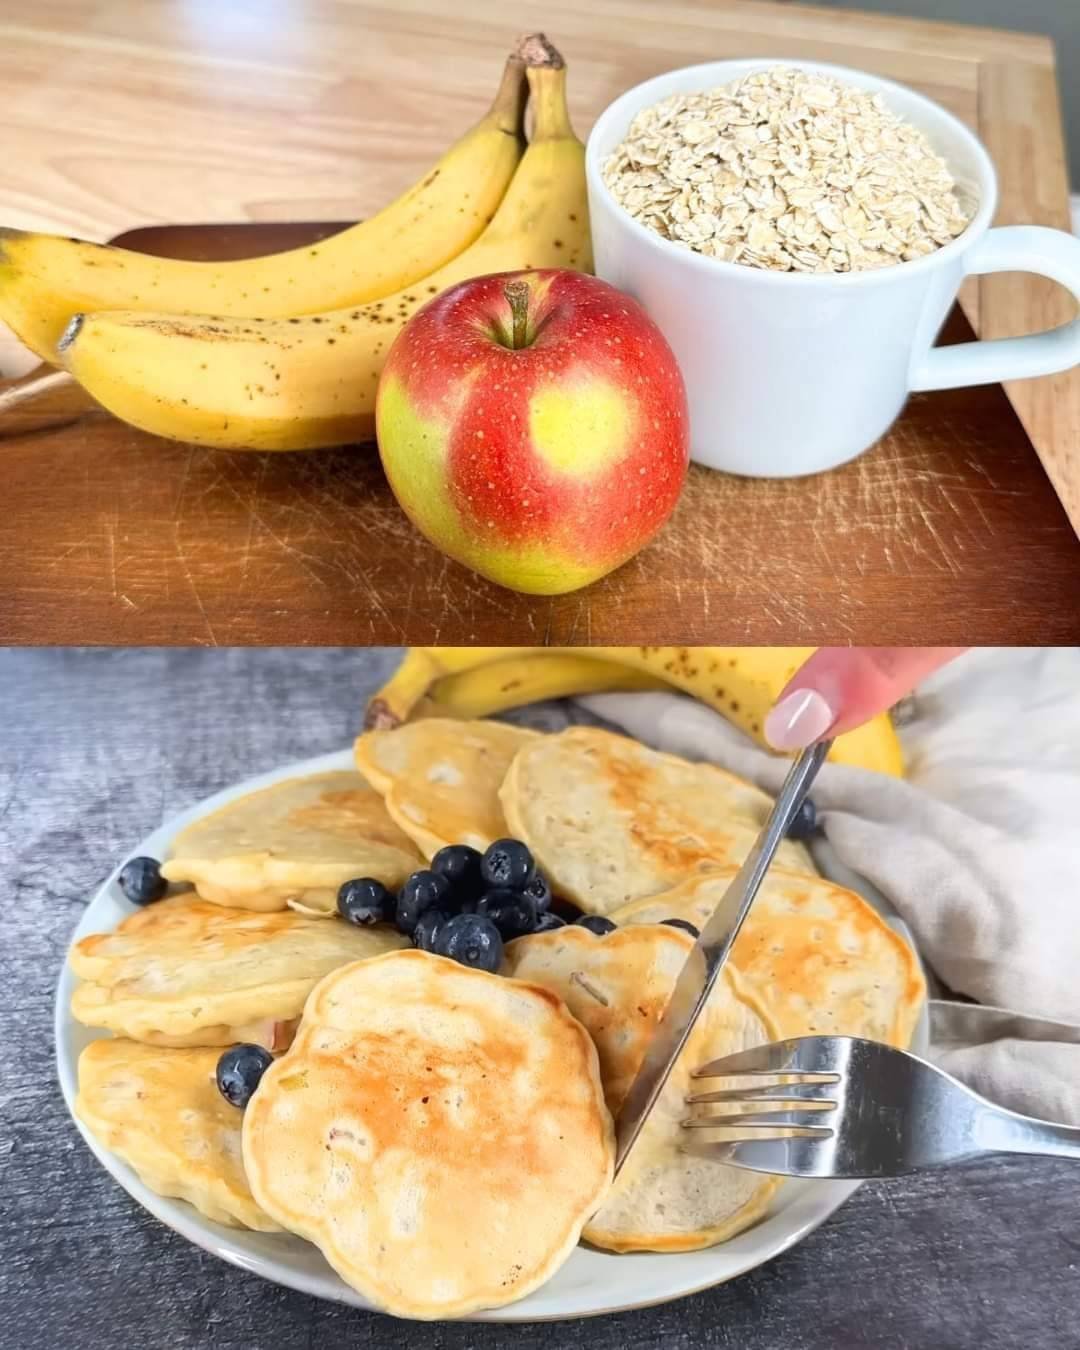
Banana Apple Pancakes: A Delicious Start for Weight Management

Ingredients:

    • 1 ripe banana
    • 240ml milk (low-fat or plant-based milk works well)
    • 200g whole wheat flour (or all-purpose flour)
    • 1.5 teaspoons baking powder
  • 1 apple
  • Oil for cooking (coconut oil, avocado oil, or vegetable oil)

Instructions:

    1. Mash it Up: In a bowl, mash the banana until smooth and creamy.
    2. Mix it In: Add the milk to the mashed banana and whisk together until well combined.
    3. Dry Together: In a separate bowl, combine the flour and baking powder.
    1. Batter Up: Gradually add the dry ingredients to the wet ingredients, stirring just until a slightly lumpy batter forms. Don’t overmix!
    2. Apple Surprise: Peel and grate the apple, then fold it gently into the pancake batter.
    3. Get Cooking: Heat a thin layer of oil in a non-stick pan over medium heat.
    1. Pancake Power: Pour about 1/4 cup of batter per pancake onto the hot pan. Cook for 2-3 minutes, or until bubbles appear on the surface.
    2. Flip and Finish: Flip the pancakes and cook for another 1-2 minutes, or until golden brown.
    3. Repeat and Enjoy: Repeat steps 6-8 with the remaining batter. Serve your pancakes warm and enjoy!

More Information:

This recipe incorporates several elements that contribute to weight management:

    • Fiber: Whole wheat flour and apples provide fiber, which keeps you feeling fuller for longer and helps regulate digestion.
  • Protein: Milk offers a protein boost, which can also aid in satiety and reduce cravings.
  • Reduced Sugar: Compared to traditional pancake recipes loaded with processed sugar, this version uses the natural sweetness of the banana.
  • Healthy Fats: Depending on the oil you choose, you can incorporate healthy fats that contribute to a feeling of fullness.

Lemon Ginger Immunity Drink

Lemon Ginger Immunity Drink

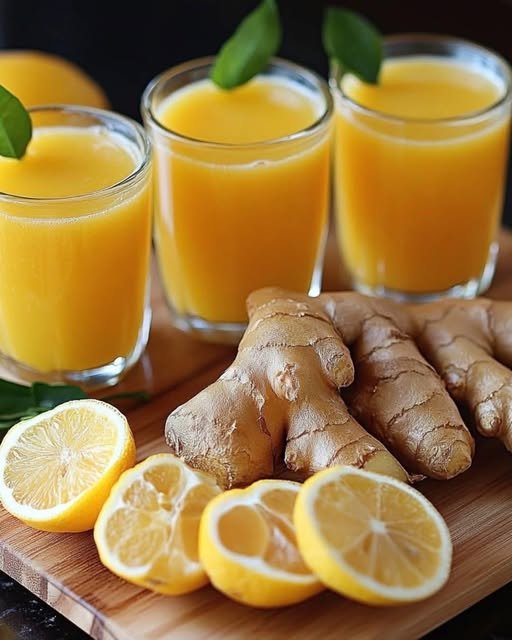
This lemon ginger drink is a powerful, natural beverage known for boosting immunity, aiding digestion, and refreshing the body. Made with simple ingredients, it can be enjoyed as a morning shot or a soothing drink during the day.

Ingredients

  • Fresh ginger root – 2 to 3 inches (peeled and sliced)

  • Fresh lemons – 3 to 4 (juiced)

  • Water – 2 cups

  • Honey – 2 to 3 tablespoons (adjust to taste)

  • Turmeric powder or fresh turmeric – ½ teaspoon (optional)

  • Black pepper – a pinch (optional, for better absorption)

  • Mint leaves – for garnish (optional)

Preparation Method

Start by thoroughly washing and peeling the ginger root. Slice it thinly to release maximum flavor and nutrients. In a saucepan, add the sliced ginger and water. Bring it to a gentle boil, then reduce the heat and let it simmer for about 10–15 minutes. This allows the ginger to infuse the water fully.

Once done, remove the saucepan from heat and allow the mixture to cool slightly. Strain the ginger water into a bowl or jug, discarding the ginger pieces. Next, squeeze fresh lemons and add the juice to the warm ginger infusion. Stir well.

Add honey while the mixture is still warm so it dissolves easily. If using turmeric and black pepper, add them now and mix thoroughly. Taste and adjust sweetness or lemon as desired.

Serving Suggestions

Pour the drink into small glasses for immunity shots or larger glasses for a refreshing beverage. Garnish with fresh mint leaves or a thin lemon slice if desired. It can be enjoyed warm for soothing effects or chilled for a refreshing boost.

Health Benefits

  • Ginger helps reduce inflammation, supports digestion, and eases nausea.

  • Lemon is rich in vitamin C, which strengthens the immune system and promotes clear skin.

  • Honey provides natural sweetness and has antibacterial properties.

  • Turmeric adds anti-inflammatory and antioxidant benefits.

Storage Tips

Store the drink in a sealed glass bottle in the refrigerator for up to 2–3 days. Shake well before serving.

This lemon ginger drink is perfect for daily wellness, especially in the morning on an empty stomach for maximum benefits.

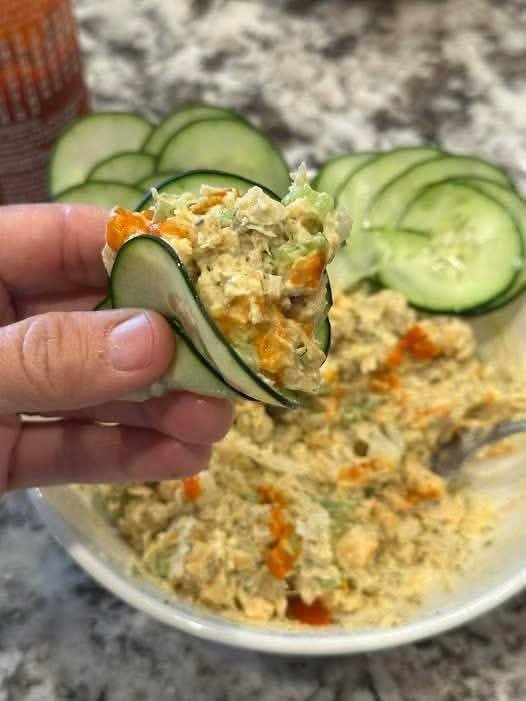
Chickpea “Chicken” Salad on Cucumber Chips

Chickpea “Chicken” Salad on Cucumber Chips

This plant-based, high-protein salad uses chickpeas as a hearty base and is packed with flavor and texture.

⏰ Quick Glance

  • Prep Time: 15 minutes

  • Yields: 4 servings

  • Diet: Vegan/Vegetarian (depending on the mayonnaise)

🛒 Ingredients

Category Ingredient Quantity Notes
Salad Base Chickpeas 1 can (15 oz) Drained and rinsed, reserving the liquid (“aquafaba”).
Celery Stalk 1 large Diced fine.
Onion 2 tbsp Finely diced (red or white onion).
Red Grapes ¼ cup Halved or quartered (optional, for sweetness).
Dressing Vegan Mayonnaise (or regular mayo) ½ cup Adjust to desired creaminess.
Dijon Mustard 1 tsp For a little tang.
Apple Cider Vinegar (or Lemon Juice) 1 tsp
Salt ½ tsp Or to taste.
Black Pepper ¼ tsp Or to taste.
Garlic Powder ¼ tsp
Optional Add-ins Curry Powder or Turmeric ¼ tsp For color and spice (as suggested by the image).
Sriracha or Hot Sauce 1 tsp For a spicy kick (as suggested by the image).
Serving Cucumber 1–2 large Sliced into chips (about ¼ inch thick).


👩‍🍳 Instructions

  1. Prepare Chickpeas: Place the drained and rinsed chickpeas in a bowl. Use a fork or potato masher to lightly mash them. Mash until about two-thirds of the chickpeas are broken down, leaving the rest chunky for texture.

  2. Chop Vegetables: Finely dice the celery and onion. If using, halve the red grapes. Add all chopped ingredients to the bowl with the mashed chickpeas.

  3. Make Dressing: In a separate small bowl, whisk together the mayonnaise, Dijon mustard, apple cider vinegar/lemon juice, salt, black pepper, and garlic powder.

  4. Combine: Pour the dressing over the chickpea and vegetable mixture. Stir well until everything is evenly coated and the salad reaches your desired consistency.

  5. Add Flavor Boosts: If using, stir in the curry powder/turmeric (which gives it a yellowish color like in the photo) and the Sriracha/hot sauce (which gives it the visible red streaks).

  6. Chill: Cover the bowl and refrigerate the chickpea salad for at least 30 minutes to allow the flavors to meld.

  7. Serve: Slice the cucumber into rounds about ¼ inch thick. Use the cucumber slices as “chips” to scoop up and serve the chilled Chickpea “Chicken” Salad.

Enjoy your new favorite healthy lunch!

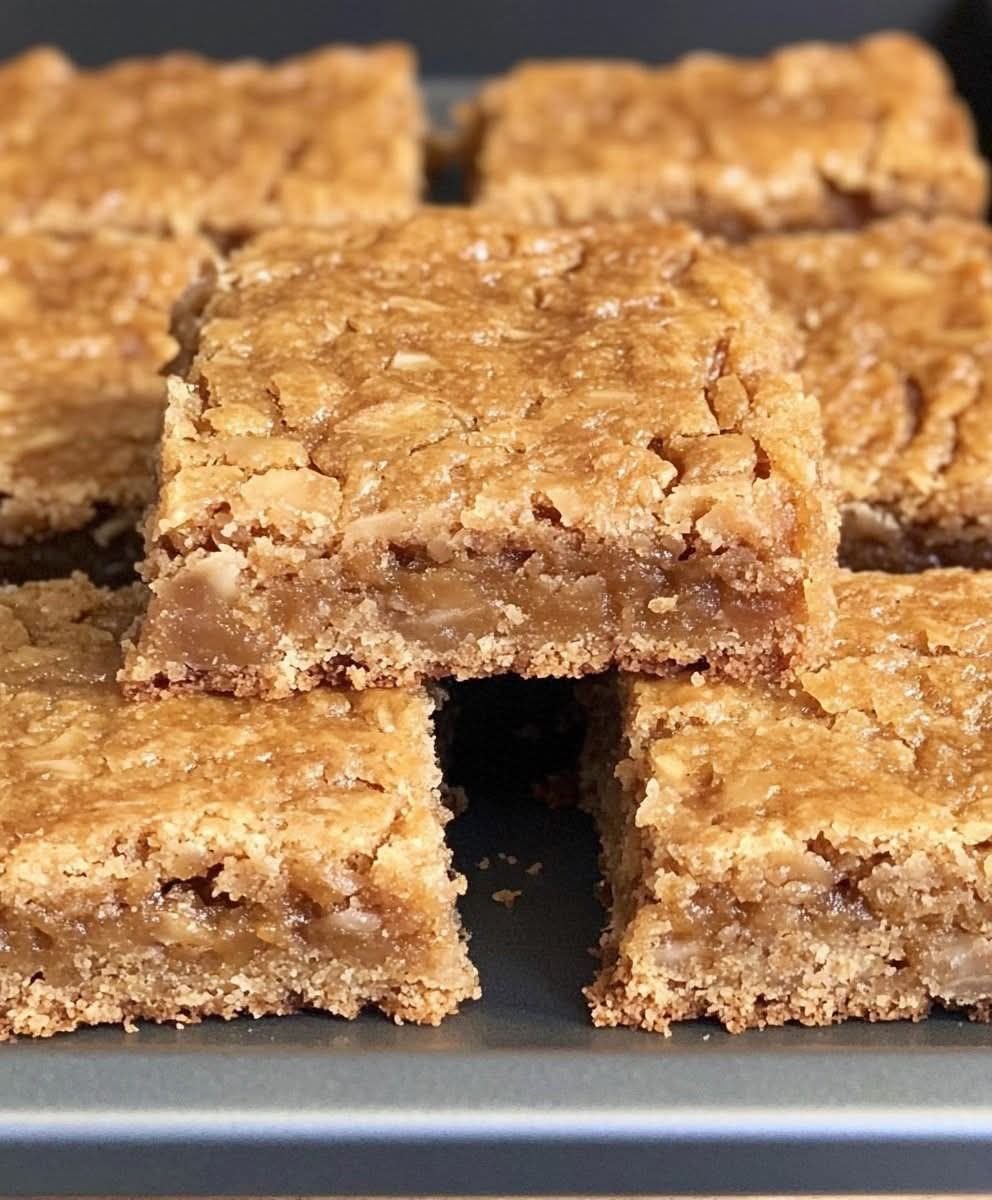
Chewy Coconut Bars

Chewy Coconut Bars

Chewy Coconut Bars are one of those desserts that feel nostalgic and timeless, yet never go out of style. They are simple to make, deeply satisfying, and rely on pantry staples rather than complicated techniques. The texture is the real star here. Soft and chewy in the center, lightly golden on top, and packed with coconut flavor in every bite. These bars are perfect for afternoon tea, lunchboxes, bake sales, or when you want something sweet without committing to a layered cake or frosted dessert. They store well, slice cleanly, and taste even better the next day, which makes them ideal for both casual home baking and sharing.

Prep time: 15 minutes

Bake time: 30 minutes

Cooling time: 20 minutes

Total time: 1 hour 5 minutes

Servings: 12 bars

Difficulty: Easy

Ingredients

2 cups shredded coconut, unsweetened or lightly sweetened

1 cup all-purpose flour

¾ cup granulated sugar

½ cup brown sugar, packed

½ cup unsalted butter, melted

2 large eggs, room temperature

1 teaspoon vanilla extract

½ teaspoon baking powder

¼ teaspoon salt

Optional: ¼ cup milk or cream for extra moisture

Instructions

Preheat your oven to 350°F (175°C) and line an 8×8-inch baking pan with parchment paper.

In a large bowl, whisk together flour, baking powder, and salt until evenly combined.

In a separate bowl, mix granulated sugar and brown sugar with the melted butter until smooth.

Add eggs one at a time, whisking well after each addition.

Stir in vanilla extract until fully incorporated.

Gradually fold the dry ingredients into the wet mixture until just combined.

Gently mix in shredded coconut, ensuring it is evenly distributed.

If the batter feels too thick, stir in milk or cream one tablespoon at a time.

Spread the batter evenly into the prepared pan, smoothing the top.

Bake for 28 to 32 minutes, until the top is lightly golden and the center is just set. Cool completely before slicing.

Tips

Use room temperature eggs to help the batter blend smoothly.

Do not overmix once flour is added to keep bars tender.

Line the pan with parchment for easy removal and clean slices.

Unsweetened coconut gives better control over sweetness.

Check doneness early to avoid dry bars.

Let bars cool fully before cutting for best texture.

Use a sharp knife and wipe between cuts.

Melt butter gently to avoid separating fats.

Slight underbaking keeps the bars chewy.

Store tightly covered to maintain moisture.

Variations

Add chocolate chips for a classic coconut-chocolate combo.

Mix in chopped nuts like almonds or pecans for crunch.

Add lemon zest for a fresh citrus note.

Replace half the flour with almond flour for richness.

Drizzle baked bars with melted dark chocolate.

Add a pinch of cinnamon for warmth.

Use coconut sugar instead of brown sugar.

Fold in dried fruit like cranberries or pineapple.

Top with toasted coconut before baking.

Add a thin layer of jam underneath for a surprise filling.

Q&A

Are Chewy Coconut Bars supposed to be soft?
Yes, the texture should be moist and chewy, not dry or crumbly.

Can I use sweetened coconut?
Yes, but reduce sugar slightly to balance sweetness.

Can these bars be frozen?
They freeze well for up to 2 months when wrapped tightly.

How do I know when they are done?
The edges should be set and the center slightly soft.

Can I make them dairy-free?
Yes, use plant-based butter and milk alternatives.

Why did my bars turn dry?
Overbaking is the most common reason.

Can I double the recipe?
Yes, use a larger pan and adjust baking time slightly.

Do these bars need refrigeration?
No, room temperature storage is fine for a few days.

Can I reduce sugar?
You can reduce by about ¼ cup without affecting texture too much.

Are these good for gifting?
Yes, they travel well and stay fresh for days.

Nutrition

(Approximate per bar)

Calories: 240

Carbohydrates: 30 g

Protein: 4 g

Fat: 12 g

Fiber: 2 g

Sugar: 18 g

Conclusion

Chewy Coconut Bars are proof that simple baking can still deliver big results. With minimal effort and familiar ingredients, you get a dessert that is comforting, versatile, and consistently satisfying. They work just as well for everyday treats as they do for special occasions, and the recipe is flexible enough to match your preferences. Whether enjoyed plain, dressed up with chocolate, or shared with friends, these bars are a dependable favorite that earns a permanent place in your baking rotation.

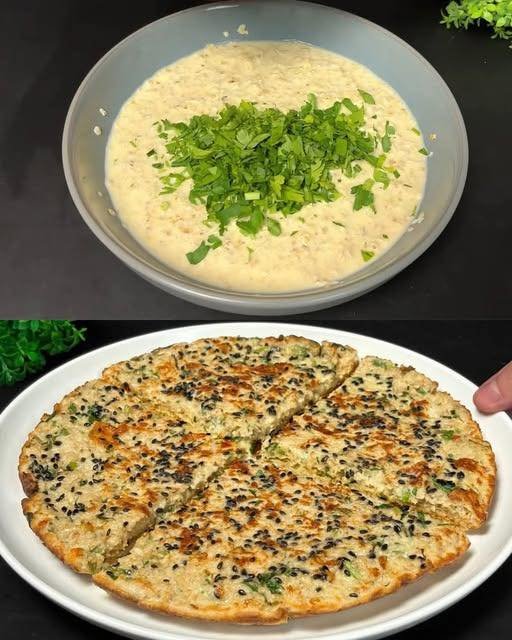
Savory Oatmeal & Cheese Pancakes

Savory Oatmeal & Cheese Pancakes

This recipe makes approximately 2 large pancakes (intended to be sliced) or 4–6 smaller ones.

Ingredients

  • 1 cup (90g) Oatmeal (Rolled or Instant)

  • 2 Large Eggs

  • 1 glass (200ml) Milk

  • 100g (3.5 oz) Cheese, grated (Cheddar or Mozzarella work best)

  • 2 tbsp Fresh Parsley, finely chopped

  • 1 tbsp Sesame seeds (for the topping)

  • ½ tsp Salt

  • ½ tsp Dry Provençal herbs

  • ¼ tsp Chili flakes (optional)

  • 1-2 tbsp Oil (for frying)


Instructions

  1. Prepare the Base: In a large mixing bowl, combine the oatmeal and milk. Let it sit for about 5–10 minutes. This softens the oats, ensuring the pancake isn’t “gritty.”

  2. Mix the Batter: Whisk the eggs into the soaked oats. Stir in the grated cheese, chopped parsley, salt, Provençal herbs, and chili flakes. Mix until well combined.

  3. Heat the Pan: Place a non-stick frying pan over medium-low heat and add a thin layer of oil.

  4. Cook and Garnish: Pour half of the batter into the pan (if making a large one) and spread it out evenly with a spatula. Sprinkle half of the sesame seeds over the top of the wet batter.

  5. The Flip: Cover the pan with a lid for 3–4 minutes; this helps the center cook through. Once the bottom is golden brown and the edges look set, carefully flip the pancake.

  6. Finish: Cook the other side for another 2–3 minutes until golden. Repeat with the remaining batter.