Creamy Sauce Quartet (4 Easy Dipping Sauces)

Creamy Sauce Quartet (4 Easy Dipping Sauces)

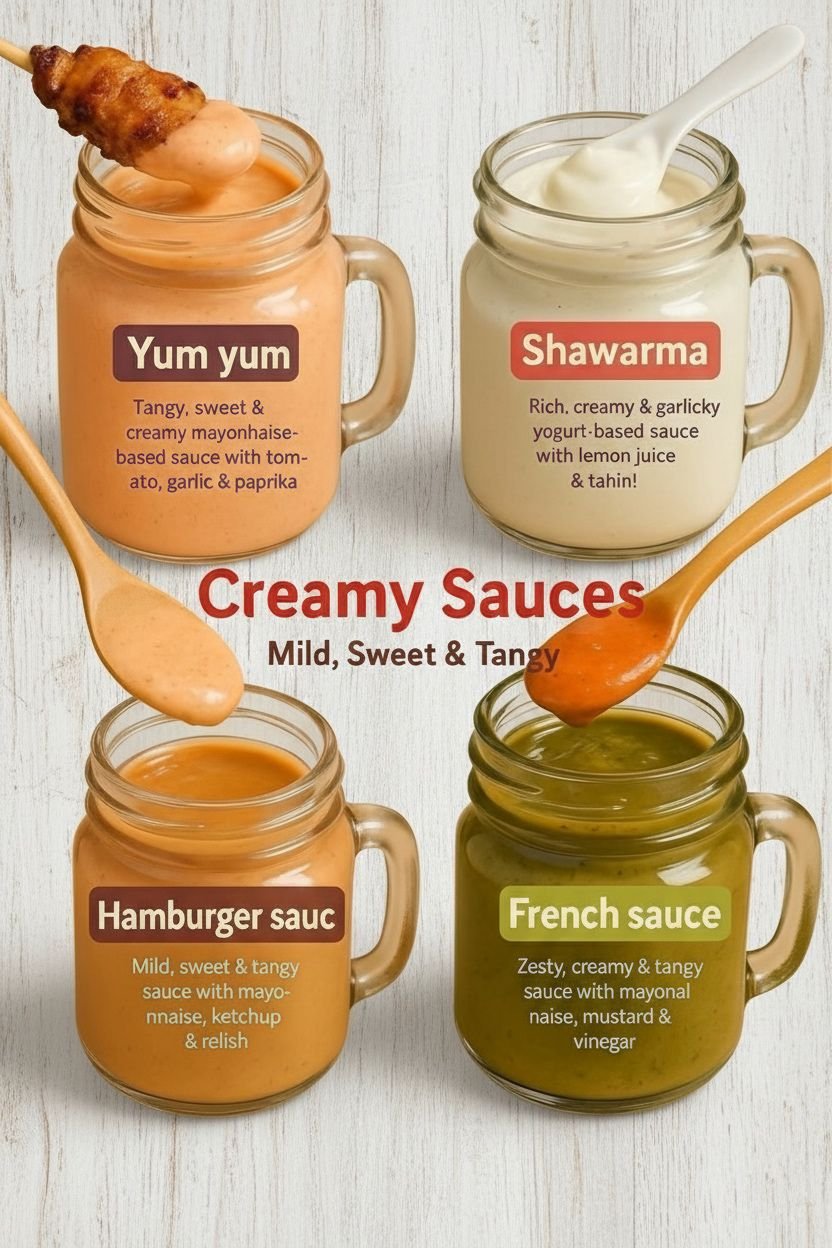
These four smooth and flavorful sauces are inspired by popular restaurant-style dips. They are mild, sweet, tangy, and creamy—perfect for burgers, fries, wraps, and grilled foods.


📝 Common Creamy Base

(Used for Yum Yum, Hamburger, and French Sauce)

  • ½ cup high-quality mayonnaise

Place the mayonnaise in a small mixing bowl and use it as the base for each sauce.


🍅 1. Yum Yum Sauce (Sweet & Tangy)

Ingredients

  • ½ cup mayonnaise

  • 1 teaspoon tomato paste

  • ½ teaspoon garlic powder

  • ½ teaspoon paprika

  • 1 teaspoon sugar

Instructions

  1. Add mayonnaise to a bowl.

  2. Mix in tomato paste until smooth.

  3. Add garlic powder, paprika, and sugar.

  4. Stir until evenly blended and creamy.

  5. Taste and adjust sweetness or seasoning if needed.

Best with: fries, chicken, seafood, sandwiches


🧄 2. Shawarma-Style Yogurt Sauce (Creamy & Garlicky)

Ingredients

  • ½ cup plain Greek yogurt

  • 1 tablespoon tahini

  • 1 garlic clove, finely crushed

  • 1 tablespoon fresh lemon juice

Instructions

  1. Add yogurt to a bowl.

  2. Mix in tahini until smooth.

  3. Stir in crushed garlic and lemon juice.

  4. Blend well until creamy.

  5. Chill for 30 minutes for better flavor.

Best with: shawarma, wraps, grilled meat, falafel


🍔 3. Hamburger Sauce (Mild & Sweet)

Ingredients

  • ½ cup mayonnaise

  • 1 tablespoon ketchup

  • 1 tablespoon finely chopped sweet relish

Instructions

  1. Place mayonnaise in a bowl.

  2. Add ketchup and mix until uniform in color.

  3. Stir in chopped relish.

  4. Mix gently until fully combined.

  5. Refrigerate for 20–30 minutes before serving.

Best with: burgers, fries, sandwiches


🥒 4. French-Style Sauce (Zesty & Tangy)

Ingredients

  • ½ cup mayonnaise

  • 1 tablespoon yellow mustard

  • 1 teaspoon white vinegar

  • A small pinch of dried herbs (optional)

Instructions

  1. Add mayonnaise to a bowl.

  2. Mix in mustard until smooth.

  3. Add vinegar and stir well.

  4. Add herbs if using and mix again.

  5. Chill before serving for best taste.

Best with: salads, grilled chicken, wraps, vegetables


⭐ Helpful Tips

  • Use fresh ingredients for best flavor

  • Chill sauces before serving for thicker texture

  • Store in sealed containers in the refrigerator

  • Use within 3–5 days

  • Stir before serving

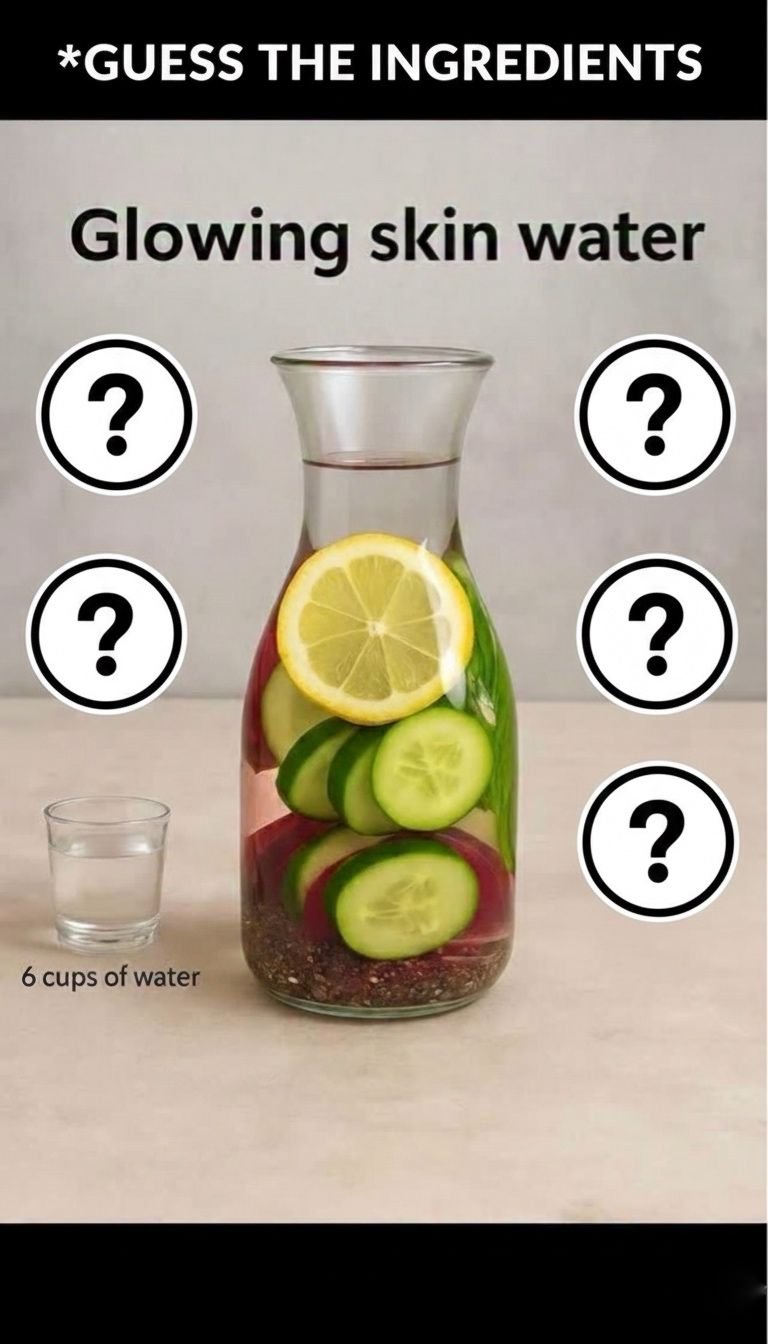
Beetroot Basil Seed Infused Water (Refreshing & Naturally Colored)

🥤 Beetroot Basil Seed Infused Water (Refreshing & Naturally Colored)

This infused water combines vegetables, citrus, and basil seeds to create a lightly flavored, cooling drink with a beautiful natural color and pleasant texture.


📝 Ingredients

  • 6 cups filtered drinking water

  • 1 small beetroot, peeled and thinly sliced

  • 1 small cucumber, sliced

  • ½ lemon, sliced

  • 1 tablespoon basil seeds (sabja)

  • A handful of fresh mint leaves


👩‍🍳 Step-by-Step Preparation

1️⃣ Prepare the Basil Seeds

Place the basil seeds in a small bowl.
Add about ½ cup clean water and let them soak for 15 to 30 minutes.

They are ready when they swell and form a soft, jelly-like coating around each seed.
Once soaked, strain off any extra water and set aside.


2️⃣ Prepare the Fruits and Vegetables

  • Wash the beetroot, cucumber, lemon, and mint thoroughly.

  • Peel the beetroot and slice it thinly so it releases color and flavor more easily.

  • Slice the cucumber and lemon into thin rounds.


3️⃣ Assemble the Infused Water

Pour 6 cups of water into a large glass pitcher or jar.

Add ingredients in this order for best appearance and flavor:

  1. Beetroot slices (for natural color)

  2. Cucumber slices

  3. Lemon slices

  4. Mint leaves

Gently stir to mix.


4️⃣ Add the Basil Seeds

Add the soaked basil seeds to the pitcher.
Stir gently so they spread evenly through the water.

These seeds give the drink a pleasant texture and make it more enjoyable to sip.


5️⃣ Chill and Infuse

Cover the pitcher and place it in the refrigerator for at least 2 hours.

For deeper color and fuller flavor, allow it to infuse overnight.


6️⃣ Serve

Stir gently before serving.
Pour into glasses, making sure each serving includes some basil seeds and fruit slices.
Serve cold for best taste.


🌿 Ingredient Purpose (Simple & Safe Explanation)

  • Beetroot: Adds natural color and mild sweetness

  • Cucumber: Provides freshness and light flavor

  • Lemon: Adds gentle citrus taste

  • Mint: Gives a cooling and clean aroma

  • Basil seeds: Add texture and make the drink more satisfying


⭐ Helpful Tips

  • Use glass containers instead of plastic for better flavor

  • Thin slices release flavor faster

  • Drink within 24 hours for best freshness

  • You can refill the pitcher once with water before discarding the ingredients

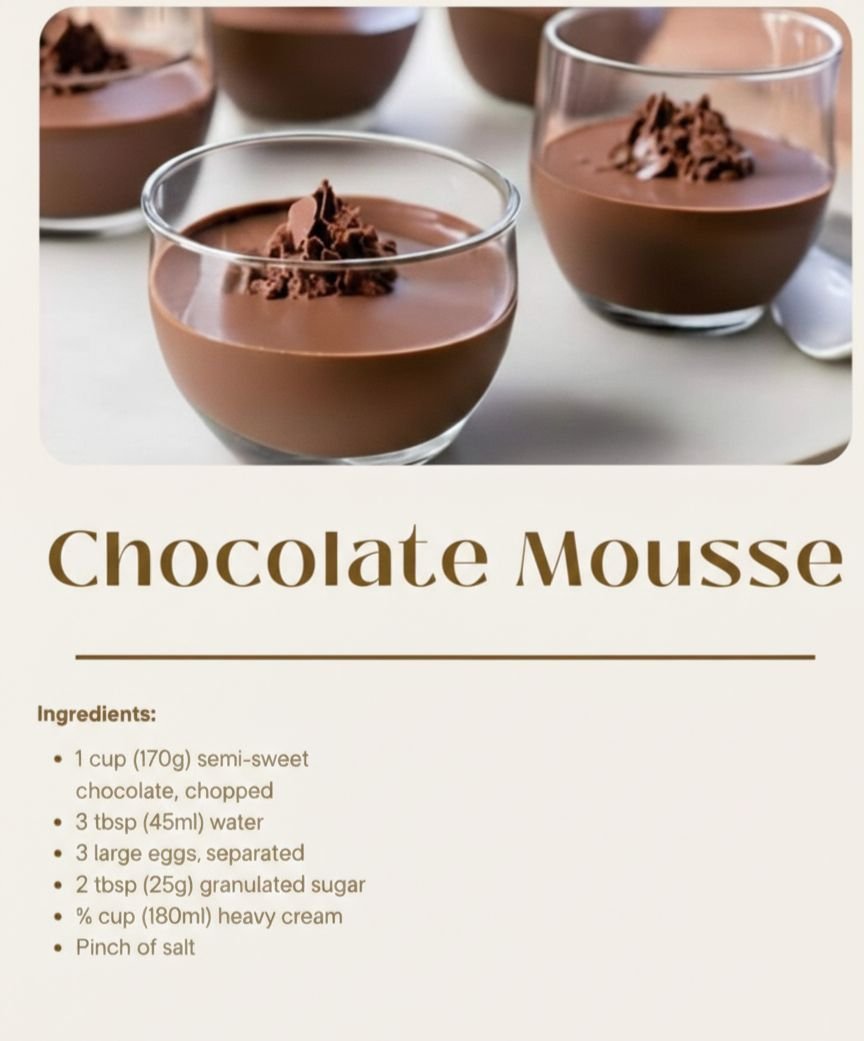
Classic Airy Chocolate Mousse (Light & Creamy)

🍫 Classic Airy Chocolate Mousse (Light & Creamy)

This chocolate mousse is smooth, fluffy, and rich in flavor, made with simple ingredients and gentle folding to keep it airy.


📝 Ingredients

  • 1 cup (170 g) semi-sweet chocolate, finely chopped

  • 3 tablespoons (45 ml) water

  • 3 large eggs, separated

  • 2 tablespoons (25 g) granulated sugar

  • ¾ cup (180 ml) heavy cream (cold)

  • A small pinch of salt


👩‍🍳 Step-by-Step Instructions

1️⃣ Melt the Chocolate

Place the chopped chocolate and water into a heat-safe bowl.
Melt using one of these methods:

  • Double boiler: Set the bowl over gently heated water and stir until smooth.

  • Microwave: Heat in 20-second intervals, stirring each time until fully melted.

Set aside and allow the chocolate to cool slightly so it is warm, not hot.


2️⃣ Add the Egg Yolks

Add the egg yolks to the melted chocolate one at a time, whisking well after each addition.
The mixture should become smooth and glossy.


3️⃣ Whip the Cream

In a separate bowl, beat the cold heavy cream until stiff peaks form.
This means the cream holds its shape when you lift the whisk.

Gently fold the whipped cream into the chocolate mixture using a spatula.
Use light movements to keep the texture fluffy.


4️⃣ Whip the Egg Whites

In a clean, dry bowl, beat the egg whites with a pinch of salt until they become foamy.
Slowly add the sugar and continue beating until stiff, shiny peaks form.


5️⃣ Fold the Mixture

Add the whipped egg whites to the chocolate mixture in two portions.
Fold gently using a cut-and-fold motion until just combined.
Do not stir, as this removes the air and makes the mousse heavy.


6️⃣ Chill and Set

Spoon the mousse into serving cups or glasses.
Cover and refrigerate for at least 2 to 4 hours until set and creamy.


🌱 Bonus: Basil Seed Chocolate Mousse Topping

Basil seeds (Sabja) add a refreshing texture and visual beauty.

How to Prepare Basil Seeds

  • Soak 1 tablespoon basil seeds in ½ cup water for 15 minutes

  • They will swell and form a gel-like coating

  • Drain excess water before using

How to Use

✔ As a topping: Spoon soaked seeds over chilled mousse
✔ As a layer: Add seeds to the bottom of the glass before filling with mousse


⭐ Helpful Tips

  • Eggs whip better at room temperature

  • Always fold gently to keep mousse light

  • Chill thoroughly for best texture

  • Use good-quality chocolate for richer taste

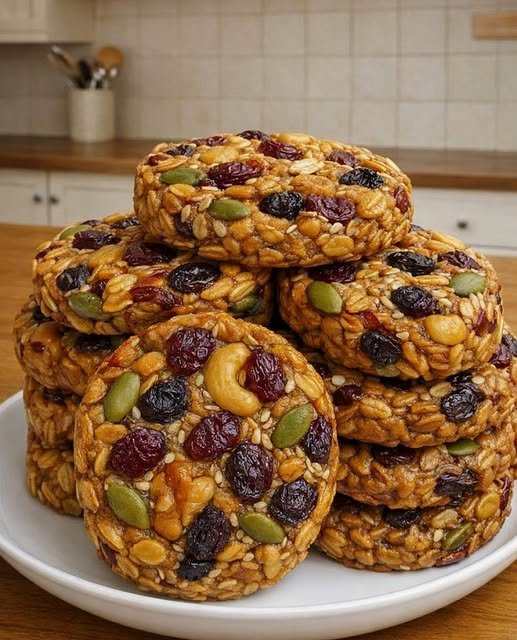
Healthy Flourless Nut & Seed Cookies

Healthy Flourless Nut & Seed Cookies – Crunchy, Naturally Sweet & Easy Homemade Recipe

These Healthy Flourless Nut & Seed Cookies are a delicious combination of crunchy peanuts, rich hazelnuts, nutritious seeds, and chewy dried cranberries. Think of your favorite trail mix transformed into a satisfying homemade cookie!

Made without traditional flour or refined white sugar, these cookies are packed with nutty flavors and wholesome ingredients. They’re perfect for breakfast on busy mornings, afternoon snacks, lunchboxes, or enjoying with a warm cup of tea.

The best part? You don’t need any complicated baking techniques. Simply chop, mix, shape, and bake!

Prep Time: 15 minutes Cook Time: 12–15 minutes Total Time: 30 minutes Servings: 12 cookies Difficulty: Easy

Ingredients

For the Nut & Seed Cookies

  • 200 g (7 oz) peanuts, unsalted

  • 60 g (2 oz) hazelnuts

  • 30 g (1 oz) pumpkin seeds

  • 1 tablespoon sunflower seeds

  • 1 tablespoon sesame seeds

  • 30 g (1 oz) dried cranberries

For Binding (Recommended)

  • 1 large egg white

  • 1–2 tablespoons honey or maple syrup (optional, for additional sweetness)

Important: Nuts and seeds alone will not reliably hold together as cookies. Egg white helps bind the mixture during baking. Honey adds sweetness and some stickiness but may not provide enough structure by itself. For a vegan version, use a flaxseed binder as described below.

Step-by-Step Instructions

Step 1: Preheat the Oven

Preheat your oven to 350°F (175°C).

Line a large baking sheet with parchment paper to prevent sticking and make cleanup easier.

Make sure the oven reaches the correct temperature before baking.

Step 2: Prepare the Peanuts and Hazelnuts

Place the peanuts and hazelnuts into a food processor.

Pulse several times until the nuts are finely chopped but still have some texture.

Avoid processing them into a fine powder or nut butter.

You want small, uneven pieces that create a crunchy texture in every bite.

Transfer the chopped nuts to a large mixing bowl.

Step 3: Add the Seeds

Add the pumpkin seeds, sunflower seeds, and sesame seeds to the bowl.

Mix everything together using a wooden spoon or spatula.

These seeds provide additional crunch and a delicious roasted flavor.

For a more delicate cookie texture, you can roughly chop the pumpkin seeds before adding them.

Step 4: Add the Dried Cranberries

Roughly chop the dried cranberries if they are large.

Add them to the nut and seed mixture.

Stir until the cranberries are evenly distributed.

The cranberries provide a pleasant chewy texture and a sweet-tart flavor that balances the richness of the nuts.

If you prefer a cookie with less added sugar, choose unsweetened dried cranberries.

Step 5: Prepare the Binder

In a separate small bowl, lightly whisk the egg white until slightly frothy.

You do not need to beat it into stiff peaks.

Pour the egg white over the nut mixture.

If using honey or maple syrup, add it now.

Mix thoroughly until all the ingredients are lightly coated and the mixture becomes sticky enough to press together.

The mixture should hold its shape when firmly squeezed.

Step 6: Shape the Cookies

Using a tablespoon or small cookie scoop, divide the mixture into approximately 12 equal portions.

Place each portion onto the prepared baking sheet.

Use your fingers or the back of a spoon to firmly press each portion into a round cookie shape, approximately ½ inch thick.

Pressing firmly is important because these cookies do not contain traditional flour.

Leave a little space between each cookie.

Step 7: Bake Until Golden

Place the baking sheet on the middle rack of the oven.

Bake for 12–15 minutes, or until the cookies are lightly golden and fragrant.

The nuts should develop a beautiful toasted aroma, while the cranberries become slightly softer.

Keep an eye on the cookies during the final few minutes because nuts can brown quickly.

Step 8: Cool Completely

Remove the cookies from the oven and allow them to cool on the baking sheet for at least 10–15 minutes.

They may feel slightly delicate while warm.

As they cool, the egg white binder sets and the cookies become firmer.

Carefully transfer them to a wire rack and allow them to cool completely before storing.

Step 9: Serve and Enjoy

Arrange the cookies on a beautiful wooden serving board or ceramic plate.

Serve with hot tea, coffee, or a glass of milk.

Each bite offers crunchy nuts, toasted seeds, and chewy cranberries.

These cookies are especially delicious as a quick afternoon snack.

Tips and Notes

Use unsalted nuts: Unsalted peanuts and hazelnuts allow the natural flavors of the ingredients to shine.

Do not overprocess: Finely chopped nuts provide a better texture than completely ground nuts.

Press the cookies firmly: Compacting the mixture helps the cookies hold together during baking.

Use a binder: Egg white is recommended for reliable results. Simply adding milk may make the mixture wet without helping the cookies hold their shape after baking.

Avoid overbaking: The cookies should be golden and fragrant, not dark brown.

Choose cranberries carefully: Many dried cranberries contain added sugar. Read the package label if you’re trying to reduce added sugar.

Make them vegan: Replace the egg white with 1 tablespoon ground flaxseed mixed with 2½ tablespoons water. Let the mixture rest for 10–15 minutes until thickened. The cookies may be more delicate.

For extra flavor: Add a pinch of cinnamon or vanilla extract. These are optional additions.

Storage: Keep cooled cookies in an airtight container in the refrigerator for up to 5–7 days.

Freezing: Store the cookies in a freezer-safe container for up to 2 months.

Frequently Asked Questions

Are these cookies completely flourless?

Yes! These cookies contain no wheat flour, almond flour, or other traditional baking flour. Their texture comes from chopped nuts and seeds.

Are these cookies gluten-free?

The main ingredients are naturally gluten-free. However, check packaging for possible cross-contamination if preparing them for someone with celiac disease.

Can I make these cookies without eggs?

Yes. You can use a flaxseed-and-water binder instead of egg white. However, the cookies may be more crumbly.

Can I use almonds instead of hazelnuts?

Absolutely! Almonds, walnuts, or pecans work beautifully in this recipe.

Can I replace dried cranberries with raisins?

Yes. Raisins, chopped dates, or dried cherries can be used. Keep in mind that different dried fruits contain different amounts of sugar.

Are these cookies good for weight loss?

They contain fiber, protein, and unsaturated fats, but nuts and seeds are calorie-dense. Portion size matters if you’re managing your calorie intake.

Can I make these cookies without honey?

Yes. The egg white provides the main binding, so honey is optional.

Why are my cookies falling apart?

The mixture may not have been pressed firmly enough, the nuts may be too coarsely chopped, or there may not be enough binder. Allowing the cookies to cool completely also helps them hold together.

Can children eat these cookies?

Older children who can safely chew nuts may enjoy them. However, these cookies contain chopped nuts and should not be given to young children for whom nuts present a choking risk. They are also unsuitable for anyone with relevant nut allergies.

Servings and Nutrition

Yield: Approximately 12 cookies

Estimated nutrition per cookie (with egg white, without optional honey):

Nutrient Amount
Calories 180 kcal
Protein 7 g
Carbohydrates 10 g
Fat 14 g
Fiber 3 g
Sugar 4 g

Nutrition values are approximate and depend on the specific nuts, seeds, and dried cranberries used.

Why You’ll Love These Healthy Flourless Nut & Seed Cookies

These homemade cookies are a wonderful alternative to traditional flour-based cookies when you’re looking for something crunchy and satisfying.

Peanuts and hazelnuts provide rich, roasted flavors, while pumpkin, sunflower, and sesame seeds add extra texture. Dried cranberries bring a chewy sweetness that makes every bite interesting.

They’re easy to customize with your favorite nuts and seeds, and you can prepare a batch ahead of time for convenient snacks throughout the week.

Final Tip: For beautiful bakery-style cookies, shape the mixture using a round cookie cutter placed directly on the parchment-lined baking sheet. Press the mixture firmly inside the cutter before carefully lifting it away. This creates evenly shaped cookies with a rustic, crunchy appearance.

Would you try these Healthy Flourless Nut & Seed Cookies? Save this recipe for later and share it with someone who loves homemade healthy snacks!
Homemade Pepperoni & Green Pepper Pizza

Homemade Pepperoni & Green Pepper Pizza

Ingredients

The Base:


Pizza Dough: 1 lb (store-bought or homemade)


Cornmeal: A pinch (for the bottom of the tray to add crunch)


The Toppings:


Pizza Sauce: 1/2 cup (tomato-based with herbs)


Mozzarella Cheese: 1.5 to 2 cups, shredded


Pepperoni: 15–20 slices (ensure they are thinly sliced)


Green Bell Pepper: 1 medium, sliced into long, thin strips


Instructions

Prep the Oven: Preheat your oven to 475°F (245°C). If you have a pizza stone, put it in now; otherwise, a standard baking sheet works great.


Prepare the Tray: Line your baking sheet or pizza pan with aluminum foil (as seen in your photo). Lightly grease the foil or sprinkle a little cornmeal on it to prevent sticking.


Stretch the Dough: Roll or stretch your dough into a wide circle. For that specific look, aim for a “medium-thin” thickness. Place it onto the foil.


Layer the Flavors: * Spread the sauce evenly, leaving about half an inch for the crust.


Sprinkle the mozzarella generously over the sauce.


Lay the pepperoni slices on top.


Arrange the green pepper strips in a starburst or radial pattern across the cheese and pepperoni.


Bake: Place the pizza in the oven for 10–12 minutes. You’ll know it’s done when the cheese is bubbly and starting to brown, and the pepperoni edges are slightly curled and crisp.


Rest & Serve: Let it sit for 2 minutes before slicing. This helps the cheese set so it doesn’t slide off when you cut it.


Pro-Tips for Success

Crispy Pepperoni: if you like them extra crispy, look for “cup and char” pepperoni at the deli.


Seasoning: A quick sprinkle of dried oregano or red pepper flakes right after it comes out of the oven adds a nice “pizzeria” aroma.

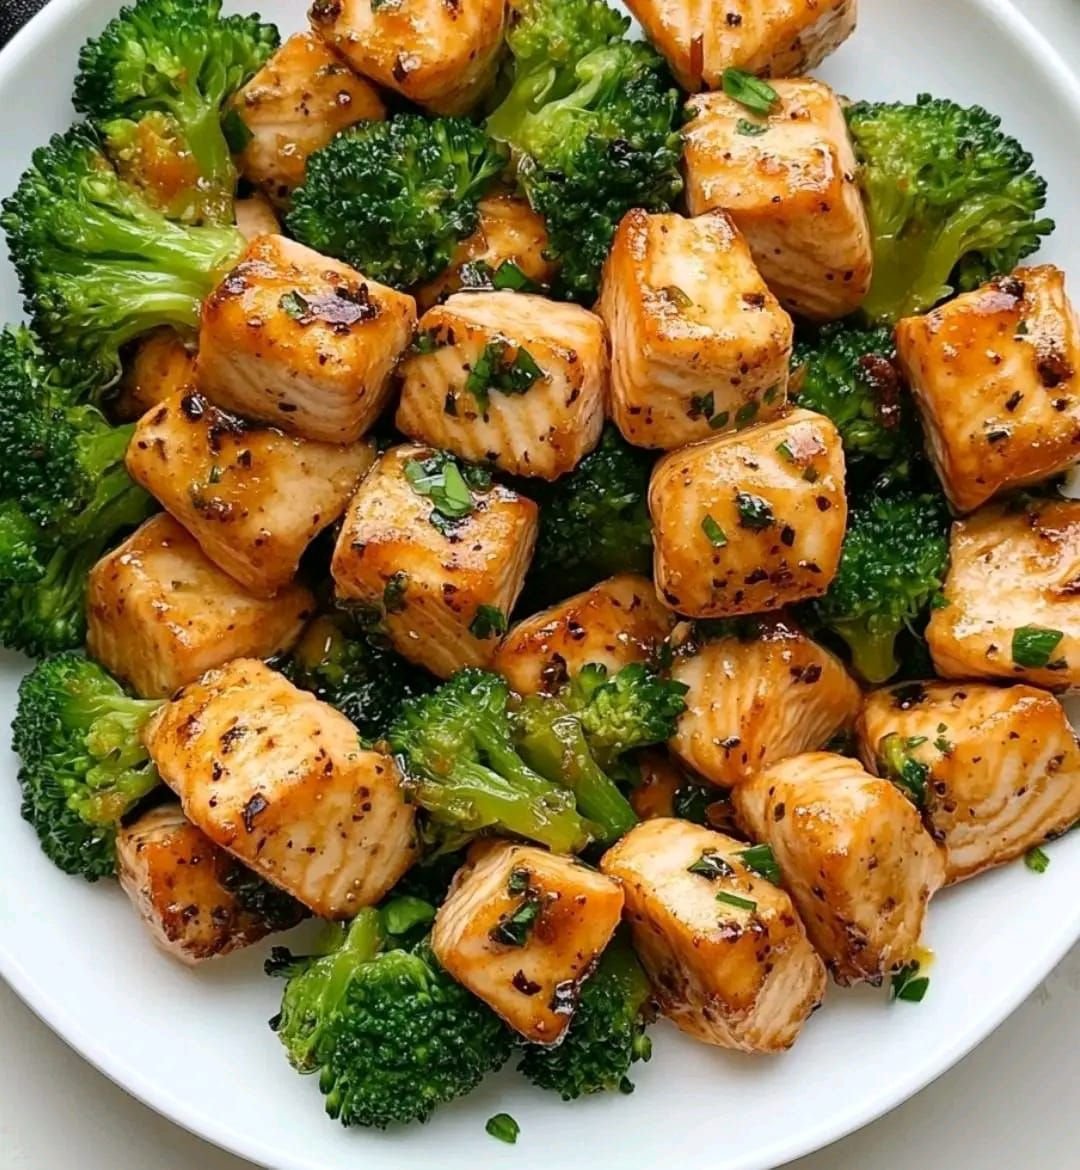
Salmon Bites with Broccoli

Salmon Bites with Broccoli is a delicious and healthy dish that combines tender, perfectly seasoned pieces of salmon with vibrant, crunchy broccoli. This simple yet flavorful meal is packed with protein, omega-3 fatty acids, and essential vitamins, making it a great choice for a nutritious lunch or dinner. The savory salmon pairs beautifully with the mild bitterness of the broccoli, creating a balanced, satisfying plate that’s both light and filling. Whether you’re cooking for yourself or serving it to guests, this dish is sure to impress with its vibrant colors and fresh flavors!

Ingredients:

For the Salmon Bites:

1 lb (450g) fresh salmon fillet, skin removed

2 tbsp olive oil

1 tbsp lemon juice

1 tsp garlic powder

1 tsp onion powder

1/2 tsp smoked paprika (optional)

Salt and pepper to taste

1 tbsp fresh dill or parsley (optional for garnish)

For the Broccoli:

2 cups fresh broccoli florets

1 tbsp olive oil

1/2 tsp garlic powder

Salt and pepper to taste

1 tbsp lemon zest (optional)

Instructions:

1. Prepare the Salmon:

Preheat the oven to 400°F (200°C).

Cut the salmon fillet into bite-sized pieces, about 1-2 inches each.

In a bowl, mix olive oil, lemon juice, garlic powder, onion powder, smoked paprika, salt, and pepper.

Toss the salmon bites in the mixture, ensuring they’re fully coated.

2. Prepare the Broccoli:

Steam or blanch the broccoli florets for 2-3 minutes until bright green and tender (but still crisp). Alternatively, you can sauté it.

See also  Mediterranean Greek Appetizer Board with Hummus and Grilled Pita

If sautéing: In a large pan, heat olive oil over medium heat and add the broccoli florets. Season with garlic powder, salt, and pepper, and cook for 5-7 minutes until tender.

3. Cook the Salmon Bites:

Lay the seasoned salmon pieces on a parchment-lined baking sheet in a single layer.

Bake for 10-12 minutes or until the salmon is cooked through (internal temperature should be 145°F or 63°C).

4. Combine and Serve:

Once the salmon bites are cooked, remove them from the oven.

Serve the salmon bites alongside the broccoli. Garnish with fresh dill or parsley, and add a squeeze of lemon juice over the top for extra flavor.

Tips:

For a crispy finish, you can also pan-sear the salmon bites in a hot skillet with a little olive oil for 2-3 minutes on each side after baking.

Feel free to add other vegetables like bell peppers or zucchini to make the dish even more colorful.

Salmon (per 3 oz portion)

Calories: 180-220 kcal

Protein: 22-25 g

Fat: 10-15 g

Omega-3 Fatty Acids: 1.5-2.5 g (depending on the type of salmon)

Carbohydrates: 0 g

Vitamin D: 570 IU (over 70% of daily value)

Vitamin B12: 2.5 µg (over 100% of daily value)

Selenium: 30-35 µg (about 50% of daily value

Enjoy your tasty and healthy Salmon Bites with Broccoli! Let me know if you need more details or adjustments.