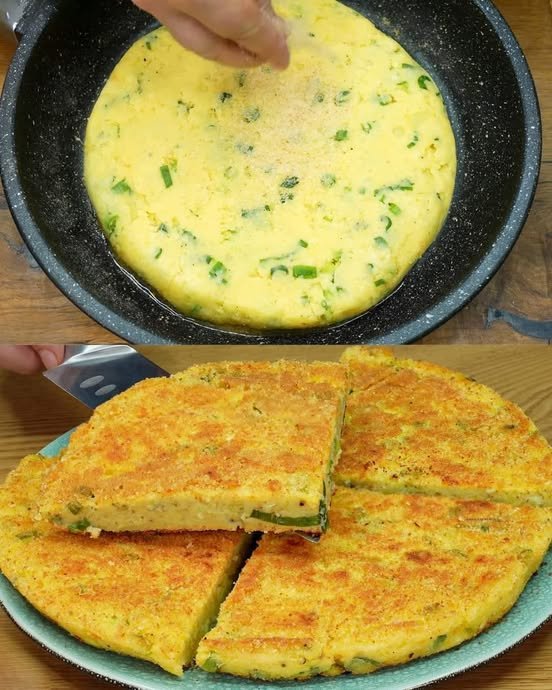
Crispy Parmesan Potato Pancake

Crispy Parmesan Potato Pancake

Crunchy outside, soft and tender inside – perfect for sharing

Ingredients

  • 2 medium potatoes, peeled, boiled, and mashed

  • 1 large egg

  • ¼ cup Parmesan cheese, freshly grated

  • 2 tablespoons all-purpose flour

  • 1–2 spring onions, finely chopped

  • ½ cup breadcrumbs (for coating)

  • Salt and black pepper, to taste

  • 1–2 tablespoons olive oil or butter, for cooking

Optional Filling:

  • ½ cup shredded mozzarella cheese (for a soft, stretchy center)


Instructions

Step 1: Prepare the Potato Mixture

Place the warm, mashed potatoes into a large mixing bowl.
Add the egg, grated Parmesan cheese, flour, and chopped spring onions.
Season lightly with salt and black pepper.

Mix everything gently until well combined. The mixture should be thick and soft, easy to shape.
If it feels too loose, add 1 teaspoon of flour at a time until it holds together.


Step 2: Shape and Coat

Spread half of the breadcrumbs on a flat plate.
Place the potato mixture on top and gently shape it into a thick round pancake (about 2–3 cm thick).

If using mozzarella, flatten half the potato mixture, sprinkle mozzarella in the center, and cover with the remaining potato mixture before shaping.

Sprinkle the remaining breadcrumbs over the top and lightly press so the pancake is evenly coated on both sides.


Step 3: Heat the Pan

Place a non-stick pan on medium heat.
Add the olive oil or butter and allow it to warm gently.


Step 4: Cook the Pancake

Carefully place the coated potato pancake into the pan.
Cook for 5–7 minutes on the first side, until the bottom becomes golden and crisp.

To turn it over safely, transfer the pancake onto a flat plate.
Place the pan over the plate and turn both together so the pancake returns to the pan with the other side facing down.

Cook the second side for another 5 minutes, until it is golden and crisp.


Step 5: Serve

Transfer the pancake to a serving plate or board.
Cut into wedges using a knife or pizza cutter.
Serve warm on its own or with yogurt, sour cream, or a fresh salad.


Helpful Tips

  • For extra crisp texture, use fine breadcrumbs or panko.

  • For more flavor, add a pinch of garlic powder or paprika to the potato mixture.

  • Best enjoyed hot while the outside is crunchy and the inside is soft.

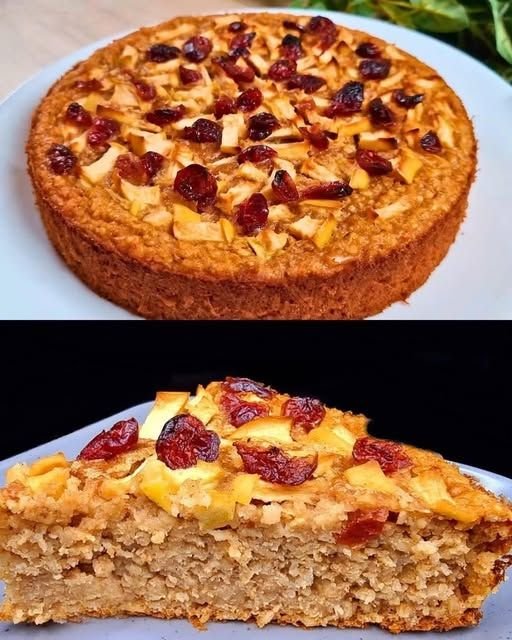
Oat, Apple & Cranberry Cake (Flour-Free)

Oat, Apple & Cranberry Cake (Flour-Free)

Prep Time: 15 minutes
Resting Time: 10 minutes
Bake Time: 35–40 minutes
Servings: 8 slices

Soft, lightly sweet, and naturally hearty, this oat-based cake is made without flour and filled with apples and cranberries for a fresh, fruity bite.


🧾 Ingredients

  • 200 g (2¼ cups) rolled oats (certified gluten-free if needed)

  • A small pinch of salt

  • 400 ml (1⅔ cups) hot milk (dairy or plant-based)

  • 2 eggs

  • 40 g (¼ cup) erythritol or preferred sweetener

  • 1 teaspoon ground cinnamon

  • 1¾ teaspoons baking powder

  • 1 small apple, finely chopped

  • Handful of dried cranberries

  • Butter or oil for greasing the pan


👩‍🍳 Step-by-Step Instructions

🥣 Step 1: Soften the Oats

  1. Place rolled oats and salt into a large bowl.

  2. Pour hot milk over the oats and stir.

  3. Cover and let sit for 10 minutes so the oats absorb the milk and soften.


🥄 Step 2: Prepare the Batter

  1. In another bowl, whisk eggs with sweetener and cinnamon.

  2. Add this egg mixture to the soaked oats.

  3. Add baking powder and stir until smooth and well combined.


🍏 Step 3: Add the Fruit

  1. Fold in:

    • About ⅔ of the chopped apple

    • Half of the cranberries

  2. Mix gently so the fruit spreads evenly.


🧁 Step 4: Assemble

  1. Preheat oven to 350°F (180°C).

  2. Grease or line a 7–8 inch (18–20 cm) round pan.

  3. Pour batter into the pan and level the top.

  4. Scatter remaining apple pieces and cranberries over the surface.


🔥 Step 5: Bake

  1. Bake for 35–40 minutes.

  2. The cake is ready when:

    • The top feels firm

    • A toothpick inserted comes out clean


❄ Step 6: Cool & Serve

  1. Let cake cool in the pan for 15 minutes.

  2. Remove, slice, and serve warm or at room temperature.


🌟 Helpful Tips

✔ Use sweet apples for best flavor
✔ Add walnuts or almonds for crunch
✔ Serve with yogurt for a breakfast-style cake
✔ Store covered in the fridge up to 3 days

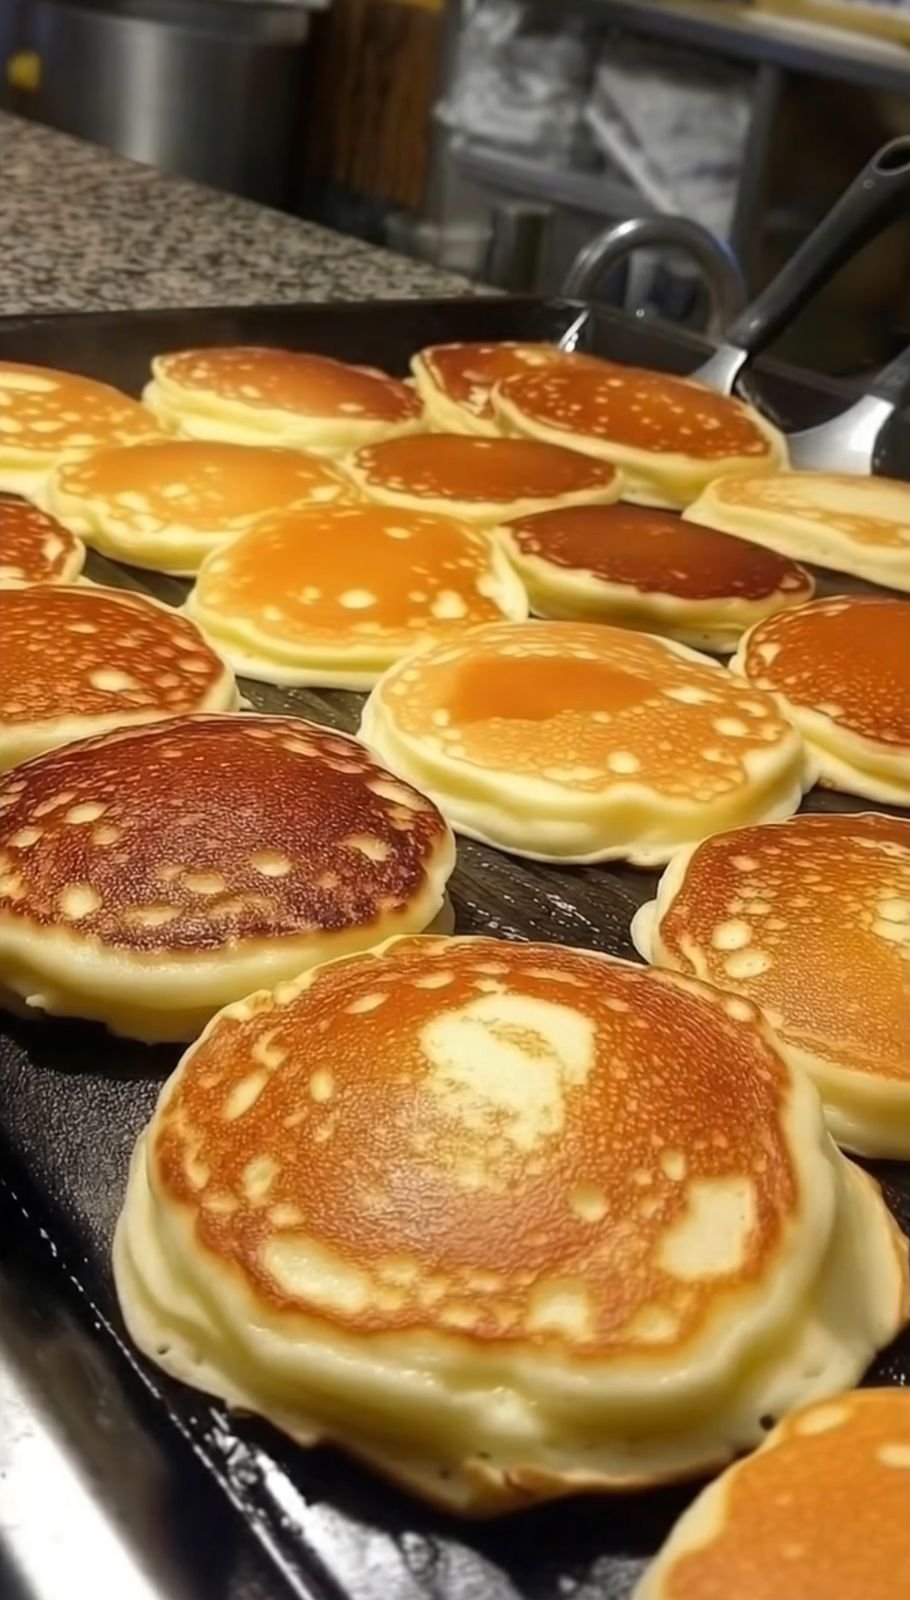
Ultimate Low-Carb Cream Cheese Pancakes

Ultimate Low-Carb Cream Cheese Pancakes

Fluffy, buttery, and made with zero grains

These pancakes are soft, lightly sweet, and perfect for anyone following a low-carb or gluten-free lifestyle. They cook gently, stay tender inside, and taste amazing with both sweet and savory toppings.


🧾 Ingredients

  • 4 oz (115 g) cream cheese, softened to room temperature

  • 4 large eggs

  • ½ cup almond flour (super-fine gives the best texture)

  • 1 teaspoon baking powder

  • 1 teaspoon vanilla extract

  • 1 tablespoon erythritol or stevia (optional, for sweetness)

  • ½ teaspoon cinnamon (optional, for aroma and warmth)

  • Butter or light oil for the pan


🥣 Step-by-Step Instructions

1️⃣ Prepare the Batter

Add the cream cheese, eggs, almond flour, baking powder, vanilla, sweetener, and cinnamon into a blender or food processor.
Blend for about 30 seconds until the mixture becomes smooth and creamy with no visible lumps.


2️⃣ Rest the Batter

Let the batter rest for 2–3 minutes.
This helps the almond flour absorb moisture and makes the pancakes stronger and easier to handle while cooking.


3️⃣ Warm the Pan

Place a non-stick pan or griddle over medium-low heat.
Add a small amount of butter or oil and spread it evenly across the surface.

💡 Low-carb batters cook faster than regular pancake batter, so gentle heat gives the best results.


4️⃣ Pour the Pancakes

Scoop 2–3 tablespoons of batter per pancake onto the pan.
Keep pancakes small for easy turning and better shape.


5️⃣ Cook the First Side

Cook for about 2 minutes until:

  • The edges look firm

  • Small bubbles appear on the surface


6️⃣ Flip Carefully

Use a thin spatula to gently turn each pancake over.
Cook for 1 more minute until lightly golden and cooked through.


7️⃣ Serve Warm

Serve immediately with:

  • Sugar-free syrup

  • Fresh berries

  • A spoon of whipped cream

  • Or a little melted butter


⭐ Pro Tips

✔ Room Temperature Cream Cheese
Cold cream cheese can cause small lumps.
If needed, warm it in the microwave for 15 seconds before blending.

✔ Steam Trick for Fluffiness
Cover the pan with a lid for the first 60 seconds of cooking.
The trapped steam helps the pancakes rise and stay soft.

✔ Extra Flavor Ideas

  • Add lemon zest for freshness

  • Add a pinch of nutmeg for bakery-style aroma

  • Add cocoa powder for chocolate pancakes


🥞 Texture & Taste

These pancakes are:
✔ Soft inside
✔ Light and fluffy
✔ Mildly sweet
✔ Great for low-carb or gluten-free diets

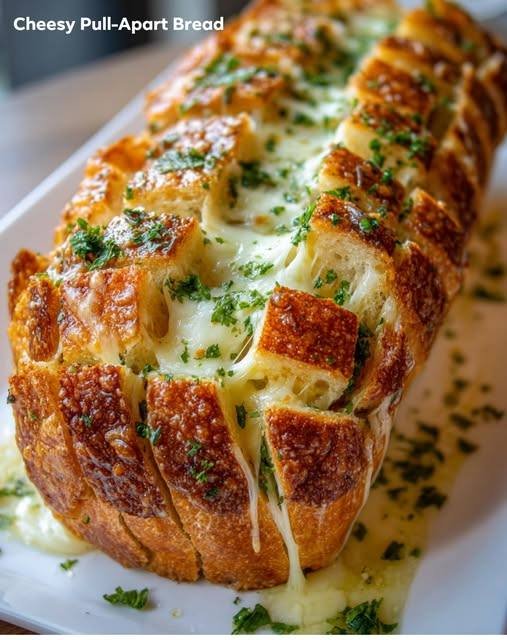
Cheesy Pull-Apart Bread!

🧀🍞 Cheesy Pull-Apart Bread

Soft, buttery, garlicky, cheesy… and dangerously addictive.


📝 Ingredients (Serves 6–8)

  • 1 round loaf of bread (sourdough or Italian works best)

  • 2 cups shredded cheese

    • mozzarella for stretch

    • cheddar for sharpness

    • or a blend

  • ½ cup butter, melted

  • 3–4 cloves garlic, minced

  • 2 tbsp fresh parsley, chopped

  • ½ tsp salt

  • ½ tsp black pepper

  • Optional add-ins:

    • red pepper flakes

    • cooked bacon bits

    • green onions

    • parmesan cheese


🍳 Instructions

1. Preheat oven

Set oven to 350°F (175°C).


2. Slice the bread

Place the bread on a cutting board.

  • Cut 1-inch slices across the loaf, but do NOT cut all the way through.

  • Rotate the loaf and cut 1-inch slices the other direction.
    You should have a grid pattern of pull-apart cubes.


3. Make the garlic butter

In a bowl, mix:

  • melted butter

  • minced garlic

  • parsley

  • salt & pepper


4. Fill the bread

  • Carefully pull apart each cut and drizzle the garlic butter inside the cracks.

  • Stuff shredded cheese into each gap—don’t be shy!

Add optional toppings inside the crevices for extra flavor.


5. Wrap & bake

  • Wrap the whole loaf in foil.

  • Bake for 15 minutes until cheese is melted.


6. Unwrap & crisp

  • Open the foil to expose the top.

  • Bake 10 more minutes until the top is golden and slightly crispy.


7. Serve

Place on a board and let everyone pull pieces apart.
Best warm and fresh!


💡 Tips & Variations

✔ Use different bread

Try baguette, ciabatta, French bread, or even Hawaiian rolls.

✔ Make it extra garlicky

Add roasted garlic or garlic powder to the butter.

✔ Add protein

Sprinkle cooked bacon, ham, or pepperoni between the slices.

✔ Make it spicy

Add jalapeños, chili flakes, or pepper jack cheese.

✔ Herby version

Mix in basil, oregano, or thyme.


❓ Q&A Section

Q1: Can I prepare it ahead of time?

Yes! Assemble the whole loaf, wrap tightly in foil, and refrigerate up to 24 hours.
Bake when ready.


Q2: Can I freeze it?

Yes—freeze after assembling. Bake from frozen at 350°F for 25–30 minutes.


Q3: Can I use pre-sliced cheese?

Shredded melts better, but sliced cheese torn into pieces works too.


Q4: What cheese melts best?

Mozzarella, Monterey Jack, and Gouda are excellent.
Cheddar adds flavor but doesn’t stretch as much.


Q5: How do I keep it from drying out?

The foil step is important—keeps it soft so the cheese melts before crisping the top.

Egg Salad Sandwich Delicious

Classic Egg Salad Sandwich Recipe
Egg salad sandwiches are a beloved classic in many households, offering a simple yet satisfying meal. This timeless dish can be served at picnics, parties, or as a quick lunch. While it may seem basic, the combination of hard-boiled eggs, creamy mayonnaise, and seasonings creates a rich, flavorful filling that is both comforting and delicious. In this detailed recipe, we’ll walk through everything you need to know to make the perfect egg salad sandwich, including variations, tips, and serving suggestions.

Ingredients
To make a traditional egg salad, you’ll need the following ingredients:

6 large eggs: The heart of the egg salad. The freshness of the eggs plays a crucial role in the final taste and texture.
1/2 cup mayonnaise: This is the binding agent in the salad. You can use full-fat, light, or even vegan mayonnaise depending on your preference.
1 tablespoon Dijon mustard: Adds a mild tang and extra depth of flavor to the egg salad.
1 tablespoon lemon juice: Freshly squeezed lemon juice brightens up the dish with a touch of acidity.
1/4 teaspoon salt: Enhances the flavor and balances out the creaminess of the mayonnaise.
1/4 teaspoon black pepper: Freshly ground black pepper adds a hint of spice.
1 tablespoon fresh dill (optional): Dill complements the eggs with its herbal, slightly tangy flavor.
1/4 cup finely chopped red onion: For some crunch and sharpness.
1/4 cup finely chopped celery: Adds a crunchy texture to the creamy egg salad.
2 slices of whole wheat or white bread (or any bread of your choice): The foundation for your sandwich.
Lettuce leaves (optional): For added texture and a fresh contrast to the creamy salad.
Tomato slices (optional): If you like, you can include tomato for a juicy and refreshing element.
Instructions
Step 1: Boiling the Eggs
The first step in making egg salad is boiling the eggs. Follow these simple steps:

Place the eggs in a pot: Put the eggs in a single layer in a large saucepan. Fill the pan with cold water until the eggs are submerged by about an inch.

Bring to a boil: Over medium-high heat, bring the water to a boil. Once it reaches a rapid boil, cover the pot with a lid and remove it from the heat.

Let the eggs sit: Allow the eggs to sit in the hot water for about 10-12 minutes for hard-boiled eggs. The exact time can vary depending on your stove and the size of your eggs, but 10 minutes should be sufficient for firm yolks.

Cool the eggs: After the eggs have cooked, carefully transfer them to a bowl of ice water or run cold water over them to cool. This stops the cooking process and makes peeling easier.

Peel the eggs: Once cooled, peel the eggs under running cold water, which helps remove the shells without damaging the whites.

Step 2: Preparing the Egg Salad Filling
Chop the eggs: After peeling the eggs, chop them into small pieces. The size of the pieces is entirely up to you—some people like a chunkier texture, while others prefer a smoother filling. Chop them as finely or coarsely as you like.

Mix the ingredients: In a large mixing bowl, combine the chopped eggs, mayonnaise, Dijon mustard, lemon juice, salt, and pepper. Stir until well combined. Adjust the seasonings to taste, adding more salt, pepper, or mustard if desired.

Add the vegetables: To make the egg salad more flavorful and texturally interesting, add finely chopped red onion and celery. These ingredients contribute crunch and a burst of freshness that perfectly balance the creamy filling.

Herbs and seasonings: If you’re using fresh dill, add it to the mixture and stir it in. Dill pairs wonderfully with eggs and adds a bright, herby flavor. You can also experiment with other fresh herbs such as chives or parsley, depending on what you have on hand.

Taste and adjust: Before assembling the sandwich, taste the egg salad and adjust any seasonings to your liking. If you want a creamier texture, add more mayonnaise; for a tangier taste, increase the Dijon mustard or lemon juice.

Step 3: Assembling the Sandwich
Prepare the bread: Start by choosing your bread. Traditional egg salad sandwiches are made with white or whole wheat bread, but you can also use other types like sourdough, rye, or even a croissant for a more decadent option. You can lightly toast the bread if you prefer a crispy texture, but it’s not necessary.

Spread the egg salad: Place a generous amount of the prepared egg salad onto one slice of bread. Use a spatula or spoon to spread it evenly, covering the surface of the bread.

Add extras: If you like, you can layer the sandwich with fresh lettuce leaves or tomato slices for extra flavor and freshness. These ingredients not only enhance the taste but also add a nice crunch and juiciness.

Top and serve: Place the second slice of bread on top, pressing gently to hold the sandwich together. Slice it diagonally or straight, depending on your preference.

Serve immediately: Enjoy your egg salad sandwich right away, or wrap it in parchment paper or plastic wrap for later. If you’re preparing the sandwich in advance, keep the filling separate from the bread to avoid sogginess.

Variations and Tips
Egg salad sandwiches are incredibly versatile, so don’t hesitate to experiment with different ingredients and flavors. Here are some variations to consider:

1. Avocado Egg Salad Sandwich
For a richer, creamier texture, add mashed avocado to the egg salad. This adds healthy fats and a smooth consistency that complements the eggs perfectly.

2. Spicy Egg Salad Sandwich
If you like a little heat, incorporate a teaspoon of sriracha or hot sauce into the egg salad mixture. You can also add finely chopped jalapeños or a sprinkle of cayenne pepper for an extra kick.

3. Bacon and Egg Salad Sandwich
Crispy bacon crumbles add a savory, smoky flavor that pairs wonderfully with the creamy egg salad. Simply cook the bacon, crumble it, and mix it into the salad before assembling the sandwich.

4. Pickled Egg Salad Sandwich
For a tangy twist, add some pickles or relish to the egg salad. Pickled onions, dill pickles, or sweet relish all work great in providing a zesty contrast to the eggs and mayonnaise.

5. Vegan Egg Salad
For a plant-based version, replace the eggs with mashed chickpeas. Combine with vegan mayonnaise, mustard, and seasonings to create a chickpea salad that mimics the texture and taste of traditional egg salad.

6. Herbed Egg Salad Sandwich
If you love fresh herbs, experiment with different combinations such as basil, thyme, or tarragon. Herbs can completely change the flavor profile of the egg salad, making it feel fresh and seasonal.

How to Serve
Egg salad sandwiches are best served fresh, but they can also be enjoyed the next day if stored properly. For the most enjoyable experience, here are a few serving suggestions:

On a platter: Serve the sandwiches on a platter with some additional garnishes, like extra fresh herbs, sliced vegetables, or even some pickled onions for a tangy touch.

As a tea sandwich: If you’re hosting a brunch or afternoon tea, cut the sandwiches into small, bite-sized pieces. This allows guests to enjoy the egg salad in a more delicate, elegant presentation.

With sides: Pair the egg salad sandwich with classic side dishes like potato chips, a light salad, or fruit salad for a complete meal.

Storing Leftovers
If you have leftover egg salad, store it in an airtight container in the refrigerator. It will keep well for up to 3-4 days. However, be sure to avoid storing the sandwich itself once assembled, as the bread may become soggy. Instead, store the egg salad and bread separately, and assemble the sandwich when you’re ready to eat.

Conclusion
The egg salad sandwich is a simple yet satisfying dish that can be adapted to suit a variety of tastes. Whether you prefer it classic or with creative twists, this recipe offers plenty of room for personalization. By following the steps and tips provided, you’ll be able to create the perfect egg salad sandwich every time. It’s the kind of meal that never goes out of style, providing comfort and nourishment in every bite. Whether you’re making it for yourself, friends, or family, you can’t go wrong with this timeless favorite. Enjoy!
Comforting Chicken Soup with Potatoes!

🍲 Comforting Chicken Soup with Potatoes

Servings

6

Total Time

45–55 minutes


🛒 Ingredients

  • 1½ lbs chicken (bone-in thighs or drumsticks; or boneless thighs)

  • 1 tbsp olive oil or butter

  • 1 medium onion, diced

  • 3 carrots, sliced

  • 2 celery stalks, sliced

  • 3 cloves garlic, minced

  • 3 medium potatoes (Yukon Gold or russet), diced

  • 6–7 cups chicken broth (low sodium)

  • 1 bay leaf

  • 1 tsp dried thyme

  • ½ tsp dried rosemary (optional)

  • Salt & black pepper, to taste

  • 2 tbsp fresh parsley, chopped

  • Optional: squeeze of lemon juice


👩‍🍳 Instructions

  1. Sauté the aromatics
    Heat oil/butter in a large pot over medium heat.
    Add onion, carrots, and celery. Cook 5–6 minutes until softened.

  2. Add garlic & herbs
    Stir in garlic, thyme, rosemary, and bay leaf. Cook 30 seconds until fragrant.

  3. Add chicken & broth
    Place chicken in the pot. Pour in broth until just covered.

  4. Simmer
    Bring to a gentle boil, then reduce heat.
    Simmer 20–25 minutes (until chicken is cooked through).

  5. Shred chicken
    Remove chicken, shred, discard bones/skin if needed.
    Return meat to the pot.

  6. Add potatoes
    Stir in diced potatoes. Simmer 12–15 minutes until tender.

  7. Finish
    Season with salt and pepper. Remove bay leaf.
    Add parsley and optional lemon juice.

Serve hot with crusty bread.


❓ Q & A

Q: What potatoes work best?

A: Yukon Gold for creamy texture, russet for heartier soup, red potatoes if you want them to hold shape.


Q: Can I use rotisserie chicken?

A: Yes!

  • Add shredded chicken during the last 10 minutes

  • Simmer potatoes separately or add them earlier


Q: Can I make this in a slow cooker?

A: Absolutely.

  • Add everything except parsley & lemon

  • Cook 6–7 hours on LOW or 3–4 hours on HIGH

  • Shred chicken, then add potatoes for last hour


Q: How do I make it extra comforting?

A:

  • Add a splash of cream or milk

  • Stir in a knob of butter at the end

  • Add egg noodles or rice


Q: Can I freeze this soup?

A: Yes, but potatoes soften after freezing.

  • Freeze up to 3 months

  • For best texture, freeze before adding potatoes


Q: How do I thicken it slightly?

A:

  • Mash a few potatoes in the pot

  • Or add 1 tsp cornstarch mixed with water


Q: What can I serve with it?

A:

  • Crusty bread or biscuits

  • Grilled cheese

  • Simple green salad.