Creamy Garlic Butter Chicken & Linguine in Alfredo Sauce 🍝🧄

Full recipe >>>Creamy Garlic Butter Chicken & Linguine in Alfredo Sauce 🍝🧄

Ingredients

For the Chicken

2 boneless, skinless chicken breasts (sliced)

Salt & black pepper – to taste

1 tsp paprika

1 tsp Italian seasoning

2 tbsp butter

1 tbsp olive oil

For the Pasta

250 g linguine (or fettuccine)

Water + salt (for boiling)

For the Alfredo Sauce

3 tbsp butter

4–5 garlic cloves (minced)

1 cup heavy cream

1 cup milk

¾ cup grated Parmesan cheese

½ tsp black pepper

Salt – to taste

½ tsp chili flakes (optional)

1 tsp Italian seasoning

Garnish (optional)

Fresh parsley

Extra Parmesan cheese

Instructions

1. Cook the Pasta

Boil linguine in salted water according to package instructions.

Drain and set aside (reserve ¼ cup pasta water).

2. Cook the Chicken

Season chicken with salt, pepper, paprika, and Italian seasoning.

Heat butter + olive oil in a pan over medium heat.

Cook chicken 4–5 minutes per side until golden and fully cooked.

Remove chicken from pan and set aside.

3. Make the Garlic Alfredo Sauce

In the same pan, add butter.

Add minced garlic and sauté for 30 seconds (don’t burn).

Pour in cream and milk, stir well.

Add salt, black pepper, chili flakes, and Italian seasoning.

Simmer on low heat for 3–4 minutes.

Add Parmesan cheese slowly, stirring until smooth and creamy.

4. Combine Everything

Add cooked pasta to the sauce.

Slice chicken and add it back to the pan.

Toss everything together.

(Add a little pasta water if sauce is too thick.)

5. Serve

Garnish with parsley and extra Parmesan.

Serve hot and creamy

🍋 Lemon Ginger Water

Full recipe>>> 🍋 Lemon Ginger Water

Ingredients:

1 fresh lemon

1-inch piece fresh ginger

1–2 cups water (hot or warm)

Optional: a few mint leaves

Method:

Wash and thinly slice the ginger (no need to peel if clean).

Boil the water.

Add ginger slices and simmer for 5–10 minutes.

Turn off heat and let it cool slightly.

Squeeze in ½ to 1 lemon (don’t add lemon to boiling water).

Strain if you like, or drink as is.

How to drink:

Best first thing in the morning on an empty stomach

Can also drink warm or cold during the day

Benefits:

Boosts digestion

Helps with bloating

Supports immunity

Refreshing and detox-friendly

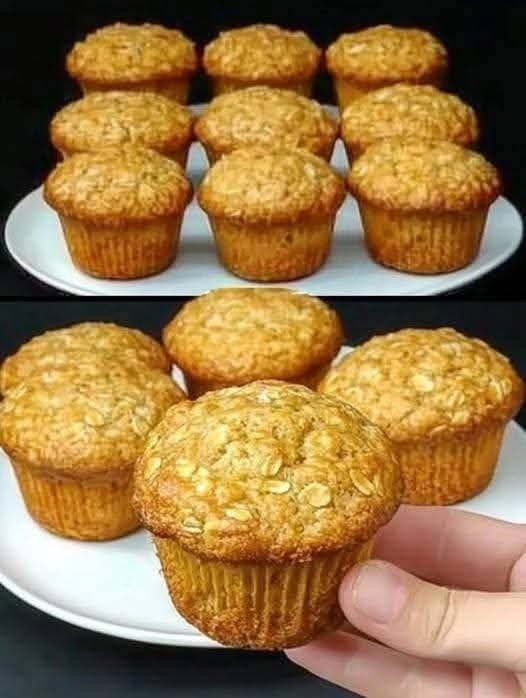
Soft Homemade Oatmeal Muffins Recipe

Soft Homemade Oatmeal Muffins Recipe

These oatmeal muffins are warm, comforting, and perfect for breakfast, tea time, or a light snack. They have a golden top, a gentle oat texture, and a naturally satisfying taste. Made with simple pantry ingredients, these muffins are easy to prepare and fill your kitchen with a lovely aroma while baking. They are enjoyable on their own or with a little butter, honey, or fruit spread.


Ingredients (Makes 10–12 muffins)

1½ cups rolled oats


1 cup milk (warm, not hot)


1½ cups all-purpose flour


¾ cup sugar (white or light brown)


2 teaspoons baking powder


½ teaspoon baking soda


½ teaspoon salt


1 teaspoon ground cinnamon (optional but nice)


2 large eggs (room temperature)


½ cup cooking oil or melted butter


1 teaspoon vanilla essence


Preparation Steps

Soak the oats:

Place the rolled oats in a bowl and pour the warm milk over them. Stir gently and let them rest for about 15–20 minutes. This step softens the oats and helps create moist muffins.


Prepare the oven and pan:

Preheat your oven to 180°C (350°F). Line a muffin tray with paper liners or lightly grease each cup.


Mix dry ingredients:

In a large bowl, combine the flour, sugar, baking powder, baking soda, salt, and cinnamon. Stir well so everything is evenly mixed.


Mix wet ingredients:

In another bowl, whisk the eggs, oil (or melted butter), and vanilla essence until smooth. Add the soaked oats along with any remaining milk and mix gently.


Combine everything:

Pour the wet mixture into the bowl of dry ingredients. Fold gently using a spatula or spoon. Mix just until combined. Do not overmix, as this keeps the muffins soft.


Fill the muffin cups:

Spoon the batter evenly into the prepared muffin cups, filling each about ¾ full.


Bake:

Place the tray in the preheated oven and bake for 18–22 minutes, or until the tops are golden and a toothpick inserted in the center comes out clean.


Cool and enjoy:

Remove the muffins from the oven and let them cool in the tray for 5 minutes, then transfer to a wire rack.


Serving Tips

These oatmeal muffins taste wonderful warm or at room temperature. You can enjoy them plain or pair them with fresh fruit, yogurt, or a warm drink. They also store well in an airtight container for a few days.


If you’d like, I can also share variations such as banana oat muffins, apple oat muffins, or a honey-sweetened version.

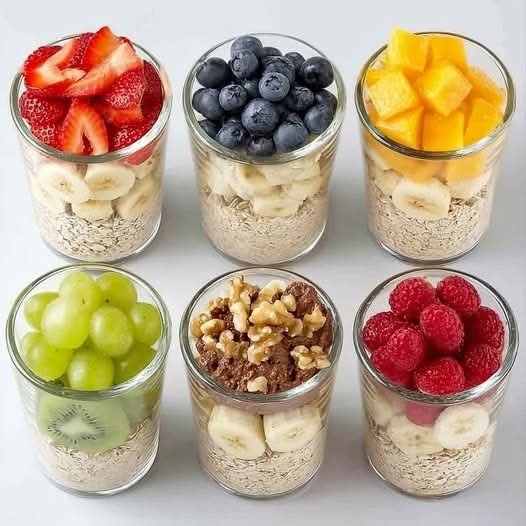
Mixed Fruit Oat Breakfast Cups

These vibrant, layered breakfast cups are made with oats, bananas, assorted fruits, and optional toppings like nuts or cocoa. They are healthy, quick, and perfect for meal-prep.

Ingredients (for 6 Cups)

Base Layer (all cups):

1½ cups rolled oats (¼ cup per cup)


3–4 bananas, sliced (used in all cups)


Fruit Toppings:

Strawberry Cup – ½ cup sliced strawberries


Blueberry Cup – ½ cup fresh blueberries


Mango Cup – ½ cup diced mango


Grape & Kiwi Cup – 6–8 green grapes + ½ kiwi sliced


Walnut & Cocoa Cup – 1 tbsp cocoa powder + 2 tbsp chopped walnuts


Raspberry Cup – ½ cup fresh raspberries

Optional Add-ins:

Honey or maple syrup


Greek yogurt


Chia seeds


Almond milk or any milk


Cinnamon or vanilla


🥣 Instructions

Prepare the Base:

Fill each glass with ¼ cup rolled oats. You may keep them dry (as shown) or lightly moisten them with 1–2 tablespoons milk or yogurt for softer texture.


Add Banana Layer:

Add an even layer of sliced bananas over the oats. Bananas add natural sweetness and creaminess.


Add Fruit Toppings:


Cup 1: Add sliced strawberries.


Cup 2: Add blueberries.


Cup 3: Add diced mango.


Cup 4: Add grapes and kiwi slices.


Cup 5: Spoon in cocoa powder over bananas, then add chopped walnuts.


Cup 6: Add fresh raspberries.


Optional:

Drizzle honey, add yogurt, or pour a bit of milk if you prefer a soaked-oat texture similar to overnight oats.


Serve Immediately or refrigerate for 1–2 hours for a chilled parfait.

Q&A Section

Q1: Are these breakfast cups healthy?

Yes! They contain whole grains, fiber-rich fruits, potassium-rich bananas, and healthy fats from nuts.


Q2: Can I prepare them in advance?

Yes—prepare up to 24 hours early, but sprinkle lemon juice on bananas to prevent browning.


Q3: Can I replace bananas?

Absolutely. Substitute pears, apples, yogurt, or berries.

Q4: Are these suitable for weight loss?

Yes. They are low-fat, high-fiber, and very filling, making them excellent for weight control.


Q5: Can I turn these into overnight oats?

Yes. Add ½ cup milk or yogurt to each cup, mix lightly, cover, and refrigerate overnight.

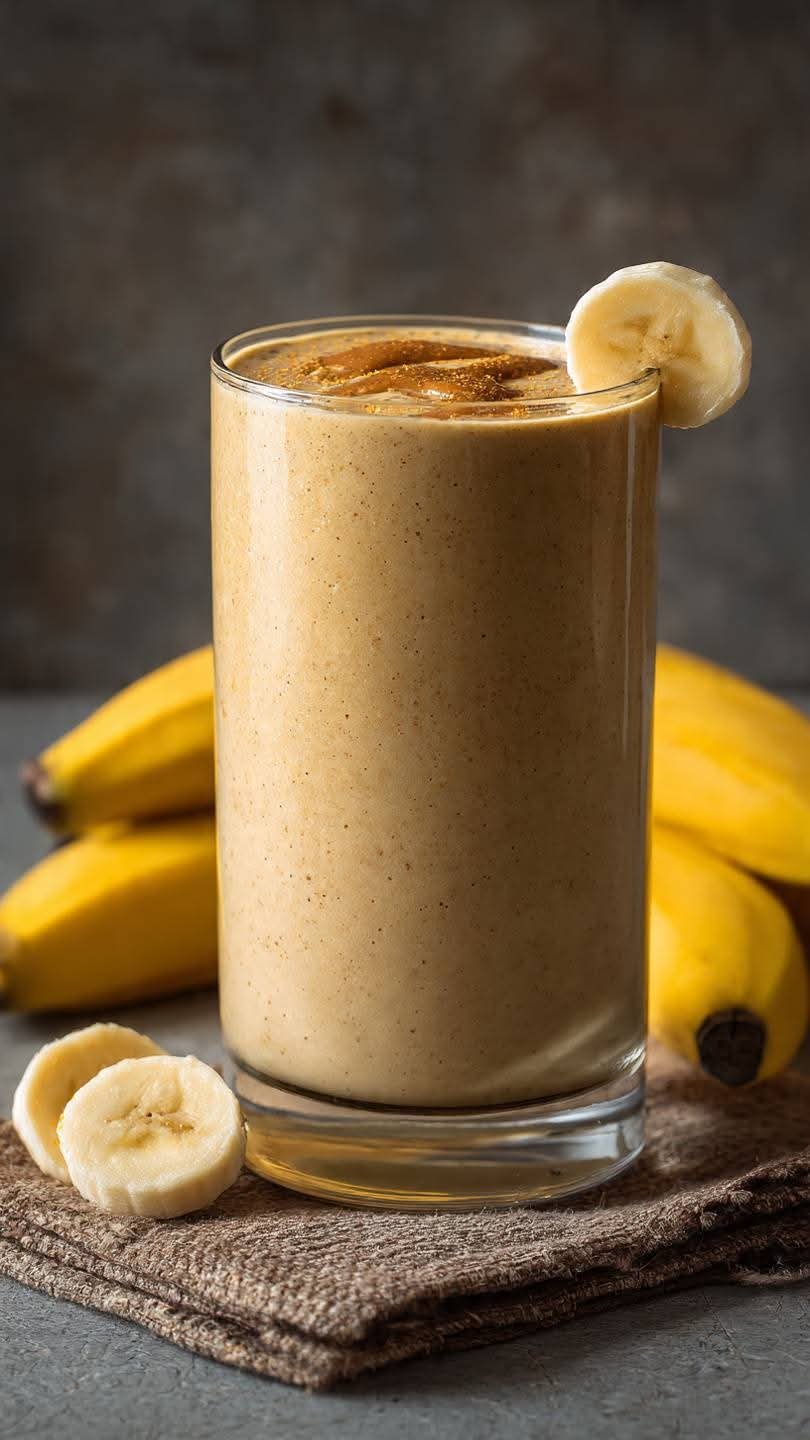
Creamy Peanut Butter Banana Smoothie

Creamy Peanut Butter Banana Smoothie

Prep time: 5 minutes | Servings: 1


Ingredients

1 large banana (frozen is best for that thick, creamy texture)


1 cup milk of choice (dairy, almond, oat, or soy)


2 tablespoons creamy peanut butter


1/4 cup Greek yogurt (plain or vanilla for extra thickness and protein)


1/2 teaspoon ground cinnamon (to match the dusting on top)


1 teaspoon honey or maple syrup (optional, for extra sweetness)


A handful of ice (only if using a fresh banana instead of frozen)


Instructions

Prep the Fruit: If you have time, peel and slice your banana and freeze it for at least 2 hours. If you’re in a hurry, a fresh banana works too!


Combine: Add the milk, peanut butter, yogurt, banana, and cinnamon into a high-speed blender.


Blend: Start on low speed and gradually increase to high. Blend for about 45–60 seconds until the mixture is completely smooth and no lumps remain.


Check Consistency: If it’s too thick, add a splash more milk. If it’s too thin, add a couple more ice cubes or a piece of frozen fruit.


Garnish: Pour into a tall glass. Drizzle a small amount of melted peanut butter on top, sprinkle with extra cinnamon, and finish with a fresh banana slice on the rim, just like in the photo.

Oven-Baked Chicken Mushroom Cheese Casserole

Oven-Baked Chicken Mushroom Cheese Casserole

Description


This Oven-Baked Chicken Mushroom Cheese Casserole is a rich and savory dish with deep, comforting flavors. The mushrooms bring an earthy taste that pairs beautifully with tender chicken and melted cheese. Baked to perfection, this crustless casserole has a soft interior and a lightly golden top. It’s perfect for family dinners and pairs well with rice, salad, or steamed vegetables.


Ingredients


2 cups cooked chicken, diced


1½ cups mushrooms, sliced


1 small onion, chopped


1 cup shredded mozzarella cheese


½ cup shredded cheddar cheese


4 large eggs


1 cup milk


2 tablespoons butter or olive oil


1 teaspoon salt


½ teaspoon black pepper


½ teaspoon garlic powder


Directions


Preheat oven to 180°C (350°F). Grease a casserole dish.


Heat butter in a pan and sauté onion until soft.


Add mushrooms and cook until moisture evaporates.


In a bowl, whisk eggs, milk, salt, pepper, and garlic powder.


Add chicken, mushroom mixture, and half of the cheese. Stir well.


Transfer mixture to the baking dish.


Sprinkle remaining cheese evenly on top.


Bake for 35–40 minutes until firm and golden.