Homemade Spiced Carrot Relish (Jar-Friendly Recipe)

Homemade Spiced Carrot Relish (Jar-Friendly Recipe)

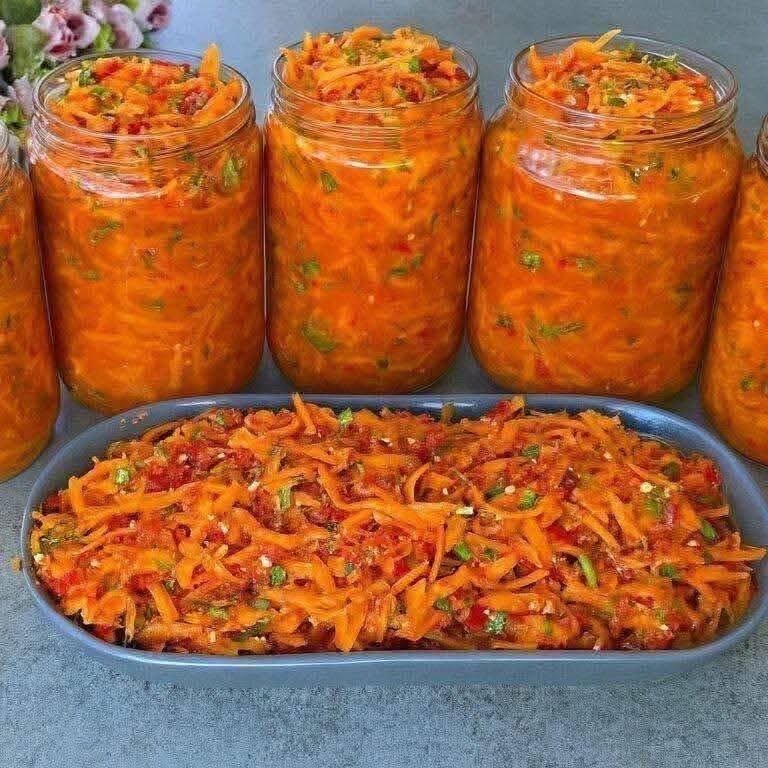
This vibrant carrot relish is a beautiful combination of fresh vegetables, warming spices, and gentle tanginess. It is perfect for spreading on bread, serving alongside meals, or enjoying as a flavorful side. The bright color comes from fresh carrots and mild spices, while herbs add freshness. This recipe is simple, flexible, and suitable for making in larger batches for storing in jars.


Ingredients

1½ kg fresh carrots, washed, peeled, and grated


2 medium onions, finely chopped


3 medium tomatoes, finely chopped or lightly crushed


½ cup vegetable oil


¼ cup vinegar (white or apple-based)


2 tablespoons sugar (adjust to taste)


1 tablespoon salt (or to taste)


1 tablespoon crushed red chili (adjust for mild warmth)


1 teaspoon turmeric powder


1 teaspoon cumin seeds


1 teaspoon mustard seeds


1 teaspoon coriander powder


4–5 cloves garlic, finely minced


1 small bunch fresh coriander leaves, finely chopped


2 green chilies, finely chopped (optional)


Preparation Steps

Begin by preparing all vegetables. Grate the carrots evenly so they cook at the same pace. Chop onions and tomatoes finely to ensure a smooth, well-blended texture in the relish. Keep everything ready before starting to cook.


Place a large, heavy-bottomed pan on medium heat and add the vegetable oil. Once the oil is warm, add cumin seeds and mustard seeds. Allow them to gently release their aroma, which adds depth to the relish. Add the chopped onions and stir until they turn soft and lightly golden.


Next, add garlic and green chilies, stirring gently for about one minute. Add the chopped tomatoes and cook until they soften and blend into the mixture, creating a thick base. Stir occasionally to keep everything evenly combined.


Now add the grated carrots, salt, sugar, turmeric, coriander powder, and crushed red chili. Mix thoroughly so the carrots are well coated with the spices. Reduce the heat to low and let the mixture cook slowly. Stir every few minutes as the carrots soften and release their natural sweetness.


After about 20–25 minutes, the mixture will thicken and become glossy. Add vinegar and mix well. This step balances flavors and helps preserve freshness. Cook for another 5 minutes, then turn off the heat. Stir in freshly chopped coriander leaves for a bright, fresh finish.


Storing and Serving

Allow the carrot relish to cool completely before transferring it into clean, dry glass jars. Seal tightly and store in the refrigerator. It keeps well for several weeks when handled with clean utensils.


This relish pairs wonderfully with flatbreads, rice dishes, sandwiches, wraps, or simple meals. Its balance of sweetness, tang, and spice makes it versatile and comforting.


Helpful Tips

Adjust spice levels according to your preference


Use fresh, firm carrots for best texture


Always use clean spoons when serving to maintain freshness


This homemade carrot relish is colorful, flavorful, and made with care, bringing warmth and joy to everyday meals.
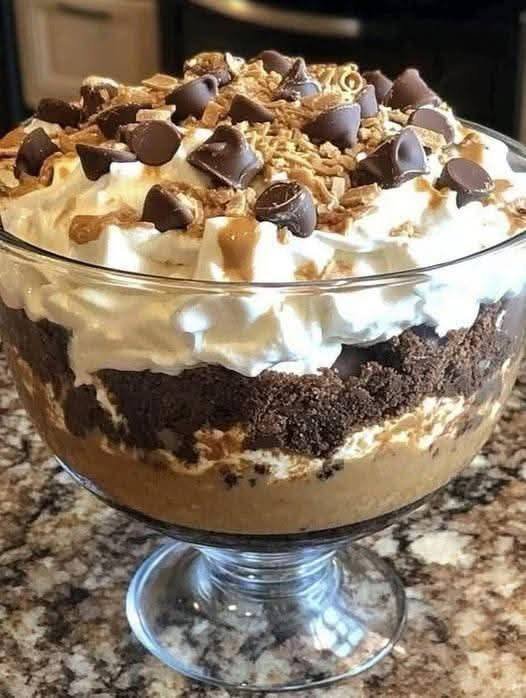
Chocolate Peanut Butter Trifle

🍨 Chocolate Peanut Butter Trifle
📝 Ingredients

For the Cake Layer:

1 chocolate cake (baked and cooled – box mix or homemade)

Crumbled into chunks

For the Peanut Butter Layer:

1 cup creamy peanut butter

1 cup powdered sugar

1 cup cream cheese, softened

1 cup cold milk

1 packet (3.4 oz / 100 g) instant vanilla pudding mix

For the Whipped Layer:

2 cups heavy whipping cream

3 tbsp powdered sugar

1 tsp vanilla extract

For Topping:

1 cup chocolate chips

½ cup chopped peanut butter cups (or caramel chocolates)

½ cup crushed cookies or brownie crumbs

🧁 Instructions
Step 1: Make the Peanut Butter Cream

In a large bowl:

Beat peanut butter, cream cheese, and powdered sugar until smooth

Add milk and pudding mix

Beat again until thick and creamy
Set aside.

Step 2: Make the Whipped Cream

Beat heavy cream with powdered sugar and vanilla until stiff peaks form

Chill in refrigerator until ready to use

Step 3: Assemble the Trifle

In a glass bowl or trifle dish:

1️⃣ First Layer:
Spread peanut butter cream at the bottom

2️⃣ Second Layer:
Add crumbled chocolate cake

3️⃣ Third Layer:
Spread whipped cream

👉 Repeat layers until bowl is full
(Finish with whipped cream on top)

Step 4: Decorate

Top with:

Chocolate chips

Chopped peanut butter cups

Cookie crumbs

Step 5: Chill

Refrigerate at least 3–4 hours (overnight is best)
This helps flavors blend beautifully.

🍽 Serving Tips

Serve cold

Use a big spoon to scoop all layers

Keep refrigerated

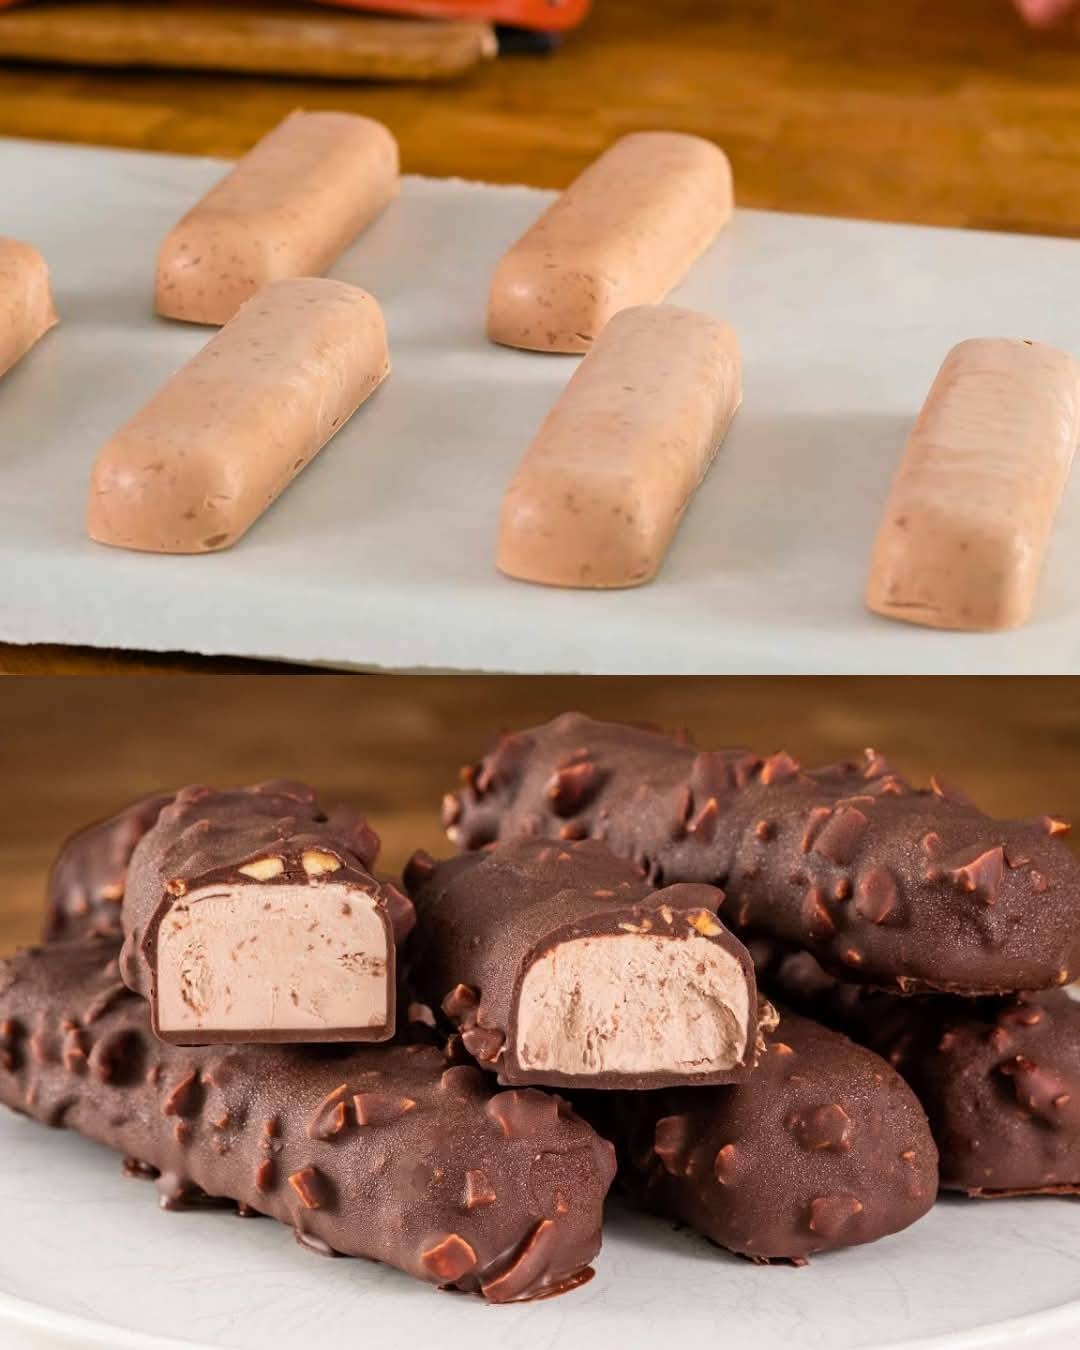
Decadent Frozen Chocolate Peanut Bars

Decadent Frozen Chocolate Peanut Bars

Prep time: 20 mins | Freezing time: 2–3 hours | Yield: 6–8 bars

Ingredients

The Creamy Center

  • 300g cottage cheese: (or curd cheese/cream cheese for a smoother finish).

  • 40g coconut or cocoa butter: (regular butter works as a substitute).

  • 40g honey: Adjust to your preferred sweetness.

  • 1 tsp vanilla extract

  • 20g cocoa powder

The Crunchy Coating

  • 160g dark chocolate: High-quality chocolate melts most evenly.

  • 40g peanuts: Ground or finely chopped.


Instructions

1. Blend the Filling

In a food processor or high-speed blender, combine the cottage cheese, melted butter (coconut, cocoa, or regular), honey, vanilla extract, and cocoa powder. Blend until the mixture is completely smooth and no lumps from the cheese remain.

2. Shape the Bars

Pour the mixture into silicone bar molds. If you do not have molds, you can pour the mixture into a parchment-lined square pan and cut them into bars once partially frozen. Place in the freezer for at least 2 hours or until they are firm enough to handle.

3. Prepare the Coating

While the bars are freezing, melt the dark chocolate in a microwave-safe bowl in 30-second intervals or using a double boiler. Once smooth, stir in the ground peanuts. Pour the chocolate mixture into a tall glass; this makes dipping the bars much easier and ensures an even coat.

4. Dip and Set

Remove the frozen bars from their molds. Working quickly, dip each bar into the chocolate-peanut mixture until fully coated. Because the bars are frozen, the chocolate will set almost instantly.

5. Storage

Place the finished bars back in the freezer for another 15–20 minutes to fully set. Store them in an airtight container in the freezer.


Pro Tips for Success

  • Texture Secret: If using cottage cheese with large curds, pulsing the cheese by itself first before adding the other ingredients ensures the smoothest possible texture.

  • Butter Choice: Using coconut or cocoa butter will give the filling a firmer, “snap” quality when bitten into compared to regular butter.

  • Peanut Prep: Toast your peanuts slightly before grinding them to significantly enhance the nutty aroma of the coating.


Nutritional Highlight (Per Bar)

  • High Protein: Thanks to the cottage cheese base.

  • Antioxidants: Provided by the dark chocolate and cocoa powder.

  • Healthy Fats: From the peanuts and coconut butter.

Quick Strawberry Jam-Filled Muffins

Quick Strawberry Jam-Filled Muffins

Prep Time: 15 minutes
Bake Time: 20–25 minutes
Yield: 12 muffins

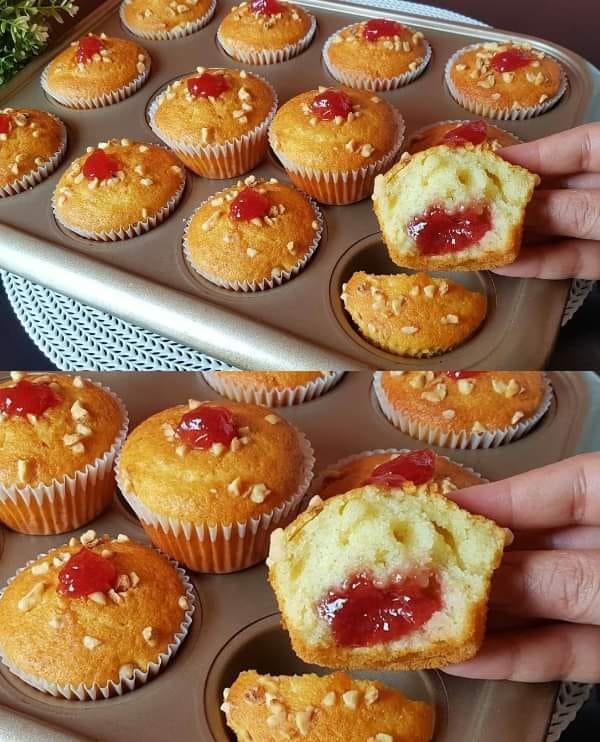
These muffins are soft and moist with a fruity jam center and a lightly crunchy almond topping. They are ideal for breakfast, snacks, or dessert.


📝 Ingredients

  • 2 large eggs

  • 100 g sugar

  • 8 g vanilla sugar (or 1 teaspoon vanilla extract)

  • Pinch of salt

  • 125 g vanilla yogurt

  • 50 ml milk

  • 100 ml vegetable or sunflower oil

  • 200 g all-purpose flour

  • 8 g baking powder

  • Strawberry jam (for filling and topping)

  • Chopped almonds (for topping)


👩‍🍳 Instructions

Step 1: Prepare the Oven and Pan

Preheat oven to 350°F (175°C).
Line a muffin tin with paper liners or lightly grease each cup.


Step 2: Mix the Eggs and Sugar

In a large bowl:

  • Add eggs, sugar, vanilla sugar, and salt.

  • Whisk until the mixture becomes pale and slightly thick.


Step 3: Add the Liquid Ingredients

Stir in:

  • Vanilla yogurt

  • Milk

  • Oil

Whisk until the mixture is smooth and evenly blended.


Step 4: Add the Dry Ingredients

Sift together:

  • Flour

  • Baking powder

Add them to the wet mixture.
Fold gently with a spatula until just combined.
Do not mix too much, as this can affect the texture.


Step 5: Fill the Muffin Cups

  • Spoon batter into each cup until half full.

  • Add 1 teaspoon strawberry jam in the center of each.

  • Cover with more batter until cups are about ¾ full.


Step 6: Add Toppings

  • Sprinkle chopped almonds on top of each muffin.

  • Add a small dot of jam on the top for appearance.


Step 7: Bake

Bake for 20–25 minutes, or until:

  • The tops are lightly golden

  • A toothpick inserted into the muffin (not the jam) comes out clean


Step 8: Cool

Let muffins cool in the pan for 5 minutes.
Transfer to a wire rack to cool completely or serve slightly warm.


🌟 Tips for Best Results

  • Yogurt: Vanilla or plain yogurt works well.

  • Jam options: Strawberry, raspberry, apricot, or mixed berry can be used.

  • Topping alternative: Use chopped walnuts or omit nuts if preferred.

  • Do not overfill: This prevents overflow during baking.


📦 Storage

  • Store in an airtight container at room temperature for up to 3 days.

  • Refrigerate for up to 5 days.

Quick Stovetop Flatbread (No Oven)

Quick Stovetop Flatbread (No Oven)

Prep Time: 5 minutes
Cook Time: 10 minutes
Total Time: 15 minutes
Yield: 8–10 flatbreads

Soft, flexible flatbreads cooked on a pan. Perfect for wraps, dipping, or serving with meals.


📝 Ingredients

For the Dough

  • 4 cups (480 g) all-purpose flour

  • 1 cup (220 g) plain yogurt

  • ¾ cup (200 ml) lukewarm water

  • 10 g baking powder

  • 1 teaspoon salt

  • 1 tablespoon vegetable oil

For Finishing

  • 3½ tablespoons olive oil (for brushing after cooking)


👩‍🍳 Instructions

Step 1: Mix the Dough

In a large bowl:

  1. Add yogurt, water, vegetable oil, and salt.

  2. Stir in the baking powder.

  3. Gradually add flour while mixing.

  4. When the dough becomes thick, knead gently with your hands until smooth and no longer sticky.


Step 2: Divide and Shape

  • Divide the dough into 8–10 equal pieces.

  • Lightly flour your work surface.

  • Roll each piece into a circle about ¼ inch thick.


Step 3: Cook on the Stovetop

  • Heat a non-stick pan over medium heat (no oil needed).

  • Place one flatbread in the pan.

  • Cook for 1–2 minutes until bubbles appear.

  • Flip and cook the other side for 1–2 minutes until light brown spots form.

  • Repeat with remaining pieces.


Step 4: Brush with Olive Oil

  • As each flatbread comes off the pan, brush lightly with olive oil.

  • Stack them on a plate and cover with a clean cloth to keep warm and soft.


🌟 Tips for Best Results

  • Yogurt: Use plain yogurt for the best texture.

  • Pan heat: Medium heat prevents burning while cooking evenly.

  • Thickness: Thinner dough cooks faster and stays flexible.

  • Flavor ideas: You may add garlic powder or herbs to the dough if desired.


📦 Storage

  • Store leftovers in a sealed bag at room temperature for 1 day, or refrigerate for up to 3 days.

  • Reheat briefly in a dry pan or microwave before serving.

Simple Fluffy Breakfast Rolls

Simple Fluffy Breakfast Rolls

Prep Time: 15 minutes + rising time
Bake Time: 20–25 minutes
Yield: 9–12 rolls

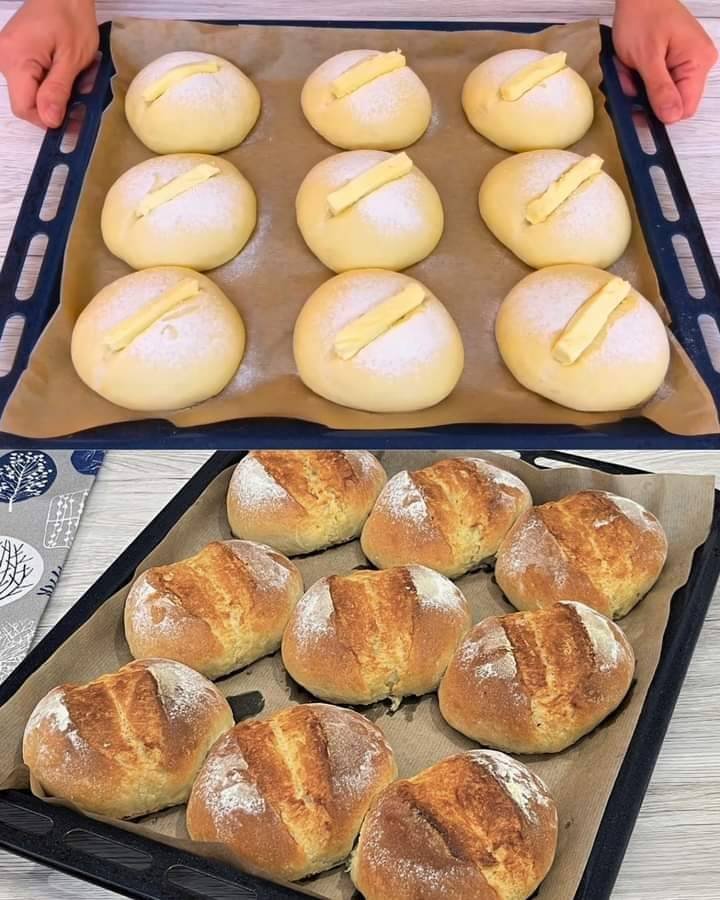
Soft, lightly golden rolls with a tender inside. Perfect for breakfast or serving with meals.


📝 Ingredients

  • 1 cup (200 ml) warm water

  • 1 cup (200 ml) warm milk

  • 1 tablespoon sugar

  • 10 g dry yeast (about 2 teaspoons)

  • 1 teaspoon salt

  • 30 g butter (about 2 tablespoons), softened

  • 600 g all-purpose flour (about 4¾ cups)

  • 40 g butter (about 3 tablespoons), chilled and cut into thin strips (for topping)


👩‍🍳 Instructions

Step 1: Prepare the Yeast

In a large bowl, combine:

  • Warm water

  • Warm milk

  • Sugar

Stir in the yeast and let sit for 5–10 minutes until a light foam appears on the surface.


Step 2: Make the Dough

Add to the yeast mixture:

  • Softened butter

  • Salt

  • About half of the flour

Mix until a rough dough forms.
Gradually add the remaining flour while kneading.

Knead for 8–10 minutes until the dough becomes:

  • Smooth

  • Elastic

  • No longer sticky


Step 3: First Rise

Place the dough in a lightly greased bowl.
Cover with a clean cloth or plastic wrap.
Let rise in a warm place for about 1 hour, or until doubled in size.


Step 4: Shape the Rolls

Gently press down the dough to remove excess air.
Divide into 9–12 equal portions.
Roll each portion into a smooth ball.

Place on a parchment-lined baking tray.
Cover and let rise again for 20–30 minutes.


Step 5: Prepare for Baking

Preheat oven to 375°F (190°C).

Using a sharp knife or scissors, cut a deep line across the top of each roll.
Place a thin strip of chilled butter into each cut.
Lightly dust the tops with flour if desired.


Step 6: Bake

Bake for 20–25 minutes until:

  • The tops are golden

  • The rolls sound hollow when tapped underneath

The butter melts into the center while baking, adding moisture and flavor.


🌟 Tips for Best Results

  • Liquid temperature: Use lukewarm water and milk (about 100–110°F / 38–43°C).

  • Rising: Do not rush the rising time; this helps the rolls stay soft.

  • Serving: Best served warm with butter, honey, or jam.

  • Storage:

    • Store in a sealed container at room temperature for up to 3 days.

    • Reheat briefly before serving to refresh softness.