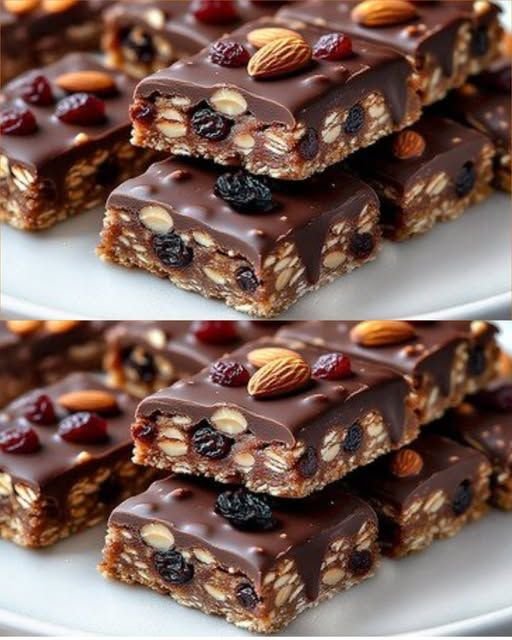
Deliciously Chewy Oat Bars for Healthy Snacking

Deliciously Chewy Oat Bars for Healthy Snacking

If you’re on the lookout for a tasty and nutritious snack, these Oat Bars are a fantastic choice! With their chewy texture and delightful combination of flavors from nuts and fruits, they’re becoming a popular go-to for health-conscious snackers. Plus, they’re super easy to make, giving you a delicious treat without any fuss. Let’s jump right into this simple yet satisfying recipe!

What You’ll Need for Oat Bars

  • 50 g oatmeal (1/2 cup)
  • 50 g raisins (1/3 cup)
  • 1 tbsp cocoa powder
  • 1 tbsp sesame seeds
  • 50 g dried cranberries (1/3 cup)
  • 80 g almonds (1/2 cup)
  • 60 g prunes (1/3 cup)
  • 1 ripe banana
  • 80 g hazelnuts (1/2 cup)
  • 120 g dark chocolate without sugar (1 cup)

How to Make Oat Bars

  1. Preheat your oven to 180°C (350°F).
  2. In a large mixing bowl, combine the oatmeal, raisins, cocoa powder, sesame seeds, dried cranberries, almonds, prunes, and hazelnuts. Mix well.
  3. Mash the ripe banana and add it to the dry ingredients. Stir until everything is nicely combined.
  4. Melt the dark chocolate gently and stir it into the mixture until evenly coated.
  5. Spread the mixture into a baking dish lined with parchment paper, pressing it down firmly.
  6. Bake in the preheated oven for 20 minutes.
  7. Once baked, remove it from the oven and let it cool slightly.
  8. Refrigerate for 1 hour to set before cutting into bars.

Why Everyone Is Loving This Oat Bars Recipe

These Oat Bars are trending right now because they hit all the right notes for a healthy snack! With families looking for convenient, nutritious options, these bars deliver on flavor without any added sugars. They’re perfect for meal prep and can be easily customized, making them a hit in many households.

Serve & Enjoy

You can enjoy these Oat Bars at any time of the day. They make an excellent breakfast on the go or a delightful afternoon snack. Pair them with a cup of your favorite tea or coffee for a cozy moment. You can also add toppings like yogurt or a drizzle of honey for an extra treat!

Expert Tips for Oat Bars

  • Storage: Keep your Oat Bars in an airtight container in the refrigerator to maintain their freshness for up to a week.
  • Flavor Variations: Experiment with different nuts or dried fruits based on your preferences. You might enjoy adding coconut flakes or chopped apricots!
  • Grab-and-Go: Cut your bars into smaller pieces for an easy snack to take with you wherever you go.

Oat Bars: Frequently Asked Questions

1. Can I use other types of nuts?
Yes! Feel free to swap out the nuts in the recipe for whatever you have on hand or prefer.

2. How do I know when they’re done baking?
They should be firm to the touch and lightly golden on the edges when done.

3. Can I freeze these Oat Bars?
Absolutely! These bars freeze well. Just wrap them individually before placing them in a freezer bag.

4. Are these Oat Bars gluten-free?
If you use certified gluten-free oats, then yes, this recipe can be gluten-free.

These Oat Bars are bound to be a favorite in your home. They’re not only easy to make and delicious but also healthy enough to feel good about snacking on. Enjoy making and savoring them!
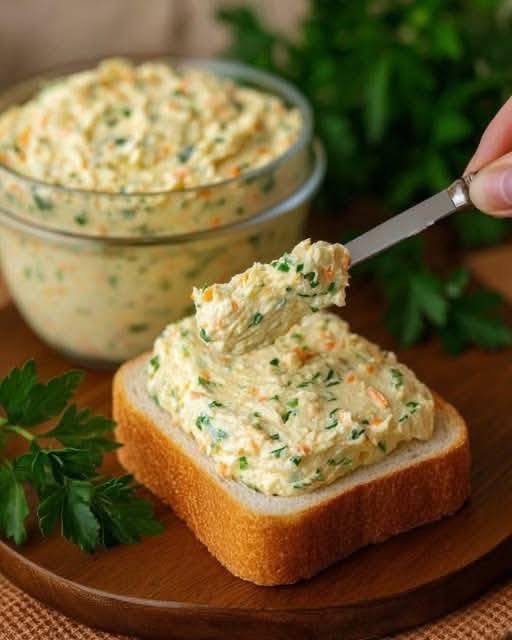
Savory Carrot & Herb Cream Spread

Savory Carrot & Herb Cream Spread

A vibrant, fresh spread perfect for breakfast toast or appetizer platters.

Ingredients

  • The Base: 1 cup cream cheese or thick Greek yogurt (strained).

  • The Veggies: 2 medium carrots, very finely grated.

  • The Herbs: 1/4 cup fresh parsley and 2 tablespoons fresh chives, finely chopped.

  • Seasoning: 1/2 teaspoon garlic powder, salt and black pepper to taste.

  • Optional: A squeeze of lemon juice for brightness.

Instructions

  1. Prep the Carrots: Grate the carrots using the smallest holes on your grater. If they are very juicy, pat them dry with a paper towel to prevent the spread from becoming watery.

  2. Mix: In a medium bowl, combine the cream cheese (or yogurt) with the grated carrots and chopped herbs.

  3. Season: Add the garlic powder, salt, pepper, and optional lemon juice. Stir until the colors are evenly distributed.

  4. Incorporate: Fold the ingredients together until the spread is smooth and colorful.

  5. Serve: Spread a thick layer onto toasted white bread, sourdough, or crackers. Garnish with an extra sprig of parsley.

Breakfast

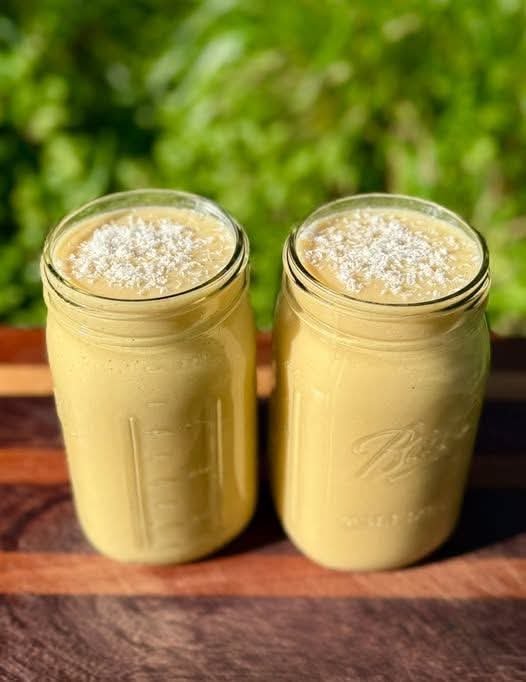
Full recipe>>> Ingredients


4 frozen bananas


1½ cups frozen mango


3 dates, pitted


1–2 tablespoons Irish sea moss gel


¼ cup unsweetened coconut flakes


½ teaspoon turmeric powder


½–1 cup water (adjust for desired thickness)


👩‍🍳 Instructions


Add all ingredients into a high-speed blender.


Start blending on low, gradually increasing speed.


Add water slowly until thick, smooth, and creamy.


Pour into a bowl or glass.


Top with extra coconut flakes, mango chunks, banana slices, or chia seeds if desired.


Enjoy immediately for best flavor and texture.


🍽 Servings


Serves: 2

Serving Size: 1 medium bowl or large glass

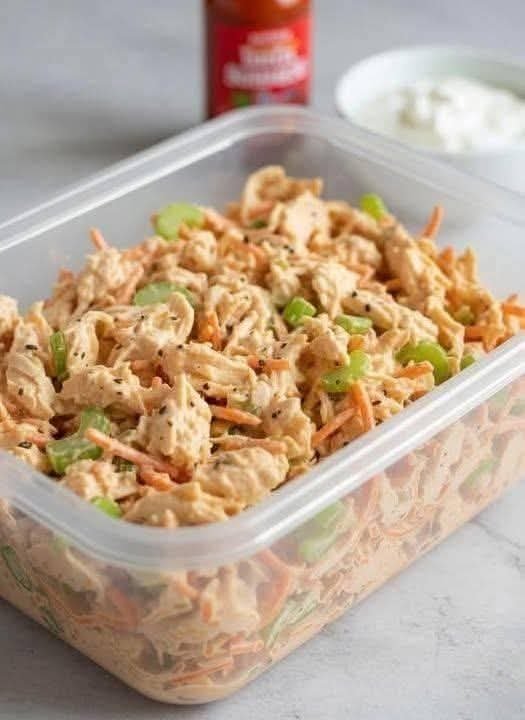
Creamy Buffalo Chicken Salad

Creamy Buffalo Chicken Salad

Prep time: 15 mins | Servings: 4-6


Ingredients

The Base:


Chicken: 3–4 cups cooked chicken, shredded (rotisserie chicken works perfectly here).


Celery: 2 stalks, finely diced for crunch.


Carrots: ½ cup shredded or matchstick carrots.


Onion: ¼ cup red onion or green onions, finely chopped (optional).


The Sauce:


Mayonnaise: ½ cup (provides the creamy texture).


Greek Yogurt or Sour Cream: ¼ cup (adds tang and lightens it up).


Buffalo Hot Sauce: 1/3 cup (adjust based on your spice preference).


Lemon Juice: 1 tsp.


Seasonings: ½ tsp garlic powder, ¼ tsp black pepper, and a pinch of salt.


Instructions

Prep the Chicken: If you aren’t using a rotisserie chicken, poach or bake two large chicken breasts, let them cool, and shred them using two forks.


Whisk the Dressing: In a small bowl, combine the mayonnaise, Greek yogurt, buffalo sauce, lemon juice, and seasonings. Taste it! If you want it spicier, add another splash of hot sauce.


Combine: In a large mixing bowl, toss the shredded chicken, diced celery, and carrots together.


Mix: Pour the dressing over the chicken mixture and fold gently until everything is evenly coated.


Chill: For the best flavor, cover the container and refrigerate for at least 30 minutes before serving. This allows the spices to meld.


Pro Tips for the Best Result

The “Blue Cheese” Factor: If you love traditional wings, fold in ¼ cup of blue cheese crumbles at the very end.


Serving Suggestions: Serve it inside a large flour tortilla with lettuce, or use celery sticks as “scoops” for a low-carb snack.


Storage: Keep it in an airtight container (like the one in your photo) in the fridge for up to 3–4 days.

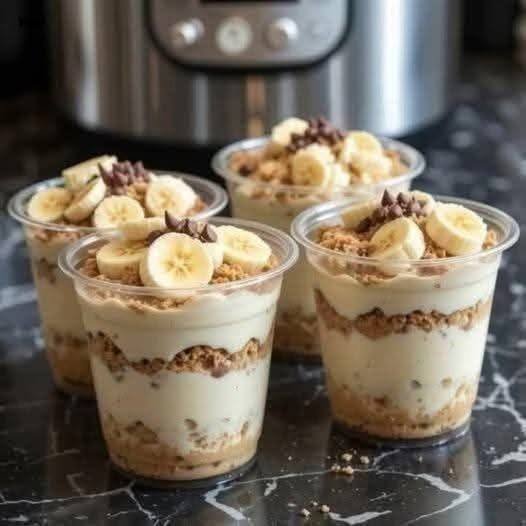
Banana Yogurt Parfait Cups

Banana Yogurt Parfait Cups

Prep Time: 10 minutes
Chill Time: 30 minutes (optional)
Servings: 4 cups
Difficulty: Easy

This layered dessert or breakfast cup is made with yogurt, crushed biscuits or oats, and fresh bananas.


Ingredients

  • 2 cups plain yogurt (or Greek yogurt)

  • 2 ripe bananas, sliced

  • 1 cup crushed biscuits, granola, or oats

  • 2 tablespoons peanut butter or nut butter (optional)

  • 1 teaspoon vanilla extract (optional)

  • Mini chocolate chips or grated chocolate (optional, for topping)


Equipment

  • Mixing bowl

  • Spoon

  • 4 clear cups or glasses

  • Knife and cutting board


Instructions

  1. Prepare yogurt mixture
    In a bowl, mix yogurt with vanilla extract and peanut butter (if using) until smooth.

  2. Prepare bananas
    Peel bananas and slice into thin rounds.

  3. Layer the cups
    In each cup:

    • Add a layer of crushed biscuits or granola

    • Add a layer of yogurt

    • Add banana slices

  4. Repeat layers
    Continue layering until the cup is full, finishing with yogurt and banana on top.

  5. Add topping (optional)
    Sprinkle with mini chocolate chips or grated chocolate.

  6. Chill (optional)
    Refrigerate for 30 minutes before serving for better texture.


Optional Variations

  • Use strawberries or apples instead of bananas

  • Add cinnamon for extra flavor

  • Use honey or dates for sweetness (optional)

  • Add chia seeds or nuts for crunch


Storage

  • Store covered in refrigerator

  • Best consumed within 24 hours

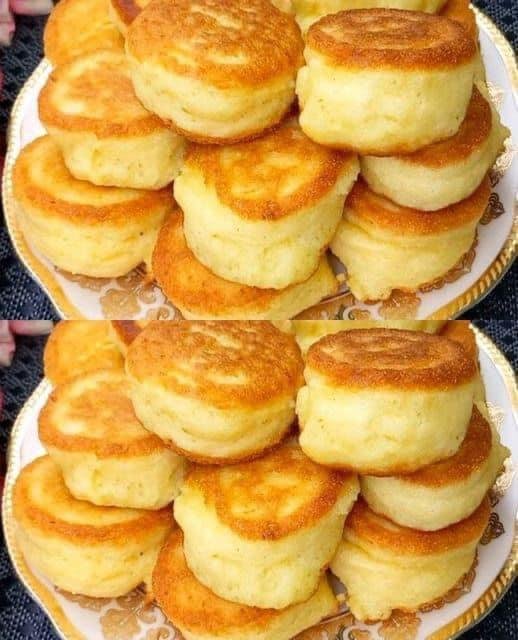
Chickpea Flour Pancakes with Apple Filling

Chickpea Flour Pancakes with Apple Filling

Prep Time: 10 minutes
Cook Time: 10–12 minutes
Servings: 8–10 small pancakes
Difficulty: Easy

These pancakes are made with chickpea flour and yogurt, giving them a soft texture and mild flavor. They are filled with lightly cooked apples and cooked in a pan until golden.


Ingredients

Pancake Batter

  • 2 large eggs

  • 2 tablespoons sugar

  • 1 cup (250 ml) plain yogurt

  • 1¾ cups (250 g) chickpea flour

  • 1 teaspoon baking soda

  • Pinch of salt

Apple Filling

  • 2 medium apples, peeled and diced

  • 1 tablespoon butter

  • 1 tablespoon sugar (optional)

For Cooking

  • Butter or oil, for greasing the pan


Equipment

  • Mixing bowls

  • Whisk or spoon

  • Frying pan or skillet

  • Knife and cutting board

  • Spoon or piping bag

  • Spatula


Instructions

1. Prepare the Batter

  1. In a large bowl, add the eggs and sugar. Whisk until combined.

  2. Add the yogurt and salt. Mix until smooth.

  3. Stir in the baking soda.

  4. Gradually add the chickpea flour while mixing to form a smooth, thick batter.
    Set aside for 5 minutes.


2. Prepare the Apple Filling

  1. Peel and dice the apples into small cubes.

  2. Heat butter in a pan over medium heat.

  3. Add the apples and sugar (if using).

  4. Cook for 5–7 minutes, stirring, until apples become soft and lightly golden.

  5. Remove from heat and let cool slightly.


3. Cook the Pancakes

  1. Lightly grease a skillet and heat over medium-low heat.

  2. Spoon or pipe small rounds of batter onto the pan.

  3. Place a small spoon of apple filling in the center of each pancake.

  4. Cover the filling with a little more batter.

  5. Cook for 2–3 minutes per side, until golden brown and cooked through.


Serving Suggestions

  • Serve warm with honey or maple syrup

  • Sprinkle with powdered sugar

  • Add yogurt or fresh fruit on top


Storage

  • Store cooked pancakes in the refrigerator for up to 2 days

  • Reheat in a pan or microwave

  • Best served fresh