Vanilla Custard Slice

Vanilla Custard Slice

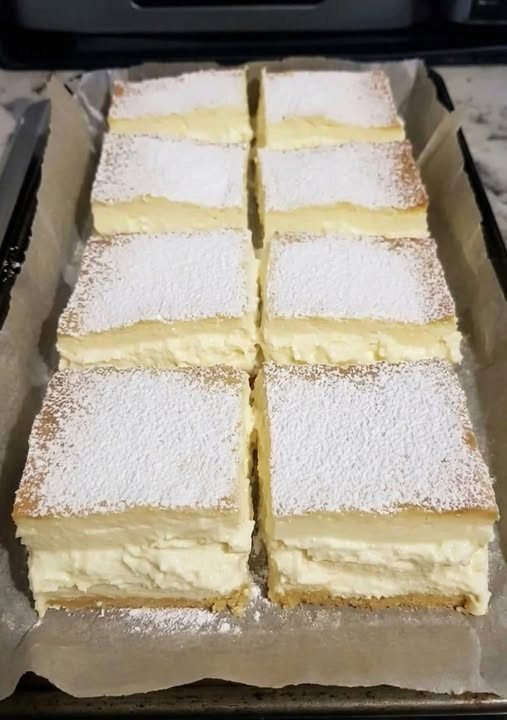
A baked dessert that naturally forms three textures while cooking: a soft base, a creamy custard center, and a light sponge top.

Prep Time: 15 minutes
Bake Time: 45–50 minutes
Chill Time: Minimum 3 hours
Yield: 12 squares


🧾 Ingredients

• 4 large eggs, separated (room temperature)
• 150 g (¾ cup) granulated sugar
• 125 g (½ cup) unsalted butter, melted and slightly cooled
• 115 g (¾ cup) all-purpose flour
• 500 ml (2 cups) whole milk, lukewarm
• 1 tablespoon vanilla extract or vanilla bean paste
• Pinch of salt

For topping:
• Powdered sugar, for dusting


👩‍🍳 Instructions

1. Prepare the Pan and Oven

Preheat oven to 160°C (325°F).

Grease an 8 × 8 inch (20 × 20 cm) baking pan.
Line with parchment paper, leaving excess paper hanging over the sides to help lift the dessert out later.


2. Beat the Egg Whites

Place egg whites and a pinch of salt in a clean, dry bowl.

Beat with a mixer until stiff peaks form (the whites should stand upright when the whisk is lifted).

Set aside.


3. Mix Egg Yolks and Sugar

In a separate large bowl, beat egg yolks and granulated sugar together for about 2 minutes, until:
• Pale in color
• Thickened slightly
• Smooth in texture


4. Add Butter and Vanilla

Add melted butter and vanilla extract to the yolk mixture.

Beat for 1 minute until fully blended.


5. Add Flour

Sift flour into the bowl.

Mix gently until just combined and no dry flour remains.


6. Add Milk

Slowly pour in the lukewarm milk while mixing on low speed.

The batter will be very thin and liquid-like — this is expected.


7. Fold in Egg Whites

Add the beaten egg whites in 2–3 portions.

Using a spatula, gently fold them into the batter.
Do not mix until fully smooth — small lumps or “clouds” of egg white should remain floating.

These help create the light top layer during baking.


8. Bake

Pour batter into the prepared pan.

Bake for 45–50 minutes, until:
• Top is light golden
• Center jiggles slightly when shaken
• Surface is set, not wet

If the top browns too quickly, loosely cover with foil during the last 10 minutes.


9. Cool and Chill

Let the pan cool completely at room temperature.

Then refrigerate for at least 3 hours (overnight is best) so the layers can fully firm up.


10. Finish and Slice

Lift the dessert out using parchment paper.

Dust generously with powdered sugar.

Slice into 12 even squares using a sharp knife.


⭐ Helpful Tips

✔ Eggs should be at room temperature for smoother mixing
✔ Milk should be lukewarm, not hot
✔ Do not overmix after adding egg whites
✔ Chill fully before cutting for clean layers


🧊 Storage

• Store covered in the refrigerator
• Best within 2–3 days
• Serve chilled
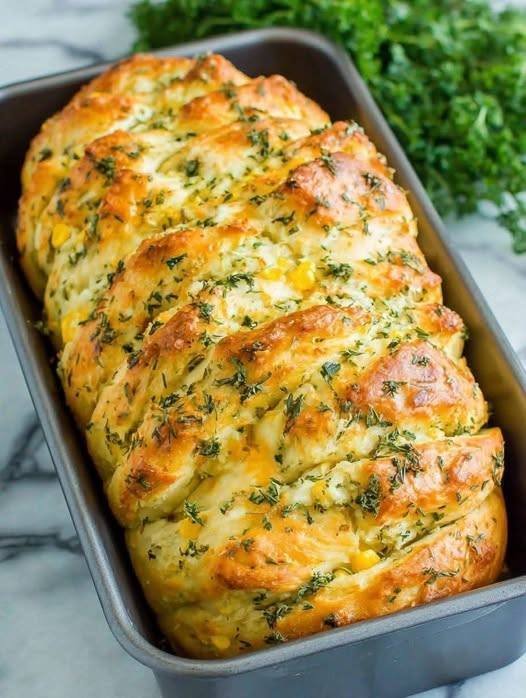
Cheesy Herb Pull-Apart Bread

Cheesy Herb Pull-Apart Bread

A soft baked loaf made from layered dough pieces coated in herb butter and melted cheese, designed to be pulled apart into warm, savory portions.

Prep Time: 10 minutes
Bake Time: 20–25 minutes
Servings: 6–8


🧾 Ingredients

• 1 loaf refrigerated biscuit dough (8–10 pieces)
or
• Pre-made pizza dough

• ½ cup unsalted butter, melted
• 2 cloves garlic, finely minced
• 1 cup shredded cheddar cheese (or cheddar blend)
• ½ cup shredded mozzarella cheese
• 2 tablespoons fresh parsley, finely chopped
• 1 tablespoon fresh chives or dill, finely chopped
• ¼ teaspoon onion powder
• Salt and black pepper, to taste


👩‍🍳 Instructions

1. Preheat and Prepare the Pan

Preheat oven to 175°C (350°F).

Grease a standard 9 × 5-inch loaf pan generously with butter or cooking spray.
Set aside.


2. Prepare the Herb Butter

In a small bowl, combine:

• Melted butter
• Minced garlic
• Chopped parsley
• Chopped chives or dill
• Onion powder
• A pinch of salt and black pepper

Stir until fully blended and fragrant.


3. Prepare the Dough

If using biscuit dough:
Separate each biscuit into individual pieces.

If using pizza dough:
Lightly flour a surface. Roll dough out and cut into 3-inch squares or circles.

Keep dough pieces loosely covered while assembling.


4. Coat the Dough

Dip each piece of dough into the herb butter mixture, coating both sides.
Allow excess butter to drip off slightly.

Set coated pieces aside on a plate.


5. Assemble the Loaf

Stand the loaf pan upright (on its short end).

Layer as follows:

  1. Place one butter-coated dough piece into the pan.

  2. Sprinkle with a small amount of cheddar and mozzarella.

  3. Add another dough piece.

  4. Sprinkle with cheese again.

Continue layering until all dough and cheese are used.

Do not compress the layers tightly — the dough needs space to expand during baking.


6. Add Remaining Butter and Cheese

Pour any remaining herb butter evenly over the top of the loaf.

Sprinkle remaining cheese over the surface.


7. Bake

Place pan in the center of the oven.

Bake for 20–25 minutes, until:
• The top is deep golden
• Cheese is melted and lightly browned
• Center dough is fully cooked

If the top browns too quickly, loosely cover with foil for the final 5 minutes.


8. Cool and Serve

Remove from oven and let rest in the pan for 5 minutes.

Carefully lift the loaf out and place on a serving plate.

Serve warm so the layers separate easily and the cheese remains soft.


⭐ Optional Flavor Variations

✔ Spicy version:
Add a pinch of red pepper flakes to the butter mixture.

✔ Sweet and savory version:
Stir 1 teaspoon honey into the butter for gentle sweetness.

✔ Extra herb version:
Add thyme, rosemary, or basil to the butter.

✔ Garlic-lover version:
Add ½ teaspoon garlic powder in addition to fresh garlic.


🧊 Storage

• Best served fresh
• Refrigerate leftovers for up to 2 days
• Reheat in oven at 160°C (325°F) for 8–10 minutes

Crispy Two-Cheese Flatbread

Crispy Two-Cheese Flatbread

A thin baked cheese flatbread with a bubbly surface and a deeply golden crust — ideal for slicing and dipping.

Prep Time: 5 minutes
Bake Time: 15–18 minutes
Yield: About 12–16 squares


🧾 Ingredients

• 1 cup shredded mozzarella cheese
• 1 cup finely grated Parmesan cheese
• 1 large egg, lightly beaten
• ½ teaspoon garlic powder
• ½ teaspoon dried oregano or Italian seasoning

Optional topping:
• Red pepper flakes
• Everything-style seasoning
• Sesame or poppy seeds


👩‍🍳 Instructions

1. Preheat the Oven

Preheat oven to 200°C (400°F).

Line a large baking sheet with:
• Parchment paper
or
• A silicone baking mat

This prevents sticking and allows the cheese to crisp evenly.


2. Combine the Cheese Mixture

In a medium mixing bowl, add:

• Shredded mozzarella
• Grated Parmesan
• Garlic powder
• Dried herbs

Stir until evenly blended.


3. Add the Egg

Pour the lightly beaten egg into the cheese mixture.

Mix thoroughly until:
• All cheese is coated
• The mixture holds together
• No dry patches remain

The egg helps the flatbread hold its shape after baking.


4. Shape the Flatbread

Transfer the mixture to the prepared baking sheet.

Using a spatula or the back of a spoon:
• Press into a thin rectangle or circle
• About ¼ inch (6 mm) thick
• Smooth the surface evenly

Compact it well so it bakes uniformly.


5. Add Optional Topping

Sprinkle your chosen seasoning lightly over the top.

Press gently so it sticks to the surface.


6. Bake

Place the tray in the center of the oven.

Bake for 15–18 minutes, watching closely near the end.

You want:
• Deep golden edges
• Bubbling surface
• Light browning across the top

Do not underbake or it will remain soft instead of crisp.


7. Rest and Slice

Remove from oven and let rest on the tray for 3–5 minutes.

This allows the cheese to firm up and become sliceable.

Transfer to a cutting board and slice into:
• Squares
or
• Thin strips

Use a sharp knife or pizza cutter.


⭐ Tips for Best Results

✔ Use firm, shredded mozzarella instead of fresh soft cheese for better browning.
✔ Spread thin for crisp texture.
✔ Let it cool slightly before cutting — it crisps as it rests.
✔ If edges brown faster, rotate the pan halfway through baking.


🍅 Serving Ideas

Serve with:
• Warm tomato sauce
• Creamy herb dip
• Chili sauce
• Yogurt-based dip
• Garlic butter

Chocolate Mousse Candy Bites

Chocolate Mousse Candy Bites

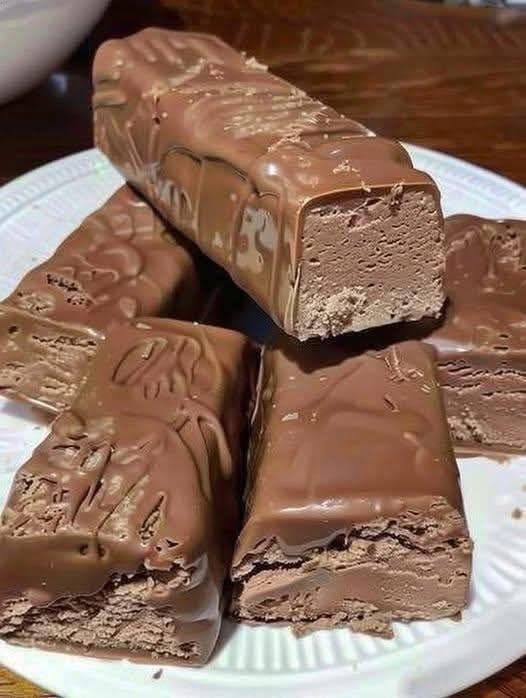
No-bake chocolate bars with a soft, airy center and a smooth chocolate coating — inspired by classic fluffy candy bars.

Prep Time: 15 minutes
Chill Time: 2 hours
Yield: 12–14 bites


🧾 Ingredients

For the Mousse Center:

• 1 cup whipped topping, thawed
• ¼ cup unsweetened cocoa powder
• 2 tablespoons powdered sweetener (or powdered sugar, to taste)
• ½ teaspoon vanilla extract

For the Chocolate Coating:

• ½ cup dark or milk chocolate chips
• 1 teaspoon coconut oil (for smooth melting)


👩‍🍳 Instructions

1. Make the Chocolate Mousse Filling

In a medium mixing bowl:

Add the whipped topping, cocoa powder, powdered sweetener, and vanilla extract.

Using a spatula or spoon, gently fold everything together.
Do not beat or stir aggressively — fold slowly to keep the mixture light and airy.

Mix until:
• The color is evenly chocolatey
• The texture is fluffy and smooth
• No streaks of cocoa remain


2. Shape and Freeze

Line a small rectangular dish or loaf pan with parchment paper.

Spread the mousse mixture evenly into the pan.
Smooth the top with a spatula so it is about 1 inch thick.

Place in the freezer for 1 hour, or until firm enough to cut cleanly.


3. Cut into Bites

Lift the frozen slab out using the parchment paper.

Using a sharp knife, cut into:
• Small rectangles
• Or bite-size squares

Return the pieces to the freezer while preparing the chocolate coating.


4. Melt the Chocolate

Place chocolate chips and coconut oil in a microwave-safe bowl.

Microwave in 20-second bursts, stirring between each round, until fully melted and smooth.

Do not overheat — stop as soon as the chocolate is fluid and glossy.


5. Coat the Bars

Using a fork:

Dip each frozen piece into the melted chocolate.
Lift it out and let excess chocolate drip off.

Place coated pieces on a parchment-lined tray.

💡 The frozen center will cause the chocolate to set quickly.


6. Final Set

Return the tray to the freezer for 15–20 minutes until the chocolate shell is firm.

Store in the refrigerator or freezer until ready to serve.


✨ Optional Enhancements

✔ For firmer texture:
Add 1 tablespoon milk powder or protein powder to the mousse mixture.

✔ For decorative finish:
Drizzle remaining melted chocolate over the bars for a candy-shop look.

✔ Flavor twist ideas:
• Add a pinch of salt
• Add espresso powder
• Add peppermint extract
• Add orange zest


🧊 Storage

• Refrigerator: up to 3 days
• Freezer: up to 2 weeks
Store in an airtight container.

Baked Zucchini, Carrot, and Potato Casserole

Baked Zucchini, Carrot, and Potato Casserole

Baked Zucchini, Carrot, and Potato Casserole

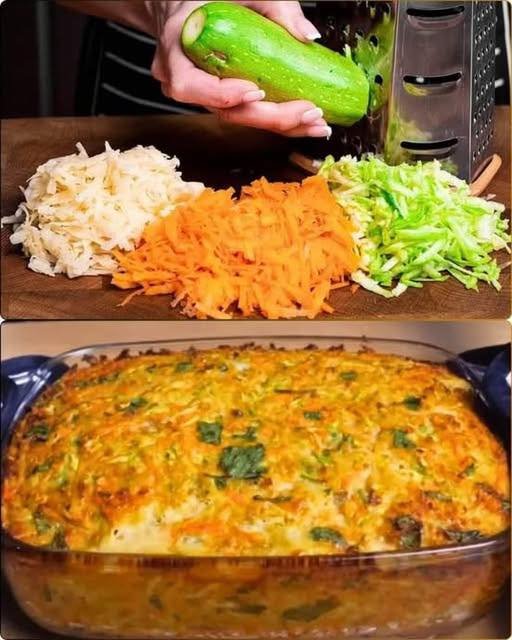
A fuss-free, meatless dish that is savory, tender, and incredibly easy to prep.

  • Prep time: 15 minutes

  • Bake time: 40–50 minutes

  • Yields: 4–6 servings

Ingredients

  • Vegetables: 12 oz (total) of carrots, potatoes, and zucchini

  • Onions: 5.5 oz, finely chopped

  • Protein: 3 eggs

  • Aromatics: 2-3 cloves of garlic, minced

  • Oil: 2 tbsp vegetable oil

  • Seasoning: 1 tsp salt, plus pepper to taste

  • Herbs: Fresh herbs (like parsley or dill) at your discretion

  • Breading: 3 tbsp ready-made breadcrumbs or 2 slices of crumbled bran bread


Instructions

1. Prepare the Vegetables

  • Grate the carrots, potatoes, and zucchini using a box grater.

  • Chef’s Tip: After grating the zucchini and potatoes, squeeze out the excess moisture with your hands or a kitchen towel to prevent the casserole from becoming soggy.

  • Finely chop the onions and mince the garlic.

2. Create the Mixture

  • In a large mixing bowl, beat the 3 eggs with the vegetable oil, salt, and pepper.

  • Stir in the grated vegetables, chopped onions, minced garlic, and your choice of fresh herbs.

  • Mix in the breadcrumbs (or crumbled bran bread) to help bind the ingredients together.

3. Assemble and Bake

  • Preheat your oven to 350°F (180°C).

  • Grease a glass baking dish and pour the vegetable mixture into it, smoothing the top with a spatula.

  • Bake for 40 to 50 minutes, or until the center is set and the top has turned a beautiful golden brown.

4. Serve

  • Let the casserole rest for 5 minutes after taking it out of the oven to allow the juices to redistribute.

  • Slice into squares and serve warm.


Perfect Pairings

Since you’ve been working on your Skillet Bread, this casserole is the ideal topping or side. You can scoop the warm vegetable bake directly onto a piece of the crusty bread for a complete, nutritious meal.

2 Ingredient Low-Carb Protein Bread

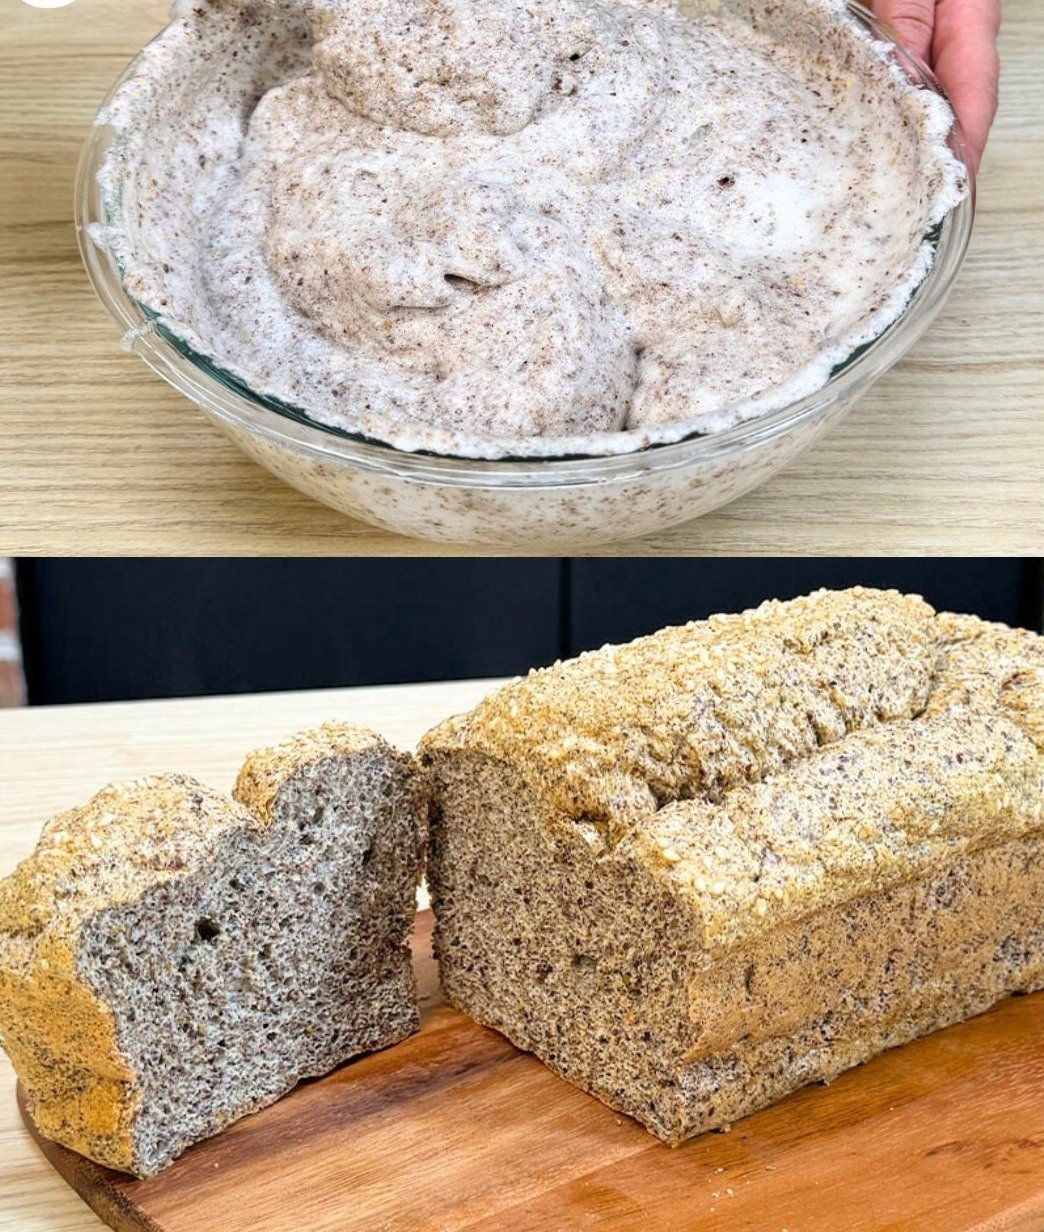
Quick, soft, and protein-packed bread made with just egg whites and chia seeds.

Servings: 8 slices
Prep Time: 10 minutes
Cook Time: 35 minutes
Total Time: 45 minutes
Dietary Badges: High-Protein, Low-Carb, Gluten-Free, Vegetarian

Ingredients

  • 500 grams egg whites
  • 180 grams chia seeds
  • Sesame seeds, optional, for topping

Instructions

1. Prepare the chia flour

  • Use a blender or food processor to grind 180 grams of chia seeds into a fine flour.
  • Set aside.

2. Whip the egg whites

  • In a large bowl, use an electric mixer to whip 500 grams of egg whites until very frothy but not stiff.

3. Combine ingredients

  • Gradually fold the chia seed flour into the frothy egg whites.
  • Mix gently until just combined, taking care not to over-mix to preserve the airiness.

4. Prepare the loaf pan

  • Grease or line a loaf pan with parchment paper to prevent sticking.

5. Bake

  • Transfer the batter into the prepared loaf pan, spreading it evenly.
  • Bake in a preheated oven at 180°C (356°F) for 35 minutes.

6. Cool and serve

  • Allow the bread to cool in the pan for 10 minutes before transferring to a wire rack.
  • Slice and enjoy immediately or store as preferred.

Additional Notes

  • Topping: Lightly sprinkle sesame seeds on top before baking for added texture and flavor.
  • Texture Tip: Folding gently preserves the airiness of the bread, resulting in a soft and fluffy texture.
  • Dietary Note: This bread is naturally gluten-free and very low in carbs.

Ingredient Details and Substitutions

  • Chia Seeds: Provide fiber, protein, and healthy fats. Ground into a flour to absorb moisture and help the bread rise.
  • Egg Whites: Act as the primary structure and protein source. Using pasteurized egg whites ensures safety if consumed lightly cooked.
  • Substitutions:
    • No chia seeds? Flaxseed meal can be used, but it will alter texture slightly.
    • Optional sesame seeds can be replaced with poppy seeds or omitted entirely.

Equipment Alternatives

  • No food processor? Use a high-speed blender to grind chia seeds.
  • No electric mixer? Whisk egg whites vigorously by hand, though it may take longer to reach frothy consistency.

Serving Suggestions

  • Serve toasted with avocado or nut butter for a quick breakfast.
  • Use as sandwich bread for a high-protein lunch.
  • Pair with soups or stews for a low-carb accompaniment.

Storage, Make-Ahead, and Reheating

  • Storage: Store in an airtight container at room temperature for up to 2 days, or refrigerate for up to 5 days.
  • Freezing: Slice and freeze individually for up to 2 months; thaw in the fridge or at room temperature.
  • Reheating: Warm slices in a toaster or oven at 160°C (320°F) for 5 minutes.

Nutrition Facts (per slice, yields 8 slices)

  • Calories: 60 kcal
  • Protein: 7 g
  • Carbs: 2 g
  • Fat: 2 g
  • Fiber: 2 g
  • WW Points: 1

Dietary Highlights: High-protein, low-carb, gluten-free, vegetarian.
Allergens: Egg.


Recipe Variations

  • Add 1 tsp cinnamon or cocoa powder to the batter for a flavored variation.
  • Mix in 1–2 tbsp chopped nuts or seeds for extra texture.
  • Top with a sprinkle of herbs (like rosemary) for a savory twist.

Frequently Asked Questions

Q: Can I use whole eggs instead of egg whites?

  • A: Using whole eggs will change texture and moisture content. Bread may be slightly denser.

Q: Why is it important not to over-mix?

  • A: Over-mixing collapses the air in the egg whites, resulting in denser bread.

Q: Can I double this recipe?

  • A: Yes, use a larger loaf pan and extend baking time slightly. Check doneness with a toothpick.

Q: Can I use chia flour instead of grinding whole seeds?

  • A: Yes, 180 grams of chia flour can be used directly.

Personal Notes

I developed this 2-ingredient protein bread when I wanted a quick, low-carb alternative to traditional bread. It’s surprisingly soft and versatile, perfect for breakfasts or snacks. I often toast it and add avocado or a fried egg for a satisfying start to the day.