![]()
Chickpea and Roasted Veggie Delight Bowls
These colorful bowls are packed with roasted vegetables, protein-rich chickpeas, and a zesty lemon dressing for a wholesome, satisfying meal.
Ingredients::
For the Roasted Vegetables:
1 can (15 oz) chickpeas, drained and rinsed
1 zucchini, diced
1 red bell pepper, chopped
1 yellow bell pepper, chopped
1 small red onion, cut into wedges
1 cup broccoli florets
2 tbsp olive oil
1 tsp garlic powder
1 tsp paprika
½ tsp dried oregano
Salt and black pepper, to taste
For the Lemon Dressing:
3 tbsp olive oil
1½ tbsp fresh lemon juice
1 tsp Dijon mustard
1 clove garlic, minced
Salt and black pepper, to taste
For Assembly:
2 cups cooked quinoa, brown rice, or couscous
¼ cup crumbled feta cheese (optional)
2 tbsp chopped fresh parsley
Lemon wedges, for serving
Instructions::>
1. Roast the Vegetables
Preheat oven to 425°F (220°C).
On a large baking sheet, combine chickpeas, zucchini, bell peppers, red onion, and broccoli.
Drizzle with olive oil and sprinkle with garlic powder, paprika, oregano, salt, and pepper.
Toss well to coat.
Roast for 25–30 minutes, stirring halfway through, until vegetables are tender and lightly caramelized.
2. Prepare the Dressing
In a small bowl, whisk together olive oil, lemon juice, Dijon mustard, garlic, salt, and pepper until smooth.
3. Assemble the Bowls
Divide cooked quinoa, rice, or couscous among serving bowls.
Top with roasted chickpeas and vegetables.
Drizzle generously with lemon dressing.
Sprinkle with feta cheese and fresh parsley.
4. Serve
Serve warm with lemon wedges on the side.
Easy Recipes
HEALTHY CHICKEN SALAD , LIGHT, CREAMY CHICKEN SALAD TUCKED INSIDE BUTTERY CROISSANTS FOR THE PERFECT BALANCED MEAL.
Do you miss that comforting, creamy, deli-style chicken salad? If you’re following the Weight Watchers plan, you know that creamy dressings and high-fat ingredients can quickly blow through your daily SmartPoints (or PersonalPoints). That’s why we created this brilliant SmartPoints-friendly chicken salad recipe!
We’ve swapped traditional mayonnaise for a blend of nonfat Greek yogurt and just a touch of light mayo to keep the points low while dramatically boosting the protein. This switch makes the filling incredibly satisfying and keeps you full for hours—the perfect strategy for weight loss meals. The result is a vibrant, crunchy, and absolutely delicious sandwich that fits perfectly into your plan. This recipe promises a quick, protein-rich, and macro-friendly meal that tastes like a cheat day but keeps you on track!
Look At The Recipe
- Sensory Appeal: The fantastic textural contrast of a flaky croissant (choose a lighter option!) against the super creamy, yet lean, chicken salad filling.
- Flavor Highlight: A bright, balanced flavor profile with zesty lemon, savory chicken, and pops of sweetness from grapes and crunch from celery.
- Key WW Benefit: Utilizes ZeroPoint foods (lean chicken breast, nonfat Greek yogurt in many plans, celery) to build a high-volume, high-protein filling for maximum satiety on fewer points.
Ingredients Needed
FOR THE ZEROPOINT-HEAVY CHICKEN SALAD
- 2 cups cooked chicken breast (shredded or diced, skin removed – a ZeroPoint food on most plans)
- $1/2$ cup nonfat plain Greek yogurt (ZeroPoint in many plans)
- 2 Tbsp light mayonnaise (or a light, reduced-fat dressing)
- $1/4$ cup finely chopped red onion
- $1/2$ cup chopped celery
- $1/2$ cup red or green grapes, halved (high-volume ingredient)
- 1 Tbsp fresh lemon
-
- 1 tsp Dijon mustard
- $1/2$ tsp dried dill (or 1 Tbsp fresh)
- Salt and black pepper to taste
FOR ASSEMBLY
- 4 small croissants (look for smaller, portion-controlled sizes to minimize points)
- 4 pieces of Butter Lettuce or watercress (high-volume, ZeroPoint greens)
How To Make Our SmartPoints Chicken Salad
- Prepare the Base: Ensure your healthy chicken breast is cooled and shredded or diced evenly. Place the chicken into a large mixing bowl. This is a great easy meal prep idea to do on Sunday.
- Add Volume & Crunch: Finely chop the celery and red onion; halve the grapes. Add these high-volume, low-point ingredients into the bowl with the chicken.
- Mix the Light Dressing: In a separate bowl, whisk together the nonfat Greek yogurt, light mayonnaise, lemon juice, Dijon mustard, and dill. Season well with salt and black pepper. The yogurt keeps this a macro-friendly meal.
- Combine Gently: Pour the lightened dressing over the chicken and vegetable mixture. Fold everything together until the chicken is completely and evenly coated.
- Chill for Flavor: Cover and refrigerate for at least 30 minutes. This chilling time is essential for the flavors to deepen and the salad to set up.
- Assemble the WW Sandwich: To assemble, slice your croissant open. Layer with a piece of crisp lettuce (a great ZeroPoint addition) and spoon a portion of the chilled low-point chicken salad onto the bottom half. Enjoy immediately!
Storage & Serving Suggestions
- Storing: The WW chicken salad filling is best stored separately in an airtight container for up to 3 days in the refrigerator.
- Reheating: This is a cold recipe and should not be reheated.
- Freezing: Freezing is not recommended, as the Greek yogurt base will change texture when thawed.
- Serving Pairings (WW-Approved): To keep the points low, serve alongside a huge cup of raw, chopped vegetables (ZeroPoint on most plans), a bowl of air-popped popcorn, or a simple side salad with a fat-free dressing.
Tips & FAQs
Q: HOW CAN I REDUCE THE SMARTPOINTS FURTHER IF CROISSANTS ARE TOO HIGH?
A: Skip the croissant entirely! Serve this delicious healthy chicken salad over a large bed of mixed greens, on top of cucumber slices, or stuffed into large bell pepper halves. Focus on using your ZeroPoint foods as the vehicle.
Q: WHAT IF I DON’T LIKE GRAPES IN MY CHICKEN SALAD?
A: You can swap the grapes for $1/2$ cup of chopped apple for a similar sweetness and crunch, or use pickles/relish for a more savory flavor profile. Both are clean eating additions that keep the points low.
Q: IS USING ROTISSERIE CHICKEN OKAY ON WW?
A: Yes, as long as you meticulously remove all the skin and any visible fat, the lean breast meat is fine. However, boiling or baking your own chicken breast ensures the lowest possible points for this weight loss meal.
Q: CAN I ADD NUTS FOR CRUNCH?
A: You can, but nuts (like pecans or almonds) are high in points. If you need the crunch, measure them carefully (e.g., 1 Tbsp, chopped fine) and make sure to account for the added points in your tracker
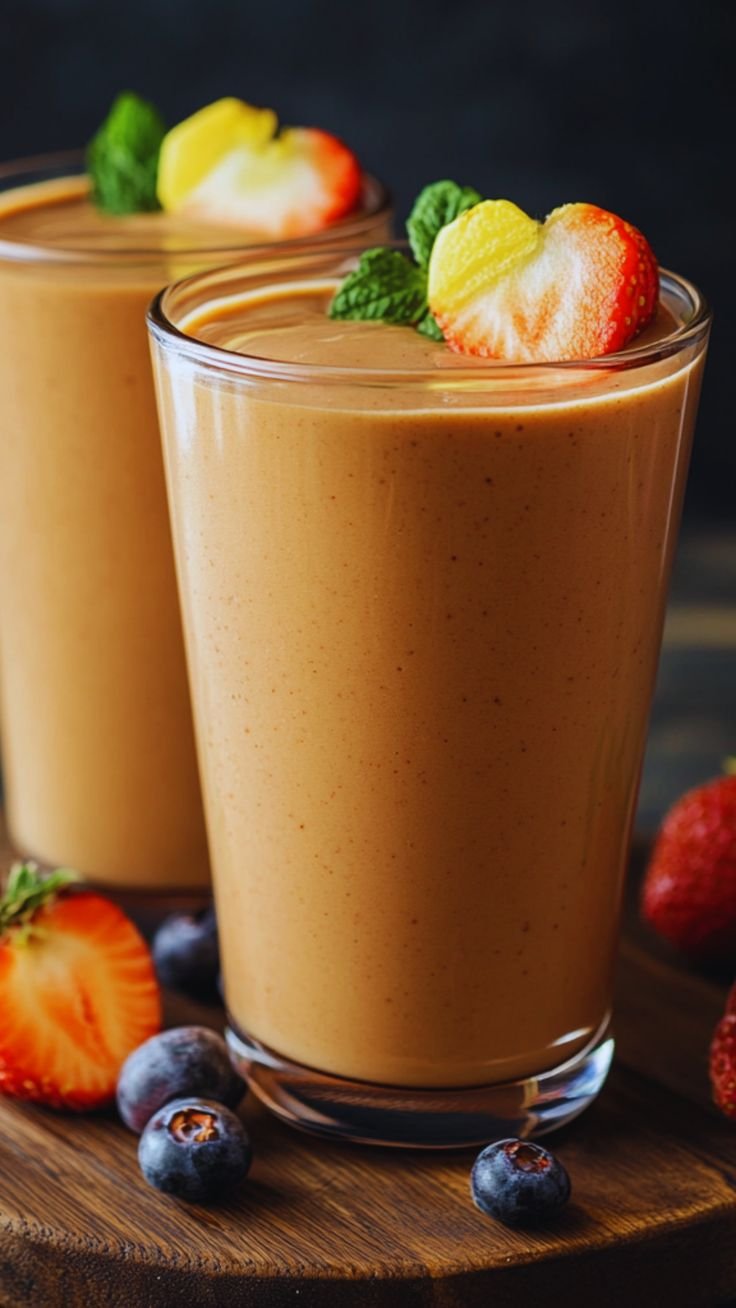
CREAMY ORANGE SUNSHINE SMOOTHIE
Yields: 2 servings | Prep time: 5 minutes
Ingredients
-
2 large Oranges: Peeled and segmented (remove seeds if necessary).
-
1 cup Frozen Mango: This provides that thick, velvety texture and enhances the yellow color.
-
½ cup Greek Yogurt: Plain or vanilla works best for creaminess and a protein boost.
-
½ cup Almond Milk: Or any milk of your choice to help it blend.
-
1 tsp Vanilla Extract: The secret ingredient for that “creamsicle” flavor.
-
1 tbsp Honey or Maple Syrup: Optional, depending on the sweetness of your fruit.
-
Garnish: Fresh strawberries and orange slices (as seen in your photo).
Instructions
-
Prep the Fruit: For the best results, peel your oranges thoroughly, removing as much of the white pith as possible to avoid bitterness. If you want an extra cold smoothie, you can freeze the orange segments for an hour before blending.
-
Layer the Blender: Add your liquid (milk) first, followed by the yogurt, vanilla, and sweetener. Finally, add the oranges and frozen mango on top.
-
Blend: Start on a low speed to break up the frozen fruit, then increase to high. Blend for about 45–60 seconds until the mixture is completely smooth and no bits of orange pulp remain.
-
Adjust Consistency: If the smoothie is too thick, add a splash more milk. If you prefer it frostier, add a handful of ice cubes and blend again.
-
Serve: Pour into two glasses. Slice a strawberry halfway up the middle and perch it on the rim along with a thin orange wheel to match your beautiful picture.
MINT CHOCOLATE CHIP SMOOTHIE
Prep time: 5 minutes | Servings: 1
Ingredients
-
1 large frozen banana (peeled and sliced before freezing for maximum creaminess)
-
1/2 cup Greek yogurt (plain or vanilla)
-
1/2 cup milk of choice (dairy, almond, or oat milk work beautifully)
-
1 handful fresh spinach (this provides that vibrant green color without affecting the flavor)
-
1/4 tsp peppermint extract (start small; it’s powerful!)
-
1 tbsp honey or maple syrup (optional, depending on your sweet tooth)
-
2 tbsp dark chocolate chips
-
Fresh mint leaves for garnish
Instructions
-
Combine the Base: Place the frozen banana, yogurt, milk, spinach, peppermint extract, and sweetener into a high-speed blender.
-
Blend until Smooth: Pulse on high until the mixture is completely creamy and the spinach is fully pulverized into a solid green hue.
-
Add the “Chips”: Add the chocolate chips to the blender. Pulse 3–4 times just to break them into tiny bits. You want texture, not a brown smoothie!
-
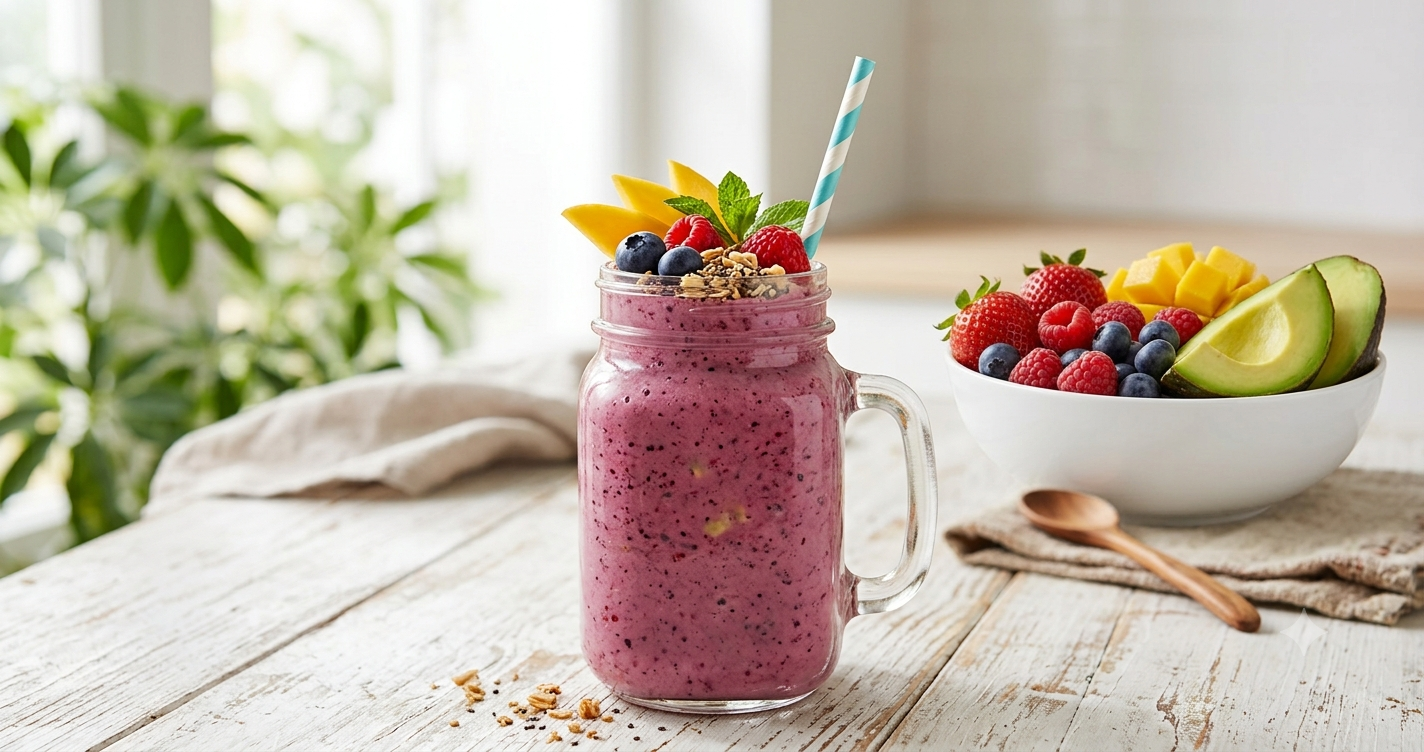
Serve: Pour the mixture into a glass jar. Top with a few extra chocolate chips and a sprig of fresh mint as seen in your photo.
Pro Tip: If you want an even thicker, “milkshake” consistency, add 1/4 cup of ice cubes before blending. Enjoy your cool, minty treat!
CRUNCHY TANGY REFRIGERATOR PICKLED VEGETABLES
Forget the canning jars and the boiling water baths. These Refrigerator Pickled Vegetables are the “set it and forget it” champions of the condiment world. Crisp, vibrant, and punchy, these pickles rely on a simple vinegar brine to transform raw veggies into a zesty snack or topping in just a few hours.
Whether you’re looking to rescue that lone carrot in the crisper drawer or want to elevate your next charcuterie board, this recipe is your go-to. It’s infinitely customizable—think of this as a template rather than a rigid rulebook.
Recipe Overview
-
Prep time: 20 minutes
-
Chill time: 2–24 hours (for best flavor)
-
Servings: Makes approx. 2 quart-sized jars
-
Shelf Life: Up to 3 weeks in the refrigerator
Ingredients
THE VEGETABLES
-
4 cups mixed crunchy vegetables (sliced cucumbers, cauliflower florets, carrot sticks, radishes, red onion, or green beans)
-
4 cloves garlic, smashed
THE BRINE
-
1 ½ cups White vinegar (or Apple Cider Vinegar for a fruitier profile)
-
1 ½ cups Water
-
2 tbsp Kosher salt (non-iodized)
-
2 tbsp Granulated sugar (adjust to taste)
THE FLAVOR BOOSTERS (OPTIONAL)
-
1 tsp Whole peppercorns
-
1 tsp Mustard seeds
-
½ tsp Red pepper flakes (for heat)
-
2 sprigs Fresh dill or thyme
Instructions
-
Prep the Veggies: Wash all vegetables thoroughly. Slice them into your preferred shapes—coins, spears, or bite-sized florets.
-
Pack the Jars: Divide the garlic and spices between two clean quart-sized glass jars. Pack the vegetables tightly into the jars, leaving about an inch of headspace at the top.
-
Simmer the Brine: In a small saucepan, combine the vinegar, water, salt, and sugar. Bring to a simmer over medium heat, stirring until the salt and sugar are completely dissolved.
-
Pour and Seal: Carefully pour the hot brine over the vegetables until they are completely submerged. Tap the jars gently on the counter to release any trapped air bubbles.
-
Cool and Chill: Let the jars sit at room temperature until cool. Screw on the lids and place them in the refrigerator.
-
Wait (The Hard Part): While you can eat them in 2 hours, they are significantly better after 24 hours.
Nutritional Info (Per ½ Cup Serving)
| Metric | Amount |
| Calories | 25 kcal |
| Total Fat | 0g |
| Sodium | 480mg |
| Carbohydrates | 5g |
| Fiber | 1g |
| Sugar | 3g |
| Protein | 1g |
Benefits Of Pickling
-
Waste Reduction: A perfect way to preserve vegetables before they go bad.
-
Low Calorie: High-flavor impact with very little fat or heavy caloric load.
-
Digestive Aid: While not fermented (like kimchi), the vinegar can help stimulate digestion and the fiber keeps things moving.
-
Vitamin Retention: Since the vegetables aren’t cooked, they retain much of their original vitamin C and B-complex content.
Tips For Success
-
Keep it Cold: These are not shelf-stable. They must stay refrigerated.
-
The Crunch Factor: For maximum crunch, use the freshest vegetables possible. If using cucumbers, Kirby or Persian varieties work best because they have thinner skins.
-
Salt Matters: Use Kosher or pickling salt. Table salt contains anti-caking agents that can make your brine look cloudy and unappetizing.
-
Submerge: Ensure the veggies stay under the brine. If they float, they may soften or spoil faster.
Q&A
Q: Can I use less sugar?
A: Absolutely. The sugar is there to balance the acidity of the vinegar. You can omit it entirely, though the result will be very sharp.
Q: How long do they last?
A: They are safest and tastiest within 3 weeks. After that, the vegetables begin to lose their “crunch” and become mushy.
Q: Why is my brine cloudy?
A: This usually happens if you use table salt or if your water has high mineral content. It’s generally safe to eat, just less “pretty.”
Q: Can I reuse the brine?
A: You can reuse it once for another quick batch, but keep in mind the vegetables release water, so the second batch will be slightly more diluted and less tangy.
ZESTY HOMEMADE GINGER WATER
PAN-SEARED LEMON HERB SALMON
A quick, high-protein meal that feels like a restaurant dish but takes less than 15 minutes.
Ingredients
-
Salmon Fillets: 2 (6 oz each)
-
Olive Oil: 1 tablespoon
-
Butter: 1 tablespoon
-
Garlic: 2 cloves, minced
-
Lemon: 1/2 (for juice and slices)
-
Herbs: 1 tablespoon fresh parsley or dill, chopped
-
Seasoning: Salt and black pepper to taste
Instructions
-
Season: Pat the salmon fillets dry with a paper towel. Season both sides generously with salt and pepper.
-
Sear: Heat olive oil in a skillet over medium-high heat. Place salmon skin-side up in the pan. Cook for 4–5 minutes until golden brown.
-
Flip: Carefully flip the fillets. Add the butter, minced garlic, and lemon slices to the pan.
-
Baste: As the butter melts, spoon it over the salmon. Cook for another 3–4 minutes until the salmon is cooked through and flakes easily with a fork.
-
Finish: Squeeze fresh lemon juice over the top and garnish with fresh herbs.
2. MEDITERRANEAN CUCUMBER & TOMATO SALAD
A bright, crunchy side dish that stays fresh in the fridge and requires zero cooking.
Ingredients
-
Cucumber: 2 large (diced)
-
Cherry Tomatoes: 1 cup (halved)
-
Red Onion: 1/4 cup (finely diced)
-
Feta Cheese: 1/4 cup (crumbled)
-
Dressing: 2 tablespoons olive oil, 1 tablespoon red wine vinegar, 1 teaspoon dried oregano
-
Seasoning: Pinch of salt and cracked black pepper
Instructions
-
Prep: In a large bowl, combine the diced cucumbers, tomatoes, and red onion.
-
Dress: In a small jar or bowl, whisk together the olive oil, vinegar, oregano, salt, and pepper.
-
Toss: Pour the dressing over the vegetables and toss gently to coat everything evenly.
-
Top: Sprinkle the crumbled feta cheese over the top just before serving.
COOKING TIPS
-
Ginger Water Pairing: These dishes are quite light, so the “spicy” kick of your ginger water acts as a great palate cleanser between bites.
-
Storage: The salad can be made a few hours in advance, which actually allows the flavors to meld together even better.
This recipe focuses on a “simmer method” to extract the maximum amount of gingerol—the bioactive compound responsible for ginger’s medicinal punch.
-
Prep time: 5 minutes
-
Cook time: 15 minutes
-
Servings: 4 cups
-
Yield: Approx. 1 liter
Ingredients
| Ingredient | Amount | Notes |
| Fresh Ginger Root | 2-inch piece | Scrubbed clean (peeling is optional) |
| Water | 4 cups | Filtered is best for taste |
| Lemon | 1/2 fruit | Sliced or juiced (optional) |
| Raw Honey | 1-2 tbsp | To taste (optional) |
Instructions
-
Prep the Ginger: Thinly slice the ginger into coins. The more surface area exposed, the stronger the flavor. For an even more intense kick, you can grate it.
-
Boil: Place the water and ginger slices in a medium saucepan. Bring to a rolling boil.
-
Simmer: Reduce the heat to low and let it simmer for 10 to 15 minutes.
4. Strain: Remove from heat. Strain the mixture into a teapot or jar to remove the ginger pieces.
5. Flavor: Stir in lemon juice or honey while the water is warm (but not boiling) to preserve the honey’s enzymes.
6 .Serve: Enjoy hot, or let it cool and serve over ice.
Nutrition Information (Per 1 Cup Serving)
Plain ginger water without honey:
-
Calories: 2 kcal
-
Carbohydrates: 0.5g
-
Sugar: 0g
-
Sodium: 2mg
Health Benefits
-
Digestive Aid: Ginger stimulates saliva and bile production, helping food move through the gut more smoothly.
-
Anti-Inflammatory: Contains gingerols which may reduce joint pain and muscle soreness.
-
Nausea Relief: Highly effective against morning sickness or motion sickness.
-
Blood Sugar Support: Some studies suggest ginger may help improve insulin sensitivity.
Tips For Success
-
Don’t Peel: Most of the nutrients are right under the skin. Just give it a good scrub with a vegetable brush.
-
The “Concentrate” Trick: Make a double-strength batch and keep it in the fridge. Mix it with sparkling water for a healthy, homemade ginger ale.
-
Add Spice: Throw in a cinnamon stick or a pinch of cayenne pepper during the simmer for an extra metabolic boost.
Common Questions & Answers
Q: Can I drink ginger water every day?
A: Generally, yes. Most health experts suggest staying under 4 grams of ginger per day. One cup of this water usually contains about 1 gram.
Q: Should I drink it hot or cold?
A: Hot ginger water is excellent for congestion and digestion. Cold ginger water is a fantastic, hydrating replacement for sugary sodas. Both offer the same core benefits.
Q: Does it help with weight loss?
A: While not a “magic fat burner,” it promotes satiety (feeling full) and has a slight thermogenic effect, which can support your goals when paired with a healthy lifestyle.
BLUEBERRY MANGO TANGO SMOOTHIE
Ingredients
-
The Mango Base: 1 ½ cups frozen mango chunks, ½ cup Greek yogurt (or coconut yogurt), and ¼ cup orange juice.
-
The Blueberry Base: 1 ½ cups frozen blueberries, 1 ripe banana (frozen is best), and ½ cup almond or oat milk.
-
Toppings: Fresh blueberries, mango slices, and a sprig of fresh mint.
Instructions
-
Prepare the Mango Layer: In a high-speed blender, combine the mango chunks, yogurt, and orange juice. Blend until completely smooth and thick. If it’s too thick to move, add a tiny splash of juice. Pour this into a separate bowl and set aside.
-
Prepare the Blueberry Layer: Rinse the blender quickly. Add the frozen blueberries, banana, and milk. Blend until you achieve a deep purple, velvety consistency.
-
Create the “Tango” Swirl: To get that beautiful marbled look shown in your image, grab a tall glass. Use a spoon to drop large dollops of the mango mixture and the blueberry mixture into the glass, alternating colors as you go.
-
The Swirl Technique: Once the glass is full, take a thin knife or a skewer and gently swirl it through the layers once or twice. Don’t over-mix, or it will just turn brown!
-
Garnish: Top with a generous swirl of the remaining smoothie, then decorate with fresh blueberries, mango wedges, and a mint leaf for that professional finish.
Pro Tip: Using frozen fruit is the secret to that thick, soft-serve texture. If you use fresh fruit, add a handful of ice to each batch to keep it chilled and sturdy.
Hearty Lentil Vegetable Soup
Description
This Hearty Lentil Vegetable Soup is the perfect one-pot comfort meal that’s packed with wholesome ingredients and rich, savory flavor. Tender lentils simmer alongside potatoes, carrots, celery, tomatoes, and leafy spinach in a seasoned vegetable broth, creating a nourishing soup that’s both filling and budget-friendly. It’s naturally high in fiber and plant-based protein, making it an excellent choice for lunch, dinner, or meal prep. Serve it with crusty bread for a satisfying meal the whole family will love.
Ingredients
For the Soup
- 2 tablespoons olive oil
- 1 medium onion, diced
- 2 celery stalks, diced
- 2 carrots, diced
- 3 cloves garlic, minced
- 1½ cups dried brown lentils, rinsed
- 2 medium potatoes, peeled and cubed
- 1 can (14 oz) diced tomatoes
- 6 cups vegetable broth
- 1 teaspoon Italian seasoning
- 1 teaspoon paprika
- ½ teaspoon dried thyme
- 1 bay leaf
- Salt and black pepper to taste
To Finish
- 2 cups fresh spinach, chopped
- 2 tablespoons chopped fresh parsley
- 1 tablespoon lemon juice (optional)
For Serving
- Crusty artisan bread
- Freshly grated Parmesan (optional)
Instructions
Step 1: Sauté the Vegetables
Heat olive oil in a large soup pot over medium heat. Add the onion, carrots, and celery. Cook for about 6–8 minutes until softened. Stir in the garlic and cook for another minute.
Step 2: Add the Main Ingredients
Add the lentils, potatoes, diced tomatoes, vegetable broth, Italian seasoning, paprika, thyme, bay leaf, salt, and pepper. Stir well.
Step 3: Simmer
Bring the soup to a gentle boil. Reduce the heat to low, cover, and simmer for 35–40 minutes, or until the lentils and potatoes are tender.
Step 4: Add the Spinach
Stir in the chopped spinach and cook for 2–3 minutes until wilted.
Step 5: Finish
Remove the bay leaf. Stir in fresh parsley and lemon juice for extra brightness.
Step 6: Serve
Ladle the hot soup into bowls and serve with crusty bread. Sprinkle with Parmesan cheese if desired.
Tips
- Add cooked sausage or shredded chicken for extra protein.
- Kale can be used instead of spinach.
- For a thicker soup, mash a few potatoes into the broth before serving.
- Add a pinch of red pepper flakes for a little heat.
Storage
- Refrigerate in an airtight container for up to 5 days.
- Freeze for up to 3 months.
- Reheat gently on the stovetop or microwave.
Frequently Asked Questions
Can I use canned lentils?
Yes. Add them during the last 10 minutes of cooking since they’re already cooked.
Can I make this in a slow cooker?
Absolutely. Cook on Low for 7–8 hours or High for 4–5 hours.
Is this soup vegan?
Yes, if you use vegetable broth and skip the Parmesan cheese.
Servings
6 servings
Approximate Nutrition (Per Serving)
- Calories: 295
- Protein: 14g
- Carbohydrates: 47g
- Fat: 6g
- Fiber: 15g
- Sodium: 520mg
Creamy 3-Ingredient Passion Fruit Dessert
Description
If you’re looking for a quick, budget-friendly dessert that tastes incredibly creamy, this 3-ingredient Passion Fruit Dessert is the perfect choice. It requires no gelatin, no condensed milk, and only takes a few minutes to prepare in a blender. The powdered milk creates a rich, mousse-like texture while the passion fruit drink mix adds a delicious sweet-tangy flavor. Simply blend, chill, and enjoy! It’s an ideal dessert for busy weekdays, family gatherings, or whenever you’re craving something sweet without much effort.
Ingredients
For the Dessert
- 10 tablespoons powdered milk
- 1 packet (25 g / 0.88 oz) passion fruit flavored powdered drink mix
- ¾ cup (200 ml) ice-cold water
Optional Garnish
- Fresh passion fruit pulp
- Whipped cream
- Mint leaves
- White chocolate shavings
Instructions
Step 1: Blend the Base
Pour the ice-cold water into a blender.
Step 2: Add Flavor
Add the passion fruit powdered drink mix and blend for about 30 seconds until completely dissolved.
Step 3: Add the Powdered Milk
With the blender running on low speed, gradually add the powdered milk one spoonful at a time. This helps prevent lumps and creates a smooth texture.
Step 4: Blend Until Creamy
Continue blending for 2–3 minutes until the mixture becomes thick, creamy, and fluffy.
Step 5: Transfer
Pour the dessert into individual serving glasses or one medium glass serving dish.
Step 6: Chill
Refrigerate for at least 2 hours, or until the dessert is firm and well chilled.
Step 7: Serve
Top with fresh passion fruit pulp, whipped cream, or chocolate shavings if desired, and enjoy cold.
Tips
- Use very cold water for the thickest consistency.
- Blend a little longer for an extra light and airy texture.
- Refrigerating overnight makes the dessert even creamier.
- Add a few ice cubes while blending for an even fluffier result.
Storage
- Store covered in the refrigerator for up to 3 days.
- Not recommended for freezing, as the texture may become grainy after thawing.
Frequently Asked Questions
Can I use another drink mix flavor?
Yes! Strawberry, lemon, pineapple, grape, and mango all work well.
Can I use warm water?
No. Ice-cold water helps the dessert become thick and creamy.
Can I make it sweeter?
If you prefer a sweeter dessert, add 1–2 tablespoons of sugar or your favorite sweetener before blending.
Can I prepare it ahead of time?
Absolutely! It’s a great make-ahead dessert for parties and family dinners.
Servings
- Makes: 4 servings
Approximate Nutrition (Per Serving)
- Calories: 140
- Protein: 7 g
- Carbohydrates: 19 g
- Fat: 3 g
- Sugar: 17 g
- Calcium: Good source from powdered milk
This simple no-bake dessert is creamy, refreshing, and perfect whenever you need a fast sweet treat with minimal ingredients.
Creamy Homemade Egg Salad Spread
Description
This Creamy Homemade Egg Salad Spread is a classic, comforting, and protein-packed recipe that’s perfect for sandwiches, wraps, or even as a dip. Made with perfectly boiled eggs, creamy dressing, and fresh herbs, it delivers a rich texture with a balanced flavor. The combination of smooth mayonnaise, a hint of tang, and crunchy bits of vegetables creates a satisfying bite every time. Whether you’re preparing a quick lunch, picnic dish, or meal prep option, this egg salad is simple, affordable, and always delicious. It’s creamy, slightly tangy, and full of wholesome goodness.
Ingredients
Main Ingredients:
- 6 large eggs, hard-boiled and chopped
- ½ cup mayonnaise
- 1 tbsp mustard (yellow or Dijon)
Vegetables & Add-ins:
- ¼ cup finely chopped green onions
- ¼ cup finely chopped celery (optional)
- 1 tbsp fresh parsley or dill, chopped
Seasoning:
- ½ tsp salt
- ½ tsp black pepper
- ¼ tsp paprika
Optional Extras:
- 1 tsp lemon juice or vinegar (for extra tang)
- 1 tbsp pickle relish
Step-by-Step Instructions
- Boil eggs: Place eggs in a pot, cover with water, and bring to a boil. Turn off heat, cover, and let sit for 10–12 minutes. Cool, peel, and chop.
- Prepare base: In a large bowl, add chopped eggs and gently mash slightly for desired texture.
- Mix dressing: Add mayonnaise, mustard, and lemon juice (if using). Stir until creamy.
- Add vegetables: Mix in green onions, celery, and herbs.
- Season: Sprinkle salt, pepper, and paprika. Mix well until everything is combined.
- Chill: Cover and refrigerate for at least 30 minutes to let flavors blend.
- Serve: Spread on bread, toast, crackers, or use as a dip.
Tips, Notes & Q&A
- Do not overmix if you prefer a chunkier texture.
- Use fresh eggs for best flavor and consistency.
- Add a little Greek yogurt for a lighter version.
- For extra creaminess, mash one egg completely into the mixture.
Q: How long does egg salad last?
A: Store in the refrigerator for up to 3 days in an airtight container.
Q: Can I make it without mayo?
A: Yes, substitute with Greek yogurt or avocado.
Q: Can I add protein?
A: Add tuna or shredded chicken for variation.
Q: Is it good for meal prep?
A: Yes, it’s quick, filling, and easy to store.
Servings & Nutrition (Approx.)
- Servings: 4
- Calories: ~250 kcal per serving
- Protein: 12 g
- Fat: 20 g
- Carbohydrates: 2 g
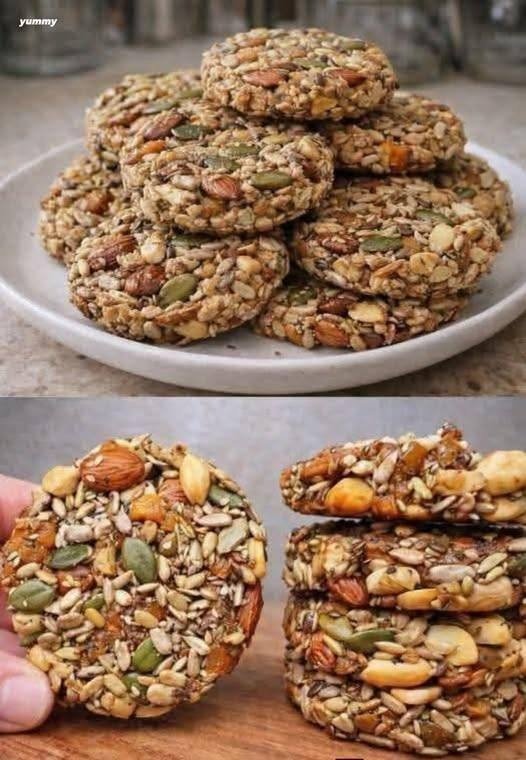
No-Bake Nut & Seed Clusters
Description
No-Bake Nut & Seed Clusters are a wholesome, crunchy snack made with a nutritious blend of nuts, seeds, and a naturally sweet binder. These bite-sized clusters are packed with protein, healthy fats, fiber, and essential minerals, making them perfect for busy mornings, post-workout fuel, or an afternoon energy boost. Since they require no baking, they’re quick to prepare and ideal for warm days when you don’t want to turn on the oven. The combination of almonds, walnuts, pumpkin seeds, and sunflower seeds creates a satisfying texture, while honey and nut butter hold everything together with a touch of sweetness.
Ingredients
- 1 cup almonds, roughly chopped
- ½ cup walnuts, chopped
- ½ cup pumpkin seeds
- ½ cup sunflower seeds
- ¼ cup chia seeds
- ⅓ cup honey or maple syrup
- ¼ cup natural peanut butter or almond butter
- 1 teaspoon vanilla extract
- Pinch of salt
Instructions
- Line a tray or plate with parchment paper.
- In a large mixing bowl, combine almonds, walnuts, pumpkin seeds, sunflower seeds, and chia seeds.
- In a small microwave-safe bowl, combine honey, nut butter, vanilla extract, and salt.
- Heat for 20–30 seconds and stir until smooth.
- Pour the wet mixture over the nut and seed mixture.
- Stir thoroughly until everything is evenly coated.
- Scoop tablespoon-sized portions onto the prepared tray.
- Press each cluster together firmly with a spoon or your hands.
- Refrigerate for 30–45 minutes, or until firm.
- Serve immediately or store in an airtight container.
Recipe Notes
- Maple syrup can be used instead of honey for a vegan version.
- Feel free to mix and match your favorite nuts and seeds.
- Add unsweetened coconut flakes or dried fruit for extra flavor.
Tips
- Slightly warm the nut butter for easier mixing.
- Press the clusters firmly to prevent crumbling.
- Store chilled during hot weather to maintain their shape.
Servings
Serves: 12 clusters
Nutritional Information (Per Cluster)
- Calories: 145
- Protein: 5g
- Carbohydrates: 8g
- Fat: 11g
- Fiber: 3g
- Sugar: 4g
- Sodium: 20mg
Health Benefits
- Rich in heart-healthy unsaturated fats.
- Provides plant-based protein for sustained energy.
- High in fiber, supporting digestive health.
- Contains vitamins, minerals, and antioxidants from nuts and seeds.
- Helps promote fullness and reduce unhealthy snacking.
Frequently Asked Questions
Q: Can I make these clusters vegan?
A: Yes. Replace honey with maple syrup or agave nectar.
Q: How long do they last?
A: Store in an airtight container in the refrigerator for up to 2 weeks.
Q: Can I freeze them?
A: Yes. Freeze for up to 3 months and thaw before eating.
Q: What other nuts can I use?
A: Pecans, cashews, hazelnuts, or pistachios work wonderfully in this recipe.
Q: Are these good for meal prep?
Creamy White Bean Soup
Creamy White Bean Soup is a rich, comforting, and nourishing soup made with tender white beans, aromatic vegetables, garlic, and herbs blended into a velvety, satisfying bowl of goodness. Despite its creamy texture, this soup gets much of its richness from blended beans rather than heavy cream, making it both hearty and wholesome. Perfect for chilly evenings, meal prep, cozy lunches, or simple family dinners, this easy one-pot recipe delivers incredible flavor with pantry-friendly ingredients. Serve it with crusty bread, crackers, or a fresh salad for a complete and comforting meal.
Ingredients For the Soup
- 2 tbsp olive oil
- 1 medium onion, diced
- 2 carrots, diced
- 2 celery stalks, diced
- 4 garlic cloves, minced
For the Base
- 3 cans (15 oz each) white beans, drained and rinsed
- 6 cups vegetable broth or chicken broth
- 1 bay leaf
For the Seasoning
- 1 tsp dried thyme
- 1 tsp dried oregano
- 1 tsp salt
- ½ tsp black pepper
For Creaminess
- ½ cup heavy cream
- ¼ cup grated Parmesan cheese (optional)
For Garnish
- Fresh parsley, chopped
- Extra Parmesan cheese
- Cracked black pepper
Step-by-Step Instructions
Step 1: Sauté the Vegetables
Heat olive oil in a large soup pot over medium heat. Add the onion, carrots, and celery. Cook for 5–6 minutes until softened.
Step 2: Add the Garlic
Stir in the minced garlic and cook for 30 seconds until fragrant.
Step 3: Add the Beans
Add the drained white beans to the pot and stir to combine with the vegetables.
Step 4: Add the Broth
Pour in the broth and add the bay leaf.
Step 5: Season the Soup
Add thyme, oregano, salt, and black pepper. Stir well.
Step 6: Simmer
Bring the soup to a gentle boil, then reduce the heat and simmer for 20–25 minutes.
Step 7: Remove the Bay Leaf
Carefully remove and discard the bay leaf.
Step 8: Blend the Soup
Using an immersion blender, blend about half of the soup until smooth while leaving some beans whole for texture. Alternatively, transfer half of the soup to a blender and return it to the pot.
Step 9: Add the Cream
Stir in the heavy cream and Parmesan cheese if using.
Step 10: Simmer Again
Cook for another 3–5 minutes until the soup is hot and creamy.
Step 11: Taste and Adjust
Taste and adjust seasoning if needed.
Step 12: Garnish
Ladle into bowls and top with fresh parsley, Parmesan cheese, and cracked black pepper.
Step 13: Serve
Serve warm with crusty bread or crackers.
Tips & Notes
- Cannellini beans, Great Northern beans, or navy beans all work well.
- Blend more of the soup for a smoother texture.
- Add spinach or kale during the last few minutes of cooking for extra vegetables.
- Fresh herbs can be used instead of dried herbs.
- For a lighter version, replace heavy cream with milk.
Q&A
Can I make this soup vegetarian?
Yes. Simply use vegetable broth instead of chicken broth.
Can I freeze this soup?
Absolutely. Cool completely and freeze for up to 3 months.
How long does it last in the refrigerator?
Store in an airtight container for up to 4 days.
What can I serve with it?
Crusty bread, grilled cheese sandwiches, crackers, or a fresh green salad pair perfectly.
Servings
6 servings
Nutrition (Per Serving)
- Calories: 290
- Protein: 12g
- Carbohydrates: 28g
- Fat: 15g
- Fiber: 8g
- Sugar: 4g
- Sodium: 620mg
Creamy White Bean Soup is a simple yet satisfying comfort food recipe that transforms humble pantry ingredients into a rich and flavorful meal. The combination of tender beans, aromatic vegetables, herbs, and creamy broth creates a cozy soup that’s perfect for any season. Easy to prepare, budget-friendly, and incredibly delicious, this soup is sure to become a regular favorite in your kitchen.
Blueberry Lemon Cookie Bars
These soft and buttery Blueberry Lemon Cookie Bars are bursting with juicy blueberries, bright lemon flavor, and finished with a sweet lemon glaze. They’re easy to make in one pan and perfect for brunch, afternoon snacks, summer gatherings, or dessert. Every bite is tender, fruity, and refreshing!
🛒 Ingredients
For the Cookie Bars
- 2 cups all-purpose flour
- 1 tsp baking powder
- ¼ tsp salt
- ½ cup unsalted butter, softened
- ¾ cup granulated sugar
- 1 large egg
- 1 tsp vanilla extract
- 2 tbsp fresh lemon juice
- 1 tbsp lemon zest
- 1½ cups fresh blueberries (or frozen, not thawed)
For the Lemon Glaze
- 1 cup powdered sugar
- 2–3 tbsp fresh lemon juice
- 1 tsp lemon zest
👩🍳 Instructions
Step 1: Prepare the Pan
- Preheat your oven to 350°F (175°C).
- Line an 8×8-inch baking pan with parchment paper.
Step 2: Mix Dry Ingredients
- In a bowl, whisk together the flour, baking powder, and salt.
- Set aside.
Step 3: Make the Batter
- In a large bowl, beat the softened butter and sugar until light and fluffy.
- Add the egg, vanilla extract, lemon juice, and lemon zest.
- Mix until smooth.
Step 4: Combine
- Gradually add the dry ingredients to the wet mixture.
- Stir just until combined.
- Gently fold in the blueberries without crushing them.
Step 5: Bake
- Spread the batter evenly into the prepared pan.
- Bake for 28–35 minutes, or until the edges are lightly golden and a toothpick inserted in the center comes out mostly clean.
Step 6: Cool
- Let the bars cool completely in the pan before glazing.
Step 7: Make the Glaze
- Whisk together powdered sugar, lemon juice, and lemon zest until smooth.
- Drizzle generously over the cooled bars.
Step 8: Slice & Serve
- Cut into bars or squares.
- Garnish with extra lemon zest if desired and enjoy!
💡 Tips
- Toss blueberries with 1 teaspoon flour before folding them into the batter to prevent sinking.
- Fresh lemon juice gives the best flavor.
- Allow the glaze to set for 15–20 minutes before slicing for neat bars.
- Store in an airtight container for up to 4 days, or refrigerate for up to 1 week.
❓Q&A
Can I use frozen blueberries?
Yes! Use them straight from the freezer without thawing.
Can I make these ahead of time?
Absolutely. They taste even better the next day after the flavors meld together.
Can I freeze them?
Yes. Freeze (without glaze if possible) for up to 2 months. Thaw overnight in the refrigerator before serving.
🍽️ Servings
- Makes: 16 bars
🥣 Nutrition (Approx. Per Bar)
- Calories: 185
- Protein: 2g
- Carbohydrates: 28g
- Fat: 7g
- Fiber: 1g
- Sugar: 16g
Ginger Lemon Wellness Shot
Description
This homemade Ginger Lemon Wellness Shot is a refreshing drink made with fresh ginger, lemon juice, apple cider vinegar, and a touch of honey. It has a bold, zesty flavor and can be enjoyed as part of a balanced diet. While these ingredients are commonly used in wellness drinks, no single beverage can replace healthy eating, regular exercise, or medical care.
Prep Time
10 minutes
Servings
8–10 shots
Ingredients
For the Wellness Shot
- 1 large fresh ginger root (about 150g), peeled and chopped
- Juice of 2 large lemons
- 2 tablespoons apple cider vinegar (with the mother, optional)
- 1 tablespoon honey (optional)
- 1 cup cold water
Instructions
Step 1: Prepare the Ingredients
Wash and peel the ginger. Cut it into small pieces for easier blending. Squeeze the juice from the lemons and remove any seeds.
Step 2: Blend
Add the chopped ginger, lemon juice, water, apple cider vinegar, and honey (if using) to a blender. Blend on high speed for about 1 minute until smooth.
Step 3: Strain
Pour the mixture through a fine mesh strainer or cheesecloth into a bowl or measuring jug. Press with the back of a spoon to extract as much liquid as possible.
Step 4: Bottle
Transfer the strained liquid into clean glass bottles or jars with lids.
Step 5: Chill
Refrigerate for at least 1 hour before serving.
Step 6: Serve
Shake well before each use. Pour about 1–2 tablespoons into a small glass and enjoy chilled.
Tips
- Fresh ginger gives the best flavor.
- Adjust the amount of honey to suit your taste.
- Add a pinch of turmeric or black pepper for extra flavor if desired.
- Store in the refrigerator for up to 5 days.
- Shake before serving, as natural separation is normal.
Frequently Asked Questions
Can I drink this every day?
Yes, many people enjoy a small serving daily as part of a balanced diet. If you have a medical condition or take medications, consult your healthcare provider first.
Can I skip the apple cider vinegar?
Absolutely. The drink is still delicious with just ginger, lemon, water, and honey.
Can I freeze it?
Yes. Freeze in ice cube trays or small containers for up to 2 months.
Can I make it sweeter?
Add more honey or use a natural sweetener of your choice.
Nutrition (Per Shot – Approximate)
- Calories: 12
- Carbohydrates: 3g
- Protein: 0g
- Fat: 0g
- Fiber: 0g
- Sugar: 2g
- Vitamin C: Good source
- Sodium: 2mg
Note: This wellness shot may be a flavorful addition to a healthy lifestyle, but it is not a proven treatment for belly fat or a substitute for medical care. Sustainable weight management comes from a balanced diet, regular physical activity, good sleep, and overall healthy habits.
🍗 Garlic Herb Chicken with Roasted Sweet Potatoes
Blueberry Greek Yogurt Bites
Description
These Blueberry Greek Yogurt Bites are a refreshing, high-protein frozen snack made with creamy Greek yogurt, juicy blueberries, and a touch of honey. They’re naturally sweet, easy to prepare, and perfect for a healthy dessert, afternoon snack, or grab-and-go breakfast. Keep a batch in the freezer for a cool treat anytime!
🛒 Ingredients
- 1 cup plain Greek yogurt
- ½ cup fresh blueberries
- 1 tbsp honey or maple syrup
- 1 tsp vanilla extract
- ¼ cup melted white chocolate (optional, for marbled look)
👩🍳 Instructions
- Line a small tray or plate with parchment paper.
- In a bowl, mix the Greek yogurt, honey, and vanilla extract until smooth.
- Gently fold in the blueberries, being careful not to crush them.
- If using white chocolate, drizzle it into the yogurt mixture and lightly swirl with a spoon to create a marbled effect.
- Scoop small spoonfuls or use a silicone mold to portion the mixture into bite-sized rounds.
- Freeze for 2–3 hours, or until completely firm.
- Remove from the mold or parchment paper and transfer the bites to a freezer-safe container.
- Enjoy straight from the freezer.
💡 Tips
- Use full-fat Greek yogurt for the creamiest texture.
- Add chopped strawberries or raspberries for extra flavor.
- Sprinkle crushed pistachios or shredded coconut on top before freezing.
- Store in the freezer for up to 2 months.
❓Frequently Asked Questions
Can I use frozen blueberries?
Yes, but thaw and pat them dry before mixing.
Can I make these dairy-free?
Yes. Use your favorite dairy-free Greek-style yogurt.
How should I store them?
Keep them in an airtight freezer container and enjoy directly from the freezer.
🍽️ Servings
Makes: 12–16 bites
🥗 Approximate Nutrition (Per Bite)
- Calories: 45
- Protein: 3g
- Carbohydrates: 4g
- Fat: 2g
- Fiber: 0.3g
- Sugar: 3g
🥗 Classic Creamy Chicken Salad
Description
This Classic Creamy Chicken Salad is packed with tender shredded chicken, a rich and creamy dressing, and fresh herbs for the perfect balance of flavor and texture. It’s ideal for sandwiches, wraps, crackers, lettuce cups, or meal prep. Ready in just minutes, this protein-packed recipe is perfect for lunch, picnics, or quick family meals.
🛒 Ingredients
Chicken Salad
- 4 cups cooked shredded chicken
- ¾ cup mayonnaise
- ¼ cup sour cream or Greek yogurt
- 2 celery stalks, finely diced
- 2 green onions, finely sliced
- 2 tbsp fresh parsley, chopped
- 1 tsp Dijon mustard
- 1 tsp garlic powder
- ½ tsp onion powder
- ½ tsp dried dill
- ½ tsp salt
- ¼ tsp black pepper
- 1 tbsp fresh lemon juice
👩🍳 Instructions
- Place the shredded chicken into a large mixing bowl.
- Add the mayonnaise, sour cream, Dijon mustard, and lemon juice.
- Sprinkle in the garlic powder, onion powder, dried dill, salt, and black pepper.
- Add the diced celery, green onions, and chopped parsley.
- Mix everything together until the chicken is evenly coated in the creamy dressing.
- Cover and refrigerate for 30 minutes to allow the flavors to blend.
- Stir once before serving.
- Serve in sandwiches, wraps, croissants, lettuce cups, or with crackers.
💡 Tips
- Rotisserie chicken works perfectly for this recipe.
- Add chopped grapes or dried cranberries for a touch of sweetness.
- Chopped pecans or almonds add a delicious crunch.
- Store in an airtight container in the refrigerator for up to 4 days.
❓Frequently Asked Questions
Can I make it ahead of time?
Yes! It actually tastes even better after chilling for a few hours.
Can I freeze it?
Freezing isn’t recommended because mayonnaise can separate after thawing.
Can I use canned chicken?
Yes, just drain it well before mixing.
🍽️ Servings
6 servings
🥗 Approximate Nutrition (Per Serving)
- Calories: 340
- Protein: 31g
- Carbohydrates: 3g
- Fat: 22g
- Fiber: 0.5g
- Sugar: 1g
Cheesy Garlic Asparagus Bake
Blood Sugar Support Herbal Tea
Description
This soothing herbal tea combines cinnamon, fenugreek seeds, and fresh mint for a warm, flavorful drink. Some of these ingredients have been studied for their potential role in supporting healthy blood sugar levels, but they are not a replacement for diabetes medication or medical care. Enjoy this tea as part of a balanced diet and healthy lifestyle.
Ingredients
- 2 cups water
- 1 cinnamon stick (or ½ tsp ground cinnamon)
- 1 tsp fenugreek seeds
- 8–10 fresh mint leaves
- 1 tsp fresh grated ginger (optional)
- 1 tsp lemon juice (optional)
- Honey or a sugar-free sweetener (optional)
Instructions
- Pour the water into a small saucepan and bring it to a gentle boil.
- Add the cinnamon stick, fenugreek seeds, and ginger (if using).
- Reduce the heat and simmer for 8–10 minutes.
- Add the fresh mint leaves and simmer for another 2 minutes.
- Remove from the heat and let the tea steep for 5 minutes.
- Strain into a mug.
- Add lemon juice if desired and stir well.
- Enjoy warm.
Tips
- Drink 1 cup once daily if it agrees with you.
- Avoid adding sugar if you’re trying to manage blood sugar.
- Pair this tea with a balanced diet, regular physical activity, and adequate hydration.
- If you take diabetes medication or have a medical condition, talk to your healthcare provider before using herbal remedies regularly, as ingredients like fenugreek may affect blood sugar.
Frequently Asked Questions
Can this cure diabetes?
No. There is no evidence that this tea cures diabetes. It may be a pleasant beverage, but it should not replace prescribed treatment.
Can I drink it every day?
Many people enjoy it daily, but check with your healthcare provider if you have diabetes, are pregnant, or take medications.
Can I use powdered cinnamon?
Yes. Use about ½ teaspoon in place of one cinnamon stick.
Nutrition (Approximate Per Serving)
- Calories: 5–10
- Carbohydrates: 2g
- Fat: 0g
- Protein: 0g
- Fiber: Less than 1g
- Sugar: 0g (without honey)
Note: This tea may complement a healthy lifestyle, but it is not proven to lower blood sugar on its own. If you have diabetes or prediabetes, continue following your prescribed treatment plan and monitor your blood sugar as recommended by your healthcare provider.
Healthy Layered Snack Salad
Creamy Cabbage and Vegetable Bake
This creamy cabbage and vegetable bake is a comforting savory casserole made with shredded cabbage, carrots, herbs, cheese, and a rich egg-cream mixture baked until golden brown. It is soft inside, slightly crispy on top, and perfect as a light dinner, side dish, or meal-prep recipe.
Ingredients (Serves 6–8)
- 1 small green cabbage, finely shredded
- 2 medium carrots, grated
- 1 onion, finely chopped
- 1 cup shredded mozzarella or cheddar cheese
- 4 eggs
- 1 cup heavy cream or milk
- ½ cup mayonnaise or sour cream
- 1 cup all-purpose flour
- 1 tsp baking powder
- 2 tbsp olive oil or melted butter
- 1 tsp salt
- ½ tsp black pepper
- 1 tsp garlic powder
- 1 tsp dried rosemary or parsley
- Optional: cooked chicken, mushrooms, or bacon bits
Instructions
1. Prepare the Vegetables
Preheat the oven to 180°C (350°F). Grease a baking dish with butter or cooking spray.
Shred the cabbage finely and place it in a large bowl. Add grated carrots and chopped onion. Toss everything together evenly.
2. Make the Creamy Batter
In another bowl, whisk eggs, cream, and mayonnaise until smooth. Add flour and baking powder slowly while whisking to avoid lumps. Season with salt, pepper, garlic powder, and herbs.
The mixture should be creamy but pourable.
3. Assemble
Spread the vegetable mixture evenly in the baking dish. Sprinkle cheese over the top.
Pour the creamy batter evenly across the vegetables so it reaches all corners. Lightly shake the dish to distribute the mixture.
4. Bake
Bake for 35–45 minutes or until the top becomes golden brown and the center is fully set.
Allow the casserole to rest for 10 minutes before slicing into squares.
Serve warm.
Description Notes
This dish combines the freshness of vegetables with the richness of a savory custard-like filling. The cabbage becomes tender and slightly sweet while baking, and the top develops a beautiful golden crust.
It tastes similar to a cross between a vegetable quiche and a savory pie, but without needing complicated pastry dough.
Perfect for:
- Family dinners
- Potlucks
- Vegetarian meals
- Lunchboxes
- Holiday side dishes
Tips for Best Results
- Drain excess moisture: If the cabbage releases too much water, lightly squeeze it before baking.
- Add protein: Chicken, tuna, or smoked sausage can make it a complete meal.
- Use fresh herbs: Dill, parsley, or chives boost flavor beautifully.
- Cheese options: Mozzarella gives stretchiness while cheddar adds stronger flavor.
- Crispier top: Broil for the last 2–3 minutes.
- Low-carb version: Replace flour with almond flour.
Nutritional Information (Approx. Per Serving)
- Calories: 260–320
- Protein: 10–14g
- Carbohydrates: 15–18g
- Fat: 18–22g
- Fiber: 3–5g
- Calcium: Good source
- Vitamin A: High
- Vitamin C: Moderate
Values vary depending on cheese and cream used.
Health Benefits
1. Rich in Fiber
Cabbage and carrots support digestion and help maintain gut health.
2. Packed with Vitamins
Carrots provide vitamin A for eye health, while cabbage offers vitamin C and antioxidants.
3. Good Energy Meal
The combination of eggs, cheese, and vegetables provides balanced protein and carbohydrates.
4. Budget-Friendly
Simple pantry ingredients make this recipe affordable and filling.
5. Versatile
You can customize it easily with different vegetables and proteins.
Questions & Answers
Q1: Can I make this ahead of time?
Yes. Prepare and refrigerate before baking for up to 24 hours.
Q2: Can I freeze it?
Yes. Slice into portions and freeze for up to 2 months.
Q3: What can replace mayonnaise?
Greek yogurt or sour cream works well.
Q4: Can I make it gluten-free?
Yes. Use gluten-free flour or oat flour.
Q5: Why is my casserole watery?
Cabbage naturally releases moisture. Salt lightly and drain excess liquid before baking.
Q6: What should I serve with it?
It pairs well with soup, salad, grilled meat, or roasted potatoes.