Air Fryer Grilled Cheese Sandwich

Air Fryer Grilled Cheese Sandwich

A crispy-on-the-outside, gooey-on-the-inside classic made easier and more consistent using an air fryer. The air fryer circulates hot air around the bread, giving you a golden crust with perfectly melted cheese in the center—without needing a pan or flipping.

Grilled cheese sandwich is one of the simplest comfort foods, and the air fryer version upgrades it with even browning and less mess.

Ingredients (1 sandwich)

2 slices bread (white, whole wheat, sourdough, etc.)

  • 2 slices cheese (cheddar, American, mozzarella, or mix)
  • 1–2 tsp butter (softened) or mayonnaise (for crispier crust)
  • Optional: pinch of garlic powder, black pepper, or herbs

Instructions

1. Prep the bread

Spread butter or mayonnaise evenly on one side of each bread slice.

2. Assemble

Place cheese between the unbuttered sides (buttered sides should face outward).

3. Preheat air fryer

Preheat to 180°C (350°F) for 2–3 minutes.

4. Air fry

  • Place sandwich in air fryer basket
  • Cook for 5–7 minutes
  • Flip halfway through for even browning

5. Check & serve

Remove when golden brown and cheese is melted. Let it rest 1 minute before cutting.

Recipe Notes

Thicker bread = sturdier sandwich (good for melting cheese without leaks)

  • Use shredded cheese for faster melting
  • Don’t overload cheese or it may ooze out too much
  • Every air fryer model varies slightly—watch closely the first time

Tips for Best Results

  • Mayonnaise trick: spreads easier and browns faster than butter
  • Low-temp melt trick: if cheese isn’t melting well, reduce temp to 170°C and cook slightly longer
  • Crispier crust: use sourdough or artisan bread
  • Extra flavor: add mozzarella + cheddar combo for stretch + taste
  • Lightly press sandwich before air frying for better contact heat

Servings

  • 1 sandwich per serving
  • Easily scalable for 2–6 sandwiches (cook in batches)

Approximate Nutritional Info (per sandwich)

  • Calories: 320–420 kcal
  • Protein: 12–18 g
  • Carbohydrates: 25–35 g
  • Fat: 18–25 g
  • Fiber: 1–3 g
  • Sodium: 450–800 mg (varies by cheese and bread)

Benefits

  • Quick comfort  food (ready in under 10 minutes)
  • Less oil than pan-frying
  • Easy cleanup (no skillet needed)
  • Customizable for dietary needs
  • Good source of calcium and protein (from cheese)

Q&A

Q1: Can I use any bread?

Yes, but sturdier breads like sourdough or whole wheat hold up better.

Q2: What cheese melts best?

Cheddar, American cheese, mozzarella, or a blend works best for melt + flavor.

Q3: Why is my sandwich not crispy?

You may need more butter/mayo or slightly higher temperature.

Q4: Can I make it vegan?

Yes—use plant-based cheese and vegan butter.

Q5: Do I need to flip it?

Yes, flipping ensures even browning on both sides

Garlic Chicken and Green Beans

This garlic chicken and green beans skillet is a quick, healthy, high-protein dinner packed with flavor. It’s perfect for busy weeknights, meal prep, or low-carb eating.

Prep & Cook Time

  • Prep Time: 10 minutes
  • Cook Time: 20 minutes
  • Total Time: 30 minutes

Servings

4 servings

Ingredients

  • 2 large chicken breasts, sliced
  • 4 cups green beans, trimmed
  • 3 cloves garlic, minced
  • 2 tbsp olive oil
  • 1 tbsp butter
  • 1 tsp Italian seasoning
  • 1/2 tsp paprika
  • Salt & black pepper to taste
  • 1 tbsp lemon juice (optional)

Instructions

1. Season the Chicken

Season sliced chicken with:

  • Italian seasoning
  • paprika
  • salt
  • pepper

2. Cook the Chicken

Heat 1 tbsp olive oil in a large skillet over medium-high heat.

Cook chicken for 5–7 minutes until golden and cooked through.

Remove from skillet and set aside.

3. Cook the Green Beans

In the same skillet add:

  • remaining olive oil
  • butter
  • garlic

Cook 30 seconds until fragrant.

Add green beans and sauté for 6–8 minutes until tender.

4. Combine Everything

Return chicken to skillet.

Stir together and cook another 2 minutes.

Add lemon juice if desired.

Serving Ideas

Serve with:

  • rice
  • mashed potatoes
  • cauliflower rice
  • pasta
  • roasted vegetables

Optional Add-Ons

  • Parmesan cheese
  • Red pepper flakes
  • Mushrooms
  • Soy sauce for extra flavor

Storage

  • Refrigerate up to 4 days
  • Great for meal prep

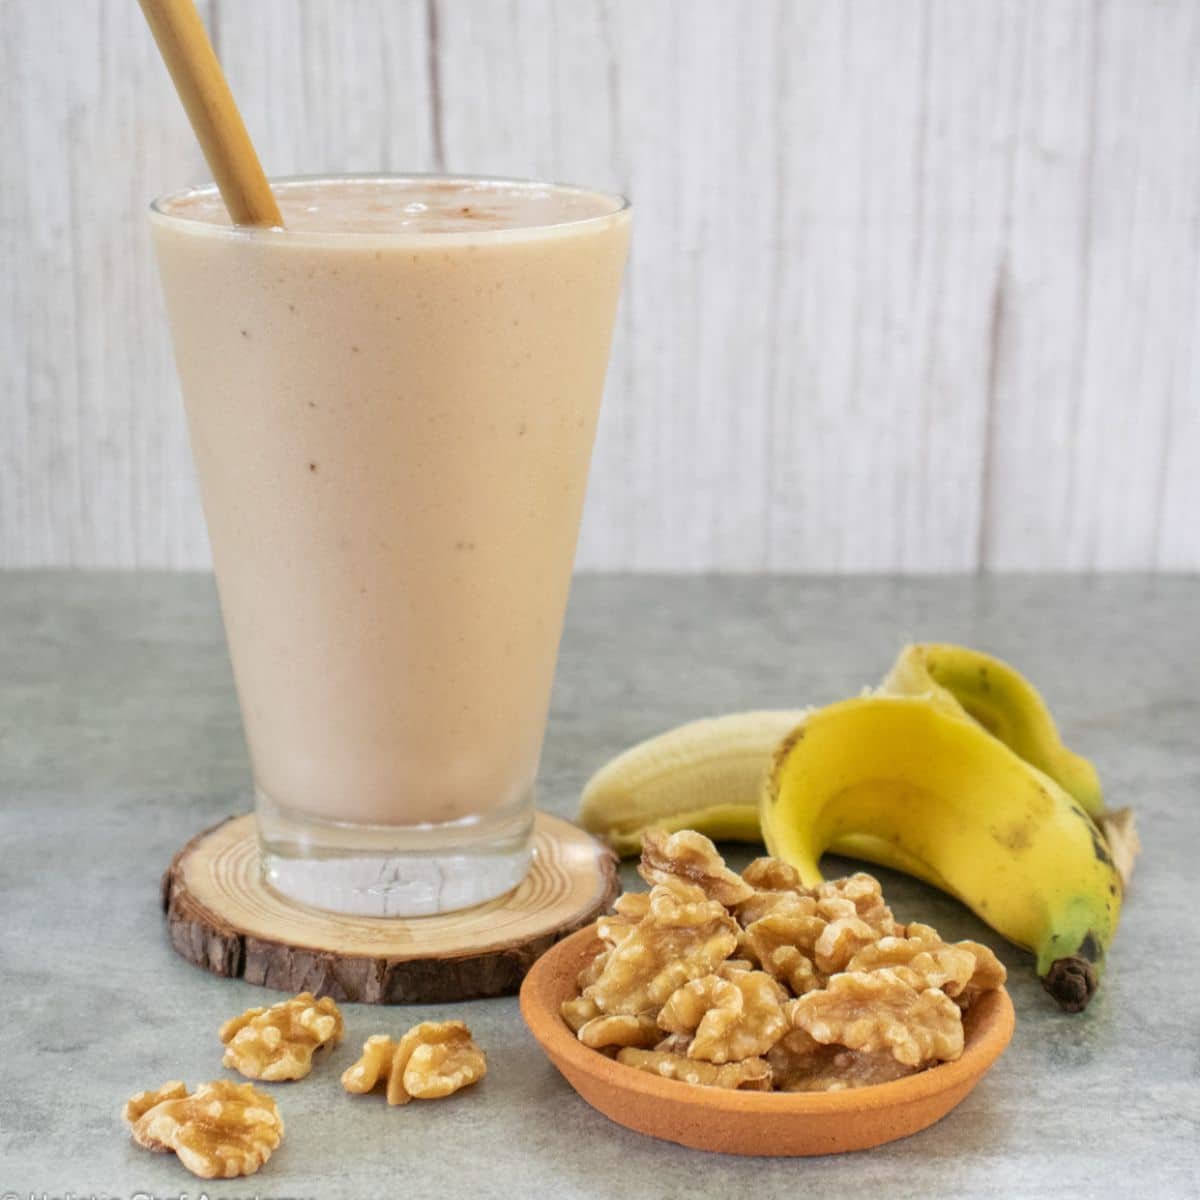
Creamy Banana & Oat Breakfast Smoothie.

 Creamy Banana & Oat Breakfast Smoothie

Ingredients

  • 1 large banana (frozen chunks work best for that milkshake-like consistency)

  • 1/2 cup rolled oats (provides a nutty flavor and sustained energy)

  • 1 cup milk of choice (dairy, almond, oat, or soy all work beautifully)

  • 1 tablespoon almond or peanut butter (for healthy fats and creaminess)

  • 1/2 teaspoon vanilla extract

  • A pinch of cinnamon

  • 1 teaspoon honey or maple syrup (optional, depending on the ripeness of the banana)

  • A handful of ice cubes (if using a fresh banana)


Instructions

  1. Prep the Base: If you have a high-powered blender, you can add the oats directly. If your blender is smaller, pulse the dry oats first until they reach a flour-like consistency to ensure the smoothie is perfectly smooth.

  2. Combine: Add the liquid milk to the blender first. Following with the liquids helps the blades move more freely and prevents sticking.

  3. Layer the Solids: Drop in the banana chunks, the nut butter, vanilla, and cinnamon. Add your sweetener of choice if you prefer a more dessert-like flavor.

  4. The Blend: Start the blender on a low speed to break up the frozen fruit, then gradually increase to high. Blend for about 45–60 seconds until the mixture is completely homogeneous and you see those lovely little air bubbles shown in the photo.

  5. Adjust Consistency: If it feels too thick, splash in more milk. If you want it thicker, add a few more ice cubes or another half-banana and blend again.

  6. Serve: Pour into a tall chilled glass and enjoy immediately with a reusable straw.


Quick Tip

To get that exact look in the picture, use frozen bananas. They create a natural creaminess without needing heavy creams or powders!

Creamy Banana & Oat Breakfast Smoothie

← Back

Thank you for your response. ✨

 Creamy Banana & Oat Breakfast Smoothie.


Ingredients

  • 1 large banana (frozen chunks work best for that milkshake-like consistency)

  • 1/2 cup rolled oats (provides a nutty flavor and sustained energy)

  • 1 cup milk of choice (dairy, almond, oat, or soy all work beautifully)

  • 1 tablespoon almond or peanut butter (for healthy fats and creaminess)

  • 1/2 teaspoon vanilla extract

  • A pinch of cinnamon

  • 1 teaspoon honey or maple syrup (optional, depending on the ripeness of the banana)

  • A handful of ice cubes (if using a fresh banana)


Instructions

  1. Prep the Base: If you have a high-powered blender, you can add the oats directly. If your blender is smaller, pulse the dry oats first until they reach a flour-like consistency to ensure the smoothie is perfectly smooth.

  2. Combine: Add the liquid milk to the blender first. Following with the liquids helps the blades move more freely and prevents sticking.

  3. Layer the Solids: Drop in the banana chunks, the nut butter, vanilla, and cinnamon. Add your sweetener of choice if you prefer a more dessert-like flavor.

  4. The Blend: Start the blender on a low speed to break up the frozen fruit, then gradually increase to high. Blend for about 45–60 seconds until the mixture is completely homogeneous and you see those lovely little air bubbles shown in the photo.

  5. Adjust Consistency: If it feels too thick, splash in more milk. If you want it thicker, add a few more ice cubes or another half-banana and blend again.

  6. Serve: Pour into a tall chilled glass and enjoy immediately with a reusable straw.


Quick Tip

To get that exact look in the picture, use frozen bananas. They create a natural creaminess without needing heavy creams or powders!

Tropical Raspberry-Mango Swirl Smoothie


Ingredients

For the Mango Layer:

  • 1 cup frozen mango chunks

  • 1/2 cup Greek yogurt (plain or vanilla)

  • 1/2 cup orange juice or coconut milk

  • 1 tsp honey or agave nectar (optional)

For the Raspberry Layer:

  • 1 cup frozen raspberries

  • 1/2 cup almond milk (or milk of choice)

  • 1/2 banana (frozen works best for creaminess)

  • A squeeze of fresh lime juice

For the Topping:

  • Fresh raspberries

  • A few slices of fresh mango

  • A sprig of mint (optional)


Instructions

  1. Prepare the Raspberry Base: In a high-speed blender, combine the frozen raspberries, milk, banana, and lime juice. Blend until completely smooth and thick. If the mixture is too thin, add a few more frozen berries. Pour this into a separate bowl and set aside (or rinse the blender).

  2. Prepare the Mango Layer: Add the mango chunks, yogurt, juice, and sweetener to the blender. Blend until creamy and golden. You want this to be a similar consistency to the raspberry layer so they don’t mix too quickly when poured.

  3. Create the Swirl Effect: To achieve the look in the photo, tilt your serving glass slightly. Pour a large portion of the raspberry mixture into the bottom. Gently spoon or pour the mango mixture over the top. Use a long spoon or a straw to gently swirl the two colors together—be careful not to over-mix, or it will turn a solid orange-pink!

  4. Garnish and Serve: Top the smoothie with a generous handful of fresh raspberries and a fan of sliced mango. Add a colorful straw and enjoy immediately while chilled.


Pro Tip

For the most defined layers, place the glass in the freezer for 5 minutes after pouring the first layer. This firms it up just enough to support the second layer on top!

Triple Chocolate Mousse Ice Cream,

Chocolate Mousse Ice Cream

Ingredients

  • The Base: 2 cups (480ml) heavy whipping cream, chilled.

  • The Sweetener: 1 can (14oz) sweetened condensed milk.

  • The Flavor: 1/2 cup unsweetened cocoa powder (Dutch-processed for a darker look).

  • The Texture: 1/2 cup semi-sweet chocolate chips (melted and cooled).

  • The Garnish: Chocolate syrup and extra chocolate shavings.


Instructions

  1. Prep the Chocolate Base: In a medium bowl, whisk together the sweetened condensed milk and the cocoa powder until smooth. Stir in the melted (but cooled) chocolate chips. This creates the intense “fudge” backbone of your ice cream.

  2. Whip the Cream: In a separate large chilled bowl, beat the heavy whipping cream on high speed until stiff peaks form. Be careful not to over-mix; you want it light and fluffy like a cloud.

  3. The Fold (Crucial Step): Gently fold about a cup of the whipped cream into the chocolate mixture to lighten it up. Then, pour the chocolate mixture back into the remaining whipped cream. Use a spatula to gently fold them together. Do not stir vigorously, or you will lose the air that gives it that mousse texture.

  4. Assemble and Freeze: Pour half the mixture into a loaf pan. Drizzle with chocolate syrup. Add the remaining mixture and top with more syrup and chocolate shavings.

  5. Set: Cover with plastic wrap (touching the surface to prevent ice crystals) and freeze for at least 6 hours or overnight.


Serving Tip

To get those perfect, textured scoops like the image, let the container sit on the counter for 5 minutes before scooping. Use a warm metal scoop to create those beautiful, rugged ridges. Enjoy!

Mint Chocolate Chip Milkshake

Mint Chocolate Chip Milkshake

Ingredients

To get that perfect creamy texture and minty flavor, you will need:

  • Ice Cream: 3 large scoops of premium mint chocolate chip ice cream.

  • Milk: 1/2 cup of whole milk (or a dairy-free alternative like oat milk for extra creaminess).

  • Flavor Boost: 1/4 teaspoon of peppermint extract (optional, if you want an extra “zing”).

  • Color: 1 drop of green food coloring (if your ice cream is more white than green).

  • Toppings:

    • Whipped cream (stiff peaks work best for stacking).

    • Fresh mint leaves for garnish.

    • Extra dark chocolate shavings or mini chocolate chips.


Instructions

  1. Chill the Glass: For that professional look where the shake clings to the glass, place your mug or glass in the freezer for 10 minutes before starting.

  2. Combine: In a high-speed blender, add the mint chocolate chip ice cream and the milk. If you are using peppermint extract or food coloring, add them now.

  3. Blend: Pulse the blender on low speed. You want to mix the ingredients until they are smooth but still thick. Over-blending will make the shake runny.

  4. The “Drip” Effect: To achieve the dripping look seen in the image, pour the shake slowly into the chilled glass, allowing a small amount of the foam to overflow naturally down the sides.

  5. Garnish: Top generously with a swirl of whipped cream. Sprinkle the finely chopped chocolate or mini chips over the top.

  6. Final Touch: Tuck a few sprigs of fresh mint into the whipped cream and add a wide straw.


Pro Tip

If you prefer a thicker shake, use less milk. If the blender is struggling, let the ice cream sit on the counter for 5 minutes to soften slightly before blending rather than adding more liquid!

Blueberry Lemon Ice Cream

Blueberry Lemon Ice Cream

Ingredients

  • 2 cups Heavy whipping cream (chilled)

  • 1 can (14 oz) Sweetened condensed milk

  • 2 cups Fresh or frozen blueberries

  • 2 tbsp Granulated sugar

  • 1 tbsp Fresh lemon zest

  • 3 tbsp Freshly squeezed lemon juice

  • 1 tsp Vanilla extract

  • Extra blueberries and lemon slices for garnish


Instructions

1. Prepare the Blueberry Compote

In a small saucepan, combine the blueberries, granulated sugar, and 1 tablespoon of lemon juice. Cook over medium heat for 8–10 minutes, stirring occasionally, until the berries burst and the mixture thickens into a syrupy consistency. Remove from heat and let it cool completely. For a smoother texture, you can pulse this mixture in a blender.

2. Mix the Base

In a medium bowl, whisk together the sweetened condensed milk, lemon zest, remaining lemon juice, and vanilla extract. Once combined, gently stir in the cooled blueberry compote until you see beautiful purple swirls.

3. Whip the Cream

In a separate large chilled bowl, beat the heavy whipping cream using a hand mixer or stand mixer on high speed until stiff peaks form. Be careful not to overbeat.

4. Fold and Combine

Gently fold the blueberry-milk mixture into the whipped cream using a spatula. Use a slow “under-and-over” motion to keep the mixture light and airy. Do not stir vigorously, or you will deflate the cream.

5. Freeze

Pour the mixture into a 9×5-inch loaf pan or an airtight container. Smooth the top and scatter a few fresh blueberries over the surface. Cover with plastic wrap (touching the surface to prevent ice crystals) and freeze for at least 6 hours, or preferably overnight.

6. Serve

Scoop into chilled bowls and garnish with a fresh lemon wheel and extra berries to match the beautiful presentation in the photo!

Easy Beef Enchiladas

These easy beef enchiladas are warm, cheesy, hearty, and perfect for busy weeknights. They come together with simple ingredients but taste like full comfort food straight from the oven.

Ingredients

  • 1 pound ground beef
  • 1 can enchilada sauce
  • 1½–2 cups shredded cheese
  • 6–8 flour tortillas

Optional Additions

  • 1 small onion, chopped
  • 1 tsp garlic powder
  • 1 tsp chili powder
  • 1/2 tsp cumin
  • Salt & black pepper
  • 1 can diced tomatoes with green chiles
  • Sour cream for serving
  • Cilantro or parsley for garnish

Instructions

1. Cook the Beef

Heat a skillet over medium heat.

Cook:

  • ground beef
  • onion (if using)

Break apart while cooking until browned.

Drain excess grease.

Season with:

  • garlic powder
  • chili powder
  • cumin
  • salt & pepper

2. Warm the Tortillas

Warm tortillas in:

  • microwave for a few seconds
    OR
  • dry skillet

This keeps them soft and easy to roll.

3. Assemble the Enchiladas

  1. Spread a little enchilada sauce in the baking dish.
  2. Add beef and cheese to each tortilla.
  3. Roll tightly and place seam-side down.

Repeat with remaining tortillas.

4. Add Sauce & Cheese

Pour remaining enchilada sauce over the top.

Sprinkle generously with cheese.

5. Bake

Bake at 375°F (190°C) for 20–25 minutes until:

  • cheese melts
  • sauce bubbles
  • top becomes golden

Let rest 5–10 minutes before serving.

Serving Ideas

Serve with:

  • rice
  • tortilla chips
  • sour cream
  • avocado
  • refried beans
  • salad

Tips

  • Warm tortillas before rolling.
  • Don’t overfill tortillas.
  • Use plenty of sauce to keep enchiladas moist.
  • Let rest before serving for cleaner slices.

Flourless & Sugar-Free Carrot Cake

The Ultimate Flourless & Sugar-Free Carrot Cake

This carrot cake is a game-changer for anyone following a Mediterranean diet or looking for a guilt-free dessert. It relies on the natural sweetness of carrots and the richness of healthy fats to create a moist, decadent texture that rivals any traditional bakery cake. By removing refined flour and sugar, you are left with a nutrient-dense masterpiece that focuses on whole-food ingredients.

Ingredients

For the Cake Base:

  • 2 cups Carrots, finely grated (about 3-4 large carrots)

  • 2 ½ cups Almond flour (blanched for a finer texture)

  • 3 large Eggs, room temperature

  • ⅓ cup Extra virgin olive oil

  • ½ cup Chopped walnuts or pecans (plus extra for topping)

  • 1 tsp Vanilla extract

  • 2 tsp Ground cinnamon

  • ½ tsp Ground ginger

  • 1 tsp Baking powder

  • ¼ tsp Sea salt

Optional Sweetener:

  • ¼ cup Raw honey or maple syrup (if a sweeter profile is desired while staying natural)

Instructions

1. Preparation

Preheat your oven to 170°C (340°F). Grease a 7-inch or 8-inch round cake pan with a little olive oil and line the bottom with parchment paper. This ensures the flourless cake releases perfectly without sticking.

2. Mix the Wet Ingredients

In a large mixing bowl, whisk the eggs until they are frothy and light. Slowly pour in the extra virgin olive oil and vanilla extract. If you are using a natural liquid sweetener like honey, whisk it in at this stage until the mixture is well-incorporated and smooth.

3. Incorporate the Dry Ingredients

Add the almond flour, cinnamon, ginger, baking powder, and sea salt directly into the wet mixture. Fold gently with a spatula until just combined. The almond flour provides a beautiful, nutty foundation that keeps the cake moist without the need for gluten.

4. The Star Ingredient

Fold in the finely grated carrots and chopped walnuts. The carrots add essential moisture and a natural sweetness that intensifies as it bakes. Ensure the carrots are evenly distributed throughout the thick batter.

5. The Bake

Pour the batter into your prepared pan and smooth the top with a spatula. Bake for 40–45 minutes. You’ll know it’s ready when the top is golden brown and a toothpick inserted into the center comes out clean.

6. Cooling

This is the most critical step for flourless cakes: let it cool completely in the pan. Because there is no gluten to provide structure, the cake sets and develops its “unreal” fudgy texture as it reaches room temperature.

Nutrition Highlights

Nutrient Benefit
Almond Flour High in Vitamin E and magnesium for heart health.
Carrots Rich in Beta-carotene and fiber.
Olive Oil Provides monounsaturated fats, a staple of healthy living.
Walnuts Adds a boost of Omega-3 fatty acids and a satisfying crunch.

This cake proves that you don’t need refined ingredients to create something truly crave-worthy. It is a perfect addition to your rotation of healthy, whole-food recipes.

Chocolate Ice Cream Bars

These creamy homemade chocolate ice cream bars are rich, smooth, and melt-in-your-mouth delicious. Perfect for summer treats, parties, or quick frozen desserts!

Prep Time

  • Prep Time: 15 minutes
  • Freeze Time: 6 hours or overnight
  • Total Time: About 6 hours

Makes

8–10 bars

Ingredients

  • 2 cups heavy cream
  • 1 can (14 oz) sweetened condensed milk
  • 1/2 cup cocoa powder
  • 1 tsp vanilla extract
  • 1 cup melted milk chocolate
  • Pinch of salt

Optional Coating

  • Melted chocolate
  • Crushed nuts
  • Chocolate chips

Instructions

1. Make the Chocolate Mixture

In a large bowl whisk together:

  • sweetened condensed milk
  • cocoa powder
  • vanilla
  • melted chocolate
  • salt

Mix until smooth.

2. Whip the Cream

In another bowl whip heavy cream until soft peaks form.

Fold gently into the chocolate mixture.

3. Fill the Mold

Pour mixture into:

  • popsicle molds
  • loaf pan
  • silicone bar molds

Smooth the top.

4. Freeze

Freeze for at least 6 hours or overnight until fully firm.

5. Optional Chocolate Coating

Dip frozen bars into melted chocolate for a crunchy shell.

Let set for 1–2 minutes.

Tips

  • Use dark chocolate for richer flavor.
  • Add crushed Oreos or nuts for texture.
  • Run molds under warm water for easy release.

Storage

  • Keep frozen up to 2 weeks in an airtight container.

Homemade Flatbread

These homemade flatbreads are soft, fluffy, and perfect for wraps, dipping, sandwiches, or serving alongside soups and curries. No oven needed — they cook beautifully in a skillet!

Prep & Cook Time

  • Prep Time: 20 minutes
  • Rise Time: 1 hour
  • Cook Time: 15 minutes
  • Total Time: 1 hour 35 minutes

Makes

8–10 flatbreads

Ingredients

  • 3 cups all-purpose flour
  • 1 tsp salt
  • 1 tbsp sugar
  • 2 tsp instant yeast
  • 1 cup warm water
  • 1/4 cup warm milk
  • 2 tbsp olive oil or melted butter

Instructions

1. Make the Dough

In a large bowl combine:

  • flour
  • salt
  • sugar
  • yeast

Add:

  • warm water
  • warm milk
  • olive oil

Mix until dough forms.

2. Knead

Knead for 8–10 minutes until smooth and soft.

If sticky, add a little flour.

3. Let It Rise

Place dough in a greased bowl.

Cover and let rise for 1 hour or until doubled in size.

4. Shape the Flatbreads

  1. Divide dough into 8–10 balls.
  2. Roll each into a small circle about 1/4 inch thick.

5. Cook

Heat a dry skillet or pan over medium heat.

Cook each flatbread:

  • 2–3 minutes on first side
  • flip and cook another 1–2 minutes

They should puff slightly and develop golden spots.

6. Keep Soft

Brush warm flatbreads with butter and cover with a towel.

Serving Ideas

Serve with:

  • hummus
  • garlic sauce
  • grilled chicken
  • curry
  • sandwiches
  • breakfast eggs

Optional Variations

  • Add garlic butter on top
  • Mix herbs into the dough
  • Use whole wheat flour for a healthier version

Storage

  • Room temperature: 2 days
  • Refrigerator: 5 days
  • Freeze up to 2 months

Cheesy Taco Dip

This hot cheesy taco dip is creamy, meaty, loaded with flavor, and perfect for parties, game nights, or quick appetizers. Serve it warm with tortilla chips and watch it disappear fast!

Prep & Cook Time

  • Prep Time: 10 minutes
  • Cook Time: 20 minutes
  • Total Time: 30 minutes

Servings

6–8 servings

Ingredients

Dip Base

  • 1 lb ground beef
  • 1 small onion, diced
  • 2 cloves garlic, minced
  • 1 packet taco seasoning
  • 1 can (10 oz) diced tomatoes with green chilies
  • 1 can black beans, drained
  • 1 cup corn
  • 1 package (8 oz) cream cheese, softened
  • 1 cup sour cream
  • 2 cups shredded cheddar or Mexican blend cheese

Toppings

  • Diced tomatoes
  • Jalapeños
  • Fresh cilantro
  • Sour cream

For Serving

  • Tortilla chips

Instructions

1. Cook the Beef

In a skillet over medium heat:

  1. Cook onion until soft.
  2. Add garlic and ground beef.
  3. Cook until browned and drain excess grease.

2. Add Flavor

Stir in:

  • taco seasoning
  • diced tomatoes
  • black beans
  • corn

Cook for 3–4 minutes.

3. Make It Creamy

Reduce heat and stir in:

  • cream cheese
  • sour cream

Mix until smooth and creamy.

4. Add Cheese

Transfer mixture to an oven-safe dish.

Top with shredded cheese.

Bake at 375°F (190°C) for 10–15 minutes until melted and bubbly.

5. Add Toppings

Top with:

  • diced tomatoes
  • jalapeños
  • cilantro
  • sour cream

Serve hot with tortilla chips.

Optional Add-Ons

  • Avocado or guacamole
  • Green onions
  • Hot sauce
  • Extra queso cheese

Storage

  • Refrigerate up to 3 days
  • Reheat in microwave or oven

Mediterranean Stuffed Sweet Potatoes with Spinach & Mushrooms

Mediterranean Stuffed Sweet Potatoes with Spinach & Mushrooms

A wholesome Mediterranean-inspired meal featuring roasted sweet potatoes filled with savory sautéed mushrooms, spinach, garlic, herbs, and creamy feta cheese. This dish is hearty, nutrient-dense, naturally vegetarian, and perfect for lunch or dinner. The sweetness of the potatoes balances beautifully with earthy mushrooms and tangy Mediterranean flavors.

Recipe Description

These stuffed sweet potatoes combine comforting roasted vegetables with classic Mediterranean ingredients. Tender sweet potatoes are baked until caramelized, then loaded with a flavorful filling of spinach, mushrooms, onions, garlic, olive oil, herbs, and feta. The result is a colorful, satisfying meal packed with fiber, vitamins, and antioxidants.

This recipe works well for:

  • Healthy weeknight dinners
  • Meal prep
  • Vegetarian entertaining
  • Gluten-free diets
  • Mediterranean diet meal plans

Preparation Time

  • Prep Time: 15 minutes
  • Cook Time: 45 minutes
  • Total Time: 1 hour

Servings

  • Serves: 4

Ingredients

For the Sweet Potatoes

  • 4 medium sweet potatoes
  • 1 tablespoon olive oil
  • ½ teaspoon salt
  • ¼ teaspoon black pepper

For the Filling

  • 1 tablespoon olive oil
  • 1 small onion, finely chopped
  • 3 garlic cloves, minced
  • 8 oz mushrooms, sliced
  • 4 cups fresh spinach
  • 1 teaspoon dried oregano
  • ½ teaspoon smoked paprika
  • Salt and pepper to taste
  • ½ cup crumbled feta cheese
  • 2 tablespoons chopped parsley
  • 1 tablespoon lemon juice

Optional Toppings

  • Cherry tomatoes
  • Kalamata olives
  • Red pepper flakes
  • Tahini drizzle
  • Toasted pine nuts

Instructions

Step 1: Roast the Sweet Potatoes

  1. Preheat oven to 400°F (200°C).
  2. Wash and dry the sweet potatoes.
  3. Pierce each potato several times with a fork.
  4. Rub with olive oil, salt, and pepper.
  5. Place on a baking sheet and roast for 40–50 minutes until fork tender.

Step 2: Prepare the Filling

  1. Heat olive oil in a skillet over medium heat.
  2. Add onion and sauté for 3–4 minutes until softened.
  3. Stir in garlic and cook for 30 seconds.
  4. Add mushrooms and cook until browned and moisture evaporates.
  5. Add spinach and cook until wilted.
  6. Season with oregano, smoked paprika, salt, and pepper.
  7. Remove from heat and stir in lemon juice, parsley, and feta.

Step 3: Stuff the Potatoes

  1. Slice each roasted sweet potato lengthwise.
  2. Gently fluff the inside with a fork.
  3. Spoon the spinach and mushroom filling into each potato.
  4. Add extra feta or toppings if desired.

Step 4: Serve

Serve warm with a side salad, soup, or roasted vegetables.

Recipe Notes

  • Roast potatoes directly on the oven rack for crispier skins.
  • Avoid overcrowding mushrooms in the skillet to help them brown properly.
  • Add chickpeas or lentils for extra protein.
  • For vegan preparation, replace feta with vegan cheese or tahini sauce.

Helpful Tips

Cooking Tips

  • Choose evenly sized sweet potatoes for uniform cooking.
  • Use baby spinach for a softer texture.
  • Squeeze spinach dry if using frozen spinach.

Flavor Tips

  • Add sun-dried tomatoes for richer Mediterranean flavor.
  • A touch of cumin adds warmth and depth.
  • Fresh dill pairs beautifully with feta.

Storage Tips

  • Refrigerate leftovers in an airtight container for up to 4 days.
  • Reheat in the oven for best texture.
  • Filling can be made 2 days ahead.

Nutritional Information (Per Serving Approx.)

Nutrient Amount
Calories 320
Protein 10g
Carbohydrates 42g
Fiber 8g
Sugars 10g
Fat 13g
Saturated Fat 4g
Sodium 420mg
Potassium 760mg
Vitamin A 380% DV
Vitamin C 35% DV
Iron 15% DV
Calcium 18% DV

Health Benefits

Sweet Potatoes

  • Rich in beta-carotene and antioxidants
  • Excellent source of fiber
  • Supports eye and immune health

Spinach

  • High in iron, folate, and vitamin K
  • Supports bone health and circulation
  • Low in calories and nutrient dense

Mushrooms

  • Provide selenium and B vitamins
  • May support immune function
  • Add savory umami flavor without excess calories

Olive Oil

  • Contains heart-healthy monounsaturated fats
  • Supports Mediterranean diet benefits
  • Rich in antioxidants

Feta Cheese

  • Adds calcium and protein
  • Strong flavor means less cheese is needed

Variations

Protein-Packed Version

Add:

  • Chickpeas
  • White beans
  • Grilled chicken
  • Ground turkey

Vegan Version

Replace feta with:

  • Vegan feta
  • Cashew cream
  • Tahini sauce

Spicy Mediterranean Version

Add:

  • Harissa
  • Chili flakes
  • Spicy roasted red peppers

Serving Suggestions

Pair with:

  • Greek salad
  • Lentil soup
  • Cucumber yogurt sauce
  • Quinoa tabbouleh
  • Roasted broccoli

Frequently Asked Questions (Q&A)

Q1: Can I make these ahead of time?

Yes. Roast the sweet potatoes and prepare the filling separately. Assemble before reheating and serving.

Q2: Can I freeze stuffed sweet potatoes?

Yes. Wrap individually and freeze for up to 2 months. Thaw overnight before reheating.

Q3: What mushrooms work best?

Cremini, button, baby bella, or portobello mushrooms all work well

Q4: Is this recipe gluten-free?

Yes, naturally gluten-free as written.

Q5: How can I increase the protein?

Add chickpeas, lentils, quinoa, or grilled chicken.

Q6: Can I use regular potatoes instead?

Absolutely. Russet or Yukon Gold potatoes also taste great with this filling.

Chef’s Recommendation

For the best Mediterranean flavor:

  • Finish with fresh lemon zest
  • Add extra virgin olive oil before serving
  • Sprinkle toasted pine nuts on top
  • Serve with a simple cucumber-tomato salad

Summary

Mediterranean Stuffed Sweet Potatoes with Spinach & Mushrooms are nutritious, comforting, and packed with bold Mediterranean flavors. This recipe is easy to customize, meal-prep friendly, and suitable for many dietary lifestyles while delivering a satisfying balance of sweet, savory, creamy, and fresh elements.

Sushi Cucumber Salad

Sushi Cucumber Salad 

Ingredients

  • 2 large English Cucumbers: Thinly sliced into rounds or half-moons.

  • 1 cup Imitation Crab (Surimi): Shredded or finely chopped.

  • 1/2 Red Onion: Thinly slivered.

  • 1 medium Carrot: Grated or julienned.

  • Optional: 1 Avocado (cubed) and a sprinkle of toasted sesame seeds.

The Creamy Dressing

  • 1/2 cup Japanese Mayo (Kewpie): For that authentic richness.

  • 1 tbsp Rice Vinegar: For a hit of acidity.

  • 1 tsp Soy Sauce: For salt and depth.

  • 1 tsp Toasted Sesame Oil: For aroma.

  • 1 tsp Honey or Sugar: To balance the vinegar.

  • 1/2 tsp Sriracha: (Optional) For a hint of warmth.


Instructions

  1. Prep the Cucumbers: After slicing, toss the cucumbers with a pinch of salt and let them sit for 10 minutes. Squeeze out the excess water to ensure your salad stays crunchy and the dressing doesn’t get watery.

  2. Whisk the Dressing: In a small bowl, combine the mayo, rice vinegar, soy sauce, sesame oil, and sweetener. Whisk until smooth and glossy.

  3. Assemble: In a large mixing bowl, combine the prepared cucumbers, shredded crab, red onion, and carrots.

  4. Toss: Pour the dressing over the vegetables. Toss gently until everything is evenly coated in that creamy goodness.

  5. Serve: Garnish with sesame seeds or extra shredded crab on top. Serve chilled for the best experience!


Tip: If you want an extra “crunch,” top the salad with crushed tempura flakes or furikake seasoning just before serving!

This salad is perfect as a light lunch or a side dish for your next homemade sushi night. Enjoy!

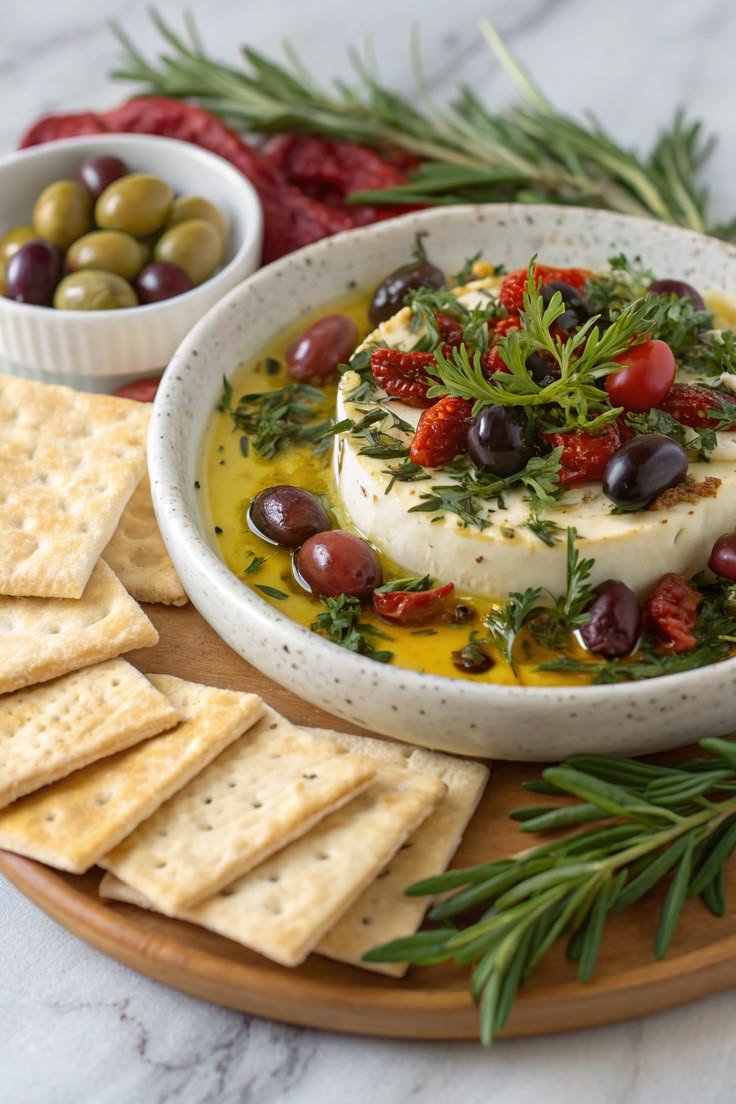
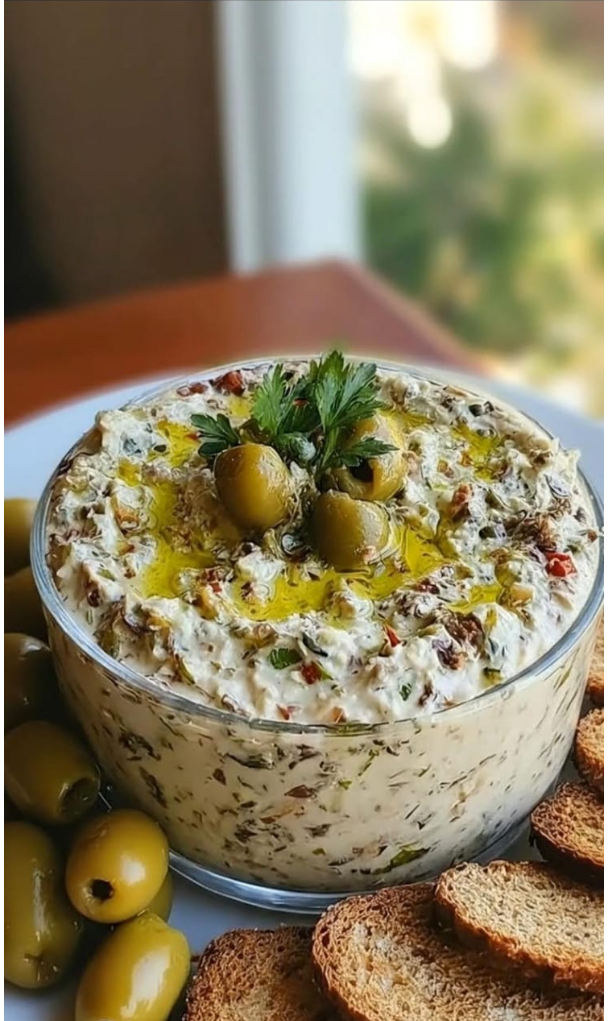
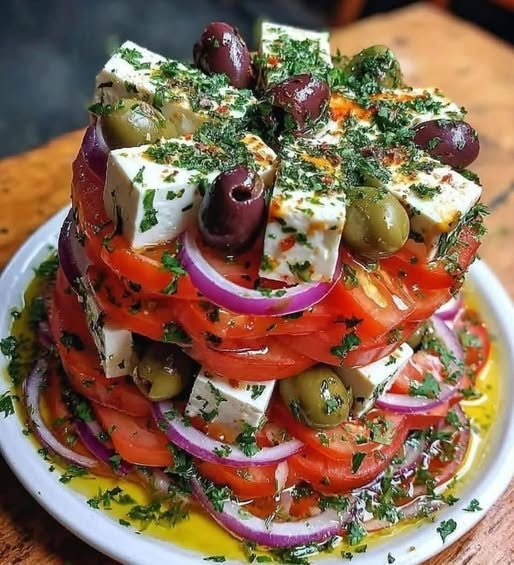
Creamy Olive & Herb Whipped Feta Dip

Creamy Olive & Herb Whipped Feta Dip 🫒🧄
10-min no cook, Mediterranean style

Serves 6–8 | Prep 10 min

Ingredients
Feta: 250g / 8oz block
Cream cheese: 4oz / 115g, softened
Olive oil: ⅓ cup + extra for topping
Garlic: 1 clove, minced
Lemon juice: 1 tbsp
Parsley + oregano: ¼ cup chopped total
Green olives: ½ cup, halved
Chili flakes: 1 tbsp, for garnish

Method
Whip: Blend feta + cream cheese + 3 tbsp oil + garlic + lemon juice until creamy.
Herbs: Pulse in herbs. Fold in half the olives.
Top: Spoon into bowl. Add remaining olives, chili, drizzle of oil.

High-Protein Version:
Use 1 cup blended cottage cheese instead of cream cheese. Add 1 scoop unflavored whey.
Macros per ¼ cup: ∼190 cal, 8g protein, 2g net carbs

Key tip: Don’t over-blend herbs — you want green flecks.

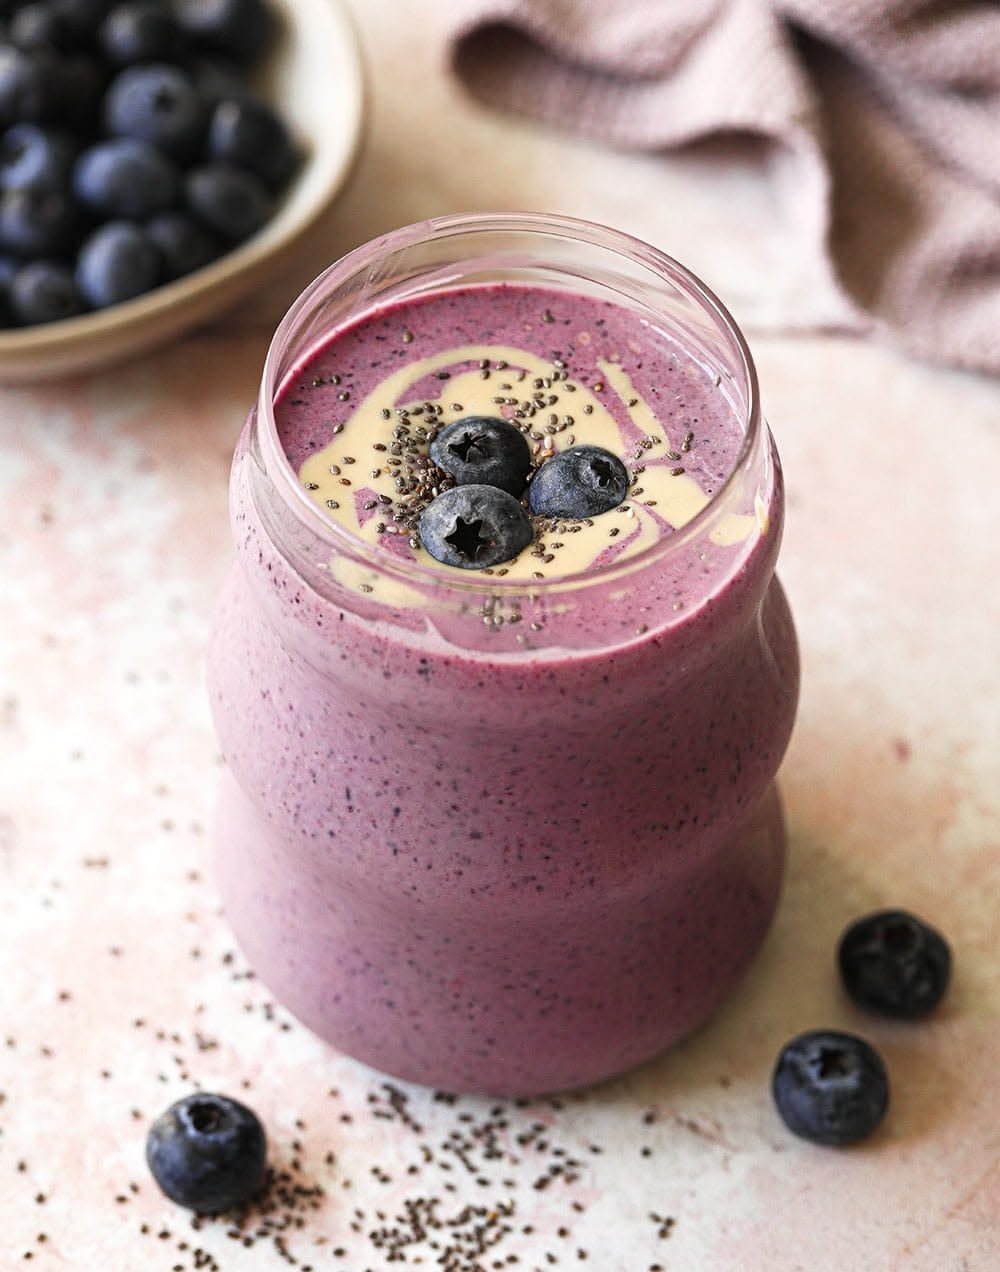
Blueberry Chia Power Smoothie.

Blueberry Chia Power Smoothie.

Ingredients

  • 1 ½ cups Frozen wild blueberries (wild blueberries offer a more intense color and flavor)

  • 1 cup Unsweetened almond milk or cashew milk

  • ½ cup Plain Greek yogurt (for protein and creaminess)

  • 1 tbsp Chia seeds

  • 1 small Medjool date (pitted) or 1 tsp honey for natural sweetness

  • ¼ tsp Ground cinnamon

  • ½ cup Fresh baby spinach (optional; it won’t change the color, but adds nutrients!)

  • A few Fresh blueberries (for garnish)


Instructions

  1. Hydrate the Chia (Optional): If you prefer a smoother texture, soak the chia seeds in your milk for about 5 to 10 minutes before blending. This allows them to swell and creates a “gel” that blends more seamlessly.

  2. Combine Ingredients: In a high-speed blender, pour in the almond milk and Greek yogurt first. Adding liquids at the bottom helps the blender blades move freely without getting stuck on frozen fruit.

  3. Add the Superfoods: Add the frozen blueberries, the pitted date (or honey), cinnamon, and the chia seeds. If you are adding spinach for an extra boost, toss that in now.

  4. The Blend: Start your blender on the lowest setting to break up the frozen berries, then quickly move to high speed. Blend for 60 seconds. You want to make sure the chia seeds and the date are fully pulverized into the mixture.

  5. Check Consistency: This smoothie should be thick enough to hold a straw upright. If it’s too thick, add a splash more milk. If you want it frostier, add three or four ice cubes and pulse again.

  6. The Reveal: Pour the smoothie into a glass jar or mason jar. Top with a few fresh blueberries and serve with a reusable metal straw to match the aesthetic in the photo.


Why it Works

The combination of frozen berries and chia seeds creates a natural thickening effect that mimics a milkshake without the heavy sugars. The cinnamon acts as a bridge, bringing out the natural sweetness of the blueberries while providing a warm, comforting finish. Enjoy!

Lemon Ginger Smoothie

Zesty Lemon Ginger Smoothie

Ingredients

  • 1 cup Greek yogurt (or plain coconut yogurt for a dairy-free version)

  • ½ cup Milk of choice (almond, oat, or dairy)

  • 1 medium Lemon (zested and juiced)

  • 1 inch Fresh ginger root (peeled and roughly chopped)

  • 1 frozen Banana (sliced before freezing for the creamiest texture)

  • 1 tbsp Honey or maple syrup (adjust based on your sweetness preference)

  • ½ tsp Vanilla extract

  • A pinch of Turmeric (optional, for that bright golden color)

  • ½ cup Ice cubes


Instructions

  1. Prep the Aromatics: Begin by zesting half of your lemon. Be careful to only get the yellow outer layer, as the white pith can be bitter. Squeeze the juice from the entire lemon into a small bowl, discarding any seeds.

  2. Prepare the Ginger: Peel the ginger using the edge of a spoon—it’s the easiest way to get into the nooks and crannies! Chop it into small pieces to ensure your blender can process it into a smooth consistency.

  3. Layer the Blender: To ensure a smooth blend, add your liquids first (milk, lemon juice, and honey). Follow with the yogurt, ginger, lemon zest, and vanilla. Finally, add the frozen banana slices and ice on top.

  4. Blend: Start the blender on a low speed, gradually increasing to high. Blend for about 45–60 seconds until the mixture is completely velvety and no ginger chunks remain.

  5. Adjust: Taste the smoothie. if it’s too tart, add a splash more honey. If it’s too thick, add a tablespoon of milk and pulse again.

  6. Serve: Pour into a chilled glass. Garnish with a fresh lemon slice and a colorful straw, just like in the photo!


Pro Tips for the Best Texture

  • The Frozen Banana: This is the secret to the “shake-like” consistency. If you use a room-temperature banana, the drink will be much thinner.

  • Ginger Kick: If you love a spicy burn, increase the ginger to 1.5 inches. If you prefer just a hint of warmth, stick to a half-inch piece.

Potato Roll with Minced Meat

This cheesy potato roll stuffed with savory minced meat is crispy on the outside, juicy inside, and loaded with melted cheese. Perfect for dinner, parties, or comfort food nights.

Ingredients

For the Filling

  • 500 g minced meat (beef or mixed)
  • 1 onion, finely chopped
  • 2 garlic cloves, minced
  • 1 yellow bell pepper, diced
  • 3 tbsp tomato paste
  • 1 tsp dried thyme
  • 1 tsp paprika
  • Fresh parsley, chopped
  • 200 g mozzarella cheese, shredded
  • Salt & black pepper to taste
  • 1 tbsp olive oil

For the Potato Base

  • 4–5 large potatoes, thinly sliced
  • 100 g Parmesan cheese, grated
  • 100 g mozzarella cheese, shredded

Instructions

1. Prepare the Potato Base

  1. Preheat oven to 400°F (200°C).
  2. Line a baking tray with parchment paper.
  3. Arrange thin potato slices overlapping in a rectangle shape.
  4. Sprinkle Parmesan and mozzarella evenly over the potatoes.
  5. Bake for 25–30 minutes until golden and slightly crispy.

2. Make the Meat Filling

  1. Heat olive oil in a pan.
  2. Cook onion and garlic until soft.
  3. Add minced meat and cook until browned.
  4. Stir in:
    • bell pepper
    • tomato paste
    • thyme
    • paprika
    • salt & pepper
  5. Cook for 5–7 minutes.
  6. Add chopped parsley.

3. Assemble the Roll

  1. Remove potato base from oven.
  2. Spread meat filling evenly over the potatoes.
  3. Top with 200 g mozzarella cheese.
  4. Carefully roll it tightly using the parchment paper.

4. Final Bake

  1. Place seam-side down.
  2. Bake another 10–15 minutes until cheese melts and top becomes golden.

Serving Ideas

Serve with:

  • garlic sauce
  • sour cream
  • fresh salad
  • spicy mayo

Tips

  • Slice potatoes very thin for easy rolling.
  • Let cool slightly before slicing.
  • Add mushrooms or jalapeños for extra flavor.

Storage

  • Refrigerate up to 3 days
  • Reheat in oven or air fryer for best texture

Ground Beef and Cabbage Stir Fry

This quick ground beef and cabbage stir fry is savory, slightly sweet, packed with flavor, and perfect for busy weeknights. It’s budget-friendly, healthy, and comes together in one pan in about 30 minutes.

Prep & Cook Time

  • Prep Time: 10 minutes
  • Cook Time: 20 minutes
  • Total Time: 30 minutes

Servings

4–6 servings

Ingredients

  • 1 lb ground beef
  • 1 small head cabbage, chopped
  • 2 carrots, sliced into thin strips
  • 3 green onions, chopped
  • 3 cloves garlic, minced
  • 1 tbsp fresh ginger, minced
  • 2 tbsp soy sauce
  • 1 tbsp oyster sauce
  • 1 tbsp sesame oil
  • 1 tbsp brown sugar or honey
  • 1 tbsp vegetable oil
  • Salt and black pepper, to taste
  • Optional: red pepper flakes or sriracha for heat

Instructions

1. Cook the Beef

Heat vegetable oil in a large skillet or wok over medium-high heat.

Add ground beef and cook until browned, breaking it apart as it cooks.

Drain excess grease if needed.

2. Add Aromatics

Stir in:

  • garlic
  • ginger

Cook for about 1 minute until fragrant.

3. Cook the Vegetables

Add:

  • chopped cabbage
  • carrots

Stir fry for 5–7 minutes until cabbage softens slightly but still has some crunch.

4. Make the Sauce

In a small bowl, mix:

  • soy sauce
  • oyster sauce
  • sesame oil
  • brown sugar

Pour sauce into the skillet and stir well to coat everything evenly.

5. Finish

Cook another 2–3 minutes until glossy and heated through.

Top with green onions before serving.

Serving Ideas

Serve with:

  • steamed rice
  • noodles
  • cauliflower rice
  • lettuce wraps

Variations

  • Use ground turkey or chicken instead of beef
  • Add mushrooms or bell peppers
  • Make it spicy with chili garlic sauce
  • Add scrambled eggs for extra protein

Storage

  • Refrigerate up to 4 days
  • Reheats beautifully for meal prep

Pro Tip

For extra flavor, let the cabbage char slightly in the pan before stirring too much.

Grandma Helen calls this her 4 ingredient secret weapon for potlucks. I finally learned how easy they are to make and I am completely obsessed.

These easy butterscotch pecan bars are rich, chewy, buttery, and perfect for potlucks, holidays, bake sales, or quick family desserts. With only 4 ingredients, they come together fast and bake into sweet golden squares with crunchy pecans and gooey butterscotch flavor.

Prep & Cook Time

  • Prep Time: 10 minutes
  • Bake Time: 22–28 minutes
  • Cooling Time: 1–2 hours
  • Total Time: About 2 hours

Servings

16 bars

Ingredients

  • 2 cups graham cracker crumbs
    (about 14–16 full graham cracker sheets, finely crushed)
  • 1 can (14 oz) sweetened condensed milk
  • 1½ cups butterscotch chips
  • 1 cup chopped pecans

Instructions

1. Prepare the Pan

Preheat oven to 350°F (175°C).

Grease an 8×8-inch or 9×9-inch ceramic baking dish lightly, or line with parchment paper for easier removal.

2. Make the Crust

Spread graham cracker crumbs evenly across the bottom of the dish.

Press firmly into an even layer using:

  • clean hands
  • the back of a spoon
  • or a flat measuring cup

3. Add the Sweetened Condensed Milk

Pour the sweetened condensed milk slowly and evenly over the crumb layer.

Use a spatula to spread gently so the entire crust is coated.

4. Add Toppings

Sprinkle butterscotch chips evenly across the surface.

Top with chopped pecans and lightly press them into the chips.

5. Bake

Bake for 22–28 minutes until:

  • edges are bubbly
  • top looks glossy and set
  • edges turn golden brown

The center should no longer appear wet.

6. Cool Completely

Let bars cool in the pan for at least 1–2 hours.

For cleaner slices:

  • chill 30–45 minutes after cooling
  • use a sharp knife wiped clean between cuts

Cut into 16 squares.

Serving Ideas

These bars pair wonderfully with:

  • coffee
  • hot tea
  • cold milk
  • vanilla ice cream
  • whipped cream

They’re excellent for:

  • church potlucks
  • bake sales
  • holiday dessert trays
  • family gatherings

Variations

Nut-Free Version

Leave out the pecans or replace them with extra butterscotch chips.

Less Sweet

Use:

  • 1 cup butterscotch chips
  • 1½ cups chopped pecans

Different Nuts

Try:

  • walnuts
  • mixed nuts
  • toasted pecans for extra flavor

Storage

  • Room temperature: up to 3 days in an airtight container
  • Refrigerator: up to 1 week

The bars become firmer when chilled.

Tips for Best Results

  • Let bars cool completely before covering.
  • Avoid overbaking—the center firms as it cools.
  • Transport directly in the baking dish covered tightly with foil.
  • Do not leave in a hot car for long periods.

Baked Oatmeal with Fruits and Nuts

Preparation Time:

  • Prep Time: 10 minutes
  • Cook Time: 30 minutes
  • Total Time: 40 minutes

Ingredients:

  • 1 cup oatmeal
  • 50 g cranberries
  • 50 g dried apricots
  • 60 g nuts (your choice)
  • 1 banana
  • 1 apple
  • 50 g oat flakes

Instructions:

  1. Preheat Oven: Preheat your oven to 180°C (360°F).
  2. Prepare Ingredients:
    • Slice the banana and apple into small pieces.
    • Chop the dried apricots into smaller bits.
    • Roughly chop the nuts.
  3. Mix Ingredients: In a large bowl, combine the oatmeal, cranberries, dried apricots, nuts, banana slices, and apple pieces. Mix well.
  4. Add Oat Flakes: Add the oat flakes to the mixture and stir until everything is well combined.
  5. Bake: Transfer the mixture into a baking dish and spread it out evenly. Bake in the for 30 minutes.
  6. Cool and Serve: Let it cool slightly before serving. Enjoy your delicious and healthy baked oatmeal!

Serving Suggestions:

  • Serve warm with a dollop of Greek or a splash of milk.
  • Top with fresh berries or a drizzle of honey for extra sweetness.
  • Enjoy as a snack on its own or paired with a hot cup of tea or coffee.

Cooking Tips:

  • Use ripe bananas for added natural sweetness.
  • Feel free to substitute the dried fruits and nuts with your favorites. For a vegan version, use plant-based milk and  alternatives.

Nutritional Benefits:

  • Oats: High in fiber, can help lower cholesterol levels and stabilize blood sugar.
  • Fruits: Provide essential vitamins and antioxidants.
  • Nuts: A good source of healthy fats and protein.

Dietary Information:

  • Vegetarian: Yes
  • Vegan: Yes, if using plant-based substitutes
  • Gluten-Free: Use gluten-free oats
  • Dairy-Free: Yes, if using plant-based substitutes

Storage:

  • Store leftovers in an in the for up to 5 days.
  • Reheat individual servings in the microwave or enjoy cold.

Why You’ll Love This Recipe:

  • It’s a versatile and easy-to-make recipe.
  • Packed with wholesome ingredients, making it a nutritious option.
  • Perfect for meal prep and can be enjoyed throughout the week.
  • Adaptable to various dietary needs and preferences.

Conclusion:

This baked oatmeal with fruits and nuts is a fantastic way to start your day or enjoy as a nutritious snack. Its delightful combination of flavors and textures will leave you satisfied and energized. Try it out and make it a staple in your meal rotation!

Blackened Cod Bites with Lemon Garlic Aioli

Blackened Cod Bites with Lemon Garlic Aioli

Description

These crispy, smoky blackened cod bites are tender on the inside with a flavorful spice crust on the outside. Served with a creamy lemon garlic aioli, they make a perfect appetizer, light dinner, taco filling, or game-day snack. The cod cooks quickly, making this recipe ideal for busy weeknights while still feeling restaurant-worthy.

The blackening seasoning delivers bold Cajun-inspired flavor with paprika, garlic, herbs, and a hint of heat, while the aioli balances everything with bright citrus and creamy richness.

Recipe Information

Prep Time: 15 minutes

  • Cook Time: 10 minutes
  • Total Time: 25 minutes
  • Cuisine: American / Cajun-Inspired
  • Difficulty: Easy
  • Servings: 4 servings

Ingredients

For the Blackened Cod Bites

  • 1½ pounds cod fillets, skin removed
  • 2 tablespoons olive oil
  • 1 teaspoon smoked paprika
  • 1 teaspoon paprika
  • 1 teaspoon garlic powder
  • 1 teaspoon onion powder
  • ½ teaspoon dried thyme
  • ½ teaspoon dried oregano
  • ½ teaspoon cayenne pepper (adjust to taste)
  • ½ teaspoon black pepper
  • ¾ teaspoon salt

For the Lemon Garlic Aioli

  • ½ cup mayonnaise
  • 2 garlic cloves, minced
  • 1 tablespoon lemon juice
  • 1 teaspoon lemon zest
  • ½ teaspoon Dijon mustard
  • Pinch of salt
  • Pinch of black pepper

Optional Garnishes

  • Chopped parsley
  • Lemon wedges
  • Extra aioli for dipping

Instructions

Step 1: Prepare the Cod

Pat the cod fillets dry with paper towels. Cut into bite-sized cubes, about 1 to 1½ inches each.

Drying the fish helps create a better crust when cooking.

Step 2: Make the Blackening Seasoning

In a small bowl, combine:

  • smoked paprika
  • paprika
  • garlic powder
  • onion powder
  • thyme
  • oregano
  • cayenne
  • black pepper
  • salt

Mix thoroughly.

Step 3: Season the Fish

Place the cod bites in a large bowl. Drizzle with olive oil and toss gently.

Sprinkle the seasoning mixture over the fish and coat evenly.

Step 4: Cook the Cod

Heat a large skillet or cast-iron pan over medium-high heat.

Add the cod bites in a single layer without overcrowding the pan.

Cook for:

  • 2–3 minutes per side
  • until blackened and cooked through

The fish should flake easily with a fork and reach an internal temperature of 145°F (63°C).

Step 5: Make the Lemon Garlic Aioli

In a small bowl, whisk together:

  • mayonnaise
  • garlic
  • lemon juice
  • lemon zest
  • Dijon mustard
  • salt
  • pepper

Taste and adjust lemon or seasoning as desired.

Step 6: Serve

Serve the hot blackened cod bites immediately with lemon garlic aioli on the side.

Garnish with parsley and lemon wedges if desired.

Serving Suggestions

These cod bites pair well with:

  • roasted vegetables
  • rice bowls
  • coleslaw
  • fries
  • tacos
  • fresh salads
  • grilled corn
  • mashed potatoes

They also work wonderfully in wraps or lettuce cups.

Recipe Notes

  • Cod is mild and flaky, making it perfect for bold blackened seasoning.
  • Cast-iron pans create the best blackened crust.
  • Avoid overcooking; cod becomes dry quickly.
  • Fresh lemon juice gives the aioli brighter flavor than bottled juice.
  • If using frozen cod, thaw completely and pat dry before seasoning.

Tips for Success

1. Dry the Fish Well

Moisture prevents proper browning and crust formation.

2. Don’t Overcrowd the Pan

Cook in batches if needed to maintain high heat.

3. Adjust Spice Level

Reduce cayenne for milder bites or increase for extra heat.

4. Let the Pan Get Hot

A properly heated pan gives the signature blackened exterior.

5. Make Aioli Ahead

The aioli tastes even better after chilling for 20–30 minutes.

Nutritional Information (Per Serving Approx.)

Nutrient Amount
Calories 320
Protein 28g
Carbohydrates 3g
Fat 21g
Saturated Fat 3g
Fiber 1g
Sugar 1g
Sodium 540mg


Health Benefits

High in Lean Protein

Cod provides high-quality protein that supports muscle repair and satiety.

Rich in Omega-3 Fatty Acids

Cod contains beneficial fats that support heart and brain health.

Lower in Calories

Compared to fried seafood dishes, these cod bites are relatively light while still flavorful.

Garlic Benefits

Garlic may help support immune function and cardiovascular health.

Vitamin C from Lemon

Fresh lemon juice and zest provide antioxidants and vitamin C.

Variations

Air Fryer Version

Cook at 400°F (200°C) for 8–10 minutes, shaking halfway through.

Oven-Baked Version

Bake at 425°F (220°C) for 12–15 minutes.

Spicy Version

Add hot sauce to the aioli or extra cayenne to the seasoning blend.

Gluten-Free

This recipe is naturally gluten-free if all packaged ingredients are certified gluten-free.

Storage & Reheating

Refrigerator

Store leftovers in an airtight container for up to 2 days.

Reheating

Reheat in:

  • skillet over medium heat
  • air fryer at 350°F for 3–4 minutes

Avoid microwaving to maintain texture.

Frequently Asked Questions

Can I use another fish?

Yes. Haddock, tilapia, halibut, or salmon also work well.

Is blackened seasoning very spicy?

It has moderate heat, but you can easily adjust the cayenne pepper.

Can I make this dairy-free?

Yes. The recipe is naturally dairy-free if using dairy-free mayonnaise.

Can I prepare the fish ahead of time?

You can season the fish a few hours ahead and refrigerate until cooking.

What does “blackened” mean?

Blackening refers to cooking seasoned food over high heat until a dark, flavorful crust forms.

Can I freeze leftovers?

Cooked cod can be frozen, but texture is best when eaten fresh.

Conclusion

Blackened Cod Bites with Lemon Garlic Aioli are quick, flavorful, and versatile. The smoky spice blend combined with creamy citrus aioli creates an irresistible balance of heat and freshness. Whether served as an appetizer, main dish, or party snack, this recipe delivers bold flavor with minimal effort.

Carrot and Cheese Sandwich Spread

Carrot and Cheese Sandwich Spread

Description

Carrot and Cheese Sandwich Spread is a creamy, slightly sweet and savory spread made by combining grated carrots with cheese, herbs, and seasonings. It’s quick to prepare, budget-friendly, and works perfectly for sandwiches, wraps, toast, or even as a dip for crackers and veggies. The natural sweetness of carrots balances beautifully with the richness of cheese.

Ingredients (Makes ~2 cups spread)

  • 2 medium carrots (finely grated)
  • 1 cup cream cheese (softened)
  • ½ cup grated cheddar cheese (or processed cheese)
  • 2 tbsp mayonnaise (optional, for extra creaminess)
  • 1 tbsp butter (softened, optional)
  • 1–2 tbsp fresh parsley or coriander (chopped)
  • 1 tsp lemon juice
  • ½ tsp black pepper
  • Salt to taste
  • ½ tsp garlic powder (optional)
  • ½ tsp mustard (optional for tang)

Instructions

  1. Prepare carrots: Wash, peel, and finely grate carrots. Lightly squeeze to remove excess moisture.
  2. Mix base: In a bowl, combine cream cheese, butter, and mayonnaise until smooth.
  3. Add cheese: Mix in grated cheddar until evenly blended.
  4. Combine carrots: Add grated carrots and mix well.
  5. Season: Add lemon juice, salt, pepper, garlic powder, and mustard.
  6. Herbs: Stir in chopped parsley or coriander.
  7. Chill: Refrigerate for 20–30 minutes for flavors to blend.

Serving Suggestions

  • Spread on toasted bread or sandwich slices
  • Use in wraps with lettuce and cucumber
  • Serve as a dip with crackers or veggie sticks
  • Pair with grilled chicken or boiled eggs in sandwiches

Tips & Notes

  • Dry carrots well to avoid watery spread.
  • For a healthier version, replace mayonnaise with Greek yogurt.
  • Use sharp cheddar for stronger flavor.
  • Add chopped nuts (walnuts or almonds) for crunch.
  • Store in an airtight container in the fridge.

Servings

  • Makes: 6–8 sandwiches
  • Yield: ~2 cups spread
  • Serving size: 2 tablespoons per sandwich

Nutritional Info (Approx. per 2 tbsp serving)

  • Calories: 90–120 kcal
  • Protein: 3–4 g
  • Fat: 7–9 g
  • Carbohydrates: 3–5 g
  • Fiber: 0.5–1 g
  • Calcium: Moderate
    (Values vary based on ingredients used)

Health Benefits

  • 🥕 Carrots: Rich in beta-carotene for eye and skin health
  • 🧀 Cheese: Good source of calcium and protein
  • 🌿 Herbs: Provide antioxidants and freshness
  • 🧈 Healthy fats (in moderation): Help absorb fat-soluble vitamins

Q & A

Q1: Can I make it ahead of time?
Yes, it stays fresh for 2–3 days in the refrigerator.

Q2: Can I make it vegan?
Yes, use vegan cream cheese and plant-based cheese alternatives.

Q3: Why is my spread watery?
Carrots likely had excess moisture—always squeeze them after grating.

Q4: Can I skip mayonnaise?
Yes, replace it with yogurt, cream cheese, or simply omit it.

Q5: What bread works best?
Whole wheat, sourdough, or sandwich bread all work well.

flour-free bread alternative

This recipe offers a delicious, flour-free  bread alternative that is perfect for anyone following a low-carb or keto diet. It’s quick to prepare, with simple ingredients, and is light yet satisfying. You can eat as much as you like, making it a perfect option for those trying to reduce carbs while still enjoying tasty bread-like textures.

Baked Goods

Ingredients:

  • 1 cup full-fat  Greek yogurt
  • 1 cup almond  flour (or coconut flour, depending on preference)
  • 1 egg
  • 1 teaspoon baking powder
  • A pinch of salt
  • Butter or olive oil (for cooking)

Instructions:

  1. Combine the Ingredients: In a bowl, mix together the Greek yogurt, almond flour, egg, baking powder, and salt. Stir until a smooth dough forms.
  2. Knead the Dough: Knead the dough for a few minutes until it becomes soft and smooth, not sticky.
  3. Shape the Dough: Divide the dough into small portions and roll them into balls. Flatten each ball to form a thin round shape.
  4. Cook the Flatbreads: Heat a non-stick pan over medium heat, and brush with a little butter or olive oil. Place the flattened dough into the pan and cook each side for 2-3 minutes, or until golden brown and cooked through.
  5. Serve and Enjoy: Once cooked, serve the flatbreads warm. They can be paired with your favorite dip or spread for added flavor. Enjoy your zero-carb, delicious bread!