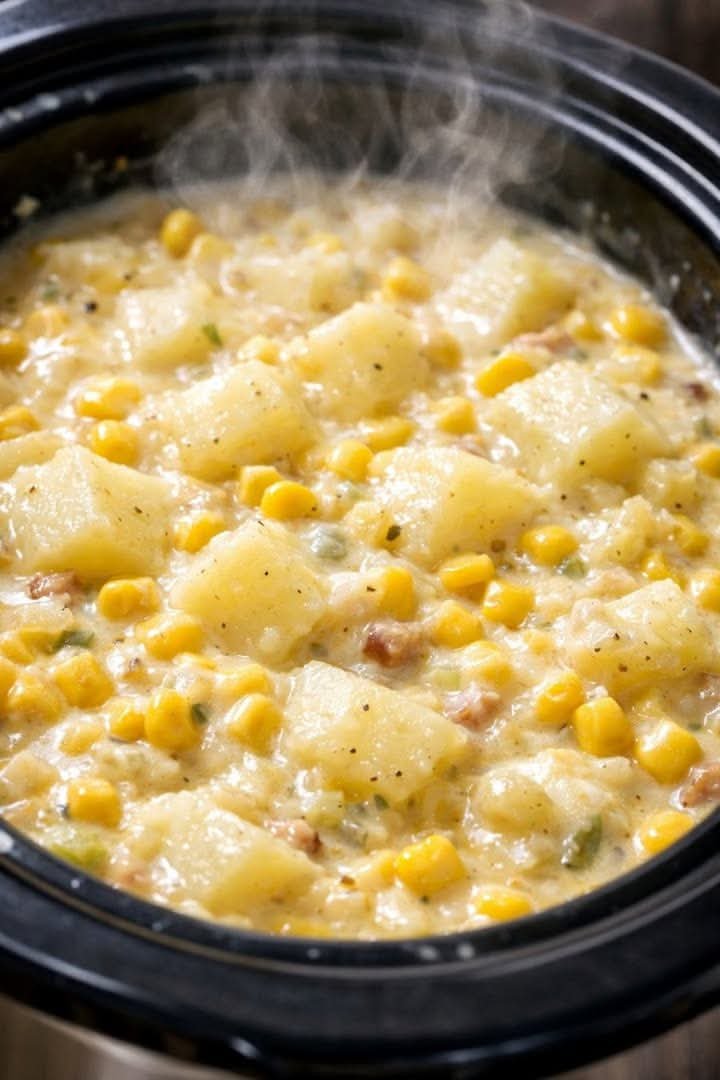
Sour Cream Beef Noodle Casserole

Growing up, my mom made something that we just called “casserole” because it was the only casserole we ever had in our house. I LOVED it. (Still do.) It was made up of pasta shells, cottage cheese, cream cheese, sour cream, tomato sauce, ground beef, and sometimes some green onion if she was feeling fancy. I saw this and immediately thought of that beloved casserole — it has a lot of the same delicious stuff going on. My mom’s casserole is one that makes some people raise an eyebrow… Cottage cheese with pasta and red sauce? This Sour Cream Beef Noodle Casserole might raise the same concerns. But not for me! I know enough to know that this combo is just comfort food through and through.

INGREDIENTS

  • 1 lb lean ground beef
  • 1/2 yellow onion, chopped
  • 2 cloves garlic, minced
  • 2 (15 oz each) cans tomato sauce
  • 1 teaspoon Italian seasoning
  • 8 oz egg noodles
  • 1 cup sour cream
  • 1 cup cottage cheese
  • 1 cup cheddar cheese, grated
  • Kosher salt and freshly ground black pepper, to taste

PREPARATION

Preheat oven to 350°F and grease a 9×13-inch baking dish with nonstick spray.

In a large skillet over medium-high heat, brown the ground beef and onion until beef is cooked through, about 10 minutes. Add garlic and cook 1 minute more.

Stir in tomato sauce and Italian seasoning and bring to a simmer. Let simmer for 5 minutes, stirring frequently. Season to taste with salt and pepper. Remove from heat and set aside.

While you’re making the sauce, cook egg noodles according to package directions in a large pot of salted boiling water. Drain and set aside.

In a large bowl, stir together the sour cream and cottage cheese. Add egg noodles and season with salt and pepper to taste. Stir to combine.

Transfer half of the egg noodle mixture to the prepared baking dish. Top with half of the meat sauce. Top with remaining egg noodle mixture, followed by remaining meat sauce.

Top with cheese and bake until sauce is bubbly and cheese has melted, about 30 minutes.

Let cool 10 minutes before serving. Enjoy!

Parisian Apple Cake

Ingredients

3 large apples, peeled and diced

1 teaspoons apple cider vinegar

1 cup all-purpose flour

1 teaspoon baking powder

1 teaspoon kosher salt

½ teaspoon cinnamon

¼ teaspoon cardamom

½ cup butter, room temperature

1/2 cup granulated sugar

2 tablespoons brown sugar

2eggs

1 1/2 tablespoons dark rum

1/2 teaspoon vanilla extract

2 tablespoons granulated sugar, for topping

How To Make Parisian Apple Cake

Preheat oven to 350 degrees F and grease an 8×8-inch baking dish.

Place diced apples in a medium-sized mixing bowl and pour apple cider vinegar over the top, then toss to coat.

In another large bowl, sift together flour, baking powder, salt, cinnamon, and cardamom.

In a separate large mixing bowl, add butter, ½ cup granulated sugar, and brown sugar until light and airy. Mix in eggs one at a time, followed by the rum and vanilla.

Slowly mix in flour mixture until just combined, then fold in the diced apples.

Transfer to the prepared baking dish and sprinkle remaining granulated sugar over the top.

Bake for 40-45 minutes or until an inserted toothpick comes out clean.

Allow cake to cool before slicing for best results.

Best Ever Crock Pot Chicken and Dumplings

Ingredients

1 Onion, diced

6 Boneless skinless chicken thighs

1can Cream of chicken soup

1can Cream of celery soup

2 tbsp.Fresh parsley, chopped

1tsp.Poultry seasoning

2c.Chicken broth

1can Buttermilk refrigerated biscuits

2c.Frozen mixed vegetables, defrosted

Black pepper to taste

How To Make Best Ever Crock Pot Chicken and Dumplings

  1. Layer the chopped onion on the bottom of your crockpot.
  2. Place the chicken thighs on top of the chopped onion in a single layer.
  3. In a mixing bowl, place 1 can of cream of chicken soup.
  4. Pour a can of cream of celery soup into the mixing bowl.
  5. Add 1 tsp of poultry seasoning to the mixing bowl.
  6. Sprinkle in 2 tablespoons of chopped fresh parsley.
  7. Add black pepper to taste.
  8. Stir all of the ingredients in the mixing bowl, and pour over top of the chicken thighs in the crockpot.
  9. Pour 2 cups of chicken broth over top of the chicken.
  10. Set the crockpot to high for 5 hours and close the lid.
  11. Do not open the lid until you have just 1 hour of cook time left on the crockpot’s display. With 1 hour left, open the lid and pour in 2 cups of mixed vegetables that have been defrosted. Mix them into the crockpot well, shredding the chicken thighs as you stir.
  12. Open a can of refrigerated biscuits, and flatten each one. Cut each biscuits into 4 long slices.
  13. Layer the biscuits on the top of the chicken mixture in the crockpot.
  14. Let the biscuits cook for the remaining hour of cook time, and then stir the mixture together well to incorporate the dumplings into the chicken mixture.
  15. Serve topped with freshly chopped parsley.

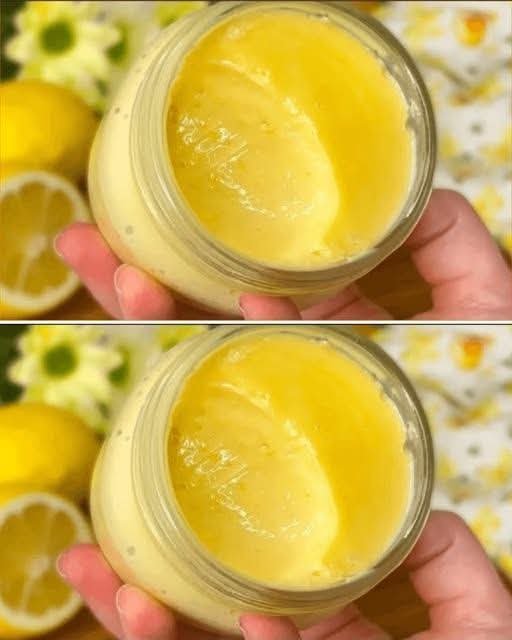
Lemon Soufflé Cakes


Lemon Soufflé Cakes

Prep time: 20 mins | Bake time: 15–20 mins | Yields: 12 cupcakes


Ingredients

4 large eggs (separated into whites and yolks)


1 cup Granulated sugar (divided into two halves)


1 ½ cups All-purpose flour


1 tsp Baking powder


½ cup Unsalted butter (melted and cooled)


½ cup Whole milk


2 tbsp Fresh lemon juice


1 tbsp Lemon zest


¼ tsp Salt


Powdered sugar (for dusting)


Instructions

Prep the Oven & Pan: Preheat your oven to 175°C (350°F). Line a muffin tin with paper liners or grease ramekins with butter and a light coating of sugar.


Mix the Yolks: In a large bowl, whisk the egg yolks with ½ cup of sugar until the mixture is pale and thick. Stir in the melted butter, milk, lemon juice, and zest.


Add Dry Ingredients: Sift the flour, baking powder, and salt into the yolk mixture. Fold gently until just combined. Don’t overmix!


Whip the Egg Whites: In a separate, very clean bowl, beat the egg whites until soft peaks form. Gradually add the remaining ½ cup of sugar while continuing to beat until you reach stiff, glossy peaks.


The Gentle Fold: This is the secret to the “soufflé” lift! Take a third of the egg whites and stir them into the batter to lighten it. Then, very gently fold in the remaining egg whites using a spatula. You want to keep as much air in the batter as possible.


Bake: Fill the liners about ¾ full. Bake for 15–20 minutes or until the tops are golden and spring back when lightly touched.


Finish: Let them cool for 5 minutes (they may sink slightly, which is normal for a soufflé style). Dust generously with powdered sugar before serving.


Tips for Success

Room Temp Eggs: Egg whites whip much better and hold more air when they aren’t cold.


No Grease: Ensure the bowl and whisk used for the egg whites are completely free of oil or yolk, or they won’t stiffen.

Ultimate Patty Melt with Secret Sauce

Ultimate Patty Melt with Secret Sauce

Ingredients:


1 lb ground beef

8 slices of rye bread

8 slices of Swiss cheese

1 large onion, thinly sliced

4 tbsp butter, plus more for spreading

Salt and pepper to taste

For the Secret Sauce:

1/2 cup mayonnaise

2 tbsp ketchup

1 tbsp relish

1 tsp Worcestershire sauce

1/2 tsp garlic powder

1/2 tsp onion powder

Salt and pepper to taste


Directions:


Begin by mixing the secret sauce ingredients in a small bowl. Adjust seasoning to taste, then set aside.

In a skillet over medium heat, melt 1 tbsp of butter. Add the thinly sliced onions, season with salt and pepper, and cook until caramelized, about 10-15 minutes. Transfer to a plate.

Form the ground beef into 4 patties, slightly larger than your bread slices. Season both sides with salt and pepper.

In the same skillet, cook the patties to your desired doneness, about 4 minutes per side for medium. Remove and set aside.

Butter one side of each bread slice. To assemble, spread the secret sauce on the non-buttered side of 4 slices, add a slice of cheese, a patty, caramelized onions, another slice of cheese, and top with another bread slice, buttered side up.

In a clean skillet over medium heat, grill the sandwiches until golden brown and the cheese is melted, about 3-4 minutes per side.

Prep Time: 15 minutes | Cooking Time: 30 minutes | Total Time: 45 minutes

Kcal: 650 kcal | Servings: 4 servings

@tout le monde

🥤 Classic Blueberry Banana Oatmeal Smoothie

🥤 Classic Blueberry Banana Oatmeal Smoothie

A light, antioxidant-rich breakfast that tastes like blueberry pie.

Ingredients

  • Oats: $1/4$ cup rolled oats (old-fashioned)

  • Fruit: 1 ripe banana (frozen is best for creaminess)

  • Berries: $1/2$ cup fresh or frozen blueberries

  • Liquid: 1 cup unsweetened almond milk (or soy/skim milk)

  • Spice: $1/2$ teaspoon ground cinnamon

  • Sweetener (Optional): 1 teaspoon honey or 1 pitted date (only if your fruit isn’t ripe enough)


💪 Protein-Packed Weight Loss Version

Higher protein content to help preserve muscle and curb hunger longer.

Ingredients

  • Oats: $1/4$ cup rolled oats

  • Fruit: $1/2$ frozen banana

  • Berries: $1/2$ cup frozen blueberries

  • Liquid: $1/2$ cup unsweetened almond milk + $1/4$ cup water

  • Protein: $1/2$ cup plain Greek yogurt OR 1 scoop vanilla protein powder

  • Healthy Fat: 1 tablespoon chia seeds or ground flaxseed


📋 Instructions (For Both Recipes)

  1. Prep the Oats: For the smoothest texture, place the dry oats in the blender first and pulse until they become a fine flour. This prevents a “gritty” drink.

  2. Layer Ingredients: Add the liquid first, followed by the yogurt (if using), then the fruit and spices.

  3. Blend: Start on a low speed and gradually increase to high. Blend for 45–60 seconds until completely smooth.

  4. Adjust Consistency: If it’s too thick, add a splash more milk. If you prefer it colder/thicker, add a handful of ice cubes and blend again.

  5. Serve: Pour into a tall glass and top with a few extra blueberries or a sprinkle of dry oats for crunch.


💡 Pro-Tips for Weight Loss

  • Use Frozen Bananas: Peel and slice your overripe bananas before freezing. They act like “healthy ice cream” and give the smoothie a thick, milkshake-like texture.

  • Watch the Toppings: Granola and nut butters are delicious but high in calories. Stick to fresh berries or a dash of cinnamon if you are strictly tracking.

  • Don’t skip the Fiber: Using whole rolled oats instead of “instant” packets ensures you get the full benefit of the beta-glucan fiber, which is what actually helps with hunger control.

Banana Blueberry Baked Pancake (Oven Pancake)


Banana Blueberry Baked Pancake (Oven Pancake)

This banana blueberry baked pancake is a warm, comforting dish that combines the softness of a pancake with the ease of oven baking. It is lightly sweet, naturally flavored by ripe bananas and juicy blueberries, and perfect for breakfast, brunch, or a cozy snack. The texture is fluffy in the center with lightly golden edges, and every bite offers a gentle balance of fruit and batter. This recipe is simple to prepare and does not require special equipment, making it ideal for home cooking.


Ingredients

1 cup all-purpose flour


2 ripe bananas, sliced


½ cup blueberries (fresh or frozen)


2 large eggs


¾ cup milk (regular or plant-based)


2 tablespoons melted butter or neutral oil


2 tablespoons honey or maple syrup


1 teaspoon vanilla extract


1 teaspoon baking powder


¼ teaspoon baking soda


A pinch of salt


Extra butter or oil for greasing the pan


Preparation Method

Start by preheating your oven to 180°C (350°F). Lightly grease a baking dish or oven-safe skillet with butter or oil so the pancake lifts easily after baking.


In a mixing bowl, crack the eggs and whisk them until smooth. Add the milk, melted butter, honey, and vanilla extract, then whisk again until everything blends nicely. This mixture forms the soft and creamy base of the pancake.


In a separate bowl, combine the flour, baking powder, baking soda, and salt. Stir gently to distribute the ingredients evenly. Slowly add the dry mixture into the wet mixture, whisking as you go to avoid lumps. The batter should be smooth and slightly thick but still pourable.


Pour the batter into the prepared baking dish, spreading it evenly. Arrange the banana slices on top, gently pressing them into the batter. Scatter the blueberries evenly across the surface so each slice gets fruit in every bite.


Place the dish in the preheated oven and bake for 25 to 30 minutes, or until the top turns a beautiful golden color and the center feels set when lightly touched. The pancake will puff slightly while baking and settle as it cools.


Serving Suggestions

Remove the baked pancake from the oven and allow it to rest for a few minutes. Slice it into squares or wedges and serve warm. You can enjoy it as is, or add a drizzle of honey, maple syrup, or a spoon of yogurt for extra comfort. A light dusting of powdered sugar also works beautifully for presentation.


Tips and Variations

Add a pinch of cinnamon for a warm aroma


Replace blueberries with strawberries or apples if desired


Use whole-wheat flour for a heartier texture


Serve with nuts for a pleasant crunch


This banana blueberry baked pancake is simple, nourishing, and satisfying, making it a wonderful addition to your recipe collection

Salty One-Pot Creamy Beef and Garlic Butter Pasta

Creamy Beef Pasta Skillet

Ingredients

  • 1 lb ground beef

  • 8 oz pasta (penne or rotini)

  • 4 cups beef broth

  • 1 tablespoon olive oil

  • 3 tablespoons butter

  • 4 cloves garlic, minced

  • 1 teaspoon Italian seasoning

  • ½ teaspoon crushed red pepper flakes (optional)

  • ½ teaspoon paprika

  • Salt and black pepper, to taste

  • ½ cup grated Parmesan cheese

  • ½ cup heavy cream

  • ½ cup shredded mozzarella cheese

  • 2 tablespoons chopped parsley (for garnish)


Instructions

  1. Cook the Beef
    Heat olive oil in a large deep skillet or Dutch oven over medium heat. Add ground beef and cook until browned, breaking it apart as it cooks. Drain excess fat if needed.

  2. Add Seasonings
    Add butter, garlic, Italian seasoning, red pepper flakes, paprika, salt, and pepper. Cook for 1–2 minutes until garlic becomes fragrant.

  3. Cook Pasta
    Pour in beef broth and add uncooked pasta. Stir well and bring to a boil. Reduce heat to medium-low, cover, and simmer for 12–15 minutes, stirring occasionally, until pasta is tender and most liquid is absorbed.

  4. Make It Creamy
    Stir in heavy cream, Parmesan, and mozzarella. Mix until cheese is melted and sauce becomes creamy.

  5. Rest & Serve
    Remove from heat and let sit for 3–5 minutes to thicken slightly. Garnish with parsley before serving.


Time & Nutrition

  • Prep Time: 10 minutes

  • Cook Time: 20 minutes

  • Total Time: 30 minutes

  • Servings: 4

  • Calories: ~640 kcal per serving

Soft & Fluffy Homemade Dinner Rolls

Soft & Fluffy Homemade Dinner Rolls

These homemade dinner rolls are soft, fluffy, and lightly sweet with a buttery finish. Perfect as a side dish for soups, roasts, or tea-time, they are easy to prepare and freezer-friendly.


Ingredients

Dough

  • 4 cups all-purpose flour

  • 2 teaspoons yeast (instant or active dry)

  • 3 tablespoons sugar

  • 1¼ cups warm milk or water (110°F / 43°C)

  • ¼ cup vegetable or sunflower oil

  • 2 eggs

  • ½ teaspoon salt

For Brushing

  • 1 egg white + 2 tablespoons water

  • 2 tablespoons melted butter


Instructions

1. Activate Yeast

In a bowl, mix yeast and sugar. Add warm milk or water and let stand 5–7 minutes until foamy.

2. Mix Wet Ingredients

Add oil, eggs, and salt. Mix well.

3. Add Flour

Add flour gradually and mix until dough forms. Knead 5–7 minutes until smooth and elastic.

4. First Rise

Place dough in a greased bowl. Cover and let rise 1 hour or until doubled.

5. Shape Rolls

Divide dough into 24 equal pieces. Shape into balls and place in a greased pan.

6. Second Rise

Cover and let rise 30–40 minutes.

7. Bake

Brush tops with egg wash.
Bake at 350°F (180°C) for 20–25 minutes until golden.

8. Finish

Brush immediately with melted butter after baking.


Optional Flavor Ideas

  • Cheese-filled (mozzarella or cheddar inside)

  • Garlic butter topping

  • Honey butter glaze

  • Sesame or poppy seed topping


Storage

  • Room temperature: up to 3 days

  • Freeze baked rolls: up to 2 months

  • Reheat before serving


Nutrition (per roll, approx.)

  • Calories: 160

  • Carbs: 24g

  • Protein: 4g

  • Fat: 5g

  • Sugar: 3g

Effortless Lemon Ice Cream

Effortless Lemon Ice Cream

Ingredients Needed:


1 cup of heavy cream

2 tablespoons of fresh lemon juice

3 tablespoons of honey (or to taste, depending on your preference for sweetness)

Instructions:


Mix Ingredients: In a medium-sized mixing bowl, combine the heavy cream, fresh lemon juice, and honey. Mix thoroughly until the honey is completely dissolved.

Whisk or Blend: Using a hand mixer or blender, whip the mixture until it becomes thick and creamy. This usually takes about 3 to 4 minutes.

Freeze: Pour the mixture into a freezer-safe container. If you prefer a soft-serve consistency, you can enjoy it immediately. For those who like their ice cream firmer, freeze it for about an hour, then stir it, and freeze again until it reaches the desired consistency.

Serving Suggestions: Scoop your lemon ice cream into bowls or cones. This ice cream pairs beautifully with fresh berries or a sprig of mint for an extra touch of elegance and freshness.


Storage Tips: Store any leftover ice cream in an airtight container in the freezer. Before serving again, let it sit out for a few minutes to soften slightly for easier scooping.

Salsa Verde Chicken Cottage Cheese Taco Bowls

Salsa Verde Chicken Cottage Cheese Taco Bowls


Tangy, creamy, and melty like enchiladas but faster.


Ingredients (Serves 2)


Base


• 1 cup low-fat cottage cheese, blended with 4 tablespoons salsa verde


• 6 oz cooked shredded chicken


• 1 teaspoon taco seasoning (or ½ teaspoon cumin + ½ teaspoon garlic powder)


• 1 cup diced zucchini or bell peppers


• ¼ cup corn


• ¼ cup black beans


• 1 oz shredded Monterey Jack or Mexican-blend cheese


Toppings


• Fresh cilantro


• Lime wedges


• ½ avocado, sliced


• 2 tablespoons Greek yogurt or sour cream.Salsa Verde Chicken Cottage Cheese Taco Bowls


Tangy, creamy, and melty like enchiladas but faster.


Ingredients (Serves 2)


Base


• 1 cup low-fat cottage cheese, blended with 4 tablespoons salsa verde


• 6 oz cooked shredded chicken


• 1 teaspoon taco seasoning (or ½ teaspoon cumin + ½ teaspoon garlic powder)


• 1 cup diced zucchini or bell peppers


• ¼ cup corn


• ¼ cup black beans


• 1 oz shredded Monterey Jack or Mexican-blend cheese


Toppings


• Fresh cilantro


• Lime wedges


• ½ avocado, sliced


• 2 tablespoons Greek yogurt or sour cream.Salsa Verde Chicken Cottage Cheese Taco Bowls


Tangy, creamy, and melty like enchiladas but faster.


Ingredients (Serves 2)


Base


• 1 cup low-fat cottage cheese, blended with 4 tablespoons salsa verde


• 6 oz cooked shredded chicken


• 1 teaspoon taco seasoning (or ½ teaspoon cumin + ½ teaspoon garlic powder)


• 1 cup diced zucchini or bell peppers


• ¼ cup corn


• ¼ cup black beans


• 1 oz shredded Monterey Jack or Mexican-blend cheese


Toppings


• Fresh cilantro


• Lime wedges


• ½ avocado, sliced


• 2 tablespoons Greek yogurt or sour cream.

Crustless Spinach and Feta Quiche

Crustless Spinach and Feta Quiche

Prep time: 15 mins | Cook time: 35-45 mins | Servings: 6-8


Ingredients

Eggs: 6 large


Dairy: 1 cup heavy cream (or whole milk for a lighter version)


Spinach: 2 cups fresh baby spinach, roughly chopped


Cheese: 1 cup crumbled Feta and 1 cup shredded Mozzarella or Monterey Jack


Aromatics: 1/2 small onion (finely diced) and 2 cloves garlic (minced)


Seasoning: 1/2 tsp salt, 1/4 tsp black pepper, and 1 tsp dried oregano or Italian herbs


Butter/Oil: 1 tbsp for sautéing


Instructions

Preheat & Prep: Preheat your oven to 190°C (375°F). Grease a 9-inch round baking dish or a deep-dish pie pan thoroughly with butter or non-stick spray.


Sauté the Greens: In a skillet over medium heat, sauté the onions until soft. Add the garlic and chopped spinach. Cook just until the spinach wilts (about 2 minutes). Important: Squeeze out any excess liquid from the spinach so the quiche isn’t watery.


Whisk the Base: In a large bowl, whisk together the eggs, cream, salt, pepper, and half of your dried herbs until smooth and slightly frothy.


Layer the Flavors: Spread the sautéed spinach mixture evenly across the bottom of the prepared baking dish. Sprinkle the Feta and shredded cheese over the top.


Combine: Pour the egg mixture over the spinach and cheese. Use a fork to gently swirl the ingredients so they are evenly distributed. Sprinkle the remaining herbs on top for that beautiful finished look.


Bake: Place in the center of the oven and bake for 35–45 minutes. The quiche is done when the edges are golden brown and the center is set (it shouldn’t jiggle when you move the pan).


Rest: Let it sit for 10 minutes before slicing. This allows the internal structure to firm up so you get those clean, sharp slices shown in your photo.


Pro-Tips for Success

The Golden Top: If the top isn’t as brown as the photo near the end of the timer, turn on the broiler for the last 1–2 minutes—but watch it closely!


Add-ins: This recipe is very forgiving. You can add sun-dried tomatoes or sautéed mushrooms for extra depth.

“Super Drink for Weight Loss.”

“Super Drink for Weight Loss.”


Ingredients


2 tbsp lemon juice


1 tbsp raw honey


1 tsp ground cinnamon


2 tbsp apple cider vinegar


1 cup hot water


What this drink can do


This mix may:


Help some people feel fuller (apple cider vinegar)


Provide a pleasant, low-calorie flavored drink


Support hydration


Offer antioxidants (lemon, honey, cinnamon)


What this drink cannot do


Despite claims, this drink alone will not cause weight loss.


Weight loss happens when:


total calorie intake is lower than calories burned


eating patterns and activity levels change consistently


There is no single drink—even with ACV, lemon, or cinnamon—that burns fat on its own.


A realistic, safe summary


It can be a helpful morning drink for some people.


It might assist with appetite control a little.


But no special drink will replace diet, sleep, and activity for weight loss.,

Fluffy Pancakes – Light, Filling & Guilt-Free

Meta Info

Servings: 2 (4 pancakes)

Total Time: 15 minutes

Difficulty: Easy

Calories per Serving: ~240


Macros (Per Serving):

Protein 18g • Carbs 10g • Fat 12g • Fiber 3g


Introduction

Few things feel as comforting as warm pancakes fresh off the pan. Soft centers, lightly crisp edges, and that familiar cozy aroma instantly turn an ordinary morning into something special. These pancakes deliver all the comfort you crave without the heaviness of traditional versions.


Made with simple ingredients and easy swaps, this recipe fits beautifully into low-carb, high-protein, and balanced eating plans. They’re filling, satisfying, and perfect for breakfast, brunch, or even a quick sweet meal any time of day.


If you’re looking for pancakes that feel indulgent but support your goals, these fluffy pancakes are quick to make, easy to customize, and endlessly reliable.


Look at the Recipe

Light, fluffy texture with a soft center

Mild sweetness that pairs with any topping

Protein-rich and lower in carbs than classic pancakes

Ingredients Needed

Pancake Batter

½ cup oat flour or almond flour

½ cup cottage cheese or Greek yogurt

2 large eggs

½ tsp baking powder

½ tsp vanilla extract

Sweetener of choice, to taste

Pinch of salt

For Cooking

Olive oil spray or butter


How to Make Our Pancakes

Blend all pancake batter ingredients until smooth.

Heat a non-stick pan over medium heat and lightly grease.

Pour batter into small circles to form pancakes.

Cook for 2–3 minutes until bubbles form on the surface.

Flip gently and cook another 1–2 minutes until golden.

Serve warm with your favorite toppings.

This method keeps the pancakes fluffy while maintaining a macro-friendly balance for low-carb and high-protein eating.

Macros & Plan Compatibility

Plan Notes
Keto & Low-Carb ~3–4g net carbs per pancake using almond flour and sugar-free sweetener.
Slimming About 3–4 syns per serving using oat flour as a Healthy Extra B and low-fat cottage cheese.
High-Protein ~20–22g protein per serving; add whey protein or extra egg whites for more protein.
Weight Watchers ~3–4 SmartPoints (Blue plan) using low-fat dairy and minimal oil.
Mediterranean Fits well using yogurt, eggs, olive oil, and natural sweetness.

Storage & Serving Suggestions

Store:
Refrigerate pancakes in an airtight container for up to 3 days.

Reheat:
Warm in a dry skillet or microwave for 20–30 seconds.

Freeze:
Freeze with parchment between pancakes for up to 1 month.

Serve With:

  • Fresh berries
  • Greek yogurt
  • Nut butter
  • Sugar-free syrup or honey (non-low-carb plans)

Tips & FAQs

Can I make these pancakes ahead of time?

Yes. They reheat well and are perfect for meal prep breakfasts.

Why are my pancakes too dense?

Overmixing or too much flour can cause density. Blend just until smooth.

Can I make them dairy-free?

Yes. Use plant-based yogurt and adjust thickness with water or almond milk.

Are these pancakes good for weight loss?

Yes. They’re filling, protein-rich, and lower in refined carbs.

Can I make them savory?

Absolutely. Skip sweetener and add herbs or cheese.

Blueberry Almond Cream Bake

Blueberry Almond Cream Bake

Ingredients List

Base Custard Mixture

3 large eggs

¾ cup granulated sugar

1½ cups whole milk

½ cup heavy cream

2 tablespoons melted butter

1 teaspoon vanilla extract

½ teaspoon almond extract (optional but recommended)

Pinch of salt

Structure & Texture

2 cups day-old bread cubes (brioche, challah, or milk bread work best)

Topping

1½ cups fresh blueberries

¼ cup sliced almonds

1–2 tablespoons honey or maple syrup (for drizzling)

Step-by-Step Instructions

1. Prepare the Baking Dish

Preheat oven to 350°F (175°C).

Grease a medium ceramic or glass baking dish generously with butter.

Spread bread cubes evenly across the bottom of the dish.

2. Make the Custard

In a mixing bowl, whisk together eggs and sugar until pale and smooth.

Add milk, cream, melted butter, vanilla, almond extract, and salt. Whisk gently until fully combined—avoid over-whipping to keep the texture silky.

3. Assemble

Pour the custard mixture evenly over the bread cubes.

Press gently so all bread absorbs liquid.

Scatter blueberries evenly across the surface.

Sprinkle sliced almonds on top.

Drizzle lightly with honey or maple syrup.

4. Bake

Bake uncovered for 40–45 minutes, until:

Top is golden and lightly crisp

Center is softly set but slightly jiggly

Edges are caramelized and fragrant

5. Rest & Serve

Let rest 15 minutes before slicing—this allows the custard to fully set while staying creamy.

No Knead Beer Bread

No-Knead Artisan Beer Bread

A crusty, rustic loaf that relies on time and fermentation rather than elbow grease.

  • Prep time: 10 mins

  • Rise time: 3 hrs 10 mins

  • Cook time: 35 mins

  • Yield: 1 Loaf (approx. 15 servings)

Ingredients

  • 1 ½ tsp active dry yeast

  • 4 ½ cups all-purpose flour (divided)

  • ½ cup warm water (approx. 100°F / 38°C)

  • 1 (12 oz) can or bottle of beer (room temperature works best)

  • 1 ½ tsp fine salt

  • Extra flour for dusting

  • 1 tbsp cornmeal (for the baking sheet)

Instructions

  1. Activate the Yeast: In a large bowl, stir together the yeast, ½ cup of the flour, and the warm water. Cover the bowl and let it sit in a warm spot for 30 minutes until slightly bubbly.

  2. Mix the Dough: Stir in the beer, salt, and the remaining 4 cups of flour. Mix until the flour is fully incorporated. The dough will be thick, sticky, and should pull away from the sides of the bowl.

  3. First Rise: Cover the bowl again and let the dough rise in a warm spot for 2 hours, or until it has doubled in size.

  4. Shape: Scrape the dough onto a well-floured surface using a spatula. Dust the top of the dough generously with flour and gently shape it into an oval or round loaf.

  5. Second Rise: Sprinkle a baking sheet with cornmeal. Transfer the loaf to the sheet, sprinkle a little more flour on top, and cover loosely with a clean kitchen towel. Let it rise for another 30–40 minutes.

  6. Prepare the Oven: Preheat your oven to 425°F (220°C). To get that “bakery crust,” place a small loaf pan filled with warm water on the bottom rack to create steam.

  7. Score and Bake: Use a sharp knife or razor to slash a long slit down the center of the loaf. Place the baking sheet on the rack above the water pan. Bake for 35 minutes or until the crust is deep golden brown.

  8. Cool: Transfer to a wire rack. Resist the urge to cut it immediately! Letting it cool completely ensures the middle finishes setting and doesn’t become gummy.


A Quick Tip for Success

The type of beer you use will change the flavor profile significantly:

  • Lagers/Pilsners: Result in a mild, classic bread flavor.

  • Stouts/Porters: Create a darker, maltier, and slightly sweeter loaf.

  • IPAs: Can sometimes leave a bitter aftertaste due to the hops, so stick to maltier brews if you’re unsure!

Mango Banana Oat Breakfast Smoothie

🥭 Mango Banana Oat Breakfast Smoothie

Ingredients

Category Ingredient Quantity

Fiber Rolled Oats (Old Fashioned) ¼ cup

Fruit Fresh or Frozen Mango (cubed) 1 cup

Fruit Ripe Banana ½ large

Liquid Orange Juice or Coconut Water ½ cup

Creaminess Milk or Yogurt (Dairy or Plant-based) ½ cup

Optional Honey or Agave Syrup 1 tsp

Optional Fresh Turmeric or Ginger A tiny pinch (for extra glow)

Instructions

  1. Soften the Oats (Optional): If you prefer a completely smooth texture without any “chew,” place the oats in the blender first and pulse them into a fine powder before adding other ingredients.

  2. Layer Your Ingredients: Add your liquid base (orange juice/milk) first. Follow with the oats, then the banana and mango chunks. Placing the frozen items on top helps push everything down into the blades.

  3. The Blend: Start on a medium speed to break down the oats and fruit, then finish on high for 45 seconds. You want to ensure the oats are fully pulverized for that “silk” finish seen in the second image.

  4. Adjust Consistency: * Too thick? Add a splash more orange juice.

    • Too thin? Add a few ice cubes or more frozen mango.


Why this combination works

  • The Oats: They act as a natural thickener and provide slow-release energy, preventing a “sugar crash” later in the morning.

  • The Mango: High in Vitamin C and fiber, it provides that intense tropical color and natural sweetness.

  • The Banana: This is the “glue” of the smoothie; it provides the creamy, emulsified texture that binds the oats and juice together.

Pro Tip for Texture

If you have the time, let the blended smoothie sit for 2–3 minutes before drinking. This allows the oats to hydrate slightly, making the drink even creamier!

Creamy Green Power Smoothie Recipe

Creamy Green Power Smoothie Recipe

This creamy green power smoothie is a refreshing, nutrient-packed drink made with simple, wholesome ingredients. It combines leafy greens, tropical fruit, and healthy fats to create a smooth, naturally sweet beverage that’s perfect for breakfast, post-workout recovery, or a mid-day energy boost. The vibrant green color comes from fresh spinach, while banana, mango, and avocado add richness and natural sweetness without the need for added sugar.

Ingredients:

  • 1 cup fresh spinach leaves (washed and loosely packed)

  • 1 ripe banana (peeled and sliced)

  • ½ ripe avocado (peeled and cubed)

  • 1 cup fresh or frozen mango chunks

  • 1 to 1½ cups cold water, coconut water, or almond milk

  • Optional: 1 teaspoon honey or dates (for extra sweetness)

  • Optional: Ice cubes for a thicker, colder smoothie

Instructions:

  1. Begin by washing the spinach thoroughly under running water to remove any dirt. Pat dry if needed.

  2. Peel the banana and avocado, then cut them into medium-sized pieces for easier blending.

  3. Add the liquid of your choice (water, coconut water, or almond milk) to the blender first. This helps the blades move smoothly.

  4. Add spinach on top of the liquid, followed by banana, avocado, and mango chunks.

  5. Blend on medium speed for about 30 seconds, then increase to high speed and blend for another 30–60 seconds until completely smooth and creamy.

  6. Taste the smoothie. If you prefer it sweeter, add honey or dates and blend again briefly.

  7. If the texture is too thick, add a little more liquid. For a colder drink, add ice and blend once more.

  8. Pour into a tall glass and serve immediately.

Benefits:

This smoothie is rich in fiber, vitamins A and C, potassium, and healthy fats. Spinach supports digestion and immunity, banana provides natural energy, mango adds antioxidants, and avocado contributes heart-healthy fats that keep you full longer. Together, they create a balanced, satisfying drink that’s both delicious and nourishing.

Serving Tip:

Enjoy this smoothie fresh for the best taste and nutrition. Pair it with nuts or whole-grain toast for a complete, energizing meal.

Tropical Carrot & Pineapple Glow Smoothie

Tropical Carrot & Pineapple Glow Smoothie

This blend is packed with Vitamin A from the carrots and Vitamin C from the pineapple, making it great for energy and skin health.

Ingredients

Carrots: 2 medium carrots (peeled and roughly chopped)


Pineapple: 1.5 cups fresh or frozen pineapple chunks


Liquid Base: 1 cup coconut water (or orange juice for extra sweetness)


Creaminess: 1/2 cup Greek yogurt or a splash of coconut milk


Optional Kick: 1/2 inch piece of fresh ginger (peeled)


Sweetener: 1 tsp honey or maple syrup (optional, depending on fruit ripeness)


Ice: 1/2 cup (if using fresh instead of frozen fruit)


Instructions

Prep the Carrots: Since carrots are quite firm, if you don’t have a high-speed blender, you may want to finely grate them or lightly steam them for 2 minutes and let them cool before blending.


Layer the Blender: Add the liquid (coconut water) first, followed by the carrots and ginger, then the pineapple and yogurt on top.


Blend: Start on a low speed and gradually increase to high. Blend for 60–90 seconds until the carrot particles are completely pulverized and the texture is silky smooth.


Adjust: If the smoothie is too thick, add a little more coconut water. If you want it colder, toss in a few ice cubes and pulse again.


Serve: Pour into a tall glass as shown in the image and enjoy immediately!

Pro Tips for the Best Texture

  • High-Speed Blending: To get that perfectly smooth pour seen in the second panel of your image, a high-speed blender is key for handling raw carrots.

  • Juice vs. Smoothie: If you prefer a thinner consistency like a juice, you can strain the mixture through a fine-mesh sieve or nut milk bag to remove the fiber.

🥒 Healthy Dill Pickle Chicken Salad (WW-Friendly)

🥒 Healthy Dill Pickle Chicken Salad (WW-Friendly)

Ingredients

2 cups cooked chicken breast, chopped or shredded

½ cup fat-free Greek yogurt

1–2 tbsp light mayo (optional but adds richness)

⅓ cup dill pickles, finely chopped

1–2 tbsp pickle juice (to taste)

¼ cup celery, finely chopped

1–2 tbsp red onion or scallions (optional)

1 tsp dill (fresh or dried)

½ tsp garlic powder

Salt & black pepper to taste


Directions

In a bowl, mix Greek yogurt, light mayo, pickle juice, and seasonings.

Fold in chicken, pickles, celery, and onion.

Chill 20–30 minutes if you can (flavor gets better 👌).

Taste and adjust pickle juice or dill.


WW Points (Approximate)

💙 Blue / Purple: 0–1 points per serving

💚 Green: 2–3 points per serving

(Assumes fat-free Greek yogurt + light mayo; points depend on exact brands and portion size.)


Serving Ideas (Low Point)

On lettuce wraps 🥬

With cucumber slices or bell pepper boats

On 647 bread or light sandwich thins

Stuffed in a tomato or low-carb wrap


Home Made Beef Taco Soup

prep time: 5 MINS

cook time: 40 MINS

total time: 45 MINS

calories: 253KCAL

This Beef Taco Soup is a filling, flavorful and super satisfying one-pot meal!

yield: 8 (GENEROUS 1 CUP) SERVINGS

Table of Contents

Ingredients

1 ½ tablespoons chili powder

½ teaspoon garlic powder

½ teaspoon onion powder

½ teaspoon crushed red pepper flakes

½ teaspoon dried oregano

¾ teaspoon paprika

2 ¼ teaspoon ground cumin

1 teaspoon salt

1 ½ teaspoons black pepper

1 teaspoon canola oil

½ cup chopped onion

2 garlic cloves, minced

1 ½ lbs raw 95% lean ground beef

3 cups low sodium beef broth

1 (28 oz) can crushed tomatoes

3 oz 1/3 less fat cream cheese, cut into cubes

1 cup frozen corn kernels

1 ½ cups drained and rinsed canned black beans

Optional toppings (not included in nutrition info or points calculations): chopped cilantro, avocado, shredded cheese, sour cream, tortilla strips or chips, sliced scallions, etc.

Instructions

Combine the chili powder, garlic powder, onion powder, crushed red pepper, oregano, paprika, cumin, salt and pepper in a bowl and stir to combine. Set aside.

Pour the canola oil into a soup pot or Dutch oven and bring over medium-high heat. Add the onions and stir to coat. Cook, stirring occasionally, for a few minutes until the onions are softened. Add the minced garlic, stir together and cook for another 30-60 seconds. Add the ground beef and stir together. Cook, breaking the meat up into small pieces, until the beef is cooked through and fully broken up. Add the spice mixture from step 1 to the meat and stir to coat.

Add the broth and crushed tomatoes, increase the heat and bring to a boil. Once boiling, reduce the heat to low and simmer, covered, for 20 minutes. Uncover the pot and add the cream cheese. Whisk the cream cheese in while simmering until the cheese is dissolved. Add the corn and black beans and stir together. Cover the pot and simmer for an additional 10 minutes.

Notes

Nutrition Information per (generous 1 cup*) serving:


253 calories, 22 g carbs, 3 g sugars, 8 g fat, 3 g saturated fat, 25 g protein, 6 g fiber


MyW-W SmartPoints per (generous 1 cup*) serving:


Green: 5 SmartPoints/ Blue: 4 SmartPoints/ Purple: 4 SmartPoints


W-W Points Plus:


6 per (generous 1 cup*) serving


*When I measured the finished soup I got 9 cups, so I made it into 8 servings at around 1 1/8 cups each

Best Mother’s Crack Cake

🍰 Best Mother’s Crack Cake (Full Recipe)🧺 Ingredients

Cake


1 box yellow cake mix


1 small box (3.4 oz) instant vanilla pudding mix


4 large eggs


½ cup cold water


½ cup vegetable oil


½ cup brown sugar


½ cup white sugar


1 teaspoon ground cinnamon


½ cup chopped pecans or walnuts (optional but recommended)

  • ¼ cup butter

  • ½ cup white sugar

  • ¼ cup water

  • ¼ cup vanilla extract (yes, a full ¼ cup)


👩‍🍳 Instructions

  1. Preheat oven to 350°F (175°C).

  2. Grease a Bundt pan generously (this cake will stick if you don’t).


  3. In a large bowl, mix:

    • Cake mix

    • Pudding mix

    • Eggs

    • Water

    • Oil

  4. Beat until smooth (about 2 minutes).

  5. In a separate bowl, mix:

    • Brown sugar

    • White sugar

    • Cinnamon

    • Nuts (if using)

  6. Layering time:

    • Sprinkle half of the sugar mixture into the bottom of the Bundt pan.

    • Pour in the batter.

    • Sprinkle the remaining sugar mixture on top.

    1. Bake for 45–50 minutes, until a toothpick comes out mostly clean.

    2. Let cake cool 10 minutes—don’t skip this.


    🍯 Glaze Magic

    1. In a saucepan, combine:

      • Butter

      • Sugar

      • Water

    2. Bring to a boil, then simmer 2–3 minutes.

    3. Remove from heat and stir in vanilla.

    4. Poke holes all over the cake (use a skewer or fork).

    5. Slowly pour glaze over the cake while it’s still warm.

    6. Let it soak for 10–15 minutes, then invert onto a plate.


❓ Q & A (Because Everyone Asks)

Q: Why is it called “Crack Cake”?

A: Because it’s addictively good. Sweet, buttery, moist, and impossible to stop eating.

Q: Can I make it without nuts?

A: Absolutely. Still amazing without them.

Q: Can I use a different cake mix?

A: Yellow is best, but butter cake or vanilla also work. Avoid chocolate—it changes the whole vibe.

Q: Is ¼ cup of vanilla really correct?

A: YES. Trust the process. The alcohol cooks out and leaves insane flavor.

Q: Can I make it ahead?

A: Yes! It’s even better the next day once the glaze fully settles in.

Q: How do I store it?

A: Cover tightly and keep at room temperature up to 3 days, or refrigerate up to 5 days.

Q: Can I freeze it?

A: Yep. Wrap slices tightly and freeze up to 3 months. Thaw at room temp.

Q: What makes this cake so moist?

A: The pudding mix + oil + glaze combo = unstoppable moisture.

Spinach & Feta Egg Bites


Spinach & Feta Egg Bites

Prep time: 10 mins | Cook time: 20–25 mins | Yields: 12 muffins


Ingredients

8 Large Eggs


1/2 cup Milk (whole or 2% works best)


2 cups Fresh Spinach, roughly chopped


1/2 cup Feta Cheese, crumbled


1/4 cup Parmesan Cheese, shredded


1/4 tsp Salt (feta is salty, so don’t overdo it!)


1/4 tsp Black Pepper


Optional: 1/2 tsp Garlic powder or a pinch of red pepper flakes for heat.


Instructions

Prep the Oven: Preheat your oven to 375°F (190°C).


Line the Tin: As seen in your photo, use squares of parchment paper pushed into the muffin tin cups. This prevents sticking and gives them that “rustic” bakery look. Alternatively, grease the tin very well with olive oil or butter.


Whisk: In a large bowl, whisk together the eggs, milk, salt, pepper, and any extra spices until the mixture is frothy.


Distribute Fillings: Evenly divide the chopped spinach and crumbled feta into the bottom of the 12 muffin cups.


Pour: Carefully pour the egg mixture over the fillings in each cup until they are about 3/4 full. Sprinkle the Parmesan cheese on top.


Bake: Place in the oven and bake for 20–25 minutes, or until the tops are golden brown and the centers are set (they shouldn’t jiggle when you move the pan).


Cool: Let them sit for 5 minutes before removing. The parchment paper makes them easy to lift right out!


Pro-Tips for Success

Avoid Sogginess: If you use frozen spinach instead of fresh, make sure to squeeze out every drop of water first, otherwise the egg bites will become watery.


Add-ins: Feel free to add sautéed mushrooms or sundried tomatoes to match the rich colors in your photo.


Storage: These keep beautifully in an airtight container in the fridge for up to 4 days. Reheat for 30 seconds in the microwave.

No sugar! No flour! Healthy Banana Oatmeal Muffins

Full recipe>>> Ingredients


Makes 10–12 muffins


2 large ripe bananas (the spottier, the better)


2 cups rolled oats (old‑fashioned or quick oats)


2 large eggs


1/3 cup milk of choice (almond, oat, dairy, etc.)


1 teaspoon baking powder


1/2 teaspoon baking soda


1 teaspoon vanilla extract


1 teaspoon cinnamon (optional but recommended)


1/4 teaspoon salt


Optional Add‑Ins (choose 1–2)


1/4 cup chopped nuts (walnuts or almonds)


1/4 cup dark chocolate chips (no‑sugar if preferred)


2 tablespoons chia seeds or flaxseeds


1/4 cup blueberries or raisins


Instructions


Preheat oven to 350°F (175°C). Line a muffin tin with paper liners or lightly grease it.


Blend the oats in a blender or food processor until they resemble coarse flour.


Add bananas, eggs, milk, vanilla, cinnamon, and salt to the blender. Blend until smooth.


Add baking powder and baking soda, then pulse briefly to combine.


Fold in any add‑ins by hand if using.


Divide batter evenly among muffin cups (about 3/4 full).


Bake for 18–22 minutes, or until a toothpick inserted in the center comes out clean.


Cool for 5 minutes in the pan, then transfer to a wire rack.


Tips for Best Results


Use very ripe bananas for maximum natural sweetness.


Do not over‑blend after adding baking soda/powder—this keeps muffins light.


For extra moisture, add 1 tablespoon nut butter or coconut oil.


Want jumbo muffins? Bake 24–26 minutes.

Vibrant Dragon Fruit & Blueberry Smoothie

Vibrant Dragon Fruit & Blueberry Smoothie

Ingredients

1 cup Red Dragon Fruit: Fresh or frozen (cubed).


1 medium Banana: Best if frozen to get that thick, creamy texture shown.


1/2 cup Blueberries: Fresh for topping, or frozen for the blend.


1/2 to 3/4 cup Liquid: Use coconut water for a light taste, or almond milk for extra creaminess.


Optional sweetener: A drizzle of honey or agave if your fruit isn’t quite sweet enough.


Instructions

Prep the Fruit: Peel the dragon fruit and cut it into cubes. Slice the banana. If you want the smoothie to be very thick (like the one in the glass), use frozen fruit.


Blend: Place the dragon fruit, banana, and half of the blueberries into a high-speed blender.


Add Liquid: Pour in your choice of liquid. Start with 1/2 cup and add more only if the blender is struggling.


Process: Blend on high until completely smooth and the color is uniform.


Assemble: To mimic the photo’s “deconstructed” look for a guest or a photo, you can layer fresh slices of banana and dragon fruit against the inside of a glass before pouring the smoothie in, or simply top the finished drink with the extra blueberries.


Why this works

Dragon Fruit: High in fiber and antioxidants.


Banana: Provides the base “creaminess” without needing dairy.


Blueberries: Adds a deep, tart complexity to the sweet tropical flavor.