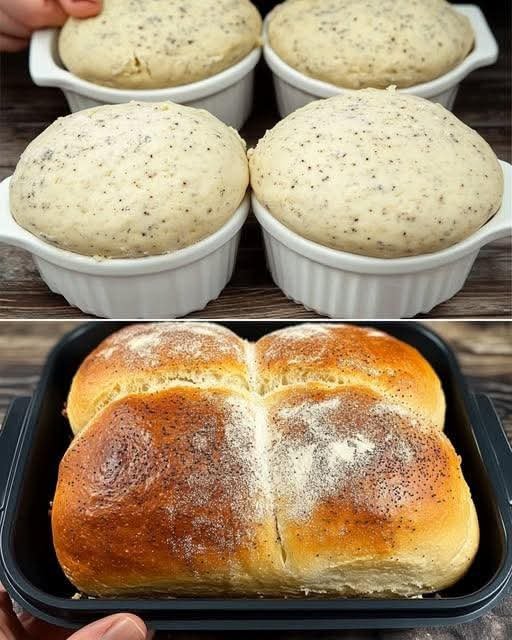
Homemade Garlic Buns

Homemade Garlic Buns

Soft, fluffy buns brushed with aromatic garlic butter

These homemade garlic buns are tender on the inside with a lightly golden top and a rich garlic aroma. They are perfect as a side for soups, pasta, or enjoyed on their own while warm.


Ingredients

Dough

  • All-purpose flour — 400 g (about 3¼ cups)

  • Sugar — 50 g (¼ cup)

  • Salt — 1 teaspoon

  • Instant dry yeast — 7 g (1 packet)

  • Lukewarm milk — 250 ml (1 cup)

  • Egg — 1 large, room temperature

  • Butter — 55 g (¼ cup), softened

  • Minced garlic — 1 tablespoon


Garlic Butter Topping

  • Minced garlic — 1 tablespoon

  • Dried parsley — 2 teaspoons

  • Salted butter — 55 g (¼ cup), melted


Step-by-Step Method

1. Prepare the Dough

  • In a large bowl, combine the flour, sugar, salt, and instant yeast.

  • Add the lukewarm milk and egg.

  • Mix until a rough dough forms.


2. Knead the Dough

  • Knead using a stand mixer or by hand for 5 minutes, until smooth.

  • Cover the dough with a clean towel and let it rest for 20 minutes.


3. Add Butter and Garlic

  • Add the softened butter and minced garlic to the dough.

  • Continue kneading for 5–7 minutes until the dough becomes elastic and slightly glossy.


4. First Rise

  • Lightly grease a bowl with oil.

  • Place the dough inside, cover, and let rise in a warm place for 1 hour, or until doubled in size.


5. Shape the Buns

  • Gently press the dough to release excess air.

  • Shape into a square and divide into 25 equal pieces.

  • Roll each piece into a smooth ball.

  • Cover and let rest for 15 minutes.


6. Second Rise

  • Lightly flatten each dough ball and tuck the edges underneath to create a smooth top.

  • Place in a greased baking pan.

  • Cover and let rise again for 30 minutes, until puffy.


7. Prepare Garlic Butter

  • In a small bowl, combine:

    • Melted butter

    • Minced garlic

    • Dried parsley

  • Mix well.


8. Bake

  • Preheat the oven to 180°C (350°F).

  • Brush the tops of the buns generously with garlic butter.

  • Bake for 15–17 minutes, until lightly golden.


9. Finish and Serve

  • Remove from the oven.

  • While still warm, brush with more garlic butter for extra flavor.

  • Serve warm.


Serving Suggestions

  • Pair with soups or pasta dishes

  • Serve as a dinner roll or party bread

  • Enjoy plain or with cheese spread


Storage Tips

  • Store at room temperature for 1 day

  • Refrigerate for up to 3 days

  • Reheat gently before serving

Ginger Water

Ginger Water

A warm, refreshing drink made with fresh ginger and lemon

Ginger water is a simple homemade beverage prepared by gently simmering fresh ginger in water. It has a naturally warming flavor and is often enjoyed as part of a balanced daily routine for hydration and digestive comfort.


Ingredients

  • Fresh ginger root — 1 large piece (about 2 inches)

  • Water — 1 liter (4 cups)

  • Fresh lemon juice — from 1 lemon (optional, for flavor)

  • Honey — 1 teaspoon (optional, for mild sweetness)


Step-by-Step Preparation

Step 1: Prepare the Ginger

  • Wash the ginger thoroughly.

  • Peel the skin using a spoon or vegetable peeler.

  • Slice the ginger thinly.
    Thin slices help release flavor more evenly into the water.


Step 2: Heat the Water

  • Add the sliced ginger and water to a saucepan.

  • Place over medium heat.

  • Bring to a gentle boil.


Step 3: Simmer

  • Reduce heat to low.

  • Simmer for 10–15 minutes, depending on how strong you prefer the flavor.

    • Shorter time = milder taste

    • Longer time = stronger, spicier taste


Step 4: Cool and Strain

  • Remove the pot from heat.

  • Allow the liquid to cool slightly.

  • Strain into a glass jar or bottle to remove ginger pieces.


Step 5: Add Optional Flavorings

  • Stir in fresh lemon juice if desired.

  • Add honey for light sweetness, or leave it out for an unsweetened version.

  • Mix well.


How to Enjoy Ginger Water

  • Drink warm, room temperature, or chilled

  • Enjoy:

    • In the morning as a warm beverage

    • Between meals for hydration

    • In the evening as a caffeine-free drink


Gentle Benefits (No Medical Claims)

Ginger water may:

  • Provide a warming, soothing drink

  • Support general digestive comfort

  • Help reduce the feeling of fullness after meals

  • Encourage regular hydration

  • Offer natural flavor without artificial additives

(This drink supports overall wellness as part of a healthy lifestyle but is not a treatment or cure.)


Helpful Tips

  • Fresh ginger provides the best flavor

  • For storage, keep refrigerated and use within 24–48 hours

  • You can reheat gently without boiling again

  • Adjust ginger quantity to suit your taste


Variations

  • Add a cinnamon stick while simmering

  • Add mint leaves after straining

  • Replace lemon with orange slices

  • Serve over ice in warm weather

Soft Homemade Donuts (Simple & Beginner-Friendly)

Soft Homemade Donuts (Simple & Beginner-Friendly)

These homemade donuts are soft on the inside, lightly crisp on the outside, and coated with sugar for a classic finish. While the active preparation is quick, the dough needs resting time to achieve the best texture.


Ingredients

  • 2 large eggs (room temperature)

  • 180 ml (¾ cup) milk (lukewarm, not hot)

  • 10 g fresh yeast (about 1 tablespoon)

  • 500 g all-purpose flour (about 3⅓ cups)

  • 60 g butter (¼ cup), softened

  • 30 g sugar (2 tablespoons)

  • 1 teaspoon salt

  • Oil for frying (vegetable or sunflower oil)

  • Extra sugar for coating


Step-by-Step Preparation

1. Prepare the Yeast Mixture

  • In a small bowl, add the eggs, lukewarm milk, and fresh yeast.

  • Mix gently until the yeast dissolves completely.

  • Set aside for 5 minutes.


2. Make the Dough

  • In a large mixing bowl, add:

    • Flour

    • Butter

    • Sugar

    • Salt

  • Pour in the yeast mixture.

  • Mix with your hands or a spoon until a soft dough forms and no dry flour remains.


3. Knead the Dough

  • Transfer the dough to a clean work surface.

  • Knead for 8–10 minutes until smooth, elastic, and soft.

  • Shape into a ball.


4. First Rest (Rising)

  • Place the dough in a lightly greased bowl.

  • Cover with a clean cloth or plastic wrap.

  • Let it rest in a warm place for 2 hours, or until doubled in size.


5. Shape the Donuts

  • Gently press the air out of the dough.

  • Divide into 9 equal pieces.

  • Roll each piece into a smooth ball.

  • Use your fingers to gently shape each piece into a donut or oval fritter shape.


6. Second Rest (Proofing)

  • Place shaped donuts on a tray lined with baking paper.

  • Cover loosely.

  • Let them rest in a warm place (around 30°C / 86°F) for 1 hour until puffy.

(This step helps the donuts become light and airy — this is not baking.)


7. Fry the Donuts

  • Heat oil in a deep pan over medium heat.

  • Fry donuts in small batches.

  • Cook 1–2 minutes per side, turning gently, until evenly golden.

  • Remove and place on paper towels to drain excess oil.


8. Sugar Coating

  • While still warm, roll each donut in sugar until fully coated.


Serving Suggestions

  • Enjoy warm with tea, coffee, or milk

  • Add cinnamon to the sugar for extra flavor

  • Serve plain or with jam on the side


Helpful Tips

  • Do not overheat the oil; medium heat ensures even cooking

  • Lukewarm milk helps yeast work properly

  • Resting time is essential for soft texture

Butter Castella Cake Recipe

🍰 Butter Castella Cake Recipe

Ingredients (for one 8-inch loaf pan or a small square pan)

  • 1 cup (120 g) cake flour
    (You can use all-purpose flour sifted 2–3 times for extra lightness.)
  • 6 large eggs, at room temperature
  • ¾ cup (150 g) granulated sugar
  • 3 tbsp (45 ml) honey (or golden syrup)
  • 4 tbsp (60 g) unsalted butter, melted
  • 3 tbsp (45 ml) whole milk, warmed
  • 1 tsp vanilla extract

Instructions

1. Prepare the Pan and Oven

  • Preheat oven to 325°F (160°C).
  • Line your baking pan with parchment paper, leaving some extra on the sides so the cake can be lifted out easily after baking.
  • In a small bowl, mix the warm milk, melted butter, and honey. Set aside.

2. Beat Eggs and Sugar

  • In a heatproof bowl, combine eggs and sugar.
  • Place the bowl over a pot of simmering water (double boiler style).
  • Whisk constantly until the mixture is warm to the touch and the sugar granules have dissolved.
  • Remove from heat and beat using an electric mixer on high speed for about 5–7 minutes, until the mixture becomes pale, thick, and tripled in volume.

3. Fold in the Flour

  • Sift the cake flour in 2–3 additions into the whipped egg mixture.
  • Gently fold with a spatula each time, being careful not to deflate the airy batter.

4. Add Flavoring

  • Pour in the butter-milk-honey mixture and vanilla extract.
  • Fold gently until just combined. Avoid overmixing — this keeps the cake soft and fluffy.

5. Bake the Cake

  • Pour the batter into the prepared pan and tap lightly to remove large air bubbles.
  • Bake for 35–45 minutes, or until the top is golden brown and a skewer inserted in the center comes out clean.

6. Cool and Set

  • Remove the cake from the oven and, while still warm, cover the top with plastic wrap to retain moisture.
  • Once completely cooled, wrap the entire cake in plastic wrap and refrigerate overnight.
    This resting time gives the Castella its signature moist, dense, and slightly sticky texture.
  • Slice into thick pieces and serve at room temperature.

Tips & Variations

  • For a chewier texture, substitute bread flour for cake flour.
  • For a different flavor, replace honey with maple syrup or golden syrup.
  • For Matcha Castella, add 1–2 tsp of matcha powder when sifting the flour.
  • To ensure even baking, place the pan on the middle rack and avoid opening the oven during the first 30 minutes.

Spinach, Mushroom, and Ricotta Stuffed Zucchini

 Ingredients for Spinach Mushroom and Ricotta Stuffed Zucchini
To make Spinach, Mushroom, and Ricotta Stuffed Zucchini, you’ll need:
2 medium zucchinis
1 cup fresh spinach, chopped
1 cup mushrooms, diced (button or cremini work well)
1 cup ricotta cheese
½ cup shredded mozzarella cheese (plus extra for topping)
¼ cup grated Parmesan cheese
2 cloves garlic, minced
1 tablespoon olive oil
Salt and pepper, to taste
½ teaspoon Italian seasoning (optional) 1. Preheat the Oven
Set your oven to 375°F (190°C) to ensure even cooking.
2. Prepare the Zucchini
Slice the zucchinis in half lengthwise.
Use a spoon to carefully scoop out the centers, creating a hollow “boat.”
Arrange them cut-side up on a baking sheet.
3. Cook the Filling
Heat olive oil in a skillet over medium heat.
Add minced garlic and sauté for 1 minute until fragrant.
Stir in mushrooms and cook for 5–7 minutes until softened.
Add chopped spinach and cook until wilted (2–3 minutes).
Season with salt, pepper, and Italian seasoning (if using). 4. Mix the Filling
In a bowl, combine the cooked spinach and mushroom mixture with ricotta, mozzarella, and Parmesan cheese.
Stir until everything is well blended. 6. Bake
Place the baking sheet in the oven.
Bake for 25–30 minutes or until the zucchini is tender and the cheese is bubbly and slightly golden.
7. Serve and Enjoy!
Let the stuffed zucchinis cool for a few minutes before serving.
Enjoy them warm as a main dish or side!

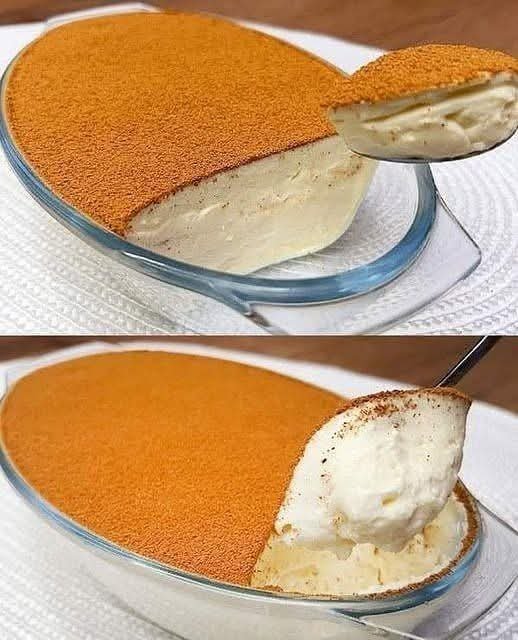
Dreamy Creamy Dessert: Delicious recipe made in a glass dish

Hello, everyone, today we’re going to learn how to make Creamy Dessert using simple ingredients. So grab your pen and paper to jot down the ingredients, then follow the complete preparation method.

How to Make Dreamy Creamy Dessert

An irresistible dessert with smooth cream, crunchy cookies, and just the right touch of chocolate. Perfect for parties and special occasions. See below the list of all ingredients and required quantities. And then, a very complete preparation method with details of the recipe.

Recipe Ingredients:

White Cream:

  • 2 egg yolks
  • 1 can sweetened condensed milk (14 oz / 395g)
  • 2 cups milk (16 fl oz / 480ml)
  • 2 tablespoons cornstarch (0.7 oz / 20g)
  • 1 teaspoon vanilla extract (0.17 oz / 5ml)

Chocolate Ganache:

  • 7 oz chopped semi-sweet chocolate (200g)
  • 1 small box of table cream or heavy cream (6.7 oz / 200g)

Assembly:

  • 1 package of ladyfinger or Maria cookies (about 6 oz / 170g)
  • Milk for soaking the cookies
  • Chocolate sprinkles or chocolate shavings (optional)

Instructions:

White Cream:
First, in a saucepan, combine the sweetened condensed milk, milk, egg yolks, and cornstarch. Stir well before turning on the heat to ensure all ingredients are fully mixed.

Then, place over medium heat, stirring constantly, until the mixture thickens into a creamy consistency.

Right after that, turn off the heat and stir in the vanilla extract. Set aside and let it cool completely.

Ganache:
Next, melt the chocolate using a double boiler or microwave, heating it in 30-second intervals and stirring in between.

After that, add the heavy cream to the melted chocolate and mix until smooth and glossy.

Assembly:
Afterwards, in a glass baking dish, make a layer using cookies dipped in milk. Then, spread half of the white cream on top of the cookies.

Next, add another layer of milk-dipped cookies, followed by the remaining white cream.

To finish, pour the chocolate ganache over the top. If you like, decorate with chocolate sprinkles or shavings.

Lastly, refrigerate for at least 3 hours before serving, so the dessert sets properly and is nicely chilled.

Layered Salad in a Jar!

Layered Salad in a Jar

Serves: 1 (This recipe can be multiplied to make more jars)

Prep Time: 10 minutes
Total Time: 10 minutes

Ingredients:

For the salad layers:

  • 1/4 cup corn kernels (cooked, fresh, or canned)

  • 1/4 cup shredded carrots

  • 1/4 cup shredded red cabbage

  • 1/4 cup shredded green cabbage

  • 1/4 cup shredded lettuce (romaine, iceberg, or a mix)

  • A handful of cherry tomatoes, halved

  • Optional: Avocado slices, cucumbers, bell peppers, or any other vegetables you like

For the dressing:

  • 2 tbsp olive oil

  • 1 tbsp apple cider vinegar (or lemon juice for a tangy kick)

  • 1 tsp Dijon mustard (optional, for a little spice)

  • 1 tsp honey or maple syrup (optional, for sweetness)

  • Salt & pepper, to taste

Instructions:

  1. Prepare the dressing:
    In a small bowl or jar, whisk together the olive oil, apple cider vinegar, Dijon mustard (if using), honey (if using), salt, and pepper. Set it aside.

  2. Layer the ingredients:

    • Start with the heaviest or most liquid ingredients at the bottom of the jar to prevent them from making the greens soggy. In this case, place the corn at the bottom.

    • Layer the vegetables in the following order: shredded carrots, shredded red cabbage, shredded green cabbage, and lettuce.

    • Top with a few halved cherry tomatoes for a fresh and colorful touch. If you want, you can also add optional ingredients like sliced cucumbers or bell peppers.

  3. Assemble the salad:
    Seal the jar tightly with the lid. If you’re making several, arrange them in your fridge for easy grab-and-go lunches or dinners.

  4. When ready to serve:

    • Shake the jar to mix the dressing through the salad, or pour the dressing on top and toss the salad in a separate bowl.

    • Enjoy as a quick, healthy, and portable meal!

Q&A for Layered Salad in a Jar

Q: Can I prepare these jars ahead of time?
A: Yes, absolutely! These salads are perfect for meal prep. You can store them in the fridge for up to 3–4 days. Just make sure the dressing is at the bottom and the lettuce and greens are at the top so they stay fresh.

Q: Can I make a bigger batch in one large jar or container?
A: Yes! You can scale this recipe for larger containers or multiple servings. Just be sure to layer the ingredients in the same order, keeping the wetter ingredients at the bottom and the greens at the top.

Q: How do I keep the salad from getting soggy?
A: The key is to layer the ingredients properly and to store the dressing separately or at the bottom of the jar. The vegetables that release moisture (like tomatoes or cucumbers) should be placed toward the bottom. When you’re ready to eat, mix everything together, so the greens don’t get soggy from the dressing.

Q: Can I add protein to this salad?
A: Yes! You can add grilled chicken, tuna, chickpeas, or any protein of your choice. For a vegetarian version, add some feta cheese or a hard-boiled egg for extra protein.

Q: Can I use other vegetables instead of the ones listed?
A: Absolutely! You can customize your salad with any vegetables you like. Try adding ingredients like avocado, roasted sweet potatoes, spinach, or even some olives for a Mediterranean twist.

Q: How long will the salad last in the fridge?
A: When stored properly in a jar, this salad should last for 3–4 days in the fridge. The key to freshness is keeping the dressing separate from the veggies until you’re ready to eat.

Q: Can I make this salad vegan?
A: Yes! Simply skip any dairy like cheese or add a dairy-free cheese alternative. Also, ensure your dressing is vegan by using maple syrup instead of honey.

This Layered Salad in a Jar is the perfect meal prep solution for busy days. It’s healthy, easy to make, and looks so colorful and appetizing. You can also mix it up with different veggies, proteins, and dressings based on your preferences.

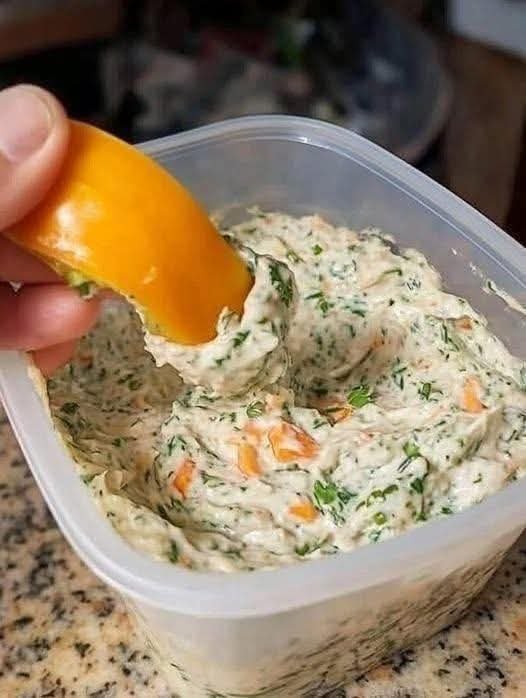
Classic No-Name Dip

Classic No-Name Dip

Ingredients

  • 1 cup sour cream
  • ½ cup mayonnaise
  • 1 teaspoon garlic powder
  • 1 teaspoon onion powder
  • 1 teaspoon dried parsley
  • ½ teaspoon dried dill
  • ½ teaspoon paprika
  • ¼ teaspoon salt adjust to taste
  •  teaspoon black pepper
  • Optional: 1 teaspoon lemon juice or a dash of hot sauce for extra zing

Instructions

  • Combine the base: In a medium bowl, mix together the sour cream and mayonnaise until smooth and creamy.
  • Add seasonings: Stir in garlic powder, onion powder, parsley, dill, paprika, salt, and black pepper until evenly incorporated.
  • Optional boost: If desired, add lemon juice or a dash of hot sauce to enhance flavor. Mix thoroughly.
  • Chill for flavor: Cover the bowl and refrigerate for at least 30 minutes. This helps the flavors meld together and taste richer.
  • Serve: Scoop into a serving dish and enjoy with chips, veggies, crackers, or as a sandwich spread.

Garbage Bread Recipe

Ingredients

  • 1 pound pizza dough store-bought or homemade
  • 1 tablespoon olive oil
  • ½ pound ground beef or Italian sausage
  • ½ cup onion finely chopped
  • ½ cup bell pepper diced
  • 1 cup shredded mozzarella cheese
  • ¼ cup grated Parmesan cheese
  • ½ cup pepperoni slices chopped
  • ½ teaspoon garlic powder
  • ½ teaspoon Italian seasoning
  • ¼ teaspoon black pepper
  • 1 egg beaten (for egg wash)
  • Optional: marinara sauce for dipping

Instructions

  • Preheat the oven to 375°F (190°C) and line a baking sheet with parchment paper.
  • In a skillet over medium heat, cook the ground meat with onion and bell pepper until browned. Drain excess grease and season with garlic powder, Italian seasoning, and pepper.
  • Roll the pizza dough into a large rectangle on a lightly floured surface.
  • Spread the cooked meat mixture evenly over the dough, leaving a small border around the edges.
  • Sprinkle mozzarella, Parmesan, and chopped pepperoni on top.
  • Carefully roll the dough lengthwise into a tight log, sealing the edges. Place seam-side down on the baking sheet.
  • Brush the top with beaten egg for a golden finish.
  • Bake for 22–25 minutes, or until golden brown and fully cooked through.
  • Let rest for 5 minutes before slicing. Serve warm with marinara sauce if desired.

🍌 Creamy Banana & Oat Breakfast Smoothie

🍌 Creamy Banana & Oat Breakfast Smoothie

Prep time: 5 minutes | Servings: 1


Ingredients

  • ½ cup Rolled oats (old-fashioned)

  • 1 Ripe banana (frozen chunks work best for a creamy texture)

  • 1 cup Unsweetened almond milk (or any milk of your choice)

  • ½ cup Plain Greek yogurt (adds protein to keep you full longer)

  • 1 tbsp Chia seeds or ground flaxseeds (for healthy Omega-3s)

  • ½ tsp Cinnamon (helps regulate blood sugar)

  • A splash of vanilla extract


Instructions

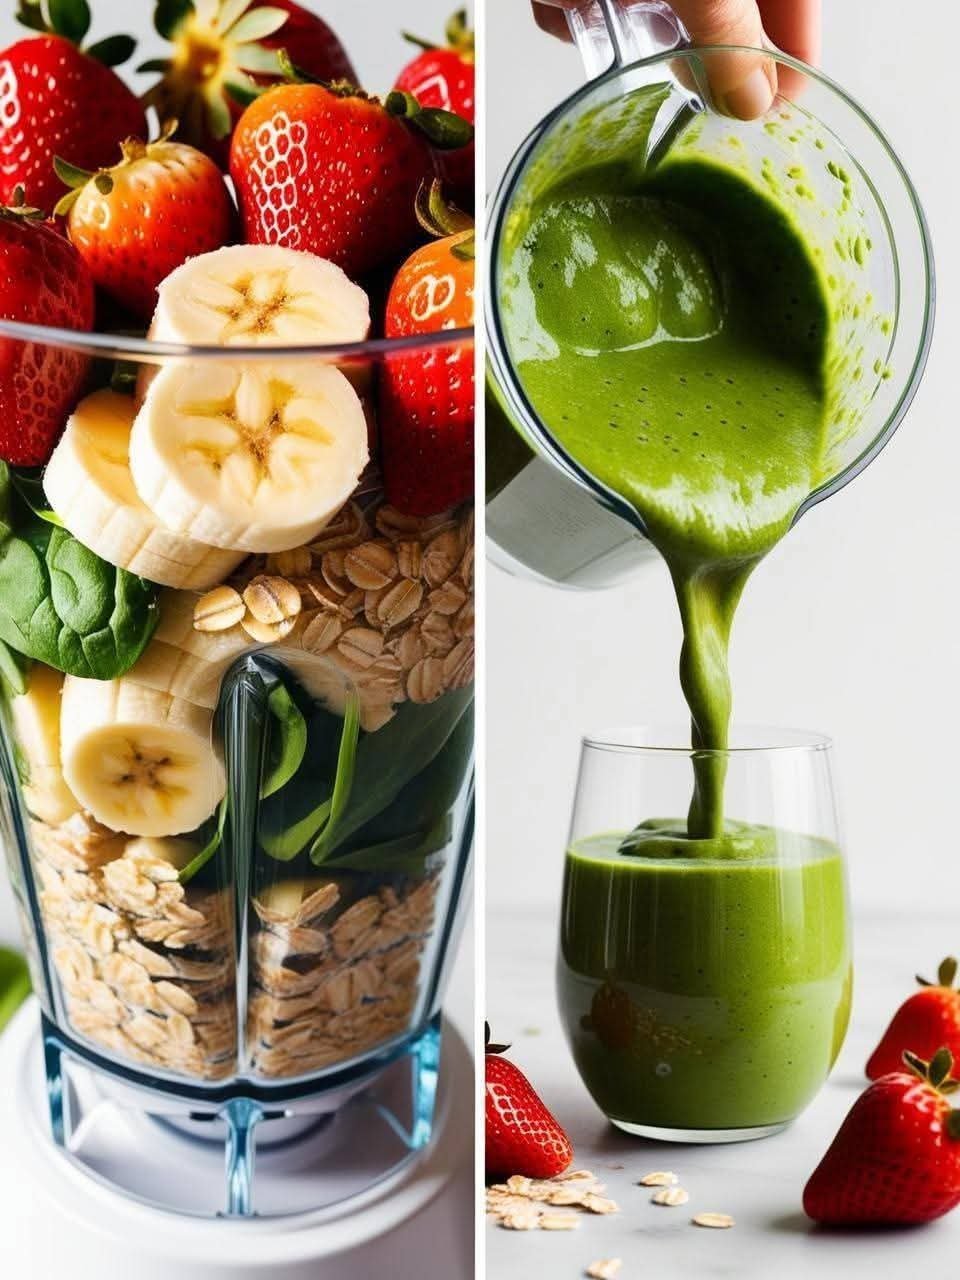
  1. Pulse the Oats: For a smoother texture, add the dry oats to your blender first and pulse until they reach a flour-like consistency.

  2. Combine: Add the banana, milk, yogurt, chia seeds, cinnamon, and vanilla to the blender.

  3. Blend: Blend on high until completely smooth and creamy.

  4. Adjust: If the smoothie is too thick, add a little more milk. If you prefer it colder, add a handful of ice cubes and blend again.

  5. Serve: Pour into a glass and top with a few extra oat flakes or a dash of cinnamon for garnish.


💡 Why this works for weight management

  • High Fiber: The oats and chia seeds provide soluble fiber, which slows digestion and keeps you feeling satisfied for hours.

  • Protein Boost: Using Greek yogurt ensures you get enough protein to maintain muscle mass while losing weight.

  • No Added Sugar: The natural sweetness of the banana eliminates the need for honey or syrups.

Homemade Chinese Egg Rolls

Homemade Chinese Egg Rolls

Ingredients

Filling

  • 1 lb 450 g ground pork or chicken
  • 2 cups shredded green cabbage
  • 1 cup shredded carrots
  • ½ cup finely chopped green onions
  • 2 cloves garlic minced
  • 1 teaspoon fresh grated ginger
  • 2 tablespoons soy sauce
  • 1 tablespoon oyster sauce
  • 1 teaspoon sesame oil
  • ½ teaspoon white pepper
  • ½ teaspoon sugar
  • 1 tablespoon cornstarch

For Rolling

  • 12 –14 egg roll wrappers
  • 1 egg + 1 tablespoon water for sealing

For Frying

  • 3 –4 cups vegetable or peanut oil

Instructions

Cook the Filling

  • Heat a large skillet over medium-high heat. Add the ground meat and cook until browned, breaking it into small pieces. Add garlic and ginger; cook 30 seconds.

Add Vegetables & Seasoning

  • Stir in cabbage, carrots, and green onions. Cook until vegetables soften and moisture evaporates (about 4–5 minutes).
  • Add soy sauce, oyster sauce, sesame oil, sugar, white pepper, and cornstarch. Stir well. Remove from heat and let cool completely.

Roll the Egg Rolls

  • Place one wrapper on a flat surface in a diamond shape.
  • Spoon 2–3 tablespoons filling near the bottom corner.
  • Fold bottom corner over filling → fold in both sides → roll tightly upward.
  • Seal the top edge using egg wash.
  • Repeat until finished.

Fry

  • Heat oil to 350°F (175°C).
  • Fry 3–4 rolls at a time for 3–4 minutes, turning occasionally, until golden brown.
  • Transfer to paper towels to drain.

Serve

  • Serve hot with sweet chili sauce, duck sauce, or soy sauce.

Cucumber Salad Recipe

  • Prep Time: 15 minutes

  • Chill Time: 30 minutes (minimum)

  • Total Time: 45 minutes

  • Course: Side Dish, Salad, Appetizer

  • Cuisine: International, Vegetarian

  • Yield: Serves 4-6

  • Difficulty: Easy (1/5 Intensity)

  • Dietary Notes: Vegetarian, Vegan, Gluten-Free, Nut-Free. Can be made Low-Sodium and Sugar-Free with modifications.


Ingredients

For the Salad:

  • 2 large English (or hothouse) cucumbers (about 1.5 lbs / 680g)

  • 1/2 medium red onion, thinly sliced

  • 1/4 cup fresh dill, finely chopped

  • 2 tablespoons fresh parsley, chopped (optional, for color)

For the Dressing:

  • 1/3 cup plain Greek yogurt (or vegan yogurt/sour cream for dairy-free)

  • 2 tablespoons extra virgin olive oil

  • 2 tablespoons apple cider vinegar (or white wine vinegar)

  • 1 tablespoon fresh lemon juice

  • 1 teaspoon honey or maple syrup

  • 1 small garlic clove, minced or grated

  • 1/2 teaspoon sea salt, plus more for salting cucumbers

  • 1/4 teaspoon freshly ground black pepper


Equipment Needed

  • Sharp knife & cutting board

  • Mandoline slicer (optional, for very thin slices)

  • Medium mixing bowl

  • Small mixing bowl or jar for dressing

  • Colander

  • Kitchen towels or paper towels


Step-by-Step Instructions

Step 1: Prepare the Cucumbers (5 mins)

Wash the cucumbers thoroughly. You can peel them in stripes for a decorative look or leave the skin on for added texture and nutrients (English cucumber skins are tender). Using a sharp knife or mandoline, slice the cucumbers into very thin rounds, about 1/8-inch thick.
Place the slices in a colander set over a bowl or in the sink. Sprinkle generously with about 1 teaspoon of salt and toss gently. Let them drain for 10-15 minutes. This crucial step draws out excess water, preventing a watery salad and ensuring maximum crispness.

Step 2: Make the Dressing (5 mins)

While the cucumbers drain, prepare the dressing. In a small bowl, combine the Greek yogurt, olive oil, apple cider vinegar, lemon juice, honey, minced garlic, salt, and pepper. Whisk vigorously until the mixture is completely smooth, creamy, and emulsified. Taste and adjust seasoning—you might want more tang (vinegar), sweetness (honey), or salt.

Step 3: Combine & Chill (5 mins active + 30 mins inactive)

After the cucumbers have drained, use your hands or a clean kitchen towel to gently squeeze out any remaining liquid. This is the secret to a non-watery salad!
Transfer the crisp, dry cucumber slices to a medium mixing bowl. Add the thinly sliced red onion and fresh dill. Pour the dressing over the top.
Using a large spoon or your hands, toss everything together gently but thoroughly until every slice is coated in the creamy dressing.

Step 4: Rest and Serve

Cover the bowl with plastic wrap or a lid and refrigerate for at least 30 minutes before serving. This allows the flavors to marry and the onions to mellow slightly. For best results, chill for 1-2 hours.
Garnish with an extra sprinkle of fresh dill and black pepper before serving.


Chef’s Notes & Tips for Success

  • Cucumber Choice: English cucumbers are ideal as they have fewer seeds and thinner skin. If using regular cucumbers, you may want to scoop out the large seeds with a spoon after halving lengthwise.

  • Get Ahead: This salad tastes even better the next day! Make it up to 24 hours in advance and store it covered in the refrigerator.

  • Variations: Add crumbled feta cheese for a salty punch, toasted sunflower seeds for crunch, or substitute the dill with fresh mint or chives for a different herb profile.

  • Avoid Sogginess: Do not skip the salting and draining step. It makes all the difference in texture.


Serving Suggestions

This versatile salad pairs wonderfully with:

  • Grilled Proteins: Chicken, fish, salmon, burgers, or kebabs.

  • Hearty Mains: Alongside quiche, frittata, or a creamy soup.

  • BBQ & Picnics: A light counterpoint to rich, smoky meats and heavy sides.

  • As a Healthy Snack: Enjoy it straight from the bowl for a refreshing, low-calorie treat.


Storage Instructions

  • Refrigerator: Store in an airtight container for up to 3-4 days. The cucumbers will soften slightly but remain flavorful.

  • Freezer: This salad does not freeze well due to the high water content of cucumbers and the dairy-based dressing.


Nutritional Information

  • Serving Size: Approximately 1 cup

  • Servings Per Recipe: 6

Nutrient Amount per Serving % Daily Value*
Calories 65 kcal
Total Fat 4.5g 6%
Saturated Fat 0.8g 4%
Cholesterol 1mg 0%
Sodium 205mg 9%
Total Carbohydrate 5g 2%
Dietary Fiber 1g 4%
Sugars 3g
Protein 2g 4%
Vitamin D 0mcg 0%
Calcium 40mg 3%
Iron 0.5mg 3%
Potassium 220mg 4%

Fruit Salad

Fruit Salad
Ingredients:
2 bananas, sliced
1 cup green grapes
1 cup red grapes
1 cup mandarin orange segments (fresh or canned)
1 cup pineapple chunks
1 cup diced mango
Optional: Fresh mint or parsley for garnish
Instructions:
Wash all the fresh fruits thoroughly.
Slice the bananas and other large fruits into bite-sized pieces.
In a large bowl, combine bananas, green grapes, red grapes, mandarin oranges, pineapple chunks, and diced mango.
Gently toss the fruits together to mix.
Garnish with fresh mint or parsley if desired.
Serve immediately or chill in the refrigerator for 30 minutes before serving.
Tips:
You can squeeze a bit of lemon or lime juice over the salad to keep the bananas from browning.
For extra sweetness, drizzle with a little honey or a spoonful of orange juice.

Artisanal Rustic Italian Bread

Artisanal Rustic Italian Bread

This method uses a high-hydration dough and steam to achieve that professional “bakery-style” finish.

Instructions

1. Mix the Dough

  • In a large mixing bowl, whisk together the all-purpose flour, sea salt, and instant yeast.

  • Add the warm water ($105\text{–}110^{\circ}\text{F}$). Stir with a sturdy spoon or a dough whisk until a shaggy, sticky ball forms and no dry flour remains.

  • Note: The dough will be wetter than standard sandwich bread; do not be tempted to add too much extra flour.

2. The First Rise (Bulk Fermentation)

  • Cover the bowl with plastic wrap or a damp kitchen towel.

  • Let it sit in a warm, draft-free spot for about 2 to 3 hours. The dough should double in size and look bubbly on the surface.

3. Shape the Loaf

  • Generously flour your work surface. Gently tip the dough out (it will be stretchy).

  • Fold the edges of the dough toward the center to form a round ball (boule).

  • Place the dough onto a piece of parchment paper dusted with semolina or cornmeal. Cover loosely and let it rest for another 45 to 60 minutes.

4. Prepare for Baking

  • While the dough rests, place a Dutch oven (with lid) or a pizza stone into the oven.

  • Preheat the oven to $450^{\circ}\text{F}$ ($230^{\circ}\text{C}$). Let the pot/stone heat for at least 30 minutes.

  • Just before baking, use a sharp knife or razor blade to “score” (slash) the top of the loaf about 1/2 inch deep. This controls where the bread expands.

5. Bake with Steam

  • If using a Dutch oven: Carefully lower the parchment paper and dough into the hot pot. Cover with the lid. Bake for 30 minutes. The lid traps steam, which allows the bread to rise fully and creates a thin, crispy crust.

  • If using a pizza stone: Slide the dough onto the stone. Place a shallow pan of hot water on the bottom rack of the oven to create steam.

  • Finish the Crust: Remove the lid (or the water pan) and bake for another 10 to 15 minutes until the crust is a deep golden brown and the loaf sounds hollow when tapped on the bottom.

6. The Cooling Rule

  • Transfer the bread to a wire rack. Wait at least 1 hour before slicing. Cutting into hot bread lets the steam escape too quickly, which can make the inside gummy.


Pro-Tips for Success

  • The “Windowpane” Test: If you have time, perform a few “stretch and folds” every 30 minutes during the first hour of rising to build better gluten structure.

  • Yeast Check: If using active dry yeast instead of instant, dissolve it in the warm water with a pinch of sugar for 5 minutes until foamy before adding it to the flour.

🍓 Strawberry Kiwi Banana Smoothie

🍓 Strawberry Kiwi Banana Smoothie

This recipe yields approximately one large glass (about 12–16 oz).

Ingredients

  • Strawberries: 1 cup fresh or frozen (provides the pink color and base sweetness).

  • Kiwi: 1 ripe kiwi, peeled and sliced (adds a tropical tang and vitamin C).

  • Banana: 1 ripe banana (ideally frozen for a creamier, thicker texture).

  • Liquid Base: 1/2 to 3/4 cup of your choice (milk, almond milk, or coconut water work best).

  • Optional Creaminess: 1/4 cup Greek yogurt or a spoonful of chia seeds for extra thickness.

Instructions

  1. Prepare the Fruit:

    • Wash the strawberries and remove the green hulls.

    • Peel the kiwi and the banana. Slice them into smaller chunks to make blending easier.

  2. Combine: Place the banana, strawberries, and kiwi into your blender.

  3. Add Liquid: Pour in your liquid base. Start with 1/2 cup; you can add more later if you prefer a thinner consistency.

  4. Blend: Secure the lid and blend on high for about 30–60 seconds until the mixture is completely smooth and those tiny kiwi seeds are evenly distributed.

  5. Serve: Pour into a glass immediately while cold.


Tips for Success

  • Temperature: Using at least one frozen fruit (usually the banana) is the secret to getting that thick, frosty texture seen in the photo without needing to add ice, which can water down the flavor.

  • Balance: If your kiwi is very tart, you can add a drizzle of honey or a pitted date to the blender to sweeten it up naturally.

  • Garnish: For a professional look, save a small slice of kiwi or a strawberry to place on the rim of the glass.

Creamy Broccoli Cauliflower Salad

Creamy Broccoli Cauliflower Salad

Ingredients

  • 1 head of broccoli, chopped into bite-sized florets
  • 1 head of cauliflower, chopped into bite-sized florets
  • 1 cup of Colby Jack cheese, cubed
  • ½ small red onion, chopped
  • 1 cup mayonnaise
  • ½ cup sour cream
  • 1 tablespoon red wine vinegar
  • 2 teaspoons sugar (adjust to taste)
  • 1 teaspoon dried parsley flakes
  • ½ teaspoon sea salt (adjust to taste)
  • ½ teaspoon black pepper

Instructions

  • In a large mixing bowl, combine the broccoli, cauliflower, cheese, and onion.
  • In a separate small bowl, whisk together the mayonnaise, sour cream, and vinegar until smooth. Stir in the sugar, adjusting to taste if needed.
  • Add salt, pepper, and parsley to the dressing and mix well until fully blended.
  • Pour the dressing over the salad ingredients and toss until everything is well coated. Cover and refrigerate for at least one hour before serving.

Hearty Chicken & Garden Vegetable Soup

Hearty Chicken & Garden Vegetable Soup

Prep time: 15 mins | Cook time: 30 mins | Servings: 4-6


Ingredients

  • Protein: 2 large chicken breasts, cooked and shredded (rotisserie chicken works great too).

  • Vegetables: * 2 cups broccoli florets, chopped small.

    • 3 large carrots, peeled and sliced into rounds.

    • 2 cups cabbage or kale, shredded.

    • 1 can (14 oz) diced tomatoes (undrained).

    • 1 medium onion, diced.

  • Liquid & Aromatics:

    • 6 cups chicken bone broth or stock.

    • 3 cloves garlic, minced.

    • 1 tbsp olive oil.

  • Seasoning:

    • 1 tsp dried oregano or Italian seasoning.

    • Salt and black pepper to taste.

    • Optional: A pinch of red pepper flakes for a tiny bit of warmth.


Instructions

  1. Sauté the Base: Heat olive oil in a large pot over medium heat. Add the onions and carrots. Cook for about 5 minutes until the onions are translucent. Stir in the minced garlic and cook for 1 more minute until fragrant.

  2. Simmer the Broth: Pour in the chicken broth and the diced tomatoes. Bring the mixture to a gentle boil, then reduce the heat to low.

  3. Add Vegetables: Stir in the broccoli and shredded cabbage. Let them simmer for about 8–10 minutes until the broccoli is tender but still bright green.

  4. Incorporate Chicken: Add your shredded chicken to the pot. Stir in the oregano, salt, pepper, and red pepper flakes.

  5. Finish: Let everything simmer together for another 5 minutes to ensure the chicken is heated through and the flavors have blended.


Tips for Success

  • Texture: If you prefer your broccoli to have a “crunch,” add it in the last 5 minutes of cooking.

  • Brighten it up: Squeeze the juice of half a lemon into the pot just before serving to make the flavors pop.

  • Storage: This soup tastes even better the next day! It stays fresh in the fridge for up to 4 days.

5-Minute Homemade “Bottle” Cheese

5-Minute Homemade “Bottle” Cheese

This recipe creates a semi-soft, sliceable cheese similar in texture to a mild provolone or a firm mozzarella block.

Ingredients

  • 2 liters of Full-fat milk (Whole milk works best for yield)

  • 1 tsp Salt (adjust to taste)

  • 50 ml White vinegar (or lemon juice)

  • 100 g Butter (unsalted preferred)

  • 200 g Mozzarella cheese, shredded or diced

  • Equipment: 1 empty plastic bottle (top cut off)

Instructions

  1. Curdle the Milk: Pour the 2 liters of milk into a large pot. Heat over medium heat until it almost reaches a boil. Just as it begins to foam, stir in the white vinegar.

  2. Separate the Curds: Continue stirring gently for 1–2 minutes. You will see the milk separate into white clumps (curds) and a yellowish liquid (whey). Turn off the heat.

  3. Strain: Pour the mixture through a fine-mesh strainer or cheesecloth to collect the curds. Press down firmly to remove as much liquid as possible. (You can discard the whey or save it for baking).

  4. Melt and Blend: Place a clean pot over low heat. Add the butter and let it melt. Add the strained curds, the salt, and the 200 g of mozzarella.

  5. Emulsify: Stir constantly until the mixture becomes a smooth, stretchy, and unified mass. For an extra smooth texture like the one in the photo, you can use an immersion blender while it’s still hot in the pot.

  6. Mold: While the cheese is still hot and pliable, pour/spoon it into your empty plastic bottle. Tap the bottle firmly on the counter to remove air bubbles.

  7. Chill: Let it cool to room temperature, then refrigerate for at least 3 hours (or until completely firm).

  8. Serve: Once set, you can either squeeze the cheese out or carefully slit the side of the plastic bottle with scissors to release the cheese log. Slice into rounds and enjoy!

Pistachio Pesto

Pistachio Pesto

A creamy, nut-forward pesto that clings perfectly to pasta and doubles as a luxurious spread for sandwiches or grilled meats.

  • Prep time: 10 minutes

  • Cook time: 3 minutes (for toasting)

  • Total time: 13 minutes

  • Yield: Approximately 1 ½ cups

Ingredients

  • 1 cup shelled pistachios (no shells)

  • 2 cups fresh basil leaves, firmly packed

  • ½ cup extra virgin olive oil (high quality is best)

  • ½ cup grated Parmesan cheese (freshly grated is preferred)

  • 2 cloves garlic, peeled

  • ½ tsp salt (adjust to taste)

  • ¼ tsp black pepper (freshly cracked)

Instructions

  1. Toast the Nuts: Toss the shelled pistachios in a dry pan over medium heat for 2–3 minutes. Stir constantly until they are fragrant and smell heavenly; be careful as they can burn quickly.

  2. Combine the Base: In a food processor, combine the toasted pistachios, fresh basil, grated Parmesan, and garlic cloves.

  3. Pulse: Pulse the mixture until it reaches the consistency of coarse sand. Use a spatula to scrape down the sides of the bowl to ensure everything is evenly incorporated.

  4. Emulsify with Oil: Turn the processor back on and slowly drizzle the olive oil through the feed tube while it is running. This slow process helps create a smooth emulsion.

  5. Season: Add the salt and black pepper. Pulse a few more times to blend and achieve your desired texture—leave it slightly chunky for a rustic feel or process longer for a smooth paste.

  6. Taste Test: Try a spoonful and adjust the salt or oil if needed until it reaches your preference.


Pro-Tips & Substitutions

  • The Golden Rule: Never skip toasting the nuts; it is essential for unlocking the warm, buttery flavor.

  • Fixing Texture: If the pesto is too thick, drizzle in more olive oil. If it starts to separate, stir in a teaspoon of ice water to help it emulsify and “come back together”.

  • Swaps: If you run out of basil, you can use half baby spinach or arugula, though the color may be less vibrant. For a vegan version, substitute nutritional yeast for the Parmesan.

Storage Guidelines

  • Refrigerate: Keep in an airtight container for up to 5 days. To maintain the bright green color, pour a thin layer of olive oil over the top before sealing.

  • Freeze: Freeze in ice cube trays for up to 3 months. These “pesto cubes” can be tossed directly into hot pasta for a quick meal.

🍓🍌 Creamy Fruit Salad 🍊🍇

🍓🍌 Creamy Fruit Salad 🍊🍇
📝 Ingredients
1 banana, sliced 🍌
1 apple, diced 🍎
1 orange, peeled & segmented 🍊
½ cup grapes 🍇
½ cup strawberries, chopped 🍓
½ cup pineapple chunks 🍍
1 cup plain or vanilla yogurt 🥣
2 tbsp fresh cream or whipped cream 🍶
1 tbsp honey (optional) 🍯
👩‍🍳 Method
Wash and cut all fruits into bite-sized pieces 🔪
Add the fruits to a large bowl 🥗
In a separate bowl, mix yogurt, cream, and honey until smooth 🥣
Pour the creamy mixture over the fruits 🍶
Gently mix until well coated 🍴
Chill for 15–20 minutes and serve cold ❄️

Banana Peach Smoothie

Banana Peach Smoothie

Ingredients

  • 2 Fresh Bananas: Best if they are ripe (with a few brown spots) for natural sweetness.

  • 2 Cups Frozen Peaches: Using frozen peaches gives the smoothie a thick, chilled texture without needing ice.

  • 1 Cup Yogurt: You can use plain or vanilla. Greek yogurt works great if you want extra protein and a thicker consistency.

  • Optional Liquid (as needed): 1/4 to 1/2 cup of milk, water, or orange juice if the mixture is too thick to blend.


Instructions

  1. Prep the Fruit: Peel the bananas and break them into smaller chunks to help your blender process them more easily.

  2. Layer the Ingredients: Add the yogurt to the blender first. Adding the liquid/soft ingredients at the bottom helps the blades move more efficiently. Follow with the banana chunks and finally the frozen peaches.

  3. Blend: Secure the lid and blend on high until the mixture is completely smooth and creamy.

  4. Adjust Consistency: If the smoothie is too thick, add a small splash of your preferred liquid and blend for another 5–10 seconds.

  5. Serve: Pour into a chilled glass and enjoy immediately while cold!


Tips for Success

  • Sweetness: If your peaches aren’t very sweet, you can add a teaspoon of honey or maple syrup.

  • Texture: If you prefer an even colder “soft-serve” texture, try slicing and freezing your bananas ahead of time as well.

Apple Cinnamon Cake

Apple Cinnamon Cake

Ingredient Notes & Details

Apples
Use crisp baking apples like Honeycrisp, Granny Smith, or Fuji. They hold their shape and provide the perfect sweet-tart balance.

All-purpose flour
Gives structure while keeping the cake soft and fluffy.

Granulated sugar
Sweetens the cake while allowing the apple flavor to shine.

Brown sugar
Adds moisture and deep caramel notes to the cinnamon topping.

Ground cinnamon
The heart of this baked apple recipe — warm, comforting, and fragrant.

Eggs
Bind the batter and create a tender crumb.

Milk
Keeps the batter smooth and pourable.

Vegetable oil or melted butter
Adds richness and moisture.

Baking powder
Ensures a soft, fluffy rise.

Vanilla extract
Enhances the sweetness and spice.

Salt
Balances all the flavors.

Step-by-Step Instructions

Preheat and prepare your pan
Preheat your oven to 350°F (175°C). Grease and line an 8×8 or 9×9 baking pan with parchment paper.

Peel and dice the apples
Cut apples into small chunks so they bake evenly and melt into the cake.

Mix the dry ingredients
In a bowl, whisk flour, baking powder, salt, and cinnamon together.

Combine wet ingredients
In another bowl, whisk eggs, sugar, milk, oil, and vanilla until smooth.

Bring everything together
Slowly add dry ingredients to wet ingredients and mix just until combined.

Fold in the apples
Gently stir in the diced apples so they’re evenly distributed.

Make the cinnamon topping
Mix brown sugar and cinnamon. Sprinkle evenly over the batter.

Bake until golden and set
Bake for 35–45 minutes, or until a toothpick comes out clean.

Cool before slicing
Let the cake cool slightly before cutting for clean slices.

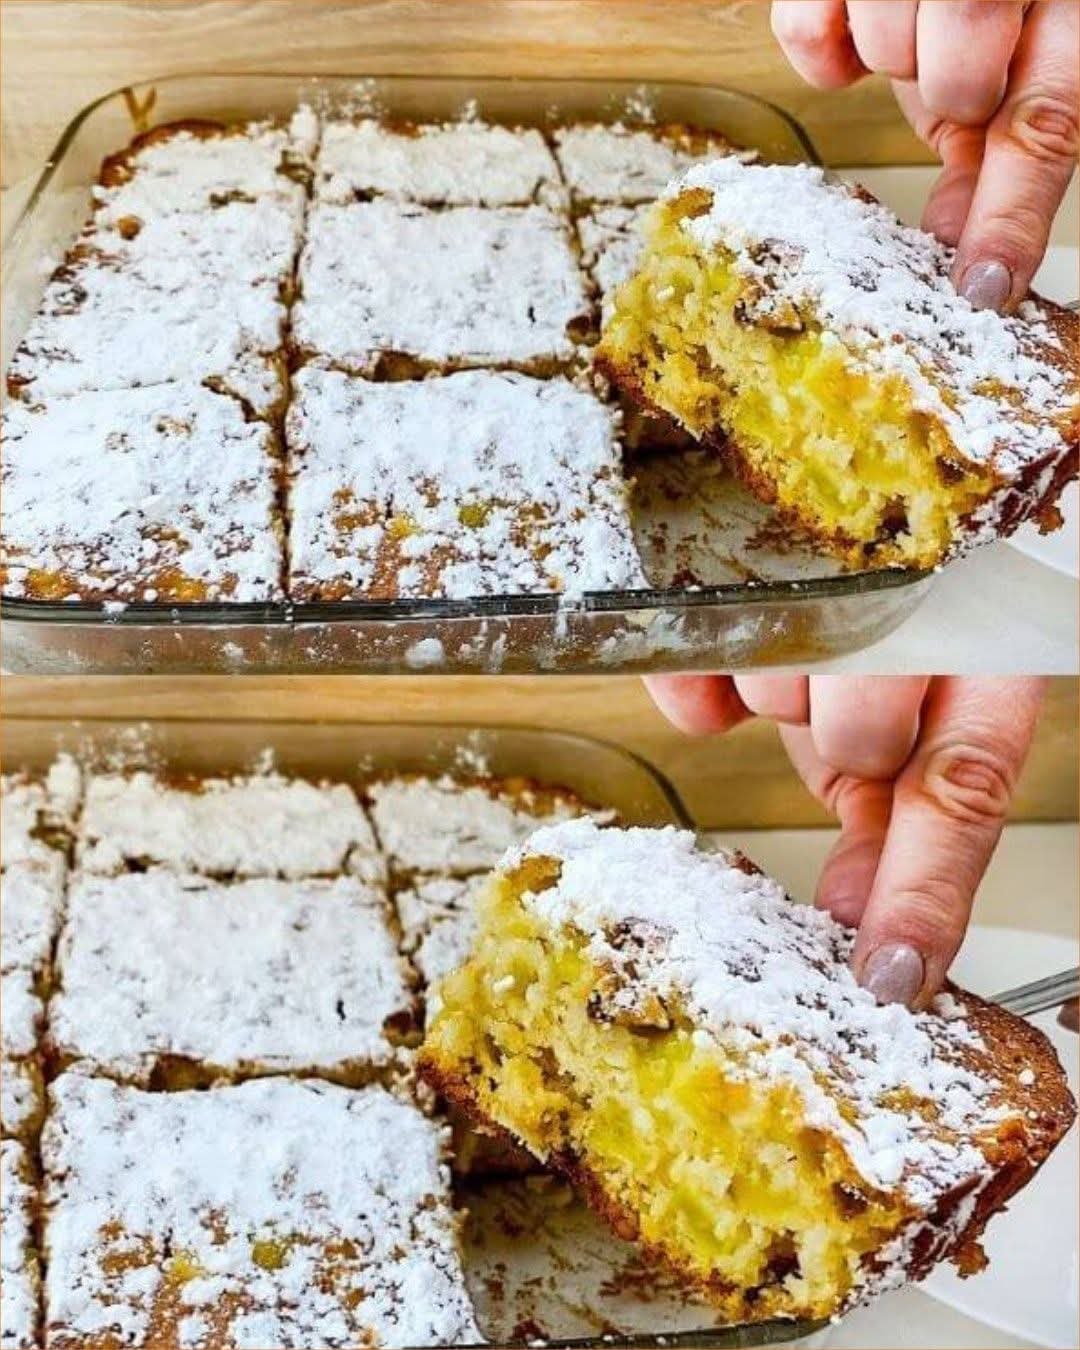
Pineapple Bake

Ingredient Notes & Details

Crushed pineapple
Use canned crushed pineapple in juice, not syrup.
Drain slightly but don’t remove all the liquid for moisture.

Sugar
Granulated sugar enhances the pineapple’s natural sweetness.
You can reduce slightly if you prefer it less sweet.

All-purpose flour
Helps thicken the mixture as it bakes.
Creates a soft, spoonable texture.

Butter
Melted butter adds richness and flavor.
Unsalted butter gives you better control over saltiness.

Eggs
Bind everything together and give structure.
Bring them to room temperature for best results.

Cheddar cheese
Sharp cheddar is traditional and adds savory contrast.
Grate it fresh for better melting.

Step-by-Step Instructions

Preheat the oven
Set your oven to 350°F (175°C).
Lightly grease a baking dish to prevent sticking.

Mix the pineapple base
In a large bowl, combine crushed pineapple, sugar, and flour.
Stir until smooth and evenly combined.

Add the eggs and butter
Mix in the beaten eggs and melted butter.
The mixture should look thick but pourable.

Fold in the cheese
Gently stir in shredded cheddar cheese.
Make sure it’s evenly distributed.

Transfer to baking dish
Pour the mixture into the prepared dish.
Smooth the top with a spatula.

Bake until golden
Bake for 45–50 minutes.
The top should be lightly golden and set in the center.

Cool slightly before serving
Let it rest for 10 minutes.
This helps it firm up and enhances flavor.

Cheeseburger Biscuit Bites

Cheeseburger Biscuit Bites

  • Prep time: 15 minutes

  • Cook time: 15-18 minutes

  • Yields: 10-12 bites

Ingredients

  • Meat Filling: 1 lb lean ground beef

  • Dough: 1 can (16.3 oz) refrigerated flaky layers biscuits (usually 8 or 10 count)

  • Cheese: 1 ½ cups shredded cheddar cheese (or 10-12 small cubes of cheddar)

  • Seasoning: ½ tsp garlic powder, ½ tsp onion powder, salt and pepper to taste

  • Sauce: 2 tbsp ketchup, 1 tbsp yellow mustard, and 1 tsp Worcestershire sauce

  • Garnish: Dried parsley or sesame seeds (optional)


Instructions

  1. Preheat & Prep: Preheat your oven to 375°F (190°C). Lightly grease a standard 12-cup muffin tin with non-stick cooking spray.

  2. Brown the Beef: In a large skillet over medium-high heat, cook the ground beef until it is fully browned and no longer pink. Drain off any excess fat. Stir in the garlic powder, onion powder, salt, pepper, ketchup, mustard, and Worcestershire sauce. Mix well and remove from heat.

  3. Prepare the Biscuits: Take each refrigerated biscuit and pull it apart into two thinner rounds (or flatten them out with your palm). Press each piece into the bottom and up the sides of the muffin tin cups to create a “well” for the meat.

  4. Assemble:

    • Place a small amount of shredded cheese at the bottom of each biscuit cup.

    • Spoon about 2 tablespoons of the beef mixture into each cup.

    • Top generously with the remaining shredded cheese.

  5. Bake: Place the tin in the oven and bake for 12 to 15 minutes, or until the biscuit edges are golden brown and the cheese is melted and bubbly.

  6. Serve: Let them cool for about 5 minutes before removing them from the tin. Garnish with a sprinkle of parsley for that “pro” look shown in your photo.


Tips for Success

  • Extra Flavor: Add finely diced sautéed onions or pickles into the meat mixture if you like a “loaded” burger taste.

  • Crispy Bottoms: Ensure the meat is well-drained before filling the biscuits to prevent the bottom of the dough from getting soggy.

  • Storage: These stay fresh in the fridge for up to 3 days and reheat perfectly in an air fryer or oven to keep the biscuit crisp.

Blueberry Cottage Cheese Pancake Bites

 Blueberry Cottage Cheese Pancake Bites

Ingredients (Makes 10–12 Bites)

1 cup cottage cheese
2 large eggs
½ ripe banana, mashed
½ cup oat flour
(or almond flour for lower-carb option)
1 tbsp honey or maple syrup (optional)
1 tsp vanilla extract
1 tsp baking powder
Pinch of salt
½ cup fresh or frozen blueberries

Instructions

1. Make the Batter
Add cottage cheese, eggs, mashed banana, honey (if using), and vanilla to a blender or food processor.
Blend until smooth.
Pour mixture into a bowl and fold in oat flour, baking powder, and salt.
Gently stir in blueberries.
2. Air Fryer Method (Recommended)
Preheat air fryer to 350°F (175°C).
Lightly grease silicone molds or the air fryer basket.
Spoon batter into molds, filling each about ¾ full.
Air fry for 8–10 minutes, until set and lightly golden.
Cool slightly before removing.
3. Oven Method
Preheat oven to 375°F (190°C).
Grease a mini muffin tin or line with silicone cups.
Fill each cup about ¾ full.
Bake for 14–16 minutes, until puffed and a toothpick comes out clean.
Let cool for 5 minutes before serving.