Easy Recipes
Mediterranean Chickpea Salad Bowl
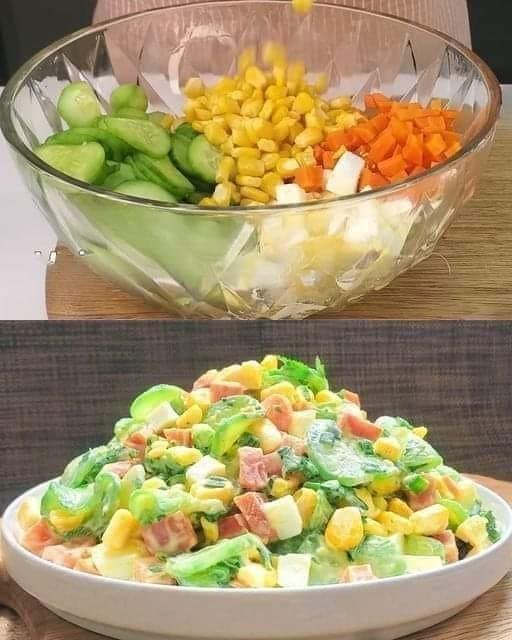
Mediterranean Garden Slaw with Creamy Lemon-Tahini Dressing
Mediterranean Garden Slaw with Creamy Lemon-Tahini Dressing is a bright, crunchy, and nourishing salad that celebrates fresh vegetables and bold, wholesome flavors. This slaw is light yet satisfying, making it perfect as a side dish, a light lunch, or a refreshing companion to grilled meats and plant-based mains. The creamy tahini dressing adds richness without heaviness, while lemon and garlic bring a lively, zesty finish. Every bite is crisp, colorful, and packed with texture.
Ingredients
For the Slaw
-
2 cups shredded green cabbage
-
1 cup shredded purple cabbage
-
1 large carrot, grated
-
½ cucumber, julienned or thinly sliced
-
½ red bell pepper, thinly sliced
-
2 tablespoons fresh parsley, finely chopped
-
1 tablespoon fresh mint, chopped (optional)
-
2 tablespoons toasted sunflower seeds or sliced almonds (optional, for crunch)
For the Creamy Lemon-Tahini Dressing
-
3 tablespoons tahini
-
2 tablespoons fresh lemon juice
-
1 tablespoon olive oil
-
1 small garlic clove, minced
-
1–2 tablespoons warm water, as needed
-
1 teaspoon honey or maple syrup
-
Salt and black pepper, to taste
Instructions
-
Prepare the vegetables
Start by washing and drying all your vegetables thoroughly. Shred the green and purple cabbage finely for the best texture. Grate the carrot, slice the cucumber into thin matchsticks or rounds, and cut the bell pepper into thin strips. Place all prepared vegetables into a large mixing bowl. -
Add fresh herbs and crunch
Sprinkle the chopped parsley and mint over the vegetables. If using sunflower seeds or almonds, add them now for extra texture and nutty flavor. Gently toss the slaw to distribute everything evenly. -
Make the lemon-tahini dressing
In a small bowl, whisk together the tahini and lemon juice until smooth. Add olive oil, minced garlic, honey or maple syrup, salt, and black pepper. Slowly whisk in warm water, one tablespoon at a time, until the dressing becomes creamy and pourable. Taste and adjust seasoning as needed. -
Combine and toss
Pour the dressing over the slaw. Using tongs or clean hands, toss everything together until the vegetables are evenly coated with the dressing. The slaw should look glossy but not overdressed. -
Rest and serve
For the best flavor, allow the slaw to rest for 10–15 minutes before serving. This brief resting time helps soften the cabbage slightly and allows the flavors to blend beautifully.
Serving Suggestions
This Mediterranean garden slaw pairs wonderfully with grilled chicken, fish, or shrimp. It’s also excellent alongside falafel, roasted vegetables, or stuffed into warm pita bread. Serve it as a refreshing side at picnics, barbecues, or family dinners, or enjoy it as part of a grain bowl with quinoa or couscous.
Tips & Variations
-
Add chickpeas or lentils for a plant-based protein boost.
-
For extra creaminess, mix a spoonful of Greek yogurt into the dressing (not vegan).
-
Store leftovers in the refrigerator for up to 24 hours; toss again before serving.
This Mediterranean slaw is crisp, creamy, and endlessly versatile—an easy, healthy dish you’ll come back to again and again. 🥗✨
Quick N Easy Tuscan White Bean Soup Recipe
This Tuscan White Bean Soup is a simple and savory vegetarian recipe that comes together in less than 30 minutes! It’s made with white cannellini beans, veggies and kale for a delicious soup that is creamy and filled with flavour!
Tuscan White Bean Soup is the only soup you need in your life, this Winter! It’s full of delicious herbs and hearty white beans, to not only keep you full, but also satisfied! Plus, it’s gluten-free and vegan, too. Prep this soup ahead of time or make it quickly when the craving strikes – destiny is in your hands!
Prep Time: 15minutes
Cook Time: 15minutes
Total Time: 30minutes
SERVES: 6 Servings
INGREDIENTS FOR Quick N Easy Tuscan White Bean Soup Recipe
1/4 Cup Olive Oil extra virgin
1 Small Onion diced
2 Medium Shallots chopped
4 Cloves Garlic mashed
2 Carrots chopped into coins
2 Celery Stalks diced
3 15 Ounce Cans Cannellini Beans drained and rinsed
1 Tablespoon Italian Seasoning
1/2 Teaspoon Red Pepper Flakes
5-6 Cups Vegetable Broth
1/2 Teaspoon Sea Salt
1/4 Teaspoon Ground Black Pepper
3 Cups Fresh Spinach
INSTRUCTIONS FOR Quick N Easy Tuscan White Bean Soup Recipe
Start by heating the olive oil in a large pot, on the stove, over medium-low heat.
Saute the onions, garlic, and shallots in the olive oil for, about 3-4 minutes.
Then, adding the carrots and celery and saute for another 7-10 minutes. This is really important to ensure that the flavors build.
Rinse and drain your cannellini beans, and add them to the pot along with the bay leaves, Italian seasoning, red pepper flakes, vegetable broth, salt, and pepper.
Bring your mixture to a boil, then reduce the heat to low, cover, and simmer for another 15 minutes.
Remove the cover to pull out and discard the bay leaves.
Next, transfer two cups of the soup to a high-speed blender and blend so it gets creamy.
Return your soup to the pot and stir generously.
Add in the spinach and stir until it’s wilted.
Garnish your soup with some fresh herbs and a slice of crusty bread; serve, and enjoy!
NOTES:
Preheat your pot on the stove before adding the oil. This will help prevent anything from sticking to the pot.
Use shallots rather than cooking onions in this recipe. Shallots are sweeter in flavour and have a buttery elemtnt to them, which results in a more delicious soup!
Don’t skip browing the veggies in the pan. This helps to build flavour in the soup.
You don’t have to blend any of this soup, but blending 1/3 of the soup helps result in a creamier soup. Blended or not, this soup is delicious either way!
This recipe calls for cannellini beans, but you can substitute any white bean if needed.
NUTRITIONAL INFO:
serving size: 1/4 of the recipe
calories: 160
sodium: 290mg
fat: 7
gsaturated fat: 1g
carbohydrates: 18g
fiber: 5.4g
protein: 8g
Weight Loss Breakfast Banana Pancakes
Ingredients:
1 banana
100 grams Greek yogurt
2 chicken eggs
A pinch of salt
3 tablespoons flour
Olive oil, for frying
Directions:
Prepare the Banana: In a blender, grind the banana until smooth.
Mix the Batter: In a mixing bowl, combine the banana puree, Greek yogurt, eggs, and a pinch of salt.
Add the Flour: Add the flour to the mixture and stir until well combined.
Directions:
Heat the Skillet:
Heat a small amount of olive oil in a non-stick skillet over low heat.
Cook the Pancakes:
Pour small amounts of the batter into the skillet to form pancakes. Cover with a lid and cook over low heat until the pancakes are set and golden brown, about 3-4 minutes per side.
Serve: Serve hot and enjoy as much as you want.
Prep Time: 10 minutes | Cooking Time: 20 minutes | Total Time: 30 minutes
Kcal: 120 kcal per serving | Servings: 4 pancakes
Nutritional Benefits:
These Banana Greek Yogurt Pancakes are a healthy and delicious breakfast option that can aid in weight loss:
Banana: A good source of potassium, vitamin B6, and vitamin C, bananas help maintain heart health and provide a quick energy boost.
Greek Yogurt: High in protein and probiotics, Greek yogurt aids in digestion and supports a healthy gut. It also provides calcium for bone health.
Eggs: Rich in high-quality protein, eggs provide essential amino acids, vitamins, and minerals, contributing to muscle repair and growth.
Olive Oil: A healthy fat, olive oil is rich in monounsaturated fats and antioxidants, supporting heart health and reducing inflammation.
Incorporating these Banana Greek Yogurt Pancakes into your breakfast routine is a fantastic way to enjoy a healthy and delicious start to your day. Packed with protein, vitamins, and minerals, these pancakes are not only nutritious but also incredibly tasty.
The combination of fresh ingredients and the absence of flour makes them a perfect choice for those looking to lose weight or maintain a healthy diet. Try this simple and tasty recipe, and enjoy the benefits of a wholesome breakfast every day!
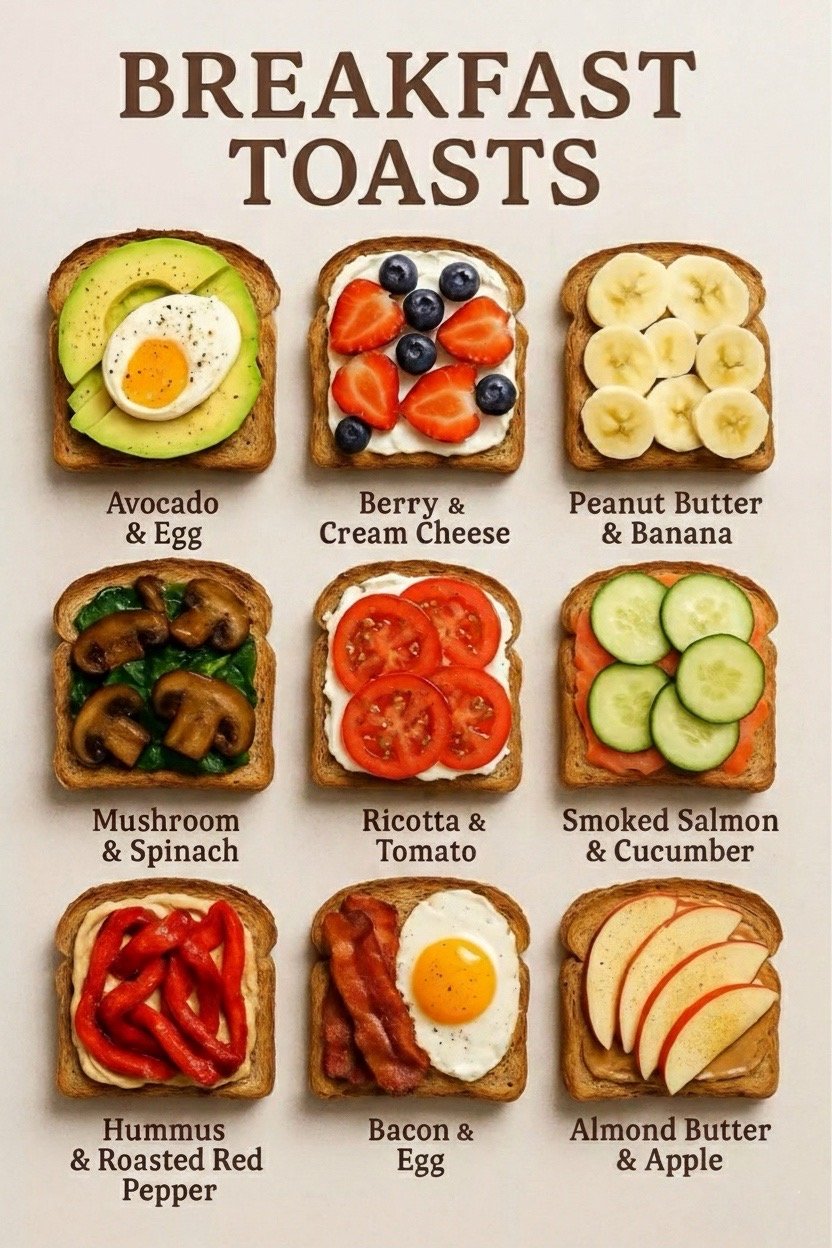
Loaded Avocado Toast with Cherry Tomatoes Goat Cheese and Balsamic Drizzle
This is not your average avocado toast — it is a flavor-packed gourmet version that is perfect for breakfast brunch or a light lunch. Creamy avocado meets juicy cherry tomatoes tangy goat cheese crunchy walnuts sweet dried cranberries and a luscious balsamic glaze all piled on crispy rustic sourdough bread. Fresh herbs top it off for a bright fresh finish. Each bite is a delicious mix of creamy crunchy sweet tangy and savory. It is quick to make beautiful to serve and totally satisfying!
Prep and Cook Time:
Prep time: 10 minutes
Cook time (to toast bread): 5 minutes
Total time: 15 minutes
Ingredients:
1 slice rustic sourdough bread
1 ripe avocado
Handful of cherry tomatoes (red and yellow)
2 tablespoons goat cheese crumbles
1 tablespoon chopped walnuts
1 tablespoon dried cranberries
1 tablespoon balsamic glaze
Fresh basil or parsley leaves
Salt and pepper to taste
Instructions:
Toast the sourdough bread until golden and crisp
Slice the avocado thinly and lay the slices evenly over the toast
Cut the cherry tomatoes in halves and scatter them over the avocado
Sprinkle the goat cheese crumbles over the top
Add chopped walnuts and dried cranberries
Drizzle generously with balsamic glaze
Tear some fresh basil or parsley and sprinkle over the toast
Season lightly with salt and pepper if desired
Serve immediately and enjoy
Tips:
Use a perfectly ripe avocado for the creamiest texture
Toast the bread well so it holds up under all the toppings
Cut ingredients small for easier biting and better flavor balance
Add balsamic glaze just before serving to avoid sogginess
Use a serrated knife to slice the toast cleanly without smashing the toppings
Variations:
Swap goat cheese with feta blue cheese or ricotta
Add a fried or poached egg on top for extra protein
Use mixed seeds instead of walnuts for a nut-free option
Try sun-dried tomatoes instead of fresh for deeper flavor
Drizzle with hot honey instead of balsamic for a spicy kick
Add microgreens or arugula for more freshness
Rub the toast with a garlic clove before adding avocado for extra flavor
Q&A:
Can I make this ahead of time?
It is best made fresh because the avocado can brown and the toast can get soggy
What bread is best for this recipe?
Thick rustic breads like sourdough multigrain or artisan white work best
Can I skip the cheese?
Yes you can leave it out or replace it with a dairy-free alternative
Nutrition (per serving estimate):
Calories 350 to 400
Protein 8 grams
Fat 25 grams
Carbohydrates 28 grams
Fiber 7 grams
Sugar 8 grams
Note Nutrition values can vary based on specific ingredients and portion sizes
Conclusion:
This loaded avocado toast is the perfect combination of creamy fresh sweet savory and crunchy. It is quick beautiful and totally satisfying whether you are making it for a busy morning a weekend brunch or a healthy snack. Customize it with your favorite toppings and enjoy every bite.
Ribeye steak
Ribeye Steak (Perfectly Seared & Juicy)
Description
Ribeye steak is one of the most flavorful and tender cuts of beef thanks to its rich marbling. When properly seasoned and seared, it develops a beautiful crust on the outside while staying juicy and buttery inside. This classic ribeye recipe uses simple ingredients and high heat to bring out the steak’s natural flavor.
Servings
Serves: 2
Prep Time: 10 minutes
Cook Time: 8–12 minutes
Rest Time: 5–10 minutes
Ingredients
-
2 ribeye steaks (1–1½ inches thick)
-
1½ tsp kosher salt
-
1 tsp freshly ground black pepper
-
1 tbsp olive oil (or high smoke point oil)
-
2 tbsp butter
-
3 cloves garlic, smashed
-
2 sprigs fresh rosemary or thyme
Instructions
Bring to Room Temperature
Remove steaks from fridge 30–45 minutes before cooking.
Season Generously
Pat steaks dry. Season both sides with salt and pepper.
Heat the Pan
Use a cast iron skillet over high heat. Add oil and heat until shimmering.
Sear
Place steaks in hot pan.
Sear 3–4 minutes per side (without moving) until a golden crust forms.
Add Butter & Baste
Reduce heat slightly. Add butter, garlic, and herbs.
Tilt pan and spoon melted butter over steaks for 1–2 minutes.
Check Doneness
-
Rare: 125°F
-
Medium Rare: 130–135°F
-
Medium: 140–145°F
-
Medium Well: 150°F
Rest
Transfer to plate. Rest 5–10 minutes before slicing.
Notes
-
Thicker steaks cook more evenly.
-
Always use a meat thermometer for best results.
-
Resting keeps juices inside the steak.
-
Salt can be applied up to 24 hours ahead for dry brining.
Pro Tips
Use cast iron for best crust
Don’t overcrowd the pan
Avoid flipping too often
Let steak rest before cutting
Finish in oven (400°F for 3–5 minutes) if extra thick
Nutritional Information (Per Serving Approx.)
Calories: 650–750
Protein: 45g
Fat: 55g
Carbohydrates: 0g
Iron: 20% DV
Vitamin B12: 100% DV
(Varies by size and marbling.)
Benefits
High-quality protein
Rich in iron and B vitamins
Supports muscle growth
Keeps you full longer
Great for low-carb & keto diets
Q & A
Q: Should I marinate ribeye?
A: Not necessary — ribeye is naturally flavorful.
Q: Why is my steak tough?
A: It may be overcooked or not rested properly.
Q: Can I grill instead?
A: Yes! Grill over high heat 4–5 minutes per side.
Q: What’s the best doneness?
A: Medium rare (130–135°F) gives best flavor and tenderness.
Q: How do I store leftovers?
A: Refrigerate up to 3 days. Reheat gently to avoid drying out.
Creamy Mushroom Soup/Stew
Ingredients
-
Butter – 2 tbsp
-
Olive oil – 1 tbsp
-
Onion – 1 medium, finely chopped
-
Garlic – 3–4 cloves, minced
-
Fresh mushrooms (button or cremini) – 400–500 g, sliced
-
All-purpose flour – 1½ tbsp (for thickening)
-
Vegetable or chicken broth – 4 cups
-
Heavy cream – 1 cup (or use half-and-half)
-
Fresh dill (or parsley) – 2 tbsp, chopped (plus extra for garnish)
-
Salt – to taste
-
Black pepper – to taste
-
Optional: A squeeze of lemon juice or ¼ tsp paprika for depth
Instructions
-
Sauté the Base
Heat butter and olive oil in a heavy pot over medium heat.
Add onion and cook until soft and translucent (about 3–4 minutes).
Stir in garlic and cook another 30 seconds. -
Cook the Mushrooms
Add the sliced mushrooms. Sauté for 6–8 minutes until golden and they release their juices. -
Thicken
Sprinkle in flour, stir well to coat the mushrooms, and cook for 1 minute to remove the raw flour taste. -
Add Liquid
Gradually pour in the broth while stirring to avoid lumps. Bring to a gentle boil, then reduce the heat and simmer for 10 minutes. -
Make it Creamy
Stir in cream, season with salt and pepper, and cook another 3–4 minutes until smooth and slightly thickened. -
Finish with Herbs
Turn off the heat, stir in fresh dill or parsley. Garnish with extra herbs before serving.
Serving
Serve hot with crusty bread, garlic toast, or over rice/noodles as a hearty meal.
Q&A
Q: Can I make it dairy-free?
A: Yes! Use coconut cream or cashew cream instead of dairy cream, and olive oil instead of butter.
Q: How do I make it thicker?
A: Increase the flour to 2 tbsp or simmer longer until the liquid reduces.
Q: Can I add meat?
A: For a heartier dish, add cooked shredded chicken or browned ground turkey when adding the broth.
Q: How do I store leftovers?
A: Refrigerate in an airtight container for up to 3 days. Reheat gently on the stove; avoid boiling to keep the cream smooth.
Q: Can I freeze it?
A: It’s best enjoyed fresh, but you can freeze it without cream. Add the cream after thawing and reheating.
Slow Cooker Creamy Garlic Chicken & Pasta
Description
This comforting Slow Cooker Creamy Garlic Chicken & Pasta is the ultimate easy dinner! Tender chicken breasts slow-cooked in a rich, creamy garlic sauce, then combined with perfectly cooked pasta for a hearty, family-friendly meal. It’s creamy, flavorful, and requires minimal prep — perfect for busy weeknights.
Ingredients
-
4 boneless, skinless chicken breasts
-
1 teaspoon salt
-
½ teaspoon black pepper
-
1 teaspoon garlic powder
-
1 teaspoon Italian seasoning
-
3 cloves garlic, minced
-
1 can (10.5 oz) cream of chicken soup
-
1 cup chicken broth
-
1 cup heavy cream (or half-and-half)
-
1 cup shredded mozzarella or Parmesan cheese
-
12 oz rotini pasta (uncooked)
-
1 tablespoon fresh parsley (optional garnish)
Instructions
Spray slow cooker with nonstick spray.
Season chicken with salt, pepper, garlic powder, and Italian seasoning.
Place chicken in slow cooker.
In a bowl, whisk together cream of chicken soup, chicken broth, heavy cream, and minced garlic.
Pour sauce over chicken.
Cover and cook:
-
Low: 5–6 hours
-
High: 3–4 hours
About 30–40 minutes before serving, cook pasta separately according to package directions. Drain.
Shred chicken in the slow cooker.
Stir in cooked pasta and shredded cheese. Cover and cook another 10–15 minutes until cheese melts and everything is creamy.
Garnish with parsley and serve warm.
Servings
Serves 4–6 people
Notes
-
Cooking on LOW keeps chicken tender and juicy.
-
If sauce is too thick, add a splash of warm broth.
-
If too thin, leave lid off for 10–15 minutes to thicken.
Tips
Add spinach or broccoli for extra veggies.
Swap mozzarella for sharp cheddar for a richer flavor.
Use chicken thighs for extra juiciness.
Great for leftovers — reheats well with a splash of milk.
Nutritional Info (Approx. Per Serving)
-
Calories: 520
-
Protein: 38g
-
Carbohydrates: 40g
-
Fat: 25g
-
Sodium: 720mg
(Values vary based on ingredients used.)
Benefits
-
High in protein
-
One-pot comfort meal
-
Kid-friendly
-
Budget-friendly ingredients
-
Perfect for meal prep
Q & A
Q: Can I cook pasta in the slow cooker?
Yes, add uncooked pasta during the last 30–40 minutes with extra broth to prevent drying.
Q: Can I freeze this dish?
Yes, but pasta texture may soften slightly after reheating.
Q: Can I make it lighter?
Use half-and-half instead of heavy cream and reduced-fat cheese.
Q: How long do leftovers last?
Store in the refrigerator up to 4 days.
Cheesy Sausage Muffins Recipe
Cheesy Sausage Muffins Recipe (Bakery Style)
✅ Ingredients (Makes 8–10 muffins)
Dry Ingredients:
- 1½ cup all-purpose flour (maida)
- 2 tsp baking powder
- ½ tsp baking soda (optional but makes muffins extra fluffy)
- ½ tsp salt
- ½ tsp black pepper
- ½ tsp garlic powder (optional)
- ½ tsp chili flakes (optional)
Wet Ingredients:
- 2 eggs
- ¾ cup milk
- ¼ cup oil (or melted butter)
- ½ cup yogurt (optional but makes muffins super soft)
Filling:
- 1 cup chicken sausages (cut into small pieces)
- 1 cup cheddar cheese (grated)
- 2 tbsp capsicum (optional)
- 2 tbsp onion (optional)
Topping:
- ½ cup cheddar cheese (for topping)
🍳 Step-by-Step Method
Step 1: Prepare Sausages
- Cut sausages into small bite size pieces.
- Heat a pan and add 1 tsp oil.
- Fry sausages for 2–3 minutes until slightly golden.
- Turn off flame and keep aside.
✅ This step gives better taste and removes raw smell.
Step 2: Preheat Oven
- Preheat oven at 180°C for 10 minutes.
📌 If using microwave oven, use convection mode.
Step 3: Mix Dry Ingredients
In a bowl add:
- Flour
- Baking powder
- Baking soda
- Salt
- Black pepper
- Garlic powder / chili flakes
Mix well.
Step 4: Mix Wet Ingredients
In another bowl:
- Add eggs and whisk properly.
- Add milk, yogurt, and oil.
- Mix until smooth.
Step 5: Combine Wet + Dry
- Add wet mixture into dry mixture slowly.
- Mix gently using spatula.
⚠️ Don’t overmix or muffins will become hard.
Step 6: Add Cheese & Sausages
Now add:
- Fried sausage pieces
- Grated cheddar cheese
- Onion/capsicum (optional)
Mix lightly.
Step 7: Fill Muffin Cups
- Place cupcake liners in muffin tray.
- Fill each cup ¾ full.
- Sprinkle extra cheese on top.
😍 This cheese topping gives that bakery look!
Step 8: Bake
Bake at 180°C for 18–22 minutes.
✅ Check by toothpick:
- Insert toothpick in center
- If it comes out clean → muffins are ready
Step 9: Cool & Serve
- Remove muffins from oven.
- Let them cool 5 minutes.
- Take out and serve warm.
🔥 Best taste when cheese is melted!
💡 Extra Tips for Perfect Muffins
✅ Use room temperature milk & eggs
✅ Don’t overmix batter
✅ Fill only ¾ cup (otherwise muffins overflow)
✅ Add mozzarella for more cheesy pull
✅ You can store in fridge for 2–3 days
🍽 Serving Idea
Serve with:
- Ketchup
- Mayo garlic sauce
- Hot tea / coffee
Cheesy Corn and Herb Pull-Apart Bread
Prep time: 20 mins
Cook time: 20-25 mins
Servings: 6–8 people
Ingredients
Category Item Quantity
The Base Sourdough or Italian Round Loaf (unsliced) 1 large loaf
The Fat Unsalted butter (melted) 1/2 cup (115g)
The Cheese Sharp Cheddar or Gruyère (shredded) 2 cups
The Corn Sweet corn (fresh, canned, or thawed) 1 cup
The Herbs Fresh parsley & chives (finely chopped) 1/4 cup total
Seasoning Garlic powder, salt, and red pepper flakes To taste
Instructions
Preheat & Prep: Heat your oven to 375°F (190°C). Line a baking sheet with foil or parchment paper.
The Grid Cut: Using a serrated knife, cut the bread into a 1-inch diamond pattern. Cut deep into the loaf, but do not cut through the bottom crust. You want the loaf to stay together.
The Herb Butter: In a small bowl, whisk together the melted butter, chopped herbs, garlic powder, salt, and red pepper flakes.
Stuffing: Use your fingers to gently pry open the cracks. Stuff the corn and shredded cheese deep into every crevice.
Drizzle: Pour the herb butter evenly over the top, making sure it seeps down into the bread.
Bake: Wrap the entire loaf loosely in foil. Bake for 15 minutes. Uncover and bake for another 5–10 minutes until the cheese is bubbly and the edges are golden-crisp.
Serve: Garnish with extra fresh herbs and serve immediately while the cheese is “stretchy.”
Chef’s Tips & Notes
Bread Choice: A sturdy, crusty bread like sourdough works best. Soft sandwich bread will turn to mush under the weight of the butter and cheese.
The Cheese Mix: For the best flavor, grate your own cheese. Pre-shredded cheese is coated in potato starch, which prevents it from melting as smoothly.
Corn Texture: If using canned corn, pat it very dry first. Excess moisture is the enemy of a crispy crust.
Nutritional Info (Per Serving)
Calories: ~340 kcal
Fat: 18g
Carbohydrates: 32g
Protein: 12g
Fiber: 2g
Benefits of This Dish
Social Interaction: It’s a “communal” food that encourages people to gather around the table.
Versatility: It works as a heavy appetizer, a side for BBQ, or a companion to a hearty tomato soup.
Customizable: You can easily swap the herbs (try rosemary or thyme) or the cheese (pepper jack adds a nice kick).
Q&A
Q: Can I make this ahead of time?
A: You can assemble the bread (stuff it with cheese and corn) up to 4 hours in advance. Keep it wrapped in the fridge, then add the butter and bake right before serving.
Q: My bread is getting too dark but the cheese isn’t melted. What do I do?
A: Tent it loosely with foil. This traps the heat to melt the cheese while protecting the crust from burning.
Q: Can I use frozen corn?
A: Absolutely. Just make sure to thaw it and pat it dry with a paper towel so you don’t end up with “soggy bread syndrome.”
Blueberry Cream Cheese Loaf
📋 Recipe: Blueberry Cream Cheese Loaf
Prep time: 20 minutes
Cook time: 55–65 minutes
Servings: 10–12 slices
Ingredients
For the Loaf:
1 ½ cups All-purpose flour
1 tsp Baking powder
½ tsp Salt
½ cup Unsalted butter (softened)
1 cup Granulated sugar
2 Large eggs (room temperature)
1 tsp Vanilla extract
½ cup Sour cream or Greek yogurt
1 ½ cups Fresh blueberries (tossed in 1 tsp flour)
For the Cream Cheese Swirl:
4 oz Cream cheese (softened)
¼ cup Granulated sugar
1 Large egg yolk
½ tsp Vanilla extract
Instructions
Prep: Preheat your oven to 350°F (175°C). Grease a 9×5 inch loaf pan and line it with parchment paper for easy removal.
Cream Butter & Sugar: In a large bowl, beat the softened butter and 1 cup of sugar until light and fluffy (about 3 minutes). Add eggs one at a time, followed by the vanilla.
Dry & Wet: Whisk together the flour, baking powder, and salt. Gradually add the dry ingredients to the butter mixture, alternating with the sour cream. Mix until just combined.
The Blueberries: Gently fold in the blueberries. (Coating them in a teaspoon of flour prevents them from sinking to the bottom!)
Cream Cheese Filling: In a separate small bowl, beat the cream cheese, sugar, egg yolk, and vanilla until smooth.
Layer & Swirl: Pour half the cake batter into the pan. Drop dollops of the cream cheese mixture on top. Cover with the remaining batter. Use a knife to gently swirl the layers together.
Bake: Bake for 55–65 minutes, or until a toothpick inserted into the cake part comes out clean.
Cool: Let it cool in the pan for 15 minutes before transferring to a wire rack.
💡 Pro-Tips & Notes
Don’t Overmix: Once you add the flour, stop mixing as soon as the streaks disappear. Overmixing leads to a tough, rubbery loaf.
Frozen Berries: You can use frozen blueberries, but do not thaw them first. Toss them in flour while frozen and expect to add 5–8 minutes to the bake time.
Room Temp is Key: Ensure your cream cheese and eggs are at room temperature to avoid a lumpy filling.
🥗 Nutritional Info (Per Slice)
Approximate values based on 12 slices:
Calories Total Fat Carbs Protein Sugar
285 kcal 14g 36g 4g 22g
✨ Benefits of this Recipe
Antioxidant Boost: Blueberries are “brain food,” packed with anthocyanins that help fight oxidative stress.
Texture Contrast: The sour cream in the batter ensures a moist crumb that stays fresh for days, unlike standard sponge cakes.
Versatility: This works as a decadent breakfast, a tea-time snack, or a legitimate dessert when served with a scoop of vanilla ice cream.
❓ Common Questions (Q&A)
Q: Can I make this gluten-free?
A: Yes! A 1:1 gluten-free baking flour blend works perfectly here. Just ensure it contains xanthan gum.
Q: How do I store leftovers?
A: Because of the cream cheese content, this loaf should be stored in the refrigerator in an airtight container. It stays delicious for up to 5 days.
Q: Why did my blueberries all sink?
A: Two reasons: either the batter was too thin or you forgot to toss the berries in flour. The flour coating helps them “grip” the batter.
Roasted cauliflower
Roasted cauliflower
Ingredients:
1 large head of cauliflower, cut into florets
3 tablespoons olive oil
2 tablespoons maple syrup
1-2 tablespoons Sriracha sauce (adjust to taste)
1 teaspoon garlic powder
1 teaspoon onion powder
Salt and pepper to taste
Half cup honey
Instructions:
Preheat oven to 400°F (200°C).
In a large bowl, toss cauliflower florets with olive oil, maple syrup, Sriracha sauce, garlic powder, onion powder, salt, honey and pepper.
Spread cauliflower in a single layer on a baking sheet lined with parchment paper.
Roast for 20-25 minutes, or until cauliflower is tender and slightly browned.
Serve hot as a side dish or appetize
Point Pesto Chicken Salad
A high-protein, zesty, and creamy meal prep staple.
-
Prep time: 15 minutes
-
Servings: 4
-
SmartPoints: 2 per serving (Base) | 3 per serving (with Pine Nuts)
Ingredients
The Salad Base:
-
2 cups cooked chicken breast, shredded or cubed (rotisserie works great)
-
1 cup cherry tomatoes, halved
-
1/2 cup cucumber, diced
-
1/4 cup red onion, finely diced
-
2 cups mixed greens (arugula, spinach, or spring mix)
The Pesto Dressing:
-
1/4 cup plain non-fat Greek yogurt
-
2 tbsp light mayonnaise
-
2 tbsp prepared pesto sauce (standard or low-fat)
-
1 tbsp fresh lemon juice
-
1 tbsp grated Parmesan cheese
-
1/8 tsp salt
-
1/8 tsp black pepper
Optional Garnishes:
-
1 tbsp pine nuts, toasted (+1 point per serving)
-
Fresh basil leaves
Instructions
-
Prepare the Protein & Veg: Shred or cube your cooked chicken breast. Halve the cherry tomatoes, dice the cucumber, and finely dice the red onion.
-
Whisk the Dressing: In a small mixing bowl, combine the Greek yogurt, light mayonnaise, pesto, lemon juice, Parmesan, salt, and pepper. Whisk until completely smooth.
-
Toss: In a large bowl, combine the chicken and chopped vegetables. Pour the pesto dressing over the mixture and toss until everything is evenly coated.
-
Plate: Divide the mixed greens among four plates or meal prep containers. Top each with a generous portion of the pesto chicken mixture.
-
Garnish: If desired, sprinkle with toasted pine nuts and fresh basil leaves just before serving.
Nutritional Info (Per Serving)
-
Calories: 180
-
Protein: 28g
-
Fat: 6 g
-
Carbs: 5 g
-
Fiber: 1 g
-
Sugar: 2g
Pro-Tips for Success
-
Storage: This holds up beautifully in the fridge for up to 4 days. Just keep the mixed greens in a separate container or baggie so they don’t wilt.
-
The “No-Cook” Hack: Use a store-bought rotisserie chicken (skin removed) to whip this up in under 10 minutes.
-
Spice it up: If you like heat, a pinch of crushed red pepper flakes in the dressing complements the basil and garlic perfectly.
Hearty Vegetable Soup
This Hearty Vegetable Soup is the kind of cozy, nourishing meal that warms you from the inside out. It’s packed with colorful vegetables, simple pantry herbs, and a rich, savory broth that tastes like it simmered all day — yet it comes together in under an hour. Perfect for busy weeknights, meal prep, or when you just need a wholesome bowl of comfort.
🛒 Ingredients
Table of Contents
-
2 tablespoons olive oil
-
1 medium onion, chopped
-
2 cloves garlic, minced
-
2 medium carrots, sliced
-
2 celery stalks, chopped
-
2 medium potatoes, peeled and cubed
-
1 cup corn kernels (fresh, frozen, or canned)
-
1 cup green peas
-
1 fresh tomato, diced (or 1 cup canned diced tomatoes)
-
6 cups vegetable broth (or water + bouillon)
-
1 teaspoon salt (adjust to taste)
-
½ teaspoon black pepper
-
1 teaspoon dried thyme (or 1 sprig fresh thyme)
-
1 teaspoon dried parsley (plus extra for garnish)
-
½ teaspoon paprika (optional)
👩🍳 Instructions
1. Build the flavor base:
Heat olive oil in a large soup pot over medium heat. Add the chopped onion and sauté for about 2 minutes until it begins to soften. Stir in the minced garlic and cook for another 30 seconds until fragrant, being careful not to let it burn.
2. Add the hearty vegetables:
Stir in the carrots, celery, and potatoes. Cook for 4–5 minutes, stirring occasionally. This step enhances the flavor and slightly caramelizes the vegetables.
3. Pour and season:
Add the diced tomato and vegetable broth. Stir in salt, pepper, thyme, parsley, and paprika. Bring everything to a gentle boil.
4. Simmer to perfection:
Reduce the heat to low, cover partially, and let the soup simmer for 20–25 minutes, or until the potatoes and carrots are fork-tender.
5. Finish with color:
Add the corn and peas during the last 5 minutes of cooking. This keeps them bright and tender.
6. Taste and serve:
Adjust seasoning as needed. Garnish with fresh parsley and serve hot with crusty bread, crackers, or a side salad.
Optional Boosters
Add chopped zucchini or green beans for extra veggies. Stir in a can of drained beans for added protein. For brightness, squeeze fresh lemon juice just before serving.
This soup stores beautifully in the refrigerator for up to 5 days and freezes well for up to 3 months, making it perfect for meal prep. Simple, satisfying, and wonderfully comforting — every spoonful
Blueberry Cream Cheese Loaf
Recipe: Blueberry Cream Cheese Loaf
-
Prep time: 20 minutes
-
Cook time: 55–65 minutes
-
Servings: 10–12 slices
Ingredients
For the Loaf:
-
1 ½ cups All-purpose flour
-
1 tsp Baking powder
-
½ tsp Salt
-
½ cup Unsalted butter (softened)
-
1 cup Granulated sugar
-
2 Large eggs (room temperature)
-
1 tsp Vanilla extract
-
½ cup Sour cream or Greek yogurt
-
1 ½ cups Fresh blueberries (tossed in 1 tsp flour)
For the Cream Cheese Swirl:
-
4 oz Cream cheese (softened)
-
¼ cup Granulated sugar
-
1 Large egg yolk
-
½ tsp Vanilla extract
Instructions
-
Prep: Preheat your oven to 350°F (175°C). Grease a 9×5 inch loaf pan and line it with parchment paper for easy removal.
-
Cream Butter & Sugar: In a large bowl, beat the softened butter and 1 cup of sugar until light and fluffy (about 3 minutes). Add eggs one at a time, followed by the vanilla.
-
Dry & Wet: Whisk together the flour, baking powder, and salt. Gradually add the dry ingredients to the butter mixture, alternating with the sour cream. Mix until just combined.
-
The Blueberries: Gently fold in the blueberries. (Coating them in a teaspoon of flour prevents them from sinking to the bottom!)
-
Cream Cheese Filling: In a separate small bowl, beat the cream cheese, sugar, egg yolk, and vanilla until smooth.
-
Layer & Swirl: Pour half the cake batter into the pan. Drop dollops of the cream cheese mixture on top. Cover with the remaining batter. Use a knife to gently swirl the layers together.
-
Bake: Bake for 55–65 minutes, or until a toothpick inserted into the cake part comes out clean.
-
Cool: Let it cool in the pan for 15 minutes before transferring to a wire rack.
Pro-Tips & Notes
-
Don’t Overmix: Once you add the flour, stop mixing as soon as the streaks disappear. Overmixing leads to a tough, rubbery loaf.
-
Frozen Berries: You can use frozen blueberries, but do not thaw them first. Toss them in flour while frozen and expect to add 5–8 minutes to the bake time.
-
Room Temp is Key: Ensure your cream cheese and eggs are at room temperature to avoid a lumpy filling.
Nutritional Info (Per Slice)
Approximate values based on 12 slices:
| Calories | Total Fat | Carbs | Protein | Sugar |
| 285 kcal | 14g | 36g | 4g | 22g |
Benefits of this Recipe
-
Antioxidant Boost: Blueberries are “brain food,” packed with anthocyanins that help fight oxidative stress.
-
Texture Contrast: The sour cream in the batter ensures a moist crumb that stays fresh for days, unlike standard sponge cakes.
-
Versatility: This works as a decadent breakfast, a tea-time snack, or a legitimate dessert when served with a scoop of vanilla ice cream.
Common Questions (Q&A)
Q: Can I make this gluten-free?
A: Yes! A 1:1 gluten-free baking flour blend works perfectly here. Just ensure it contains xanthan gum.
Q: How do I store leftovers?
A: Because of the cream cheese content, this loaf should be stored in the refrigerator in an airtight container. It stays delicious for up to 5 days.
Q: Why did my blueberries all sink?
A: Two reasons: either the batter was too thin or you forgot to toss the berries in flour. The flour coating helps them “grip” the batter.
Spinach and Potato Casserole
Ingredients
Main Ingredients
4 medium medium potatoes, peeled and sliced or cubed
1 onion, chopped
250 g spinach, washed and roughly chopped (about 9 oz)
4 eggs
100 g soft cream cheese (about 3.5 oz)
150 g hard mozzarella cheese, grated (about 5.3 oz)
2 tbsp vegetable oil
Salt to taste
Ground black pepper to taste
1/2 tsp dried ground garlic
Method
Preparation
Preheat the oven to 180°C (350°F).
In a pan, heat the vegetable oil over medium heat and sauté the chopped onion until it becomes translucent.
Add the chopped spinach to the pan and cook until it wilts down, about 2-3 minutes.
In a large bowl, combine the cooked onion and spinach mixture with the sliced or cubed potatoes.
In a separate bowl, whisk together the eggs, soft cream cheese, garlic, salt, and black pepper until smooth.
Pour the egg mixture over the potato and spinach mixture and give it all a good mix.
Transfer everything into a greased casserole dish and sprinkle the grated mozzarella cheese on top.
Baking
Bake in the preheated oven for 40-45 minutes, or until the top is golden and the casserole is set.
Allow to cool slightly before serving.
Notes
Leftovers can be stored in an airtight container in the fridge for up to three days. Reheat in the oven or microwave. Try adding diced bell peppers or mushrooms for extra flavor! Use goat cheese or feta for a tangy twist. Fresh herbs like thyme or basil can enhance the flavor before baking.
Triangle Toasted Sandwich (Sandwich Maker Style) – Step by Step
✅ Ingredients (for 2 sandwiches / 4 triangles)
Bread
- 4 slices bread (white or brown)
Filling (you can choose)
Option A (like pizza style):
- 2 tbsp pizza sauce / ketchup
- 1 cup grated cheese (mozzarella or cheddar)
- 1 small onion (chopped)
- 1 small capsicum (chopped)
- Chicken pieces / sausage / beef (optional)
- Black pepper
- Red chilli flakes
- Salt (little)
Option B (simple spicy egg filling):
- 2 boiled eggs mashed
- Mayonnaise 2 tbsp
- Salt + pepper
- Chilli flakes
🍳 Step-by-Step Method (Exactly Like Picture)
Step 1: Prepare Filling
- Take a bowl.
- Add chopped onion + capsicum.
- Add chicken/sausage pieces (optional).
- Add pizza sauce or ketchup.
- Add black pepper + chilli flakes.
- Add grated cheese.
- Mix everything properly.
👉 Your filling should be thick, not watery.
Step 2: Preheat Sandwich Maker
- Plug in the sandwich maker.
- Let it heat for 2–3 minutes.
Step 3: Apply Butter
- Take bread slices.
- Apply butter on the outer side of bread (very important for golden color).
✅ Butter side must touch the sandwich maker plate.
Step 4: Place Bread in Maker
- Put 1 bread slice on the sandwich maker plate.
- Butter side should be down.
Step 5: Add Filling
- Put filling in the center.
- Spread evenly but don’t overfill.
- Leave edges empty a little, otherwise cheese comes out (like your pic 😅).
Step 6: Cover With Second Bread
- Place second bread slice on top.
- Butter side should be up.
Step 7: Close Sandwich Maker
- Close the lid slowly.
- Press lightly.
⏳ Cook for 4–6 minutes.
Step 8: Check Golden Color
- Open slightly and check.
- If bread is golden brown and crispy, it’s ready.
👉 If you want extra crispy, cook 1–2 minutes more.
Step 9: Remove Sandwich Carefully
- Use a spatula or spoon.
- Take out sandwich gently.
- Put on plate.
Step 10: Serve
- Your sandwich will automatically cut into 4 triangle pieces.
- Serve with:
- ketchup
- mayo garlic sauce
- chilli sauce
⭐ Tips to Make It Perfect Like Your Picture
✅ Always butter outside bread
✅ Don’t add too much filling
✅ Use cheese for strong stickiness
✅ Cook on medium heat for crispy color
✅ Use thick sauce, not watery
Watermelon Banana Smoothie
Prep time: 10 minutes | Servings: 2
Ingredients
Frozen Watermelon: 3 cups (cubed and frozen beforehand)
Banana: 1 large (frozen slices are best for creaminess)
Liquid Base: 1/2 cup (Coconut water, almond milk, or plain Greek yogurt for extra protein)
Lime Juice: 1 tablespoon (adds a nice brightness)
Optional Sweetener: 1 teaspoon honey or agave (if your fruit isn’t quite sweet enough)
Instructions
Prep the Fruit: If you haven’t already, cube your watermelon and slice your banana. Freeze them for at least 2–4 hours. This ensures the smoothie is thick and frosty rather than thin.
Layer the Blender: Add your liquid base first, followed by the frozen banana and then the frozen watermelon. Adding liquid first helps the blades move more easily.
Blend: Start on a low speed and gradually increase to high. Blend until completely smooth. If it’s too thick, add an extra splash of liquid.
Taste Test: Give it a quick taste. If it needs more “zing,” add a little more lime juice.
Garnish & Serve: Pour into tall glasses. Top with a fresh banana slice and a small wedge of watermelon as seen in your image.
Pro Tips for the Perfect Texture
The “No Ice” Rule: Try to avoid using actual ice cubes. They can make the flavor taste diluted. Using frozen fruit provides the chill and the flavor simultaneously.
Storage: This smoothie is best enjoyed immediately. If you have leftovers, you can pour them into popsicle molds for a frozen treat later!
Tropical Pineapple-Spinach Smoothie
Prep time: 5 minutes | Servings: 1 large glass
Ingredients
Based on the visual cues in your image, you’ll need:
1 cup Fresh or frozen pineapple chunks (adds sweetness and tang)
1 handful Fresh baby spinach (provides that bright green color)
1 Banana (frozen is best for a creamy texture)
1/2 Orange, peeled (or 1/4 cup orange juice for extra brightness)
1/2 cup Liquid base (Water, coconut water, or almond milk)
Optional: A squeeze of lemon or a few ice cubes if using fresh fruit.
Instructions
Layer the Blender: Add your liquid base first. This helps the blades move more freely and prevents “blender jam.”
Add the Greens: Pack in the fresh baby spinach.
Add the Fruit: Add the pineapple, banana, and orange on top.
Blend: Start on a low speed and gradually increase to high. Blend for about 45–60 seconds until the mixture is completely smooth and no green flecks remain.
Serve: Pour into a tall glass, grab two striped straws just like in the photo, and enjoy immediately!
Quick Tips for the Best Result
For Creaminess: Use a frozen banana. It acts like “healthy ice cream” and gives the smoothie a thick, milkshake-like consistency.
Sweetness Check: If your pineapple isn’t very ripe, you can add a teaspoon of honey or a single pitted date.
Boost It: Feel free to toss in a tablespoon of chia seeds or flax seeds for extra fiber without changing the flavor.
Strawberry Peach Smoothie
This recipe makes approximately two servings, perfect for the two mason jars shown in your photo.
Ingredients
Strawberries: 1 ½ cups frozen (for a thicker texture) or fresh.
Peaches: 1 ½ cups sliced (frozen or fresh/peeled).
Liquid Base: 1 cup orange juice (for brightness) or almond milk (for creaminess).
Yogurt: ½ cup Greek yogurt or vanilla yogurt (adds that smooth, velvety finish).
Sweetener (Optional): 1 tablespoon honey or maple syrup if your fruit isn’t quite sweet enough.
Garnish: Extra chopped strawberries and peach chunks.
Instructions
Prep the Fruit: If using fresh peaches, remove the skin and pits. If using fresh strawberries, remove the green stems.
Layer the Blender: Always add your liquid (juice or milk) and yogurt first. This helps the blades move freely and prevents the frozen fruit from getting stuck at the bottom.
Add Solids: Add the strawberries and peaches on top of the liquid.
Blend: Start on a low speed and gradually increase to high. Blend for about 45–60 seconds until the mixture is completely smooth and no fruit chunks remain.
Adjust Consistency: * Too thick? Add a splash more liquid.
Too thin? Add a few more frozen fruit slices or a handful of ice.
Serve: Pour into glasses. Top with small diced pieces of strawberry and peach, just like in the photo, and add a festive straw!
Quick Tips for the Best Results
Use Frozen Fruit: Using frozen fruit instead of ice ensures your smoothie stays flavorful and doesn’t get “watered down.”
Peaches: If you are using fresh peaches and want that ultra-smooth texture, it’s best to peel them first.
Flourless Blueberry Banana Bread
Ingredients
Main Ingredients
3 pieces ripe bananas, mashed (about 400g) The riper the bananas, the sweeter the bread.
1 cup crunchy peanut butter (about 250g) Smooth peanut butter can be used if preferred.
1 tsp vanilla extract
2 pieces eggs Can be replaced with flax eggs for a vegan version.
1 tsp baking powder
1/2 cup fresh blueberries (about 75g) Plus a handful for topping.
Method
Preparation
Preheat your oven to 350°F (or 320°F for a fan oven).
Spray a loaf pan with cooking oil or coat it with butter to prevent sticking.
In a large bowl, mash the ripe bananas. Add the crunchy peanut butter, vanilla extract, and eggs. Mix until smooth.
Stir in the baking powder.
Gently fold the fresh blueberries into the batter.
Pour the mixture into the prepared loaf pan and top with a handful of extra blueberries.
Baking
Bake in the preheated oven for 50-55 minutes. Cover with aluminum foil if the top starts to brown too quickly.
Check for doneness with a toothpick; if it comes out clean, the bread is ready.
Let it cool in the pan before transferring it to a wire rack.
Notes
Serve warm or at room temperature; delicious with butter or yogurt. Great paired with tea or coffee. For longer storage, slice and freeze individual pieces.
Mediterranean Creamy Crustless Chicken & Spinach Cheese Casserole
-
Prep time: 15 mins
-
Cook time: 25–30 mins
-
Servings: 6
-
Difficulty: Easy
Ingredients
| Category | Items |
| Protein | 1.5 lbs Boneless skinless chicken breasts (cooked and shredded or cubed) |
| Vegetables | 10 oz Fresh baby spinach (chopped), 1/2 cup Sun-dried tomatoes (chopped), 3 cloves Garlic (minced) |
| The Creamy Base | 8 oz Cream cheese (softened), 1/2 cup Sour cream or Greek yogurt, 1/4 cup Heavy cream |
| Cheeses | 1 cup Shredded Mozzarella, 1/2 cup Crumbled Feta, 1/4 cup Grated Parmesan |
| Seasoning | 1 tsp Dried oregano, 1/2 tsp Red pepper flakes, Salt & Black pepper to taste |
Instructions
-
Prep the Oven: Preheat your oven to 375°F (190°C). Lightly grease a 9×13 inch baking dish.
-
Sauté the Greens: In a large skillet over medium heat, wilt the spinach with the minced garlic until just soft (about 2 minutes). Squeeze out any excess moisture—this prevents a soggy casserole!
-
Mix the Base: In a large bowl, beat the softened cream cheese, sour cream, heavy cream, oregano, and red pepper flakes until smooth.
-
Combine: Fold in the cooked chicken, wilted spinach, sun-dried tomatoes, half of the mozzarella, and all of the feta. Season with salt and pepper.
-
Assemble: Spread the mixture evenly into the prepared baking dish. Top with the remaining mozzarella and the Parmesan cheese.
-
Bake: Bake for 25–30 minutes, or until the cheese is bubbly and golden brown on top.
-
Rest: Let it sit for 5 minutes before serving to allow the creamy sauce to set.
Notes & Pro-Tips
-
The Moisture Secret: Spinach holds a lot of water. If using frozen spinach, thaw it completely and squeeze it in a kitchen towel until bone-dry.
-
Chicken Shortcut: Use a store-bought rotisserie chicken to shave 20 minutes off your prep time.
-
The Golden Top: If the cheese isn’t as brown as you’d like after 30 minutes, pop it under the broiler for 60–90 seconds. Watch it closely!
Nutritional Information (Per Serving)
-
Calories: 410 kcal
-
Net Carbs: 6g
-
Protein: 38g
-
Fat: 26g
-
Fiber: 1.5g
Health Benefits
-
High Protein: Supports muscle repair and keeps you full longer.
-
Iron & Vitamin K: Courtesy of the heavy dose of spinach.
-
Low Carb/Keto: Naturally grain-free and gluten-free, making it great for blood sugar management.
-
Healthy Fats: Feta and sun-dried tomatoes provide flavorful fats and antioxidants.
Q&A
Q: Can I freeze this?
A: Yes! You can freeze it before or after baking. If freezing after, ensure it’s fully cooled. Reheat in the oven to maintain the texture of the cheese.
Q: What should I serve this with?
A: Since it’s crustless, it pairs beautifully with a crisp cucumber salad, roasted cauliflower, or, if you aren’t watching carbs, a side of warm pita bread.
Q: Can I swap the chicken for something else?
A: Absolutely. Cooked shrimp or roasted chickpeas work wonderfully with these Mediterranean flavors.
hearty Breakfast Egg and Crispy Beef Bacon Wrap.
Here is a complete and friendly recipe for a warm, hearty Breakfast Egg and Crispy Beef Bacon Wrap. This comforting wrap is filled with fluffy scrambled eggs, savory beef bacon, and melty cheese, all folded inside a lightly toasted tortilla. It is perfect for breakfast, brunch, or even a quick evening meal.
Ingredients:
You will need 4 large eggs, 4 strips of cooked beef bacon, 2 large soft tortillas, 1/2 cup shredded cheddar or mozzarella cheese, 2 tablespoons milk, 1 tablespoon butter, 1/4 teaspoon salt, 1/4 teaspoon black pepper, and a pinch of paprika (optional). You may also add diced onions or bell peppers if you enjoy extra flavor and texture.
Preparation:
Begin by placing a skillet over medium heat and adding the butter. Allow the butter to melt gently. In a bowl, crack the eggs and whisk them together with the milk, salt, black pepper, and paprika until smooth and slightly frothy. This helps the eggs become soft and fluffy during cooking.
Pour the egg mixture into the warm skillet. Let it sit for a few seconds, then gently stir with a spatula, pushing the eggs from the edges toward the center. Continue cooking slowly so the eggs remain creamy and tender. Once the eggs are just set but still soft, remove them from the heat.
Warm the tortillas in a clean pan for about 20 seconds on each side until they become soft and flexible. This step makes rolling easier and enhances the overall taste.
Lay each tortilla flat on a clean surface. Place a portion of scrambled eggs in the center, followed by two strips of crispy beef bacon and a sprinkle of shredded cheese. Fold the sides inward, then roll the tortilla tightly to form a wrap.
To finish, place the wraps seam-side down in the skillet and toast lightly for 1–2 minutes on each side until golden and slightly crisp. This gives a pleasant texture and helps seal the wrap.
Serve warm with a side of fresh fruit, yogurt, or roasted potatoes. Enjoy this satisfying wrap as a cozy and nourishing meal that is simple to prepare and full of comforting flavors.
creamy Banana Chocolate Chia Oat Pudding
Here is a complete, friendly, and detailed recipe for a creamy Banana Chocolate Chia Oat Pudding that is perfect for breakfast or a nourishing snack.
Ingredients:
1 cup rolled oats
2 tablespoons chia seeds
2 cups milk of your choice (dairy or plant-based)
1 ripe banana, sliced
1 to 2 teaspoons honey or maple syrup (optional, for gentle sweetness)
1/2 teaspoon vanilla extract
1 tablespoon grated dark chocolate or chocolate shavings
1 tablespoon chopped nuts (optional)
Pinch of cinnamon (optional)
Instructions:
Begin by choosing a medium-sized mixing bowl or jar with a lid. Add the rolled oats and chia seeds into the bowl. Pour in the milk slowly while stirring to combine everything evenly. This helps the oats and chia seeds absorb the liquid smoothly and creates a lovely creamy texture later. Next, add vanilla extract and a small drizzle of honey or maple syrup if you prefer a touch of sweetness. Stir well so all ingredients are evenly blended.
Cover the bowl or close the jar and place it in the refrigerator. Allow the mixture to rest for at least 4 hours, though leaving it overnight gives the best texture. During this time, the oats soften and the chia seeds gently swell, forming a rich pudding-like consistency.
When ready to serve, remove the pudding from the refrigerator and give it a gentle stir. If the mixture feels too thick, you can add a small splash of milk and mix again until it reaches your desired creaminess. Top the pudding with fresh banana slices, a sprinkle of grated chocolate, and optional chopped nuts for extra texture and flavor. A pinch of cinnamon can also be added for a warm, comforting aroma.
Serve chilled in a glass or bowl. This pudding is wonderfully versatile, so you can also add berries, coconut flakes, or a spoonful of yogurt for variation. It keeps well in the refrigerator for up to two days, making it a convenient make-ahead option for busy mornings while still tasting fresh and delightful.