Creamy Rice Pudding With 4 Simple Ingredients, In Minutes

Hi everyone, today we’re going to learn how to make Creamy Rice Pudding using simple ingredients. So grab your pen and paper to jot down the ingredients, then follow the complete preparation method.

How to Make Creamy Rice Pudding

Learn how to prepare for dessert recipes step-by-step recipes inspired by top online culinary schools. Whether you’re an aspiring chef or just love gourmet cooking at home, these professional recipe ideas are perfect for busy days and high-quality meals.

Recipe Ingredients:

  • 1 cup of rice
  • 1 liter (4 cups) of milk
  • 395 g (14 oz) sweetened condensed milk
  • 2 cups of water
  • Ground cinnamon for garnish (optional)

Instructions

In a medium-sized saucepan, combine the rice and water. Cook over medium heat until the rice is tender and the water is fully absorbed.

Reduce the heat to low, pour in the milk, and stir continuously for about 20 minutes until the mixture thickens slightly.

Add the sweetened condensed milk and stir to combine.

Continue stirring occasionally for an additional 5–10 minutes, or until the pudding reaches a creamy consistency.

Mediterranean Creamy Smothered Chicken with Spinach, Potatoes, and Mushrooms

Mediterranean Creamy Smothered Chicken with Spinach, Potatoes, and Mushrooms

Ingredients
• 4 boneless, skinless chicken breasts (or thighs)
• 2 tablespoons olive oil
• 1 teaspoon paprika
• 1 teaspoon dried oregano
• ½ teaspoon dried thyme
• Salt to taste
• Black pepper to taste

• 2 cups baby potatoes, halved
• 1½ cups mushrooms, sliced
• 3 garlic cloves, minced
• 1 cup fresh spinach

For the creamy sauce
• 1 cup cooking cream or heavy cream
• ½ cup chicken broth
• ¼ cup grated parmesan cheese
• 1 teaspoon Dijon mustard (optional)
• ½ teaspoon chili flakes (optional)
• 1 tablespoon lemon juice

Instructions

Season chicken with paprika, oregano, thyme, salt, and black pepper.

Heat olive oil in a large skillet over medium heat. Sear chicken for 4–5 minutes per side until golden. Remove and set aside.

In the same skillet, add potatoes cut-side down. Cook for 6–8 minutes until lightly golden.

Add mushrooms and sauté for 3–4 minutes until softened. Stir in garlic and cook for 30 seconds.

Pour in chicken broth and simmer for 3 minutes, scraping up browned bits.

Lower heat and add cream, parmesan, mustard, chili flakes, and lemon juice. Stir well.

Add spinach and let it wilt into the sauce.

Return chicken to the skillet, spoon sauce over the top, cover, and simmer for 12–15 minutes until chicken is cooked through and potatoes are tender.

Taste and adjust seasoning if needed.

Serving Suggestions
• Serve with crusty bread or warm focaccia
• Pair with rice, couscous, or quinoa
• Finish with fresh parsley or basil and a squeeze of lemon

Tomato Basil Garlic Bread

Tomato Basil Garlic Bread

### Description

This recipe takes the buttery, aromatic foundation of garlic bread and tops it with a fresh “salsa” of Roma tomatoes and sweet basil. The key is to toast the bread with the garlic butter first, then top it with the cold, seasoned tomatoes. This creates a beautiful contrast of temperatures and textures—warm, crispy bread with cool, refreshing toppings.

### Recipe: Tomato Basil Garlic Bread

  • Prep time: 15 minutes

  • Cook time: 10 minutes

  • Total time: 25 minutes

  • Servings: 6-8 slices

Ingredients

  • The Bread: 1 large loaf of French or Italian bread (sliced lengthwise).

  • The Butter Spread:

    • 1/2 cup unsalted butter, softened.

    • 4 cloves garlic, minced.

    • 1 tsp dried oregano.

    • 1/4 tsp salt.

  • The Topping:

    • 3 large Roma tomatoes, diced (seeds removed).

    • 1/4 cup fresh basil, chiffonade (thinly sliced).

    • 1 tbsp extra-virgin olive oil.

    • 1 tsp balsamic glaze (optional drizzle).

    • 1/2 cup shredded mozzarella or parmesan (optional).

Instructions

  1. Preheat: Set your oven to 400°F (200°C).

  2. Prep the Topping: In a medium bowl, toss the diced tomatoes, fresh basil, and olive oil. Set aside at room temperature so the flavors marry.

  3. Make Garlic Butter: Mix the softened butter, minced garlic, oregano, and salt until smooth.

  4. Toast: Spread the garlic butter generously over the cut sides of the bread. Place on a baking sheet and bake for 8–10 minutes until the edges are golden brown.

    • Note: If using cheese, sprinkle it on for the last 3 minutes of baking.

  5. Assemble: Remove bread from the oven. Spoon the tomato-basil mixture evenly over the warm bread.

  6. Finish: Drizzle with balsamic glaze if desired, slice into thick pieces, and serve immediately.

### Tips for Success

  • Drain the Tomatoes: After dicing, let the tomatoes sit in a colander for 5 minutes. This prevents the juices from making your crispy bread soggy.

  • Fresh is Best: Dried basil will not work here. The soul of this dish is the aromatic punch of fresh leaves.

  • The Rub: For extra flavor, rub a raw garlic clove directly onto the toasted bread before adding the butter for a sharper “bite.”

### Nutritional Info (Per Serving)

Estimate based on 1 slice of a standard French loaf.

Metric Amount
Calories 210 kcal
Total Fat 12g
Carbohydrates 22g
Protein 4g
Fiber 2g

### Benefits

  • Lycopene Boost: Cooked and raw tomatoes are rich in lycopene, a powerful antioxidant linked to heart health.

  • Anti-Inflammatory: Fresh garlic and basil both contain compounds that help reduce inflammation in the body.

  • Crowd Pleaser: It’s an affordable way to make a meal feel “fancy” without hours of prep.

### Q&A

Q: Can I make this ahead of time?

A: You can prep the garlic butter and dice the tomatoes ahead of time, but do not assemble until right before serving, or the bread will lose its crunch.

Q: What’s the best bread to use?

A: A sturdy Ciabatta or a classic French Baguette works best. Avoid very soft “sandwich” style loaves as they can’t support the weight of the tomatoes.

Q: Can I make this vegan?

A: Absolutely. Simply swap the butter for a high-quality olive oil or a plant-based butter substitute.

Savory Breakfast Egg Muffins

 Savory Breakfast Egg Muffins (Mini Veggie & Cheese Egg Bites)

Description

Savory Egg Muffins are mini baked omelets made in a muffin tin. They’re customizable, low-carb, and naturally gluten-free. You can prep them ahead and reheat during the week.

 Ingredients (12 Muffins / 6 Servings)

  • 6 large eggs

  • ½ cup milk (or heavy cream for richer texture)

  • 1 cup shredded cheese (cheddar, mozzarella, or mix)

  • ½ cup diced bell peppers (red/green)

  • ¼ cup finely chopped onion

  • 2–3 tbsp chopped parsley or green onions

  • ½ tsp salt

  • ¼ tsp black pepper

  • ¼ tsp paprika (optional)

  • Cooking spray or oil for greasing

 Instructions

  1. Preheat oven to 180°C (350°F).

  2. Prepare muffin tin – grease well or line with silicone liners.

  3. Whisk eggs & milk in a bowl until smooth.

  4. Add fillings – stir in cheese, vegetables, herbs, and seasoning.

  5. Fill muffin cups about ¾ full (they puff while baking).

  6. Bake 18–22 minutes until centers are set.

  7. Cool 5 minutes before removing.

Servings

  • Makes 12 egg muffins

  • Serving size: 2 muffins per person

  • Serves: 6 people

 Tips for Best Results

✔ Don’t overfill cups (prevents spilling).
✔ Use silicone liners for easy removal.
✔ For extra fluffiness, add ½ tsp baking powder.
✔ Let them rest before removing (they deflate slightly — normal).
✔ Add cooked meats only (never raw).

 Variations

  • 🥓 Add cooked bacon or sausage

  • 🥬 Add spinach or mushrooms (sauté first)

  • 🌶 Make spicy with jalapeños

  • 🥑 Add feta and olives for Mediterranean flavor

 Storage

  • Refrigerate: up to 4 days

  • Freeze: up to 2 months

  • Reheat: 20–30 seconds in microwave

 Nutritional Info (Per 2 Muffins – Approx.)

  • Calories: 180–220 kcal

  • Protein: 14–16g

  • Fat: 14g

  • Carbohydrates: 3–5g

  • Fiber: 0.5g

  • Sugar: 1–2g

(Values vary depending on cheese and milk used.)

 Health Benefits

✅ High in protein (supports muscle & satiety)
✅ Low in carbs (great for low-carb diets)
✅ Good source of calcium
✅ Rich in vitamins A, B12, and choline
✅ Helps keep you full longer

 Q & A

Q: Why did my egg muffins sink?
A: Eggs naturally deflate after baking — totally normal!

Q: Can I make them dairy-free?
A: Yes! Use dairy-free milk and skip cheese or use plant-based cheese.

Q: Can I make them ahead?
A: Absolutely — they’re perfect for meal prep.

Q: How do I know they’re done?
A: Centers should be firm and not jiggly.

Q: Can I use egg whites only?
A: Yes — replace 6 eggs with about 1½ cups egg whites.

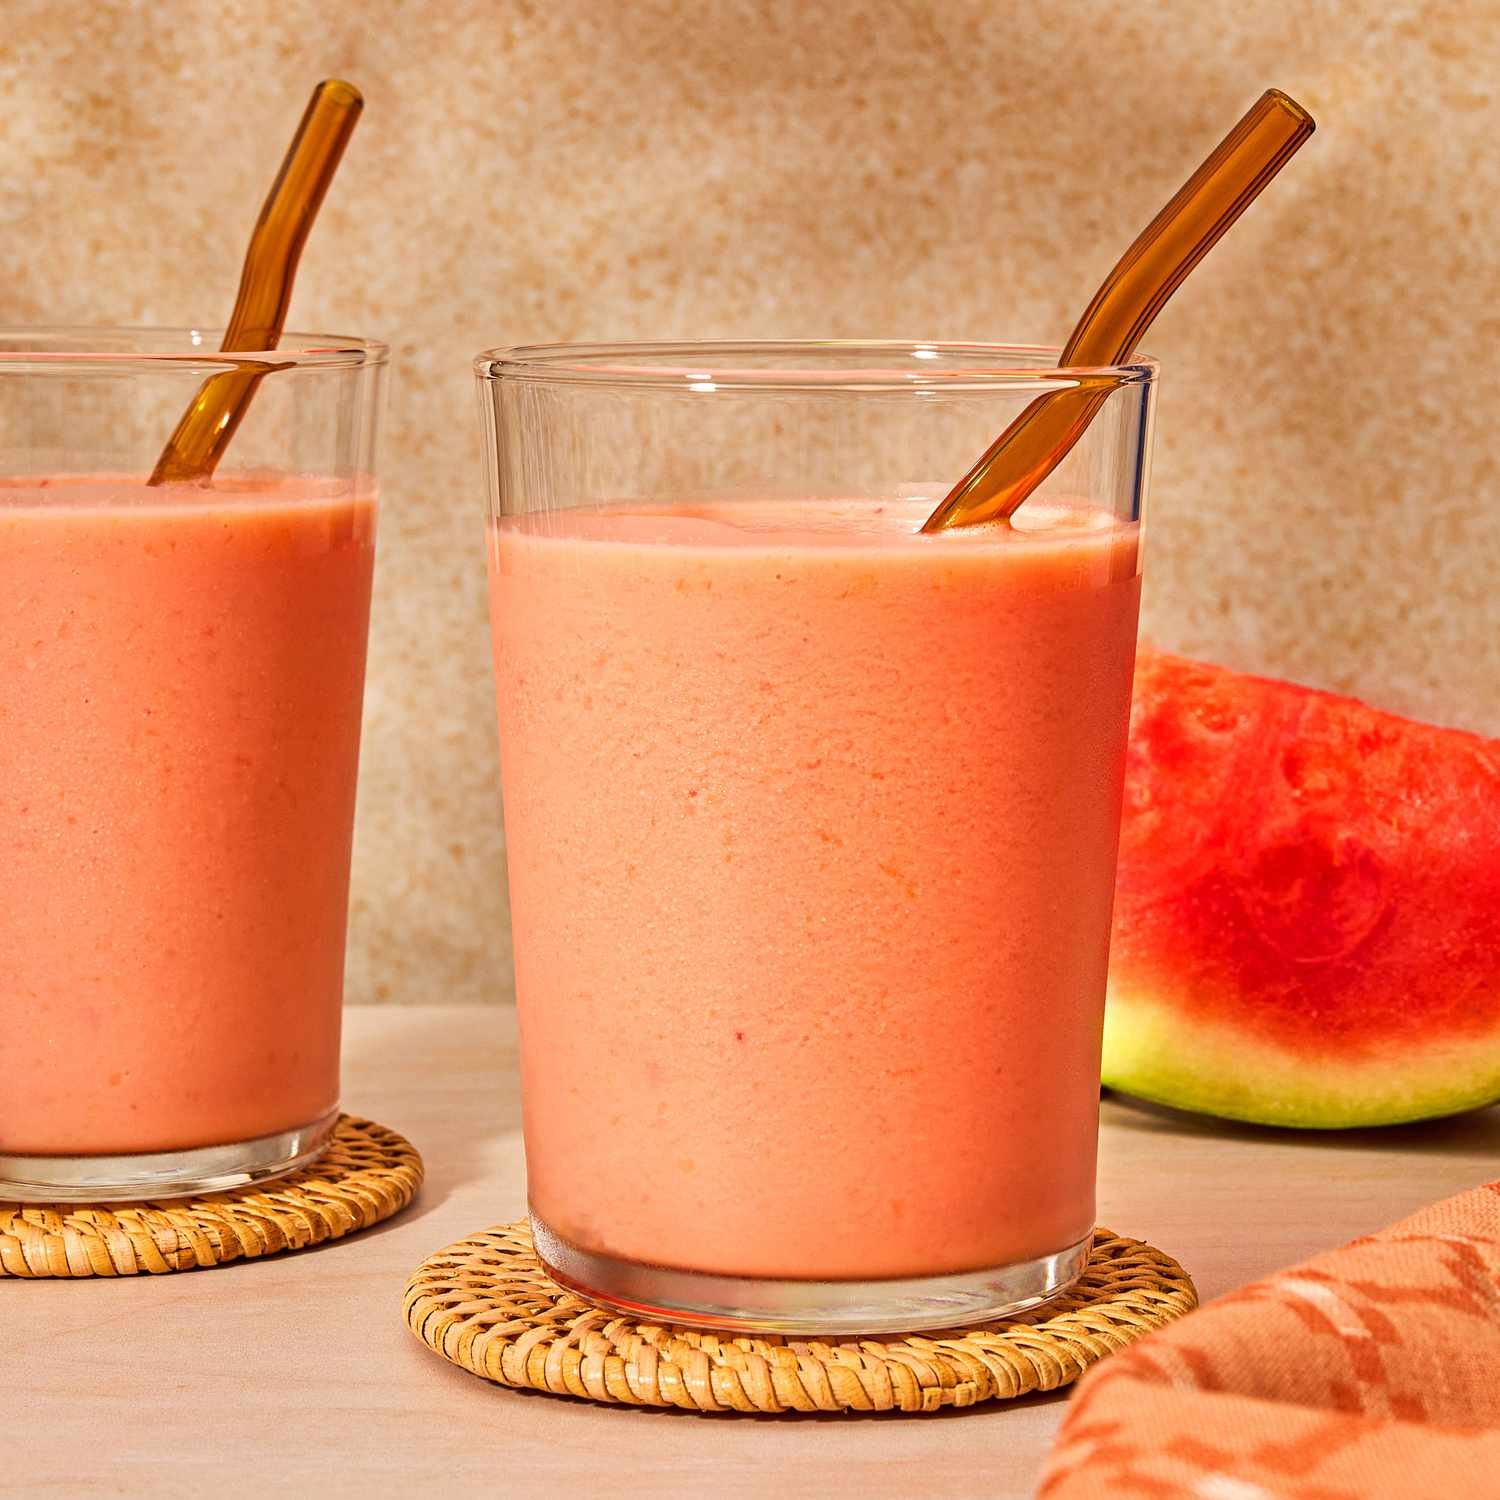
Refreshing Watermelon Strawberry Smoothie

Refreshing Watermelon Strawberry Smoothie

  • Prep time: 5 minutes

  • Servings: 2 glasses

Ingredients

  • 3 cups fresh watermelon, cubed (seedless is easiest)

  • 1 cup frozen strawberries (using frozen fruit makes it thick and creamy without needing extra ice)

  • 1/2 cup Greek yogurt or coconut yogurt (adds a lovely creamy texture and a bit of protein)

  • 1 tablespoon fresh lime juice (brightens up the flavors)

  • Optional: A few mint leaves or a splash of honey/agave if you want it extra sweet.

Instructions

  1. Prep: If you are using fresh watermelon, it helps to chill it in the freezer for about 30 minutes before blending, or simply add a handful of ice if you prefer a slushier consistency.

  2. Combine: Place the watermelon, frozen strawberries, yogurt, and lime juice into your blender.

  3. Blend: Start on a low speed and gradually increase to high. Blend until completely smooth and creamy.

  4. Serve: Pour immediately into glasses. Garnish with a small slice of fresh watermelon or a sprig of mint if you’re feeling fancy.


Tip: If you find the texture is too thick, add a small splash of coconut water or plain water and blend again until you reach your desired consistency.

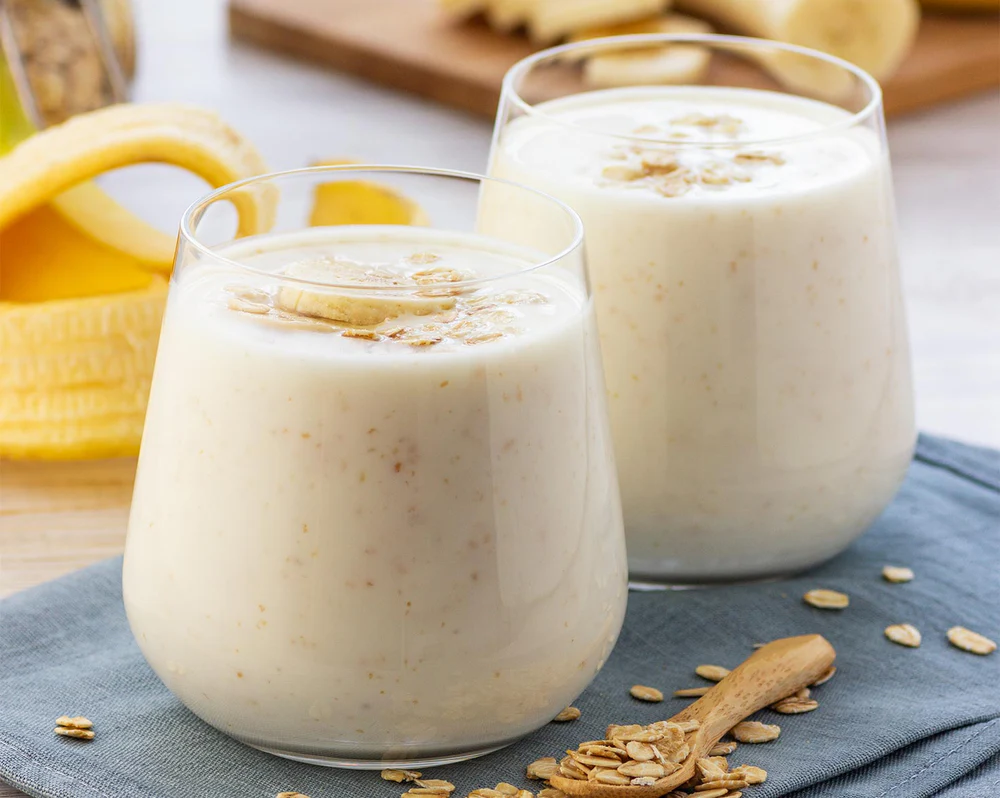
Banana Oatmeal Smoothie

This looks like a delicious and energizing Banana Oatmeal Smoothie—perfect for a quick breakfast or a post-workout snack.

Here is a simple, wholesome recipe to recreate what you see in the image.

Ingredients

  • 1 ripe banana: Use one with a few brown spots for natural sweetness.

  • 1/4 to 1/2 cup rolled oats: Depending on how thick you like your smoothie.

  • 1 cup milk of choice: Dairy, almond, oat, or soy milk all work well.

  • 1/2 cup Greek yogurt (optional): Adds extra creaminess and protein.

  • 1 teaspoon honey or maple syrup: Optional, if you prefer it a bit sweeter.

  • 1/4 teaspoon cinnamon (optional): Adds a nice warming flavor.

  • Ice cubes: A handful, if you prefer your smoothie chilled and thicker.


Instructions

  1. Prep the Oats: If you have a powerful blender, you can add the dry rolled oats directly. If your blender is less powerful, you can pulse the oats for a few seconds first to create a rough oat flour, or soak them in the milk for 10 minutes before blending for a smoother texture.

  2. Combine: Place the banana, oats, milk, yogurt, sweetener (if using), and cinnamon into the blender.

  3. Blend: Start on a low speed and gradually increase to high. Blend until the mixture is completely smooth and creamy. If the smoothie is too thick, add a little more milk until you reach your desired consistency.

  4. Serve: Pour into glasses.

  5. Garnish: Top with a thin slice of banana and a sprinkle of raw oats, just like in the picture, for a beautiful presentation.


Pro-Tips for the Best Smoothie

  • The Frozen Trick: For the creamiest, thickest texture without needing ice (which can water down the flavor), use a frozen banana. Peel it and chop it before freezing.

  • Boost It: You can easily add a tablespoon of peanut butter, a spoonful of chia seeds, or a scoop of your favorite protein powder to make this a more substantial meal.

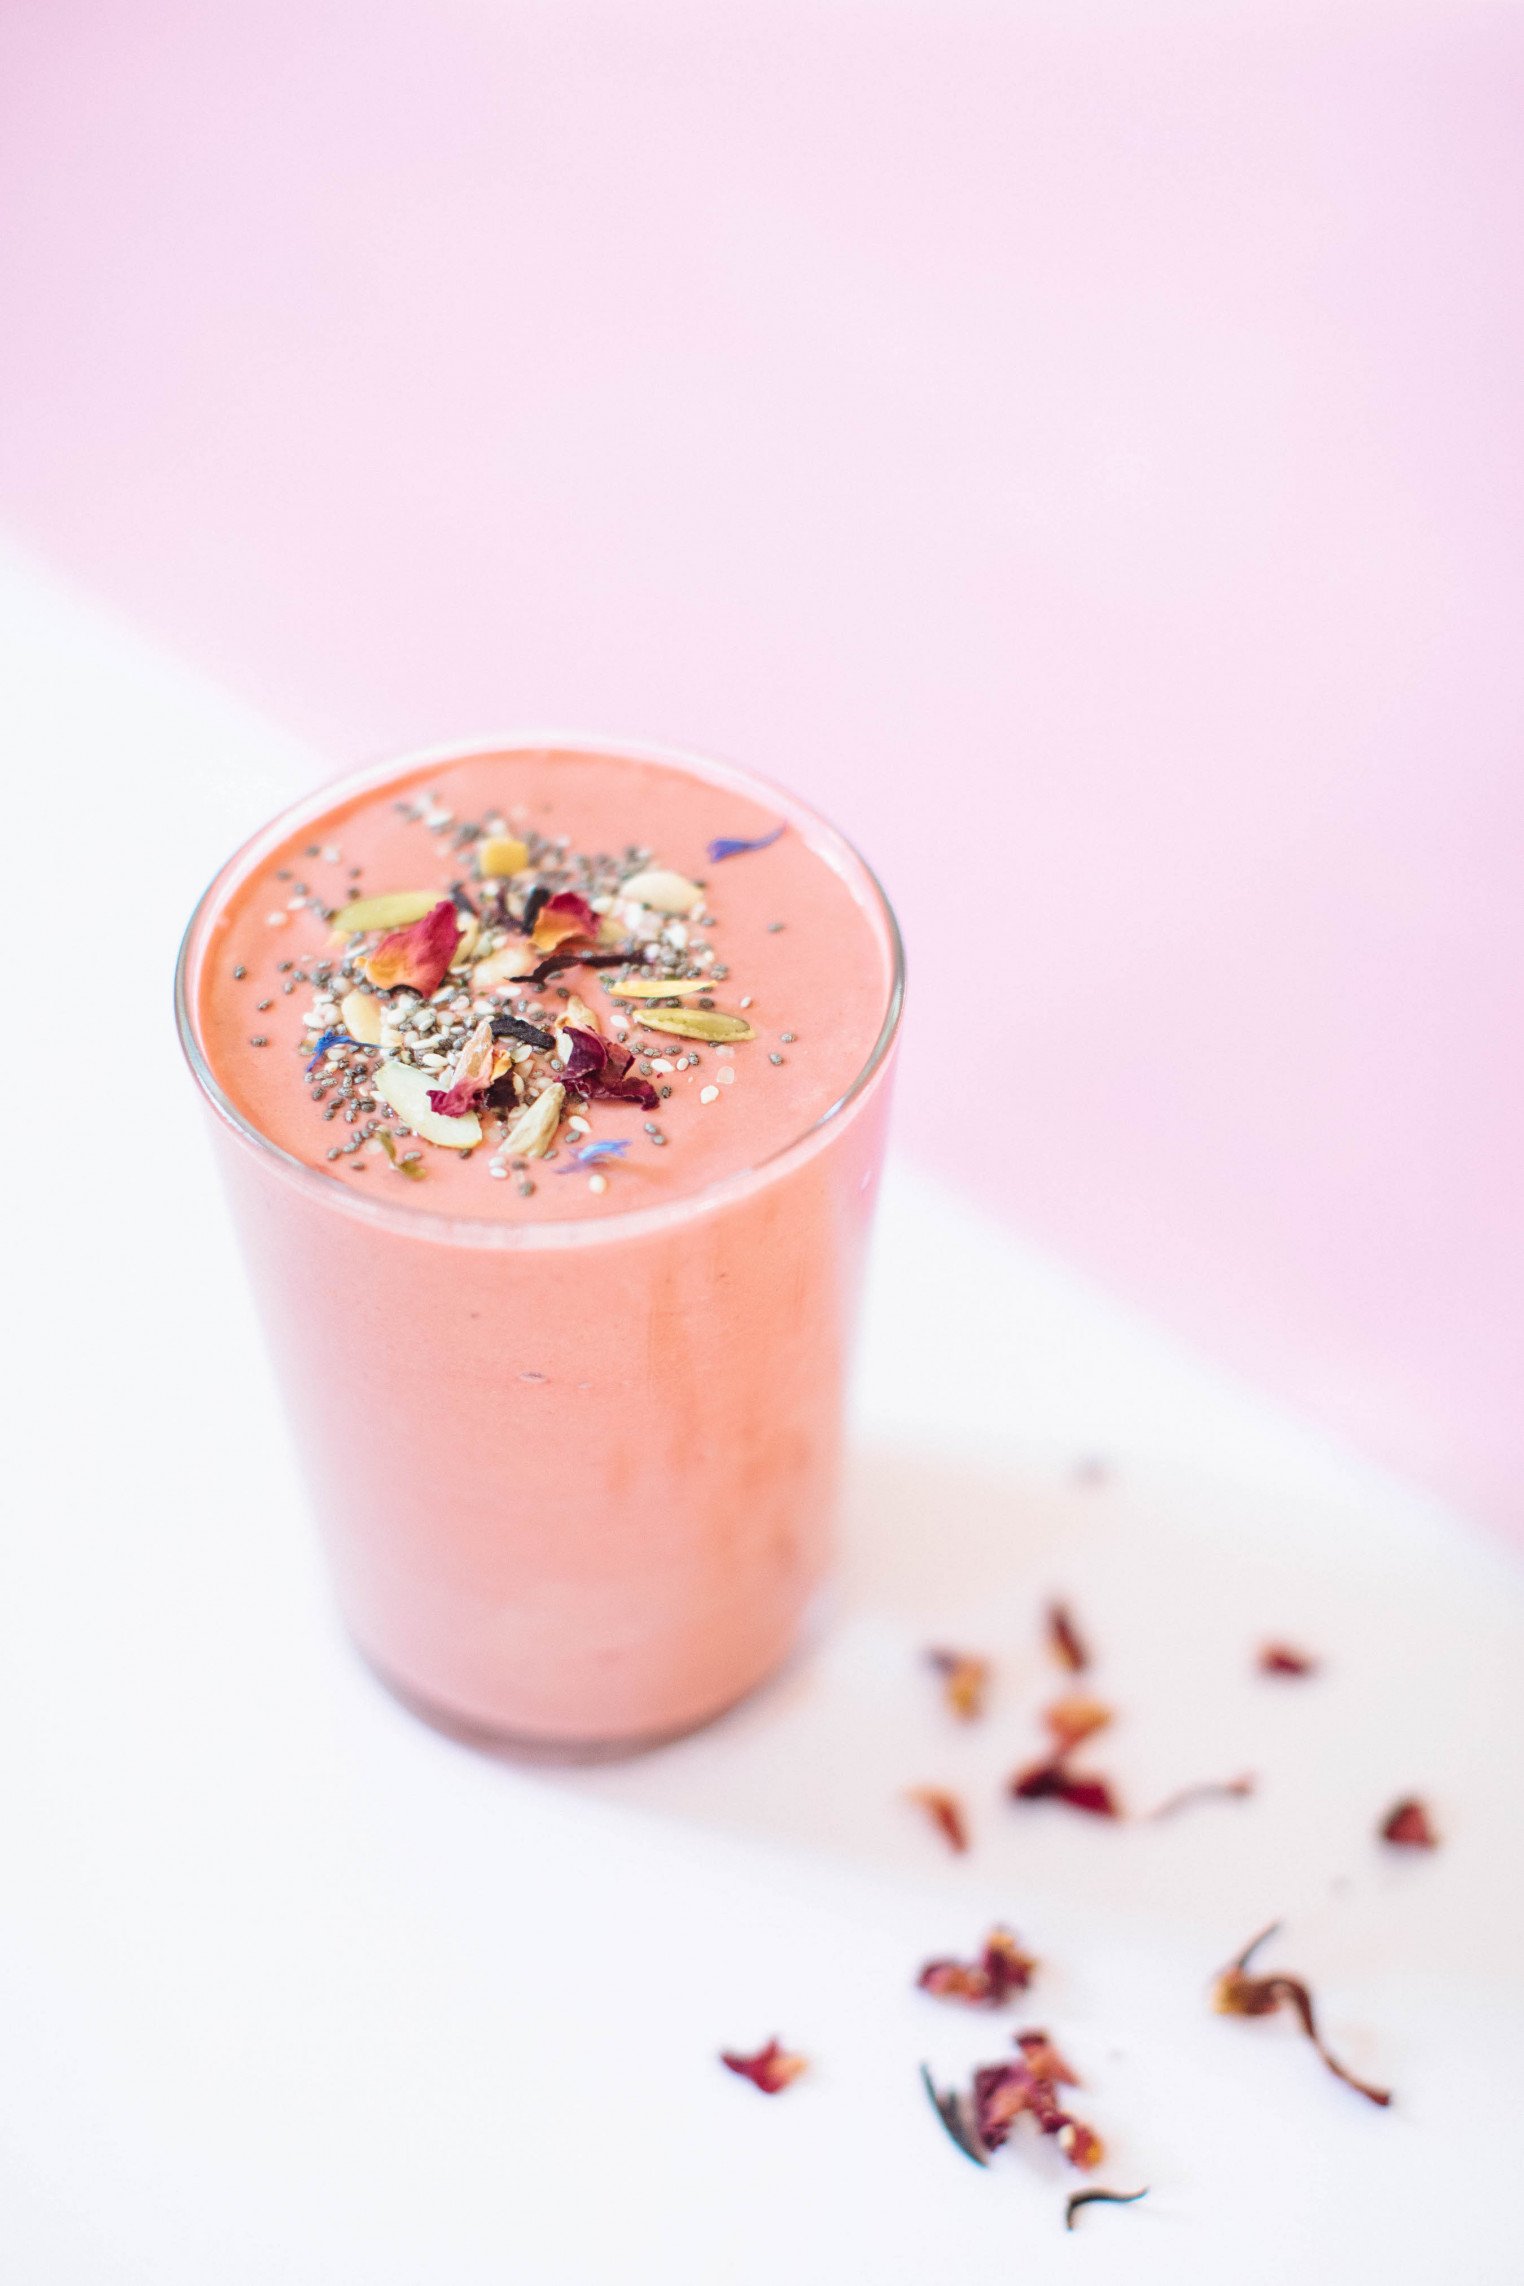
Rose & Berry Dream Smoothie

Rose & Berry Dream Smoothie

This smoothie is naturally vibrant, fragrant, and packed with nutrients.

Prep time: 5 minutes Servings: 1

Ingredients

  • 1 cup frozen strawberries or raspberries (for that beautiful pink color)

  • 1/2 frozen banana (adds creaminess)

  • 1/2 cup Greek yogurt or coconut yogurt (for texture)

  • 1/2 cup almond milk or oat milk

  • 1/2 tsp food-grade dried rose water or a pinch of ground cardamom

  • Optional: 1 tsp honey or maple syrup if you prefer extra sweetness

For the Garnish:

  • 1 tbsp chia seeds or hemp hearts

  • 1 tsp dried edible flower petals (like dried rose buds or cornflowers)


Instructions

  1. Blend: Place the frozen fruit, banana, yogurt, milk, and your chosen floral flavoring (rose water or cardamom) into a high-speed blender.

  2. Process: Blend on high until completely smooth and creamy. If the mixture is too thick, add a splash more milk until you reach your desired consistency.

  3. Pour: Pour the smoothie into a chilled glass.

  4. Decorate: Sprinkle the chia seeds and dried edible flower petals over the top to achieve that elegant look from the image. Serve immediately!

Creamy Peach Smoothie Recipe

Creamy Peach Smoothie Recipe

This recipe makes a smooth, naturally sweet drink perfect for breakfast or a snack.

Prep time: 5 minutes | Servings: 1–2


Ingredients

  • 2 cups frozen peach slices: Using frozen peaches makes the smoothie thick and cold without needing extra ice.

  • 1 cup Greek yogurt: Plain or vanilla works well; this adds protein and creaminess.

  • 1/2 cup milk of your choice: Almond, oat, soy, or dairy milk all work perfectly.

  • 1 tablespoon honey or maple syrup (optional): Adjust based on the sweetness of your peaches.

  • 1/2 teaspoon vanilla extract: For a little extra flavor depth.

  • A pinch of ground cinnamon (optional): Peaches and cinnamon are a classic pairing.


Instructions

  1. Combine: Add the milk, yogurt, frozen peaches, sweetener, and vanilla extract into your blender.

  2. Blend: Start on a low speed and gradually increase to high. Blend until the mixture is completely smooth and creamy.

  3. Adjust: If the smoothie is too thick, add a splash more milk and pulse again. If you prefer it sweeter, add a tiny bit more honey or maple syrup to taste.

  4. Serve: Pour into a glass and garnish with a fresh peach slice, just like the one in the photo!

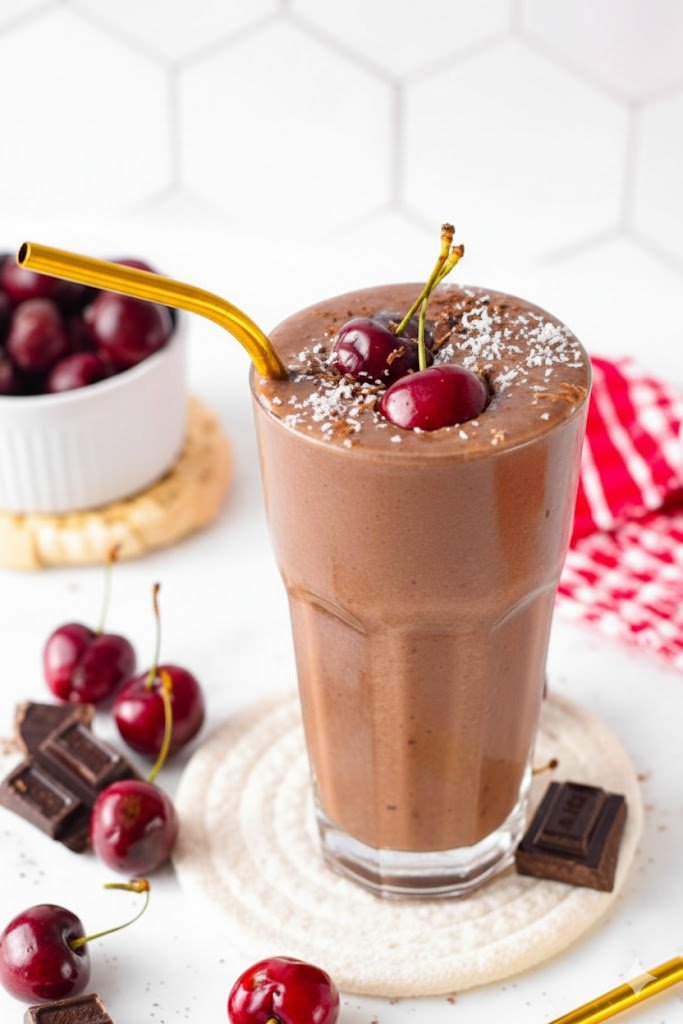
Chocolate Cherry Smoothie

Chocolate Cherry Smoothie

Ingredients:

  • 1 ½ cups frozen dark cherries (pitted)

  • 1 frozen banana (peeled before freezing for a creamier texture)

  • 1 cup unsweetened almond milk (or milk of your choice)

  • 1–2 tablespoons unsweetened cocoa powder (depending on how chocolatey you like it)

  • 1 tablespoon almond butter or peanut butter (optional, adds healthy fats and thickness)

  • A pinch of sea salt (enhances the chocolate flavor)

  • Optional: A drizzle of maple syrup or honey if you prefer it a bit sweeter.


Instructions:

  1. Combine: Add all the ingredients into your blender.

  2. Blend: Start on low speed and gradually increase to high. Blend until the mixture is completely smooth and creamy.

  3. Adjust: If the smoothie is too thick, add a splash more milk and blend again until you reach your desired consistency.

  4. Serve: Pour into a glass and top with a fresh cherry, a sprinkle of cocoa powder, or a few shaved dark chocolate chips for that extra touch shown in your photo!


Quick Tips:

  • Frozen fruit is key: Using frozen cherries and a frozen banana eliminates the need for ice, which can water down the flavor and make the texture thin.

  • Protein boost: If you’d like this to be more filling, feel free to add a scoop of your favorite chocolate or vanilla protein powder.

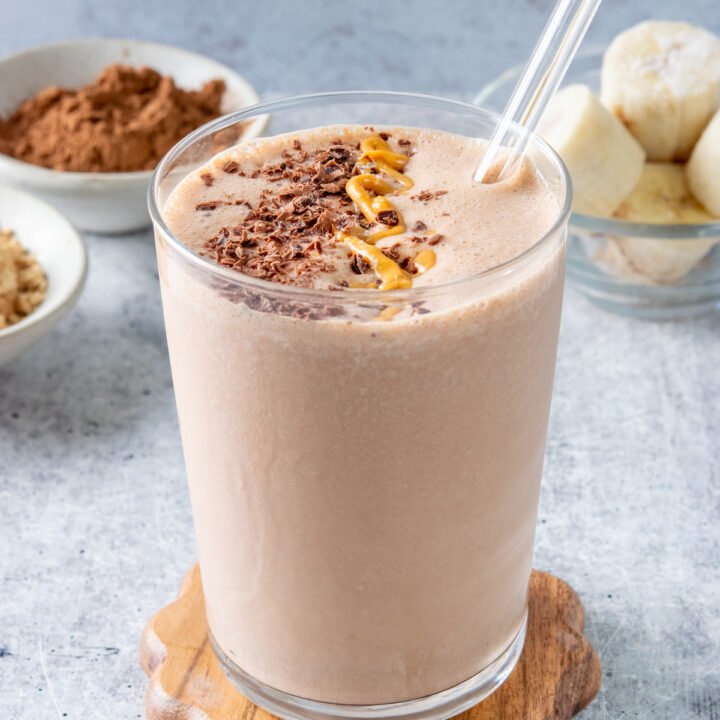
Chocolate Peanut Butter Banana Smoothie

Chocolate Peanut Butter Banana Smoothie

  • Prep time: 5 minutes

  • Servings: 1 large glass

Ingredients

  • 1 large ripe banana (frozen yields the creamiest, thickest texture)

  • 1 tablespoon peanut butter (smooth works best)

  • 1 tablespoon unsweetened cocoa powder

  • 1 cup milk of your choice (dairy, almond, oat, or soy all work well)

  • Optional: 1/2 cup ice (if using a fresh banana instead of frozen)

  • Optional: A splash of vanilla extract or a drizzle of maple syrup/honey if you prefer it sweeter.

Instructions

  1. Combine: Add the banana, peanut butter, cocoa powder, and milk into your blender.

  2. Blend: Start on a low speed and gradually increase to high. Blend until the mixture is completely smooth and creamy. If it is too thick, add a little more milk; if you want it colder or thicker, add the ice and blend again.

  3. Serve: Pour into a glass.

  4. Garnish (Optional): As shown in your photo, you can top it with a tiny drizzle of peanut butter and a sprinkle of shaved dark chocolate for that extra touch.

Sausage Gravy Puff Pie

📋 Recipe Card

Prep Time: 20 minutes
Cook Time: 30 minutes
Total Time: 50 minutes
Servings: 6
Difficulty: Easy
Tools: Skillet, 9-inch pie dish, oven

Ingredients

1 lb breakfast sausage
¼ cup flour
2 cups whole milk
1 tsp salt
½ tsp black pepper
½ tsp ground sage
½ tsp red pepper flakes (optional)
1 package puff pastry (2 sheets)

Instructions

  1. Brown sausage (7–8 min).

  2. Add flour; cook 2 min.

  3. Whisk in milk; cook until thick.

  4. Season and simmer 5 min.

  5. Line the pie dish with pastry, fill with gravy, and top with the second sheet.

  6. Bake at 375°F for 25–30 min.

  7. Rest 10 min before serving.

Nutrition (approx. per serving):
Calories: 520 | Carbs: 32g | Fat: 38g | Protein: 14g

Creamy Popover Muffins

🍽️ Recipe: Creamy Popover Muffins

Prep time: 10 minutes


Cook time: 30-35 minutes


Servings: 12 muffins


Ingredients

3 Large eggs (room temperature)


1 cup Whole milk (room temperature)


1/4 cup Heavy cream


1 ½ cups All-purpose flour


½ tsp Salt


2 tbsp Unsalted butter, melted (plus extra for greasing)


1 tsp Vanilla extract (optional for sweet versions)


Instructions

Preheat & Prep: Preheat your oven to 400°F (200°C). Heavily grease a standard muffin tin or a popover pan with butter or non-stick spray. Place the empty pan in the oven for 5 minutes to get it piping hot.


Whisk the Liquids: In a large bowl, whisk the eggs, milk, heavy cream, and melted butter until well combined and slightly frothy.


Add Dry Ingredients: Sift in the flour and salt. Whisk until the batter is mostly smooth (a few tiny lumps are fine; over-mixing will make them chewy instead of airy).


Fill the Pan: Carefully remove the hot pan from the oven. Fill each cup about 2/3 full.


The “No-Peek” Bake: Bake for 20 minutes. Then, without opening the oven door, reduce the heat to 350°F (175°C) and bake for another 10–15 minutes until deep golden brown.


Release Steam: Remove from the oven and immediately prick the side of each muffin with a toothpick or small knife. This lets steam escape and prevents them from getting soggy.


💡 Notes & Chef’s Tips

Room Temp is Key: If your eggs and milk are cold, the muffins won’t “pop.” The steam reaction requires the batter to hit the heat quickly.


The Golden Rule: Do not open the oven door during the first 20 minutes. A sudden drop in temperature will cause the muffins to collapse instantly.


Savory Swap: Omit the vanilla and add ½ cup of grated Gruyère cheese and a pinch of black pepper to the batter for a savory dinner roll version.


🥗 Nutritional Info (Per Serving)

Nutrient Amount

Calories 145 kcal

Total Fat 8g

Carbohydrates 14g

Protein 5g

Sugar 1g

✨ Benefits

Low Sugar: Unlike standard muffins, these rely on eggs and steam for volume rather than heaps of sugar and oil.


Versatile: They pair perfectly with sweet jam for breakfast or savory gravy for dinner.


Light Texture: Because they are mostly air, they feel much lighter on the stomach than dense quick breads.


❓ Common Q&A

Q: Why did my popovers deflate?


A: This usually happens if the oven door was opened too early or if you didn’t prick them to release steam immediately after baking.


Q: Can I make the batter ahead of time?


A: Yes! You can rest the batter in the fridge for up to 2 hours. Just whisk it gently before pouring into the hot pan.


Q: Do I need a special popover pan?


A: Nope. A standard muffin tin works great, though the “pop” might be slightly less dramatic than in a specialized deep-well pan.

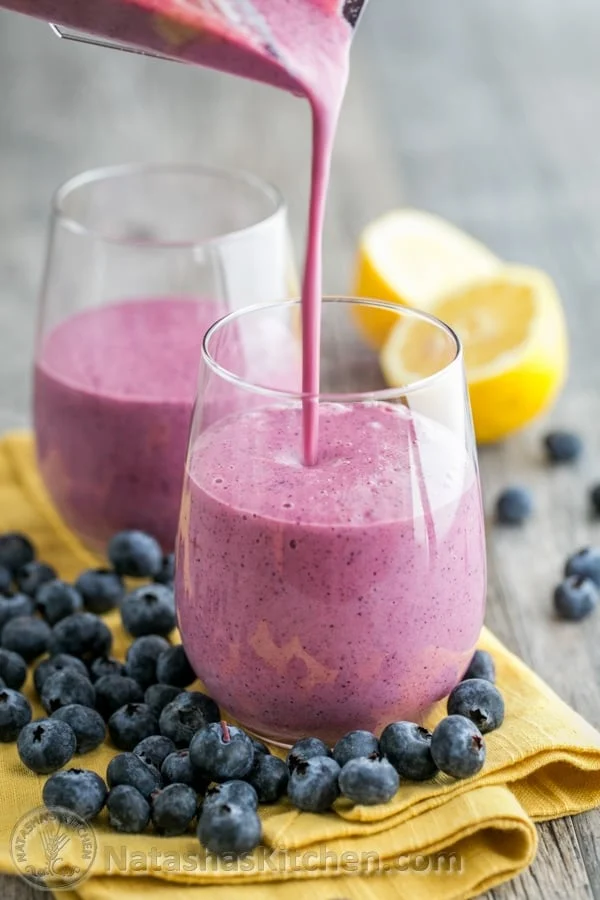
Creamy Blueberry Lemon Smoothie.

Creamy Blueberry Lemon Smoothie.

Ingredients

  • Blueberries: 1.5 cups (fresh or frozen)

  • Banana: 1 medium (frozen makes it creamier)

  • Greek Yogurt: 1/2 cup (plain or vanilla)

  • Milk of choice: 1/2 to 3/4 cup (dairy, almond, oat, etc.)

  • Lemon: 1 tablespoon of fresh juice (plus a little zest if you like extra brightness)

  • Honey or Maple Syrup: 1 teaspoon (optional, for extra sweetness)

  • Ice: A handful (if using fresh fruit rather than frozen)


Instructions

  1. Prep your fruit: If you are using fresh blueberries, wash them well. If you have fresh lemon, juice it to get that tablespoon of liquid.

  2. Combine: Place the blueberries, banana, yogurt, milk, lemon juice, and sweetener (if using) into your blender.

  3. Blend: Start on a low speed and gradually increase to high. Blend until the mixture is completely smooth and vibrant in color.

  4. Adjust: Check the consistency. If it’s too thick, add a splash more milk. If you prefer it colder or thicker, add a few ice cubes and blend again.

  5. Serve: Pour into a glass and enjoy immediately.


Tips for Success

  • Make it extra creamy: Using a frozen banana is the secret to getting that perfect milkshake-like texture without needing to add too much ice.

  • Boost the nutrition: Feel free to add a tablespoon of chia seeds, flax seeds, or a scoop of your favorite protein powder to turn this into a more filling breakfast.

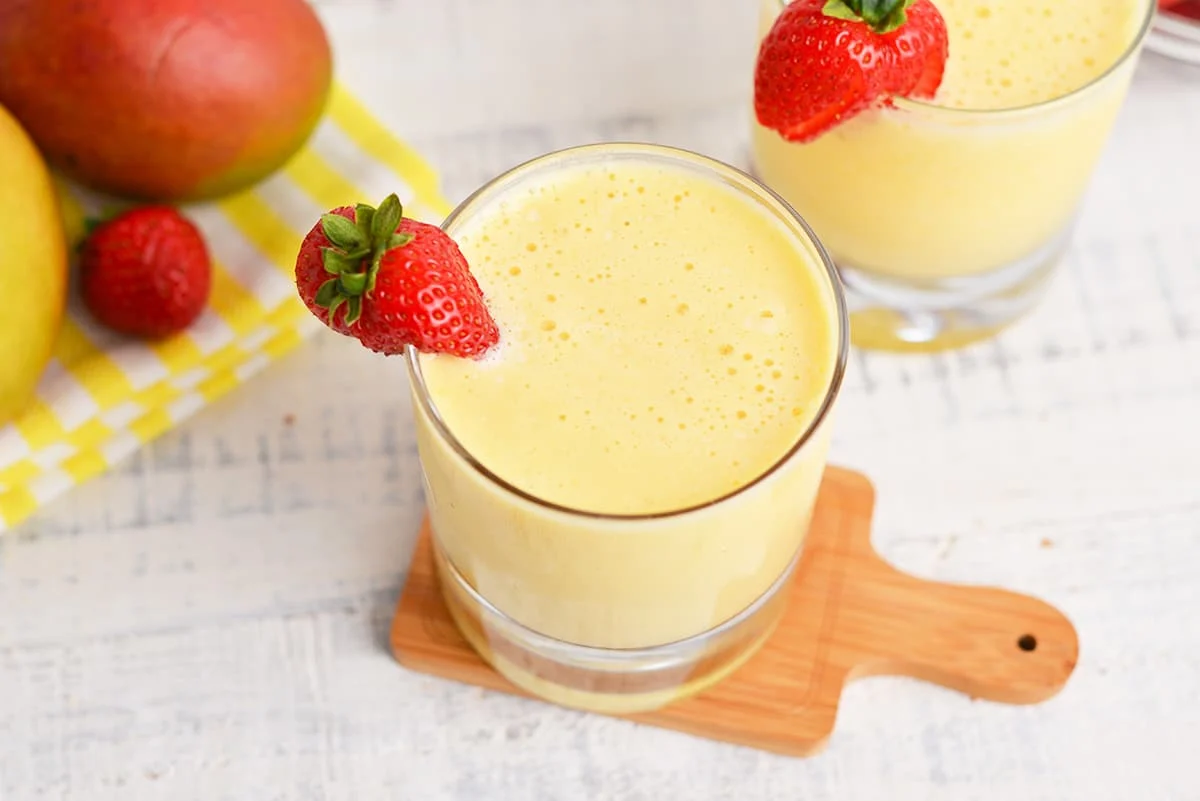
Mango Strawberry Smoothie

Mango Strawberry Smoothie

Ingredients

  • 1 cup Mango: Fresh chunks or frozen work perfectly.

  • 1/2 cup Yogurt: Greek yogurt adds a nice creaminess and protein.

  • 1/2 cup Milk of choice: Dairy, almond, oat, or coconut milk all work well.

  • 1 tablespoon Honey or Maple Syrup: (Optional, depending on how sweet your mango is).

  • Fresh Strawberries: A few for blending and extra for the garnish shown in the photo.

  • Ice: A handful, if you prefer your smoothie extra cold or thick.


Instructions

  1. Prep the Fruit: If using fresh fruit, peel and cube the mango and remove the stems from your strawberries.

  2. Combine: Place the mango, half of your strawberries, yogurt, milk, and sweetener into a blender.

    • Pro-tip: If you want the beautiful color separation sometimes seen in these recipes, you can blend the mango and yogurt base first, then stir in a strawberry puree separately, but blending everything together creates a lovely, uniform golden-yellow base.

  3. Blend: Start the blender on low and gradually increase to high until the mixture is completely smooth and creamy. If it’s too thick, add a little more milk; if it’s too thin, add a few more frozen mango chunks or ice.

  4. Garnish: Pour the smoothie into your glass. To get the look from the image, slice a small slit into the bottom of a whole strawberry and perch it right on the rim of the glass.


Tips for Success

  • Use Frozen Fruit: If you use frozen mango chunks instead of fresh, you can skip adding extra ice, which makes the smoothie much more flavorful and less watery.

  • Boost It: Feel free to add a handful of spinach (it will change the color, but you won’t taste it!) or a tablespoon of chia seeds to add a nutritional boost.

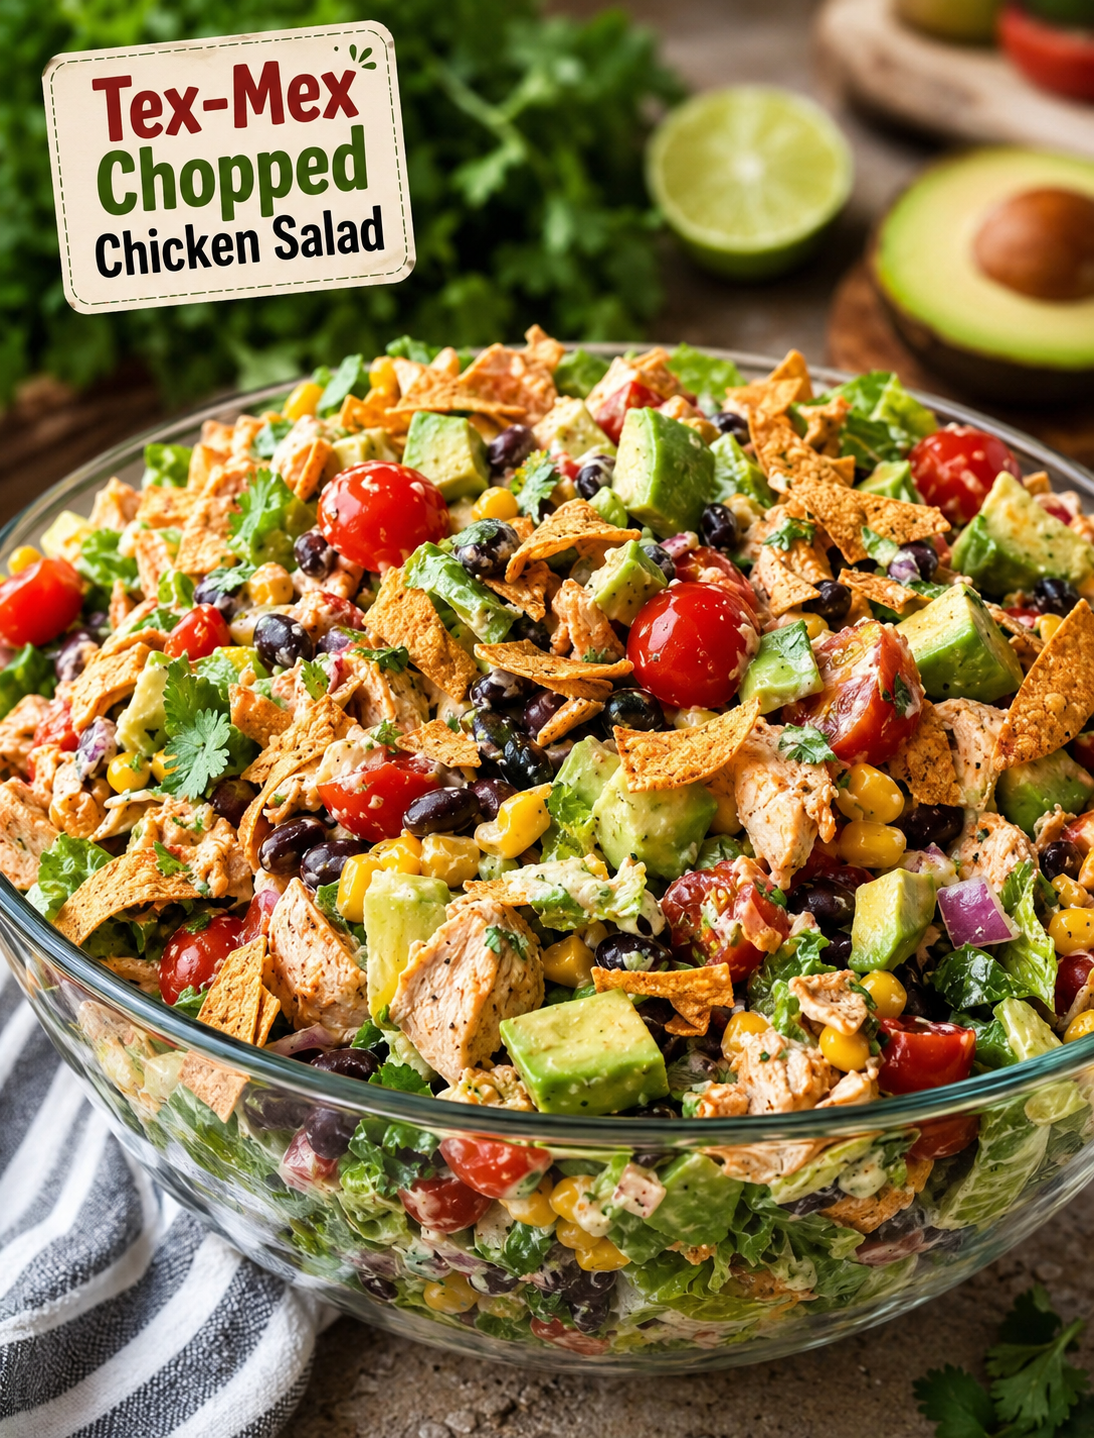
Tex-Mex Chopped Chicken Salad

Tex-Mex Chopped Chicken Salad

Tex-Mex Chopped Chicken Salad

Description

This Tex-Mex chopped chicken salad is a fresh, colourful, protein-packed meal loaded with juicy seasoned chicken, crisp lettuce, sweet corn, black beans, tomatoes, avocado, crunchy peppers, and creamy cheese. Everything is tossed together with a zesty homemade lime dressing that brings all the smoky, tangy, and fresh flavours together.

It’s hearty enough for lunch or dinner while still feeling light and refreshing. The combination of lean chicken, beans, vegetables, and avocado makes it satisfying, while the Tex-Mex seasoning gives it plenty of bold flavour.

This salad is also excellent for meal prep. Keep the dressing separate until you’re ready to eat so the vegetables stay crisp.

Recipe Details

Prep Time: 20 minutes
Cook Time: 15 minutes
Total Time: 35 minutes
Servings: 4
Course: Lunch / Dinner / Main Salad
Cuisine: Tex-Mex
Difficulty: Easy

Ingredients For:

Chicken;

  • 1½ pounds boneless, skinless chicken breasts
  • 1 tablespoon olive oil
  • 1 teaspoon chili powder
  • 1 teaspoon smoked paprika
  • ½ teaspoon ground cumin
  • ½ teaspoon garlic powder
  • ½ teaspoon onion powder
  • ½ teaspoon salt
  • ¼ teaspoon black pepper
  • ¼ teaspoon cayenne pepper, optional
  • 1 tablespoon fresh lime juice

Salad;

  • 6 cups chopped romaine lettuce
  • 1 cup cherry tomatoes, halved
  • 1 cup black beans, drained and rinsed
  • 1 cup corn, fresh, frozen, or canned
  • 1 red bell pepper, diced
  • ½ small red onion, finely diced
  • 1 avocado, diced
  • ½ cup shredded cheddar cheese
  • ¼ cup fresh cilantro, chopped
  • ¼ cup sliced jalapeños, optional
  • ¼ cup tortilla strips or crushed tortilla chips, optional

Creamy Lime Dressing;

  • ½ cup plain Greek yogurt
  • 2 tablespoons olive oil
  • 2 tablespoons fresh lime juice
  • 1 tablespoon mayonnaise, optional
  • 1 small garlic clove, minced
  • 1 teaspoon honey or maple syrup
  • ½ teaspoon chili powder
  • ¼ teaspoon ground cumin
  • ¼ teaspoon salt
  • ⅛ teaspoon black pepper
  • 1–2 tablespoons water, as needed

Instructions

1. Prepare the Chicken

Pat the chicken breasts dry with paper towels.

If the breasts are very thick, gently pound them to an even thickness. This helps them cook evenly and prevents the thinner portions from becoming dry.

Place the chicken in a bowl.

Add olive oil, chilli powder, smoked paprika, cumin, garlic powder, onion powder, salt, black pepper, cayenne pepper, and lime juice.

Rub the seasoning mixture evenly over both sides of the chicken.

Let the chicken sit for about 10 minutes while you prepare the remaining ingredients.

2. Cook the Chicken

Heat a large skillet or grill pan over medium-high heat.

Add the seasoned chicken and cook for approximately 5–7 minutes per side, depending on thickness.

The chicken should develop a beautiful golden-brown exterior.

The safest way to check doneness is with a meat thermometer. The thickest part should reach 165°F (74°C).

Remove the chicken from the skillet and let it rest for 5 minutes.

Resting allows the juices to redistribute, helping keep the chicken moist.

Once rested, chop the chicken into bite-sized pieces or slice it into strips.

3. Prepare the Vegetables

While the chicken is cooking, prepare the salad ingredients.

Chop the romaine lettuce and place it into a large salad bowl.

Add:

  • Cherry tomatoes
  • Black beans
  • Corn
  • Red bell pepper
  • Red onion
  • Avocado
  • Cheddar cheese
  • Cilantro

Add jalapeños if you enjoy extra heat.

Gently toss everything together.

4. Make the Creamy Lime Dressing

In a small bowl, whisk together the Greek yoghurt, olive oil, lime juice, mayonnaise, garlic, honey, chilli powder, cumin, salt, and black pepper.

Add water, one tablespoon at a time, until the dressing reaches your preferred consistency.

Taste and adjust For;

More tanginess, add extra lime juice.

Heat, add chilli powder or cayenne.

A slightly sweeter dressing, add another small drizzle of honey.

5. Assemble the Salad

Add the warm or cooled chopped chicken to the salad bowl.

Pour approximately half of the dressing over the salad.

Gently toss until everything is evenly coated.

Add more dressing according to your preference.

Finish with fresh cilantro and, if desired, tortilla strips or crushed tortilla chips for crunch.

Serve immediately.

Recipe Notes

Use freshly squeezed lime juice

Fresh lime juice gives the dressing a much brighter flavour than bottled lime juice.

Don’t overdress the salad

Start with half the dressing and add more as needed. This keeps the vegetables crisp and prevents the salad from becoming heavy.

Let the chicken rest

Don’t cut the chicken immediately after cooking. A five-minute resting period makes a noticeable difference in juiciness.

Add avocado last

Avocado can become mushy when aggressively tossed. Add it near the end and gently fold it through the salad.

Make it extra crunchy

Add toasted pepitas, tortilla strips, crushed tortilla chips, or roasted corn for additional texture.

Helpful Tips For;

Juicy chicken: Avoid cooking chicken breasts over excessively high heat for too long.

Extra flavour: marinate the seasoned chicken for 30 minutes before cooking.

Smoky flavour: Grill the chicken instead of pan-cooking it.

Meal prep: Store the dressing separately and add avocado just before serving.

Spicy salad: Add fresh jalapeño, cayenne, hot sauce, or chipotle powder.

For a milder version: Skip the cayenne and jalapeños.

More protein: Add extra chicken or another ½ cup of black beans.

Delicious Variations

Chipotle Chicken Salad

Add 1 teaspoon minced chipotle peppers in adobo sauce to the chicken seasoning and another small spoonful to the dressing.

Southwest Chicken Salad

Add sliced cucumber, roasted red peppers, and crunchy tortilla strips.

Fajita Chicken Salad

Cook the chicken with sliced onions and bell peppers before adding it to the salad.

Creamy Avocado Dressing

Blend half an avocado with Greek yoghurt, lime juice, cilantro, garlic, and a little water.

Vegetarian Version

Replace the chicken with extra black beans, chickpeas, grilled vegetables, or roasted sweet potatoes.

Serving Suggestions

This salad is filling enough to serve as a complete meal, but you can also pair it with:

  • Homemade tortilla chips
  • Corn on the cob
  • Black bean soup
  • Vegetable soup
  • Grilled vegetables
  • Brown rice
  • Quinoa
  • Fresh fruit
  • A small bowl of salsa and guacamole

For a lower-carbohydrate option, simply omit the corn and tortilla strips and add extra leafy greens, cucumber, peppers, or avocado.

Meal Prep Instructions

This salad is excellent for meal preparation.

Prepare the chicken and allow it to cool completely.

Divide the lettuce, tomatoes, black beans, corn, peppers, and onion among four meal-prep containers.

Store the chicken separately if possible.

Keep the dressing in small airtight containers.

Add avocado and dressing immediately before eating.

The prepared components will generally keep well in the refrigerator for 3–4 days, provided they are stored properly.

Storage

Store leftover dressed salad in the refrigerator and consume as soon as possible because the lettuce and avocado will soften.

For the best results, store the components separately.

Cooked chicken: Refrigerate for up to 3–4 days.

Prepared dressing: Refrigerate for up to 4–5 days.

Undressed salad vegetables: Generally best within 2–3 days for maximum freshness.

Nutritional Information

Approximate nutrition per serving, based on 4 servings:

  • Calories: 520
  • Protein: 47 g
  • Carbohydrates: 36 g
  • Fat: 23 g
  • Fiber: 10 g
  • Sugar: 7 g
  • Sodium: Approximately 700 mg
  • Calcium: Approximately 260 mg
  • Iron: Approximately 4 mg

Nutrition will vary depending on the specific chicken size, cheese, dressing ingredients, and toppings used.

Benefits of Tex-Mex Chopped Chicken Salad

High in Protein

Chicken, Greek yoghurt, beans, and cheese provide protein that helps make this salad satisfying and filling.

Rich in Fiber

Black beans, vegetables, avocado, and lettuce contribute dietary fibre, which supports digestive health and can help promote fullness.

Healthy Fats

Avocado and olive oil provide predominantly unsaturated fats.

Plenty of Vegetables

The combination of lettuce, tomatoes, peppers, onion, corn, and cilantro provides a colourful variety of plant foods.

Vitamin-Rich

The vegetables and avocado provide several vitamins and minerals, including vitamin C, vitamin K, folate, and potassium.

Balanced Meal

The salad combines protein, fibre-rich carbohydrates, vegetables, and healthy fats, making it a well-rounded lunch or dinner.

Frequently Asked Questions

Can I use chicken thighs instead of chicken breast?

Absolutely. Boneless, skinless chicken thighs work beautifully and tend to be especially juicy. Adjust the cooking time according to their size and thickness.

Can I use rotisserie chicken?

Yes. Rotisserie chicken makes this recipe incredibly quick. Simply shred or chop approximately 3–4 cups of cooked chicken and toss it with a little of the Tex-Mex seasoning.

Can I make the dressing without mayonnaise?

Yes. Simply omit the mayonnaise and add another tablespoon of Greek yoghurt or olive oil.

Can I use sour cream instead of Greek yoghurt?

Yes. Sour cream works well and produces a richer, creamier dressing.

Can I make this salad dairy-free?

Yes. Use dairy-free yoghurt and omit the cheese or replace it with a dairy-free alternative.

Can I make it gluten-free?

Yes. The basic ingredients are naturally gluten-free. If using tortilla strips or packaged seasonings, check the labels to ensure they are certified gluten-free if needed.

Can I use canned corn?

Yes. Drain it well before adding it to the salad.

Should I rinse canned black beans?

Yes. Drain and rinse canned black beans under cool running water before using them.

Can I make the salad ahead of time?

Yes, but keep the dressing, avocado, and crunchy toppings separate until you’re ready to eat.

How can I make it spicier?

Add diced jalapeños, cayenne pepper, chipotle powder, hot sauce, or a little chopped chipotle in adobo.

What if I don’t like cilantro?

Simply leave it out or replace it with fresh parsley.

Can I serve this warm?

Definitely. Warm freshly cooked chicken over the cool, crisp vegetables creates a delicious contrast.

 A Little Recipe Love

If you love getting delicious, easy recipes like this one, please like, comment, save, and share this recipe with someone who would enjoy it! Your support means so much and helps me keep bringing you more tasty recipes. Must express something to keep getting my recipes — thank you! ❤️🥰

Final Thoughts

This Tex-Mex Chopped Chicken Salad is the kind of meal that makes healthy eating feel anything but boring. Juicy seasoned chicken, creamy avocado, sweet corn, hearty black beans, crisp vegetables, cheddar cheese, and a zesty creamy lime dressing come together in every colourful bite.
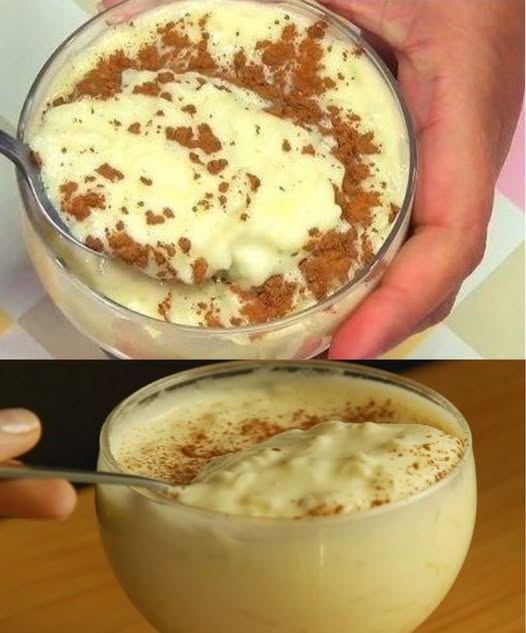

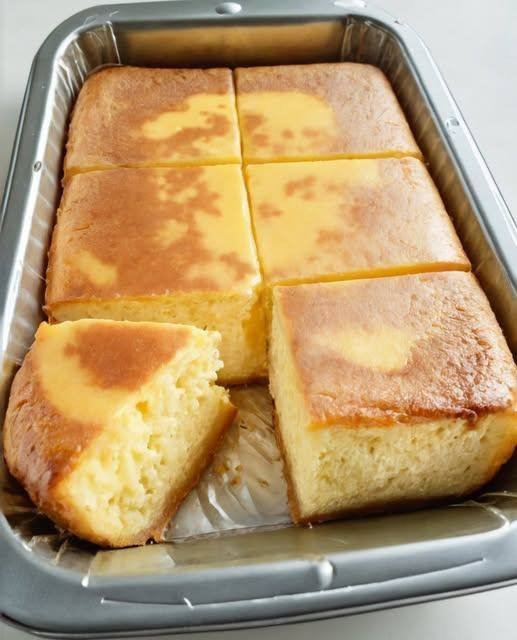
Mediterranean Super-Easy Rice Cake (Milk Custard Cake)

Mediterranean Super-Easy Rice Cake
(Milk Custard Cake)

Soft • Creamy • Naturally Fragrant

This classic Mediterranean-style dessert uses simple pantry ingredients and bakes into a custardy, melt-in-the-mouth cake—no flour, no fuss.

🛒 Ingredients (6–8 servings)

1 cup short-grain rice (or arborio)

4 cups whole milk

¾ cup sugar (adjust to taste)

2 eggs

1 tsp vanilla extract

1 strip lemon peel (or orange peel)

½ tsp cinnamon (plus extra for topping)

Pinch of salt

1 tbsp butter (for greasing)

Optional Mediterranean touches

2 tbsp raisins

1 tbsp orange blossom water or rose water

Slivered almonds or pistachios for topping

👩‍🍳 Instructions

Cook the rice
In a saucepan, combine rice, milk, lemon peel, and salt.
Simmer on low heat, stirring often, for 25–30 minutes until rice is very soft and mixture is thick and creamy.
Remove lemon peel and let cool slightly.

Sweeten & flavor
Stir sugar, vanilla, and cinnamon into the warm rice mixture.

Add eggs
Beat eggs in a bowl. Slowly whisk a few spoonfuls of the warm rice mixture into the eggs (to temper), then stir everything back into the pot.
Mix until smooth. Add orange blossom water or raisins if using.

Bake
Preheat oven to 180°C / 350°F.
Butter a baking dish or cake pan. Pour in the mixture and smooth the top.
Bake for 30–35 minutes, until set with a slight jiggle in the center.

Cool & finish
Let cool completely—it will firm up as it sets.
Dust with cinnamon and top with nuts if desired.

🍽️ Serving Ideas

Serve chilled or at room temperature

Drizzle with honey

Pair with fresh figs, berries, or citrus slices

Enjoy with coffee or mint tea ☕🌿

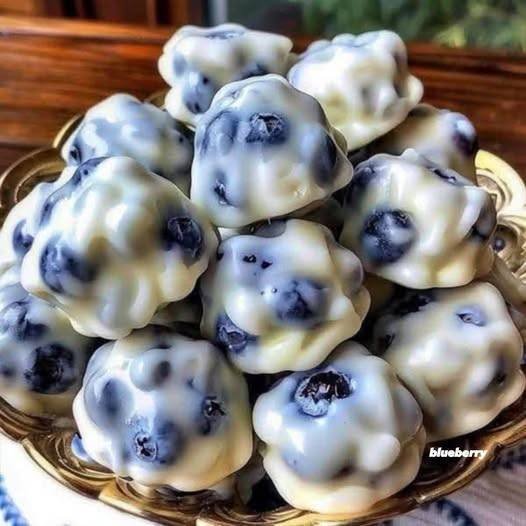
Mediterranean Moonlight Blueberry Clusters

Mediterranean Moonlight Blueberry Clusters

A naturally sweet, antioxidant-rich treat inspired by Mediterranean flavors

🧺 Ingredients

2 cups fresh blueberries (washed & fully dried)

¾ cup Greek yogurt (plain, thick)

1 tbsp honey or date syrup

½ tsp vanilla extract

Zest of ½ lemon

¼ tsp ground cinnamon (optional)

¼ cup chopped pistachios or almonds

Pinch of sea salt

Optional chocolate drizzle

¼ cup dark chocolate (70% cacao), melted

👩‍🍳 Instructions

1️⃣ Prepare the yogurt base
In a bowl, mix Greek yogurt, honey, vanilla, lemon zest, cinnamon, and sea salt until smooth.

2️⃣ Coat the blueberries
Gently fold blueberries into the yogurt mixture until evenly coated.

3️⃣ Form the clusters
Line a tray with parchment paper. Spoon small clusters (1–2 tbsp each) onto the tray.

4️⃣ Add crunch
Sprinkle chopped pistachios or almonds over each cluster.

5️⃣ Freeze
Freeze for 1½–2 hours until firm.

6️⃣ Finish (optional)
Drizzle with melted dark chocolate and return to freezer for 10 minutes to set.

🌟 Serving & Storage Tips

Serve straight from the freezer for a refreshing bite

Store in an airtight container for up to 2 weeks

Perfect as a heart-healthy dessert or snack

💙 Why You’ll Love It

No baking required

Naturally sweetened

Mediterranean diet–friendly

Rich in antioxidants & healthy fats

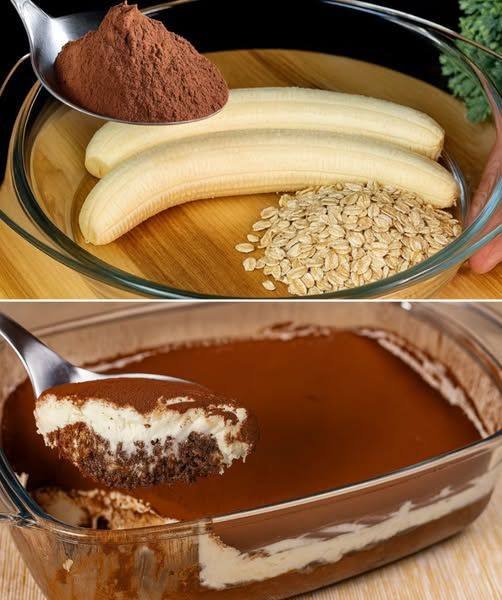
Tiramisu Oats (Sugar-Free)

Tiramisu Oats (Sugar-Free)

A creamy, coffee-kissed breakfast that tastes like dessert but keeps things healthy and naturally sweet.

Serves 1

Ingredients

½ cup rolled oats
½ cup unsweetened almond milk (or any milk of choice)
¼ cup strong brewed coffee or espresso, cooled
¼ cup plain Greek yogurt or mascarpone-style yogurt (unsweetened)
1 to 2 teaspoons sugar-free sweetener (stevia, monk fruit, or erythritol, to taste)
½ teaspoon vanilla extract
¼ teaspoon cocoa powder, plus extra for dusting
Pinch of salt

Optional toppings
Dark chocolate shavings (sugar-free)
Cocoa nibs
A light dusting of cocoa powder

Instructions

1. In a jar or bowl, combine the oats, almond milk, brewed coffee, sweetener, vanilla extract, cocoa powder, and salt. Stir well until fully mixed.

2. Cover and refrigerate for at least 4 hours or overnight, allowing the oats to soften and absorb the flavors.

3. Once chilled, gently fold in the Greek yogurt to create a creamy, tiramisu-like texture.

4. Serve cold, dusted with extra cocoa powder on top. Add optional sugar-free chocolate shavings or cocoa nibs if desired.

Tips

For extra creaminess, use full-fat Greek yogurt.
If you prefer warm oats, heat gently after soaking, then add yogurt once slightly cooled.
Adjust coffee strength based on how strong you like the tiramisu flavor.

Healthy, indulgent, and perfect for a dessert-style breakfast without added sugar.

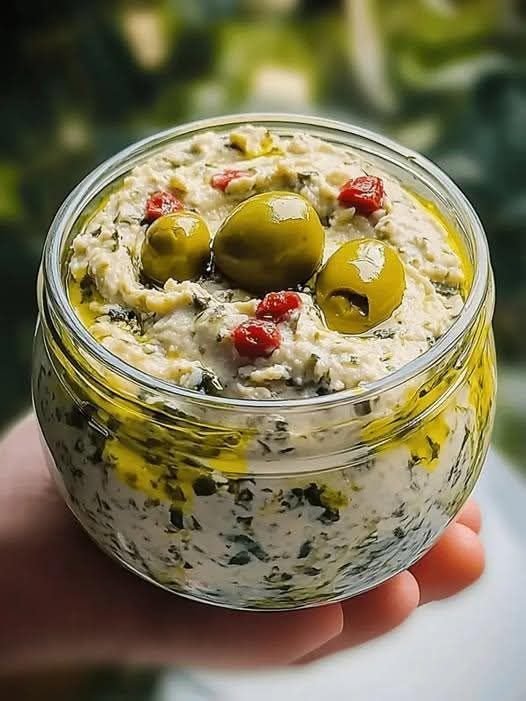
Olive Lovers’ Dream Dip

Olive Lovers’ Dream Dip
Creamy, zesty, and simply irresistible

Serves
6–8

Prep time
10 minutes
Chill time (optional)
20–30 minutes

Ingredients

1 cup pitted mixed olives (green, Kalamata, black), finely chopped
¾ cup cream cheese, softened
½ cup Greek yogurt or labneh
2 tablespoons extra virgin olive oil
1 tablespoon fresh lemon juice
1 small garlic clove, minced
2 tablespoons fresh parsley, finely chopped
1 tablespoon fresh dill or oregano, finely chopped (optional)
¼ teaspoon black pepper
Pinch of chili flakes (optional)

Instructions

1. In a bowl, mix the cream cheese and Greek yogurt until smooth and creamy.
2. Stir in olive oil, lemon juice, and minced garlic until well combined.
3. Add chopped olives, parsley, dill or oregano, black pepper, and chili flakes if using.
4. Mix gently until evenly distributed.
5. Taste and adjust lemon, salt (usually not needed due to olives), or spice.
6. Chill for 20–30 minutes for best flavor, or serve immediately.

Serving suggestions

Serve with warm pita bread, whole wheat crackers, sliced cucumbers, cherry tomatoes, or as a spread for wraps and sandwiches.

Storage

Store in an airtight container in the refrigerator for up to 3 days.

Mediterranean tip

For extra richness, drizzle a little olive oil on top and garnish with chopped olives and herbs before serving.

Grilled Parmesan Chicken Minis

Grilled Parmesan Chicken Minis

These are juicy, cheesy, and perfect as an appetizer, meal prep protein, or quick dinner 🍗🧀

Ingredients
• 1 lb chicken breast, cut into bite-sized pieces
• 1/3 cup grated Parmesan cheese
• 2 tablespoons olive oil
• 1 teaspoon garlic powder
• 1 teaspoon onion powder
• 1 teaspoon Italian seasoning
• 1/2 teaspoon paprika
• Salt and black pepper, to taste
• Optional garnish: fresh parsley or extra Parmesan

Instructions

In a large bowl, add olive oil, Parmesan cheese, garlic powder, onion powder, Italian seasoning, paprika, salt, and pepper. Mix well.

Add the chicken pieces and toss until fully coated with the Parmesan mixture. Let marinate for 10–15 minutes if you have time (optional but recommended).

Preheat grill pan or outdoor grill to medium-high heat. Lightly oil the grates.

Place chicken pieces on the grill in a single layer.

Grill for 3–4 minutes per side, turning once, until golden, lightly crispy, and cooked through (internal temp 165°F / 74°C).

Remove from grill and let rest for 2 minutes.

Garnish with fresh parsley or extra Parmesan if desired.

Serving Ideas
• Serve with garlic yogurt dip, ranch, or marinara
• Pair with salad, roasted veggies, or low-carb sides
• Great for meal prep bowls or wraps

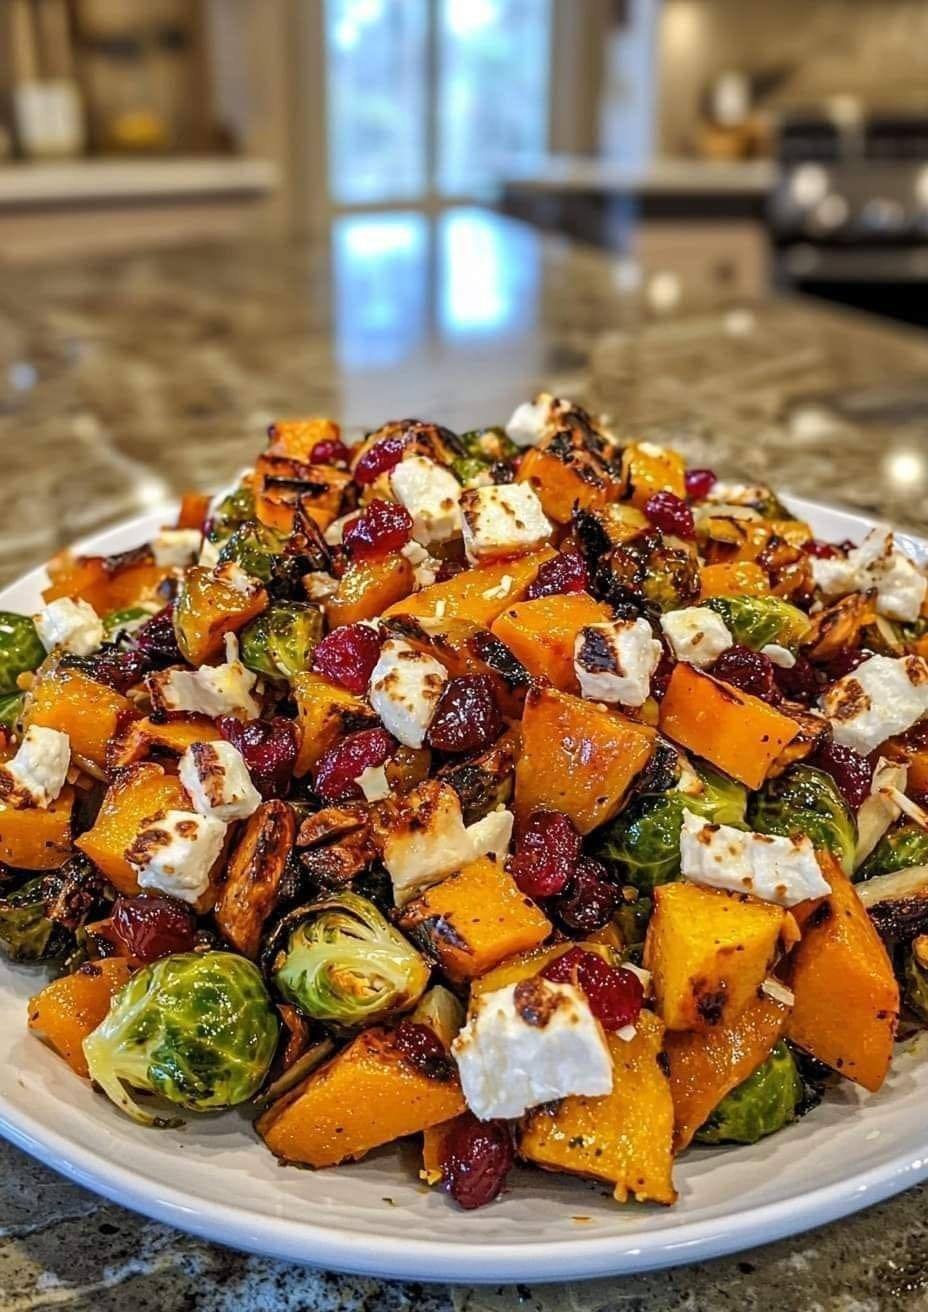
Cranberry-Glazed Roasted Butternut Squash, Brussels Sprouts, and Sweet Potato Salad

Cranberry-Glazed Roasted Butternut Squash, Brussels Sprouts, and Sweet Potato Salad
with Cranberries and Goat Cheese
full recipe 🍠🥬🧀

Ingredients

For the roasted vegetables
• 2 cups butternut squash, peeled and cubed
• 2 cups Brussels sprouts, halved
• 1 large sweet potato, peeled and cubed
• 3 tbsp olive oil
• ½ tsp salt
• ½ tsp black pepper
• ½ tsp dried thyme or rosemary

For the cranberry glaze
• ⅓ cup cranberry sauce (whole berry or jellied)
• 2 tbsp olive oil
• 1 tbsp balsamic vinegar or apple cider vinegar
• 1 tbsp maple syrup or honey
• ¼ tsp cinnamon (optional)

For the salad
• ½ cup dried cranberries
• ⅓ cup crumbled goat cheese
• ¼ cup toasted pecans or walnuts (optional)
• Optional greens: baby spinach, arugula, or mixed greens

Instructions

Preheat oven to 400°F (200°C). Line a large baking sheet with parchment paper.

In a large bowl, toss butternut squash, Brussels sprouts, and sweet potato with olive oil, salt, pepper, and dried herbs.

Spread vegetables in a single layer on the baking sheet. Roast for 30–35 minutes, flipping halfway, until tender and caramelized.

While vegetables roast, whisk together cranberry sauce, olive oil, balsamic vinegar, maple syrup or honey, and cinnamon until smooth.

Remove roasted vegetables from the oven and drizzle with cranberry glaze while still warm. Toss gently to coat.

Let vegetables cool slightly.

Assemble salad: place greens (if using) on a platter, top with roasted glazed vegetables, dried cranberries, goat cheese, and toasted nuts.

Serve warm or at room temperature.

Serving ideas
• Perfect holiday or fall-inspired salad
• Great side dish for roasted chicken, turkey, or salmon
• Can be served as a vegetarian main with crusty bread

Tips
• For extra tang, add a splash of fresh lemon juice
• For vegan version, omit goat cheese or use dairy-free cheese
• Stores well in the fridge for up to 3 days

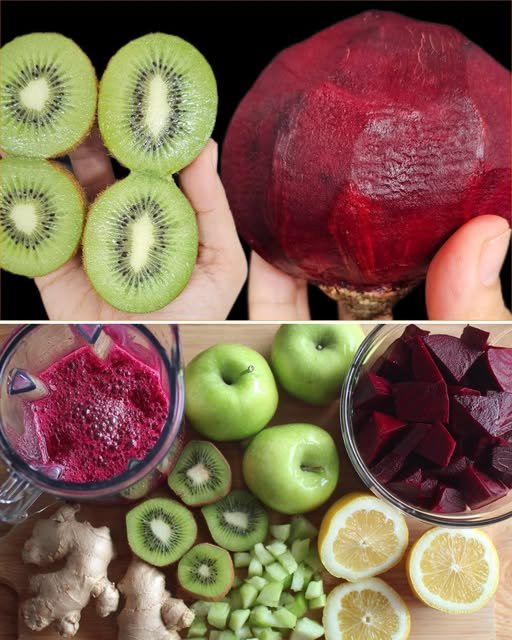
Natural Bomb: Detox Your Liver

Natural Bomb: Detox Your Liver


Easy Homemade Detox Your Liver Recipe with Beetroot and Fruits


Are you looking for a delicious way to help detox your liver? This easy homemade detox your liver recipe features a vibrant blend of fresh fruits and vegetables, making it both tasty and nutritious. The earthy sweetness of beetroot pairs perfectly with the tangy citrus and the bright flavors of apple and kiwi. Each sip is refreshing and revitalizing, ideal for anyone wanting to boost their wellness routine with a natural drink.


Prep Time: 10 minutes
Cook Time: 0 minutes
Total Time: 10 minutes
Servings: 2
Estimated Calories: 150 per serving


Ingredients

  • 1 medium raw beetroot, peeled and chopped (≈ 150 g / 5 oz)
  • 1 green apple, cored and chopped (≈ 150 g / 5 oz)
  • 2 kiwis, peeled and chopped (≈ 150 g / 5 oz total)
  • 1 lemon, juiced (≈ 30 ml / 2 tbsp)
  • 1 orange, peeled and segmented (≈ 180 g / 6 oz)
  • 10–15 g fresh ginger, peeled and chopped (≈ 1 tbsp)
  • 700 ml water (≈ 3 cups)

Instructions

  1. Peel and chop the beetroot into small cubes.
  2. Core and chop the green apple.
  3. Peel and chop the kiwis.
  4. Peel the orange and separate it into segments.
  5. Peel and finely chop the ginger.
  6. Juice the lemon.
  7. Place all prepared fruits, beetroot, ginger, and lemon juice into a blender.
  8. Add the water.
  9. Blend on high speed until completely smooth and evenly combined.
  10. Pour into a glass and consume fresh immediately.

Why This Recipe is Popular

People love this detox your liver recipe because it’s a simple, wholesome drink that’s packed with nutrients. Beetroot is known for its liver-cleansing properties, and the colorful combination of fruits makes it not just healthy but also enjoyable to drink. It’s a great recipe to whip up in spring or summer when fresh ingredients are in abundance.

Serving Suggestions

Enjoy this detox drink first thing in the morning for a refreshing start to your day. It also pairs wonderfully with a light breakfast, such as oatmeal or toast with avocado. For an afternoon pick-me-up, it’s perfect on its own or alongside a healthy snack.

Tips and Variations

  • Storage: Consume the drink immediately for the best flavor and nutritional value, but you can keep it in the fridge for up to 24 hours in an airtight container.
  • Texture: For a thicker consistency, you can add a small banana or some yogurt before blending.
  • Flavor Ideas: Experiment with adding a handful of spinach or kale for more greens, or a tablespoon of honey for added sweetness.
  • Simple Swaps: If you don’t have beetroot, carrots can be used for a different flavor profile.
  • Extra Kick: Add a pinch of cayenne pepper to give it a spicy twist!

FAQs

1. How often should I drink this detox recipe?
It’s best enjoyed 1-2 times a week to support your liver health naturally.

2. Can I use frozen fruits for this recipe?
Yes, frozen fruits can be used, but they may change the texture slightly.

3. What’s the best way to peel beetroot?
You can use a peeler or a sharp knife. Wearing gloves can prevent your hands from staining.

4. Can I adjust the sweetness of the drink?
Absolutely! If you prefer a sweeter taste, add more apple or a touch of honey.


Give this easy homemade detox your liver recipe a try! It’s a wonderful way to boost your health with deliciousness. You’ll love how refreshing and nourishing it is—it’s the perfect addition to your wellness routine. Enjoy every sip!


Ingredients

Fruits and Vegetables
  • 1 medium raw beetroot, peeled and chopped ≈ 150 g / 5 oz
  • 1 green apple cored and chopped ≈ 150 g / 5 oz
  • 2 kiwis peeled and chopped ≈ 150 g / 5 oz total
  • 1 lemon juiced ≈ 30 ml / 2 tbsp
  • 1 medium orange, peeled and segmented ≈ 180 g / 6 oz
  • 10–15 g fresh ginger, peeled and chopped ≈ 1 tbsp
  • 700 ml water ≈ 3 cups

Method

Preparation
  1. Peel and chop the beetroot into small cubes.
  2. Core and chop the green apple.
  3. Peel and chop the kiwis.
  4. Peel the orange and separate it into segments.
  5. Peel and finely chop the ginger.
  6. Juice the lemon.
Blending
  1. Place all prepared fruits, beetroot, ginger, and lemon juice into a blender.
  2. Add the water.
  3. Blend on high speed until completely smooth and evenly combined.
  4. Pour into a glass and consume fresh immediately.

Notes

Consume the drink immediately for the best flavor and nutritional value, but you can keep it in the fridge for up to 24 hours in an airtight container. For a thicker consistency, add a small banana or some yogurt before blending. Experiment with adding spinach or kale for more greens, or a tablespoon of honey for added sweetness. If you don’t have beetroot, carrots can be used for a different flavor profile. Add a pinch of cayenne pepper for a spicy twist!

Soft & Creamy Coconut Delight Cake

🥥 Soft & Creamy Coconut Delight Cake

🛒 Ingredients

1️⃣ Base Layer

  • 2 cups crushed digestive biscuits or graham crackers
  • ½ cup melted butter
  • 2 tbsp sugar

2️⃣ Cream Filling Layer

  • 1 cup heavy whipping cream (cold)
  • 1 packet (200g) cream cheese (room temperature)
  • ½ cup powdered sugar
  • 1 tsp vanilla essence

3️⃣ Coconut Cream Layer

  • 1 cup milk
  • 1 cup heavy cream
  • 3 tbsp cornflour
  • ½ cup sugar
  • 1 cup desiccated coconut

4️⃣ Topping

  • 1 to 1½ cups coconut flakes (for coating outside)

👩‍🍳 Step-by-Step Method

🔹 Step 1: Prepare the Base

  1. Crush biscuits into fine crumbs.
  2. Add melted butter and sugar.
  3. Mix until it looks like wet sand.
  4. Press firmly into a square or rectangular dish.
  5. Refrigerate for 20–30 minutes to set.

🔹 Step 2: Make Cream Filling

  1. Beat heavy whipping cream until soft peaks form.
  2. In another bowl, beat cream cheese until smooth.
  3. Add powdered sugar and vanilla.
  4. Gently fold whipped cream into cream cheese mixture.
  5. Spread this evenly over the chilled biscuit base.
  6. Refrigerate again for 20 minutes.

🔹 Step 3: Prepare Coconut Cream Layer

  1. In a saucepan add milk, cream, sugar and cornflour.
  2. Cook on medium heat while stirring continuously.
  3. When it thickens (like custard), add desiccated coconut.
  4. Cook 1–2 more minutes.
  5. Let it cool slightly (not fully cold).
  6. Spread gently over the cream layer.

🔹 Step 4: Final Coconut Coating

  1. Once slightly set, sprinkle coconut flakes generously on top.
  2. Gently press coconut on the sides as well (like in the picture).

🔹 Step 5: Chill & Serve

  • Refrigerate at least 4–6 hours (overnight is best).
  • Cut into square pieces.
  • Serve chilled for that soft, melt-in-mouth texture.

💡 Tips for Perfect Texture

✔ Use cold whipping cream

✔ Chill properly before cutting

✔ Toast coconut lightly if you want extra flavor

✔ For extra richness, add condensed milk (2–3 tbsp) in cream layer

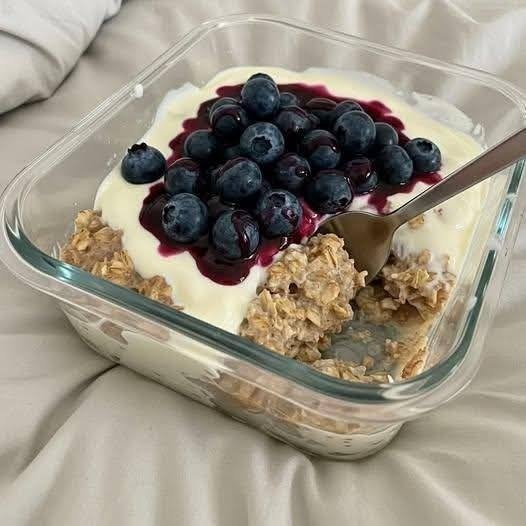
Creamy High-Protein “Overnight Oats” – Low-Carb & WW-Friendly

Quick Description: A creamy, protein-packed breakfast that’s ready in the morning – indulgent, low-carb, and friendly for Weight Watchers.

Servings & Timing:

  • Prep time: 10 minutes
  • Chill time: 4–8 hours (or overnight)
  • Total time: 4–8 hours 10 minutes
  • Servings: 1 large or 2 small

Dietary Badges: Low-Carb, High-Protein, WW-Friendly, Vegetarian

image 370 High Protein Recipe, Recipe, WW Recipes

Ingredients

Base Layer

  • ½ cup old-fashioned rolled oats
  • ½ cup unsweetened almond milk
  • ½ cup nonfat plain Greek yogurt
  • ½ scoop vanilla protein powder (casein or whey blend preferred)
  • ½ tsp vanilla extract
  • Sweetener to taste (monk fruit, stevia, or erythritol)
  • ¼ tsp cinnamon

Creamy Top Layer

  • ½ cup nonfat Greek yogurt
  • Sweetener to taste
  • Splash of vanilla extract

Blueberry Topping

  • ⅓ cup blueberries (fresh or frozen; optional microwave 20–30 sec to release juices)

Additional Notes:

  • Adjust sweetener according to your taste preference.
  • Can be split into 2 smaller servings for portion control or meal prep.
  • Naturally high in protein and fiber, keeping you full longer.

Instructions

  1. Make the Base
    • In a mixing bowl, combine oats, almond milk, Greek yogurt, protein powder, vanilla extract, cinnamon, and sweetener.
    • Stir until thick and creamy. The mixture should not be watery.
  2. Layer
    • Transfer the oat mixture evenly into a glass container. Smooth down gently.
    • In a small bowl, mix the Greek yogurt with sweetener and a splash of vanilla. Spread a thick layer over the oat base.
  3. Top with Blueberries
    • Spoon blueberries over the yogurt layer. Drizzle any released juices over the top to enhance flavor and presentation.
  4. Chill
    • Cover and refrigerate for at least 4 hours or overnight.
    • For best creaminess, let sit at room temperature for 5 minutes before serving.
image 371 High Protein Recipe, Recipe, WW Recipes

Step-by-Step Cooking Guide

Making the Base

  • Combine all base ingredients in a medium-sized bowl.
  • Tip: Use a whisk to break up any clumps of protein powder. The mixture should form a thick, creamy consistency rather than a liquid porridge.

Layering & Creamy Top

  • Gently spread the oat mixture into your container.
  • Mix sweetened yogurt separately to maintain a smooth, luscious top layer.
  • Tip: For a clean layer, use a small spatula or the back of a spoon to evenly distribute yogurt without mixing it into the oats.

Adding Fruit & Chilling

  • Blueberries can be added fresh or slightly warmed to release natural juices.
  • Cover with a lid or plastic wrap. Refrigerate overnight to let flavors meld.
  • Tip: Let sit 5 minutes at room temp before eating for extra creaminess.

Ingredient Details & Substitution Tips

  • Rolled Oats: Keeps the authentic oat flavor; steel-cut oats will not soften overnight.
  • Greek Yogurt: Adds creaminess and boosts protein. Nonfat is best for low-calorie control, but full-fat can be used for richer texture.
  • Protein Powder: Vanilla-flavored blends work best. Chocolate protein can be substituted for a sweeter variation.
  • Sweetener: Choose a zero-calorie sweetener to maintain low carb. Honey or maple syrup can be used, but will increase carbs.
  • Blueberries: Can substitute with raspberries or strawberries for variety.

Equipment Alternatives:

  • Any airtight container, mason jar, or small bowl works for layering and chilling.

Recipe Variations & Serving Suggestions

Flavor Variations:

  • Stir in 1 tsp cocoa powder for a chocolate version.
  • Add a tablespoon of nut butter between layers for richness.

Dietary Variations:

  • Make Vegan: Replace Greek yogurt with unsweetened soy or coconut yogurt; use a plant-based protein powder.
  • Make Gluten-Free: Naturally gluten-free if oats are certified GF.

Serving & Presentation:

  • Enjoy as a single-serve breakfast or divide into two smaller portions for meal prep.
  • Can be topped with toasted coconut, chia seeds, or slivered almonds for texture.

Storage and Make-Ahead Information

  • Storage: Covered in the fridge for up to 3 days.
  • Make-Ahead: Prepare the night before for a grab-and-go breakfast.
  • Shelf Life Notes: The oats will thicken over time; stir in a splash of almond milk if too thick.

Nutrition Facts (Per Serving if split into 2)

  • Calories: ~220–240
  • Protein: 22–25 g
  • Carbs: ~18–20 g
  • Fiber: ~4 g
  • Fat: ~3 g

WW Points: 2–3 per serving

Dietary Highlights: High-Protein, Low-Carb, Fiber-Rich


Frequently Asked Questions (FAQs)

Q: Can I use instant oats instead of rolled oats?
A: Instant oats will work but may result in a mushier texture. Rolled oats are preferred for creaminess and structure.

Q: Can I add other fruits?
A: Yes, raspberries, strawberries, or blackberries are excellent alternatives.

Q: Can I prep more than one serving at a time?
A: Absolutely. Multiply ingredients and layer in a larger container or multiple jars for meal prep.

Q: Will it be too thick in the morning?
A: If it thickens too much, stir in a small splash of almond milk to reach desired creaminess.


Optional Personal Story

I developed this high-protein overnight oats recipe for mornings when I wanted a quick, filling breakfast without sacrificing flavor. I experimented with Greek yogurt layers to make it rich and creamy, and the blueberries give it a naturally sweet pop without excess sugar. It’s become my go-to make-ahead breakfast that keeps me full until lunch.


Call-to-Action: Try this creamy, high-protein overnight oats for a fast, low-carb breakfast. Leave a comment to share your favorite toppings or how you customized it for your taste!

Parmesan Baked Potatoes

Ingredients (serves 4)

  • 4 large potatoes, scrubbed and cut into wedges
  • 1/4 cup olive oil
  • 1/2 cup grated Parmesan cheese
  • 1 tsp garlic powder
  • Salt and black pepper, to taste
  • Optional: chopped fresh parsley for garnish

Instructions

1. Preheat Oven

  • Preheat your oven to 425°F (220°C).
  • Line a baking sheet with parchment paper or lightly grease it.

2. Prepare the Potatoes

  1. Cut the scrubbed potatoes into even wedges to ensure uniform cooking.
  2. In a large bowl, toss the potato wedges with olive oil, garlic powder, salt, and black pepper.

3. Add Parmesan

  • Sprinkle grated Parmesan cheese over the potatoes and toss lightly to coat evenly.

4. Bake

  • Arrange the potato wedges in a single layer on the prepared baking sheet.
  • Bake for 25–30 minutes, flipping halfway through, until golden brown and crispy on the edges.

5. Serve

  • Remove from oven and optionally garnish with chopped fresh parsley.
  • Serve hot as a side dish or snack with your favorite dipping sauce.

Tips

  • For extra crispiness, soak potato wedges in cold water for 30 minutes before baking, then pat dry.
  • You can add a pinch of paprika or chili powder for a mild kick.
  • Leftovers reheat well in the oven to keep them crispy.