Description:
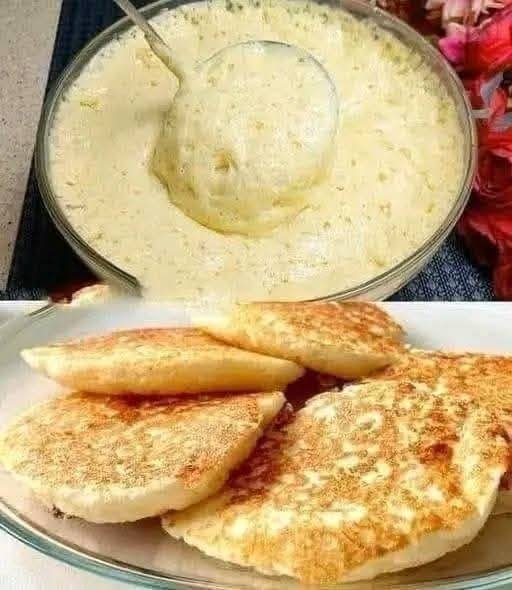
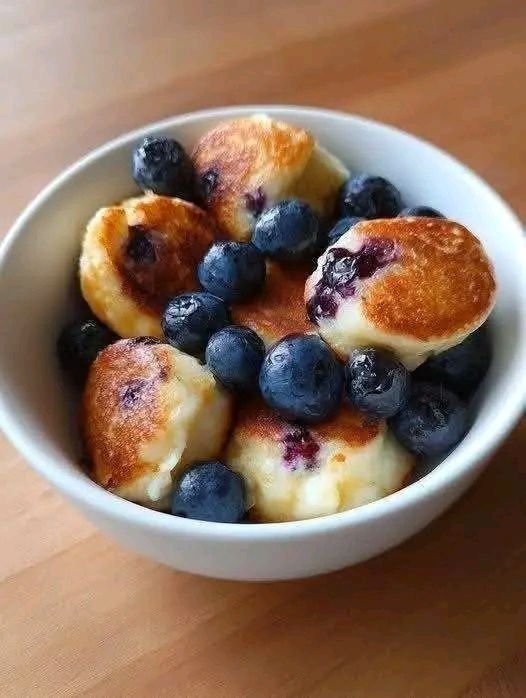
These pancakes are soft, fluffy, and naturally rich in protein thanks to cottage cheese and eggs. They’re slightly golden on the outside and tender inside—perfect for breakfast or a snack.
Ingredients (Makes ~6 pancakes)
1 cup cottage cheese
2 large eggs
½ cup all-purpose flour or oats (for a healthier version, use rolled oats)
½ teaspoon baking powder
¼ teaspoon salt
¼ teaspoon cinnamon (optional)
1–2 tablespoons sugar or honey (optional, for sweetness)
1 teaspoon vanilla extract (optional)
Butter or coconut oil, for cooking
Instructions
Prepare the Batter:
In a large bowl, mix together cottage cheese and eggs until smooth.
Add flour or oats, baking powder, salt, cinnamon, and sugar/honey if using. Stir until combined. The batter should be thick but scoopable.
Optional: Add vanilla extract for extra flavor.
Heat the Pan:
Heat a non-stick skillet or frying pan over medium-low heat.
Add a small amount of butter or coconut oil to grease the pan.
Cook the Pancakes:
Scoop 3–4 tablespoons of batter per pancake into the skillet.
Spread slightly to form a round shape.
Cook for 3–4 minutes until the bottom is golden brown.
Flip carefully and cook another 3–4 minutes until cooked through.
Reduce heat if they brown too quickly before the inside cooks.
Serve:
Serve warm with honey, maple syrup, fresh fruit, or yogurt.
Store leftovers in an airtight container in the fridge for up to 3 days.
Tips:
For extra fluffiness, blend the cottage cheese slightly before mixing with the other ingredients.
You can also fold in mashed banana for natural sweetness and extra moisture.
These pancakes can be reheated in a skillet or microwave.
These Mediterranean-style low-carb tortillas are soft, bendable, and shockingly sturdy—without flour, starches, or sugar. Made with just eggs and cheese (plus one secret ingredient), they’re perfect for wraps, gyros, quesadillas, or breakfast roll-ups while staying low-carb and protein-rich.
Unlike eggy flatbreads that crack or tear, these tortillas cool into a flexible, almost wheat-like texture. The key is gentle heat, full blending, and allowing them to rest after cooking. Simple ingredients. Smart technique. Big payoff.
Ingredients (Makes 4 Tortillas)
2 large eggs
½ cup shredded mozzarella (low-moisture works best)
1 tablespoon cream cheese (the secret to flexibility)
Optional (still carnivore, improves strength):
½ tablespoon beef gelatin
Equipment
Blender or food processor
Non-stick skillet (8–10 inch)
Silicone spatula
Instructions
1️⃣ Blend Until Silky
Add eggs, shredded mozzarella, cream cheese, and gelatin (if using) to a blender or food processor.
Blend until completely smooth—no cheese bits, no streaks. This step is crucial for even cooking and flexibility.
2️⃣ Heat the Pan Gently
Place a non-stick skillet over medium-low heat.
Lightly grease with butter or beef tallow.
The pan should be warm, not hot—too much heat causes rubbery tortillas.
3️⃣ Cook Thin & Even
Pour ¼ of the batter into the center of the pan.
Immediately swirl to form a thin, even circle.
Cook for 60–90 seconds, until:
The edges lift easily
The surface looks set with no wet spots
4️⃣ Flip Carefully
Flip gently using a silicone spatula.
Cook the second side for 30–40 seconds, then remove to a plate or cooling rack.
👉 Do not overcook — they continue to firm up as they cool.
Cooling = Flexibility
Let tortillas cool for 2–3 minutes before using.
This resting phase is where the magic happens—they become bendable, strong, and tear-resistant.
Texture Troubleshooting
Too eggy? Use 1 whole egg + 1 egg white
Breaking? Add a little more cream cheese or gelatin
Rubbery? Heat was too high
Storage
Fridge: 3–4 days (store with parchment between)
Freezer: Up to 1 month
Simple, clean, and endlessly versatile—these tortillas prove low-carb doesn’t mean low-satisfaction. 💪🌯
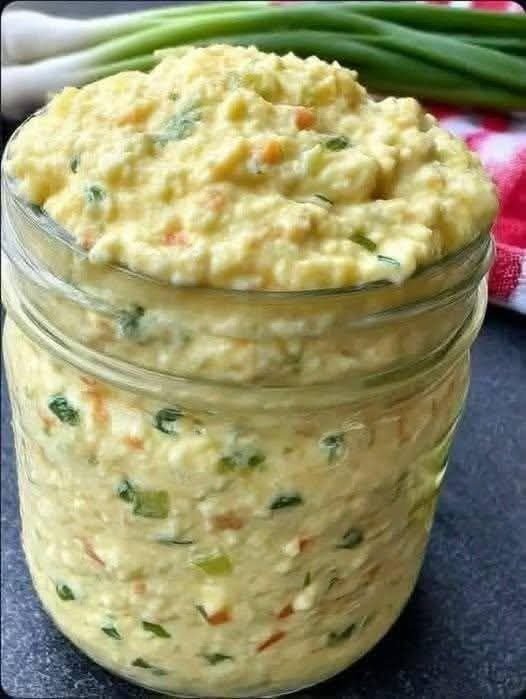
A creamy, fluffy, protein-packed spread that’s naturally very low in carbs, flour-free, and perfect for keto or low-carb lifestyles. Great as a dip, sandwich filling (lettuce wraps), or side dish.
Note: “Zero carb” is a common phrase, but eggs and dairy contain trace carbs. This recipe is very low carb (≈1g net carb per serving), not absolute zero.
Ingredients (6 servings)
6 large eggs, hard-boiled
4 oz (115g) full-fat cream cheese, softened
2 tbsp mayonnaise (sugar-free)
1 tsp Dijon mustard (optional)
2 tbsp finely chopped green onions
1 tbsp fresh chopped parsley or chives
Salt & black pepper to taste
Optional add-ins: pinch paprika, garlic powder, or shredded cheddar
Instructions
Boil Eggs Place eggs in cold water, bring to boil, then simmer 9–10 minutes. Cool in ice water and peel.
Mash Base In a bowl, mash eggs with a fork to desired texture (chunky or smooth).
Mix Creamy Ingredients Add softened cream cheese, mayonnaise, mustard, salt, and pepper. Mix until fluffy.
Add Herbs Fold in green onions and herbs.
Chill (Optional but Recommended) Refrigerate 30–60 minutes for best flavor and texture.
Serve Eat alone, in lettuce wraps, stuffed in celery, or as a side with grilled meat.
Description
This spread is:
High protein
High healthy fats
Low carb
Gluten-free
Flour-free
Quick (15 minutes prep)
It’s rich, creamy, slightly tangy, and very satisfying.
Tips for Best Results
Use room temperature cream cheese for smoother texture.
For extra fluffiness, use a hand mixer.
Add crispy bacon bits for more flavor.
For dairy-free: replace cream cheese with mashed avocado (will slightly increase carbs).
Store in airtight container up to 3 days in refrigerator.
Servings
Makes: 6 servings
Serving size: About ½ cup
Nutritional Information (Per Serving – Approximate)
Calories: 210
Protein: 10g
Fat: 19g
Net Carbs: 1g
Fiber: 0g
Sugar: <1g
(Values vary depending on brands used.)
Benefits
Supports low-carb & keto diets Helps reduce cravings High satiety (keeps you full longer) Quick meal prep option No flour or starch
Q & A
Q: Is this really zero carb? A: Not technically. Eggs and dairy contain tiny amounts of carbs, but it’s extremely low carb.
Q: Can I eat this while cutting weight? A: Yes, if it fits your calorie goals. It’s low carb but still calorie-dense due to fat.
Q: Can I freeze it? A: Not recommended — texture changes after thawing.
Q: How can I make it spicier? A: Add hot sauce, jalapeños, cayenne, or pepper flakes.
Q: Can I meal prep this? A: Yes, keeps well refrigerated for 3 days.
Asparagus-Stuffed Chicken Breast – A Homemade Delight
When hunger strikes, fast food may seem like the quickest solution. But nothing compares to the satisfaction of preparing a wholesome meal at home—especially when it’s something as flavorful and elegant as Asparagus-Stuffed Chicken Breast. Homemade cooking gives you full control over ingredients, flavors, and portion sizes, while also allowing you to enjoy the creative side of cooking.
Choosing homemade meals over fast food isn’t just about nutrition; it’s a lifestyle upgrade. Home-cooked meals typically contain fewer calories, less sodium, and better quality ingredients. With dishes like Asparagus-Stuffed Chicken Breast, you get lean protein from chicken, fiber and vitamins from asparagus, and rich flavor from herbs and cheese—all in one satisfying meal.
Cooking at home also creates opportunities to connect with loved ones. A cooking night with friends or family can turn an ordinary meal into a shared experience. Plus, this dish works beautifully for meal prep. Make a few portions in advance and enjoy stress-free dinners during busy weekdays.
Preparing meals from scratch encourages mindfulness about what you eat and how it affects your body. The next time you’re choosing between takeout and cooking, remember that a homemade dish like this offers nourishment, comfort, and pride in every bite.
Ingredients for Asparagus-Stuffed Chicken Breast
Chicken Breasts: 2 large, boneless, skinless
Asparagus: 1 cup, trimmed and chopped
Turkey Bacon: 4 slices, cooked and chopped
Cream Cheese: 4 ounces, softened
Garlic: 2 cloves, minced
Parmesan Cheese: ¼ cup, grated
Spices: Salt, black pepper, and dried herbs (thyme or oregano)
Olive Oil: For searing (optional)
Step-by-Step Preparation
1. Preheat the Oven
Preheat your oven to 375°F (190°C). This ensures even cooking and keeps the chicken juicy while the filling becomes tender.
2. Prepare the Chicken
Place each chicken breast between two sheets of plastic wrap or parchment paper.
Gently pound with a meat mallet or rolling pin until about ½ inch thick.
Season lightly with salt and pepper.
3. Make the Filling
Trim asparagus into 2–3 inch pieces.
In a bowl, mix together:
Cream cheese
Garlic
Parmesan cheese
Turkey bacon
Salt, pepper, and herbs
4. Stuff the Chicken
Lay asparagus on one side of each chicken breast.
Spoon cream cheese mixture over the asparagus.
Fold or roll the chicken over the filling.
Secure with toothpicks or kitchen twine.
5. Sear the Chicken (Optional but Recommended)
Heat olive oil in a skillet over medium-high heat.
Sear chicken seam-side down for 2–3 minutes per side until golden brown.
6. Bake
Transfer chicken to a baking dish or oven-safe skillet.
Bake for 25–30 minutes, or until internal temperature reaches 165°F (75°C).
7. Rest and Serve
Let the chicken rest for 5–10 minutes before slicing.
Slice to reveal the asparagus filling and serve hot.
Optional for flavor: 1 teaspoon vanilla extract or a pinch of stevia (if you prefer a sweeter taste)
Optional for topping: A dusting of powdered stevia or fresh berries
Detailed Instructions
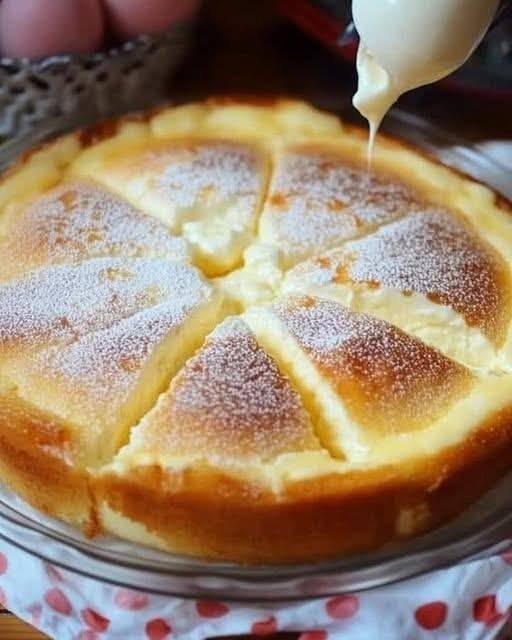
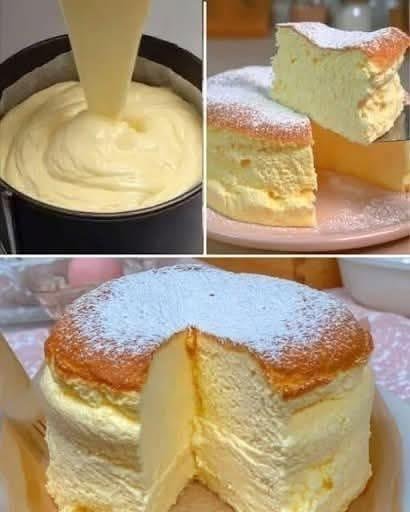
Preparation: Preheat your oven to 170°C (340°F). Line the bottom and sides of a 6-inch round cake pan with parchment paper. This is a delicate cake, so the paper helps it release without breaking.
Mix the Base: In a medium bowl, whisk the 4 egg yolks with the 1 ½ cups of Greek yogurt until the mixture is completely smooth. If you are using vanilla or a sweetener, stir it in now.
Whip the Egg Whites: In a separate, very clean glass or metal bowl, beat the 4 egg whites using an electric mixer until they form stiff peaks. You should be able to lift the beaters and have the foam stand straight up without drooping.
Fold Gently: Gently fold about one-third of the whipped egg whites into the yogurt mixture to lighten it. Then, very carefully fold in the remaining egg whites. Do not overmix, or you will lose the “cloud” airiness.
Bake: Pour the batter into your prepared pan. Place the cake pan inside a larger baking dish and fill the larger dish with about an inch of hot water (a water bath). Bake for 35–40 minutes.
Cool and Set: Turn off the oven and leave the door slightly ajar, letting the cake cool inside for 10 minutes (this prevents it from collapsing too quickly). Remove from the oven and let it cool completely before refrigerating for at least 2 hours.
Serve: Dust with a little powdered sweetener or top with fresh fruit before serving cold.
Why This Recipe Works
Protein-Packed: By using Greek yogurt and eggs, this dessert provides a high amount of protein with very little fat or carbohydrates.
Texture: The whipped egg whites act as the leavening agent, giving the cake its signature “cloud” lift.
These cheesy toast sandwiches are incredibly easy and unbelievably delicious. Crispy and golden on the outside with perfectly melted cheese inside, they’re so good that you’ll want to make them again and again. Perfect for breakfast, snacks, or quick dinners — and made with only 3 ingredients!
Ingredients (3 Only)
8 slices of bread
1½ cups cheddar cheese or mozzarella (grated)
2–3 tablespoons butter
Instructions
Spread butter on one side of each bread slice
Place grated cheese between two slices (buttered side facing out)
Close the sandwich
Cook on a pan, grill, or air fryer over medium heat
Toast until both sides are golden brown and the cheese is fully melted
Cooking Options
Pan: 2–3 minutes per side
Air Fryer: 180°C (350°F) for 6–8 minutes
Oven: 190°C (375°F) for 10 minutes
Servings
Makes 4 sandwiches
Nutritional Information (Per Sandwich – Approx.)
Nutrient
Amount
Calories
280
Protein
9 g
Carbohydrates
26 g
Fat
16 g
Calcium
High
Sugar
3 g
Benefits
Quick and budget-friendly Loved by kids and adults Rich in calcium and protein No special equipment needed Ultimate comfort food
Notes & Tips
Mozzarella gives the best cheese stretch
Use garlic butter for extra flavor
Cook on low to medium heat so the cheese melts properly
Add a little butter on the outside for extra crispiness
Q & A
Q: Can I use brown bread? Yes, it works perfectly and is a bit healthier.
Q: Can I add extra ingredients? Yes, but the classic version tastes amazing with just 3 ingredients.
Q: Are these good for kids’ lunch boxes? Yes, best when packed fresh.
Q: How often can I make them? They’re best enjoyed in moderation — 2–3 times a week.
A refreshing, metabolism-supporting drink that helps reduce bloating, curb cravings, and support overall fat loss when paired with healthy habits. This simple ginger water is hydrating, soothing, and easy to prep for the whole week.
Description
Ginger water is a natural wellness drink made by infusing fresh ginger (and optional lemon) into water. It’s known for supporting digestion, reducing inflammation, easing bloating, and gently boosting metabolism — which can help with fat loss over time, especially in stubborn areas like the abdomen, arms, back, neck, and thighs when combined with balanced nutrition and movement.
Ingredients
1–2 inches fresh ginger root, peeled and sliced
1 liter (4 cups) water
½ fresh lemon, sliced or juiced (optional, but recommended)
Instructions
Prepare ginger Peel and thinly slice fresh ginger.
Boil water Bring water to a boil, add ginger, and simmer for 10–15 minutes.
Cool & strain Remove from heat, let cool slightly, then strain.
Add lemon (optional) Stir in lemon juice or add lemon slices.
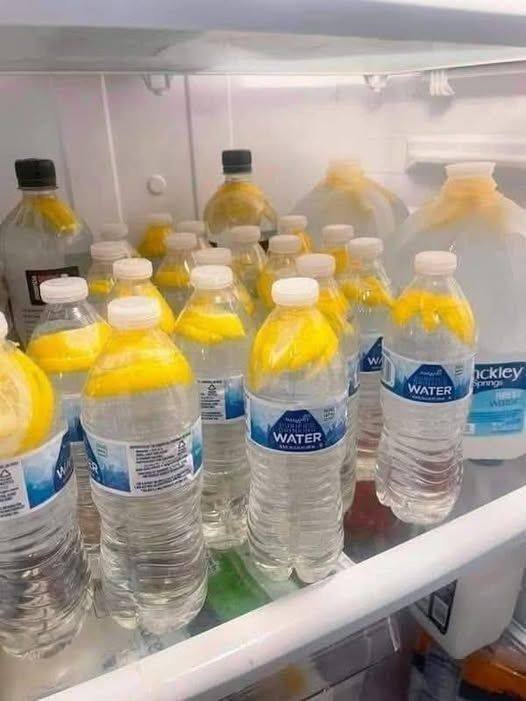
Store Pour into bottles and refrigerate for up to 3 days.
Serve warm or cold.
Notes & Tips
Stronger flavor? Simmer longer or add more ginger
Great cold for summer, warm for digestion
Add a small drizzle of honey if needed (optional)
Shake before drinking if infused overnight
Servings
4 servings (1 cup each)
Nutritional Info (Per Serving – Approx.)
Calories: 5–10
Carbs: 1–2g
Fat: 0g
Protein: 0g
Sugar: 0g
WW Points: 0
Benefits
Supports digestion and gut health
Helps reduce bloating and water retention
Anti-inflammatory properties
May support metabolism and appetite control
Naturally detoxifying and hydrating
Caffeine-free and sugar-free
Q & A
Q: Does ginger water burn belly fat? Ginger water doesn’t burn fat on its own, but it supports fat loss by improving digestion, reducing bloating, and helping control appetite when paired with a healthy lifestyle.
Q: When should I drink it? Best times are morning on an empty stomach or between meals.
Q: How much can I drink daily? 1–3 cups per day is ideal.
Q: Can I drink it every day? Yes, most people can safely enjoy it daily.
Q: Who should avoid it? If you’re pregnant, on blood thinners, or have gallbladder issues, check with a healthcare professional first.
Walnuts or Almonds: ½ cup, chopped (optional for added texture)
Detailed Instructions
Hydrate the Oats: In a large mixing bowl, combine the 1 cup of rolled oats with the ⅔ cup of warm milk. Stir well and allow the mixture to sit for 10 minutes so the oats can soften and absorb the liquid.
Prepare the Fruit and Nuts: While the oats are soaking, peel and either grate or finely dice the 2 apples. If using walnuts or almonds, chop them into small pieces to ensure even distribution.
Create the Batter: Add the 2 eggs, 2 tablespoons of melted butter, and ½ teaspoon of vanilla extract to the soaked oats. Mix thoroughly until the eggs are fully incorporated. Fold in the prepared apples and nuts.
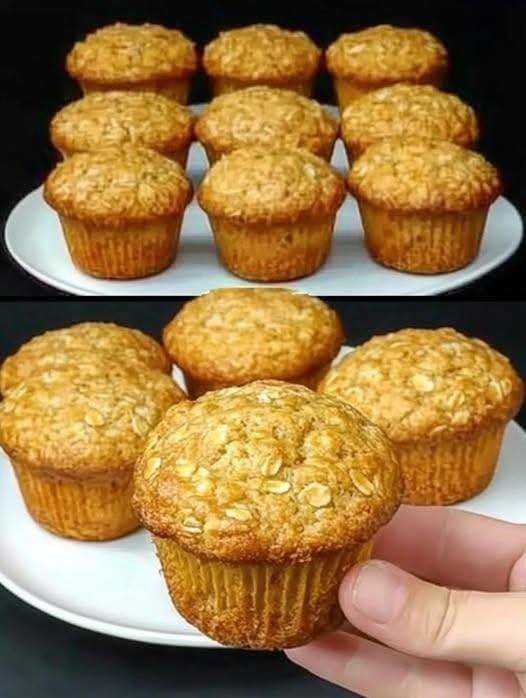
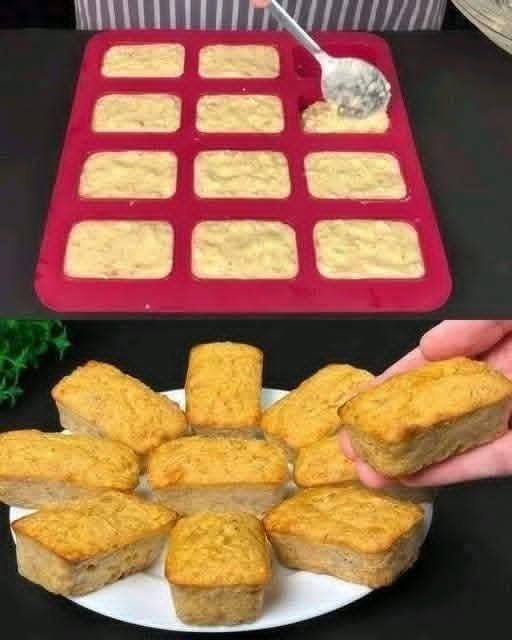
Fill the Molds: Lightly grease a silicone mold or muffin tin. Using a spoon, fill each cavity nearly to the top with the batter, as these bites do not rise significantly.
Bake: Preheat your oven to 180°C (350°F). Bake for 25–30 minutes until the tops are golden brown and the centers are firm.
Cool and Serve: Let the dessert cool in the mold for at least 5 minutes before removing. This helps the structure set, making them easy to grab as a portable energy snack.
Why This Works
Natural Sweetness: Grated apples provide moisture and sweetness without the need for refined sugar.
Satiety: The combination of fiber from the oats and protein from the eggs helps keep you feeling full and energized.
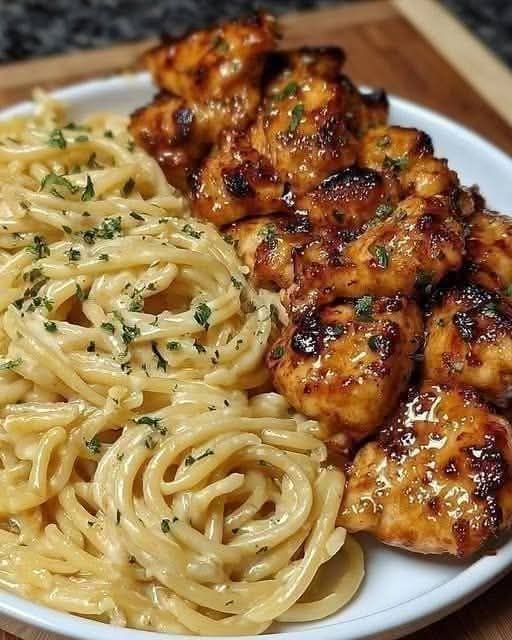
Lemon Garlic Butter Chicken & Creamy Parmesan Pasta
Ingredients
For the Chicken:
Chicken: 2 boneless, skinless chicken breasts
Olive oil: 1 tablespoon
Unsalted butter: 2 tablespoons
Garlic: 3 cloves, minced
Lemon juice: 1 tablespoon
Seasoning: Salt, black pepper, and paprika to taste
For the Pasta:
Pasta: 250g spaghetti or linguine
Heavy cream: 1 cup
Parmesan cheese: ½ cup, freshly grated
Garlic: 2 cloves, minced
Lemon zest: 1 teaspoon
Fresh parsley: 2 tablespoons, chopped
Detailed Instructions
1. Prepare the Chicken
Slice and Season: Cut the chicken breasts into bite-sized pieces. Season generously with salt, pepper, and a dash of paprika.
Sear: Heat 1 tablespoon of olive oil and 1 tablespoon of butter in a large skillet over medium-high heat. Add the chicken and cook until golden brown and cooked through (about 6–8 minutes).
Finish with Flavor: Reduce the heat to low. Add the remaining 1 tablespoon of butter, minced garlic, and 1 tablespoon of lemon juice to the pan. Toss the chicken to coat it in the garlic butter sauce, then remove the chicken from the pan and set it aside.
2. Cook the Pasta
Boil: Cook your pasta in a large pot of salted boiling water according to the package instructions until al dente.
Reserve Water: Before draining, save about ½ cup of the starchy pasta water.
3. Create the Creamy Parmesan Sauce
Sauté Garlic: In the same skillet used for the chicken (don’t wash it—those brown bits add flavor!), add a little more butter if needed and sauté the minced garlic for 30 seconds.
Simmer Cream: Pour in the heavy cream and bring to a gentle simmer.
Melt Cheese: Whisk in the ½ cup of Parmesan cheese until the sauce is smooth. If it’s too thick, add a splash of the reserved pasta water.
Add Zest: Stir in the lemon zest for that bright, zesty finish.
4. Combine and Serve
Toss: Add the cooked pasta to the skillet and toss thoroughly to coat every strand in the creamy sauce.
Plate: Serve the pasta topped with the lemon garlic chicken. Garnish with fresh parsley and extra Parmesan if desired.
Cooking Tip
To keep this meal balanced, try serving it with a side of steamed broccoli or a fresh green salad.
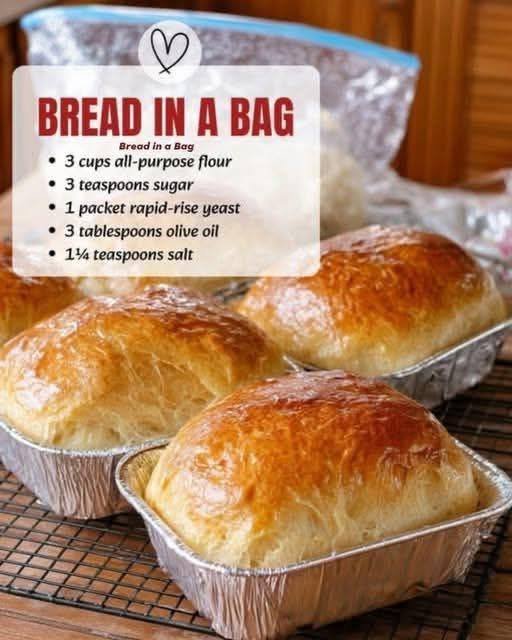
Warm water: 1 cup (essential for activating yeast)
Olive oil: 3 tablespoons
Salt:$1\frac{1}{4}$ teaspoons
Detailed Instructions
Combine Initial Ingredients:
Open a large (gallon-sized) heavy-duty freezer bag. Pour in 1 cup of flour, the sugar, the packet of yeast, and 1 cup of warm water. Seal the bag tightly, pushing out the excess air.
The “Shake” Phase:
Squeeze and shake the bag with your hands until the ingredients are well blended. Let the mixture rest for about 10 minutes; you should see bubbles forming as the yeast activates.
Add Remaining Ingredients:
Open the bag and add the olive oil, salt, and the remaining 2 cups of flour. Reseal the bag and continue to knead and squish it from the outside until a dough ball forms and pulls away from the sides of the bag.
Knead the Dough:
Lightly flour a clean surface. Remove the dough from the bag and knead it by hand for about 5–8 minutes until it is smooth and elastic.
First Rise:
Place the dough in a lightly greased bowl, cover it with a damp cloth, and let it rise in a warm spot for about 30–45 minutes, or until it has doubled in size.
Shape and Second Rise:
Gently punch the dough down to release air. Divide it into smaller portions if using mini loaf pans (as seen in the image) or keep it as one large loaf. Place the dough into greased baking pans. Cover again and let rise for another 20 minutes.
Bake:
Preheat your oven to 190°C (375°F). Bake for 25–30 minutes or until the crust is a deep golden brown and the bread sounds hollow when tapped on the bottom.
Cool:
Remove from the pans and let the bread cool on a wire rack before slicing to ensure the center stays fluffy.
Stevia: 1 teaspoon (adjust based on your brand’s sweetness level)
Salt: A pinch
Detailed Instructions
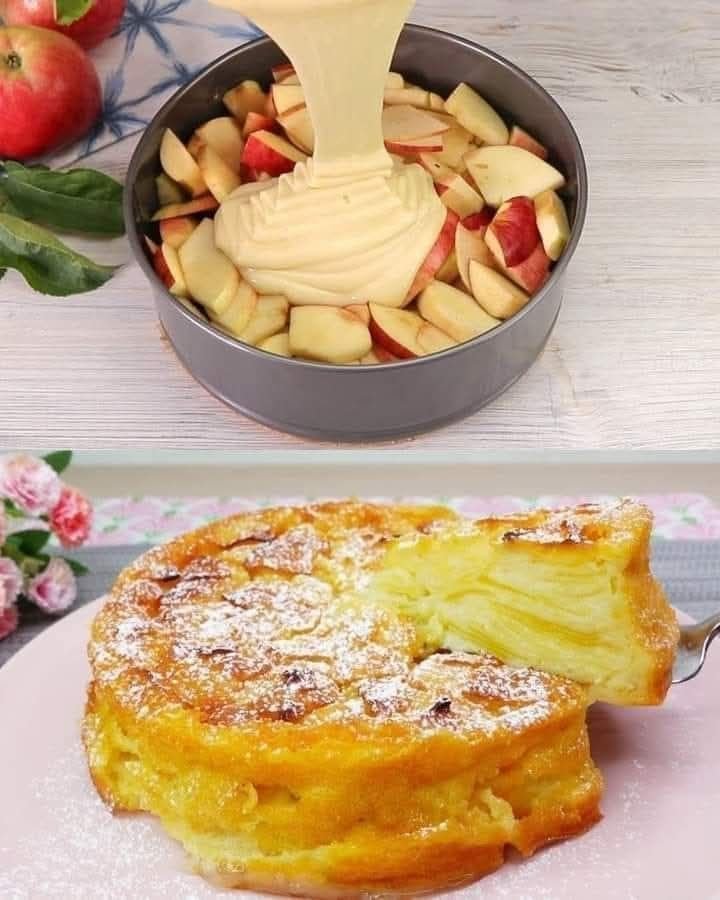
Prepare the Apples: Peel and thinly slice your apples. Immediately toss them with the juice of ½ lemon in a bowl. This prevents browning and adds a bright base flavor.
Mix the Wet Base: In a separate large bowl, whisk the 2 eggs with a pinch of salt and the 1 teaspoon of stevia until the mixture is slightly frothy. Stir in the 100ml of milk, 1 ½ tablespoons of applesauce, and the lemon zest.
Incorporate Dry Ingredients: Sift the 80g of wheat flour and 1 teaspoon of baking powder into the wet mixture. Whisk gently until the batter is smooth and there are no large lumps.
Combine: Fold the sliced apples into the batter. Ensure every slice is well-coated; this is what creates the “layered” look in the finished cake.
Prepare for Baking: Preheat your oven to 180°C (350°F). Grease a round cake pan or line it with parchment paper. Pour the apple and batter mixture into the pan, smoothing out the top.
Bake: Bake for 30–35 minutes. The cake should be golden on top and firm to the touch. Because of the high fruit content, it will remain moist and custard-like inside.
Final Touch: Let the cake cool completely before slicing. This allows the fruit layers to set. If you like, you can lightly dust the top with a tiny bit of powdered stevia or cinnamon before serving.
Soak the Oats: In a large mixing bowl, combine the 1 cup of rolled oats with the 150 ml of warm milk. Stir and let the mixture sit for about 10 minutes. This softens the oats, ensuring a better texture for the final snack.
Prepare the Apples and Nuts: While the oats soak, peel and then either grate or finely chop your 2 apples. Chop your ½ cup of walnuts or almonds into small, crunchy pieces.
Combine Ingredients: To the soaked oats, add the 2 eggs, 2 tablespoons of butter (melted), and ½ teaspoon of vanilla extract. Stir well. Fold in the prepared apples and the chopped nuts until the mixture is uniform.
Prepare the Pan: Lightly grease a muffin tin or a silicone rectangular mold with a small amount of vegetable oil.
Bake: Preheat your oven to 180°C (350°F). Spoon the mixture into the prepared molds, filling them nearly to the top. Bake for 25 to 30 minutes, or until the bites are firm to the touch and a light golden brown on top.
Cool: Allow the snacks to cool in the pan for 5–10 minutes before removing them. This helps them set so they don’t break apart.
Tips for Success
Texture: If you prefer a smoother snack, you can use “quick oats” instead of rolled oats.
Flavor Boost: Feel free to add a pinch of cinnamon or nutmeg to the batter to complement the apples.
These bites are a great way to enjoy a fiber-rich snack using simple, whole ingredients.
Ingredients
Oatmeal: 1 cup (90g)
Warm milk: 150 ml (about ⅔ cup)
Apples: 2 large, peeled and diced
Butter: 20g (1 ½ tablespoons), melted
Vanillin: 1/2 teaspoon (or vanilla extract)
Eggs: 2 large
Instructions
Soak the Oats: In a medium mixing bowl, combine the oatmeal and the warm milk. Let it sit for about 10 minutes until the oats have absorbed the liquid and softened.
Prepare the Apples: While the oats soak, peel and dice your apples into small, uniform pieces.
Mix the Base: Whisk the eggs in a separate bowl, then add them to the oat mixture along with the melted butter and vanillin. Stir until well combined.
Fold in Apples: Gently fold the diced apples into the oat mixture so they are evenly distributed.
Fill the Mold: Spoon the mixture into a silicone baking mold (rectangular or muffin-shaped). Fill each cavity nearly to the top as these will not rise significantly.
Bake: Preheat your oven to 180°C (350°F). Bake for approximately 25–30 minutes, or until the tops are golden brown and the center is set.
Cool and Serve: Allow the bites to cool in the mold for a few minutes before removing them to ensure they hold their shape.
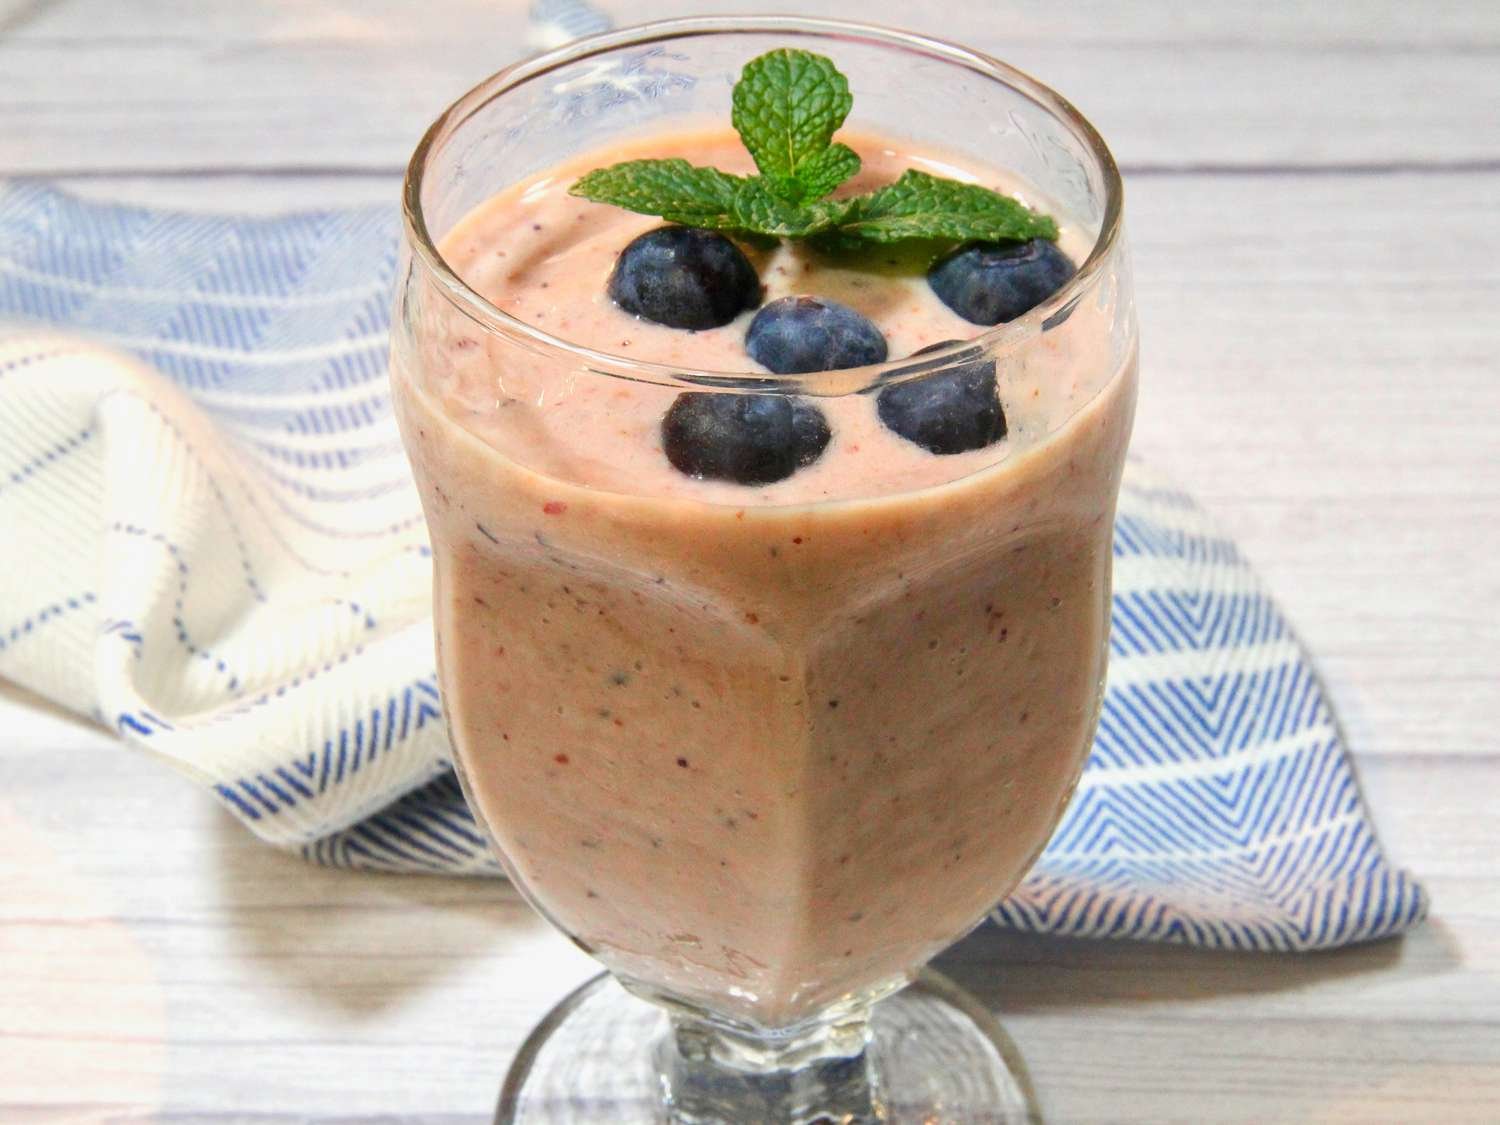
This combination creates a creamy texture with a nice balance of sweetness and tartness.
Ingredients:
1 cup frozen mixed berries (blueberries, strawberries, raspberries)
1 medium banana (ripe, fresh or frozen for extra creaminess)
½ cup Greek yogurt (plain or vanilla)
¾ cup milk of your choice (dairy, almond, oat, or soy)
1 teaspoon honey or maple syrup (optional, adjust to taste)
Optional: A handful of ice cubes if you prefer a thicker, colder consistency.
Instructions:
Combine: Add the milk, yogurt, banana, and frozen berries into your blender.
Blend: Start on a low speed and gradually increase to high. Blend until the mixture is completely smooth and no large fruit chunks remain.
Adjust: If the smoothie is too thick, add a little more milk. If you prefer it sweeter, add a touch more honey or maple syrup and pulse again.
Serve: Pour into a glass, garnish with a few fresh blueberries and a sprig of fresh mint, just like in your photo!
Tips for success:
For a thicker smoothie: Use a frozen banana instead of a fresh one.
For a protein boost: You can add a tablespoon of chia seeds, flax seeds, or a scoop of your favorite protein powder.
Prep ahead: You can put the fruit and banana into freezer-safe bags ahead of time; when you’re ready to make it, just dump the bag contents into the blender and add the liquids.
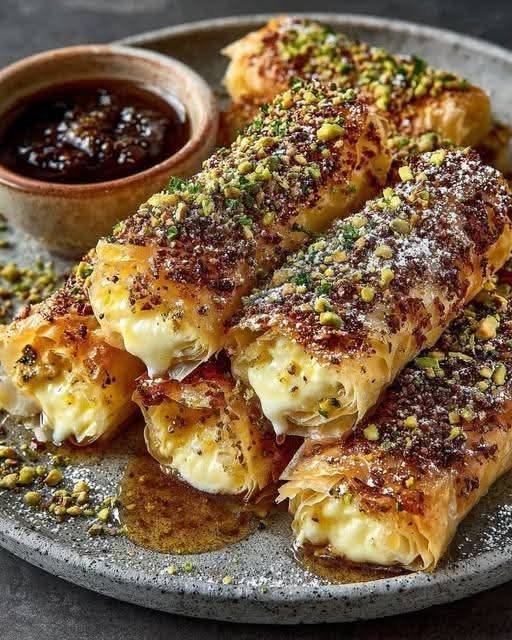
1 block (200g) High-quality Greek Feta (sheep’s milk is best)
4 sheets Phyllo pastry (thawed)
4 tbsp Unsalted butter, melted
3 tbsp Honey (thyme or wildflower recommended)
1/4 cup Roasted pistachios, finely chopped
1 tsp Black sesame seeds or poppy seeds (optional)
Pinch of Chili flakes (optional, for a “hot honey” vibe)
Neutral oil for shallow frying (or cooking spray for baking)
Instructions
Prep the Feta: Cut the feta block into 8 equal rectangular batons. Pat them dry with a paper towel to ensure the pastry doesn’t get soggy.
Layer the Phyllo: Lay one sheet of phyllo on a clean surface. Brush lightly with melted butter. Fold the sheet in half.
The Roll: Place a feta baton at the bottom edge. Fold the sides inward and roll it up tightly, like a small burrito. Repeat for all 8 pieces.
The Sear: Heat 2 tablespoons of oil in a non-stick skillet over medium heat. Fry the rolls for 2–3 minutes per side until deep golden brown and crispy.
Alternative: Bake at 200°C for 12–15 minutes until golden.
The Caramelization: While the rolls are hot, drizzle the honey directly into the pan (or over the rolls on a plate) and toss quickly so the honey bubbles and coats the pastry.
The Crunch: Immediately roll or sprinkle the honeyed pastry with chopped pistachios and sesame seeds. Serve warm.
Notes & Tips
Dry the Feta: Feta is stored in brine. If you don’t pat it dry, the steam will make the phyllo burst or turn mushy.
Work Fast: Phyllo dough dries out and cracks within minutes. Keep unused sheets under a damp kitchen towel while you work.
Don’t Over-Butter: A light brush is enough. Too much butter makes the rolls greasy rather than crispy.
Nutritional Info (Per Roll)
Calories
Total Fat
Carbs
Protein
Sodium
185 kcal
12g
14g
5g
310mg
The Benefits
High Satiety: The combination of healthy fats from pistachios and protein from feta keeps you full longer than a standard sugary pastry.
Calcium Boost: Feta is an excellent source of calcium and contains lower lactose than many cow’s milk cheeses.
Antioxidants: Raw honey and pistachios provide a hit of polyphenols and vitamin E.
Q&A
Q: Can I make these in an Air Fryer?A: Absolutely! Spray them with a little oil and air fry at 190°C for 8–10 minutes, flipping halfway. Drizzle the honey after they come out.
Q: Can I prepare these in advance?A: You can roll them up to 4 hours ahead of time. Keep them covered in the fridge. However, do not fry or honey them until right before serving, or they will lose their crunch.
Q: My feta is too salty. What should I do?A: Soak the feta block in fresh water or milk for 30 minutes before slicing. This draws out the excess salt without ruining the texture.
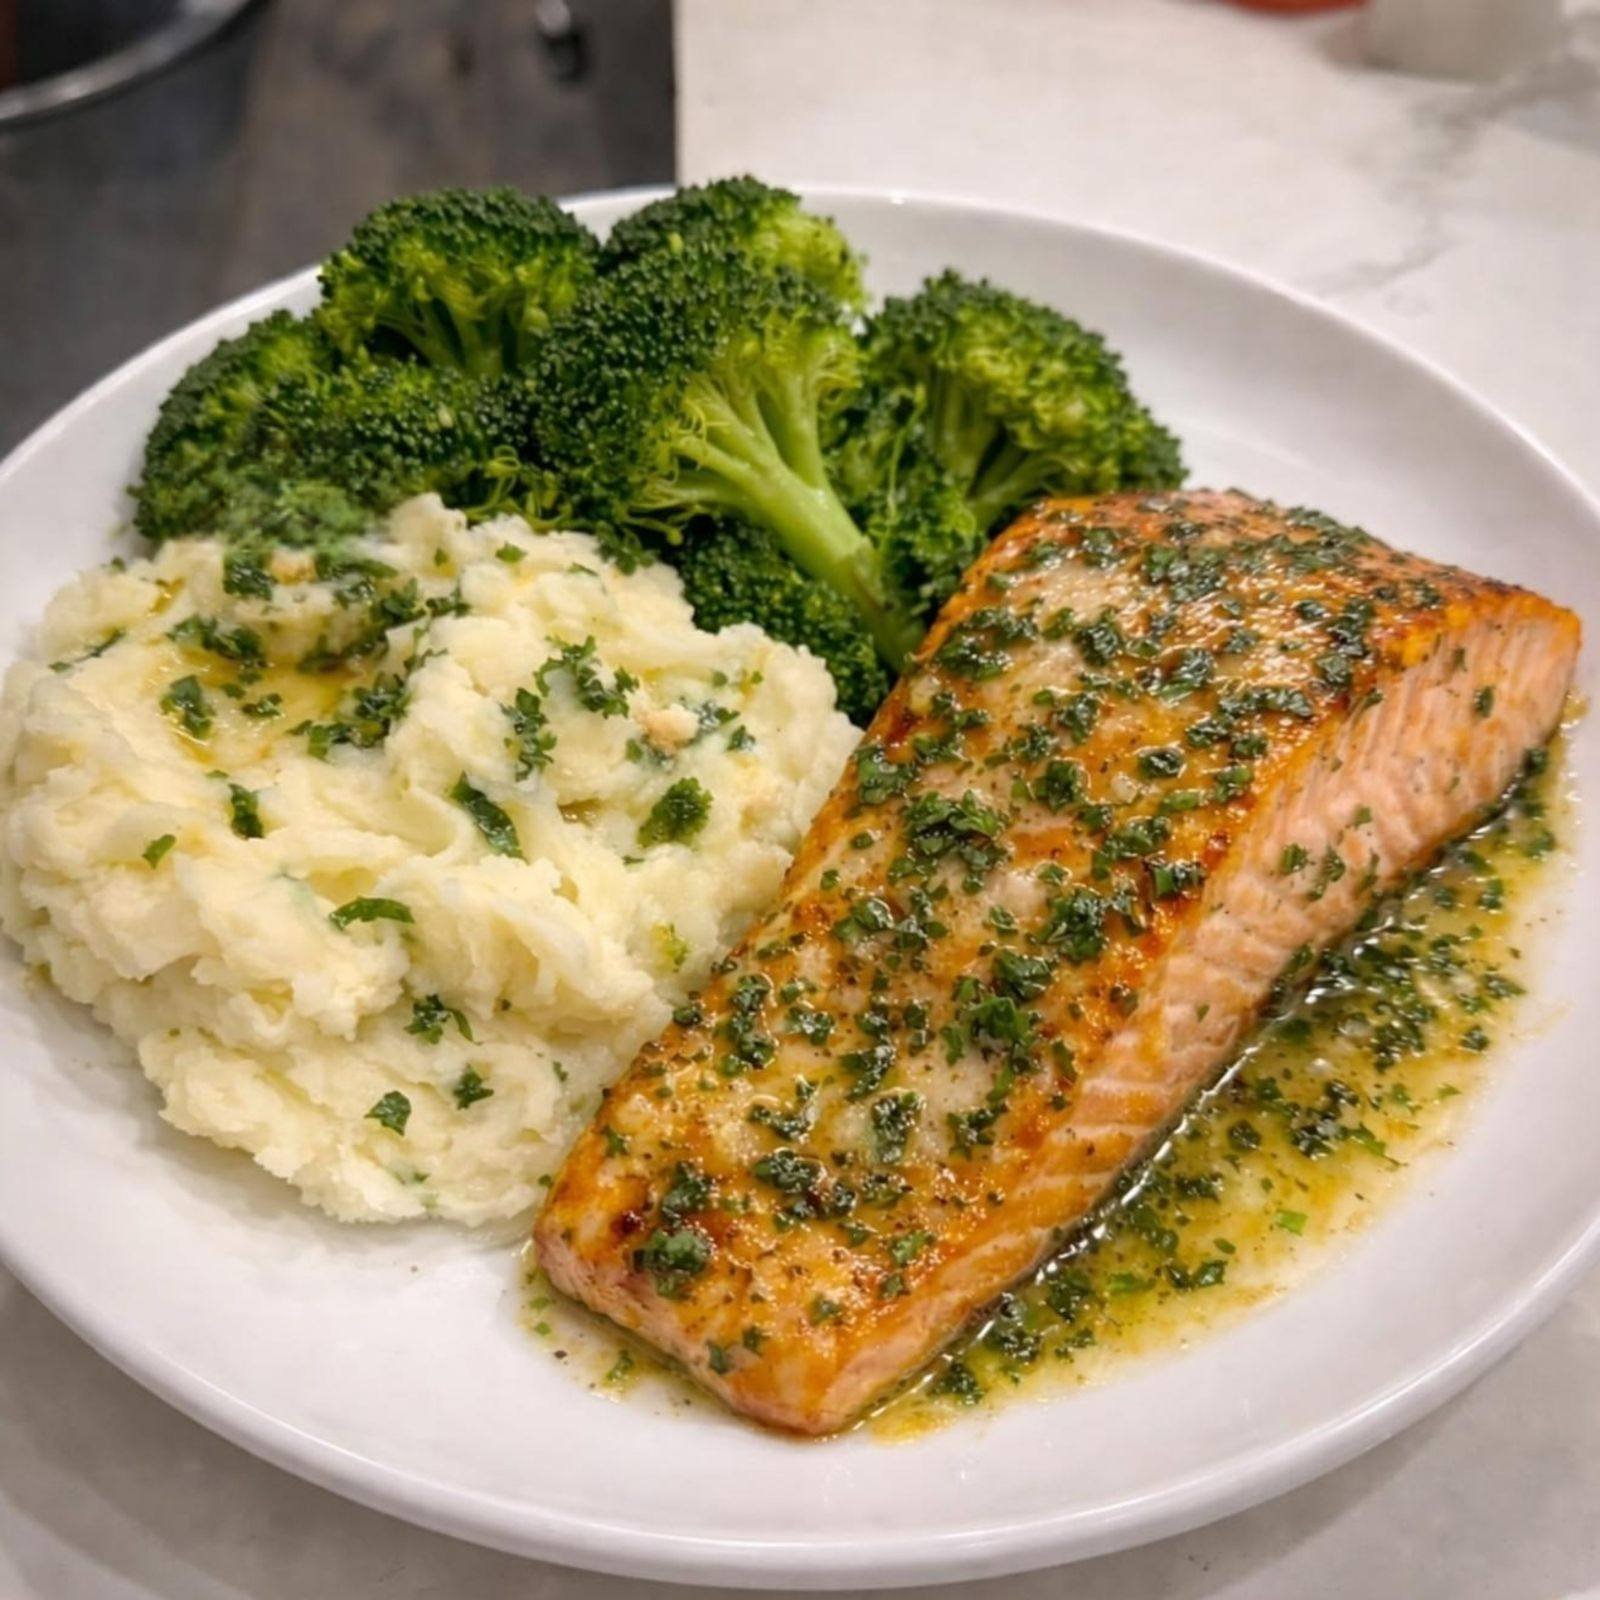
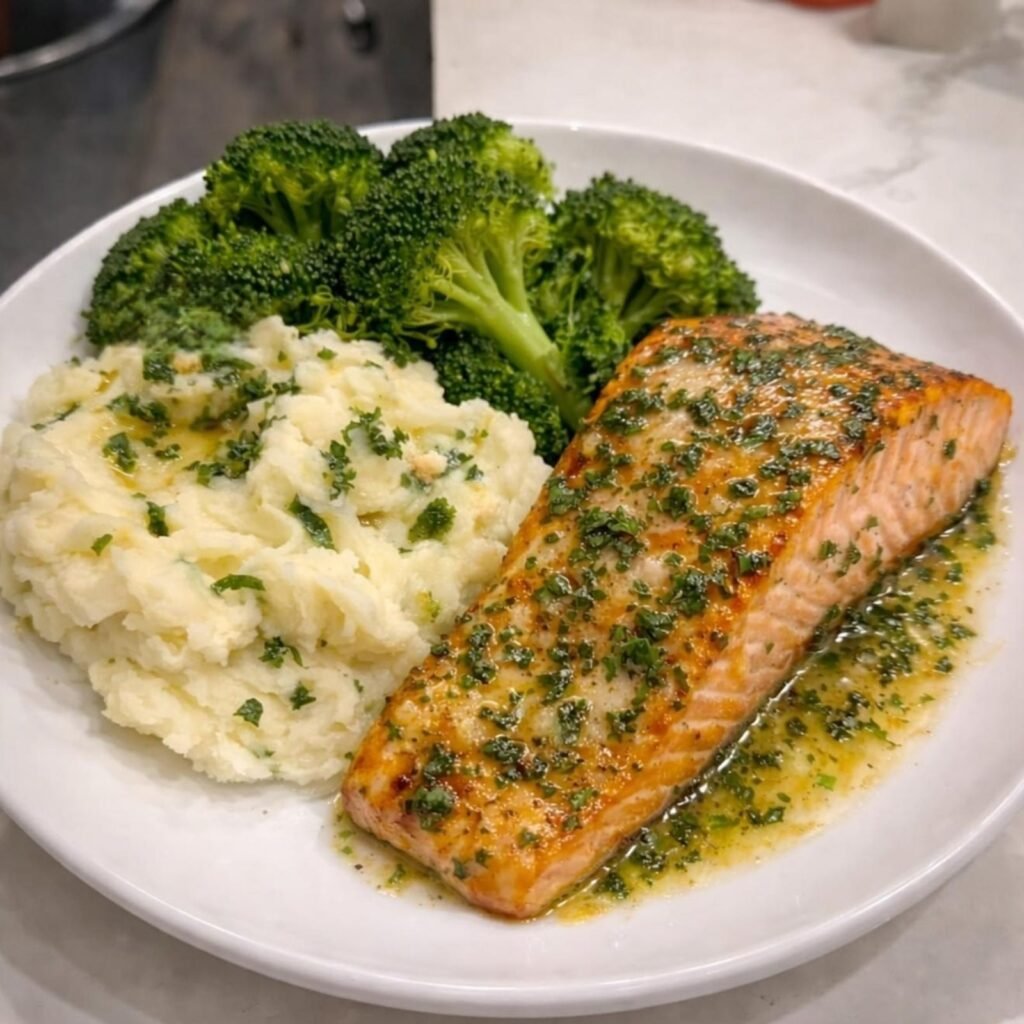
A high-protein, lower-calorie dinner featuring perfectly seared garlic butter salmon, creamy portion-controlled mashed potatoes, and lightly seasoned garlic broccoli — satisfying flavor without excess fat.
Recipe Card
Quick Description
A lighter take on the classic garlic butter salmon plate, keeping rich flavor while lowering fat and points — ideal for high-protein meals or a balanced weeknight dinner.
Servings & Timing
Servings: 1 plate
Prep Time: 10 minutes
Cook Time: 20 minutes
Total Time: 30 minutes
Dietary Badges
High-Protein | Lower Fat | Gluten-Free
Ingredients
Garlic Butter Salmon
2 salmon fillets (4 oz each)
1 tsp olive oil
1 tsp butter
2 cloves garlic, minced
1 tsp garlic herb seasoning (garlic powder, onion powder, paprika, parsley, black pepper)
Lemon juice, to taste
Chopped parsley, for garnish
Portion-Control Mashed Potatoes
1 russet potato, peeled and cubed
1 tsp butter
2 tbsp 1% or skim milk
Garlic herb seasoning, to taste
Black pepper, to taste
Garlic Broccoli
2 cups broccoli florets
Cooking spray or ½ tsp butter
Garlic herb seasoning, to taste
Instructions
1. Prepare the Salmon
Pat salmon fillets dry and season generously with garlic herb seasoning.
2. Sear the Salmon
Heat olive oil in a skillet over medium-high heat.
Place salmon skin-side down and sear 4–5 minutes until skin is crisp.
Flip salmon, add butter and minced garlic, and spoon lightly over the top.
Cook until the salmon flakes easily with a fork.
Finish with a squeeze of fresh lemon juice and garnish with parsley.
3. Make Portion-Control Mashed Potatoes
Boil cubed potato in salted water until fork-tender (about 10–12 minutes).
Drain thoroughly and mash with butter and milk.
Season with garlic herb seasoning and black pepper to taste.
4. Prepare Garlic Broccoli
Steam broccoli until bright green and tender (4–5 minutes).
Toss lightly with butter or cooking spray and garlic herb seasoning.
Additional Notes
Use room-temperature salmon for even cooking.
Spoon butter lightly over salmon to keep flavor while lowering fat.
For extra flavor, add a touch of lemon zest to the potatoes.
This plate is naturally gluten-free and high in protein.
A Balanced, Flavorful Plate
This garlic butter salmon plate delivers protein and flavor with mindful portioning. The salmon remains rich and buttery without excessive fat, the mashed potatoes are creamy but controlled, and the broccoli adds bright color and fiber. Ideal for anyone seeking a satisfying, nutrient-conscious dinner that doesn’t compromise on taste.
Step-by-Step Cooking Guide
Stage 1: Garlic Butter Salmon
Step 1: Dry and Season
Dry salmon thoroughly to ensure a crisp sear. Season on both sides generously.
Tip: If the fillets are cold from the fridge, let them rest 5–10 minutes for even cooking.
Step 2: Skin-Side Sear
Heat oil in the pan and sear skin-side down without moving for 4–5 minutes until golden and crisp.
Step 3: Flip and Baste
Add butter and garlic after flipping. Spoon lightly to coat. Reduce heat slightly to prevent garlic from burning. Cook until opaque and flaky.
Step 4: Finish
Add a squeeze of lemon and sprinkle parsley for brightness.
Stage 2: Portion-Control Mashed Potatoes
Boil Until Tender
Potatoes should break apart easily when pierced.
Mash While Hot
Mash immediately after draining. Use warm milk for creaminess.
Tip: Avoid over-mashing to prevent gluey texture.
Stage 3: Garlic Broccoli
Steam until broccoli is bright green and tender.
Toss lightly with butter or spray and season with garlic herb blend.
Tip: A quick steam preserves nutrients and keeps the broccoli crisp.
Ingredient Details & Substitutions
Salmon
Use fresh, center-cut fillets for even cooking. Wild-caught salmon is firmer, farmed is milder.
Substitutes:
Steelhead trout (similar texture)
Cod (leaner, milder flavor)
Butter
Provides flavor without overloading fat content.
Alternatives:
Ghee for lactose-free
Olive oil for lighter fat
Potato
Russets produce fluffy mashed potatoes.
Alternatives:
Yukon Gold for creamier texture
Cauliflower mash for lower carbs
Milk
Use warm milk to prevent lumps.
Alternatives:
Unsweetened almond milk
Low-fat Greek yogurt for extra protein
Equipment Alternatives
No steamer? Microwave broccoli with 1–2 tbsp water in a covered bowl.
No masher? Use a fork or hand mixer at low speed.
Recipe Variations & Serving Suggestions
Flavor Variations
Add a pinch of smoked paprika to potatoes for subtle warmth.
Stir ½ tsp Dijon mustard into the salmon butter for tang.
Add crushed red pepper flakes for mild heat.
Dietary Variations
Lower Carb: Replace potatoes with cauliflower mash.
Dairy-Free: Use olive oil instead of butter, and almond milk in potatoes.
Serving Suggestions
Garnish with lemon wedges and parsley.
Serve with a light side salad for fiber.
Pair with sparkling water or herbal tea for a refreshing finish.
Storage & Make-Ahead
Storage
Store salmon, potatoes, and broccoli separately in airtight containers.
Refrigerate up to 3 days.
Reheating
Gently reheat salmon in a skillet over low heat.
Add a splash of milk to mashed potatoes before reheating.
Steam or quickly microwave broccoli to avoid sogginess.
Make-Ahead
Potatoes can be mashed ahead and reheated with added milk.
Broccoli can be steamed earlier and quickly reheated.
Quality Notes
Salmon is best fresh but remains flavorful for 1–2 days refrigerated. Potatoes may thicken slightly over time.
Nutrition Per Full Plate (Estimated)
Calories: ~500 kcal
Protein: ~40 g
Carbohydrates: ~40 g
Fat: ~18 g
WW points: ~ 3–4 WW points
Dietary Highlights
High-Protein | Lower Fat | Gluten-Free
Allergens
Contains: Fish, Dairy
Frequently Asked Questions
Q: Can I bake the salmon instead?
Yes. Bake at 400°F for 10–12 minutes depending on fillet thickness.
Q: How do I know salmon is done?
The flesh should be opaque and flake easily with a fork. Internal temperature ~125–130°F for medium.
Q: Can I meal prep this?
Yes. Store components separately and reheat gently to maintain texture.
Q: My mashed potatoes are lumpy. What happened?
Likely undercooked or not drained properly. Mash immediately after draining.
Q: Can I freeze this meal?
Salmon and potatoes can be frozen up to 2 months; broccoli is best fresh.
The Story Behind This Plate
This garlic butter salmon plate was designed to deliver rich flavor and high protein while keeping calories and fat lower. It’s a practical, balanced dinner for anyone focused on nutrition without sacrificing taste. The lighter mashed potatoes and minimal butter still provide creamy satisfaction, and the bright broccoli rounds out a complete, mindful meal.
Try It & Share Your Results
Make this high-protein, lower-fat salmon plate and share your version. Did you tweak the seasoning? Substitute the potatoes? Add extra vegetables? Leave a comment or rating to help others enjoy this recipe and share your experience.
 Tips:
Tips: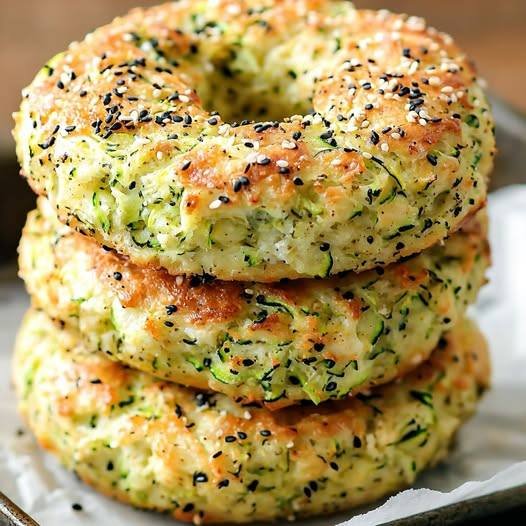
 Why they’re anti-inflammatory
 Ingredients (Makes 6 Bagels)
 Instructions
 Serving Ideas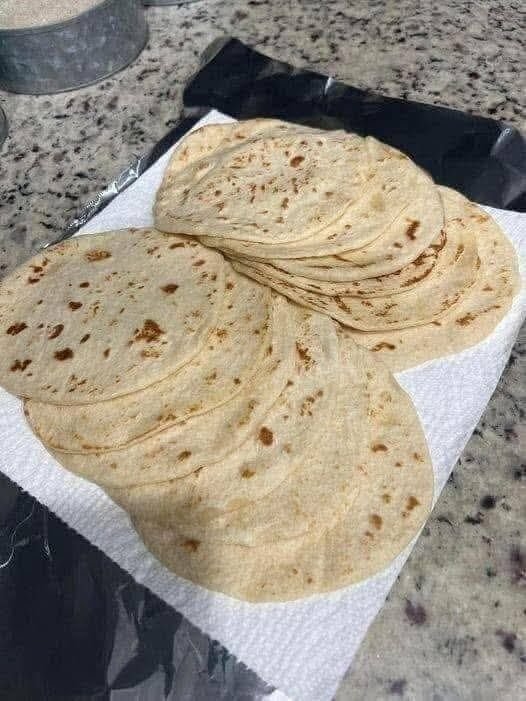
 Note: “Zero carb” is a common phrase, but eggs and dairy contain trace carbs. This recipe is very low carb (≈1g net carb per serving), not absolute zero.
 Supports low-carb & keto diets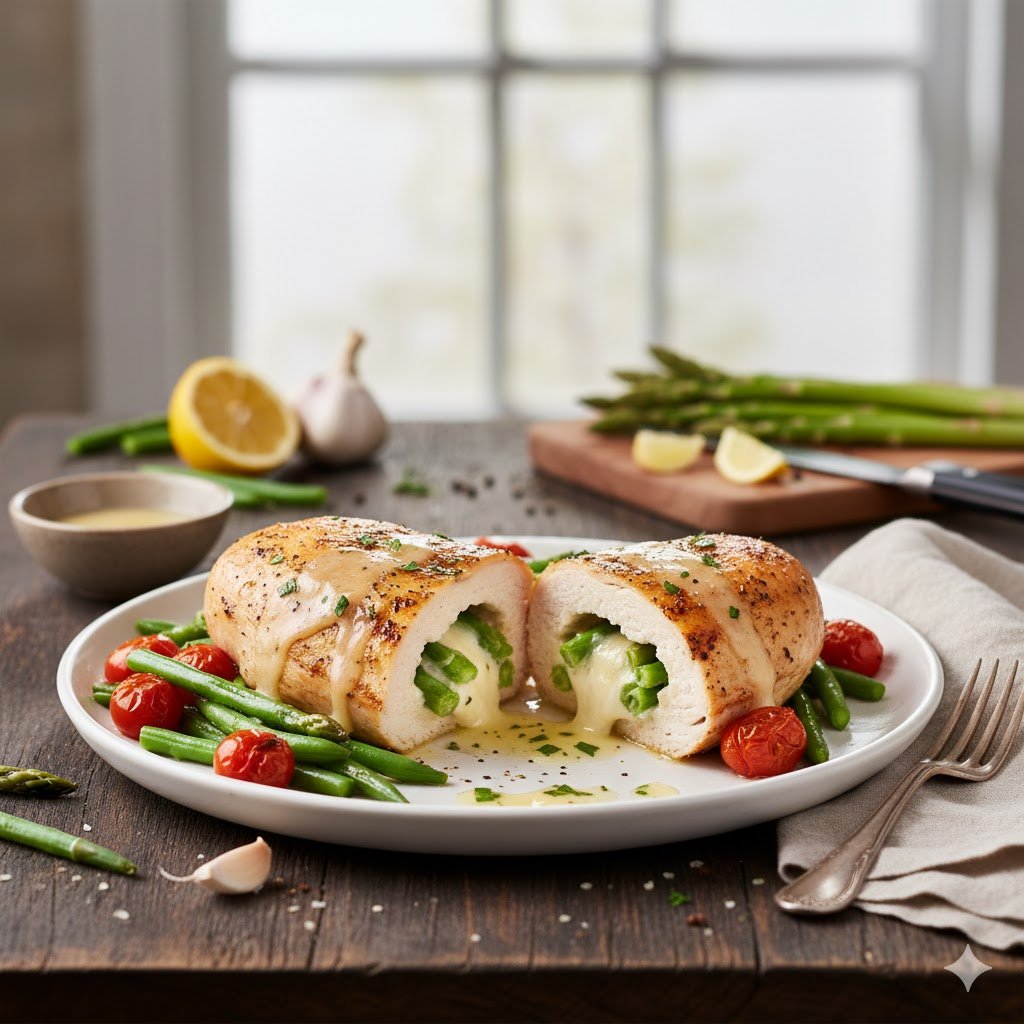
 Nutritional Info (Approximate per cup)

 Prepare the Leaves
 Boil
Boil Steep
Steep Strain & Serve
 Stronger flavor? Simmer longer or add more ginger
 Great cold for summer, warm for digestion
 Add a small drizzle of honey if needed (optional)
 Shake before drinking if infused overnight