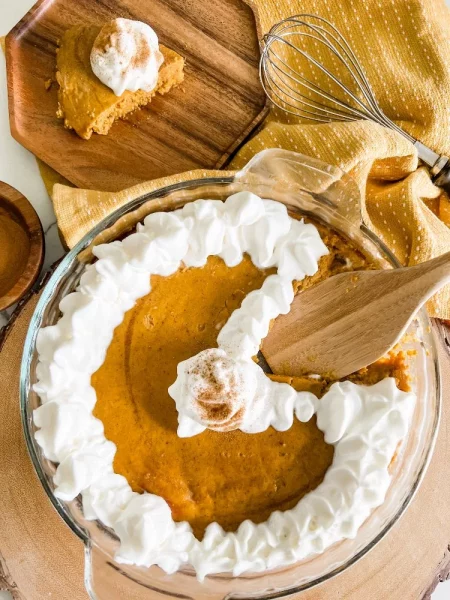
Zero Point Crustless Pumpkin Pie

An easy recipe for a homemade crustless pumpkin pie.  This Zero Point Crustless Pumpkin Pie recipe is perfect for fall-it so good. I won’t regret making this for your next family gathering!

PREP TIME5 minutes

COOK TIME45 minutes

ADDITIONAL TIME5 minutes

TOTAL TIME55 minutes

Ingredients

  • 1 (15 oz) can 100% canned pumpkin purée
  • 1/3 cup zero-point brown sugar substitute – I use Lakanto Golden Monkfruit Sweetener
  • 1 tsp cinnamon
  • 1/2 tsp nutmeg
  • 1/2 tsp vanilla extract
  • 1 tsp pumpkin spice
  • 2 large eggs or 1/2 cup liquid egg substitute
  • 8 oz. unsweetened almond milk, premier protein, unsweetened coconut milk, or Carbmaster no sugar added milk

Instructions

  1. Preheat oven to 375 degrees.
  2. Spray a 9-inch pie dish with nonstick cooking spray.
    In a large mixing bowl, combine all ingredients and mix until all ingredients are well combined.
  3. Pour into prepared pie dish.
  4. Bake for 40-45 minutes or until knife inserted in the center comes out clean.
  5. Remove from oven and let it cool for 10 minutes before serving.
  6. Store in the fridge for up to a week.

0-1 Personal.Points™ p.er slice
*This number shows the PersonalPoints™ range. The points will vary based on your individualized plan.

Notes

Smartpoints for crustless pie: GREEN: Zero Smart.points if using liquid egg substitute or 1 Smart.points per slice if using whole eggs BLUE/PURPLE: Zero SmartPoints per slice
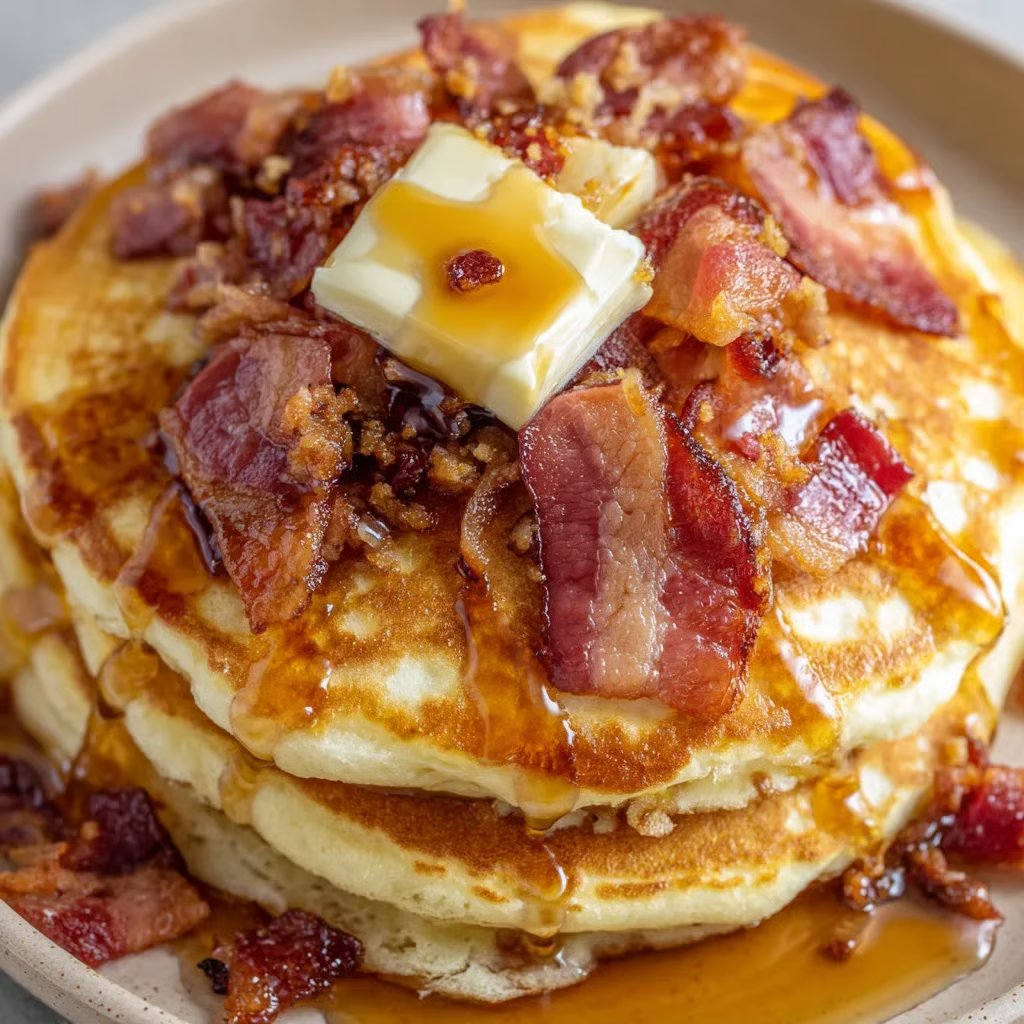
Bacon Pancakes – Sweet & Savory Bites

Fluffy pancakes studded with smoky bacon—perfect for a breakfast that balances sweet and savory in every bite.

Servings: 4–6
Prep Time: 10 minutes
Cook Time: 20 minutes
Total Time: 30 minutes
Occasion: Breakfast, Brunch, Comfort Food

Ingredients

Dry Ingredients

  • 2 cups all-purpose flour

  • 1 tsp baking powder

  • 1 tsp baking soda

  • ¼ tsp salt

  • 2 tbsp brown sugar

Wet Ingredients

  • 1 cup milk (or non-dairy alternative)

  • 1 tsp vanilla extract

  • 2 small eggs

Other Ingredients

  • 8 oz bacon strips, diced and cooked

  • 3 tbsp butter for cooking

Instructions

  1. Prepare the Batter
    In a blender, combine milk, vanilla extract, eggs, baking powder, baking soda, salt, and brown sugar. Pulse until mixed.
    Add flour and blend briefly until smooth.
    If mixing by hand: Sift the flour first to avoid lumps. Stir just until combined—do not overmix.

  2. Cook the Bacon
    In a skillet over medium heat, cook diced bacon until browned and crispy. Remove bacon with a slotted spoon and set aside, leaving some bacon grease in the skillet for flavor.

  3. Cook the Pancakes
    Heat the skillet to medium-low. Add 1 tbsp butter if needed.
    Drop portions of batter into the skillet and sprinkle cooked bacon pieces over the top.
    Cook for 1–2 minutes, until edges start to set and bubbles form on the surface. Flip and cook the other side until golden. Repeat with remaining batter.

  4. Serve
    Enjoy warm, topped with maple syrup, extra butter, or additional bacon crumbles. For large batches, keep pancakes warm in a low oven until serving.

Tips & Variations

  • Keep a thin layer of bacon grease in the skillet for a smoky, savory base.

  • If the skillet becomes too greasy, drain excess before adding more butter.

  • Try using candied bacon for a sweet twist.

  • Swap in turkey bacon or plant-based bacon for a lighter option.

Tools You’ll Need

  • Blender or whisk

  • Mixing bowl

  • Skillet

Do you want me to also group this Bacon Pancakes recipe with your other sweet–savory breakfast combos like Breakfast Pigs in a Blanket and Bacon & Croissant Casserole so they form one brunch category?

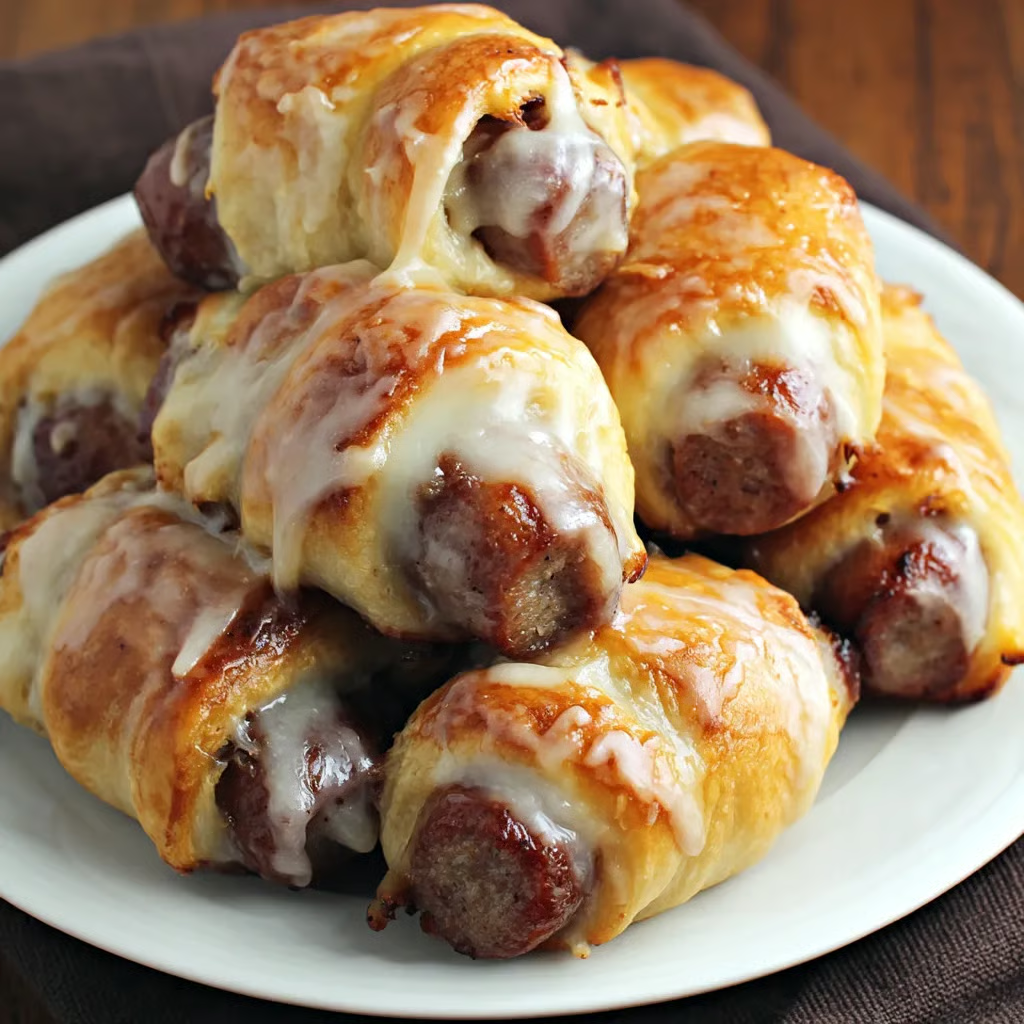
Breakfast Pigs in a Blanket — Cinnamon Roll & Sausage Edition

Sweet meets savory in this fun morning twist — juicy sausage links wrapped in warm cinnamon roll dough, baked to golden perfection, and drizzled with a buttery maple glaze.

Servings: 15–20 pieces
Prep Time: 10 minutes
Cook Time: 20–25 minutes
Total Time: 35 minutes
Occasion: Breakfast, Brunch, Holiday Mornings, Potlucks

Ingredients

  • 1 can refrigerated cinnamon rolls

  • 15–20 sausage links (regular or turkey, preferably pre-cooked)

  • 4 tablespoons butter

  • ¼ cup maple syrup

  • 1 cup powdered sugar

Instructions

  1. Preheat the Oven
    Set oven to 325°F (163°C). Line a baking sheet with parchment paper for easy cleanup.

  2. Wrap the Sausages
    Unravel each cinnamon roll and cut into 3–4 equal strips, depending on the number of sausages. Wrap each strip of dough around a sausage link and arrange on the prepared baking sheet.

  3. Bake
    Bake for 20–25 minutes, or until the cinnamon roll dough is puffed and golden brown.

  4. Make the Glaze
    In a bowl, combine melted butter and maple syrup. Gradually whisk in powdered sugar until smooth.

  5. Finish & Serve
    Drizzle the glaze generously over the warm sausage rolls. Serve immediately for the best texture and flavor.

Tips & Variations

  • Protein Swap: Try mini chicken apple sausages for a sweet and tangy version.

  • Extra Sweet: Sprinkle a pinch of cinnamon sugar on top after glazing.

  • Make Ahead: Wrap sausages in dough the night before, refrigerate, and bake in the morning.

  • Party Trick: Serve with small skewers for easy grabbing at brunch buffets.

Tools You’ll Need

  • Baking sheet

  • Parchment paper

  • Mixing bowl

  • Spoon or whisk

If you want, I can combine this with your Sausage Breakfast Hawaiian Sliders into a “Sweet & Savory Breakfast Sandwiches” blog post so they sit in one fun category. That way your readers can jump between recipes easily. Would you like me to do that?

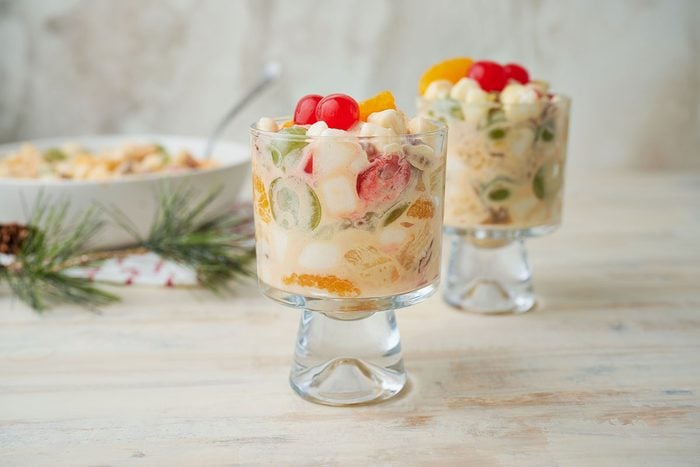
Christmas Fruit Salad

Fresh, colorful, and festive — this Christmas Fruit Salad combines seasonal fruits with a light honey-lime dressing for a holiday dish that’s as beautiful as it is delicious.

Servings: 6
Prep Time: 15 minutes
Total Time: 15 minutes
Occasion: Christmas, Holiday Parties, Winter Brunch

Ingredients

Fruit Mix

  • 1 cup red grapes

  • 1 cup green grapes

  • 1 pear, sliced

  • 1 red apple, sliced

  • 2 kiwis, peeled and sliced

  • 1 cup fresh raspberries

  • ¼ cup pomegranate seeds

Honey-Lime Dressing

  • 2 tbsp honey

  • 1 tbsp lime juice

  • 1 tbsp water

Instructions

  1. Prepare Fruit: Wash and dry all fruit. Slice the pear, apple, and kiwis into bite-sized pieces. Halve large grapes if desired.

  2. Mix Fruit: In a large glass bowl, gently combine grapes, pear, apple, kiwi slices, raspberries, and pomegranate seeds. Handle raspberries carefully so they stay intact.

  3. Make Dressing: In a small dish, whisk together honey, lime juice, and water until fully blended and smooth.

  4. Dress the Salad: Drizzle the honey-lime mixture over the fruit. Toss lightly to coat without crushing the softer fruits.

  5. Serve or Chill: Serve immediately or refrigerate covered for up to 6 hours before serving.

Brief Introduction

This salad is like Christmas in a bowl — the bright reds, greens, and golds give it a festive look, while the sweet-tart dressing ties everything together. Perfect for adding a healthy, refreshing touch to the holiday table.

Step-by-Step Cooking Guide

1. Preparing the Fruit

  • Use ripe but firm fruits to keep the salad fresh-looking for hours.

  • Soak apple and pear slices briefly in lemon water to prevent browning if making ahead.

2. Whisking the Dressing

  • The honey-lime combo gives a light glaze and a burst of flavor without overpowering the natural sweetness of the fruit.

3. Gentle Mixing

  • Add the raspberries last and fold them in gently to keep them whole.

Ingredient Details & Substitution Tips

  • Pears: Bosc or Anjou pears work best — they’re sweet yet firm.

  • Pomegranate Seeds: Can be swapped for dried cranberries if you prefer.

  • Kiwi: Golden kiwi adds a different color and a sweeter flavor.

Recipe Variations & Serving Suggestions

  • Minty Twist: Add finely chopped fresh mint for a cool finish.

  • Holiday Dessert Parfait: Layer the salad with vanilla yogurt and granola in glasses.

  • Tropical Upgrade: Toss in pineapple chunks for extra brightness.

Storage & Make-Ahead Information

  • Make Ahead: Prepare fruit and dressing separately. Combine just before serving.

  • Storage: Keep covered in the refrigerator for up to 6 hours. Best enjoyed fresh.

Nutrition Facts (per serving)

Calories: ~120 kcal | Carbs: 32g | Protein: 1g | Fat: 0.5g | Sugar: 24g | Fiber: 4g

FAQs

Q: Can I double this recipe for a big crowd?
A: Absolutely! Just keep the same dressing ratio to maintain flavor balance.

Q: How do I keep raspberries from getting mushy?
A: Add them right before serving and handle gently when tossing the salad.

Personal Story

The first time I made this salad for Christmas brunch, I didn’t expect it to disappear faster than the desserts — but it did. Everyone loved the fresh burst of flavor between heavier holiday dishes, and now it’s a must-have tradition on our table.

Do you want me to also make a matching winter salad photo inspiration guide so it looks perfect on a holiday spread? That could tie in beautifully with the rest of your recipe blog.


Delightful Hidden Surprise Easter Cakes

Mini bundt cakes filled with pastel candies and topped with colorful glaze — a fun, festive dessert that hides a sweet surprise inside!

Servings: 6 medium bundt cakes
Prep Time: 20 minutes
Cook Time: 20–25 minutes (depending on cake mix)
Cooling Time: 30–40 minutes
Total Time: ~1 hour 15 minutes
Occasion: Easter, Spring Celebrations, Baby Showers

Ingredients

For the Cakes

  • 1 box white cake mix (or homemade white cake batter), prepared as directed

  • Assorted Easter-themed candies (jelly beans, mini eggs, pastel M&Ms, etc.)

For the Glaze

  • 2 cups powdered sugar

  • 2 tbsp milk (add more if needed for consistency)

  • 1 tsp fresh lemon juice

  • ½ tsp vanilla extract

  • Pastel gel food coloring (pink, yellow, lavender, mint green, etc.)

Instructions

  1. Prepare Pan: Butter and flour a mini bundt cake pan with 6 slots. Preheat oven according to cake mix instructions.

  2. Make Cake Batter: Follow box instructions or your homemade recipe to prepare white cake batter. Pour evenly into prepared bundt pan, filling each mold about ⅔ full.

  3. Bake & Cool: Bake according to directions (usually 20–25 minutes) or until a toothpick inserted comes out clean. Let cool in pan for 10 minutes, then transfer to a wire rack to cool completely.

  4. Level Cakes: Once cooled, trim a small slice from the bottom of each cake so it stands upright without wobbling.

  5. Make Glaze: In a bowl, whisk powdered sugar, milk, vanilla, and lemon juice until smooth and thick but pourable. Adjust consistency with more milk (if too thick) or more sugar (if too thin). Divide glaze into small bowls and tint each with a different pastel gel food color.

  6. Add Hidden Candy: Fill the center hole of each bundt cake with Easter candies, mounding slightly if desired.

  7. Glaze & Decorate: Drizzle pastel glaze over cakes, keeping the center hole visible so candy peeks through. Top with extra candy for decoration.

  8. Serve & Surprise: Present whole for a “hidden treasure” effect — when sliced, the candy spills out for a delightful reveal.

Brief Introduction

These charming mini bundt cakes are a playful twist on the classic Easter dessert. Their pastel glaze and hidden candy center make them a perfect table centerpiece — and the big reveal when cutting into them is guaranteed to make both kids and adults smile.

Step-by-Step Cooking Guide

1. Baking the Cakes

Mini bundt cakes are the perfect size for individual servings, and the center hole makes an easy spot to hide candy.

2. Mixing Pastel Glaze

Use gel food coloring for bright yet soft spring shades without thinning the glaze.

3. Filling & Decorating

Pile candies high for maximum “wow” factor when the cakes are cut open.

Ingredient Details & Substitution Tips

  • Cake Mix: Use lemon, strawberry, or funfetti cake mix for extra color and flavor.

  • Candies: Choose ones that won’t melt easily at room temperature.

  • Glaze: You can replace lemon juice with orange juice for a softer citrus flavor.

Recipe Variations & Serving Suggestions

  • Chocolate Lover’s Version: Use chocolate cake mix and fill with mini chocolate eggs.

  • Kid’s Party Twist: Fill with rainbow sprinkles or gummy candies.

  • Extra Festive: Add edible glitter or gold leaf flakes on top.

Storage & Make-Ahead Information

  • Room Temperature: Store covered for up to 3 days.

  • Refrigeration: Not recommended as candies may become sticky.

  • Make Ahead: Bake cakes 1 day ahead, glaze and fill just before serving.

Nutrition Facts (per cake, based on 6 cakes)

Calories: ~380 kcal | Carbs: 65g | Protein: 4g | Fat: 12g | Sugar: 45g

FAQs

Q: Can I make these without a bundt pan?
A: Yes — bake cupcakes, then hollow out the center with a melon baller before filling with candy.

Q: How do I keep glaze from dripping too much?
A: Ensure the cakes are completely cool and glaze is slightly thick so it clings nicely.

Personal Story

The first time I made these was for an Easter brunch, and I underestimated how much excitement a little hidden candy could bring. When the first cake was cut open, everyone leaned in to see the surprise — and instantly grabbed a slice. It’s now a yearly tradition.

If you’d like, I can also create a spring brunch display idea showing how to arrange these cakes with flowers, eggs, and pastel decorations for maximum table impact. Would you like me to do that next?

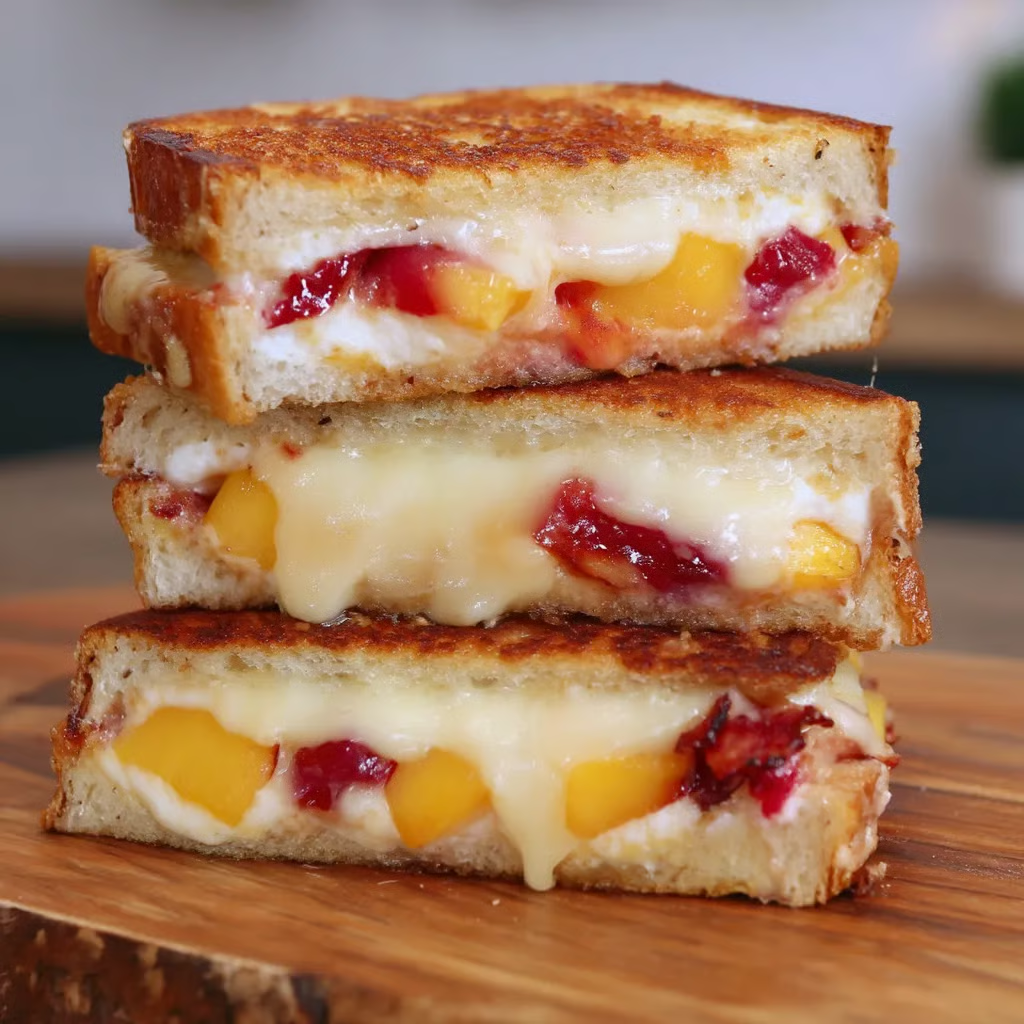
Honey Peach White Cheddar Sandwich

Sweet summer peaches meet creamy ricotta, sharp white cheddar, and golden buttery bread for a grilled sandwich that’s both decadent and refreshing.

Servings: 2 sandwiches
Prep Time: 10 minutes
Cook Time: 6–8 minutes
Total Time: 18 minutes
Dietary Badges: Vegetarian (without bacon)

Ingredients

Main Ingredients

  • Peaches, peeled and sliced (2)

  • Sourdough bread slices (4) — challah, multigrain, or thick white bread also work

  • Ricotta cheese (2–4 tbsp, optional)

  • Honey (1 tbsp)

  • White cheddar cheese slices (4)

  • Butter (2 tbsp)

Optional Ingredients

  • Crispy bacon slices (4)

  • Fresh basil leaves

  • Balsamic glaze drizzle

Instructions

  1. Prep Peaches: Peel and slice peaches; set aside.

  2. Assemble Base: Spread ricotta on one side of each bread slice. On two slices, layer peach slices and drizzle with honey. On the other two slices, place white cheddar cheese.

  3. Butter Bread: Spread butter on the outer side of each slice of bread.

  4. Grill Sandwich: Heat a panini press or skillet over medium-low. Cook sandwiches until cheese is melted and bread is golden (reduce to low if browning too fast).

  5. Optional Add-Ons: If desired, lift top bread slice and add bacon, basil, or balsamic glaze before serving.

  6. Serve: Enjoy immediately while the bread is crisp and cheese is perfectly melted.

Notes:

  • White cheddar provides a sharp contrast to the sweet peaches, but brie or Havarti make a creamier alternative.

  • Ricotta adds creaminess but can be omitted for a sharper flavor profile.

Brief Introduction

This honey peach white cheddar sandwich strikes the perfect balance between sweet, savory, and buttery crisp. It’s a quick gourmet lunch or light dinner option, especially when peaches are at their juiciest.

Step-by-Step Cooking Guide

Layering the Flavors

  1. Cheese & Fruit Harmony: Ricotta and cheddar create a creamy-sharp combo that pairs beautifully with ripe peaches.

  2. Sweet Drizzle: Honey enhances peach sweetness and caramelizes slightly during cooking.

Grilling to Perfection

  1. Gentle Heat: Medium-low ensures the cheese melts before bread over-browns.

  2. Final Flourish: Add bacon for smokiness, basil for freshness, or balsamic glaze for tangy depth.

Ingredient Details & Substitution Tips

  • Bread: Sourdough gives tang; challah is softer and sweeter; multigrain adds nuttiness.

  • Cheese: White cheddar for sharpness, brie for creaminess, or fontina for mild melt.

  • Peaches: Fresh and ripe are ideal, but grilled peaches add a smoky twist.

  • Sweetener: Maple syrup or agave can replace honey.

Recipe Variations & Serving Suggestions

  • Caprese-Inspired: Add tomato slices and mozzarella instead of cheddar.

  • Savory Spin: Swap peaches for grilled pears and add prosciutto.

  • Brunch Style: Serve with a fried egg on top.

Storage & Make-Ahead Information

  • Best Served Fresh: This sandwich is at peak flavor and texture right after cooking.

  • Short-Term Hold: Keep warm in a 90°C (200°F) oven for up to 15 minutes.

  • Make-Ahead Elements: Slice peaches and prepare add-ons ahead; assemble and grill when ready to serve.

Nutrition Facts (per serving, without optional ingredients)

Calories: ~420 kcal | Carbs: 38g | Protein: 15g | Fat: 22g | Sodium: 550mg | Sugar: 13g

FAQs

Q: Can I use canned peaches?
A: Yes, but drain and pat dry to avoid soggy bread.

Q: How do I make it less sweet?
A: Reduce or skip the honey, and use extra-sharp cheddar.

Q: Can I grill it without a panini press?
A: Absolutely — just use a skillet and press down with a spatula for even browning.

Personal Story

This sandwich was born during peach season when I had more ripe fruit than I could eat fresh. Pairing it with tangy white cheddar and golden buttery bread turned a simple lunch into a café-worthy treat.

If you want, I can also make short image captions for a photo guide so it’s blog-ready without extra editing. Would you like me to prepare those for this recipe?