Healthy Blueberry Yogurt, A light, protein-packed treat perfect for mornings or snacks.

Servings: 2
Total Time: 10 minutes
Difficulty: Easy
Calories per Serving: ~180 kcal
Macros per Serving (approx.): Protein 18g / Carbs 8 g / Fat 7 g / Fiber 3 g

Get updates on the latest posts and more from tacosbellmenu. us straight to your inbox.


Why You’ll Love This Blueberry Yogurt Parfait

Looking for a quick, nutrient-packed breakfast or snack that’s as delicious as it is healthy? This Blueberry Yogurt Parfait combines creamy yogurt, fresh blueberries, and crunchy low-carb toppings for a satisfying, energizing treat.

Perfect for keto, low-carb, high-protein, and low-calorie diets, it’s a versatile dish that can be prepped in minutes and enjoyed anytime. Each spoonful offers a balance of protein, healthy fats, and antioxidants, keeping you full and focused without the sugar spike.

Whether you’re meal prepping for the week or enjoying a last-minute breakfast, this parfait is refreshing, guilt-free, and completely diet-friendly.


What Makes This Parfait So Special

  • Sensory Appeal: Creamy yogurt, juicy blueberries, and a crunchy nut topping create a perfect textural contrast.
  • Flavor Highlight: Sweet and tangy berries pair beautifully with the richness of Greek yogurt.
  • Diet Benefits: Low in carbs, high in protein, keto-approved, and portion-controlled for WW and low-calorie diets.

Subscribe to tacosbellmenu.us!

Get updates on the latest posts and more from tacosbellmenu. us straight to your inbox.

Ingredients Needed

Base Layer:

  • 1 cup Greek yogurt (full-fat for Keto, non-fat for low-cal/WW)
  • 1 tsp vanilla extract
  • 1–2 tsp low-carb sweetener (erythritol, stevia, or monk fruit, optional)

Fruit Layer:

  • ½ cup fresh blueberries (or frozen, thawed and drained)

Crunchy Topping:

  • 2 tbsp chopped almonds or walnuts (toasted for extra flavor)
  • 1 tsp chia seeds (optional for added fiber and texture)

How to Make Our Blueberry Yogurt Parfait

  1. Prepare the yogurt: In a small bowl, mix Greek yogurt with vanilla extract and your sweetener of choice until smooth.
  2. Layer the parfait: In serving glasses or jars, start with a layer of yogurt, followed by a layer of fresh blueberries. Repeat to create two layers.
  3. Add the crunch: Sprinkle chopped nuts and chia seeds over the top for texture and extra nutrition.
  4. Serve immediately or refrigerate for up to 1 hour to chill. Perfect for on-the-go breakfasts or quick snacks.

Storage & Serving Suggestions

  • Storing: Keep refrigerated in a covered container or jar for up to 24 hours. Best enjoyed fresh.
  • Freezing: Not recommended, as yogurt may separate when thawed.
  • Serving Pairings: Pair with a cup of green tea or black coffee for a complete, balanced breakfast.

Tips & FAQs

Q: Can I use other berries?
A: Yes! Strawberries, raspberries, or blackberries work well and keep it low-carb.

Q: Can I make it vegan?
A: Substitute Greek yogurt with unsweetened coconut yogurt for a vegan-friendly option.

Subscribe to tacosbellmenu.us!

Get updates on the latest posts and more from tacosbellmenu. us straight to your inbox.

Q: How can I increase protein further?
A: Add a scoop of vanilla protein powder to the yogurt before layering.

Q: Can I prepare this ahead of time?
A: Yes! Assemble in jars the night before for an easy grab-and-go breakfast.

Q: Is it suitable for keto?
A: Absolutely! Use full-fat Greek yogurt, low-carb sweetener, and nuts for a keto-friendly parfait.

🍋🔥 Ginger Water (Healthy & Simple)

Ingredients

  • 1–2 inches fresh ginger root, peeled and sliced
  • 1 liter (4 cups) water
  • Optional:
    • Juice of ½ lemon
    • ½ tsp honey (optional, small amount)

How to Make

  1. Add ginger slices to water.
  2. Bring to a boil, then simmer 10–15 minutes.
  3. Strain into a bottle or cup.
  4. Add lemon juice if desired.
  5. Drink warm or cold.

✅ How Ginger Water Helps

  • Reduces bloating & water retention
  • Improves digestion
  • Helps control cravings
  • May slightly increase calorie burning
  • Anti-inflammatory (great for overall health)

⏰ Best Way to Drink for Weight Loss

  • 1 cup in the morning on an empty stomach
  • 1 cup before dinner
  • Total: 2–3 cups per day

⚠️ Important Truth (Very Important)

  • Ginger water supports fat loss, it does NOT spot-burn fat
  • Fat loss happens with:
    • Calorie control
    • High-protein & high-fiber foods
    • Daily movement (walking counts!)

🔥 Make It More Effective

Pair ginger water with:

  • Light dinners (salads, soups, eggs, chicken)
  • Walking 20–30 minutes daily
  • Avoid sugary drinks & late-night snacks

AMISH WHITE BREAD

INGREDIENTS FOR AMISH WHITE BREAD

  1. Two cups of heated (45°C/110°F) water
  2. Half a cup of white sugar
  3. a tsp of active dry yeast
  4. Half a cup of vegetable oil
  5. One and a half tablespoons of salt
  6. six cups of bread flour

GUIDELINES  FOR AMISH WHITE BREAD

  • Compile every component.
  • In a large basin, dissolve sugar in warm water; whisk in yeast. Give the yeast five to ten minutes to proof until it resembles a creamy froth.
  • Add salt and oil to the yeast mixture. One cup of flour at a time, mix in.
  • On a surface dusted with flour, knead dough until it’s smooth.
  • Transfer to a lightly oiled bowl, then turn the dough to coat. With a moist cloth, cover. Give it an hour or so to rise until the mass has doubled.
  • Beat down the dough.
  • Work the dough for a few minutes, then split in two. Form into loaves and transfer to two 9×5-inch loaf pans that have been well-oiled.
  • Give the dough 30 minutes or so to rise, or until it has risen an inch above the pans.
  • Meanwhile, heat the oven to 175 degrees Celsius, or 350 degrees Fahrenheit.
  • For thirty minutes, bake the risen loaves in the preheated oven, or until they are golden brown.
  • Enjoy!

No-Bake 3-Ingredient Milk Pudding

🍮 No-Bake 3-Ingredient Milk Pudding

Smooth • Creamy • Simple Custard-Style Dessert

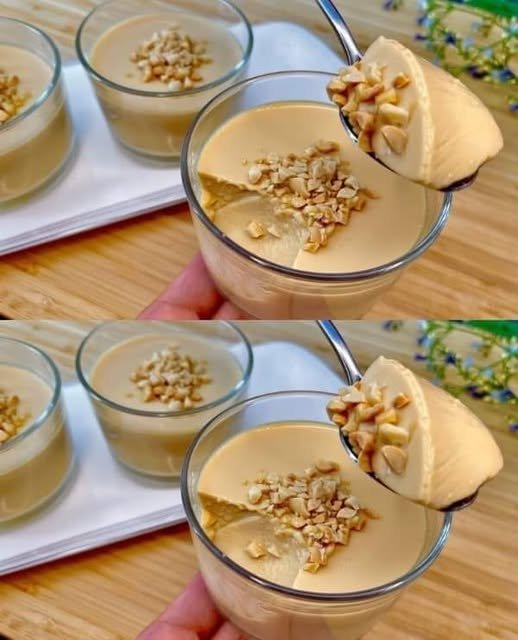
This easy milk pudding is a soft, creamy dessert made with just milk, sugar, and eggs. It sets gently in the refrigerator and has a smooth, comforting texture similar to classic custard. With careful low-heat cooking and constant stirring, you get a silky pudding without baking or complicated steps.


Recipe Overview

  • Prep Time: 5 minutes

  • Cook Time: 10–15 minutes

  • Chill Time: 2–3 hours

  • Servings: 4 small bowls


Ingredients

Main Ingredients

  • 2 cups (500 ml) milk

  • ⅓ cup (70 g) sugar

  • 2 large eggs

Optional (Recommended)

  • 1 teaspoon vanilla extract
    (adds aroma and smooth flavor)

Optional Toppings

  • Chopped peanuts or walnuts

  • Caramel drizzle

  • Fresh fruit


Equipment Needed

  • Medium saucepan

  • Whisk or silicone spatula

  • Fine-mesh strainer

  • Serving bowls or ramekins


Step-by-Step Instructions

1. Mix the Eggs and Sugar

  • Place the saucepan on the counter (do not heat yet)

  • Add eggs and sugar

  • Whisk until the sugar is mostly dissolved and the mixture looks slightly pale and smooth


2. Add the Milk

  • Slowly pour the milk into the egg mixture

  • Whisk continuously to keep everything smooth

  • Add vanilla extract if using


3. Cook Gently

  • Place the saucepan over low heat

  • Stir constantly using a whisk or spatula

  • Scrape the bottom and sides of the pan to prevent sticking

⚠️ Important: Keep the heat low. High heat can cause the eggs to cook unevenly.


4. Thicken the Pudding

  • Continue stirring for 10–12 minutes

  • The mixture will gradually thicken

  • It is ready when it:

    • Coats the back of a spoon

    • Looks creamy but still pours easily

(It will firm up more as it cools.)


5. Strain for Smoothness

  • Remove from heat

  • Pour the mixture through a fine strainer into a bowl or jug

  • This step ensures a silky, lump-free texture


6. Chill and Set

  • Pour the pudding into serving bowls or ramekins

  • Let cool at room temperature for about 20 minutes

  • Cover and refrigerate for 2–3 hours, until fully set


7. Serve

  • Serve chilled

  • Add nuts, caramel, or fruit just before serving if desired


Texture & Flavor

  • Texture: Smooth, soft, custard-like

  • Flavor: Lightly sweet, creamy, comforting


Helpful Tips

  • Stir continuously for best texture

  • Never let the mixture boil

  • Use room-temperature eggs for smoother blending

  • For extra richness, replace ¼ cup of milk with cream


Optional Variation (Firmer Texture)

If you prefer a firmer, pudding-style set:

  • Mix 1 tablespoon cornstarch into the cold milk before heating

  • Proceed with the recipe as written


Storage

  • Store covered in the refrigerator

  • Best enjoyed within 2 days

Moist Orange Pound Cake

🍊 Moist Orange Pound Cake

Soft • Fragrant • Naturally Citrus-Forward

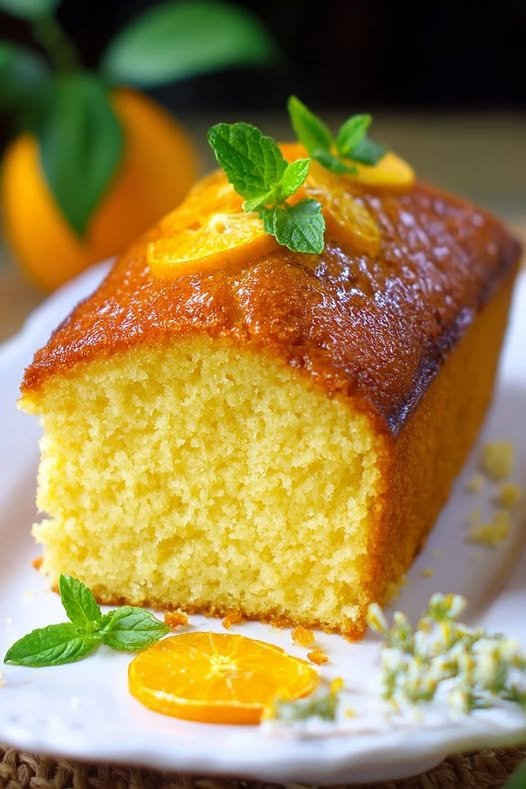
This orange pound cake is tender, moist, and filled with fresh orange flavor from real juice and zest. It has a fine crumb, a golden crust, and a bright citrus glaze that soaks gently into the cake. Perfect for tea time, breakfast, or dessert, this cake stays soft for days and slices beautifully.


Recipe Overview

  • Prep Time: 15 minutes

  • Bake Time: 65–70 minutes

  • Oven Temperature: 350°F (175°C)

  • Yield: 1 loaf or bundt-style cake (10–12 slices)


Ingredients

Dry Ingredients

  • 2½ cups (300 g) all-purpose flour

  • ¾ teaspoon baking powder

  • ¼ teaspoon salt


Wet Ingredients

  • 1 cup (200 g) granulated sugar

  • 2 tablespoons fresh orange zest
    (from about 3 oranges)

  • ¾ cup (180 ml) fresh orange juice

  • 1 cup (240 ml) vegetable oil

  • 3 large eggs, room temperature

  • 1 tablespoon vanilla extract


Orange Glaze

  • 1 cup (120 g) powdered sugar

  • Zest of ½ orange

  • 2 tablespoons fresh orange juice


Equipment Needed

  • Mixing bowls

  • Whisk

  • Rubber spatula

  • Loaf pan or bundt pan

  • Fine grater (for zest)

  • Wire cooling rack


Step-by-Step Instructions

1. Prepare the Oven and Pan

  • Preheat oven to 350°F (175°C)

  • Grease a loaf or bundt pan thoroughly

  • Lightly dust with flour and tap out excess

  • Set aside


2. Combine Dry Ingredients

  • In a large bowl, sift together:

    • Flour

    • Baking powder

    • Salt

  • Whisk briefly to distribute evenly

  • Set aside


3. Infuse the Sugar with Orange Zest

  • Place sugar and orange zest in a separate bowl

  • Rub them together using clean fingertips

  • Continue until the sugar feels slightly moist and fragrant
    (this step releases natural citrus oils for stronger flavor)


4. Mix the Wet Ingredients

  • Add to the orange-sugar mixture:

    • Eggs

    • Orange juice

    • Vegetable oil

    • Vanilla extract

  • Whisk until smooth and well blended


5. Make the Batter

  • Pour the wet mixture into the dry ingredients

  • Fold gently using a spatula

  • Mix just until no dry flour remains

  • Do not overmix to keep the cake tender


6. Bake the Cake

  • Pour batter evenly into prepared pan

  • Smooth the top gently

  • Bake for 65–70 minutes

  • Test with a toothpick inserted into the center

    • It should come out clean or with a few soft crumbs


7. Cool

  • Let cake cool in the pan for 10–15 minutes

  • Carefully remove and transfer to a wire rack

  • Allow to cool until slightly warm


Glaze Instructions

8. Prepare the Orange Glaze

  • In a small bowl, whisk:

    • Powdered sugar

    • Orange zest

    • Orange juice

  • Adjust consistency if needed

    • Add more juice for thinner glaze

    • Add more sugar for thicker glaze


9. Glaze the Cake

  • Drizzle glaze over the slightly warm cake

  • Allow glaze to set before slicing


Texture & Flavor

  • Texture: Moist, soft, fine crumb

  • Flavor: Bright orange with gentle sweetness

  • Finish: Light citrus glaze that soaks into the cake


Storage Tips

  • Store covered at room temperature for 2 days

  • Refrigerate for up to 5 days

  • Bring to room temperature before serving for best texture


Optional Variations

  • Add ½ teaspoon cardamom or cinnamon

  • Replace half the oil with melted butter for richer flavor

  • Add chopped almonds for texture

  • Use lemon instead of orange for a citrus swap

Best Walnut & Raisin Banana Bread

Best Walnut & Raisin Banana Bread

Moist • Dense • Naturally Sweet • Nutty Crunch

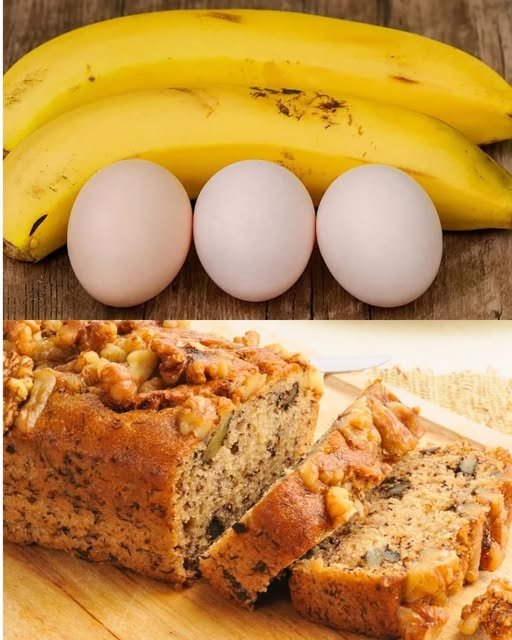
This classic Walnut & Raisin Banana Bread is rich, moist, and deeply flavorful. Overripe bananas provide natural sweetness and softness, while toasted walnuts add crunch and raisins bring gentle bursts of sweetness. This loaf is perfect for breakfast, tea time, or a comforting homemade snack.


Why This Recipe Works

  • Uses very ripe bananas for maximum flavor and moisture

  • Balanced fat and sugar for a soft yet sturdy crumb

  • Toasted walnuts enhance aroma and texture

  • Gentle mixing prevents a tough loaf

  • Bakes evenly with a beautifully golden top


Ingredients

The Base

  • 3 ripe bananas, thoroughly mashed
    (The peels should be heavily speckled or brown)

  • ½ cup unsalted butter (1 stick), softened to room temperature
    (Butter adds richness and moisture)

  • ¾ cup white sugar
    (You may substitute with 1 scant cup honey for a deeper flavor)

  • 1 large egg, lightly beaten
    (One egg keeps the bread soft and tender)

  • 1 teaspoon vanilla extract

  • 1 teaspoon baking soda

  • A pinch of salt

  • 1½ cups all-purpose flour, sifted


The Mix-Ins

  • ½ cup walnuts, chopped and lightly toasted

  • ½ cup raisins
    (Soak in warm water for 5 minutes, then drain and pat dry for plumpness)


Equipment Needed

  • 4×8-inch loaf pan

  • Mixing bowls

  • Whisk or spoon

  • Rubber spatula

  • Wire cooling rack


Step-by-Step Instructions

1. Prepare the Oven and Pan

  • Preheat your oven to 350°F (175°C)

  • Grease a 4×8-inch loaf pan with butter or non-stick spray

  • Optionally line with parchment paper for easy removal


2. Toast the Walnuts

  • Place chopped walnuts in a dry skillet over medium heat

  • Stir frequently for 3–5 minutes, until lightly golden and fragrant

  • Remove from heat and allow to cool completely

Tip: Toasting walnuts brings out their natural oils and enhances flavor.


3. Cream the Butter and Sugar

  • In a large mixing bowl, combine softened butter and sugar

  • Beat until smooth, creamy, and slightly fluffy

This step helps create a soft crumb.


4. Add Wet Ingredients

  • Stir in the beaten egg until fully incorporated

  • Add vanilla extract

  • Mix in mashed bananas until smooth and uniform


5. Add Dry Ingredients

  • Sprinkle baking soda and salt evenly over the batter

  • Gently fold in the flour using a spatula

  • Mix just until no dry flour remains

⚠️ Do not overmix — overmixing can make the bread dense


6. Fold in Walnuts and Raisins

  • Gently fold in:

    • All the raisins

    • Half of the toasted walnuts

Reserve remaining walnuts for topping.


7. Bake

  • Pour batter evenly into the prepared loaf pan

  • Sprinkle remaining walnuts on top

  • Bake for 50–60 minutes


8. Check for Doneness

  • Insert a toothpick into the center

  • It should come out clean or with a few moist crumbs

If needed, bake 5 minutes longer and check again.


9. Cool Properly

  • Let the bread cool in the pan for 10 minutes

  • Carefully remove and transfer to a wire rack

  • Allow to cool completely before slicing


Texture & Flavor Notes

  • Inside: moist, tender, and banana-rich

  • Top: golden with a nutty crunch

  • Flavor deepens even more the next day


Storage Tips

  • Room temperature: Wrap tightly, keeps fresh for 2 days

  • Refrigerator: Up to 5 days

  • Freezer: Slice, wrap individually, and freeze up to 3 months