Apple and Cinnamon Oat Breakfast Bake

Apple and Cinnamon Oat Breakfast Bake

This baked oat dish combines apples, cinnamon, eggs, milk, and nuts to create a soft, lightly spiced breakfast option that can be served warm or at room temperature.

Preparation Time

15 minutes

Baking Time

30–35 minutes

Servings

4–6


Ingredients

  • 1 cup (90 g) rolled oats or quick oats

  • 240 ml milk (dairy or unsweetened plant-based milk)

  • 3 medium apples (about 400 g), peeled and cored

  • 2 large eggs

  • 30 g butter, divided

  • 1 teaspoon ground cinnamon

  • 1 teaspoon vanilla extract or a small pinch of vanillin

  • 1 cup (100 g) chopped nuts (walnuts, almonds, or pecans)

  • ½ cup (75 g) blueberries (optional)

  • A small pinch of salt


Instructions

1. Soak the Oats

Place the oats in a mixing bowl and pour in the milk. Stir until evenly combined.
Allow the mixture to rest for 10 minutes so the oats absorb the liquid and soften.


2. Prepare the Apples

Cut the peeled and cored apples into small pieces.
Transfer them to a blender or food processor and pulse until a thick, slightly textured puree forms. Do not overblend; a small amount of texture is desirable.


3. Mix the Batter

Melt 1 tablespoon of the butter and allow it to cool slightly.
Add the apple puree, eggs, vanilla extract, cinnamon, salt, and melted butter to the soaked oats.
Stir until all ingredients are evenly incorporated.


4. Add Nuts and Fruit

Fold in the chopped nuts and blueberries, if using. Mix gently to distribute them evenly throughout the batter.


5. Prepare the Baking Dish

Preheat the oven to 180°C (350°F).
Use the remaining 1 tablespoon of butter to grease a medium-sized baking dish.

Pour the batter into the prepared dish and smooth the surface.


6. Bake

Bake for 30–35 minutes, or until the center is set and the top is lightly browned.
Remove from the oven and allow to rest for 5–10 minutes before serving.


Helpful Notes

  • For a smoother texture, the apples can be grated instead of blended.

  • The bake firms up as it cools, making it easier to slice.

  • Store leftovers in an airtight container in the refrigerator for up to 3 days.
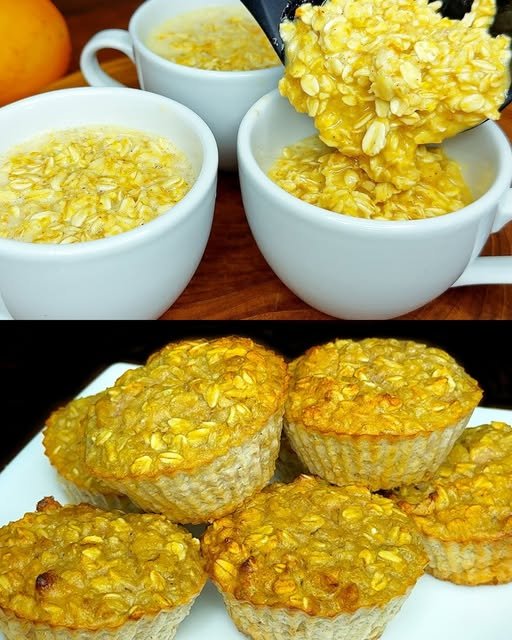
Orange Oat Muffins

Orange Oat Muffins

These muffins are made with oats, fresh orange juice, and eggs, resulting in a moist and lightly citrus-flavored baked product. They are suitable for breakfast or as a small snack.

Preparation Time

10 minutes

Baking Time

20–25 minutes

Yield

6–8 muffins


Ingredients

  • 1 large orange (zest and juice)

  • 1½ cups (120 g) oat flakes (quick oats or rolled oats)

  • 1 cup (240 ml) water or unsweetened plant-based milk

  • 2 large eggs

  • 1 teaspoon baking powder

  • 1 teaspoon vanilla extract (optional)

  • A small pinch of salt

Optional Add-ins

  • Raisins

  • Chopped nuts


Instructions

1. Prepare the Orange

Wash the orange thoroughly. Finely grate approximately 1 tablespoon of the outer zest, avoiding the white pith underneath.
Cut the orange in half and squeeze out the juice. Remove any seeds.


2. Soak the Oats

Place the oat flakes in a large mixing bowl.
Add the freshly squeezed orange juice and the water (or plant-based milk).
Stir well and let the mixture rest for 10 minutes, allowing the oats to absorb liquid and soften.


3. Mix the Batter

Add the eggs, orange zest, baking powder, vanilla extract (if using), and salt to the soaked oats.
Stir until the eggs are fully incorporated and the batter is evenly mixed.
If using raisins or nuts, fold them in gently at this stage.


4. Prepare the Muffin Pan

Preheat the oven to 180°C (350°F).
Line a muffin tin with paper or silicone liners, or lightly grease the cups.

Divide the batter evenly among the muffin cups, filling them almost to the top.


5. Bake

Place the muffin tin in the preheated oven and bake for 20–25 minutes, or until the tops are set and lightly colored.
Allow the muffins to cool in the pan for a few minutes before transferring them to a wire rack.


Helpful Notes

  • For a finer texture, the oats can be blended briefly before soaking.

  • The flavor depends on the natural sweetness of the orange used.

  • Store baked muffins in an airtight container in the refrigerator for up to 3 days.
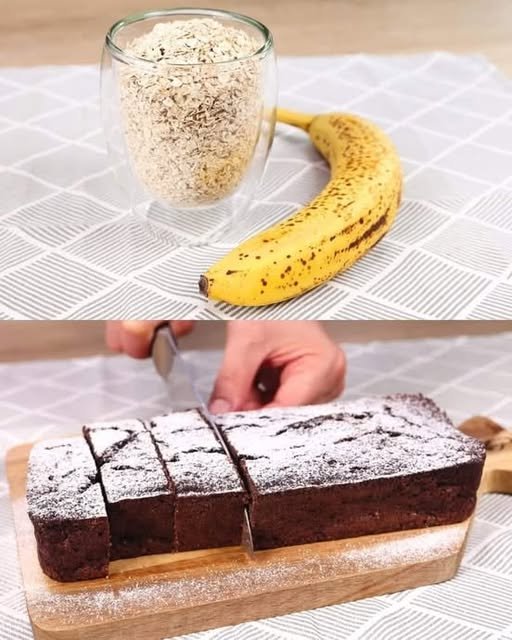
Banana Chocolate Oat Cake

Banana Chocolate Oat Cake

This baked oat-based cake combines bananas, yogurt, cocoa, and chocolate for a soft, dense texture. It is suitable for a small baking dish and can be served warm or at room temperature.

Preparation Time

10 minutes

Baking Time

35–40 minutes

Yield

1 small square or rectangular cake (8–10 slices)


Ingredients

  • 2 ripe bananas, mashed

  • ¾ cup (70 g) oat flakes

  • ½ cup (150 g) plain or Greek yogurt

  • ¼ cup (50 g) condensed milk

  • 3 tablespoons unsweetened cocoa powder

  • 1 teaspoon baking powder

  • 40 g (1.4 oz) chocolate, chopped or chocolate chips

  • Walnuts, roughly chopped (optional)


Instructions

1. Prepare the Wet Mixture

Place the bananas in a medium mixing bowl and mash thoroughly with a fork until mostly smooth.
Add the yogurt and condensed milk. Stir until the mixture is evenly combined and creamy in consistency.


2. Add the Dry Ingredients

Add the oat flakes, cocoa powder, and baking powder to the bowl.
Mix gently with a spatula until the batter is evenly blended and no dry cocoa remains.


3. Incorporate the Chocolate and Nuts

Fold in about half of the chopped chocolate and walnuts, if using.
Mix just until distributed to avoid overworking the batter.


4. Prepare the Baking Dish

Preheat the oven to 180°C (350°F).
Line a small square or rectangular baking dish with parchment paper or lightly grease it.

Pour the batter into the prepared dish and spread it evenly.
Scatter the remaining chocolate and walnuts over the surface.


5. Bake

Place the dish in the preheated oven and bake for 35–40 minutes, or until the edges are set and a toothpick inserted into the center comes out mostly clean with a few moist crumbs.


6. Cool and Serve

Remove the cake from the oven and allow it to cool in the pan for at least 15 minutes before slicing. This resting time helps the oats firm up and improves the final texture.


Helpful Notes

  • For a smoother texture, the oats can be blended briefly before mixing.

  • The cake will become firmer as it cools.

  • Store leftovers in an airtight container in the refrigerator for up to 3 days.
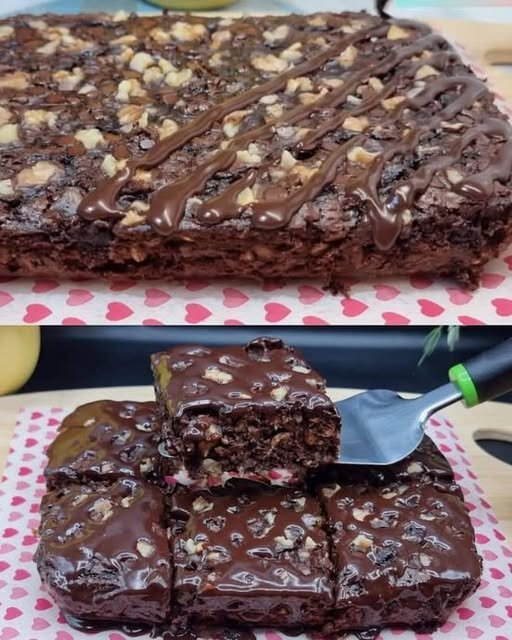
Chocolate Oat Banana Cake

Chocolate Oat Banana Cake

This baked chocolate oat cake uses oats, bananas, eggs, and cocoa powder to create a soft, moist texture without refined sugar. The natural sweetness comes from ripe bananas, while the oats provide structure and body.

Preparation Time

10 minutes

Soaking Time

15 minutes

Baking Time

35–40 minutes

Yield

1 small cake (8–10 slices, depending on size)


Ingredients

  • 120 g oat flakes (about ¾ cup + 1 tablespoon)

  • 200 ml hot milk (dairy milk or unsweetened plant-based milk such as almond or oat)

  • 2 large eggs

  • 2 ripe bananas, mashed

  • 40 g unsweetened cocoa powder (approximately 3–4 tablespoons)

  • 1 teaspoon baking powder

  • A small pinch of salt

Optional Toppings

  • Chopped walnuts

  • Melted dark chocolate (70% cocoa or higher)


Instructions

1. Soak the Oats

Place the oat flakes in a large heat-resistant bowl. Pour the hot milk over the oats and stir well.
Allow the mixture to rest for 15 minutes, stirring once or twice. This step softens the oats and helps create a smoother cake texture after baking.


2. Prepare the Banana and Egg Mixture

In a separate bowl, mash the bananas thoroughly using a fork until mostly smooth.
Add the eggs and whisk until the mixture is fully combined and slightly frothy.


3. Combine the Batter

Add the soaked oats (including any remaining liquid) to the banana and egg mixture.
Sift in the cocoa powder and baking powder, then add the salt.
Mix gently but thoroughly with a spatula until the batter is evenly blended and has a uniform chocolate color. Avoid overmixing.


4. Prepare the Baking Dish

Preheat the oven to 180°C (350°F).
Line a small square or rectangular baking dish with parchment paper, or lightly grease it with a small amount of oil.


5. Bake

Pour the batter into the prepared dish and spread it evenly.
If using toppings, sprinkle chopped walnuts or small pieces of dark chocolate over the surface.

Bake for 35–40 minutes, or until the center is set and a toothpick inserted into the middle comes out mostly clean with a few moist crumbs.


6. Cool and Finish

Remove the cake from the oven and allow it to cool completely in the pan.
If desired, drizzle melted dark chocolate over the cooled cake before slicing.


Helpful Notes

  • The sweetness of this cake depends on the ripeness of the bananas; bananas with brown spots provide the best flavor.

  • For a finer texture, the soaked oats can be blended briefly before mixing with the other ingredients.

  • Store leftovers in an airtight container in the refrigerator for up to 3 days.
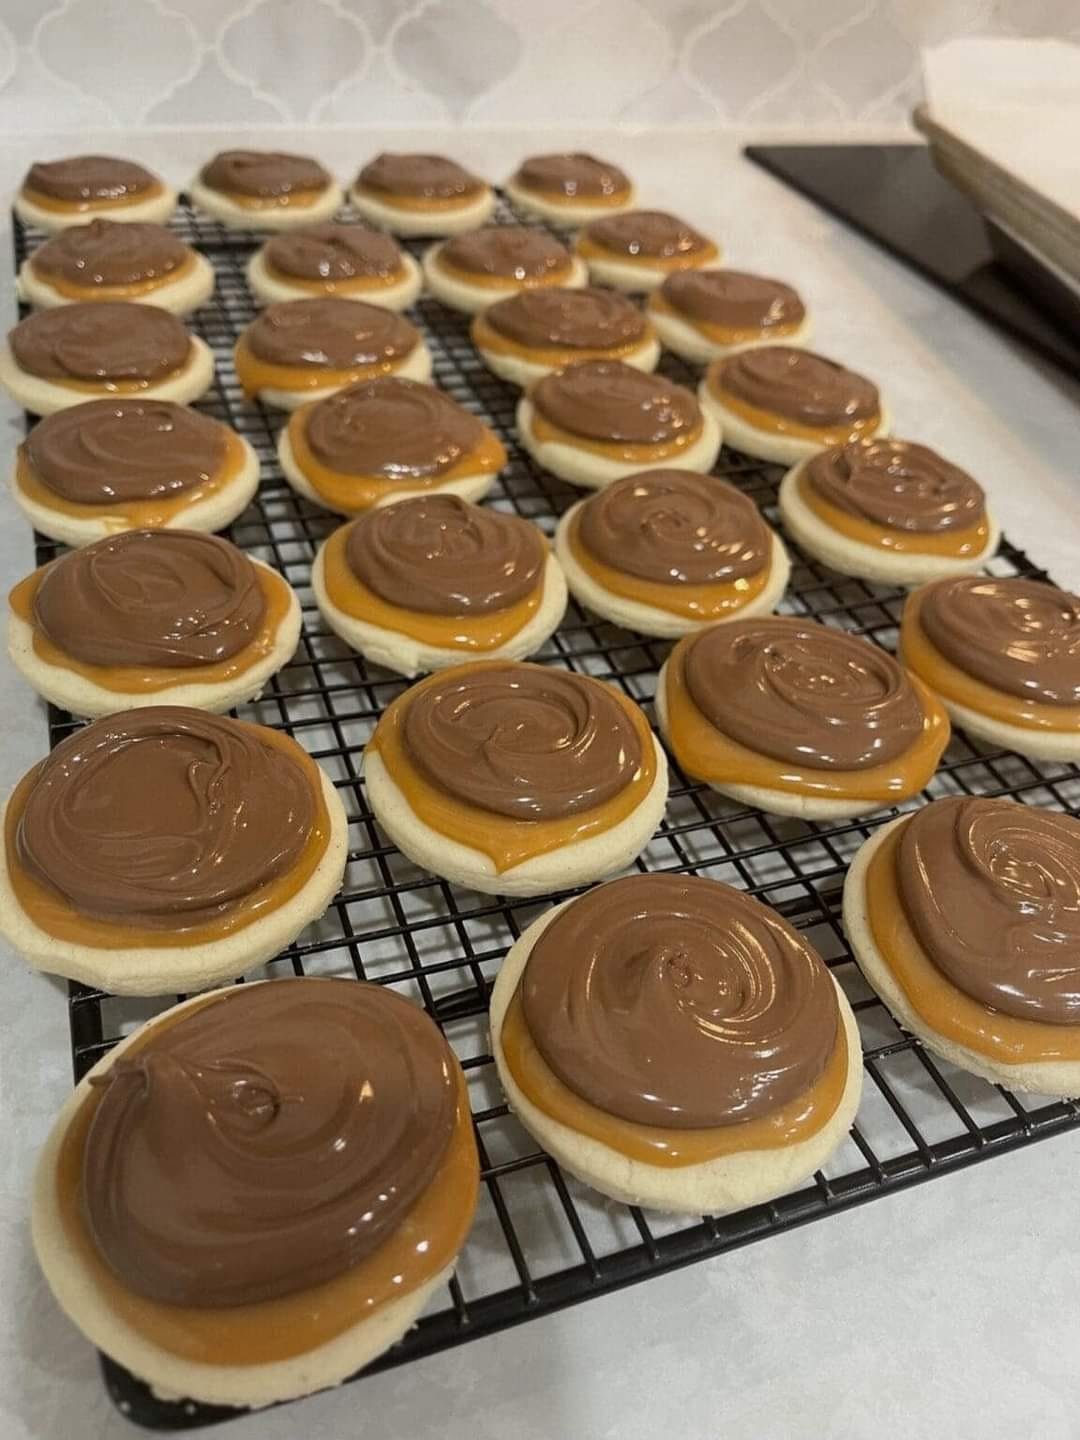
Caramel & Chocolate Shortbread Cookies

Caramel & Chocolate Shortbread Cookies

These cookies consist of a tender shortbread-style base topped with a soft caramel layer and finished with a smooth chocolate coating. Each component is prepared separately and assembled after baking for the best texture and appearance.

Preparation Time: 20 minutes
Baking Time: 10–12 minutes
Cooling & Setting Time: 30–40 minutes
Yield: About 24 cookies
Oven Temperature: 350°F (175°C)


Ingredients

Cookie Base

  • 1 cup (226 g) unsalted butter, softened to room temperature

  • ½ cup (100 g) granulated sugar

  • 2 cups (250 g) all-purpose flour

  • 1 teaspoon vanilla extract

  • ¼ teaspoon salt

Caramel Layer

  • 11 oz (310 g) soft caramel candies, unwrapped

  • 2 tablespoons heavy cream

Chocolate Layer

  • 1½ cups milk chocolate chips

  • 1 tablespoon coconut oil or unsalted butter


Step-by-Step Instructions

1. Prepare the Oven and Baking Sheet

  • Preheat the oven to 350°F (175°C).

  • Line a large baking sheet with parchment paper or a silicone baking mat.

  • Set aside.


2. Make the Cookie Dough

  • In a large mixing bowl, combine the softened butter and granulated sugar.

  • Beat with a hand mixer or stand mixer on medium speed until smooth and well blended.

  • Add the vanilla extract and mix briefly.

  • Gradually add the flour and salt, mixing on low speed or by hand until a soft dough forms.

  • The dough should be smooth and pliable, not sticky.


3. Shape the Cookies

  • Roll the dough into balls about 1 inch (2.5 cm) in diameter.

  • Place them on the prepared baking sheet, spacing them about 2 inches apart.

  • Press a shallow indentation into the center of each cookie using your thumb or the back of a small spoon.


4. Bake

  • Bake for 10–12 minutes, or until:

    • The edges are lightly golden

    • The centers remain pale

  • Remove from the oven and allow the cookies to rest on the baking sheet for 5 minutes.

  • Transfer to a wire rack and cool completely before adding toppings.


5. Prepare the Caramel

  • Place the unwrapped caramels and heavy cream in a microwave-safe bowl.

  • Heat in 30-second intervals, stirring well after each interval.

  • Continue until the mixture is fully melted and smooth.


6. Add the Caramel Layer

  • Spoon a small amount of melted caramel into the center indentation of each cooled cookie.

  • Allow the caramel to sit at room temperature for 15–20 minutes, until slightly firm.


7. Melt the Chocolate

  • In a clean microwave-safe bowl, combine the chocolate chips and coconut oil (or butter).

  • Heat in 30-second intervals, stirring frequently, until smooth and fully melted.


8. Finish the Cookies

  • Spoon melted chocolate over the caramel layer on each cookie.

  • Gently spread to cover the caramel evenly.

  • Allow the chocolate to set at room temperature, or refrigerate for 15 minutes to speed up the process.


Helpful Tips

  • Caramel Choice: Use soft caramel candies for easy melting and a tender texture.

  • Cooling Matters: Cookies must be fully cooled before adding caramel to prevent spreading.

  • Chocolate Finish: Coconut oil or butter helps the chocolate spread smoothly and set evenly.

  • Uniform Size: Evenly sized cookies bake and assemble more consistently.


Storage

  • Store cookies in an airtight container at room temperature for up to 5 days.

  • In warmer environments, refrigeration is recommended.

  • Separate layers with parchment paper to prevent sticking.

Classic Sponge Cake

Classic Sponge Cake

A light, airy cake made with whipped eggs and minimal fat

This sponge cake relies on properly beaten eggs to create structure and volume. The result is a soft, fine-crumb cake that can be served plain or paired with fruit, cream, or light glazes.

Prep Time: 15 minutes
Bake Time: 30–35 minutes
Cooling Time: 15 minutes
Servings: 8–10
Pan Size: 8-inch (20 cm) square or round pan
Oven Temperature: 325°F (165°C)


Ingredients

  • 4 large eggs, room temperature

  • ¾ cup (150 g) granulated sugar

  • ¾ cup (90 g) cake flour, sifted

  • ¼ teaspoon salt

  • 1 teaspoon vanilla extract

  • 2 tablespoons milk, warm (optional, for extra moisture)


Step-by-Step Instructions

1. Prepare the Pan and Oven

  • Preheat the oven to 325°F (165°C).

  • Line the bottom of the baking pan with parchment paper.

  • Do not grease the sides; this helps the cake rise evenly.


2. Whip the Eggs and Sugar

  • In a large heat-safe bowl, combine the eggs and granulated sugar.

  • Place the bowl over a pot of gently simmering water.

  • Whisk constantly until the mixture is warm to the touch (about 100–105°F / 38–40°C).
    This helps the eggs whip to a higher volume.

  • Remove from heat and beat with an electric mixer on high speed for 5–7 minutes, until:

    • The mixture becomes pale

    • It triples in volume

    • It forms thick ribbons when lifted


3. Add Flavoring

  • Gently mix in the vanilla extract.

  • If using milk, stir it in carefully at this stage.


4. Fold in Dry Ingredients

  • Sift the cake flour and salt together.

  • Add the dry ingredients in 2–3 additions, folding gently with a spatula.

  • Use a light hand and a folding motion to avoid deflating the batter.


5. Transfer to Pan

  • Pour the batter into the prepared pan.

  • Smooth the top gently.

  • Tap the pan lightly once to release large air bubbles.


6. Bake

  • Bake in the center of the oven for 30–35 minutes, or until:

    • The top is lightly golden

    • The cake springs back when touched

    • A toothpick inserted in the center comes out clean


7. Cool

  • Remove the cake from the oven.

  • Let it cool in the pan for 10–15 minutes.

  • Run a knife around the edges and turn out onto a wire rack to cool completely.


Serving Suggestions

  • Slice and serve plain with tea or coffee

  • Dust lightly with powdered sugar

  • Serve with fruit and whipped cream

  • Use as a base for layered or filled cakes


Helpful Tips

  • Room-Temperature Eggs: Essential for proper volume.

  • Gentle Folding: Prevents the batter from losing air.

  • Accurate Measuring: Use spoon-and-level method for flour.

  • Pan Size: A deeper pan may require a slightly longer bake time.