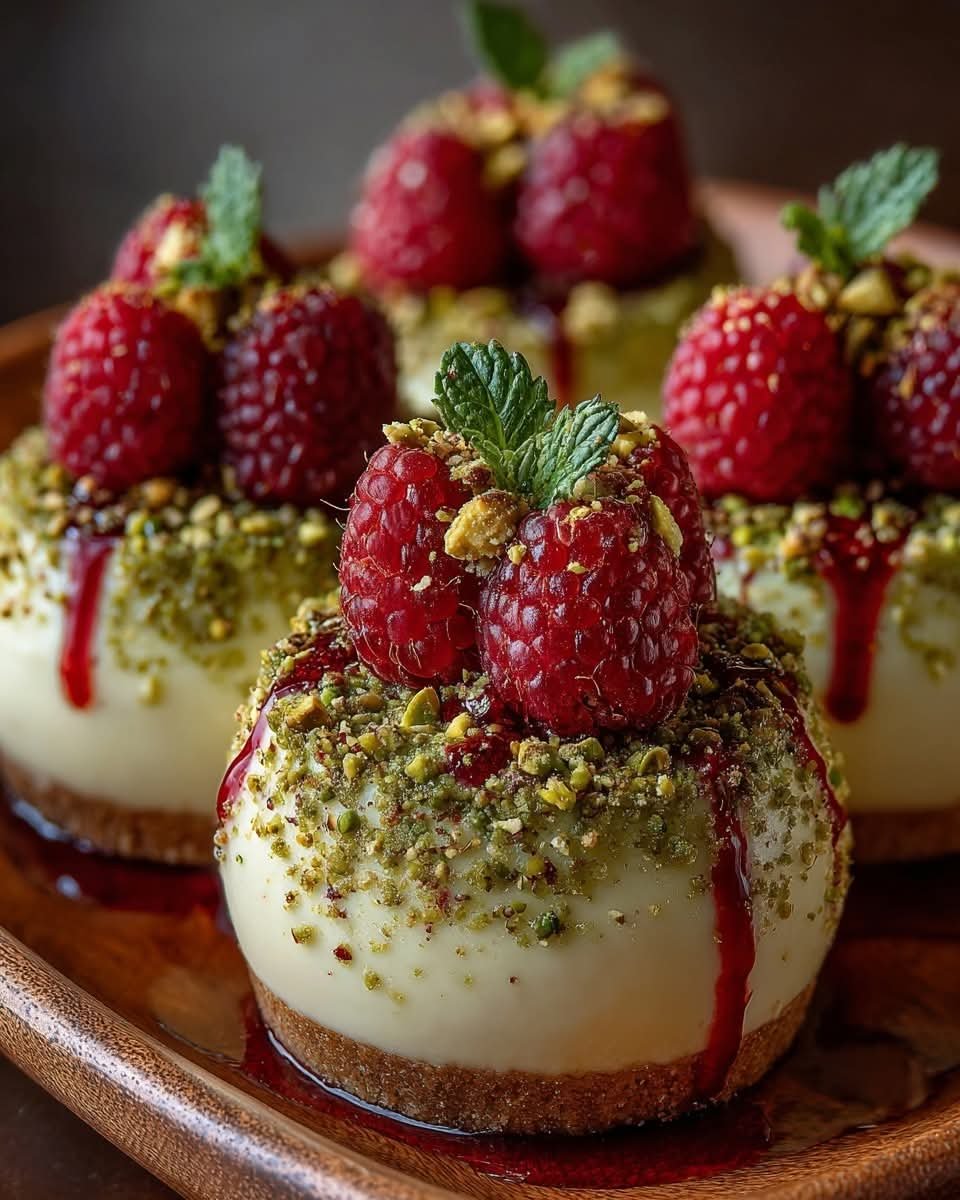
Pistachio Cheesecake Domes with Raspberry Surprise

Pistachio Cheesecake Domes with Raspberry Surprise

Ingredients

For the Pistachio Cheesecake

8 oz (225 g) cream cheese, softened

½ cup heavy cream

⅓ cup powdered sugar

⅓ cup pistachio paste or finely ground pistachios

1 tsp vanilla extract

For the Raspberry Center

½ cup fresh or frozen raspberries

1½ tbsp sugar

1 tsp lemon juice

For the Base (Optional)

¾ cup crushed graham crackers or digestive biscuits

3 tbsp melted butter

For Garnish (Optional)

Chopped pistachios

Fresh raspberries

Directions

Prepare the Raspberry Surprise

In a small saucepan, combine raspberries, sugar, and lemon juice. Cook over medium heat for 5–7 minutes until the berries break down and slightly thicken. Let cool completely.

Make the Cheesecake Base (Optional)

Mix crushed graham crackers with melted butter. Press lightly into silicone dome molds or the base of serving cups. Chill for 10 minutes.

Prepare the Pistachio Cheesecake

In a bowl, beat cream cheese and powdered sugar until smooth. Add pistachio paste and vanilla, mixing well. In a separate bowl, whip heavy cream to soft peaks, then gently fold into the pistachio mixture until light and fluffy.

Assemble the Domes

Spoon pistachio cheesecake mixture halfway into dome molds. Add a small spoon of cooled raspberry filling in the center. Cover with more cheesecake mixture and smooth the tops.

Chill

Refrigerate for at least 4 hours, or until fully set.

Serve

Carefully unmold the domes. Garnish with chopped pistachios and fresh raspberries before serving.

Nutritional Information (Per Dome – Approximate, based on 6 domes)

Calories: 340 kcal

Protein: 6 g

Carbohydrates: 22 g

Fat: 26 g

Fiber: 2 g

Sugar: 18 g
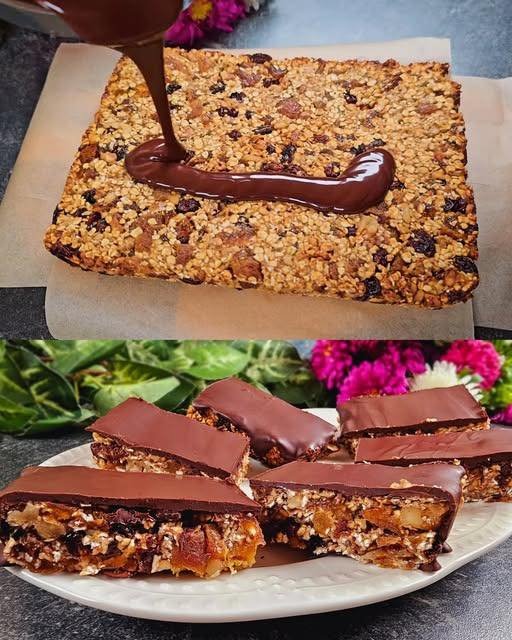
No-Sugar-Added Oat & Fruit Energy Bars

No-Sugar-Added Oat & Fruit Energy Bars

  • Prep time: 5 minutes

  • Setting time: 30–60 minutes (fridge)

  • Yields: 8–10 bars


Ingredients

  • 1 cup (80g) Rolled oats

  • 3/4 cup (100g) Raisins

  • 3/4 cup (80g) Walnuts, roughly chopped

  • 100g (3.5 oz) Dried apricots, chopped

  • 1 medium Ripe banana, mashed

  • 100g (3.5 oz) Dark chocolate (sugar-free), chopped

  • 1 tsp Coconut oil (for the chocolate glaze)


Instructions

  1. Prepare the Base: In a large mixing bowl, combine the rolled oats, chopped walnuts, chopped apricots, and raisins. Mix well to distribute the fruit.

  2. Bind: Add the mashed banana to the dry ingredients. Stir thoroughly until everything is evenly coated and the mixture sticks together. If it feels too dry, add another tablespoon of mashed banana.

  3. Shape: Line a small rectangular container or baking dish with parchment paper. Transfer the mixture into the dish and press down firmly with the back of a spoon or a spatula to create an even, compact layer.

  4. Melt Chocolate: Place the chopped dark chocolate and coconut oil in a microwave-safe bowl. Microwave in 20-second intervals, stirring in between, until completely smooth.

  5. Glaze: Pour the melted chocolate over the oat base and spread it evenly to the edges.

  6. Chill & Cut: Place the dish in the refrigerator for at least 30–60 minutes until the chocolate has hardened and the bars are firm. Lift the parchment paper out of the dish and slice into bars using a sharp knife.

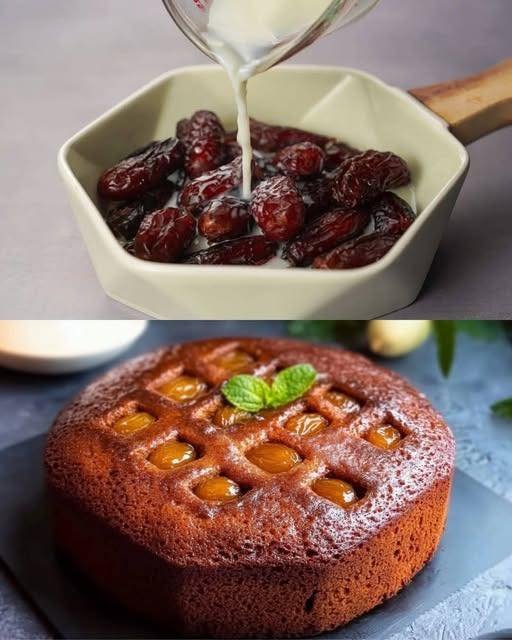
Easy Moist Date Cake

Easy Moist Date Cake

A rich, tender cake naturally sweetened by dates with a warm hint of spice.

  • Prep time: 20 minutes

  • Bake time: 35–45 minutes

  • Servings: 8–10

Ingredients

The Date Base:

  • 1 cup (150g) Pitted dates, chopped

  • 1 cup (250ml) Hot water (boiling)

  • 1 tsp Baking soda

The Batter:

  • ½ cup (115g) Unsalted butter, softened to room temperature

  • ¾ cup (150g) Granulated sugar (or brown sugar for a deeper caramel flavor)

  • 2 Large eggs

  • 1 tsp Vanilla extract

  • 1 ½ cups (190g) All-purpose flour

  • 1 tsp Baking powder

  • ½ tsp Ground cinnamon

  • ¼ tsp Ground nutmeg (optional)

  • Pinch of salt


Detailed Instructions

1. Prepare the Dates

In a heat-proof bowl, combine the chopped dates and the baking soda. Pour the boiling hot water over them. Stir gently and let the mixture sit for about 15 minutes. The baking soda will soften the date skins and break them down, creating a thick, jam-like consistency that ensures the cake is incredibly moist.

2. Prep the Oven and Pan

Preheat your oven to 350°F (175°C). Grease an 8-inch or 9-inch round cake pan (or a square pan) with butter and lightly dust with flour, or line the bottom with parchment paper for easy removal.

3. Cream the Butter and Sugar

In a large mixing bowl, beat the softened butter and sugar together using a hand mixer or stand mixer until the mixture is pale, light, and fluffy (about 3 minutes).

4. Add Wet Ingredients

Add the eggs one at a time, beating well after each addition. Stir in the vanilla extract. If the mixture looks slightly curdled at this stage, don’t worry; it will smooth out once the flour is added.

5. Sift Dry Ingredients

In a separate bowl, whisk together the flour, baking powder, cinnamon, nutmeg, and salt.

6. Combine

Gradually add the dry ingredients to the butter mixture, alternating with the date mixture (including the liquid). Stir with a spatula or use the mixer on low speed just until combined. Avoid overmixing, as this can make the cake tough rather than tender.

7. Bake

Pour the batter into your prepared pan and smooth the top. Bake for 35 to 45 minutes. To check for doneness, insert a wooden skewer or toothpick into the center—it should come out clean or with just a few moist crumbs attached.

8. Cool and Serve

Let the cake cool in the pan for about 10 minutes before transferring it to a wire rack. Serve warm or at room temperature.


Serving Suggestions

  • Classic: Serve with a dollop of whipped cream or a scoop of vanilla bean ice cream.

  • Toffee Style: Drizzle with a warm caramel sauce while the cake is still slightly warm.

  • Tea Time: This cake pairs beautifully with a strong cup of black tea or coffee.

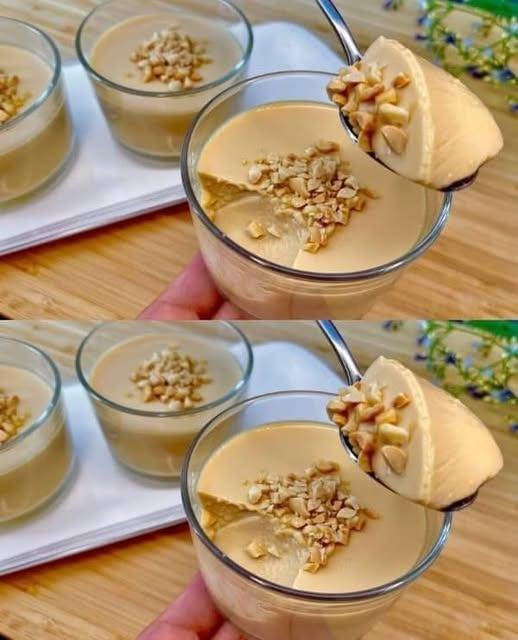
No-Bake 3-Ingredient Milk Pudding

No-Bake 3-Ingredient Milk Pudding

Smooth • Creamy • Simple Custard-Style Dessert

This easy milk pudding is a soft, creamy dessert made with just milk, sugar, and eggs. It sets gently in the refrigerator and has a smooth, comforting texture similar to classic custard. With careful low-heat cooking and constant stirring, you get a silky pudding without baking or complicated steps.


Recipe Overview

  • Prep Time: 5 minutes

  • Cook Time: 10–15 minutes

  • Chill Time: 2–3 hours

  • Servings: 4 small bowls


Ingredients

Main Ingredients

  • 2 cups (500 ml) milk

  • ⅓ cup (70 g) sugar

  • 2 large eggs

Optional (Recommended)

  • 1 teaspoon vanilla extract
    (adds aroma and smooth flavor)

Optional Toppings

  • Chopped peanuts or walnuts

  • Caramel drizzle

  • Fresh fruit


Equipment Needed

  • Medium saucepan

  • Whisk or silicone spatula

  • Fine-mesh strainer

  • Serving bowls or ramekins


Step-by-Step Instructions

1. Mix the Eggs and Sugar

  • Place the saucepan on the counter (do not heat yet)

  • Add eggs and sugar

  • Whisk until the sugar is mostly dissolved and the mixture looks slightly pale and smooth


2. Add the Milk

  • Slowly pour the milk into the egg mixture

  • Whisk continuously to keep everything smooth

  • Add vanilla extract if using


3. Cook Gently

  • Place the saucepan over low heat

  • Stir constantly using a whisk or spatula

  • Scrape the bottom and sides of the pan to prevent sticking

⚠️ Important: Keep the heat low. High heat can cause the eggs to cook unevenly.

4. Thicken the Pudding

  • Continue stirring for 10–12 minutes

  • The mixture will gradually thicken

  • It is ready when it:

    • Coats the back of a spoon

    • Looks creamy but still pours easily

(It will firm up more as it cools.)


5. Strain for Smoothness

  • Remove from heat

  • Pour the mixture through a fine strainer into a bowl or jug

  • This step ensures a silky, lump-free texture


6. Chill and Set

  • Pour the pudding into serving bowls or ramekins

  • Let cool at room temperature for about 20 minutes

  • Cover and refrigerate for 2–3 hours, until fully set


7. Serve

  • Serve chilled

  • Add nuts, caramel, or fruit just before serving if desired


Texture & Flavor

  • Texture: Smooth, soft, custard-like

  • Flavor: Lightly sweet, creamy, comforting


Helpful Tips

  • Stir continuously for best texture

  • Never let the mixture boil

  • Use room-temperature eggs for smoother blending

  • For extra richness, replace ¼ cup of milk with cream


Optional Variation (Firmer Texture)

If you prefer a firmer, pudding-style set:

  • Mix 1 tablespoon cornstarch into the cold milk before heating

  • Proceed with the recipe as written


Storage

  • Store covered in the refrigerator

  • Best enjoyed within 2 days

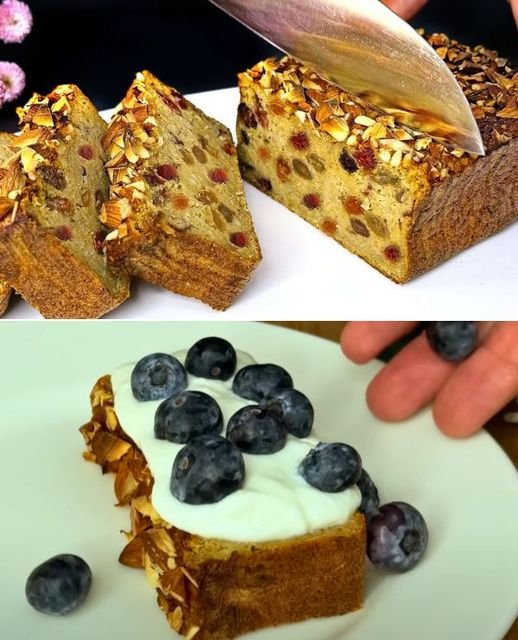
Easy & Healthy Oatmeal Apple Loaf

Easy & Healthy Oatmeal Apple Loaf

No Refined Sugar • No White Flour • Naturally Sweetened

This wholesome oatmeal apple loaf is soft, moist, and naturally sweet from fruits alone. It’s perfect for breakfast, tea time, or a healthy snack. Packed with oats, apples, bananas, dried fruits, and nuts, it’s both nourishing and satisfying.


🥧 Ingredients

  • 1 cup fine rolled oats (or oat flour)

  • 3 medium apples, peeled and grated or finely chopped

  • ½ cup water

  • 1 ripe banana, mashed

  • 3.5 oz (100 g) dried blueberries

  • 3.5 oz (100 g) raisins

  • 2 large eggs

  • 1 teaspoon baking powder

  • 1 teaspoon cinnamon powder (optional, for warmth and flavor)

  • ½ cup mixed nuts, chopped (almonds, walnuts, or your choice)


🥣 Instructions

  1. Prepare the Oats
    If using rolled oats, blend them into a fine flour using a blender or food processor. Set aside.

  2. Cook the Apples
    Add the grated apples and water to a saucepan. Cook on medium heat for 5–7 minutes until soft and slightly thick. Remove from heat and let cool slightly.

  3. Mix Wet Ingredients
    In a large bowl, mash the banana. Add the eggs and whisk well. Stir in the cooked apples.

  4. Combine Dry Ingredients
    Add oat flour, baking powder, cinnamon, dried blueberries, raisins, and chopped nuts to the wet mixture. Mix until fully combined.

  5. Prepare for Baking
    Line or lightly grease a loaf pan. Pour in the batter and smooth the top. Sprinkle extra nuts on top if desired.

  6. Bake
    Bake in a preheated oven at 180°C (350°F) for 40–45 minutes, or until a toothpick inserted in the center comes out clean.

  7. Cool & Serve
    Let the loaf cool in the pan for 10 minutes, then transfer to a wire rack. Slice and enjoy!


🍽 Serving Suggestions

  • Serve warm with yogurt and fresh blueberries

  • Enjoy plain with tea or coffee

  • Store in the refrigerator for up to 5 days

Simple 10-Minute Prep Apple Sponge Cake

Simple 10-Minute Prep Apple Sponge Cake

This recipe is prized for its “high rise” and the way the sugar creates a slightly crunchy meringue-like top.

Ingredients

  • Apples: 3–4 large (Tart varieties like Granny Smith or Honeycrisp work best)

  • Eggs: 3 large

  • Sugar: 200 g

  • Butter: 120 g (melted and slightly cooled)

  • All-Purpose Flour: 200 g

  • Baking Powder: 1 tsp

  • Vanilla Extract: 1 tsp

  • Cinnamon: 1 tsp (optional, for tossing with apples)

  • Pinch of salt


Instructions

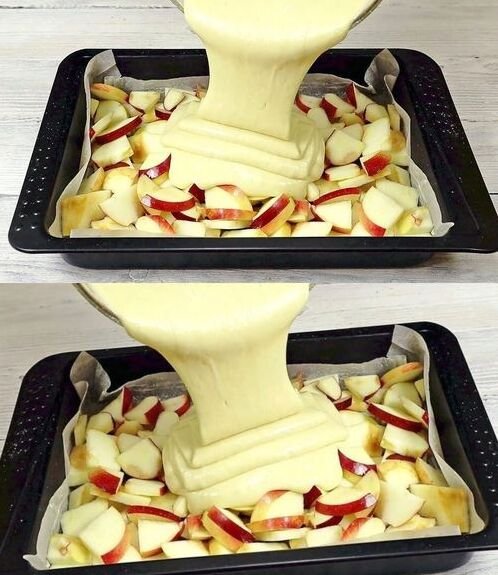
  1. Prepare the Oven and Pan: Preheat your oven to 180°C (350°F). Line a baking pan (approx. 9×9 inch or similar) with parchment paper, just like in your photo.

  2. Prepare the Apples: Core and slice the apples into bite-sized chunks or thin wedges. Spread them evenly across the bottom of the lined baking pan. If you like extra flavor, toss them with a little cinnamon beforehand.

  3. Mix the Batter:

    • In a large bowl, beat the eggs and sugar together with a mixer for about 3–5 minutes until the mixture is pale, thick, and has doubled in volume. This is the secret to the “husband-approved” fluffiness!

    • Slowly pour in the melted butter and vanilla, whisking gently.

    • Sift in the flour, baking powder, and salt. Fold gently with a spatula until just combined so you don’t deflate the eggs.

  4. Bake: Pour the batter over the apples (as shown in your image), ensuring it seeps down into the gaps. Bake for 30–40 minutes, or until a toothpick inserted into the center comes out clean and the top is golden brown.

  5. Serve: Let it cool for at least 10 minutes before slicing. It is excellent served warm with a scoop of vanilla ice cream.