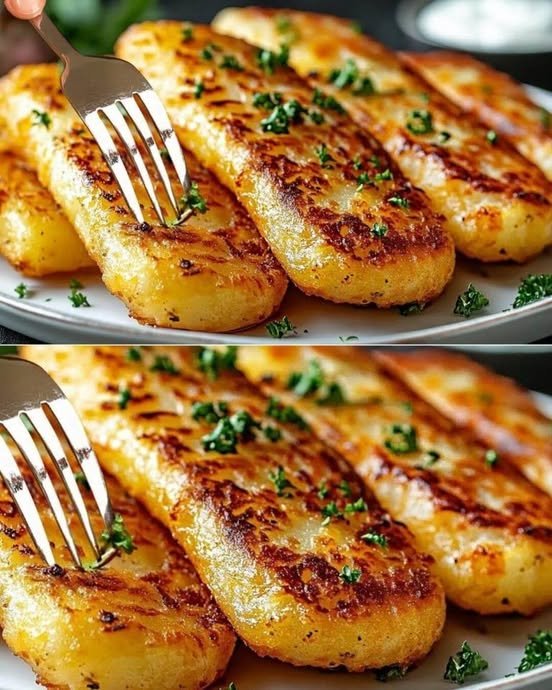
Cheesy Air Fryer Hasselback Potatoes

Cheesy Air Fryer Hasselback Potatoes

Crispy edges, soft centers, and melty cheese in every bite

These Cheesy Air Fryer Hasselback Potatoes are a comforting side dish made with simple ingredients and big flavor. Thinly sliced potatoes fan open as they cook, allowing buttery garlic seasoning and cheese to melt into every layer. The air fryer creates a crisp exterior while keeping the inside tender and fluffy.


Recipe Overview

  • Prep Time: 10 minutes

  • Cook Time: 45 minutes

  • Total Time: 55 minutes

  • Servings: 2


Ingredients

  • 2 medium russet potatoes, scrubbed clean

  • 4 tablespoons butter, melted

  • 1 tablespoon garlic paste or finely minced garlic

  • Kosher salt, to taste

  • Black pepper, to taste

  • 3–5 slices Colby Jack cheese, each slice cut into fourths

Optional Toppings

  • Sour cream

  • Fresh chives, finely chopped


Step-by-Step Instructions

1. Prepare the Potatoes

  • Rinse and scrub the potatoes thoroughly.

  • Slice a very thin piece off the bottom of each potato so it sits flat and stable.


2. Create the Hasselback Cuts

  • Place one potato between two chopsticks or wooden spoons.

  • Using a sharp knife, slice across the potato at ¼-inch intervals.

  • The chopsticks will prevent cutting all the way through, keeping the base intact.

  • Repeat with the second potato.


3. Prepare the Air Fryer Basket (Layer-Lifting Method)

  • Place the small potato slices removed from the bottoms into the air fryer basket.

  • Set the sliced potatoes on top of these pieces.

  • This helps the slices fan open during cooking, allowing better crisping and seasoning.


4. Season the Potatoes

  • In a small bowl, combine:

    • Melted butter

    • Garlic

    • Salt

    • Black pepper

  • Gently fan open the potato slices with your fingers.

  • Brush the garlic butter generously over the tops and into the gaps.

  • Sprinkle lightly with additional salt and pepper.


5. First Air Fry Stage

  • Set the air fryer to 370°F (188°C).

  • Cook the potatoes for 20 minutes.


6. Second Air Fry Stage

  • Remove the basket and brush the potatoes with any remaining garlic butter.

  • Return to the air fryer and cook for 20–25 minutes, until:

    • The edges are crisp

    • The centers are fork-tender

    • The slices are fully opened


7. Add the Cheese

  • Carefully tuck the cheese pieces between the potato slices.

  • You can add cheese to every slice or every other slice, depending on preference.

  • Return to the air fryer and cook for 1–2 minutes, just until the cheese melts and becomes lightly bubbly.


8. Serve

  • Remove from the air fryer and let rest for 2–3 minutes.

  • Top with sour cream and fresh chives if desired.

  • Serve hot as a side dish or light meal.


Helpful Tips & Variations

  • Even cooking: Choose potatoes similar in size.

  • Extra flavor: Add paprika, onion powder, or dried herbs to the butter.

  • Cheese swaps: Cheddar, mozzarella, or Monterey Jack work well.

  • Crispier texture: Brush a little butter between slices halfway through cooking.
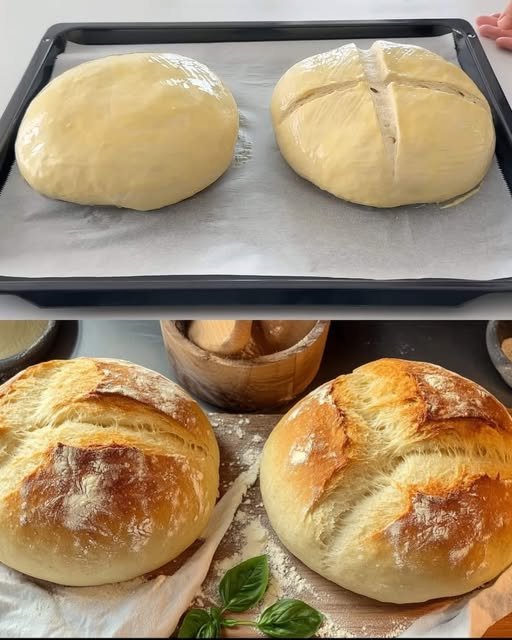
Classic Homemade Artisan Bread

🍞 Classic Homemade Artisan Bread

Crisp Crust • Soft Interior • Simple Ingredients

This Classic Homemade Artisan Bread is perfect for everyday baking. It uses basic pantry ingredients and simple techniques to create two beautiful loaves with a golden crust and light, airy inside. The dough is easy to work with, making it ideal for both beginners and experienced home bakers.


🧾 Yield & Timing

  • Makes: 2 loaves

  • Preparation Time: 20 minutes

  • Rising Time: 1½–2 hours

  • Baking Time: 30–35 minutes


🧺 Ingredients

  • Warm Water: 600 ml total (about 3 glasses)

    • 200 ml for starting the yeast

    • 400 ml added later

  • Dry Yeast: 10 grams (1 standard packet)

  • All-Purpose Flour: 840 grams total (7 cups)

    • 120 g (1 cup) for the yeast mixture

    • 720 g (6 cups) for the dough

  • Sugar: 1 tablespoon (helps awaken the yeast)

  • Salt: 2 teaspoons

  • Olive Oil: 1 tablespoon (optional, for lightly coating the bowl)


🥣 Step-by-Step Instructions

1️⃣ Prepare the Yeast Mixture

In a large mixing bowl, add:

  • 200 ml warm water

  • Dry yeast

  • Sugar

  • 120 g (1 cup) flour

Whisk gently until smooth. Cover the bowl with a clean cloth and let it rest for 10–15 minutes.

What to look for:
The surface should become foamy and slightly bubbly, showing the yeast is active and ready.


2️⃣ Build the Dough

Once the yeast mixture is ready, pour in the remaining 400 ml warm water and add the salt.

Gradually add the remaining 720 g (6 cups) flour, one cup at a time, mixing with a wooden spoon or dough hook until a soft, rough dough forms.


3️⃣ Knead Until Smooth

Transfer the dough to a lightly floured surface. Using gentle, steady motions, knead for 8–10 minutes.

As you work:

  • The dough will become smoother

  • It should feel elastic and slightly springy

Tip: If the dough sticks too much, sprinkle in small amounts of flour—just enough to handle comfortably. A soft dough creates lighter bread.


4️⃣ First Rise

Lightly coat a clean bowl with olive oil. Place the dough inside and turn it once so the surface is lightly coated.

Cover and place in a warm, draft-free area. Allow the dough to rest until it has doubled in size, about 1 to 1½ hours.


5️⃣ Divide and Shape

Gently press the dough to release excess air. Divide it evenly into two portions.

Shape each portion into a smooth, round loaf by tucking the edges underneath. Place both loaves on a parchment-lined baking sheet, leaving space between them.


6️⃣ Second Rise & Surface Design

Cover the loaves and let them rest again for 30 minutes.

While resting:

  • Preheat your oven to 200°C (400°F)

Just before baking, use a sharp knife to gently make a shallow “X” or cross on top of each loaf. This helps the bread expand evenly while baking.


7️⃣ Bake

Place the baking sheet in the oven and bake for 30–35 minutes, until:

  • The crust turns deep golden

  • The loaf sounds hollow when lightly tapped underneath

Optional Bakery-Style Finish:
Place a small oven-safe pan with 1 cup of water on the lower rack during the first 15 minutes to create steam, giving the bread a crisp, professional crust.


8️⃣ Cool Before Slicing

Transfer the baked loaves to a wire rack. Allow them to cool for at least 20 minutes before slicing. This helps the interior texture finish setting properly.


⭐ Helpful Tips

  • Warm water should feel pleasantly warm, not hot

  • Letting the bread cool improves slicing and texture

  • Store cooled bread wrapped in cloth or paper for best freshness

Stuffed Potato Patties with Mushroom Filling

Stuffed Potato Patties with Mushroom Filling

Crispy on the outside, creamy inside, with a savory mushroom and cheese center and a bright dill yogurt sauce

Prep Time: 40–50 minutes
Cook Time: 20–25 minutes
Total Time: 1 hour 10–15 minutes
Servings: 6

These patties combine smooth mashed potatoes, flavorful mushroom filling, and melty mozzarella, coated and fried to golden perfection. Served with dill yogurt sauce, they make an elegant appetizer or a hearty main course.


Ingredients

For the Potato Mixture

  • 1 kg (2.2 lbs) starchy potatoes (Russet or Yukon Gold)

  • 2 large eggs, beaten

  • 15 g (2 tablespoons) all-purpose flour

  • 1 teaspoon fine sea salt

  • ½ teaspoon freshly ground black pepper

For the Mushroom Filling

  • 400 g (14 oz) fresh mushrooms, finely chopped

  • 1 medium onion, finely diced

  • 1 large carrot, grated

  • 45 g (3 tablespoons) unsalted butter

  • 100 g (3.5 oz) mozzarella, cut into small cubes

  • Salt and pepper to taste

For Coating and Frying

  • 120 g (1 cup) all-purpose flour

  • 1 large egg, beaten

  • Additional butter for frying

For the Dill Yogurt Sauce

  • 2 tablespoons (30 g) plain yogurt

  • 2 tablespoons fresh dill, finely chopped

  • Pinch of salt


Step-by-Step Instructions

1. Prepare the Mashed Potatoes

  1. Peel and cut potatoes into uniform chunks.

  2. Place in cold, salted water and bring to a boil.

  3. Cook until tender when pierced with a fork (about 15–20 minutes).

  4. Drain thoroughly and return potatoes to the pot over low heat for 1–2 minutes to remove excess moisture.

  5. Mash while hot until completely smooth.

  6. Add 2 beaten eggs, 2 tablespoons flour, salt, and pepper. Mix until combined but do not overmix.

  7. Let the mixture cool until comfortable to handle.


2. Make the Mushroom Filling

  1. Finely chop mushrooms with a knife or food processor.

  2. Melt butter in a large skillet over medium heat.

  3. Add diced onion and cook until soft and translucent (5–6 minutes).

  4. Add grated carrot and cook 2–3 minutes until softened.

  5. Add chopped mushrooms and increase heat to medium-high. Cook, stirring frequently, until all moisture evaporates (8–10 minutes).

  6. Season generously with salt and pepper.

  7. Transfer to a bowl and let cool completely.


3. Assemble the Patties

  1. Place 1 cup of flour on a shallow plate for coating.

  2. Take about 3 tablespoons of the potato mixture and flatten in your palm.

  3. Make a small well in the center.

  4. Place 1 tablespoon mushroom filling and a cube of mozzarella in the well.

  5. Fold edges over to enclose filling completely. Shape into an oval patty about 3 inches long.

  6. Coat thoroughly in flour, shaking off excess.

  7. Repeat with remaining mixture.


4. Cook the Patties

  1. Heat 2 tablespoons butter in a large skillet over medium heat.

  2. Dip flour-coated patties in beaten egg.

  3. Place patties in the hot pan without overcrowding.

  4. Fry 3–4 minutes per side until golden brown and crispy.

  5. Transfer to paper towels to drain excess butter.

  6. Keep warm in a 200°F oven while cooking remaining batches.


5. Prepare the Dill Yogurt Sauce

  • In a small bowl, combine yogurt, chopped dill, and a pinch of salt.

  • Refrigerate until ready to serve.


Tips for Success

  • Use starchy potatoes for a fluffy, smooth texture.

  • Ensure mashed potatoes and filling are cooled before assembly to prevent breakage.

  • If the potato mixture is too soft, chill in the refrigerator for 30 minutes.

  • Test oil temperature with a small piece of mixture; it should sizzle gently.

  • Don’t flip patties too early—wait until a golden crust forms.


Storage and Reheating

  • Uncooked Patties: Store between layers of parchment paper in the fridge for up to 24 hours.

  • Cooked Patties: Keep in an airtight container in the fridge for 2–3 days. Reheat in a 350°F oven for 10–12 minutes.

  • Dill Sauce: Refrigerate for up to 3 days.


Nutrition (Per Serving, Serves 6)

  • Calories: 380 kcal

  • Total Fat: 15 g

  • Saturated Fat: 8 g

  • Cholesterol: 120 mg

  • Sodium: 450 mg

  • Total Carbohydrates: 52 g

  • Dietary Fiber: 4 g

  • Protein: 12 g

  • Iron: 10% DV

  • Calcium: 15% DV

Egg Muffins – Quick & Nutritious Breakfast

Egg Muffins – Quick & Nutritious Breakfast

High in protein, low in carbs, and fully customizable

Prep Time: 10 minutes
Cook Time: 18–22 minutes
Total Time: 30 minutes
Yield: 6 muffins

Egg muffins are a versatile breakfast or snack option. You can add your favorite vegetables, meats, or cheeses, making them ideal for low-carb, keto, or meal-prep-friendly diets.


Ingredients

  • 6 large eggs

  • ¼ cup (60 ml) milk (or unsweetened almond/oat milk for dairy-free)

  • ½ cup shredded cheese (cheddar, feta, or your choice; optional for dairy-free)

  • ½ cup chopped vegetables (bell peppers, spinach, green onions, mushrooms, zucchini, etc.)

  • ¼ cup cooked bacon or ham (optional)

  • Salt and pepper to taste

  • ½ teaspoon garlic powder (optional)

  • ½ teaspoon paprika (optional)


Step-by-Step Instructions

1. Preheat the Oven

Preheat your oven to 375°F (190°C).
Lightly grease a 6-cup muffin tin with cooking spray, oil, or butter. Silicone muffin cups can also be used.


2. Prepare Ingredients

  • Chop your vegetables into small pieces.

  • Dice cooked bacon or ham if using.

  • Pre-sauté watery vegetables (like mushrooms or spinach) for 2–3 minutes to prevent soggy muffins.


3. Whisk the Eggs

In a large bowl, whisk together the eggs, milk, salt, pepper, garlic powder, and paprika until smooth and slightly frothy.
This ensures fluffy muffins with evenly distributed seasoning.


4. Assemble the Muffins

  • Divide the chopped vegetables and cooked meat evenly among the muffin cups.

  • Pour the egg mixture over the fillings, filling each cup about ¾ full.

  • Top each with shredded cheese, if using.


5. Bake

Place the muffin tin in the preheated oven.
Bake for 18–22 minutes, or until the egg muffins are set and lightly golden on top.
A toothpick inserted in the center should come out clean.


6. Cool and Serve

  • Allow the muffins to cool for a few minutes before removing them from the tin.

  • Serve warm, or store for meal prep.


Tips for Perfect Egg Muffins

  • Grease Well: Prevents sticking; silicone cups work best.

  • Whisk Thoroughly: Ensures light, fluffy muffins.

  • Do Not Overfill: Fill ¾ full to prevent overflow.

  • Cool Slightly Before Removing: Prevents breaking.

  • Storage & Reheating: Refrigerate in an airtight container for up to 5 days; microwave for 30–45 seconds to reheat.

  • Freezing: Let muffins cool completely, then freeze in airtight containers or freezer bags for up to 3 months. Reheat 1–2 minutes in the microwave.

Crispy Potato & Egg Nest Muffins

🥔🍳 Crispy Potato & Egg Nest Muffins

Yields: 12 muffins
Prep Time: 15 minutes
Bake Time: 25–30 minutes

These Crispy Potato & Egg Nest Muffins are a comforting and satisfying dish made with simple ingredients. Grated potatoes form a crisp outer layer, while the inside stays soft and flavorful. They are perfect for breakfast, brunch, or light meals and are easy to prepare ahead of time.


📋 Ingredients

  • 3 large potatoes, peeled and grated

  • 4–5 large eggs, well beaten

  • 1 cup shredded cheese (cheddar or mozzarella works well)

  • 12 cherry tomatoes (one per muffin)

  • 2 green onions, finely chopped

  • Salt, to taste

  • Black pepper, to taste

  • A small pinch of garlic powder or paprika (optional)

  • Vegetable oil or butter, for greasing the muffin tin


👩‍🍳 Step-by-Step Instructions

Step 1: Prepare the Potatoes

  1. Preheat your oven to 400°F (200°C).

  2. Place the grated potatoes into a bowl of cold water.

  3. Rinse well to remove excess starch.

  4. Drain and squeeze the potatoes firmly using a clean kitchen towel until they are as dry as possible.
    Dry potatoes help create a crisp texture during baking.


Step 2: Make the Potato Nests

  1. Transfer the dried potatoes to a mixing bowl.

  2. Add salt, black pepper, and half of the shredded cheese.

  3. Mix gently until evenly combined.

  4. Grease a 12-cup muffin tin thoroughly.

  5. Divide the potato mixture evenly among the cups.

  6. Press the mixture firmly into the bottom and up the sides of each cup to form a nest shape.


Step 3: Prepare the Egg Mixture

  1. In a separate bowl or jug, whisk the eggs until smooth.

  2. Add chopped green onions and any remaining seasoning.

  3. Stir gently to combine.


Step 4: Assemble and Bake

  1. Carefully pour the egg mixture into the center of each potato nest.

  2. Place one cherry tomato in the center of each muffin.

  3. Sprinkle the remaining shredded cheese evenly on top.

  4. Bake for 25–30 minutes, or until:

    • The potato edges are golden and crisp

    • The egg filling is fully set


Step 5: Cool and Serve

  1. Remove the muffin tin from the oven.

  2. Allow the muffins to rest for 5 minutes.

  3. Use a small knife to gently loosen the edges.

  4. Lift the muffins out carefully.

Serve warm for the best texture and flavor.


🌟 Why You’ll Love This Recipe

  • Crispy Outside, Soft Inside: The potato base becomes golden and crunchy while the egg stays tender.

  • Easy to Customize: Add extra vegetables like spinach, bell peppers, or mushrooms for variety.

  • Great for Planning Ahead: These muffins can be prepared in advance and reheated while keeping their texture.

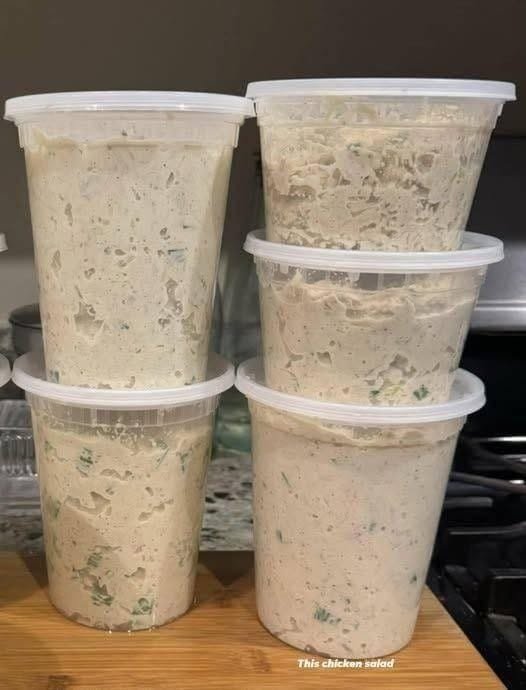
Carnivore Chicken Salad recipe

Carnivore Chicken Salad

✅ Ingredients

  • 2 cups cooked shredded or chopped chicken (breast or thigh)

  • 3 tbsp mayonnaise (egg + oil based, no sugar)

  • 1 tbsp softened cream cheese (optional for extra richness)

  • 1 hard-boiled egg, chopped

  • Salt to taste

  • Black pepper (optional if you allow seasonings)


✅ Instructions

  1. In a bowl, add chicken, chopped egg, and cream cheese.

  2. Mix in the mayonnaise until creamy.

  3. Add salt (and pepper if using).

  4. Chill for 15–20 minutes for best flavor.


✅ How to Serve

  • Eat as is with a spoon

  • Roll in slices of chicken or deli meat

  • Top on seared steak or burger patty