Healthy Blueberry Yogurt, A light, protein-packed treat perfect for mornings or snacks.

Servings: 2
Total Time: 10 minutes
Difficulty: Easy
Calories per Serving: ~180 kcal
Macros per Serving (approx.): Protein 18g / Carbs 8 g / Fat 7 g / Fiber 3 g

Get updates on the latest posts and more from tacosbellmenu. us straight to your inbox.


Why You’ll Love This Blueberry Yogurt Parfait

Looking for a quick, nutrient-packed breakfast or snack that’s as delicious as it is healthy? This Blueberry Yogurt Parfait combines creamy yogurt, fresh blueberries, and crunchy low-carb toppings for a satisfying, energizing treat.

Perfect for keto, low-carb, high-protein, and low-calorie diets, it’s a versatile dish that can be prepped in minutes and enjoyed anytime. Each spoonful offers a balance of protein, healthy fats, and antioxidants, keeping you full and focused without the sugar spike.

Whether you’re meal prepping for the week or enjoying a last-minute breakfast, this parfait is refreshing, guilt-free, and completely diet-friendly.


What Makes This Parfait So Special

  • Sensory Appeal: Creamy yogurt, juicy blueberries, and a crunchy nut topping create a perfect textural contrast.
  • Flavor Highlight: Sweet and tangy berries pair beautifully with the richness of Greek yogurt.
  • Diet Benefits: Low in carbs, high in protein, keto-approved, and portion-controlled for WW and low-calorie diets.

Subscribe to tacosbellmenu.us!

Get updates on the latest posts and more from tacosbellmenu. us straight to your inbox.

Ingredients Needed

Base Layer:

  • 1 cup Greek yogurt (full-fat for Keto, non-fat for low-cal/WW)
  • 1 tsp vanilla extract
  • 1–2 tsp low-carb sweetener (erythritol, stevia, or monk fruit, optional)

Fruit Layer:

  • ½ cup fresh blueberries (or frozen, thawed and drained)

Crunchy Topping:

  • 2 tbsp chopped almonds or walnuts (toasted for extra flavor)
  • 1 tsp chia seeds (optional for added fiber and texture)

How to Make Our Blueberry Yogurt Parfait

  1. Prepare the yogurt: In a small bowl, mix Greek yogurt with vanilla extract and your sweetener of choice until smooth.
  2. Layer the parfait: In serving glasses or jars, start with a layer of yogurt, followed by a layer of fresh blueberries. Repeat to create two layers.
  3. Add the crunch: Sprinkle chopped nuts and chia seeds over the top for texture and extra nutrition.
  4. Serve immediately or refrigerate for up to 1 hour to chill. Perfect for on-the-go breakfasts or quick snacks.

Storage & Serving Suggestions

  • Storing: Keep refrigerated in a covered container or jar for up to 24 hours. Best enjoyed fresh.
  • Freezing: Not recommended, as yogurt may separate when thawed.
  • Serving Pairings: Pair with a cup of green tea or black coffee for a complete, balanced breakfast.

Tips & FAQs

Q: Can I use other berries?
A: Yes! Strawberries, raspberries, or blackberries work well and keep it low-carb.

Q: Can I make it vegan?
A: Substitute Greek yogurt with unsweetened coconut yogurt for a vegan-friendly option.

Subscribe to tacosbellmenu.us!

Get updates on the latest posts and more from tacosbellmenu. us straight to your inbox.

Q: How can I increase protein further?
A: Add a scoop of vanilla protein powder to the yogurt before layering.

Q: Can I prepare this ahead of time?
A: Yes! Assemble in jars the night before for an easy grab-and-go breakfast.

Q: Is it suitable for keto?
A: Absolutely! Use full-fat Greek yogurt, low-carb sweetener, and nuts for a keto-friendly parfait.
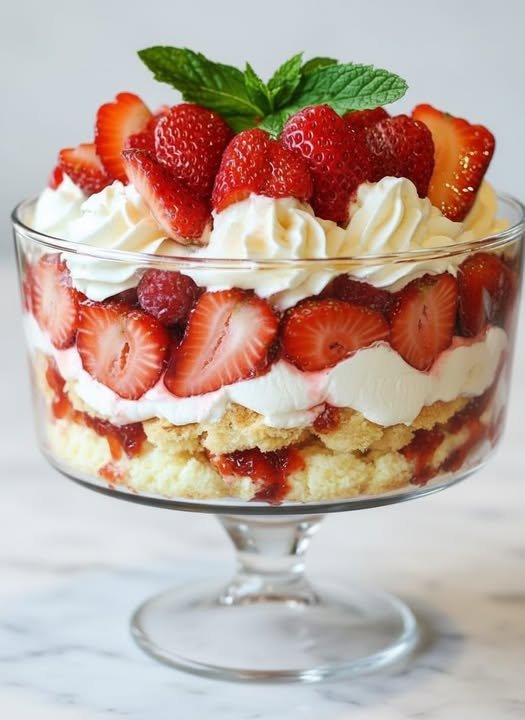
Easy Homemade Strawberry Trifle Recipe – Layered Summer Dessert

Welcome to Chef Emma’s kitchen, where elegance meets simplicity! This delight is a true showstopper, perfect for any gathering or a sweet weekend treat. Layers of fluffy sponge cake, sweet strawberry jam, fresh vibrant strawberries, and luscious whipped cream come together in a symphony of flavors and textures that will tantalize your taste buds. It’s a dessert that not only looks incredible but is also incredibly easy to assemble, making you look like a culinary genius with minimal effort!


📜 Ingredients

2 pounds fresh ripe strawberries, hulled and sliced (reserve some whole for garnish)

1/4 cup granulated sugar

1 tablespoon fresh lemon juice (optional, enhances strawberry flavor)

1 pound vanilla sponge cake or pound cake, store-bought or homemade, cut into 1-inch cubes

1 cup good-quality strawberry jam or preserves

2 cups heavy cream, very cold

1/2 cup powdered sugar (confectioners’ sugar)

1 teaspoon pure vanilla extract

Fresh mint leaves for garnish

📝 Instructions

  1. In a medium bowl, combine the sliced strawberries with the granulated sugar and lemon juice (if using). Gently stir and let them sit for at least 15-20 minutes to macerate, releasing their delicious juices.
  2. While the strawberries are macerating, prepare your whipped cream. In a large, chilled bowl using an electric mixer with a whisk attachment (or a hand whisk), beat the very cold heavy cream, powdered sugar, and vanilla extract on medium-high speed until stiff peaks form. Be careful not to overbeat, or it will turn grainy.
  3. To assemble the trifle, choose a large, clear glass trifle bowl (about 3-4 quart capacity) for best presentation.
  4. Start by arranging a layer of half the sponge cake cubes at the bottom of the bowl. Gently press them down to create an even base.
  5. Spoon half of the strawberry jam over the cake layer, spreading it evenly.
  6. Next, spoon half of the macerated strawberries (including their juices) over the jam.
  7. Top with a generous layer of half of the freshly whipped cream, spreading it to cover the strawberries.
  8. Repeat the layers: add the remaining cake cubes, followed by the rest of the strawberry jam, then the remaining macerated strawberries.
  9. Finish with the remaining whipped cream, creating beautiful swirls or peaks on top.
  10. Garnish the trifle spectacularly with the reserved whole strawberries (and any extra sliced ones) and fresh mint leaves for a pop of color.
  11. Refrigerate the trifle for at least 2-4 hours, or preferably overnight, to allow the flavors to meld and the cake to soak up all the delicious juices. Serve chilled.

💡 Chef’s Tips

  • Make Ahead Magic: This trifle is even better when made a day in advance! The flavors deepen, and the cake becomes wonderfully moist. Just add the final mint garnish just before serving.
  • Berry Bliss: Feel free to mix and match your berries! Raspberries or blueberries would be a fantastic addition alongside or instead of strawberries for a mixed berry trifle.

10-Minute No-Bake Chocolate Cheesecake

10-Minute No-Bake Chocolate Cheesecake

Ingredients

The Base:

  • 200 g Biscuits (Digestives, Graham crackers, or Oreo-style cookies), finely crushed

  • 1 tbsp Bitter cocoa powder

  • 100 g Unsalted butter, melted

The Chocolate Cream:

  • 600 g Spreadable cream cheese or Mascarpone (at room temperature)

  • 100 g Dark chocolate, melted and slightly cooled

  • 80 g Powdered sugar (adjust to taste)

  • 1 tsp Vanilla extract

  • Optional: 200 ml heavy whipping cream (if you want a lighter, fluffier texture)

Topping:

  • Grated dark chocolate or chocolate shavings


Instructions

  1. Prepare the Base: In a medium bowl, mix the crushed biscuits with the cocoa powder. Pour in the melted butter and stir until it looks like wet sand.

  2. Press the Crust: Press the mixture firmly into the bottom of a 20 cm (8-inch) springform pan lined with parchment paper. Use the back of a spoon to level it. Pop it in the freezer for 5 minutes while you make the filling.

  3. Mix the Cream: In a large bowl, beat the cream cheese (or mascarpone) with the powdered sugar and vanilla until smooth.

  4. Add Chocolate: Slowly pour the melted chocolate into the cream cheese mixture while whisking constantly to prevent lumps. Note: If using heavy cream, whip it separately to soft peaks and fold it in now.

  5. Assemble: Pour the chocolate cream over the chilled biscuit base and smooth the top with a spatula.

  6. Chill: Though the prep takes 10 minutes, let it set in the fridge for at least 4 hours (or 1 hour in the freezer if you are in a rush) to ensure clean slices.

  7. Serve: Finish with a generous layer of grated chocolate shavings before serving.

Creamy Pineapple Pastry Cake

Creamy Pineapple Pastry Cake

Ingredients

The Pastry:

  • 500 g Puff pastry dough (store-bought or homemade)

  • 3 tbsp Sugar (for sprinkling)

  • Powdered sugar (for dusting)

The Filling:

  • 300 g Canned pineapple, drained and chopped into small cubes

  • 500 ml Whole milk

  • 4 Egg yolks

  • 100 g Sugar

  • 40 g Cornstarch

  • 1 tsp Vanilla extract or cinnamon (to match your “Cinnamon Twists” theme)

  • Optional: 100 g whipped cream (to fold into the custard for a lighter “Diplomat Cream”)


Instructions

1. Bake the Pastry Layers

  • Preheat your oven to 200°C (400°F).

  • Roll out the puff pastry and cut two circles (or squares) to fit your pan.

  • Place them on a baking sheet lined with parchment paper. Prick one layer thoroughly with a fork (this will be the bottom).

  • For the top layer, score it lightly into portions (like the diamonds seen in the photo) to make it easier to cut later. Sprinkle with 3 tbsp of sugar.

  • Bake for 15–20 minutes until golden brown and puffed. Let cool completely.

2. Prepare the Custard (Pastry Cream)

  • In a saucepan, heat the milk and vanilla (or a cinnamon stick) until it just begins to simmer.

  • In a separate bowl, whisk the egg yolks, sugar, and cornstarch until pale.

  • Slowly pour half of the hot milk into the egg mixture while whisking constantly to temper the eggs.

  • Pour the mixture back into the saucepan with the remaining milk. Cook over medium heat, stirring constantly, until it thickens into a thick custard.

  • Remove from heat, stir in the chopped pineapples, and let it cool completely. (Fold in whipped cream now if using).

3. Assembly

  • Place the flat pastry layer at the bottom of a springform pan.

  • Pour the pineapple custard mixture over the base and smooth it out.

  • Place the pre-scored pastry layer on top.

  • Refrigerate for at least 4 hours to allow the cream to set firmly.

4. Finishing Touches

  • Dust the top generously with powdered sugar before serving.

  • Serve alongside Rose-Infused Tea: Simply steep your favorite black or green tea with dried culinary rosebuds for 3–5 minutes.

Lemon & Cheese Fridge Tart

Lemon & Cheese Fridge Tart

A creamy, tangy, no-bake layered dessert.

Ingredients

  • Base & Middle Layer: 1 packet (200g) Tennis Biscuits (or Graham crackers/Digestives if Tennis Biscuits are unavailable)

  • The Cream:

    • 397g (1 tin) Sweetened Condensed Milk

    • 280g Full Fat Soft Cheese (e.g., Philadelphia) or Smooth Cottage Cheese

    • 300ml Double Cream (Heavy Cream)

    • Juice of 2 fresh Lemons (adjust to taste for tanginess)

    • ½ tsp Vanilla Extract

  • Topping: Glacé cherries (as pictured) or crushed biscuit crumbs

Instructions

  1. Prepare the Filling:

    • In a large mixing bowl, whisk together the condensed milk and the soft cheese until the mixture is completely smooth and no lumps remain.

    • Pour in the double cream. Whisk steadily until the mixture begins to thicken.

    • Add the vanilla extract and the lemon juice. Whisk again briefly. The acidity in the lemon juice will react with the condensed milk to help set the tart.

    • Tip: Stop whisking as soon as it reaches a thick, spreadable consistency. Over-whisking will cause the cream to separate and become buttery.

  2. Layer the Tart:

    • Line the bottom of a square or rectangular glass dish with a single layer of Tennis Biscuits. You may need to break some to fit the corners.

    • Carefully spread half of the cream mixture over the biscuits, smoothing it out to the edges.

    • Add a second layer of Tennis Biscuits on top of the cream.

    • Spread the remaining half of the cream mixture over the second layer of biscuits.

  3. Decorate:

    • Place glacé cherries on top in a grid pattern (as seen in your photo) so each square slice gets a cherry.

  4. Chill and Set:

    • For a quick set, place the tart in the freezer for 1 hour.

    • Transfer to the fridge for at least 4 hours (overnight is best) to allow the biscuits to soften slightly and the flavors to meld.

Baklava Bundt Cake 🍯🌰

Baklava Bundt Cake 🍯🌰

Serves: 8–10
Prep Time: 20 minutes
Bake Time: 40 minutes

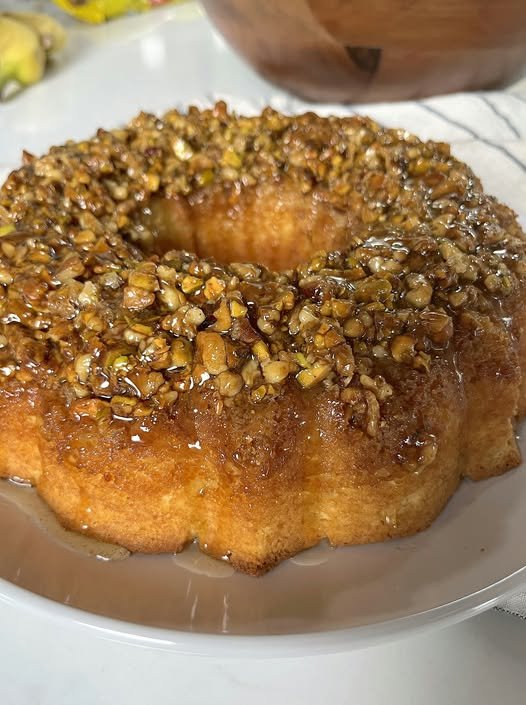
This Baklava Bundt Cake brings together the cozy flavors of classic baklava with the ease of a tender bundt cake. Don’t let the steps worry you—each part is simple, and the final result is absolutely worth it. A buttery pistachio-walnut layer bakes right into the cake, then gets finished with a glossy honey drizzle that soaks in beautifully.


🥜 Nut Topping

  • ¼ cup butter

  • ½ cup pistachios, roughly chopped

  • ½ cup walnuts, roughly chopped

  • ¼ cup brown sugar

  • 2 tablespoons corn syrup

  • Pinch of cinnamon


🍰 Cake Batter

  • 1 box (14.25 oz) white cake mix

  • 3 large eggs

  • ½ cup butter, melted

  • 1 cup buttermilk


🍯 Honey Sauce

  • ¾ cup sugar

  • 2 teaspoons lemon juice

  • 1 tablespoon water

  • ⅓ cup honey


🧁 Instructions

1. Prepare the Pan

Preheat your oven to 325°F (165°C). Generously grease a standard bundt pan, making sure to coat all the grooves well. Set aside.


2. Make the Nut Topping

In a small saucepan over medium heat, combine the butter, pistachios, walnuts, brown sugar, corn syrup, and cinnamon. Stir and cook for 2–3 minutes, just until the butter melts and the sugar dissolves.
Pour the mixture into the bottom of the prepared bundt pan and spread it evenly.


3. Mix the Cake Batter

In a large bowl, whisk together the cake mix, eggs, melted butter, and buttermilk until just smooth. Avoid overmixing.
Carefully pour the batter over the nut mixture in the bundt pan.


4. Bake

Bake for 38–42 minutes, or until a toothpick inserted into the cake comes out clean. Remove from the oven and let the cake rest.


5. Prepare the Honey Sauce

While the cake is baking, combine the sugar, lemon juice, and water in a small saucepan. Cook over medium heat for 4–5 minutes, stirring until the sugar dissolves.
Stir in the honey and cook for 1 more minute, then remove from heat and allow the sauce to cool slightly and thicken.


6. Finish & Serve

Let the cake cool in the pan for about 12 minutes, then carefully invert it onto a serving plate.
Drizzle the cooled honey sauce generously over the top, allowing it to soak into the cake.