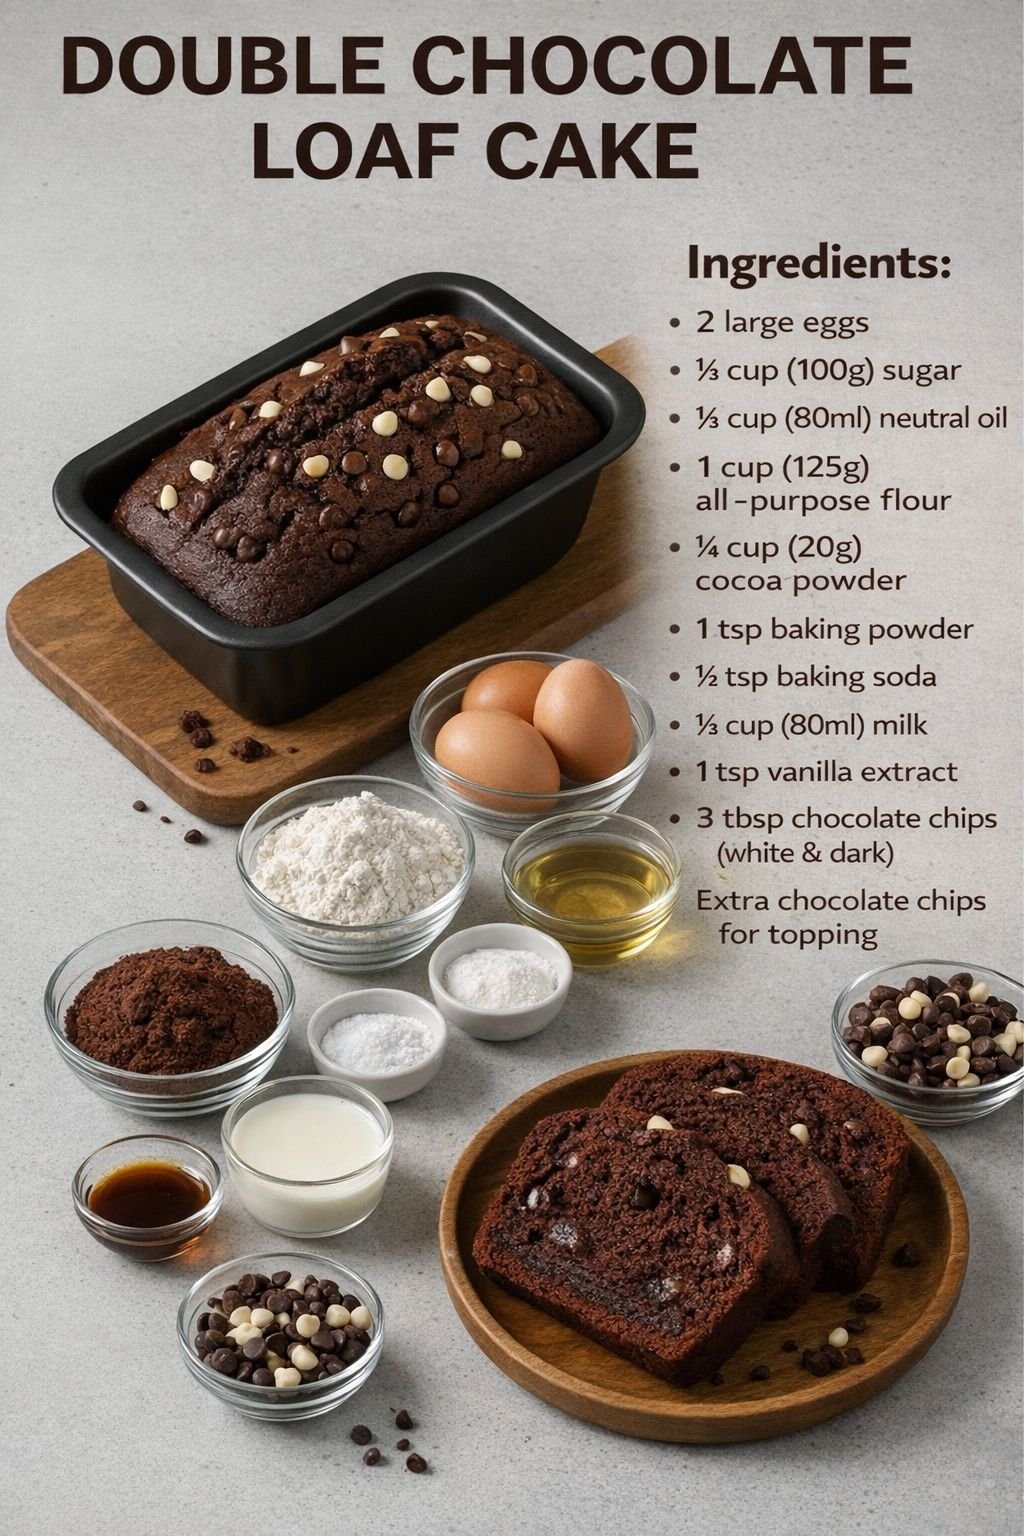
Double Chocolate Loaf Cake

🍫 Double Chocolate Loaf Cake

A rich, moist chocolate loaf packed with chocolate chips. Perfect for breakfast, dessert, or an afternoon treat.


📝 Ingredients

  • 2 large eggs

  • ⅓ cup (100 g) sugar

  • ⅓ cup (80 ml) neutral oil (vegetable or canola)

  • ⅓ cup (80 ml) milk

  • 1 teaspoon vanilla extract

  • 1 cup (125 g) all-purpose flour

  • ¼ cup (20 g) cocoa powder

  • 1 teaspoon baking powder

  • ½ teaspoon baking soda

  • 3 tablespoons chocolate chips (white or dark, or a mix)

  • Extra chocolate chips for topping


👩‍🍳 Instructions

1️⃣ Mix the Wet Ingredients

  1. In a medium bowl, whisk the eggs and sugar until slightly pale and well combined.

  2. Add the oil, milk, and vanilla extract. Stir until smooth.


2️⃣ Combine with Dry Ingredients

  1. Sift together the flour, cocoa powder, baking powder, and baking soda.

  2. Gently fold the dry ingredients into the wet mixture until just combined. Avoid overmixing to keep the cake tender.

  3. Fold in 3 tablespoons of chocolate chips.


3️⃣ Prepare for Baking

  1. Preheat the oven to 175°C (350°F).

  2. Grease a standard loaf pan or line it with parchment paper.

  3. Pour the batter into the pan and smooth the top with a spatula.

  4. Sprinkle extra chocolate chips over the surface.


4️⃣ Bake

  1. Bake for 35–45 minutes.

  2. Test doneness by inserting a toothpick into the center; it should come out clean or with a few moist crumbs.

  3. Let the cake cool in the pan for 10 minutes, then transfer to a wire rack to cool completely.


🍽 Serving Suggestions

  • Serve slightly warm so chocolate chips are melty

  • Pair with a cold glass of milk or a cup of coffee

  • Slice thick for an indulgent snack


🧁 Tips

✔️ Use high-quality cocoa powder for deeper flavor
✔️ Fold gently to keep the cake soft and airy
✔️ Store in an airtight container for 2–3 days
✔️ Freeze slices for up to 1 month
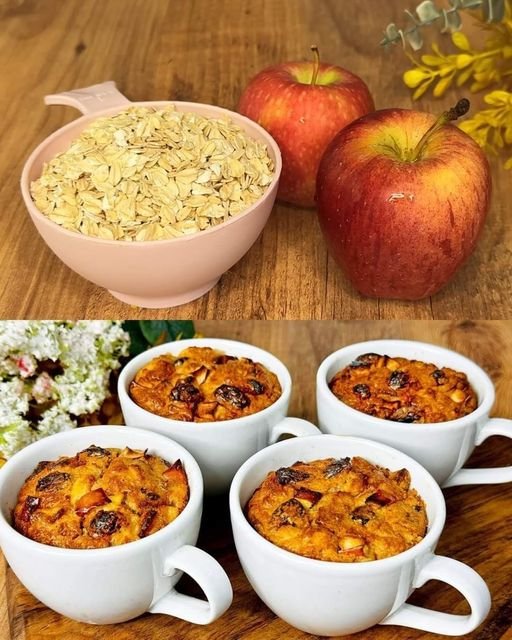
Sugar-Free Apple & Oat Mug Cakes

🍎 Sugar-Free Apple & Oat Mug Cakes

Soft, naturally sweet mug cakes made with oats, apple, and dried fruit. These are quick to prepare and suitable for microwave or oven baking.


📝 Ingredients

  • 1 cup (100 g) oatmeal (rolled oats or quick oats)

  • 1 large egg

  • ½ teaspoon ground cinnamon

  • 1 teaspoon baking powder

  • 1 pinch salt

  • 3 tablespoons raisins

  • 10–12 dried apricots

  • 1 medium apple, grated or finely diced

  • ¼ cup milk (optional, use only if batter is too dry)

  • Small amount of butter or oil for greasing mugs


👩‍🍳 Instructions

1️⃣ Prepare the Fruit

  1. Place raisins and dried apricots in hot water for 5 minutes to soften.

  2. Drain well.

  3. Finely chop the apricots.

  4. Core the apple and grate it or cut into very small cubes.


2️⃣ Mix the Batter

  1. In a mixing bowl, combine:

    • Oats

    • Cinnamon

    • Baking powder

    • Salt

  2. Add:

    • Egg

    • Grated apple

  3. Stir until well mixed.

  4. Fold in:

    • Raisins

    • Chopped apricots

  5. If batter seems too thick or dry, add milk a little at a time until you get a thick, spoonable batter.


3️⃣ Fill the Mugs

  1. Lightly grease 2–3 microwave-safe mugs or ramekins.

  2. Divide batter evenly between mugs.

  3. Fill only up to ¾ full to allow rising.


4️⃣ Cook

Microwave Method

  • Cook each mug on high power for 1½ to 2 minutes.

  • The top should look set and spring back lightly when touched.

Oven Method

  • Preheat oven to 180°C (350°F).

  • Bake for 15–20 minutes until lightly golden and firm in the center.


🍽 Serving Ideas

  • Serve warm

  • Top with yogurt

  • Sprinkle with extra cinnamon

  • Add sliced apples


🧁 Tips

✔️ Finely chopped fruit gives better texture
✔️ Do not overcook or cakes will dry out
✔️ Best eaten fresh
✔️ Can be made with pears instead of apples
✔️ Use almond or oat milk if desired

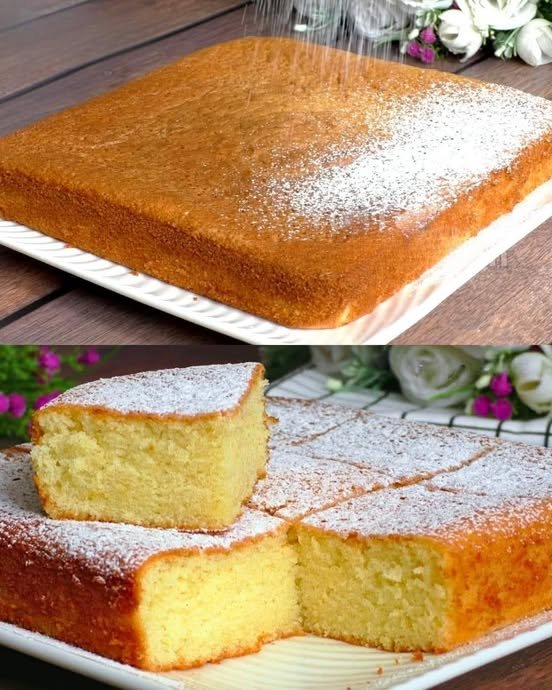
Italian 12-Spoon Sponge Cake

Italian 12-Spoon Sponge Cake

A light and tender cake made using tablespoons for easy measuring. Perfect for everyday baking, even without a kitchen scale.


Ingredients

  • Eggs: 3 large, room temperature

  • Sugar: 12 tablespoons

  • Vanilla sugar or vanilla extract: 1 teaspoon

  • Salt: a small pinch

  • Milk: 12 tablespoons

  • Vegetable oil: 12 tablespoons

  • All-purpose flour: 12 tablespoons

  • Baking powder: 1 teaspoon

  • Powdered sugar: for dusting (optional)


Instructions

1. Prepare the Baking Pan

  • Preheat the oven to 180°C (350°F).

  • Grease a 21 × 21 cm (8 × 8 inch) baking pan.

  • Line the base with parchment paper for easy removal.


2. Whisk the Eggs and Sugar

  • In a large mixing bowl, add the eggs, sugar, vanilla sugar, and salt.

  • Whisk for 3–4 minutes until the mixture becomes pale, thick, and slightly foamy. This helps create a soft texture.


3. Add Liquid Ingredients

  • Pour in the milk and vegetable oil.

  • Whisk gently until fully combined and smooth.


4. Add Dry Ingredients

  • Sift together the flour and baking powder.

  • Gradually fold the dry ingredients into the batter using a spatula or whisk.

  • Mix just until smooth, avoiding overmixing.


5. Bake the Cake

  • Pour the batter evenly into the prepared pan.

  • Tap the pan lightly on the counter to release air bubbles.

  • Bake for 25–30 minutes, or until a toothpick inserted into the center comes out clean.


6. Cool and Serve

  • Remove the cake from the oven and allow it to cool in the pan for 10–15 minutes.

  • Transfer to a serving plate and let cool completely.

  • Lightly dust with powdered sugar before slicing, if desired.


Helpful Tips

  • Use the same tablespoon for all measurements to keep proportions accurate.

  • Serve plain or pair with fresh fruit, yogurt, or jam.

  • Store covered at room temperature for up to 2 days, or refrigerate for longer freshness.

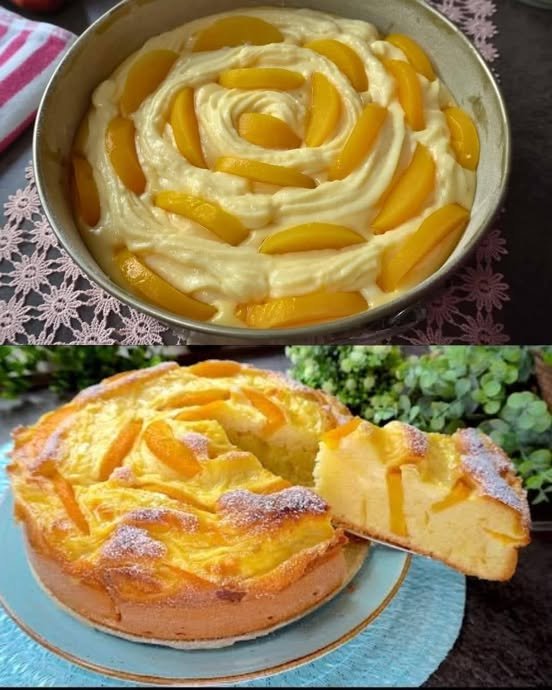
Apricot Custard Cake

Apricot Custard Cake

A tender cake layered with smooth vanilla custard and topped with fresh apricot slices. Light, flavorful, and perfect for everyday baking or special occasions.


Ingredients

For the Vanilla Custard

  • Egg yolk: 1 (reserve the white for the cake batter)

  • Milk: 350 ml (1½ cups)

  • Cornstarch: 2 heaped tablespoons

  • Sugar: 50 g (¼ cup)

  • Vanilla extract: 1 teaspoon


For the Cake Batter

  • Eggs: 3 whole eggs + 1 reserved egg white

  • Salt: a small pinch

  • Sugar: 130 g (⅔ cup)

  • Neutral oil (sunflower or vegetable): 140 ml (¾ cup)

  • All-purpose flour: 350 g (2½ cups)


For Topping

  • Fresh apricots: washed, pitted, and sliced


Instructions

1. Prepare the Custard

  • In a saucepan, whisk together the egg yolk, sugar, and cornstarch until smooth.

  • Add a small amount of the milk and whisk to remove any lumps.

  • Pour in the remaining milk and vanilla extract.

  • Cook over medium heat, stirring constantly, until the mixture thickens to a smooth custard.

  • Remove from heat, transfer to a bowl, cover the surface with plastic wrap, and allow to cool completely.


2. Prepare the Cake Batter

  • Preheat the oven to 180°C (350°F).

  • Grease a 22–24 cm (9-inch) springform pan and line the base with parchment paper.

  • In a large bowl, whisk the eggs, reserved egg white, sugar, and salt for 3–5 minutes until pale and slightly thickened.

  • Slowly pour in the oil while whisking continuously.

  • Gently fold in the flour until just combined. Avoid overmixing.


3. Assemble the Cake

  • Pour the cake batter evenly into the prepared pan.

  • Transfer the cooled custard to a piping bag or spoon.

  • Pipe or drizzle the custard in a spiral or decorative pattern over the batter.

  • Arrange apricot slices neatly along the custard lines.


4. Bake

  • Place the cake in the preheated oven.

  • Bake for 35–45 minutes, or until the top is lightly golden and a toothpick inserted into the cake portion comes out clean.

  • If the top browns too quickly, loosely cover with foil during the last 10 minutes.


5. Cool and Serve

  • Allow the cake to cool in the pan for 15 minutes, then remove the sides of the springform.

  • Let cool completely before slicing for clean layers.


Serving Tips

  • Serve plain or lightly dusted with powdered sugar.

  • Pairs well with tea or coffee.

  • Store covered at room temperature for 1 day or refrigerated for up to 3 days.

Garlic and Mozzarella Cheese-Stuffed Bread

Garlic and Mozzarella Cheese-Stuffed Bread

Soft, flavorful bread with a garlic-parsley butter filling and melted mozzarella center

Yield

1 loaf or 8–10 rolls

Oven Temperature

180°C (350°F)


Ingredients

Dough

  • 70 ml warm water

  • 70 ml warm milk

  • 1 teaspoon dry yeast

  • 1 teaspoon sugar

  • 250 g all-purpose flour

  • ½ teaspoon salt

  • 20 ml vegetable oil or melted butter

Filling

  • 100 g mozzarella cheese, shredded

  • 2 tablespoons unsalted butter, softened

  • 2 cloves garlic, minced

  • 1 tablespoon fresh parsley, finely chopped

Topping

  • 1 egg, beaten (for egg wash)

  • 1 teaspoon poppy seeds


Instructions


1. Prepare the Dough

  1. In a medium mixing bowl, combine the warm water, warm milk, sugar, and dry yeast.

  2. Stir gently and allow to stand for 5–10 minutes, until the mixture becomes frothy.

  3. Add the flour, salt, and oil to the yeast mixture. Mix until a soft, cohesive dough forms.

  4. Transfer the dough to a lightly floured surface and knead for about 5 minutes, until smooth and elastic.

  5. Place the dough in a lightly oiled bowl, cover with a clean damp cloth, and allow it to rise in a warm, draft-free area for approximately 1 hour, or until doubled in size.


2. Prepare the Filling

  1. In a small bowl, combine the softened butter, minced garlic, and chopped parsley.

  2. Mix until a smooth, spreadable paste forms.


3. Shape and Fill

  1. Punch down the risen dough to release air.

  2. Roll the dough into a large rectangle on a lightly floured surface.

  3. Spread the garlic-parsley butter evenly over the dough.

  4. Sprinkle the shredded mozzarella cheese evenly on top of the butter layer.

  5. Roll the dough tightly from one edge into a log.

  6. Optional shaping:

    • Cut the log into thick slices for individual rolls, or

    • Slice the log lengthwise, twist the two strands together, and form a braided loaf.


4. Final Rise and Bake

  1. Place the shaped loaf or rolls in a greased loaf pan or baking tray.

  2. Cover and allow to rise for 20 minutes in a warm place.

  3. Preheat the oven to 180°C (350°F).

  4. Brush the top of the dough with the beaten egg and sprinkle poppy seeds evenly.

  5. Bake for 25–30 minutes, until the bread is golden brown and the mozzarella inside is fully melted.


5. Cooling and Serving

  1. Remove the bread from the oven and allow it to cool for at least 10 minutes before slicing.

  2. Serve warm. This bread pairs well with soups, salads, or as a savory snack on its own.


Storage

  • Store at room temperature in an airtight container for up to 2 days

  • Refrigerate for longer storage; reheat in a preheated oven to restore freshness

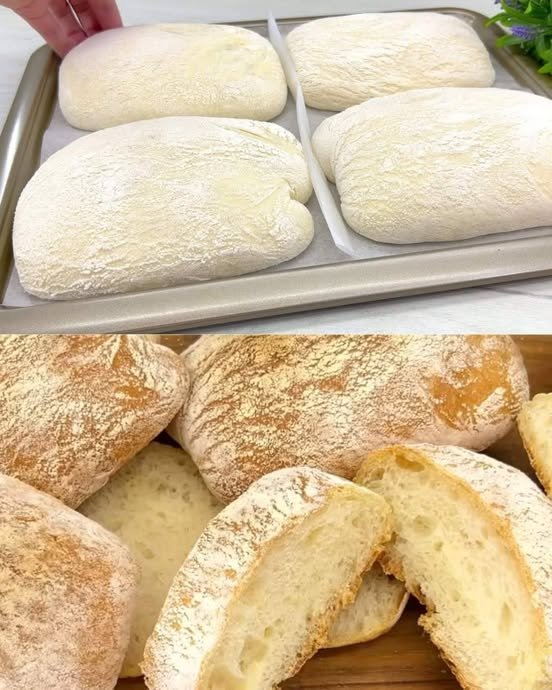
No-Knead Italian High-Hydration Bread

No-Knead Italian High-Hydration Bread

A rustic Italian-style bread with an open crumb and crisp, lightly floured crust

Yield

2 large loaves or 4–6 small loaves

Total Time

Approximately 60–70 minutes (excluding cooling)

Oven Temperature

220°C (430°F)


Ingredients

Yeast Starter

  • 100 ml water, lukewarm

  • 1 teaspoon granulated sugar

  • 8 g dry yeast

  • 3 tablespoons wheat flour (all-purpose or bread flour)

Main Dough

  • 500 g wheat flour, sifted

  • 1½ teaspoons salt

  • 350 ml water, lukewarm

  • 30 ml vegetable oil


Instructions


1. Prepare the Yeast Starter

  1. In a small bowl, combine the lukewarm water, sugar, and dry yeast.

  2. Add the flour and whisk until a smooth mixture forms.

  3. Cover the bowl and allow it to stand at room temperature for 10–15 minutes, until the mixture becomes foamy and visibly active.


2. Mix the Dough

  1. Place the sifted flour and salt into a large mixing bowl and stir to distribute evenly.

  2. Create a well in the center of the flour.

  3. Pour in the prepared yeast starter, the remaining lukewarm water, and the vegetable oil.

  4. Mix using a sturdy spoon or spatula until all ingredients are combined and a very soft, sticky dough forms.

  5. The dough should be fluid and elastic rather than firm; this high moisture content is essential for an open internal structure.

  6. Cover the bowl and allow the dough to rise in a warm, draft-free environment for 30–40 minutes, until it has doubled in volume and shows visible air bubbles on the surface.


3. Shape the Bread

  1. Generously flour a clean work surface.

  2. Carefully transfer the risen dough onto the floured surface, handling it gently to preserve the air inside.

  3. Lightly dust the top of the dough with additional flour.

  4. Using a dough scraper or lightly floured hands, divide the dough into 2 large portions or 4–6 smaller rectangular portions.

  5. Place the shaped pieces onto a baking tray lined with parchment paper, leaving space between each loaf to allow for expansion.


4. Bake

  1. Preheat the oven to 220°C (430°F).

  2. Place the baking tray on the center rack of the oven.

  3. Bake for 20–25 minutes, until the bread is evenly golden and the crust is firm.

  4. Remove from the oven and transfer the loaves to a wire rack.

  5. Allow the bread to cool for at least 15 minutes before slicing to allow the crumb to stabilize.


Storage

  • Best consumed on the day of baking

  • Can be stored at room temperature for up to 24 hours

  • Freeze once fully cooled for longer storage