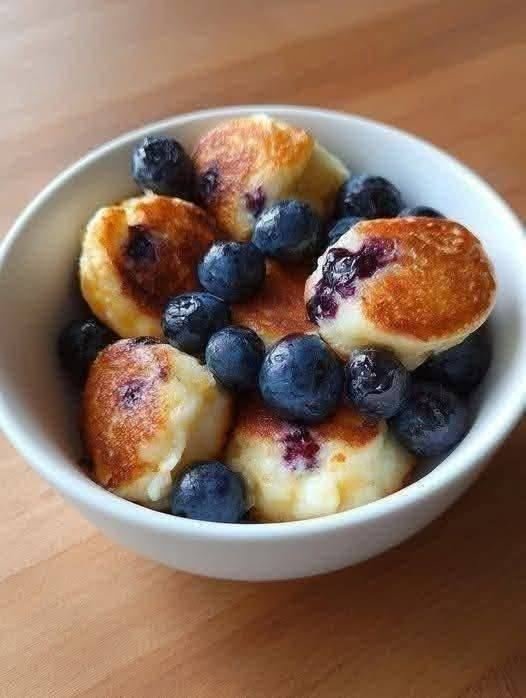
Blueberry Cottage Cheese Pancake Bites

Blueberry Cottage Cheese Pancake Bites

These bites are naturally flourless and gluten-free when using oat or almond flour.

  • Prep time: 5 minutes

  • Cook time: 10–15 minutes

  • Yields: 10–12 bites


Ingredients

  • Cottage Cheese: 1 cup

  • Eggs: 2 large

  • Banana: ½ ripe banana, mashed

  • Flour: ½ cup oat flour (or almond flour)

  • Sweetener: 1 tbsp honey or maple syrup (optional)

  • Leavening: 1 tsp baking powder

  • Flavor: 1 tsp vanilla extract and a pinch of salt

  • Fruit: ½ cup fresh or frozen blueberries


Step-by-Step Instructions

  1. Prepare Your Equipment:

    • For the Air Fryer: Line the basket with parchment paper or use silicone muffin liners.

    • For the Oven: Preheat to 190°C (375°F) and grease a mini-muffin tin or line a baking sheet.

  2. Mix the Base: In a medium bowl, whisk together the cottage cheese, eggs, mashed banana, vanilla, and honey (if using) until well combined. For a smoother texture, you can pulse these ingredients in a blender first.

  3. Add Dry Ingredients: Stir in the oat flour (or almond flour), baking powder, and salt. Mix until just combined. Gently fold in most of the blueberries, saving a few to press on top.

  4. Form the Bites: Drop rounded tablespoons of the batter onto your prepared tray or into muffin liners. Press the remaining blueberries into the top of each bite.

  5. Cook to Golden Perfection:

    • Air Fryer: Cook at 180°C (350°F) for 8–10 minutes until the centers are set and the tops are golden brown.

    • Oven: Bake for 12–15 minutes.

  6. Serve: Let them cool for a few minutes to firm up. They are delicious warm or chilled.


Recipe Tips

  • Texture: If you prefer a more “pancake-like” texture, blending the cottage cheese first makes the bites very light and airy.

  • Storage: These stay fresh in the fridge for up to 4 days, making them great for meal prep.
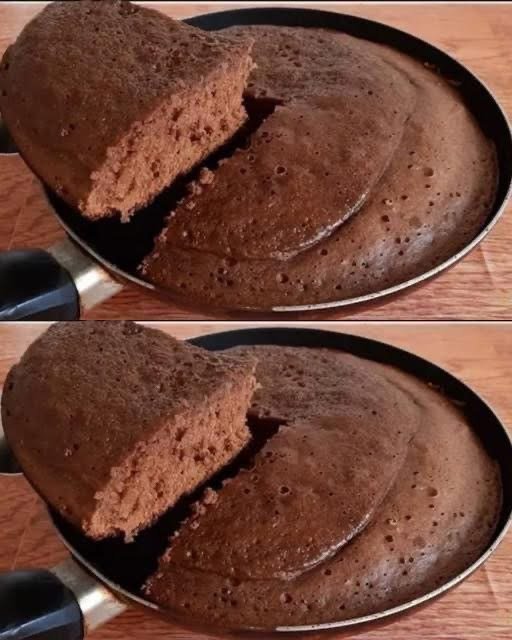
Skillet Chocolate Cake: Easy, Soft, and Very Tasty Recipe

Skillet Chocolate Cake: Easy, Soft, and Very Tasty Recipe

Ingredients

  • 2 eggs
  • 1½ cups all-purpose flour (maida)
  • 3 tablespoons chocolate drink powder (like cocoa or drinking chocolate)
  • 3 tablespoons sugar
  • 50 ml oil (about 3 tablespoons)
  • 50 ml milk (about 3 tablespoons)
  • 1 tablespoon baking powder

Step-by-Step Method

1️⃣ Prepare the Egg Mixture

  • Take a mixing bowl.
  • Crack 2 eggs into the bowl.
  • Add 3 tablespoons sugar.
  • Whisk well with a hand whisk or fork until the mixture becomes smooth and slightly creamy.

2️⃣ Add the Liquid Ingredients

  • Pour 50 ml oil into the bowl.
  • Add 50 ml milk.
  • Mix well until all the liquid ingredients combine completely.

3️⃣ Add Chocolate Powder

  • Add 3 tablespoons chocolate drink powder.
  • Mix continuously so the chocolate blends well with the batter.

4️⃣ Add Flour

  • Slowly add 1½ cups all-purpose flour.
  • Mix while adding to avoid lumps.
  • Stir until you get a smooth, thick batter.

5️⃣ Add Baking Powder

  • Add 1 tablespoon baking powder.
  • Gently mix so it spreads evenly throughout the batter.

6️⃣ Prepare the Skillet

  • Take a non-stick frying pan/skillet.
  • Grease it lightly with butter, oil, or margarine.

7️⃣ Pour the Batter

  • Pour the prepared cake batter into the greased skillet.
  • Spread it evenly.
  • Cover the pan with a lid.

8️⃣ Cook the Cake

  • Place the skillet on the stove on very low heat.
  • If possible, place a tawa or rack under the pan to prevent burning.
  • Cook slowly for 20–30 minutes.

9️⃣ Check if the Cake is Done

  • Insert a toothpick in the center.
  • If it comes out clean, the cake is ready.

🔟 Serve

  • Let the cake cool slightly.
  • Slice and serve.
  • Optional toppings:
    • Chocolate syrup 🍫
    • Cream
    • Powdered sugar

✅ Tip: You can also add chocolate chips, nuts, or raisins to the batter for extra flavor.

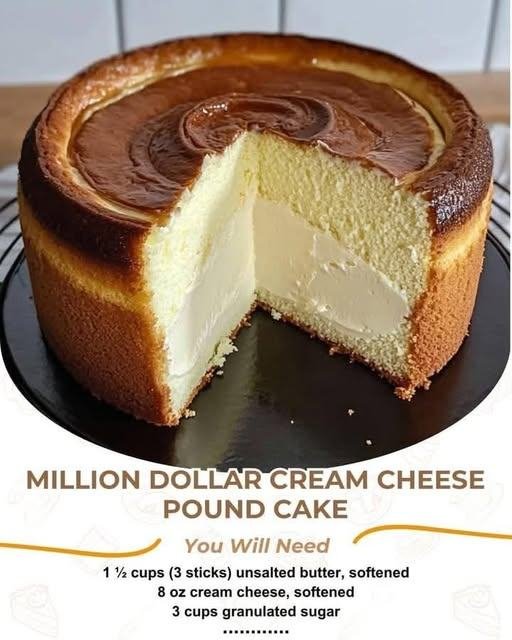
Million Dollar Cream Cheese Pound Cake

Million Dollar Cream Cheese Pound Cake

This classic pound cake is renowned for its incredibly dense, velvety crumb and rich, buttery flavor. By using both butter and cream cheese, you achieve a level of moisture and decadence that truly lives up to its “million dollar” name.

Ingredients

  • 1 ½ cups (3 sticks) Unsalted butter, softened

  • 8 oz Cream cheese, softened

  • 3 cups Granulated monk fruit or stevia (sugar substitute)

  • 6 Large eggs (at room temperature)

  • 3 cups All-purpose flour (sifted)

  • 1 tsp Vanilla extract

  • 1 tsp Almond extract (optional)

  • ¼ tsp Salt


Step-by-Step Instructions

  1. Preparation: Preheat your oven to 165°C. Generously grease and flour a 10-inch tube pan or Bundt pan to ensure the cake releases perfectly after baking.

  2. Cream the Base: In a large mixing bowl, beat the softened butter and softened cream cheese together on medium-high speed until the mixture is smooth and completely combined.

  3. Add Sweetener: Gradually add the sugar substitute to the butter mixture. Continue beating for about 5 minutes until the texture is light, fluffy, and pale in color.

  4. Incorporate Eggs: Add the eggs one at a time, beating well after each addition. Tip: Scrape down the sides of the bowl frequently to ensure everything is evenly incorporated.

  5. Flavor and Salt: Stir in the vanilla extract, almond extract (if using), and salt.

  6. Add Flour: Turn your mixer to the lowest setting and gradually add the sifted flour. Mix just until the flour disappears into the batter. Important: Avoid overmixing at this stage to keep the cake tender.

  7. Bake: Pour the thick, creamy batter into your prepared pan and smooth the top with a spatula. Bake for 1 hour and 15 minutes to 1 hour and 30 minutes. The cake is done when a long wooden skewer inserted into the center comes out clean.

  8. Cooling Process: Allow the cake to cool in the pan for about 15–20 minutes. Carefully run a thin knife around the edges before inverting the cake onto a wire rack to cool completely.


Serving Suggestion

This pound cake is beautiful on its own, but it pairs wonderfully with a side of fresh macerated strawberries and a dollop of unsweetened whipped cream for a classic dessert presentation.

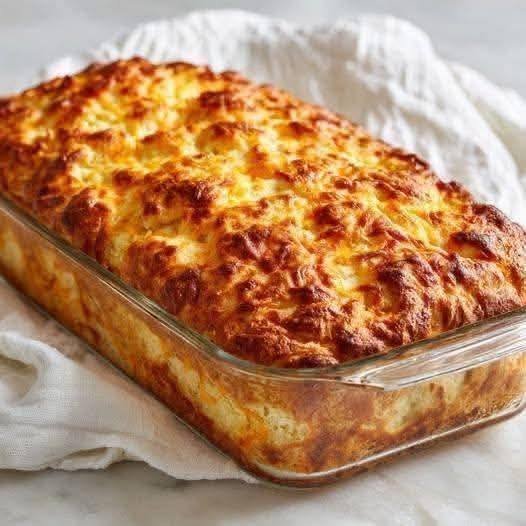
Cloud Bread (Zero-Carb Flourless Loaf)

Cloud Bread (Zero-Carb Flourless Loaf)

This “Cloud Bread” loaf is a fantastic option for anyone looking for a light, airy, and flourless alternative to traditional bread. It relies on the protein from eggs to create structure, making it a wonderful fit for low-carb or gluten-free lifestyles.

Ingredients

  • 3 Large eggs (separated into whites and yolks)

  • 3 tbsp Cream cheese (softened to room temperature)

  • ¼ tsp Baking powder (or Cream of Tartar for stability)

  • 1 pinch Salt

  • Optional: Garlic powder, dried herbs, or a pinch of stevia for a sweet version.


Step-by-Step Instructions

  1. Preheat and Prep: Preheat your oven to 150°C. Lightly grease a small loaf pan or line it with parchment paper to ensure the bread releases easily after baking.

  2. Separate the Eggs: Carefully separate the egg whites from the yolks into two clean, dry bowls. Tip: Ensure there is no yolk in the whites, as even a small drop will prevent them from fluffing up.

  3. Mix the Yolks: In the bowl with the egg yolks, add the softened cream cheese and a pinch of salt. Whisk or blend until the mixture is completely smooth and no lumps of cream cheese remain.

  4. Whip the Whites: In the other bowl, add the baking powder (or cream of tartar) to the egg whites. Using a hand mixer or stand mixer, beat the whites on high speed until stiff peaks form. The whites should be thick and glossy, standing straight up when you lift the beaters.

  5. Fold Gently: Slowly and carefully fold the yolk mixture into the whipped egg whites using a spatula. Use a “light hand” to keep as much air in the mixture as possible—this is what gives the bread its height without using flour.

  6. Bake: Gently pour the batter into the prepared loaf pan. Bake for 25–30 minutes.

  7. Golden Finish: The bread is done when the top is a beautiful golden brown and it feels firm but springy to the touch.

  8. Cool: Let the loaf cool in the pan for at least 10 minutes. As it cools, the texture will become more “bread-like” and easier to slice.


Why This Works

  • Zero Flour: By using whipped egg whites, you achieve a bubbly, airy texture that mimics a soft sponge cake or light bread without any grains.

  • High Protein: This recipe is almost entirely protein and healthy fats, making it very satisfying while staying within a low-point or low-carb budget.

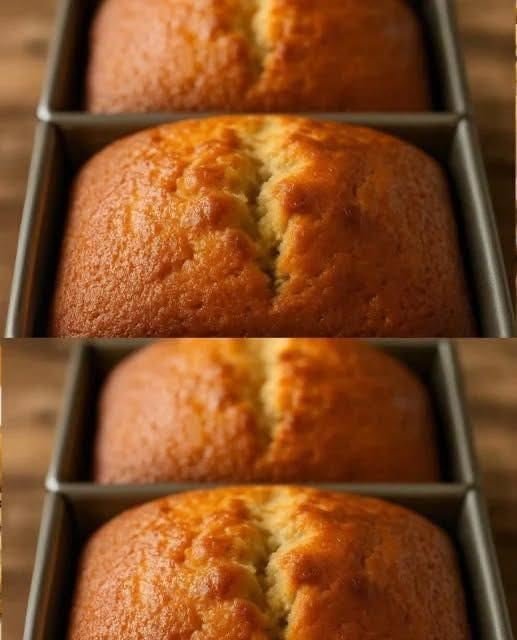
Diabetic-Friendly Homemade Sponge Cake

Diabetic-Friendly Homemade Sponge Cake

This classic sponge cake recipe uses simple swaps to create a light, airy treat that is mindful of sugar intake. It is a practical, traditional recipe that yields a beautiful golden crust and a soft interior.

Ingredients

  • 1 ½ cups Almond flour or ultra-fine whole wheat pastry flour

  • ½ cup Granulated monk fruit or stevia (sugar substitute)

  • 4 Large eggs (at room temperature)

  • 1 tsp Baking powder

  • 1 tsp Vanilla extract

  • ¼ cup Unsweetened applesauce or light olive oil

  • 1 pinch Salt


Step-by-Step Instructions

  1. Preheat and Prep: Preheat your oven to 175°C. Lightly coat a loaf pan or small cake tin with non-stick cooking spray or line it with parchment paper for easy removal.

  2. Separate and Whip Eggs: For the fluffiest texture, separate the egg whites from the yolks. In a clean bowl, beat the egg whites with a pinch of salt until stiff peaks form.

  3. Mix Yolks and Sweetener: In a separate large bowl, beat the egg yolks with the sugar substitute and vanilla extract until the mixture is pale and slightly thickened. Stir in the applesauce or olive oil.

  4. Combine Dry Ingredients: Sift the flour and baking powder into the yolk mixture. Gently stir until just combined.

  5. Fold Gently: Using a spatula, take one-third of the whipped egg whites and stir them into the batter to lighten it. Then, very gently fold in the remaining egg whites. Tip: Use a light hand to keep the air in the batter, which gives the cake its “sponge” texture.

  6. Bake: Pour the batter into your prepared pan and smooth the top. Bake for 25–30 minutes, or until a toothpick inserted into the center comes out clean and the top is golden brown.

  7. Cool: Let the cake cool in the pan for 10 minutes before transferring it to a wire rack.


Serving Suggestion

This cake is delicious on its own, but you can serve it with a dollop of Greek yogurt and fresh raspberries for a low-point, elegant dessert.

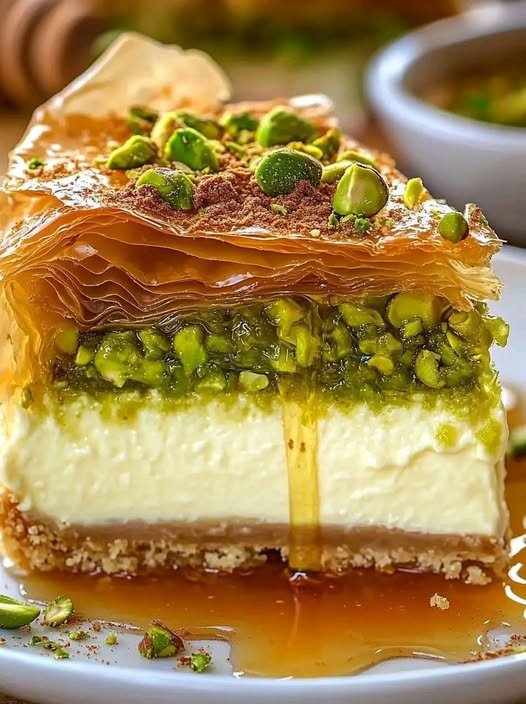
Honeyed Pistachio Baklava Cheesecake

Honeyed Pistachio Baklava Cheesecake

Description

This decadent dessert fuses the classic New York-style cheesecake with the flavors of Middle Eastern baklava. A crisp phyllo and pistachio base meets a smooth cream cheese filling, all drizzled with golden honey syrup. It’s nutty, sweet, and indulgently creamy — perfect for special occasions or a luxurious treat.

Time

Prep time: 45 minutes

Bake time: 1 hour

Chill time: 4–6 hours (preferably overnight)

Total time: ~6–7 hours

Ingredients

For the Pistachio Phyllo Crust:

6 sheets phyllo dough, thawed

1/2 cup finely chopped pistachios

2 tbsp granulated sugar

For the Cheesecake Filling:

24 oz (680 g) cream cheese, room temperature

1 cup granulated sugar

1 tsp vanilla extract

3 large eggs

1/2 cup sour cream

1/4 cup heavy cream

1/4 tsp salt

For the Honey Syrup:

1/2 cup honey

2 tbsp water

1 tsp lemon juice

1/2 tsp ground cinnamon

1/4 cup chopped pistachios, for garnish

Instructions

 Prepare the Crust

Preheat oven to 350°F (175°C).

Brush a 9-inch springform pan with butter.

Layer 2–3 sheets of phyllo in the pan, brushing each with melted butter.

Sprinkle half the chopped pistachios and sugar over the layers.

Repeat with remaining phyllo sheets and pistachios.

Bake the phyllo base for 10–12 minutes until golden. Let cool slightly.

Make the Cheesecake Filling

In a large bowl, beat cream cheese until smooth.

Add sugar and beat until fluffy.

Mix in eggs one at a time, then add sour cream, heavy cream, vanilla, and salt.

Pour the filling over the cooled phyllo crust.

Bake the Cheesecake

Bake at 325°F (160°C) for 55–60 minutes, or until the edges are set and the center slightly jiggles.

Turn off the oven and leave the cheesecake inside for 15 minutes.

Remove from oven and cool to room temperature, then refrigerate for 4–6 hours or overnight.

Prepare Honey Syrup

In a small saucepan, combine honey, water, lemon juice, and cinnamon.

Warm gently until combined (do not boil).

Serve

Drizzle honey syrup over chilled cheesecake.

Garnish with remaining chopped pistachios.

Slice with a warm knife for clean cuts.

Frequently Asked Questions

Q1: Can I make it ahead of time?

Yes! Cheesecake actually tastes better after resting overnight, allowing flavors to meld.

Q2: Can I use walnuts instead of pistachios?

Absolutely. Walnuts or almonds are a fine substitution, though pistachios give the authentic baklava flavor.

Q3: Can I freeze this cheesecake?

Yes, wrap tightly in plastic and freeze for up to 2 months. Thaw in the fridge before serving.

Q4: Can I use pre-made baklava crust?

You can, but make sure it fits the springform pan and is baked lightly before adding cheesecake filling.