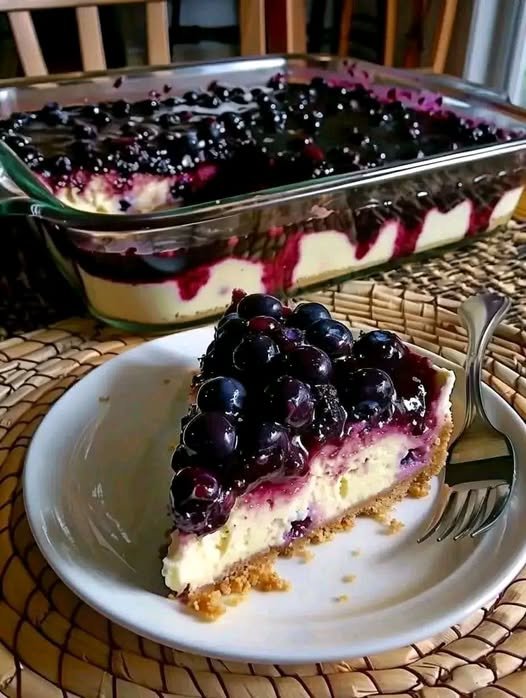
Classic Fresh Blueberry Cheesecake

πŸ›’ Ingredients

1. The Graham Cracker Crust

  • 1 Β½ cups Graham cracker crumbs (about 12 full sheets)

  • 6 tbsp Unsalted butter, melted

  • ΒΌ cup Granulated sugar

  • Pinch of salt

2. The Creamy Filling

  • 24 oz (3 blocks) Full-fat cream cheese, room temperature (very important!)

  • 1 cup Granulated sugar

  • 1 cup Full-fat sour cream, room temperature

  • 3 large Eggs, room temperature

  • 2 tsp Vanilla extract

  • 1 tsp Lemon zest (optional, for brightness)

  • 1 Β½ cups Fresh blueberries (tossed in 1 tsp flour to prevent sinking)

3. The Blueberry Compote Topping

  • 2 cups Fresh blueberries (divided)

  • β…“ cup Granulated sugar

  • 1 tbsp Lemon juice

  • 1 tbsp Cornstarch mixed with 2 tbsp water (slurry)


πŸ‘©β€πŸ³ Instructions

Step 1: Prep the Crust

  1. Preheat your oven to 350Β°F (175Β°C).

  2. Mix crumbs, sugar, salt, and melted butter until it looks like wet sand.

  3. Press firmly into the bottom and 1 inch up the sides of a 9-inch springform pan.

  4. Bake for 10 minutes. Remove and let cool completely.

  5. Lower oven temp to 325Β°F (160Β°C).

Step 2: Make the Filling

  1. In a large bowl, beat the softened cream cheese and sugar on medium speed until perfectly smooth (about 3 minutes). Scrape the sides of the bowl.

  2. Add sour cream, vanilla, and lemon zest. Beat until combined.

  3. Add eggs one at a time on low speed. Mix just until the yellow disappears. Do not overbeat here, or you’ll trap air that causes cracks.

  4. Gently fold in the 1 Β½ cups of flour-dusted blueberries with a spatula.

Step 3: The Water Bath & Bake

  1. Wrap the outside of your springform pan in 2–3 layers of heavy-duty aluminum foil to prevent water from seeping in.

  2. Place the pan in a large roasting tray. Pour the batter into the crust.

  3. Place the tray in the oven and carefully pour hot water into the roasting tray until it reaches halfway up the side of the springform pan.

  4. Bake for 55–70 minutes. The edges should be set, but the center should still have a “Jell-O” jiggle.

Step 4: The Slow Cool (Crucial!)

  1. Turn off the oven and crack the door open a few inches. Let the cheesecake sit inside for 1 hour.

  2. Remove from the water bath and let it cool completely on the counter.

  3. Refrigerate for at least 6 hours, but preferably overnight.

Step 5: The Blueberry Topping

  1. In a small saucepan, combine 1 cup of blueberries, sugar, and lemon juice over medium heat.

  2. Once the berries start to burst and release juice, stir in the cornstarch slurry.

  3. Simmer for 1–2 minutes until thickened and glossy.

  4. Remove from heat and fold in the remaining 1 cup of fresh berries. Let cool completely before spooning over the chilled cheesecake.


Pro Tip: To get those “bakery-perfect” slices, dip a sharp knife in hot water and wipe it clean between every single cut.
πŸ‹ Lemon Cream Sheet Cake Recipe

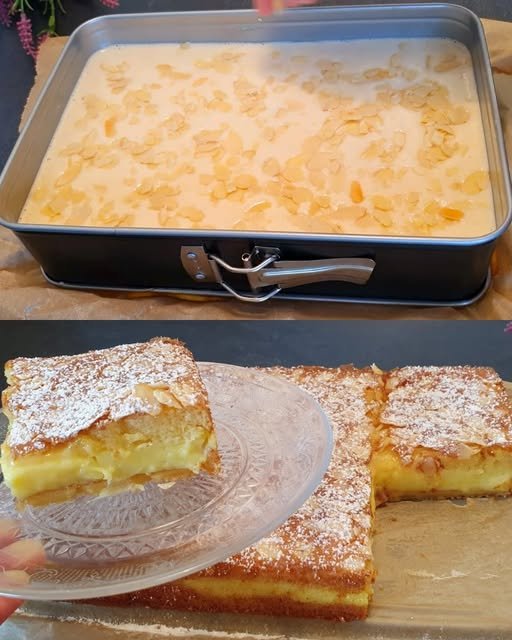
πŸ‹ Lemon Cream Sheet Cake Recipe

1. Make the Lemon Cream

  1. In a saucepan, whisk together the egg, sugar, and cornstarch until smooth.

  2. Slowly pour in the milk while whisking to avoid lumps.

  3. Cook over medium heat, stirring constantly, until the mixture thickens into a heavy custard.

  4. Remove from heat and stir in the fresh lemon juice and yellow food coloring (optional, for that vibrant pop).

  5. Cover with plastic wrap (touching the surface so no skin forms) and let it cool.

2. Prepare the Cake Base

Note: You will also need about 200g of flour and 10g of baking powder for a standard sponge base.

  1. Beat the 4 eggs, sugar, salt, and vanilla sugar for about 5–8 minutes until very pale and fluffy.

  2. Gradually stream in the vegetable oil while whisking slowly.

  3. Sift in the flour and baking powder, gently folding them in so you don’t lose the air.

3. Assembly & Baking

  1. Pour half of the cake batter into a greased/lined rectangular pan.

  2. Bake at 180Β°C for about 10–12 minutes until just set.

  3. Spread the cooled Lemon Cream evenly over the par-baked base.

  4. Carefully pour the remaining batter over the cream layer.

  5. The Topping: Sprinkle a generous handful of flaked almonds over the top.

  6. Return to the oven for another 20–25 minutes until the top is golden brown.


Finishing Touches

  • Chill: Once cooled to room temperature, refrigerate for at least 2 hours (as per your notes) to let the lemon cream set perfectly.

  • Garnish: Dust heavily with powdered sugar before slicing into squares.

Pro Tip: To get those clean, professional-looking layers shown in your photo, make sure your lemon cream is completely cold before adding the second layer of batter!

πŸŽ„ Sugar-Free, Oil-Free, Gluten-Free Holiday Biscotti

.


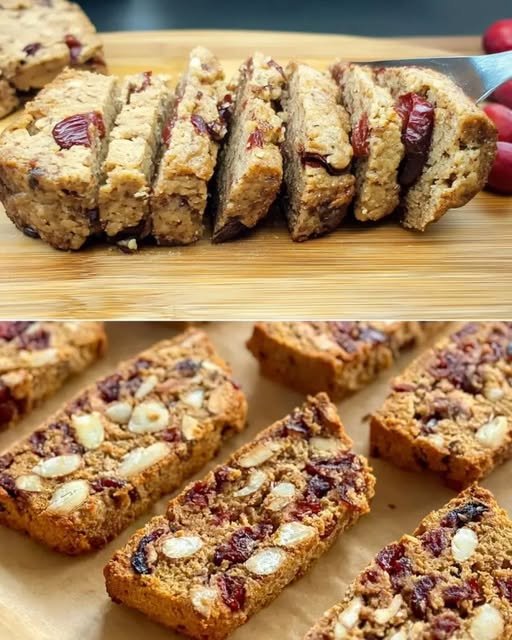
πŸŽ„ Sugar-Free, Oil-Free, Gluten-Free Holiday Biscotti

Perfect for dunking in coffee or tea!

πŸ›’ Ingredients

  • 2 cups Almond Flour (finely ground)

  • 1/2 cup Erythritol or Monkfruit sweetener (or your preferred dry sugar substitute)

  • 2 Large Eggs (room temperature)

  • 1 tsp Baking Powder

  • 1 tsp Vanilla Extract (or Almond Extract for extra flavor)

  • 1/2 cup Dried Cranberries (look for juice-sweetened to keep it sugar-free)

  • 1/2 cup Sliced or Whole Almonds

  • 1 pinch Salt


πŸ₯£ Preparation Method

  1. Dry Mix: In a large bowl, whisk together the almond flour, sweetener, baking powder, and salt. Stir in the cranberries and almonds.

  2. Wet Mix: In a separate small bowl, lightly beat the eggs with the vanilla extract.

  3. Combine: Pour the egg mixture into the dry ingredients. Mix until a stiff dough forms. (Since there is no gluten, the dough will feel slightly more “sticky” and “nutty” than traditional wheat dough).

  4. The First Bake: On a parchment-lined baking sheet, shape the dough into a long, flat log (about 10 inches long and 3 inches wide). Bake at 160Β°C (325Β°F) for 25 minutes until firm to the touch.

  5. The Slice: Remove from the oven and let it cool for at least 15 minutes. This is crucial! Use a serrated knife to cut the log into diagonal slices (about 1/2 inch thick).

  6. The Second Bake (The “Crunch”): Lay the slices flat on the baking sheet. Bake for another 8–10 minutes per side at 150Β°C (300Β°F) until they are golden and dry.


πŸ’‘ Why this is a “Cheat Code” Dessert

  • The Crunch: “Biscotti” literally means “twice-cooked.” The second bake is what removes the moisture, allowing these to stay crispy without any oil.

  • Gift-able: Because they are dry and contain no butter/oil, they have a fantastic shelf lifeβ€”up to 2 weeks in an airtight jar!

Quick Tip: If your dough is too sticky to handle, wet your hands slightly with water before shaping the log!

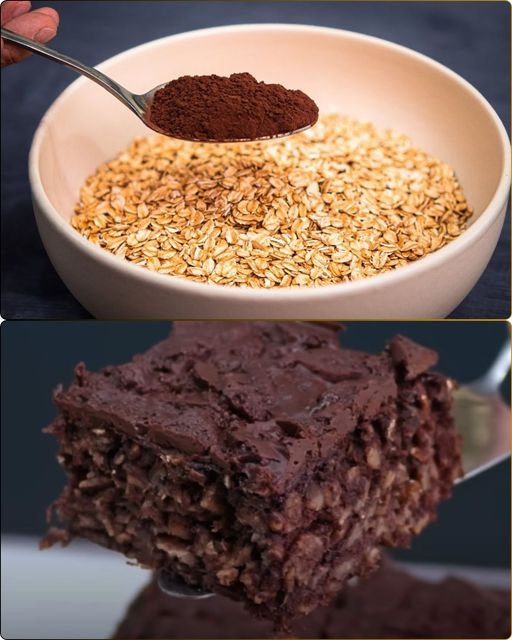
🍫 Healthy Chocolate Oat Bake

🍫 Healthy Chocolate Oat Bake

A guilt-free dessert or a very fancy breakfast.

πŸ›’ Ingredients

  • 150g Rolled Oats (Oatmeal)

  • 250ml Milk (Dairy or plant-based)

  • 2 Ripe Bananas (The spottier, the better!)

  • 2 Eggs

  • 2 tbsp Cocoa Powder

  • 40g Sugar (or maple syrup/honey/stevia)

  • 1 tsp Baking Powder

  • Β½ tsp Vanilla Extract

  • 1 pinch Salt

  • 1 bar Dark Chocolate (Chopped, for the topping)


πŸ₯£ Preparation Method

  1. Prep the Oats: Place the oatmeal in a bowl and pour the milk over it. Let it sit for about 10 minutes. This softens the oats and ensures your dessert isn’t “chewy” or dry.

  2. The Banana Base: In a separate bowl, mash the bananas until smooth. Whisk in the eggs, vanilla, salt, and your sweetener of choice.

  3. Combine: Stir the cocoa powder and baking powder into the wet banana mixture. Once smooth, fold in the soaked oats (and any leftover milk in the bowl).

  4. The Bake: Pour the batter into a greased baking dish (around 8×8 inches).

  5. The Topping: Chop the dark chocolate bar and sprinkle it generously over the top. As it bakes, this will create that molten, fudgy crust seen in your photo.

  6. Cook Time: Bake at 180Β°C (350Β°F) for 30–35 minutes. The center should be set but still moist.


πŸ’‘ Why this works

This recipe uses the natural starch in the oats and the pectin in the bananas to create structure without using processed flour.

Pro-Tip: If you want a smoother, more “cake-like” texture (like the bottom photo), you can blitz the oats in a blender for 10 seconds before mixing to turn them into oat flour.

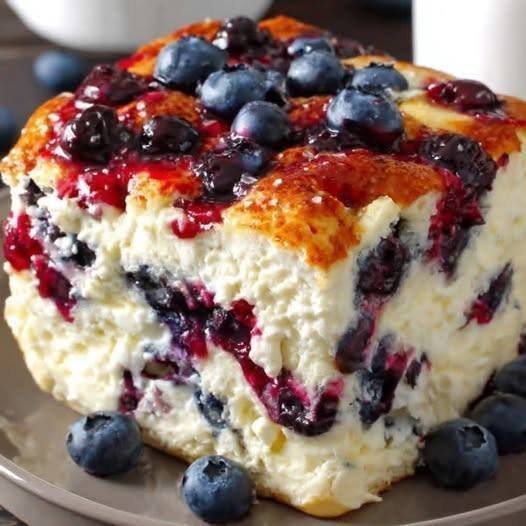
Blueberry Protein Breakfast Bake

Blueberry Protein Breakfast Bake

This high-protein breakfast is incredibly satisfying and keeps you energized throughout the morning. It has a texture similar to a fluffy cheesecake or bread pudding but is packed with nutrients to fuel your day.

Ingredients

  • 2 cups low-fat cottage cheese

  • 4 large eggs

  • 1/2 cup protein powder (vanilla or unflavored)

  • 1/2 cup oat flour or almond flour

  • 1 tsp vanilla extract

  • 1 tsp baking powder

  • 1 cup fresh or frozen blueberries

  • Zest of one lemon (optional for extra brightness)


Preparation Steps

  1. Preheat and Prepare: Preheat your oven to 350Β°F. Lightly grease an 8×8-inch baking dish with a small amount of oil or cooking spray.

  2. Blend the Base: In a blender or food processor, combine the cottage cheese, eggs, protein powder, flour, vanilla extract, and baking powder. Blend on high until the mixture is completely smooth and creamy.

  3. Incorporate the Berries: Gently fold in half of the blueberries by hand. This ensures they stay whole and create beautiful bursts of flavor.

  4. Assemble: Pour the batter into the prepared baking dish. Scatter the remaining blueberries across the top, pressing them slightly into the surface.

  5. Bake: Place the dish in the oven and bake for 35–40 minutes. The center should be set but still have a slight jiggle, and the edges should be a light golden brown.

  6. Cool and Set: Allow the bake to cool in the pan for at least 10–15 minutes before slicing. This helps the structure set firmly so you can cut perfect squares.

  7. Serve: Enjoy it warm or cold. It can be stored in the refrigerator for up to 4 days, making it perfect for a quick morning meal.

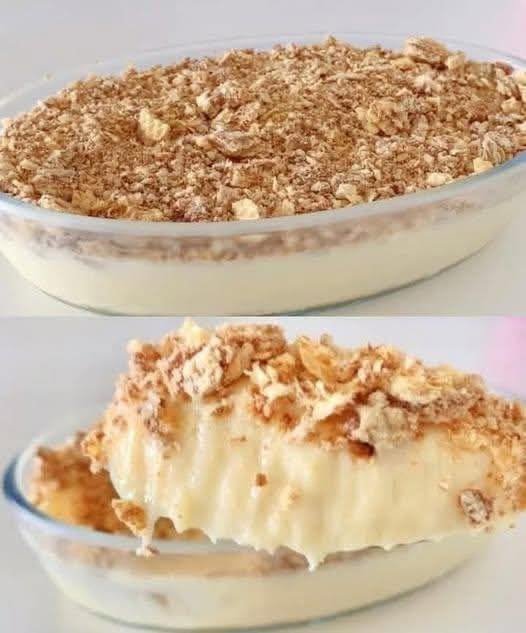
3-Ingredient No-Boil Freezer Cream

3-Ingredient No-Boil Freezer Cream

This recipe relies on the thick consistency of condensed milk and the aeration of heavy cream to set up perfectly in the freezer without ever needing to be heated.

What You’ll Need

  • 2 cans (approx. 800g) Sweetened Condensed Milk

  • 2 cups (approx. 500ml) Heavy Whipping Cream (must be very cold)

  • 1 package (approx. 200g) Biscuits/Cookies (like Maria biscuits, Graham crackers, or Digestive biscuits)


How to Make It

  1. Prep the Topping: Place the biscuits in a plastic bag and crush them into a coarse sand texture with a rolling pin (or use a food processor). Set aside.

  2. Whip the Cream: In a large bowl, beat the cold heavy whipping cream until it forms stiff peaks.

    Tip: Don’t overbeat it into butter, but it needs to be firm enough to hold its shape!

  3. Combine: Gently fold the sweetened condensed milk into the whipped cream using a spatula. Mix slowly so you don’t lose the airiness of the cream.

  4. Assemble: Pour the mixture into a glass dish. Sprinkle the crushed biscuits generously over the top.

  5. Freeze: Place it in the freezer for at least 4 to 6 hours (or overnight) until it reaches a firm, ice-cream-like consistency.


A Quick Note on the “No-Boil” Claim

A lot of people think you have to cook condensed milk to make it thick, but when you fold it into whipped cream and freeze it, it creates a “no-churn” ice cream texture that is incredibly rich